What Is Slide Film: An Introduction To Color Reversal & E-6
#photographyhobbyist #photographybestoftheday #photographyforever
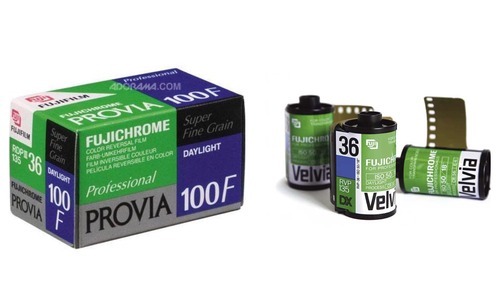
Ahhh slide film… a once completely standard medium has now become quite illusive - like personal space on an airplane or a pair of heels to fit my size 10 feet in France. (Seriously you would not believe how small French women’s feet are!) Contrary to popular belief, your grandfather’s preferred medium has not disappeared once and for all, and is in fact alive and well. As of 2015 Fuji is the only original major manufacturer of slide film which continues to produce it today, but you can also get it from Lomography, Rollei and some other independent companies.
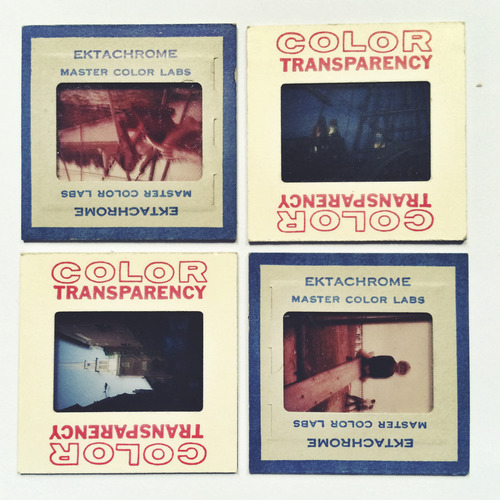
Let’s start with the basics: what is slide film? In simple terms, it’s the opposite of color negative film. Instead of a negative, it makes a positive. This is why it is also called color reversal film. When you develop it, you see a tiny photo - no print needed. Think of it as bizarro world color film, or opposite day color film if you prefer. If you were born before 1990 there is a very high chance you were forced to watch old slideshows of your parents’ vacations from the 1960s. In fact, the term “slideshow” comes from the ancient practice of subjecting one’s friends and family to sit in the dark and stare at images projected on a wall for hours while they drone on and on and on about that camping trip to the Grand Canyon that one time. When you make a slideshow presentation on your computer, the icons resemble the plastic mounting used on actual slides.
You may have heard the term “E-6” in relation to slide film. E-6 refers to the developing process for slide film (as opposed to color which uses C-41.) E-6 processing is not that different from traditional black and white processing in theory; it consists of 6 baths which include developer, stop and fixer. However that’s about where the similarities end, as other steps in the process include a color developer bath, bleach bath and even an anti-fungal agent. Some tutorials are out there for home-developing E-6, but personally I wouldn’t recommend it unless you have a fully equipped professional darkroom at your disposal – considering formaldehyde is essential to the bleach bath, best left in the hands of professionals. For more on the chemical composition of slide film itself, check out How Film Works.
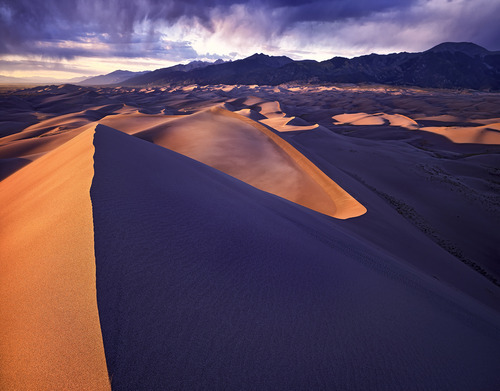
{Star Dune by Zach Boumeester, shot on FujiChrome Velvia 50}
Slide film has a one-and-a-half stop range. If you happen to be familiar with the principles of exposure, then you know that’s not a lot room for error. If you aren’t familiar with these principles, let me tell you: THAT IS NOT A LOT OF ROOM FOR ERROR. I’ll explain:
- Black and white film has a 5 stop range, meaning you can be underexposed or overexposed by up to five stops and still have detail in the highlight or shadow areas. Don’t speak photographer? Translation: The correct exposure for your photo was at F/8 for your ISO and shutter speed, but you shot at F/16 - and your photo will still be okay.
- Color film has a 3 stop range, meaning you’ll still have detail even if you’re off by up to three stops.
Which brings us back to slide film, and it’s very very low stop range of 1 ½. (Side note: I have seen articles online which state that slide film has a 3 stop range, color film a 5 stop range and B&W film an 8 stop range. This basically contradicts everything I ever learned in any darkroom class ever… and I have to assume these people are scanning and not printing in a darkroom. Scanning and tweaking in Photoshop probably will get more out of lost highlights and shadows, but I would not approach shooting with these larger stop ranges in mind.) When shooting slide film, correct exposure is essential - hence the reason it’s often referred to as “professional” film. If you feel comfortable enough with your exposure skills, there are some great benefits to shooting slide film.
Advantages of Shooting Slide Film
- You see what you actually shot. This is a BIG ONE. Whenever you scan or print from negatives, there is always the interpretation of the scanner/printer (I’m talking about humans here not machines) and how he/she thinks the print should be exposed. When you make a contact sheet in the darkroom, you can make it lighter or darker according to what you want and what you need. When you develop a roll of slide film, you see exactly how you exposed your film - zero change due to processing and printing.
- Crisp, bright colors and higher contrast range. This is probably the largest broad appeal of shooting slide film, considering all of the Photoshop actions out there designed to mimic its effects. When exposed correctly, slide film produces beautiful colors, with extra brightness and pop or ridiculously accurate skin tones depending on the brand of film.
- Very long archival life with little effort. Slides often come in a little plastic box which you can just tuck away without having to sleeve… even if you chuck them in a cigar box like someone I know and leave them in the basement for 40 years they’ll still probably be okay. Prints on the other hand, need acid-free sleeves if you don’t want them to fade and deteriorate.
- No need to order prints to see your final images. So at least that saves on what you spent on the slide film.
- Cross processing is fun and can create some cool results if you’re looking to experiment.
Before you run out and spend all your money on a brick of Fuji Velvia (actually that’s not a bad idea) let me just stop you one second - there are also quite a few serious downsides to shooting slide film:
Disadvantages of Shooting Slide Film:
- Exposure must be on point. If you push the limits in low-light situations, shoot fast-paced street photography in varying conditions, or tend to use automatic settings slide film is not for you. When it goes wrong it goes very wrong and there’s a good chance your roll will be mostly blacks or mostly whites if you don’t know what you’re doing.
- It’s expensive! Slide film is not cheap - mostly because people are using it less and less. Kodak doesn’t even make slide film anymore - and they were frontrunners of the original process!
- It’s highly specialized. Most slide films are good for one specific thing and that’s it. This is not a 100% rule, but for example the previously aforementioned Fuji Velvia is excellent for landscapes. It can also be a recipe for super weird and orange skin tones.
- Making prints is difficult and expensive. Yes, not needing to make prints is technically an advantage, but if you do want to print from a slide, you’ll have to procure some color reversal paper - and good luck with that considering I’ve never held a box in my hands ever. That doesn’t mean you can’t find it (Fujichrome Paper Type 35 still exists), it just means making prints from slides was never a particularly common practice and it’ll cost you some $$$$.

Tips for Shooting with Slide Film:
- Avoid low light. If you’re not working with artificial lights that you can adjust to fit your needs, stay away from low-light situations with slide film in the beginning - it’s a recipe for disaster, and totally black photos. If you’re trying it out for the first time, shoot in broad daylight to give yourself options.
- Bracket. What is bracketing? It’s basically taking extra pictures at different exposures because you love a shot so much you just don’t want to risk it. Meter the scene, shoot it at the correct exposure, then shoot one stop up and one stop down. There, you just bracketed.
- Use reflectors and diffusors to control light and shadow. If you have the space and time (and possibly an assistant or very nice friend to help you out) using reflectors and diffusers can seriously increase the information in your shadows and help you control blown out highlights. Not a great option for street photography, but a life-saver for portraits.
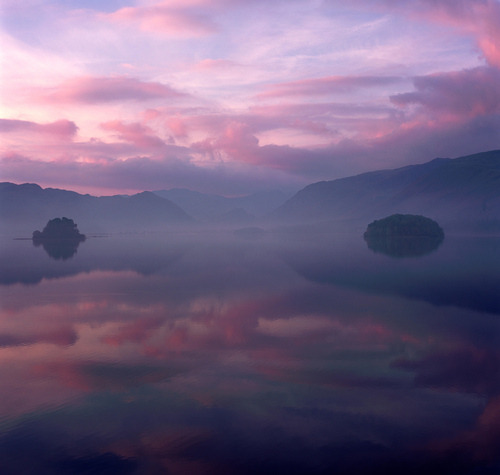
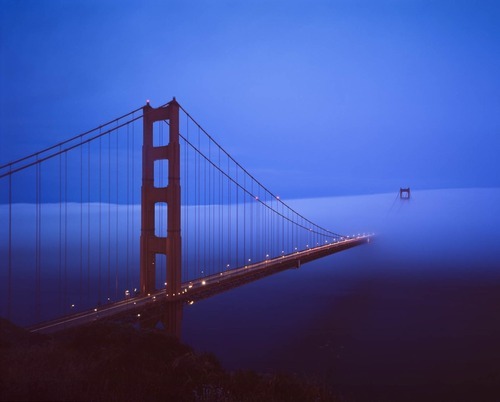
{Borrowdale in Pink by Tim Haynes, shot on Fuji Velvia RVP100}
Voila, an idiot’s guide to slide film. Now you can wow your friends with your technical knowledge on chemicals and stop range! Want to see more photos shot with slide film? We’ve got tons of great shots on Fuji Provia, Fujji Velvia and even Kodak Ektachrome.
For more information and help about getting into film photography, head on over to the Beginner’s Guide to Film Photography.
Courtesy of: I Still Shoot Film
No comments:
Post a Comment
Note: Only a member of this blog may post a comment.