Tuesday, December 31, 2019

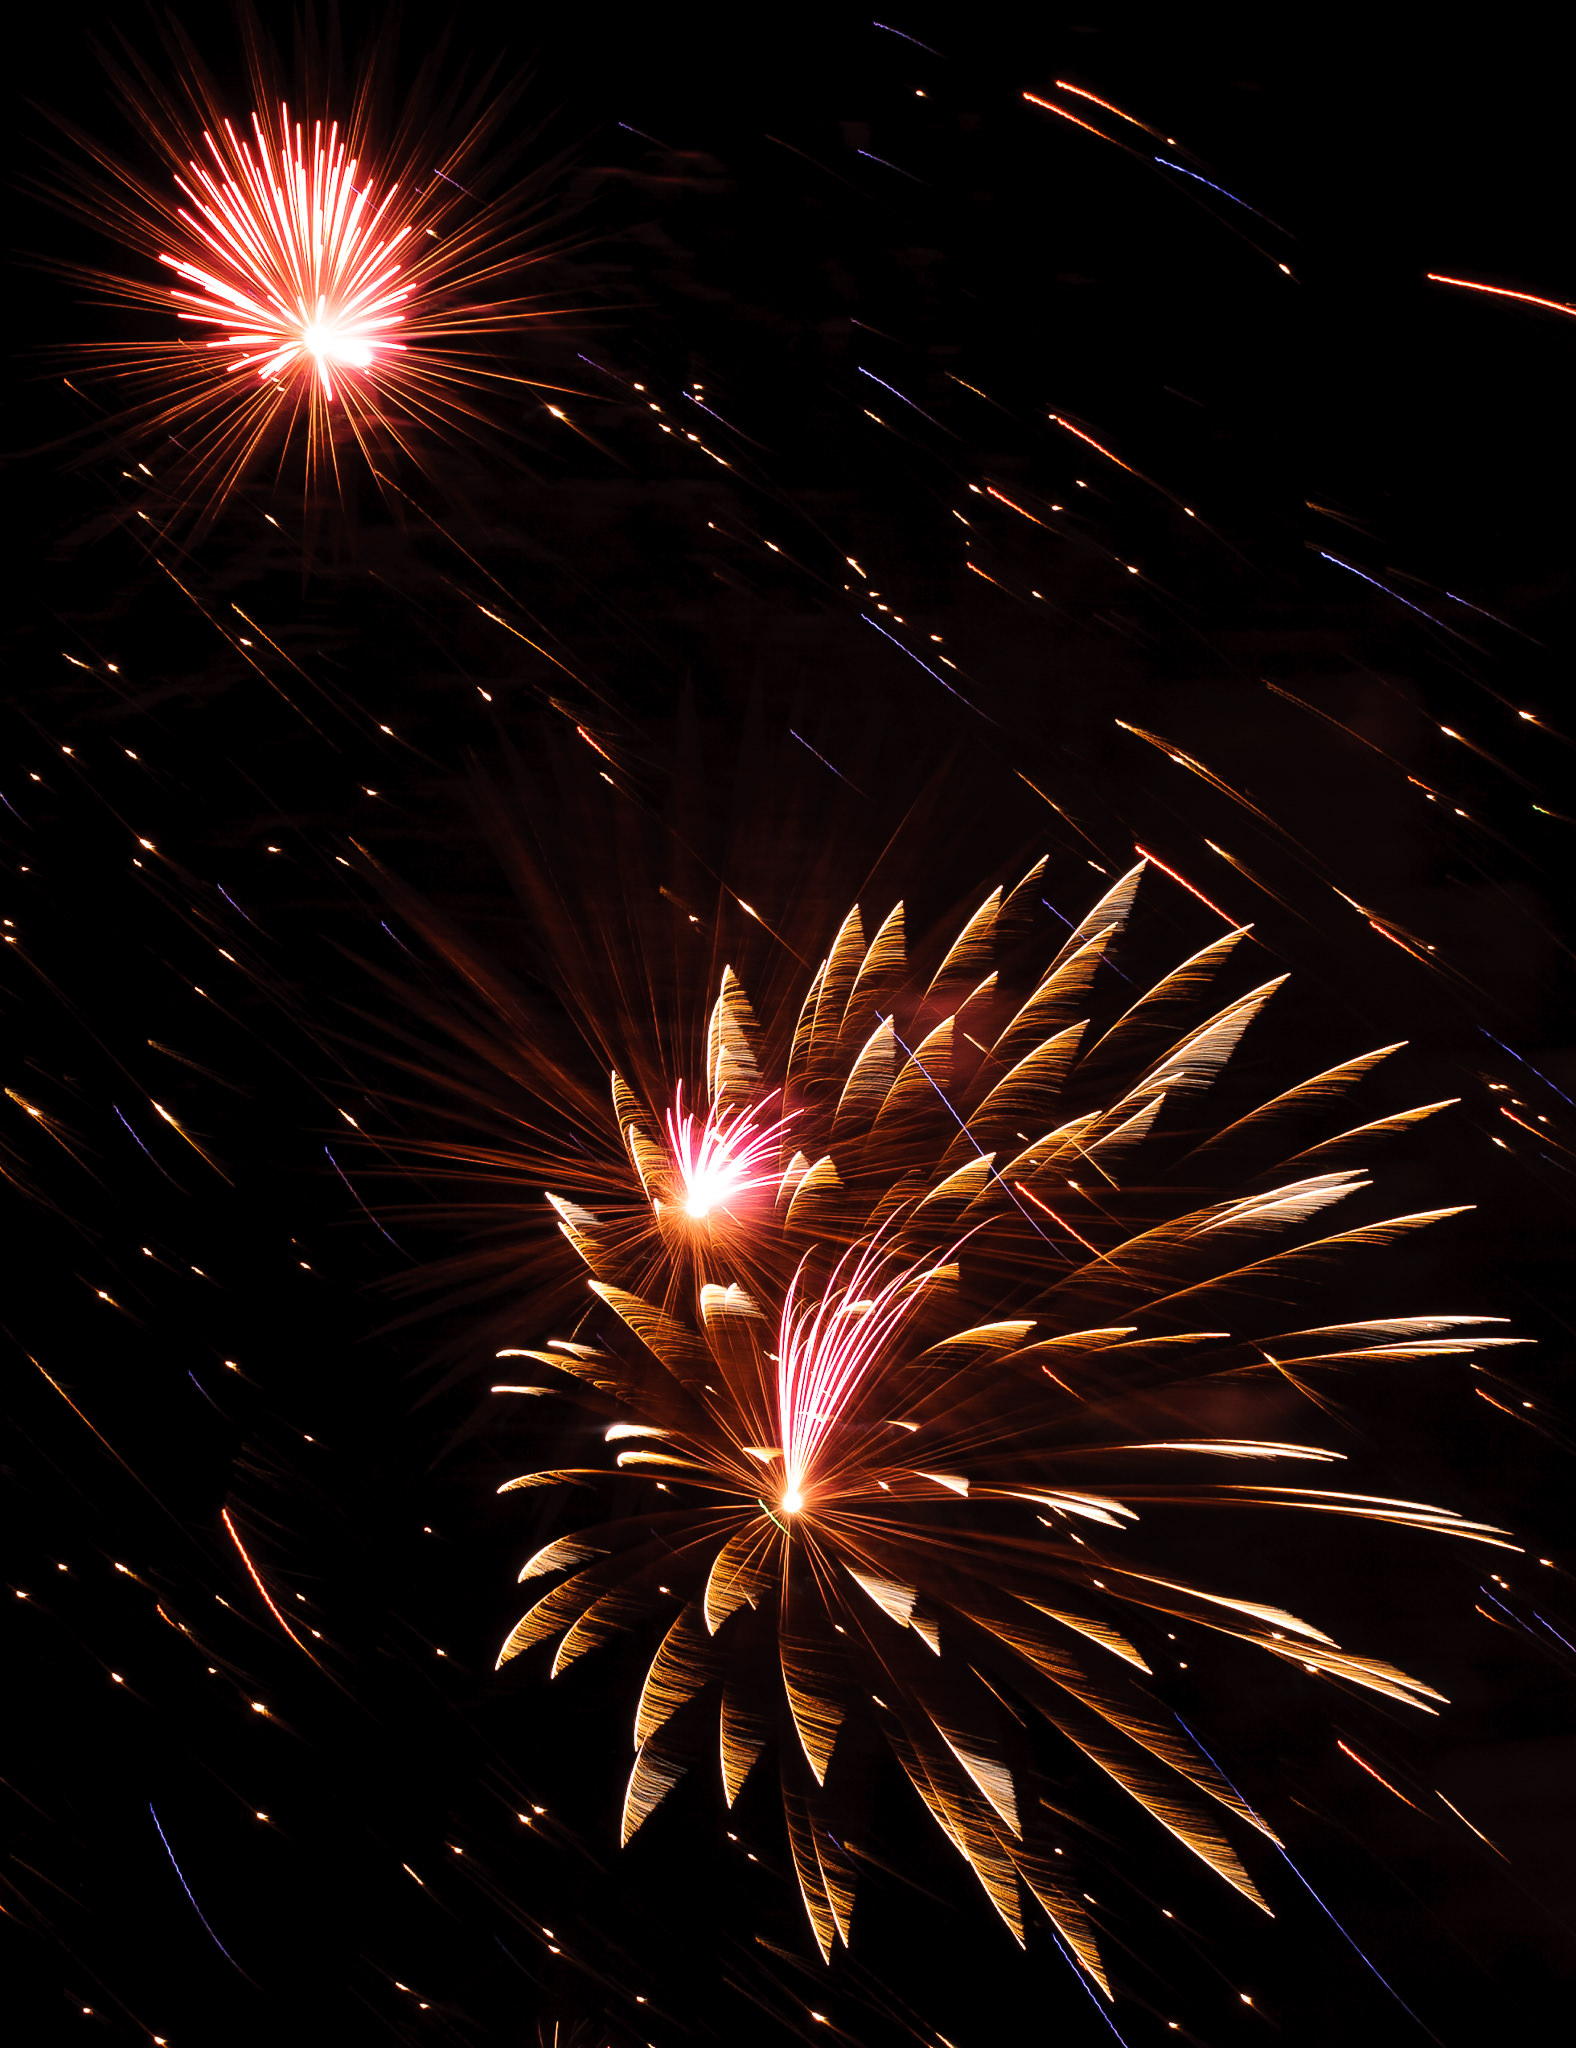
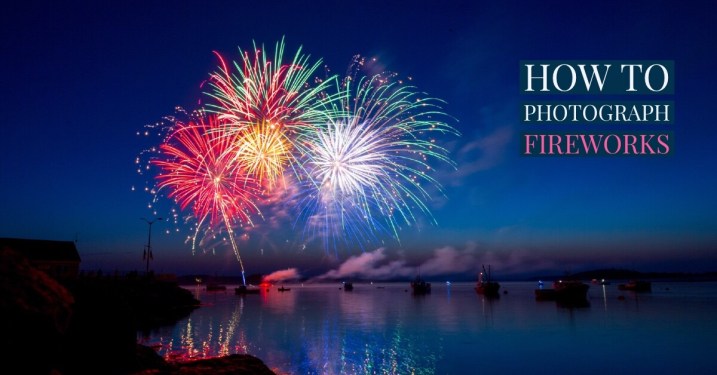
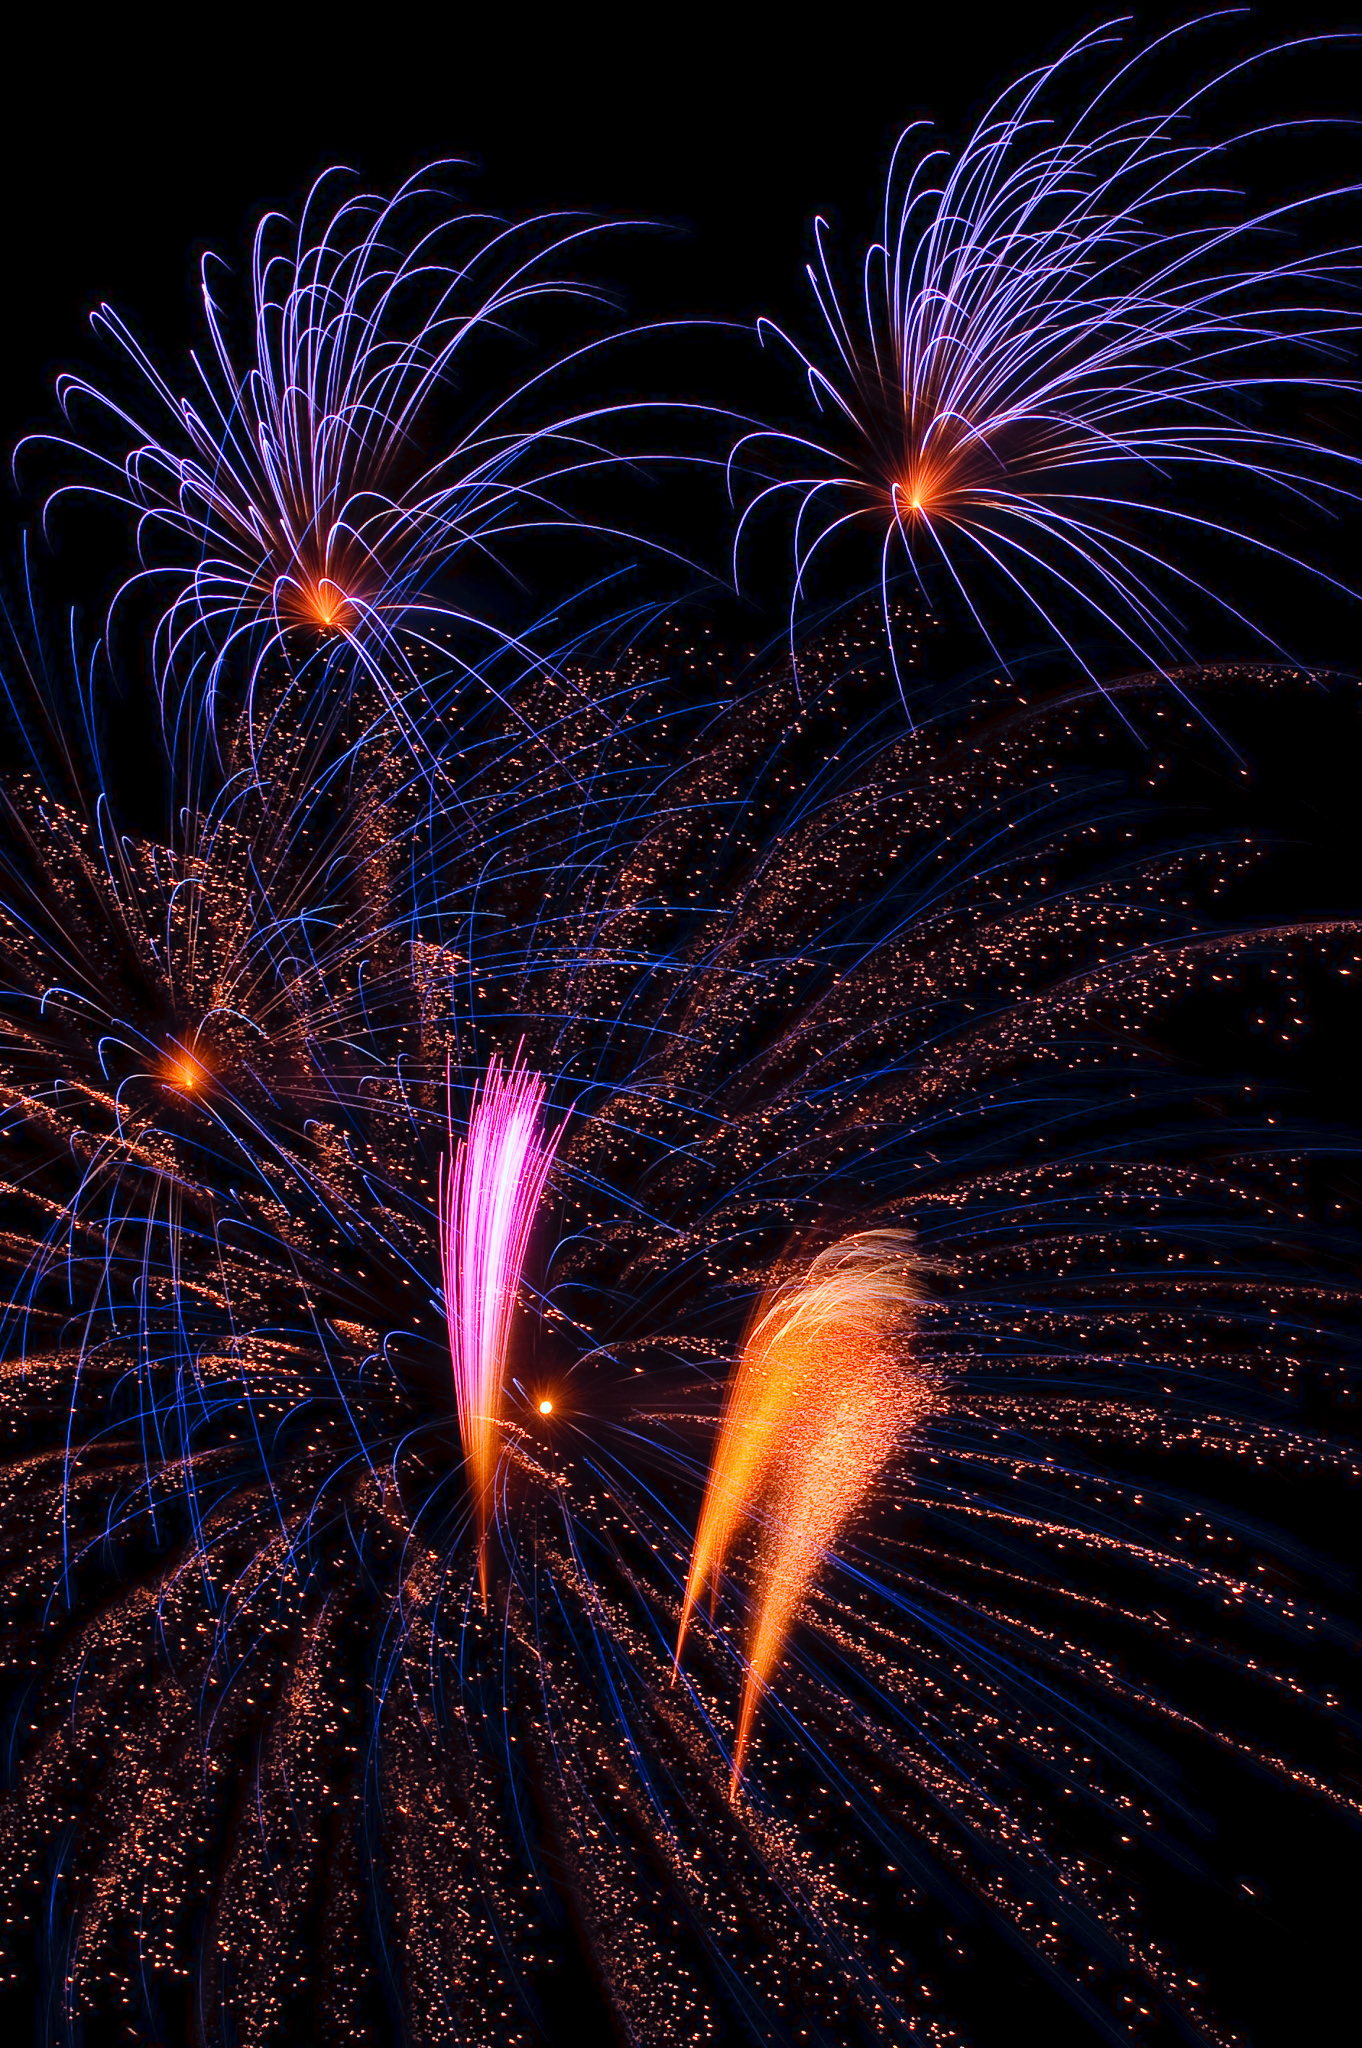
How to Photograph Fireworks in 8 Easy Steps


Related course: Wow Factor Photography
Fireworks are essentially streaks of light that are moving in the dark. But how to photograph fireworks for best results? Firework photography isn’t an easy task. And it often results in blurry shots and inaccurate exposures.
So how do photographers snap those amazing fireworks photographs you see online? With the right gear, the proper settings, a few shooting tricks, and some patience.
This straightforward guide on how to photograph fireworks will help you take your fireworks images from blah to awesome.
Amazing fireworks photography of yellow burst over water in the distance

What You Need: Gear For Photographing Fireworks

A fireworks display is spectacular to watch. But photographing them without the right gear or proper techniques is anything but. Your fireworks photographs won’t be anywhere near dazzling.
You don’t need a specialised camera for photographing fireworks. The smaller accessories can make all the difference.
For fireworks photography, you’ll need the following:
  • Camera – A model equipped with manual modes is ideal.
  • Lenses – A wide-angle lens will capture the entire scene with some context. And a telephoto can capture isolated images of fireworks against a night sky (both work well).
  • Tripod – Stabilising the camera is an absolute must. Without a tripod, you’re going to end up with blur. You don’t need the most expensive tripod out there. Look for something steady enough that your camera won’t shake in the wind.
  • Memory card – Don’t forget to put a card in your camera. A faster card will help you capture fireworks that happen one right after another.
Those are the essentials, but there are a few more things that make the experience a bit more comfortable:
  • Remote release – Anytime you are using a tripod, a remote release can help get an even steadier shot. Remote releases aren’t necessary, but it’s a helpful tool to bring along if you’ve already invested in one.
  • Chair or blanket – Some fireworks shows can last for quite some time. Setting up your tripod in front of a folding chair might make for a more enjoyable experience.
  • Flashlight – If you can’t adjust your camera settings with your eyes closed, bring along a flashlight. That way you’ll see your camera’s controls in the dark.

How to Photograph Fireworks, Step By Step

8. Arrive Early and Scope Out Potential Locations

The first thing is to plan ahead on when the fireworks are taking place. The Fourth of July or New Years are the two best examples I can think of. It will depend heavily on where you are located.
Plan to arrive at least half an hour before the fireworks are scheduled to start. Spend that extra time scoping out locations while there’s a little bit of light left.
Also, use this time to set up your fireworks photography settings. Also, think about your prime or zoom lens’ focal length, as that will decide on where to place yourself.
Identify where the fireworks will be launching from. Then imagine what the composition would look like ahead of time at different potential locations.
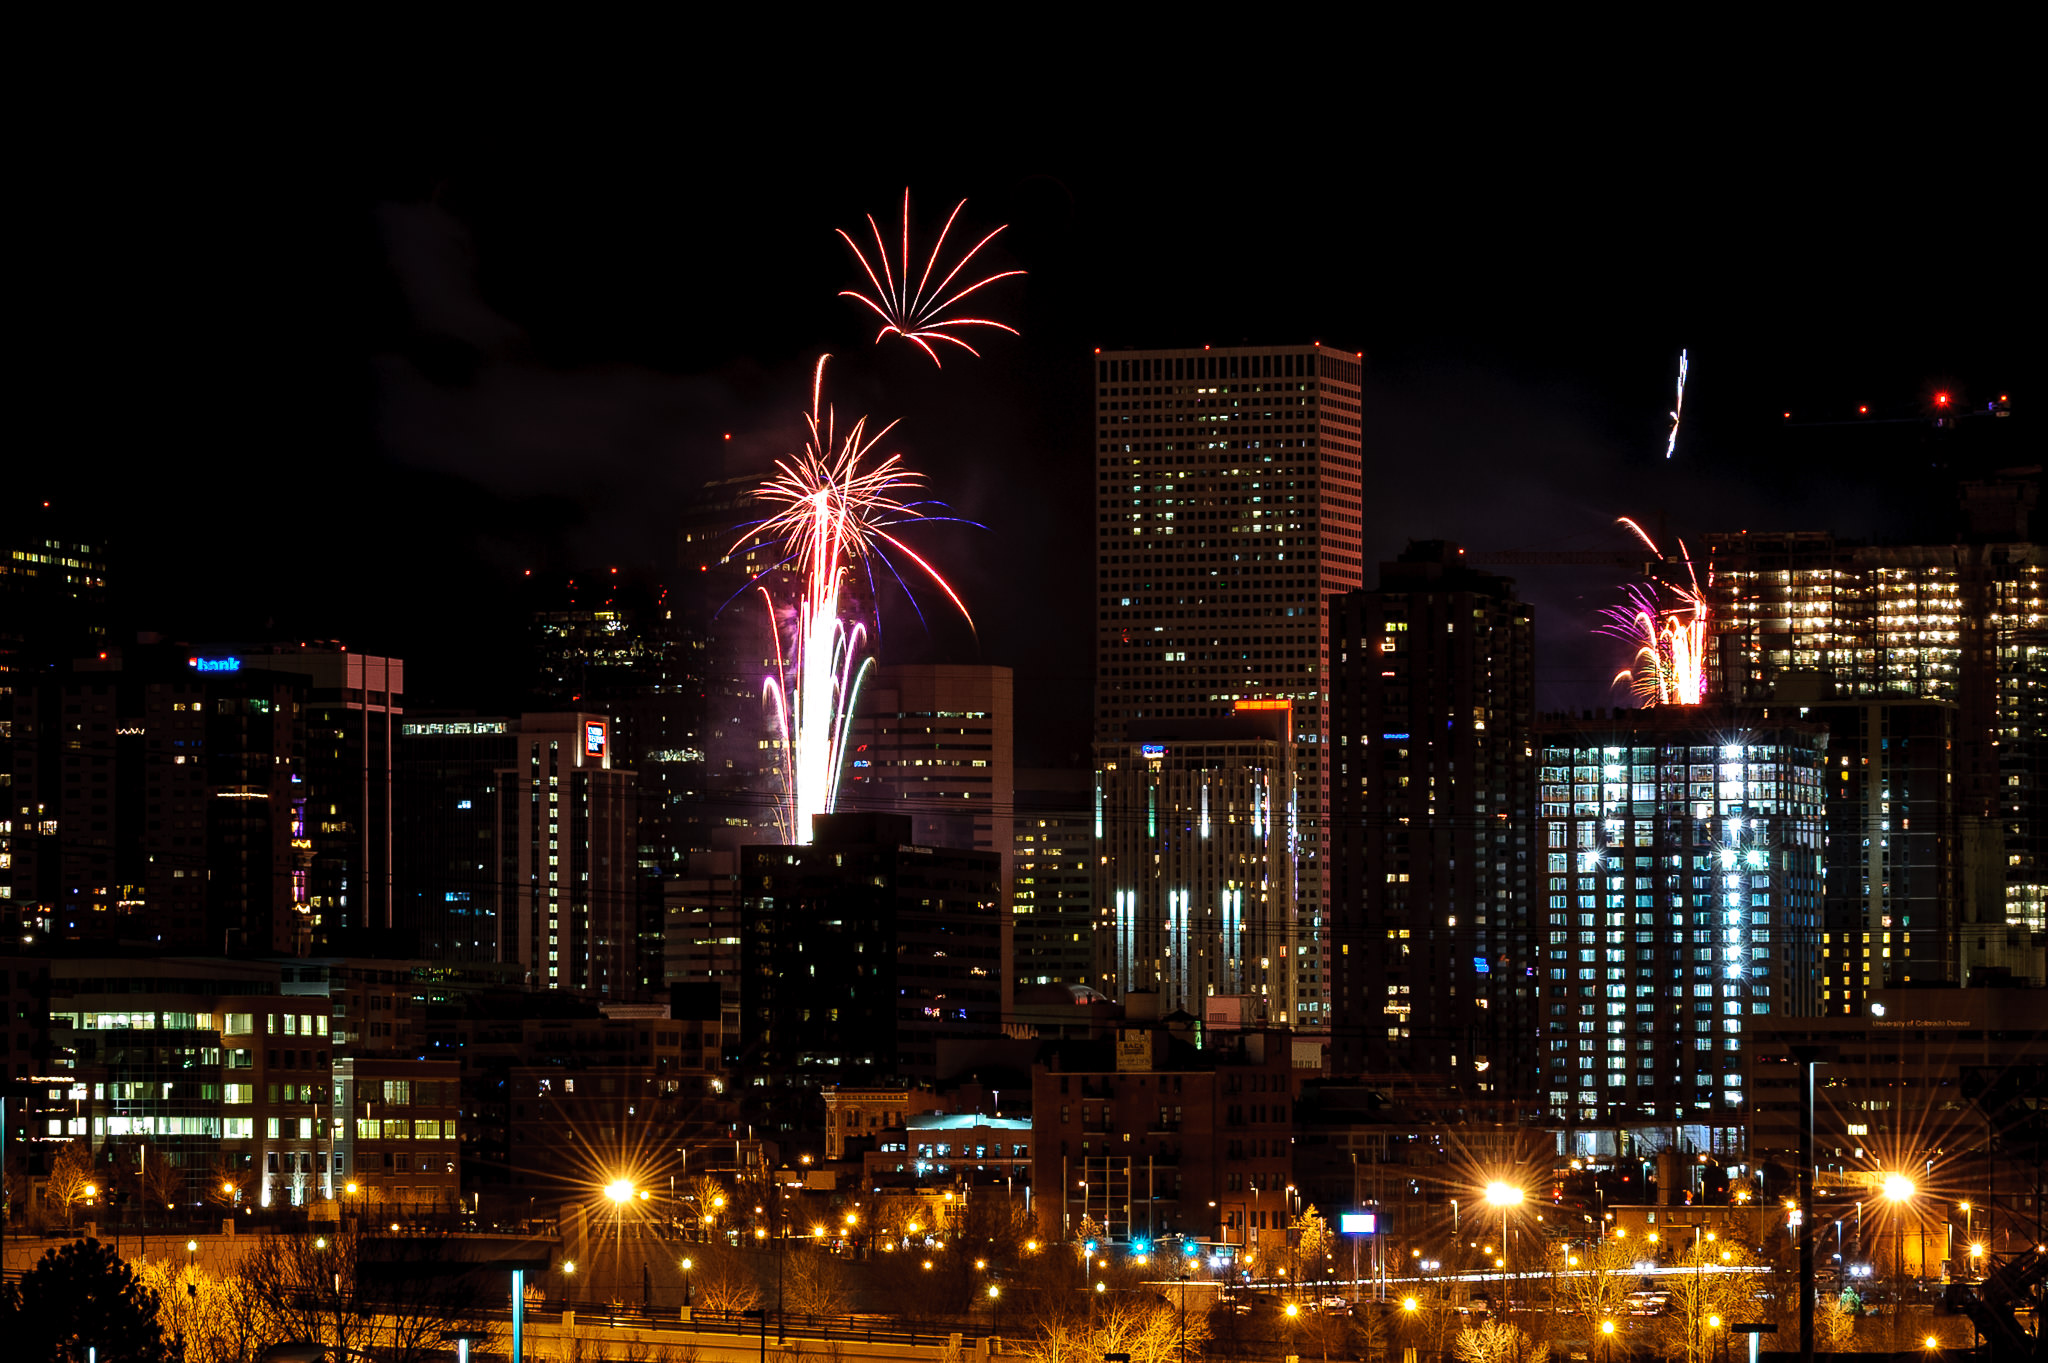
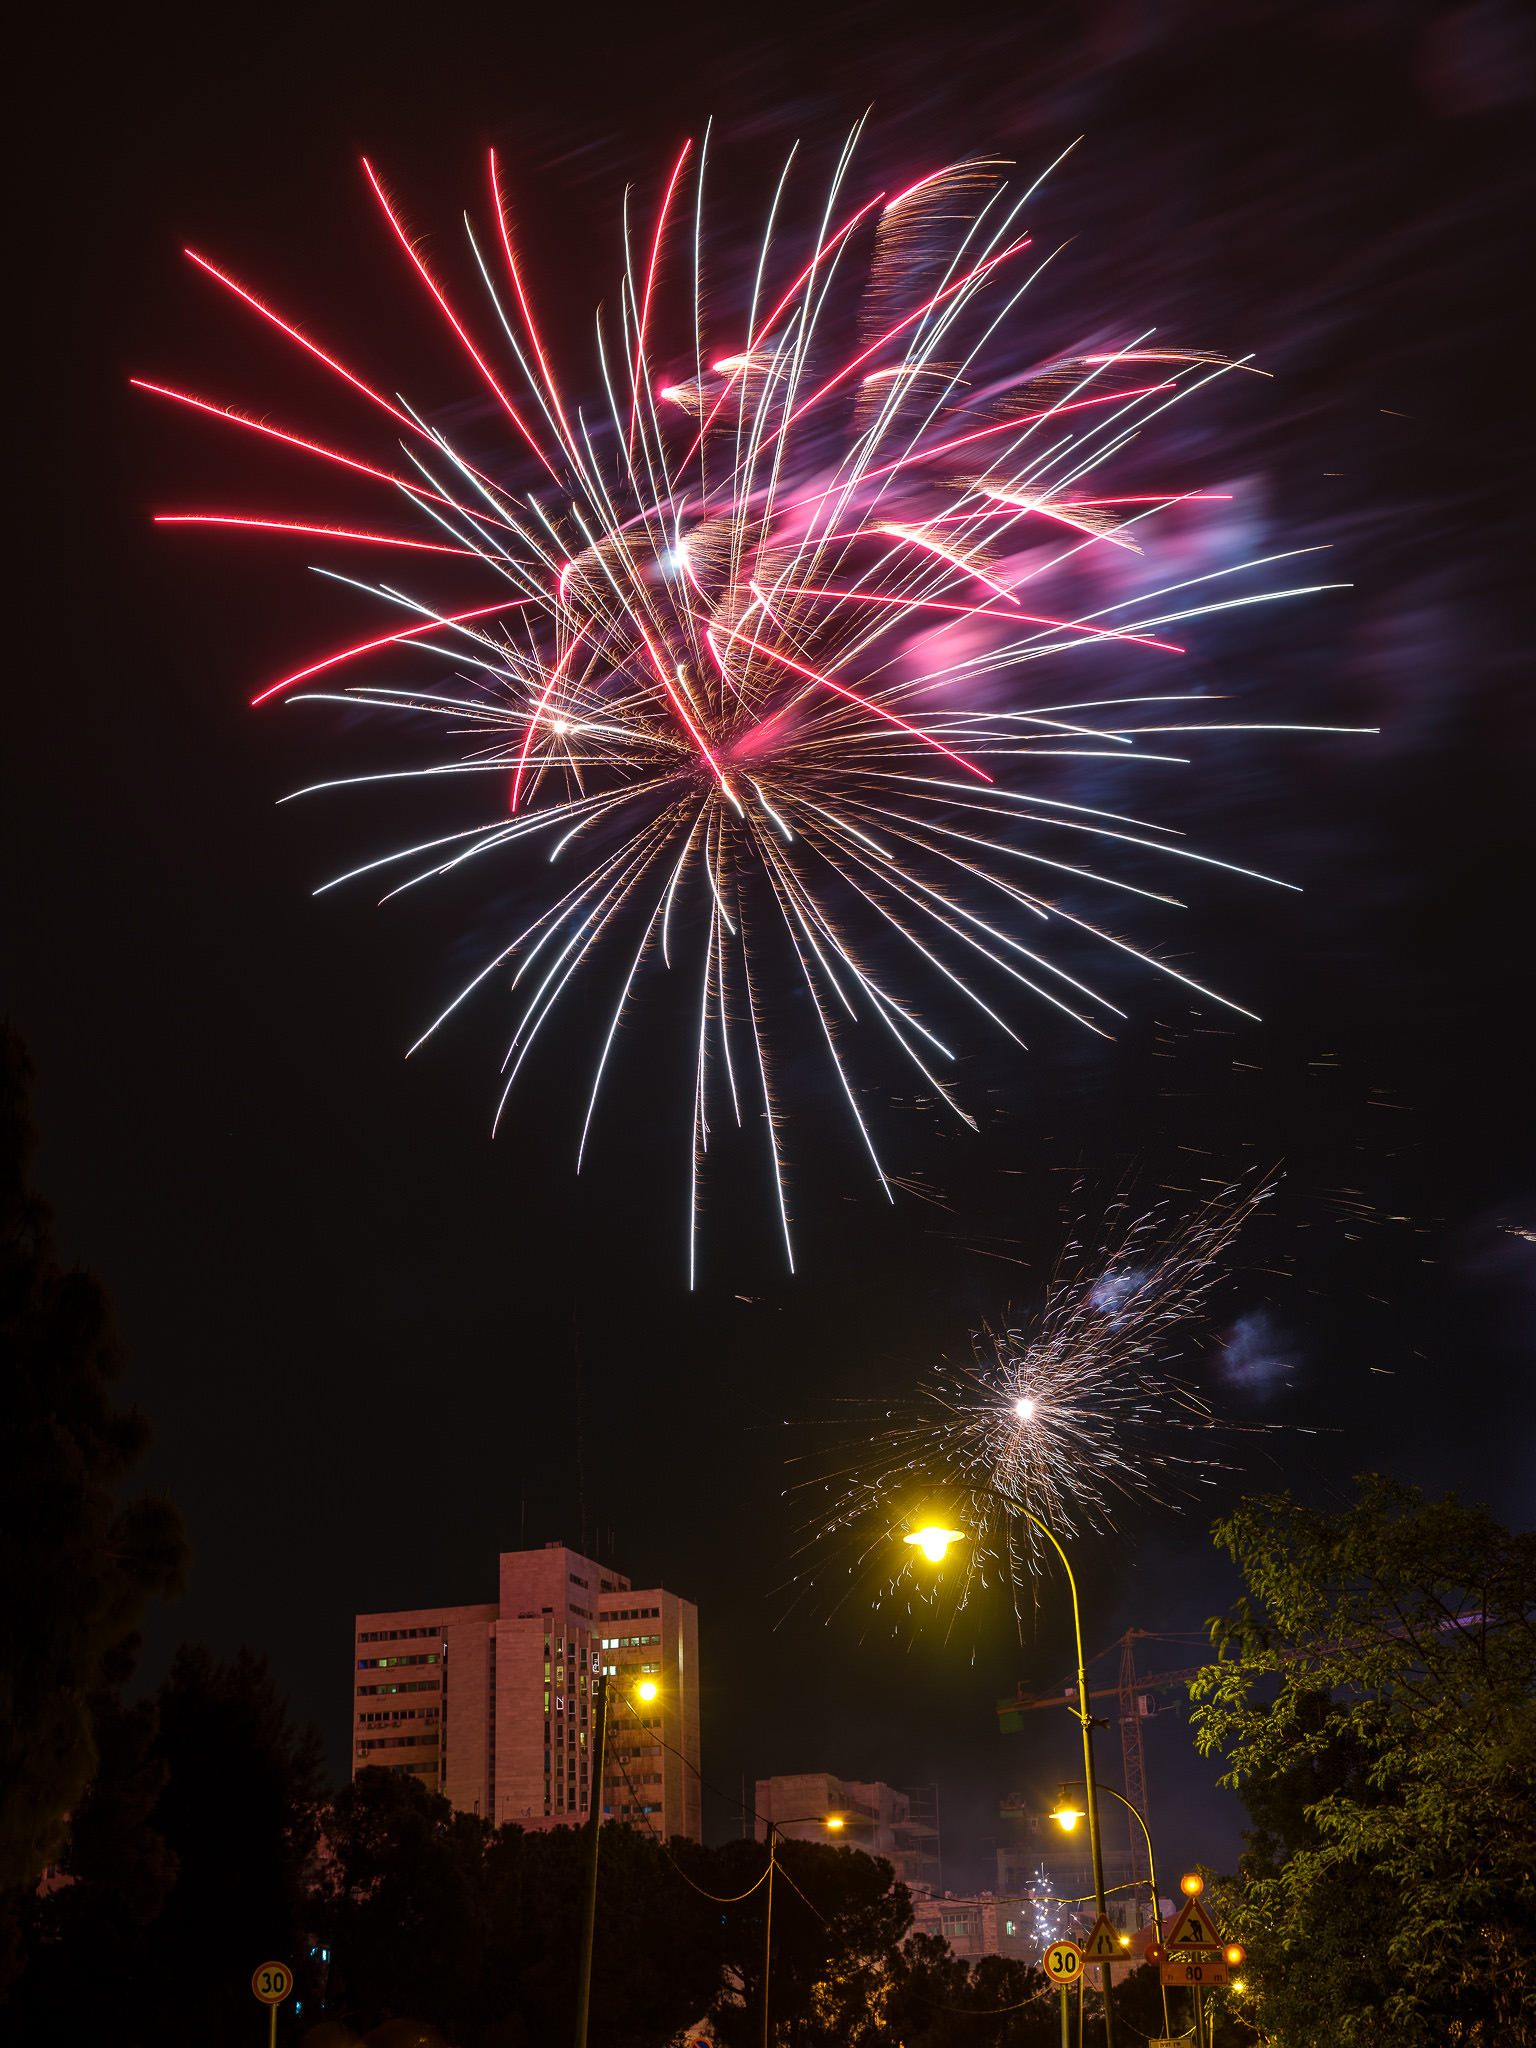
Look for neat features that would add interest to the scene. These include a reflection off water or fireworks photographs over a cityscape.
These are things that will strengthen the composition. You should also look out for potential pitfalls. These would be power lines in the way or tall trees obstructing the view.
A fireworks explosion with bystanders on shore - how to photograph fireworks

7. Do You Need a Tripod

Fireworks photography is an extension of the long exposure technique. This means that a tripod is a must. Especially if you are capturing an environment under the fireworks shots.
Once you’ve spotted your composition, set up the tripod for that view. Whether it is a Nikon or Canon DSLR or one of the mirrorless cameras, having a tripod is one of the best photography tips.
Tripod or not, consider using a cable release for your shutter to minimise camera shake. Failing that, use a self-timer. The important part is gaining the best vantage point to capture the firework photos.
A multicolor mine firework erupting, fireworks photography tips

6. How to Set the Right Exposure for Fireworks Photography

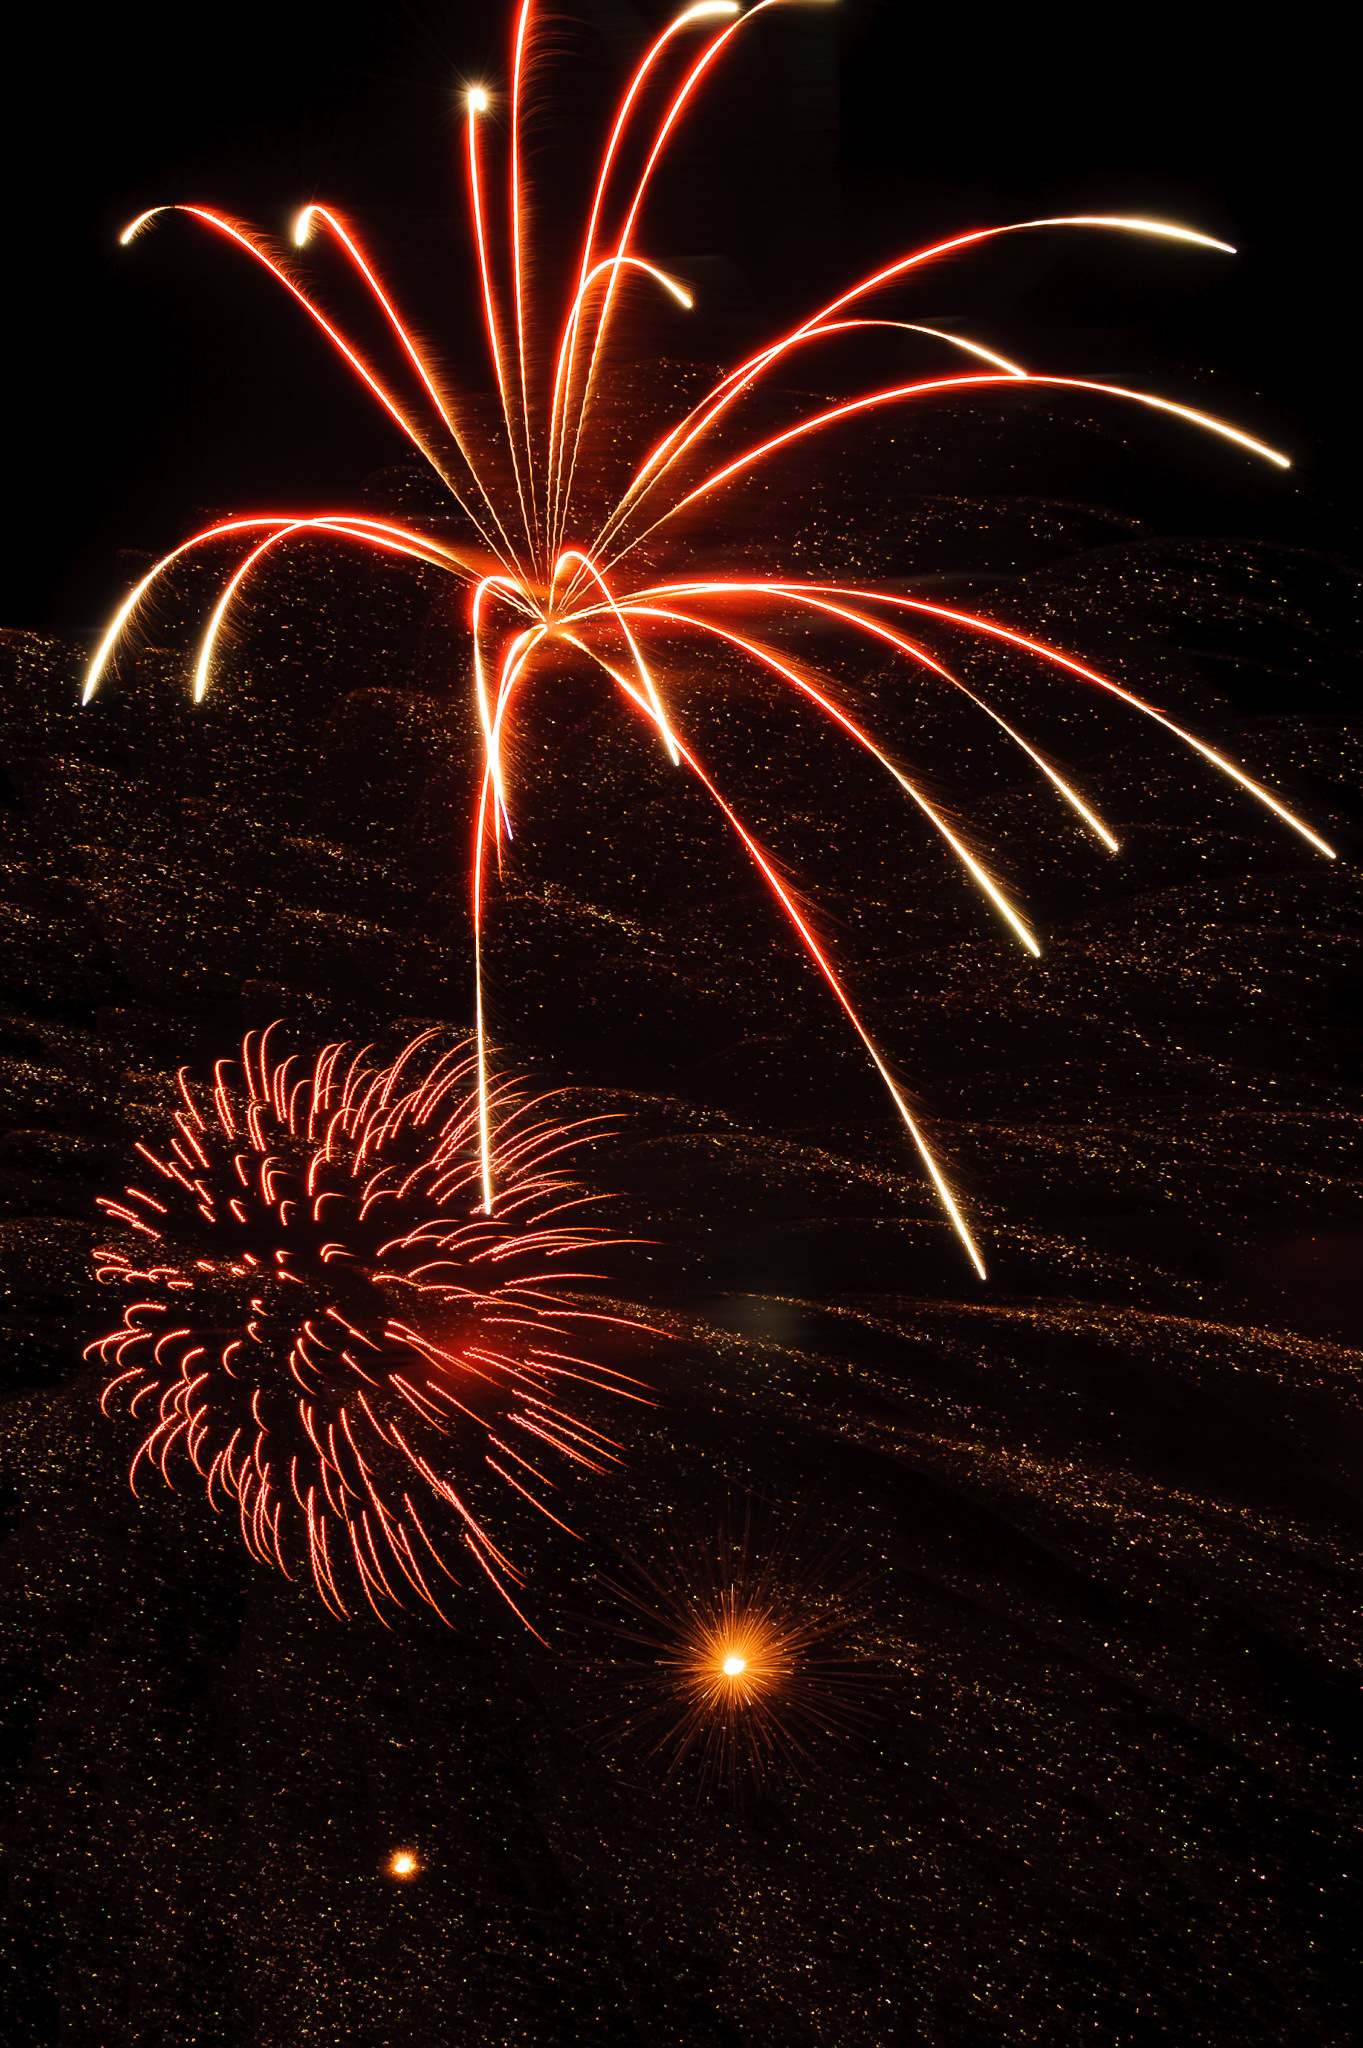
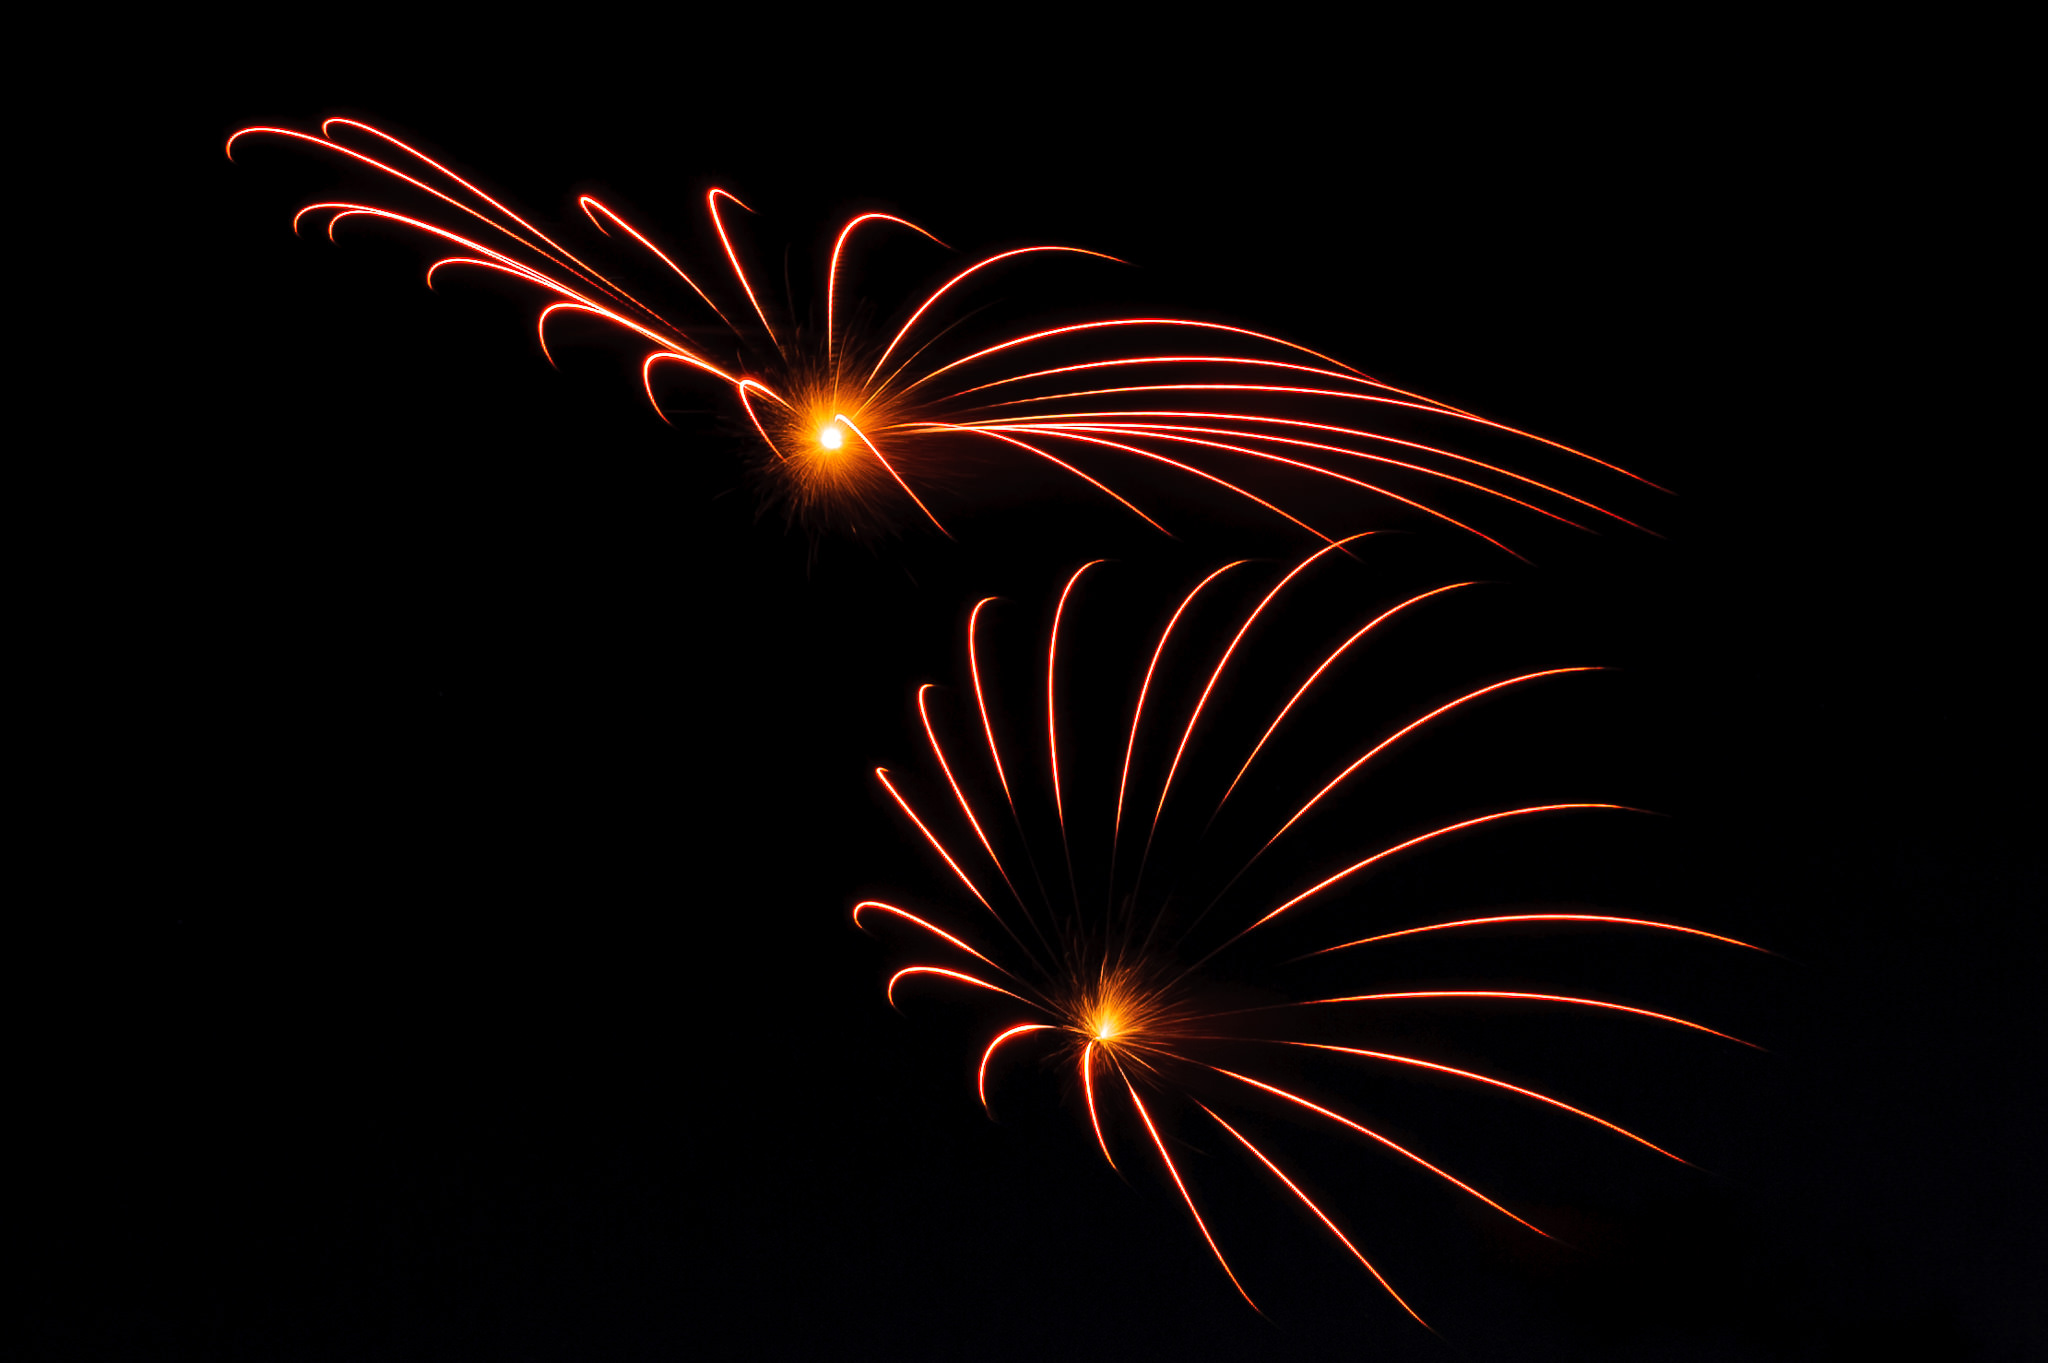
Some fireworks are quick bursts. Others maintain an impressive streak across the sky for several seconds.
The trick to getting the firework’s entire movement across the sky is to use Bulb Mode. Don’t use a preset shutter speed.
In ‘Bulb’ Mode, you control the shutter speed by holding down the shutter release. The camera continues recording until you let go of that button.
The in-camera ‘Bulb’ setting makes it possible to shoot fireworks without knowing how long that next burst is going to last.
To use ‘Bulb’ Mode, turn your camera to manual mode. Turn the shutter speed all the way down until you see B or Bulb near the shutter speed display.
You are using a long shutter speed and fireworks are actually pretty bright. So you should start with the lowest ISO available on your camera. A low ISO is typically ISO 100 or 200.
The exact exposure values are going to vary. This is based on whether there are any other lights in the scene and how many fireworks bursts are going off at once.
Start with an aperture of f/11. As you shoot, check your exposure and adjust as needed. Choose a larger f-number (a smaller opening) if the shots are too light.
You can include several fireworks or choose a smaller f-number (a wider aperture) if the shots are too dark.
For the most control in post, change the file type to RAW, but stick with JPEG if you don’t plan on editing the images.
Note: While shooting in manual mode is best, some compact cameras have a fireworks mode. If you don’t have manual modes, try shooting in the fireworks scene mode. You’ll still need a tripod, but you won’t need to manually set the exposure and focus (in steps three and four).

5. Use Manual Focus

Cameras can’t focus on the dark. And they can’t focus on a firework that hasn’t even exploded yet.
Photographing fireworks requires manual focus, but it’s not as tough as it sounds.
Turn your camera to manual focus. Then adjust the focus dial on the lens until the distance meter shows the infinity symbol.
Since the fireworks are far away and you aren’t using a very narrow depth of field, this works most of the time.
But, once the fireworks start, be sure to preview your first shot and zoom in. If the fireworks are a bit soft, you may need to pull the focus back in a bit closer.
A coconut firework bursting against deep blue sky - fireworks photography tips

4. Should You Use a Remote Release

If you have a remote release, make sure to use it for shooting. Many newer cameras have WiFi, which also allows you to use your smartphone as a release.
You’ll get sharper results with a remote release, but I’ve shot many fireworks shows without one. Move your hand as little as possible while holding the shutter release.
Shooting fireworks photography is about the timing. I release the shot as soon as I hear the screech that indicates the firework is on its way up into the sky.
I hold the shutter release until the sparks fizzle out, then I release and start over again with the next burst. Remember, in Bulb Mode, the shutter speed is how long you hold the shutter release for.

3. How Often Should You Review Your Shots

Even after shooting fireworks every summer for the past few years, I usually don’t get it perfect on the first shot. I make sure to do the following to ensure I’m starting out with good settings:
  • Pull up a preview on the LCD screen;
  • Zoom in and check that manual focus;
  • Check the exposure and adjust the aperture as needed. Smaller f-numbers if it’s too bright, lower f-numbers if it’s too dark.
Checking the shot is important when you first start the shoot. Don’t check every shot. You’ll take your eyes off the sky and miss another opportunity. But check back ever so often.
If the fireworks show starts at dusk, you may lose some light. You’ll need to brighten up your aperture to account for the low-light.
Fireworks shows tend to be long. This gives you plenty of chances to capture great shots—and get some variety. This length will help you set the aperture and exposure time correctly.
Cool fireworks photography shot of a small red, yellow, and blue willow fireworks cluster

2. Adjust—Then Add Variety

After you’ve got a few shots that you are happy with, try for some variety. Switch between a wide-angle view and a close-up of the sky by zooming or swapping lenses.
For longer firework photography shows, try moving to another viewing spot. Make sure you’re still respecting other spectators as you move.
Instead of holding the shutter down for one whole burst, try capturing more than one at a time. You do this by holding the shutter until multiple bursts are completed.
If your exposure was good for a single firework burst, use a narrower aperture. You should still get an accurate exposure with the extra light coming in from multiple bursts.
Most fireworks shows are long enough to allow you to get several different shots. By the show’s finale, I’m usually ready to put the camera down. And I can watch the rest of the show without looking through a viewfinder.
At that point I’ve already gotten quite a few shots. Plus the number of fireworks exploding at once in the finale makes it tougher to get a good exposure. It also leaves the sky filled with more smoke.
If you want to photograph the finale, stop that aperture down even further.
Fireworks photos: blue plume from mine firework

1. Editing Fireworks Photography

Shooting in RAW gives you complete control over the way the final image looks. Take advantage of that, open up those fireworks photos in your favourite photo editor, and start post-processing.
Fireworks photos can benefit from a contrast adjustment. I do that by controlling the individual exposure channels first.
Start by pulling up the highlights and whites. Then pull down the shadows and blacks to darken the sky and surrounding scenery.
I might also pull the highlights down. This minimises the smoke created by the fireworks.
If the shot still needs a boost, use the contrast adjustment. It’s best to create contrast by adjusting highlights, whites, shadows and blacks first.
Bring out the colours by tweaking the saturation and vibrance. Watch any surrounding landscape for odd hues—saturation is very easy to overdo.
Finally, make sure to sharpen the image before finishing up. A RAW file doesn’t get the same sharpening treatment that a JPEG automatically receives.
Fireworks photos: multiple large bursts over Budapest parliament building

Photographing fireworks is either a difficult disappointment, or a fun challenge.
With this guide, you’ll be able to capture fireworks photos that are as dazzling as the actual show.

Share this article.

How To SHOOT FIREWORKS: 7 SECRETS to photograph fireworks LIKE A BOSS

How to Photograph Fireworks – Everything You Need to Know

Photographing fireworks is a challenging, but worthwhile experience

Photographing fireworks can sometimes work in horizontal orientation, but you will find vertical compositions to give you more headroom.
NIKON D700 + 70-200mm f/2.8 @ 90mm, ISO 200, 5 sec, f/10.0
Wondering about how you can photograph fireworks on 4th of July, New Year or some other event / occasion? In this article, we provide detailed information on how to best capture fireworks, what type of equipment to use and what camera settings to use during the process. Although the process is relatively simple, there are some things that might be worth considering, as outlined below.

How to Photograph Fireworks

What to Bring

Although you can certainly photograph fireworks with very minimal gear, you might want to go over the list of the recommended gear and accessories below while packing for a fireworks show:
  • Camera – any point-and-shoot, DSLR or mirrorless camera will do, as explained in camera considerations step below.
  • Lens(es) – ideally, you might want to bring two zoom lenses with you, such as a 24-70mm and 70-200mm equivalent, as explained in lens considerations step below.
  • Tripod – a must-have piece of gear to take camera shake-free images of fireworks.
  • Remote Shutter Release – while not required, a remote shutter release will allow you to take pictures in “Bulb” exposure mode, as explained in step #10 below.
  • Memory Card(s) – don’t forget to pack at least one empty memory card (preferably more if you end up taking lots of images).
  • Spare Battery – just in case, you might want to take a spare battery, especially if you are going to be shooting in cold weather, since low temperatures drain camera batteries quickly.
  • Flashlight – you might need a flashlight not just to see the buttons and dials of your camera, but also to be able to properly focus on a foreground subject.
Some of the fireworks shows are so stunning that they are absolutely worth photographing with your camera.
NIKON D700 + 70-200mm f/2.8 @ 95mm, ISO 200, 3 sec, f/20.0

Find the Best Location to Photograph Fireworks

The first thing you need to determine is where exactly you are going to stand to photograph fireworks. I would not recommend standing too close to fireworks, because you will be constantly looking up and you might not be able to find a suitable and interesting foreground to incorporate in your shots. In addition, if you are too close, you might need a wide-angle lens to fit the action into the frame. This might present another problem – you might end up including unwanted objects like buildings and trees into the frame (unless, of course, it is your plan to do so).
Therefore, the best thing to do is to stand further away in an open area (with short or no trees obstructing the view). Ideally, you should stand at a spot that gives you a maximum of 45 degrees view angle relative to the ground, as shown in the diagram below:
Standing at roughly 45 degrees works best while photographing fireworks
The further you stand when you photograph fireworks, the lower the angle and the more focal length you might need. Obviously, each situation is different, so just try to find a good spot with clear views of the sky in an open, unobstructed area that can give you a nice angle to photograph the fireworks.
Ideally, you should be at the spot early on. It is helpful to know exactly where the fireworks will be shot from, so that you can frame and compose your shot exactly the way you want. Don’t forget that fireworks draw a lot of people, so even if you pre-plan and work on your composition, you might need to adjust it later on. I personally have found that unless I am standing at a higher elevation, with no potential of anyone standing in front of me, I am always better off excluding the foreground completely. Once the fireworks start, you will have a hard time asking people to move just because they are in your shot.

Choose the Right Camera

Manual Camera Mode The good news is that you don’t need an expensive camera to photograph fireworks. Any camera that allows shooting in manual mode will work perfectly fine! Many of the point and shoot cameras do, so double check your manual and see how you can switch to manual mode.
Another good thing about shooting fireworks, is that you will be most likely shooting at the lowest ISO levels, which means that there will be very minimal amounts of noise in your images. So you don’t have to worry about your camera’s capabilities, besides being able to switch to manual mode and lowering your ISO to 100. If you have a DSLR or a mirrorless camera, you are all set, because you can do all this quickly and painlessly. Some cameras even have a “Fireworks Mode”, which works great and does not require you to change any settings on the camera.

Choose the Right Lens(es)

If you have a point and shoot camera, make sure that its lens can do at least 5x optical zoom (not digital). Optical zoom means that the camera lens will physically move to get more reach, while digital zoom means that the camera will simply cut out the image corners to make it seem like you are closer. With optical zoom, you are not compromising image resolution, whereas with digital you are.
If you have a DSLR or a mirrorless camera, you might wonder what lens to take with you to photograph fireworks. I have shot fireworks for many years and I find that telephoto zoom lenses such as 70-200mm or 70-300mm equivalent work best for fireworks, especially if you are going to be shooting from a nice vantage point, with fireworks exploding in the distance. If you are going to be shooting up from a relatively close distance, then a wide to telephoto lens, such as a 24-70mm or a 24-120mm equivalent is going to work best. You don’t need a large aperture prime lens to shoot fireworks – a zoom lens is ideal, since you can fine tune your framing without having to physically move anywhere. Personally, whenever I plan on shooting fireworks, I typically bring two such zoom lenses with me.
Here, I used buildings in Denver Downtown as my background.
NIKON D700 + 70-200mm f/2.8 @ 200mm, ISO 100, 25 sec, f/10.0
The above exposure was pretty long – a total of 25 seconds. That’s obviously a bit too long of an exposure for fireworks, but the idea here was to start capturing the scene before the fireworks fired, so that I could get some of the foreground exposed. If you are more advanced in terms of your post-processing skills, you will be better off taking two exposures – one for the fireworks, and one for the foreground. You can then blend the two together in Photoshop in order to avoid cluttering up your shot with too many fireworks and potentially overexposing them.
A telephoto zoom lens proved to be useful to have for the above shot. Initially, I captured the image at a shorter focal length of 105mm, which allowed me to include a bit more of the foreground:
Another photograph of Denver Downtown, but this time I zoomed out with my lens.
NIKON D700 + 70-200mm f/2.8 @ 105mm, ISO 100, 8 sec, f/10.0
That’s why a zoom lens is a versatile option – you can try different framing options and have a better control over your composition.

Use a Tripod

It goes without saying that in order to properly capture fireworks and frame your shots, you will need to have a tripod. You will be taking shots that will be several seconds long, so having your camera on a tripod is going to be ideal for best results. The good news is, you won’t need a fancy tripod to take great shots of fireworks. Since exposure times are going to be rather long, make sure to grab a remote shutter release as well to keep your hands off your camera.
A beautiful display of fireworks with a 4 second exposure
NIKON D700 + 70-200mm f/2.8 @ 90mm, ISO 200, 4 sec, f/10.0

Use Proper Camera Settings

First, set your camera on the tripod and connect the remote shutter release (if available). Then, change the following camera settings:
  • Flash – make sure to turn flash off, as it won’t have the necessary power to illuminate the foreground anyway.
  • ISO – start out by setting your camera ISO to its base ISO level (100 on most cameras) and turn off “Auto ISO“, if you have it turned on.
  • Image Format – if your camera has the capability, shoot in RAW format instead of JPEG. This way, you can make adjustments to your photograph later on and do a lot of highlight / shadow recovery.
  • White Balance – if you shoot in RAW, set your White Balance to “Auto” (you can change it later in post-processing). If you shoot in JPEG, set your White Balance to “Daylight” – it works well in most cases.
  • Long Exposure Noise Reduction – turn it off (if available). Keeping it on will double your exposure time, which is unnecessary.
  • Metering – I find matrix / evaluative metering to work the best, especially when shooting wide and including foreground elements.
  • Camera Mode – switch your camera mode to “Manual Mode”.
  • Shutter Speed and Aperture – set your shutter speed to 3 seconds and aperture between f/5.6 and f/8.
  • Image Stabilization – if you are shooting with a camera body or lens that has Image Stabilization (or Vibration Reduction in the Nikon world), you need to turn it off – it is of no use when shooting on a tripod.
Since it is probably going to be pretty dark at the time you will be changing your camera settings, you should not forget to bring a flashlight as well. If you forgot a flashlight, your smartphone’s flashlight will work just fine as well.

Properly Frame Your Shot

If you have not figured out your framing in advance, don’t worry about it before the fireworks begin, especially if you don’t know exactly where fireworks will be shot from. Just observe the sky and once the show begins, start working on framing / composition. You might have to constantly zoom in / out and re-frame your shots, so there is really no set rule for this. If there are brightly lit objects in the scene such as buildings and lights, it might be a good idea to include them as part of your composition. If the foreground is unattractive, it is best to exclude it completely and just focus on the firework explosions.
When traveling, it is a good idea to look at local celebrations to see if there are any fireworks shows taking place. I was in Jerusalem during independence day, so I was able to capture fireworks with my camera.
GFX 50S + GF63mmF2.8 R WR @ 63mm, ISO 200, 1 sec, f/5.6
If the foreground looks good, but appears a bit too dark in your images, then try increasing your exposure time, or wait for a very bright sequence of fireworks to illuminate the foreground details. The fireworks might look too washed out and overexposed because of this, but as long as you don’t change your framing, you could use a more advanced technique to blend two different images together later on in post-processing. Make sure to capture at least one shot with a properly exposed foreground.
Make sure to straighten the horizon as well when including foreground elements. Lastly, consider both horizontal and vertical framing for your shot. While a horizontal shot often works great, a vertical shot might be necessary to fit both the fireworks and other elements of the scene in a single shot.
Lastly, watch out for distracting elements while framing. You do not want trees, power lines and other distracting subjects crossing the primary elements of your composition.

Acquire Precise Focus

This part is tricky, because you need to make sure that your focus is correctly acquired, no matter what you are shooting with. Focusing options with point-and-shoot cameras might be limited, so make sure to practice this beforehand. If you have a bright object that you can focus on, zoom in to that area via live view (make sure not to zoom in optically, or it will mess up your framing and your focusing) and try to focus manually. If there is no bright subject that you can focus on, it is best to wait until the fireworks start, since fireworks are very bright and your camera should not have a problem focusing accurately. As soon as your focus is acquired, make sure to turn off autofocus. Once you capture a shot or two, play back and zoom in to make sure that the fireworks appear sharp.

Focus and Turn off Autofocus

If you are shooting a DSLR or an advanced mirrorless camera, start out by setting your lens focus to infinity and then take a picture. Many modern lenses allow focusing “beyond infinity”, which might screw up the focus on your images. What I typically do to make sure that my focus is 100% accurate, is focus on a bright explosion using the camera’s autofocus system (by half-pressing the shutter release button or pressing the “AF-ON” button), then once the focus is properly acquired, I turn autofocus off completely. Turning off autofocus should be very simple – many lenses will have a focusing switch on their side that allow you to easily turn AF on and off. Since I do not move, my focus from that point on will be accurate and won’t change, unless I zoom in / out with my lens to change my framing.

Include Foreground Elements

If you are trying to incorporate interesting foreground elements in your shot and your foreground elements are very close, you might get disappointed to see that you cannot get both the foreground and the fireworks in perfect focus. The first recommendation would be to properly calculate hyperfocal distance, so that you have both the foreground and the background in focus.
However, if it is too dark and you do not have a flashlight that you can use to properly calculate the hyperfocal distance, or if all this sounds too complex for you, simply focus on your foreground elements and take a shot. Just make sure that you properly expose the foreground – don’t worry about the fireworks in the distance. After you take one or two shots where the foreground looks good, re-acquire focus on the fireworks without changing your composition and keep on shooting. This way, you will have two separate exposures – one for the foreground and one for the background, which you can blend later on in post-processing.

Control Shutter Speed

When the fireworks show begins, take a picture during a bright explosion and see if the image is underexposed or overexposed. If the image is too dark or too bright, use your camera’s shutter speed to change the exposure length. Since you are shooting in manual mode, it should be pretty easy to do that. Your aperture does not matter for the most part – it is the shutter speed that will be controlling how much light enters your camera. For some fireworks, you will find that it is better to have shorter shutter speeds, while for others, a longer shutter speed might be necessary to capture the trails coming from each explosion.
Make sure to control shutter speed when photographing fireworks and vary the shutter speed between 1 to 30 seconds to get different displays of fireworks action.
NIKON D700 + 70-200mm f/2.8 @ 90mm, ISO 200, 3 sec, f/10.0
Start out with a shutter speed of 1 second and experiment changing it between 1 to 6 seconds. This way, you will have plenty of different shots with different effects. Keep in mind that the longer your shutter speed, the more action your camera will capture. This is not necessarily what you might want – too long of an exposure might make fireworks look too blurry, especially when it is windy. I generally try to keep the shutter speed below 3-4 seconds when there is plenty of action.
In some cases the fireworks shows will take place over a long period of time, so you can try different compositions with or without subjects.
NIKON D700 + 70-200mm f/2.8 @ 86mm, ISO 200, 5 sec, f/14.0
You don’t want the exposure time to be too long, because the sky will brighten up and the smoke might become too visible (ideally, you want the sky to look pitch black).
As the fireworks show gets closer to its “culmination” phase, you will notice that it is going to get very bright. Make sure to adjust your shutter speed accordingly (sometimes to a fraction of a second) to avoid overexposing your images.

Use “Bulb” Mode

If you have a remote shutter release and your camera supports “Bulb” in Manual Mode, try it out by opening up the shutter at the beginning of the explosion and then release it as soon as it ends. This is the preferred method over the manual method above, as it allows you to precisely control when the shutter opens and closes as you photograph fireworks. Since firework sequences and their lengths vary by a great deal, you are going to be better off with the “Bulb” mode, since you are in full control of the exposure time and you can visually see what’s going on.
If you do not have a remote shutter release, you can still use the bulb mode by holding on the shutter release of your camera and then releasing it at the end of the sequence. However, since you are shooting at slow shutter speeds, you have a very high chance of introducing camera shake. Therefore, it is ideal to use the “Bulb” mode with a remote shutter release, so that you keep your hands off your camera.
Here are the basic steps for using the “Bulb” mode:
  1. Connect remote shutter release to your camera.
  2. Frame your shot and set desired focal length on the lens.
  3. Properly acquire focus using step #8 above.
  4. Set your camera to “Bulb” mode (changing exposure time beyond 30 seconds usually reveals the “Bulb” mode).
  5. Take a picture by holding the shutter release button on the remote shutter release. Keep holding until the firework sequence ends and release the button right after.
  6. Play back the image on the camera’s LCD and make sure that the fireworks are properly focused and exposed.
Take plenty of images and don’t forget to occasionally review your images on the camera’s LCD.

Watch Out for Wind Direction

Fireworks generate quite a bit of smoke and you do not want too much of it in your images, or your fireworks images will look quite bad. Believe it or not, but the ideal condition for photographing fireworks is a slightly windy night! If there is a little bit of wind, find the direction of the wind and try to stand in parallel direction, so that the smoke moves out of your frame and doesn’t end up behind the fireworks or in front of you.
If it is a calm day and there is no wind, then try to focus on the initial explosions – they are probably going to give you the best results. Towards the end of the show, you will probably deal with way too much smoke everywhere, so your best bet might be to shoot shorter exposures and just focus on parts of the explosion. With shorter exposures, you will end up with less smoke in your images.

Photo Challenge

Here is a photo challenge for you – using the above tips, go out and photograph fireworks at a local fireworks show. Pick your best photo of the day, then post a link to it in the comments section below.
Don't forget to share your best photographs of fireworks with other people.
NIKON D700 + 70-200mm f/2.8 @ 90mm, ISO 200, 2 sec, f/7.1
Hope this helps.

Monday, December 30, 2019

How to Photograph Fireworks

How to photograph fireworks
Do you want to know how to photograph fireworks?
With a busy time for fireworks just days away I thought I’d refresh this article in which I give 10 Fireworks Photography tips to help you get started.
Fireworks Displays are something that evokes a lot of emotion in people as they are not only beautiful and spectacular to watch but they also are often used to celebrate momentous occasions.
I’ve had many emails from readers asking how to photograph fireworks displays, quite a few of whom have expressed concern that they might just be too hard to really photograph. My response is always the same – ‘give it a go – you might be surprised at what you end up with’.
photographing fireworks
Photo by Antonio Gabola on Unsplash
My reason for this advice is that back when I bought my first ever SLR (a film one) one of the first things I photographed was fireworks and I was amazed by how easy it was and how spectacular the results were. I think it’s even easier with a digital camera as you can get immediate feedback as to whether the shots you’ve taken are good or not and then make adjustments.
Of course it’s not just a matter of going out finding a fireworks display – there are, as usual, things you can do to improve your results. With 4 July just around the corner I thought I’d share a few tips.
Here are the steps you’ll need to work through to photograph fireworks:
  1. Start by using a Tripod
  2. Use a Remote Release
  3. Frame Your Shot
  4. Choose the best Focal Length
  5. Select the right Aperture
  6. Get your Shutter Speed Right
  7. Set your ISO
  8. Switch off your Flash
  9. Shoot in Manual Mode
  10. Experiment and Track Results
Let me expand on each tip in more detail below.
Note: Get more Digital Photography Tips like this in your email with our free newsletter

1. Use a tripod to keep your camera still

Perhaps the most important tip is to secure your digital camera to something that will ensure it doesn’t move during the taking of your shots. This is especially important in photographing fireworks simply because you’ll be using longer shutter speeds which will not only capture the movement of the fireworks but any movement of the camera itself. The best way to keep your camera still is with a tripod (read our series on tripods and how to use and buy them). Alternatively – keep in mind that there are other non Tripod options for beating camera shake.
photograph fireworks tripod
Photo by Jamie Fenn on Unsplash

2. Use a remote release to further reduce camera shake

One way to ensure your camera is completely still during fireworks shots is to invest in a remote release device. These will vary from camera to camera but most have some sort of accessory made for them. The other way of taking shots without touching your camera is to use the self-timer. This can work but you really need to be able to anticipate shots well and it’s very very hit and miss (read more on remote shutter releases).

3. Plan your shot to anticipate the best framing

One of the most difficult parts of photographing fireworks is working out where to aim your camera. The challenge you’ll face in doing this is that you generally need to aim your camera before the fireworks that you’ll be photographing goes off – anticipation is key. Here are a few points on getting your framing right.
Framing fireworks photography
Photo by Evelyn Paris on Unsplash
  • Scope out the location early – Planning is important with fireworks and getting to the location early in order to get a good, unobstructed position is important. Think about what is in the foreground and background of your shots and make sure you won’t have people’s heads bobbing up into your shots (also consider what impact you’ll have on others around you also). Take note of where fireworks are being set up and what parts of the sky they are likely to be shot into – you might also want to try to ask some of those setting up the display for a little information on what they are planning. Also consider what focal lengths you might want to use and choose appropriate lenses at this time (rather than in the middle of the show).
  • Watch your Horizons – One thing that you should always consider when lining up fireworks shots is whether your camera is even or straight in it’s framing. This is especially important if you’re going to shooting with a wide focal length and will get other background elements in your shots (ie a cityscape). Keeping horizons straight is something we covered previously on this site and is important in fireworks shots also. As you get your camera on your tripod make sure it’s level right from the time you set up.
  • Vertical or Horizontal? – There are two main ways of framing shots in all types of photography, vertically (portrait) or horizontally (landscape). Both can work in fireworks photography but I personally find a vertical perspective is better – particularly as there is a lot of vertical motion in fireworks. Horizontal shots can work if you’re going for more of a landscape shot with a wider focal length of if you’re wanting to capture multiple bursts of fireworks in the one-shot – but I don’t tend to go there that often.
  • Remember your framing – I find that when I photograph fireworks that I spend less time looking in my viewfinder and more looking at the sky directly. As a result, it’s important to remember what framing you have and to watch that segment of the sky. Doing this will also help you to anticipate the right time for a shot as you’ll see the light trails of unexploded rockets shooting into the sky.

4. Experiment with focal length

zoomed in fireworks photography
Photo by Jack Patrick on Unsplash
One of the hardest parts of photographing fireworks is having your camera trained on the right part of the sky at the right time. This is especially difficult if you’re shooting with a longer focal length and are trying to take more tightly cropped shots. I generally shoot at a wider focal length than a tight one but during a show will try a few tighter shots (I usually use a zoom lens to give me this option) to see if I can get lucky with them. Of course zoomed in shots like this one can be quite effective also. They enable you to really fill the frame with great color. Keep in mind however that cropping of your wider angle fireworks shots can always be done later to get a similar impact in your photography.

5. Use apertures in the mid to small range

A common question around photographing fireworks displays is what aperture to use. Many people think you need a fast lens to get them but in reality it’s quite the opposite as the light that the fireworks emit is quite bright. I find that apertures in the mid to small range tend to work reasonably well and would usually shoot somewhere between f/8 to f/16.

6. Keep the shutter open, but not too long

shutter speed for fireworks
Photo by San Fermin Pamplona – Navarra on Unsplash
Fireworks are a moving subject, so it’s probably more important to get shutter speed right than aperture. To capture this movement you need a nice long exposure. The technique that I developed when I first photographed fireworks was to shoot in ‘bulb’ mode. This is a mode that allows you to keep the shutter open for as long as you hold down the shutter (preferably using a remote shutter release of some type). Using this technique you hit the shutter as the firework is about to explode and hold it down until it’s finished exploding (generally a few seconds).
You can also experiment with set shutter speeds to see what impact it will have but I find that unless you’re holding the shutter open for very long exposures that the bulb technique works pretty well.
Don’t keep your shutter open too long. The temptation is to think that because it’s dark that you can leave it open as long as you like. The problem with this is that fireworks are bright and it doesn’t take too much to overexpose them, especially if your shutter is open for multiple bursts in the one area of the sky. By all means, experiment with multiple burst shots – but most people end up finding that the simpler one burst shots can be best.

7. Use low ISO for the cleanest shots

Shooting at a low ISO is preferable to ensure the cleanest shots possible. Stick to ISO 100 and you should be fine.
low iso for fireworks
Photo by Steven HWG on Unsplash

8. Switch off your Flash

Shooting with a flash will have no impact upon your shots except to trick your camera into thinking it needs a short exposure time. Keep in mind that your camera’s flash will only have a reach of a few meters and in the case of fireworks even if they were this close a flash wouldn’t really have anything to light except for some smoke which would distract from the real action (the flashing lights).Switch your flash off.

9. Shoot in Manual Mode

I find I get the best results when shooting in manual exposure and manual focus modes. Auto focusing in low light can be very difficult for many cameras and you’ll end up missing a lot of shots. Once your focusing is set you’ll find you don’t really need to change it during the fireworks display – especially if you’re using a small aperture which increases depth of field. Keep in mind that changing focal lengths will mean you need to need to adjust your focusing on most lenses.

10. Experiment and Track Results

photography people watching fireworks
Photo by Amarnath Tade on Unsplash
Throughout the fireworks display periodically check your results. I generally will take a few shots at the start and do a quick check to see that they are OK before shooting any more. Don’t check after every shot once you’ve got things set up OK (or you’ll miss the action) but do monitor yours shots occasionally to ensure you’re not taking a completely bad batch.
Also experiment with taking shots that include a wider perspective, silhouettes and people around you watching the display. Having your camera pointed at the sky can get you some wonderful shots but sometimes if you look for different perspectives you can get a few shots that are a little less cliche and just as spectacular. Most of the best shots that I’ve seen in the researching of this article have included some other element than the fireworks themselves – whether it be people, buildings, landmarks or wider cityscape perspectives.

More Fireworks Photography Tips from DPS Readers

  • “Find Out the Direction of the Wind – You want to shoot upwind, so it goes Camera, Fireworks, Smoke. Otherwise, they’ll come out REALLY hazy.”
  • “Also, I find that if you shoot from a little further back and with a little more lens, you can set the lens to manual focus, focus it at infinity and not have to worry about it after that.”
  • “Remember to take advantage of zero processing costs and take as many pictures as possible (more than you’d normally think necessary). That way, you’ll up your chances of getting that “perfect” shot.”
  • “Make sure you are ready to take pictures of the first fireworks. If there isn’t much wind, you are going to end up with a lot of smoke in your shot. The first explosions are usually the sharpest one.”
  • “Get some black foam core and set your camera to bulb mode. Start the exposure when the fireworks start with the piece of foam core in front of the lens. Every time a burst happens, move the foam core out of the way. You will get multiple firework bursts in one exposure”
  • “Another tip I would add to this is pre-focus if possible (need to be able to manually focus or lock down focus for good) before the show starts so other elements in the frame are sharp They did mention that you only need to focus once but its a lot easier to take a few shots before the show starts and check them carefully rather than wait until the show has begun and you are fiddling with focus instead of watching fireworks!”
Tell us your fireworks display photography tips in comments below. Don’t forget to tell us which city you’re in and what the fireworks are like there!

Share this article.

Tips for Preparing for a Portrait Session

A portrait session can be a nerve-racking event. There’s so much to remember and prepare before the actual press of the shutter button. It takes a lot of prep work. People don’t always realize what goes into being ready.
Even if you’re an amateur taking pics of your family and friends, there are some important steps to take if you want to capture some really beautiful images. Here are some tips to help you out.
Tips for Preparing for a Portrait Session - girl jumping into the water
In some cases, planning for a shoot is really simple. In this case, we took the kids to the beach at 
sunset to shoot some pics we could share on social media.

Logistics and Planning

This is the part where you discuss the portrait session with your friends or clients. You need to pick a date, location, and a time. You should also discuss backup dates in case the original plan doesn’t work.
If you’re shooting professionally, you need to get the contract signed, collect a deposit and ensure that clients know under which circumstances their deposit (retainer) is refundable.

Image Sharing

If you are taking family pics at a reunion and you intend to share these photos with everyone, consider setting up an online photo album you can send to everyone. It’s much easier to share the pics this way.
Make sure you have everyone’s email so that they can all download the images afterward. It’s a huge pain to email people separately. You’re taking the pictures to stay in control and don’t overwork yourself sending them to everyone. They can take some of the responsibility.
If there are older family members, consider printing out a set of instructions they can use for accessing and downloading the images. I’ve run into that issue before and found myself driving an hour to click download on someone’s computer.
kids running in the water - Tips for Preparing for a Portrait Session
Another from the sunset shoot of informal family pics.

The Style and Portrait Session Design

It’s also a good idea to discuss the type of look and feel you want to create in the portrait session. If you’re working professionally, this is really important. Make sure you and the clients are on the same page.
Do they want relaxed, candid images or do they prefer something more formal? Clothing can affect the look of a photo shoot so be sure to discuss attire. If you’re snapping pics at a family event, you probably won’t have much control over the look of the images unless you plan and get everyone on board.
I’ve seen families choose themes like “Old West” for a fun afternoon of photos. At some reunions, I’ve seen groups create a t-shirt they all wear to commemorate the pics.
A friend of mine set up a photo booth at a Christmas party. Everyone was asked to bring one piece of “bling” for their photo. When paired with the props and the background she created, it was a ton of fun.
portrait of a boy by a tree - Tips for Preparing for a Portrait Session
In this case, I was working with a family. Prior to the shoot, I visited the home and we discussed 
possible locations.

Location Matters

The chosen location can also affect the look and feel of a shoot. Consider a big comfy couch in a brightly lit room versus wooden dining room chairs on a studio backdrop. The background can considerably change the feel of an image so plan carefully.

Props

Collect some props for the portrait session. If you’re working with really young people like toddlers, it is really helpful to have things to distract the kids. Teenagers love goofy items they can hold and use for posing.
If you’re working with your own kids, it can be a huge battle to get them to cooperate. I find other people’s kids far more flexible, but if I want to photograph my kids, it’s a huge ordeal.
So think about styling the shoot in such a way that your little ones will cooperate. This might mean including their favorite toy is in the image. That’s okay! Go with it because it’s far better to get a positive, happy image than a forced angry looking smile.
Tips for Preparing for a Portrait Session - 3 ladies smiling and laughing
This was another paid session. The family had gathered for a 50th-anniversary celebration. They 
were dressed semi-formal for the occasion.

Be Informed and Plan Ahead

Make sure you do your research. Know the area in which you are going to be shooting. It’s helpful to visit the site before the shoot so you can be familiar with all the little nooks and crannies.
Plan your route to the photo shoot if you can’t visit before the big day. Download offline instructions to your phone in case you lose your connection. It’s happened to me once that I lost the signal and drove around for ages before I could find the location.

Get Permits if Needed

Double check to be sure you don’t need a permit for shooting at a specific location. Some places require you to buy a permit. So don’t get caught without one.
I know of a family that planned to do photos in the Distillery District here in Toronto only to learn they could not photograph each other when they were halfway through the shoot. I’ve also seen a family get in a lot of trouble for trespassing on private land. All they wanted to do was take a family pic for their Facebook profiles.
So double check that you can visit and use the site you want for the session. If you’re shooting professionally, permits and property releases are a must so be sure to take care of the entire nitty gritty well before the day of the shoot.

Backup Plans are Essential

Have a Plan B. Always! Have an alternative plan at the ready. You never know what may go wrong. Have a family member bring an extra camera (or rent or borrow one) in case yours breaks. Choose an alternate site if the first won’t work.
Just be prepared. The reality is that when things go wrong, they usually go horribly wrong. So try to plan for every possible road bump in advance.
girls in the snow doing a selfie - Tips for Preparing for a Portraits Session
This shoot was planned for months. Friends were happy to join me for a day of photographs in the 
winter.

Day of the Portrait Session

Always make a checklist of items that you can use to help you pack up and be ready for the photoshoot. It’s really frustrating to leave equipment at home.
Arrive early! This should go without saying. You don’t want to make people wait.
Check the weather forecast and make sure you can contact people in case of emergencies. Get contact numbers from folks.
Be prepared to have fun! Just before everyone arrives or your clients show up at the studio make sure you’ve relaxed a little. I know some photographers who take 5 minutes to have a coffee before shooting. Others will sit and meditate for a few minutes beforehand.
Whatever works for you, just make sure you are confident and enthusiastic before you begin shooting. Your nerves will affect the quality of your work so don’t let them control you.

Photography is so much more than picking up a camera. To take memorable images, you need to put in some effort and plan out the event. So think carefully about the shoot and make sure you have everything ready.
If you are prepared and relaxed you will enjoy the event more, and so will those you are photographing!
girl blowing snow off her hand - Tips for Preparing for a Portraits Session
We wanted to create some of those images where you make snow dust. Of course, there was just
too much white space around our chosen location. So sometimes your plans won’t work.
Tips for Preparing for a Portraits Session
We tried a lot of different locations.
Tips for Preparing for a Portraits Session
Eventually, we chose to shoot portraits that were much different from our initial plans.
Finally, make sure you share with us some of the ways you prepare for a photography session. Let’s get a good base of tips together we can use to our benefit.

Share this article.

The Best Camera Settings for Portrait Photography


#1 Best Camera Settings for Portrait Photography

I suggest you set your camera to manual mode to give yourself more creative control of your exposure. Sure, it will take a little extra time to capture your images but you are a much better judge of how you want the final image to look than your camera.

ISO

First choose your ISO, which is usually the lowest setting in natural light, ISO 100 on most cameras. Some Nikon cameras have a lower ISO and allow you to you choose a native ISO of 64. Set your ISO as low as possible to avoid extra noise and that grainy look you will get if you use higher ISO settings.
best camera settings for natural light portraits

Aperture

Step two, decide which aperture you would like to use. For an out of focus background use an aperture like f/1.4. If you would like more of the background in focus or a sharper image, in most cases using an aperture that is two to three stops higher than the minimum aperture will be the sharpest point of the lens.
For example, an f/2.8 lens will be at its sharpest point at around f/5.6 to f/8. If you are a little confused by that, feel free to post your questions in the comment box below this article.
Read more here: How To Find Your Lens’s Sweet Spot: A Beginner’s Guide to Sharper Images
best portrait settings mirrorless cameras

Shutter Speed

Once you have set your ISO and decided on your aperture your next step is to refer to your in-camera meter and adjust your shutter speed until you get a center reading. Then take a test shot and have a look at your camera’s LCD screen and histogram.
Make sure your histogram is as far to the right as possible without blowing out the highlights in your image. Refer to the video above for some examples of how the histogram should look on your LCD screen.
best camera settings for high speed sync
A general rule is to set your shutter speed two times the focal length of your lens. For example, if you were using a 100mm prime lens then you would set a minimum shutter speed of 1/200th to avoid camera shake and image blur.
There are exceptions to this rule. If you are using a tripod or you have in-camera stabilization, like some mirrorless cameras have, or you are using a lens that has built-in image stabilization, then you can photograph at lower shutter speeds.
best camera settings for portrait photography with flash

Step #2 Best Camera Settings for Portrait Photography Using Flash

When it comes to using flash photography there are a couple of different strobes that are in common use today. There are smaller speedlights that fit on your camera’s hotshoe mount and there are larger studio strobes.
There are also strobe units that function differently. Some strobe systems do not allow you to shoot at a shutter speed faster than 1/200th (the camera’s sync speed). Other strobe setups will allow you to use something called (high-speed sync mode) to shoot with flash up to a shutter speed of 1/8000th.
best camera settings for portraits using fill flash
If a majority of your portrait photography is going to take place outdoors, then I would consider a strobe like the Godox AD600 Pro which is what I used to take a majority of the images in this article. The Godox AD600 Pro allows you to use high-speed sync and flash at shutter speeds of up to 1/8000th.
If your current strobe does not allow you to take photos at above 1/200th, you can use a filter like a B+W 3-stop ND filter which will allow you to shoot at a shutter speed of 1/200th but also at an aperture 3-stops larger than you could without it.
For example, with a 3-stop ND filter, you can shoot at f/2.8 instead of f/8 for the same exposure.
best camera setting for natural light portraits
Another important thing to keep in mind if you are shooting outdoors is that you will achieve better results if you shoot closer to sunrise or sunset when the sun is less harsh.
The image above was taken one hour before sunset in the shade and provides a nice even light on the subject’s face. If you would like softer light, then avoid shooting in the middle of the day or move to the shade if you do not have the luxury of shooting just before sunset.

Step #3 Practice These Tips and Explore Your Creativity

best camera settings for portraits at golden hour
One last tip I have for you is to set your camera’s LCD screen brightness level to 4 or 5 and to leave it there. Make sure your LCD screen brightness is not set to auto. That is because it will be difficult for you to gauge your exposure level if your LCD screen brightness is constantly changing.
Check your camera’s settings and set your LCD screen brightness level manually and keep it at the same setting for future photo outings.
best camera settings for shooting with strobes

Conclusion

If you are new to shooting in manual mode it may seem a little difficult at first. But with a little practice, you will be shooting like a pro.
If you have any questions about the best camera settings for portrait photography that were covered in this article, feel free to ask in the comment box below this article. I look forward to hearing from you.

Share this article.

Best Camera Settings For Portrait Photography DSLR And Mirrorless

Sunday, December 29, 2019

Equipment versus photographer, which matters more?

By: Jaymes Dempsey Jaymes Dempsey 


It’s a common question without an easy answer. It’s one that pretty much every photographer has asked themselves at one time or another.
In this article, I’m going to start by identifying the ways in which the equipment matters. And then I’m going to cover the ways in which the photographer matters.
Finally, I’ll address the main question:
Which is more important?
So let’s dive right in.
equipment-versus-photographer

How does equipment change your photography?

Here’s the thing:
As much as photographers hate to admit it, equipment does matter.
If it didn’t, why would professional photographers spend $5000+ on a camera setup?
It’s not a question of whether equipment matters, it’s a question of how much it affects your photography.
So here’s a list of the key reasons equipment matters:

Why your equipment matters

Continuous shooting speeds

Cameras with high continuous shooting rates make it possible to capture amazing action photos without leaving much to chance. A camera that can shoot 12 frames-per-second is going to maximize your chances of getting a gorgeous image in the thick of the action.

Autofocus capabilities

Cameras with more autofocus points, greater autofocus coverage, better tracking, and better autofocus points (e.g., cross-type points) will make it easier to quickly lock focus on your subject and track them as they move. This is useful for any genre of photography that is fast-paced.
Equipment Versus Photographer – Which Matters More?

Ruggedness

Metal cameras with weather-sealing can handle much more difficult conditions than cameras made of non-weather sealed plastic. You can shoot for longer in the rain, snow, and freezing temperatures without your camera failing, which increases your chance of capturing a once-in-a-lifetime shot.

High-ISO capabilities

Cameras with the most advanced sensors are able to capture noise-free images when shooting at high ISOs. This makes shooting at night without a tripod a much more feasible option.

Resolution

The greater your camera’s megapixel count, the more you can crop your photos. This gives you additional flexibility in post-processing and helps you compensate for a shorter lens.
Equipment Versus Photographer – Which Matters More?

High dynamic range

Cameras with a high dynamic range maximize the amount of detail you capture in a scene. This gives you more latitude when selecting an exposure. It also allows you to photography high dynamic range scenes without resorting to HDR techniques.

Accurate previews

Mirrorless cameras with high-quality electronic viewfinders (EVFs) give you fairly accurate previews of your images before you press the shutter button. This allows you to get your exposure and depth of field correct, right from the beginning.

Size and weight

Smaller and lighter cameras are easier to carry on long treks and on travel expeditions. And the easier your camera is to carry, the more likely you are to have it with you when a once-in-a-lifetime scene happens right before your eyes.

Image stabilization

Cameras and lenses with some form of image stabilization make it possible to handhold at low shutter speeds. This increases your shooting opportunities in low light and allows you to increase your depth of field during the day.

Optical quality

Higher-quality lenses are sharper and have fewer problems (such as color fringing and distortion). This makes it possible to get tack-sharp shots that look great straight out of the camera.
Equipment Versus Photographer – Which Matters More?

Focal length

Lenses with different focal lengths allow you to capture different types of shots. If you want to capture sweeping landscape images, you’ll want an ultra-wide lens on hand. If you want to capture a detail shot of a perching eagle, you’ll want a 500mm or 600mm lens. Therefore, different lenses give you different photo opportunities.

How do you, the photographer, change your photography?

Now that we’ve covered the ways in which equipment affects your photography, it’s time to talk about you, the photographer.
What impact do you have in the photo-making process? How do you make a difference in your photography?
equipment-versus-photographer

Why you matter

Focusing skills

Even if you have the best autofocus system in the world, it won’t matter if you don’t have the capabilities to use it. It takes serious skill to track fast-moving subjects, and it’s something that takes lots of practice to master. If you want to capture gorgeous action shots, you can’t just press the shutter and hope for the best. The autofocus system is part of the equation, but so are you.

Handholding skills

Your ability to handhold is often the difference between a sharp photo and a blurry photo. You’ve often got to keep your hands steady while in the thick of the action, never an easy task. Image stabilization helps, but if your technique isn’t sound, you’ll end up with blurry photos anyway.

Exposure skills

Cameras are pretty good at identifying the right exposure for the scene. But there are plenty of times when the camera’s choice just doesn’t look good. That’s when you have to step in, as the photographer, and take control of your camera’s exposure.
equipment-versus-photographer

Working with light

As great as modern cameras are, they still can’t tell you how to find good light, and they definitely can’t tell you how to use the light for great shots. That’s all up to you, and it’s something that photographers spend their whole lives studying. Expertly used light can be the sole difference between an amazing photo and a mediocre photo.

Compositional skills

I’m putting this under a single header, but it’s a big one. Composition isn’t something that’s innate, and it’s definitely not something that your camera can control. It’s something that you learn through practice and hard work. And if you don’t bring composition skills to your photography, it’s going to look plain bad. There’s no way around it.

Working with aperture

Choosing a composition is a skill. It’s also a skill to be able to pull off that composition – to be able to use camera settings to your advantage. That’s where you have to leverage your knowledge to choose the aperture and shutter speed you need to capture the perfect shot.

Post-processing skills

This is another huge factor as post-processing skills allow you to take a shot and really turn it into something incredible. Post-processing is how you put the finishing touches on your photos, and it’s how you give your photos that professional flair.
Equipment Versus Photographer – Which Matters More?

Equipment versus photographer. And the winner is…?

Now that you’ve read this far, you and I can surely agree that both the equipment and the photographer matters.
However, if you look over the two lists, you’ll notice that there are certain aspects of photography that the gear can barely contribute to such as working with light, choosing a composition, putting the final touches on a photo in post-processing, and more.
These are huge aspects of being a photographer. If you can’t do these things, your images will be consistently poor. There’s no other way to say it.
equipment-versus-photographer
But if you can do these things well, you’ll get amazing photos. Yes, high-quality gear will help. It will increase your chances of getting beautiful shots – if you’re already very skilled. However, while the equipment is important, gear will never get you an amazing photo. At best, gear will get you ultra-sharp, well-exposed, in-focus snapshots – and that’s all. At worst, gear will get you blurry, poorly-exposed images.
In other words, you don’t need incredible gear to get incredible photos. But you do need to be an incredible photographer to get incredible photos.
Equipment Versus Photographer – Which Matters More?
So…
Which is more important, the equipment or the photographer?
The photographer.
No doubt about it.
What are your thoughts on equipment versus photographer? Do you agree that the photographer matters more than the equipment? Share your thoughts in the comments!