Tuesday, November 30, 2021

13 Tips for Shooting Golden Hour Photography

Tags: Photography for Beginners, Newbie Photography

The right light can make a single photo stop you in your tracks. Imagine a warm, natural glow that makes everyone and everything look their best. That’s the magic of golden hour photography.
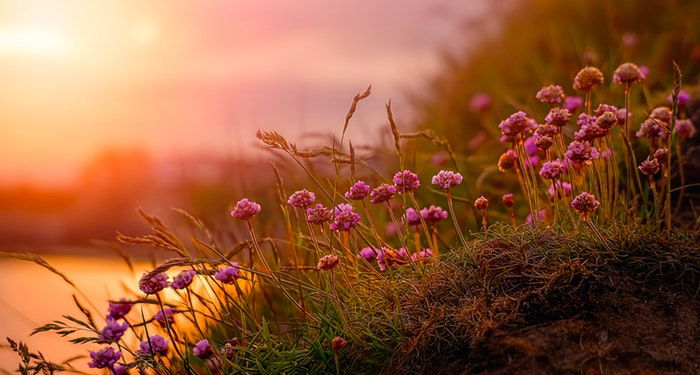
flowers in a pretty rural location the golden hour
Photo by Ray Bilcliff from Pexels

When Is Golden Hour?

The golden hour starts roughly one hour after sunrise and one hour before sunset. If you want a more exact time for when the golden hour starts, you can use a golden hour calculator app like The Photographer’s Ephemeris. Or try other apps like Helios Golden Hour (for iOS) and Blue Hour Calculator (for Android).

You can also use an online golden hour calculator like this one to find out when the golden hours start at a specific location.

The golden hour’s soft, warm, directional light makes it easier to shoot than the harsh light of a midday sun. Both professional photographers and beginners prefer to shoot during the golden hours since it’s easier to work with.

Golden hour gets its characteristic look since the sun is in a lower position in the sky. Compared to other times of day, golden hour light is:

  • Soft: the transition from light to dark is gradual, creating soft light that’s universally flattering and particularly good for portraits.
  • Warm: the low angle of the sun creates an orange glow, associated with calm and happiness.
  • Directional: since the sun is low in the sky, it’s easy to create back-lighting, side lighting or front lighting with just the sun and an inexpensive reflector or a modified fill flash.

Together, those three characteristics form the magic of the golden hour. All you have to do to take advantage of the golden hours is adjust your shooting time. And perhaps wake up a little earlier!
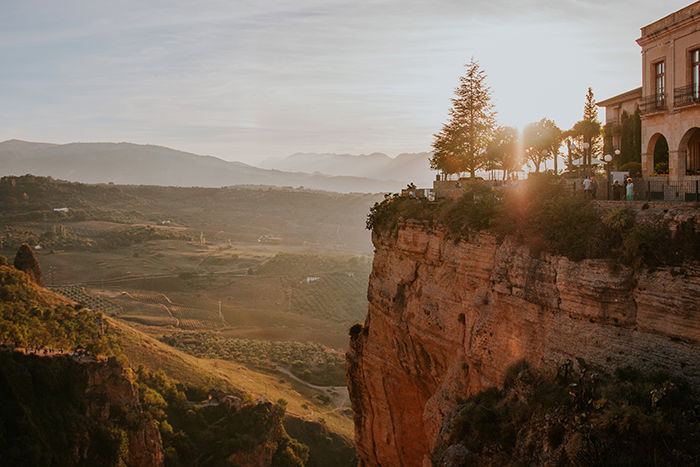
Beautiful landscape in golden hour.

Our Top Tips for Shooting During Golden Hour

13. Get the Timing Right

Golden hour is one of the easiest types of natural light to work with, but it can still go wrong. You can run out of time and have to shoot high ISOs as the light wanes, or take portraits where the subject is squinting.

To avoid rushing, plan on arriving at least an hour before sunset, depending on the weather conditions. If the weather is cloudy, give yourself even more time. Overcast days don’t provide quite the same magic, but the type of light is still soft and directional.

12. Position the Shot to Make the Most of Golden Hour

If you’re new to working with light, pay attention to the sun’s position for the best quality of light. For portrait photography, arrange your shot so that the sun is to the side. If you are not shooting a portrait, the sun should be in front of your subject. Don’t use front lighting from the sun for portraits, or you’ll get a squint.

One of the best uses for the golden hour is back-lighting. Placing the sun behind your subject gives you that magical glow.
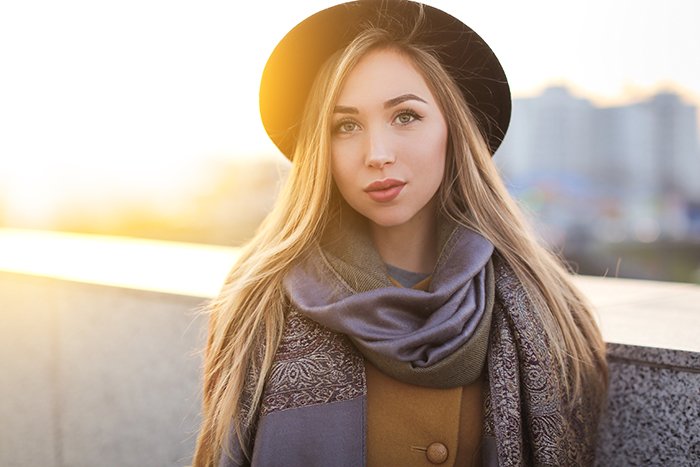
Portrait of a beautiful woman photographed at golden hour.

11. Choose the Best Golden Hour Camera Settings

Shoot in manual mode to make the most of back-lighting and to adjust exposure. Or in a semi-manual mode such as aperture priority with spot metering.
Spot metering tells the camera to expose for wherever the focal point is, instead of considering the entire scene. Without spot metering, you’ll most likely end up with a dark subject or even a silhouette.

On most DSLRs, there’s a physical shortcut for the metering mode. On many models, you can also adjust metering mode inside the menu.
Another great way to shoot with golden hour backlight is to use a reflector. Bounce some of the light back on the subject, creating a more even exposure. A low-powered flash with a diffuser also does the trick.

If I can’t juggle the reflector in the right spot, I use a hot shoe flash on-camera, but on a low setting with a diffuser. An orange gel is also helpful – the color helps the flash blend in with the ambient, or existing, light.

Golden hour settings vary based on the exact light and the subject. For portraits, I shoot with a low aperture, around f/1.8 to f/2.8. If I’m shooting a couple or a group, I use a narrower aperture to keep all the faces in focus.

I often use aperture priority mode and increase the ISO as the sun goes down. For landscapes, particularly if you use a tripod, you can keep the ISO low and lengthen the shutter speed as the sunlight wanes.

Another potential pitfall to look out for are lens flares. Adjust your position, use a lens hood or find a way to incorporate them artistically into the shot.
Back-lighting can sometimes be tough for budget lenses, so check your focus to make sure you got it sharp before leaving the scene.

The light changes quickly during the golden hour. You’ll want to watch your settings and adjust as the light fades. You might have to increase your ISO, widen the aperture or lower the shutter speed as the amount of sunlight decreases.
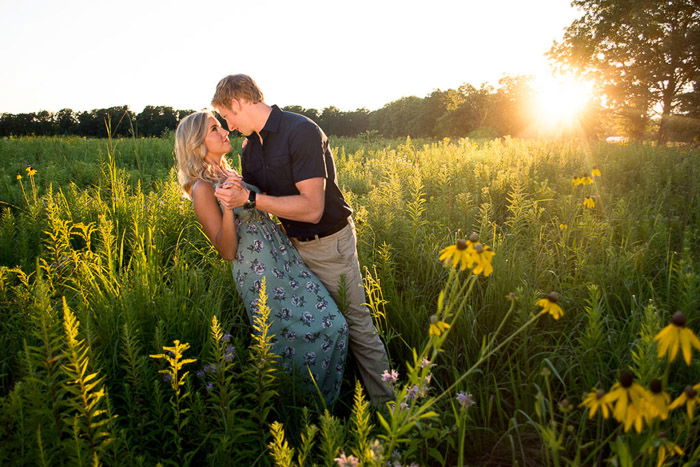
A man sweeps his girlfriend off her feet in a Golden Hour lit field in a calm countryside location

10. Avoid Unwanted Shadows

When taking portraits, the light direction has an important effect on how they will look. You should avoid vertical lights coming from above your model because they create ugly shadows on the face.

An especially unflattering effect in portrait photography is “raccoon eyes”. This is where the eyebrows cast a shadow over the eyes, making them look like dark circles. This is not the case with golden hour photos. The light comes from a low angle, illuminating the model’s face from the side, not from above.

You might need to deal with other shadows, but you can save yourself so much pain in post-processing just for avoiding the raccoon eyes effect.
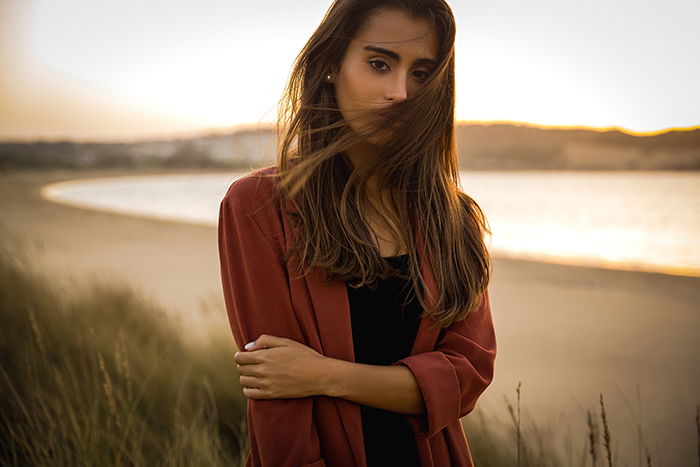
Portrait of a beautiful woman on the beach during golden hour.

9. Use the Warm Golden Hour Colors to Add Positive Energy

Colors are a strong compositional tool in photography that can be used to convey mood. One of the main traits of the golden hour is its characteristic color palette: yellows, oranges, reds.

All of these are warm colors (between 1000 and 4000 on the Kelvin colour-temperature scale). Warm colors evoke positive feelings such as happiness, excitement, and optimism. For that reason, images taken during the golden hours have positive energy associated with them.

It makes your photography look a bit magical, hence the golden hour’s nickname as “magic hour”.

Portraits also benefit from the golden hour because the quality of light makes skin tones look better. The yellow-red hue of the light makes the skin look warmer rather than neutral or cold.
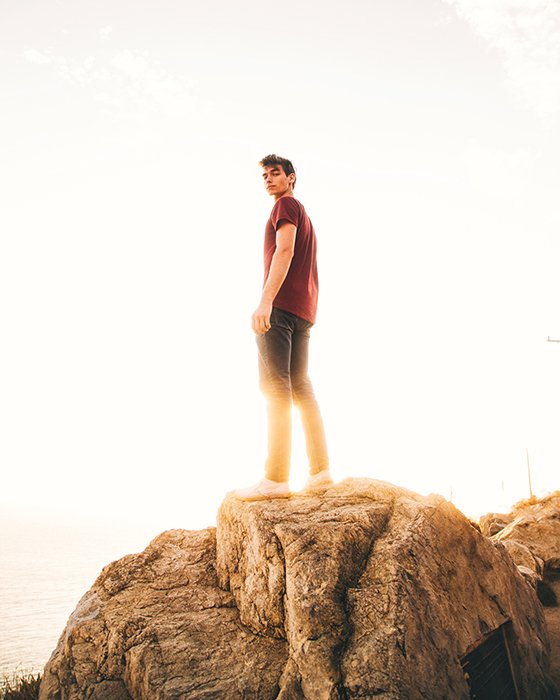
Man posing on a cliff during golden hour lights.

8. Use Creative Side Light

During the golden hour, sunlight hits the subject from only one side. This results in one side of your subject being shadowed. This is why it is also called split lighting.

Shadows add texture and depth to the portrait. They give it a different look than a front light. It also adds a bit of drama, but not as much as when you try this lighting in a studio.
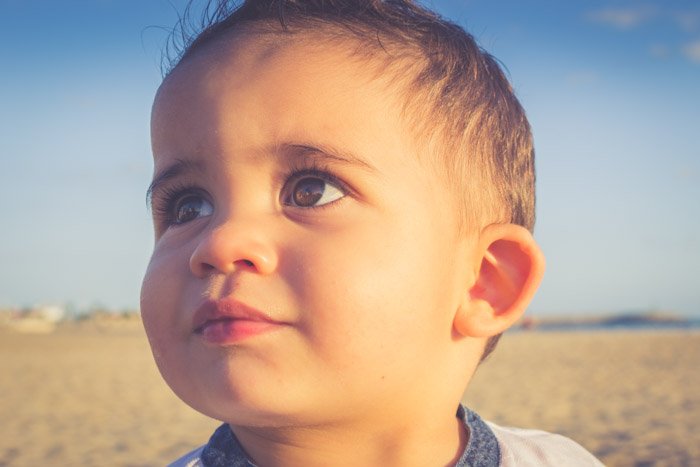
A boy looks off camera in a beach location during the golden hour

7. Make the Most of Natural Backlight Photography

The light’s angle during golden hour is perfect for some backlight photography. This occurs when the light comes from behind your model/subject. And it gives you a lot of artistic possibilities.

You can get a dramatic effect when the object you are shooting has some degree of translucence. The translucent part of the subject will have a strong light intensity, and the opaque part will be darker. This makes the subject seem to glow.

It is even more evident when the background is dark. The contrast between the translucent and the opaque areas also makes the photo look more dynamic.
Translucent parts can be;  hair, feathers, leaves, flowers, etc.
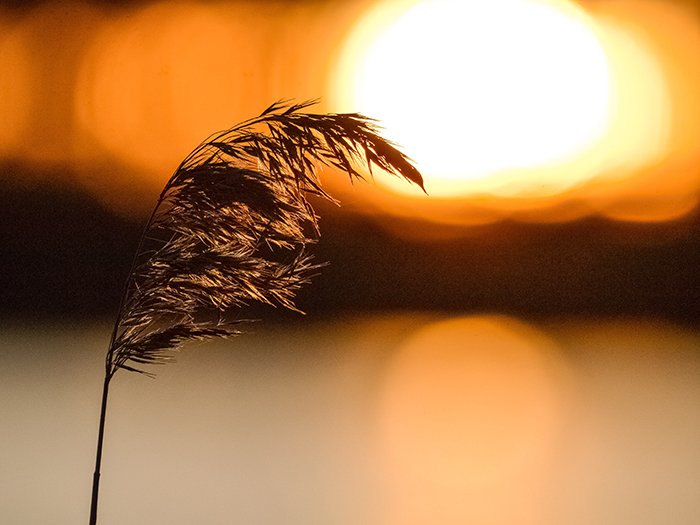
Flower in backlight situation during golden hour.

6. Shoot Towards the Sun to Create Silhouettes

The golden hour is a great opportunity to create silhouettes. A silhouette is when the subject of your photo is blacked out, and the background is well exposed. They work especially well with subjects that have an easily recognisable shape.

The high contrast with the subject and the lack of detail make silhouettes a great way to add drama and mystery to your photo. You can create them by shooting towards the light source (in this case the sun) and placing your subject between you and that source.

Exposure is important in order to get nice silhouettes. You need to set your exposure settings so that the brightest part of the image would be at optimal exposure. In our case, we want to capture the sky with all its colors and details. Under such settings, your subject will be extremely underexposed.

One thing that helps me when I am taking silhouettes is to imagine that the most important thing in the photo is the background. Then I expose the image to get it well. I use spot metering mode, and I meter by focusing on the background.

I adjust the exposure accordingly, and before taking the photo, I change the focus to the actual subject I want to shoot. The camera will say that it is underexposed, but that’s not a problem, we already have the settings the way we want them.
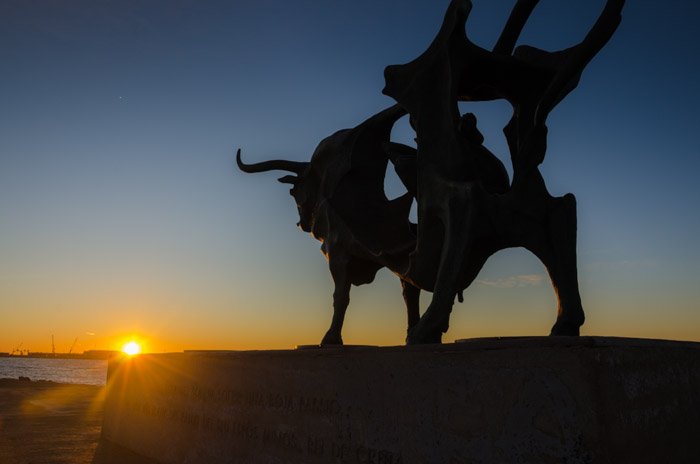
A silhouette of a statue at night in a calm location

5. Have Fun With Starburst

Starburst is one of my favourite optical effects. Here’s how to create them.

First, set your aperture to a high value (ideally f/16 or f/22). Then, set the shutter speed and the ISO to underexpose the image by two stops. The sun will be in the frame. If you don’t underexpose it, you might end up with too much light in your photo.

Starburst is easier to get if you have the sun as small as possible. In other words, if the sun is a bit covered by something. When the sun is high in the sky, it might be difficult to find objects that can hide the sun. You might find yourself limited in terms of angles and perspectives.

But since the sun is in a lower position during golden hour. You can get interesting starburst then. You can use your model to cover the sun. Be creative and have fun! But be safe too. Don’t look directly at the sun. The lens concentrates the light just like a magnifying glass, so don’t use the eyepiece if you don’t have protection!
Instead, you can use the screen display and don’t forget to consult your camera manual for details.
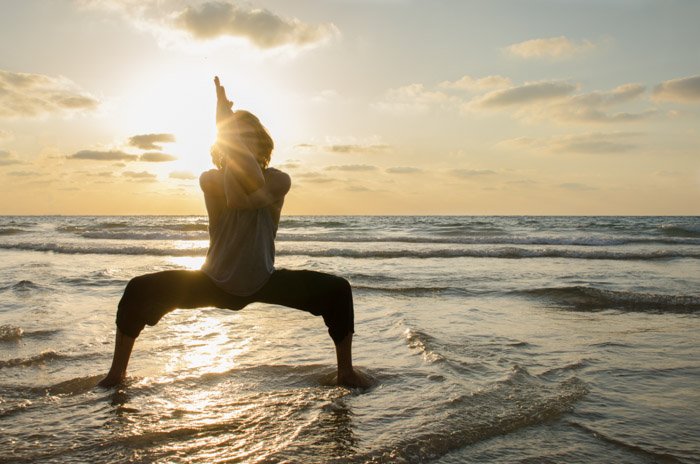
A silhouette of a woman doing yoga at sunset at a beach location

4. Get Out Early to Avoid the Crowds

If you like taking photos of empty landscapes, early golden hour is a perfect time to take photos. Most people venture outside later. During these early hours, you can enjoy the beautiful golden hour light, a calm location and some privacy.

Another thing to take into account is cleanliness. In most places, cleaning is done at the end of the day or at night. If you wake up early, chances are that you will arrive at a clean location.
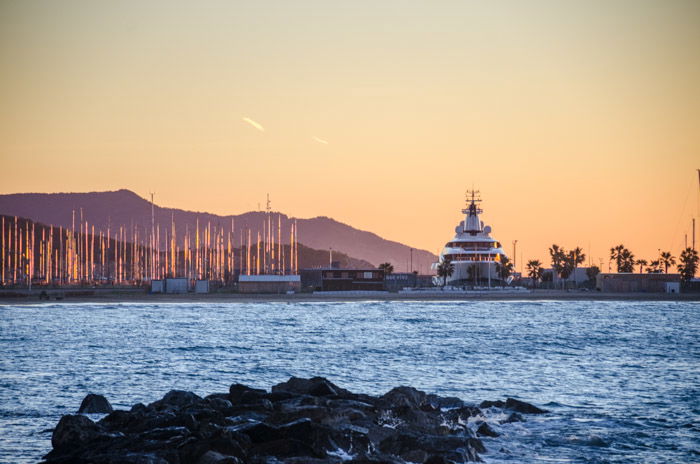
A yacht next to a marina during the golden hour
This is a very busy spot usually, but during the morning golden hour I was almost alone.

3. Use Long Shadows as Part of the Composition

Shadows add texture and detail to the image. They give a sense of volume and depth. During the golden hour, due to the position of the sun, you will have long shadows. You can use these to emphasise elements in the photo such as sand dunes, grooves etc.

You can also take photos of the shadows of your models. And you can use the shadows as a photo composition element. Shadows can balance the warm reds and yellows from the sun with their darker colours.

You should also remember your own shadow because it might get in the way and ruin the photo. This is especially important if you want to take photos with the sun behind you. Just be aware of your shadow and make sure to check where it is before you press the shutter release.

If your shadow is in the image, move around and place yourself so that your shadow falls outside of the photo frame. Unless you want to take creative photos with your shadows!
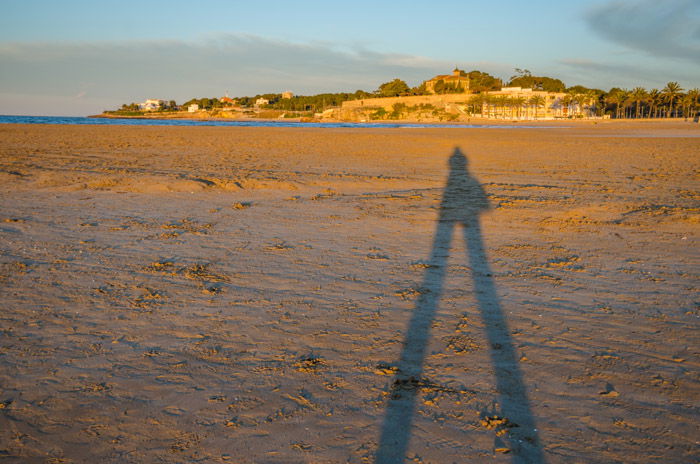
A shot of a shadow during the golden hours
Look how long a shadow can get during the golden hour!

2. Make Everyday Sights Magical

Everything under this light seems beautiful and dreamy. You can use this to your advantage and take beautiful photos even when your subject might not look so spectacular. Dry vegetation, lonely trees, old fences, empty paths – these can all turn into photography subjects.

If you want to give a sense of nostalgia to your landscape pictures that might otherwise look barren or hard, I recommend you take photos during the golden hour. It adds gold tints and soft light effects that will make the image easier to relate to.

1. Capture the Most Beautiful Sunrises and Sunsets

I have always loved sunrises and sunsets. And since becoming a photographer, the number of sunrise and sunset I’ve witnessed has increased. It’s easy to miss these in our daily lives. We’re tired, or sleeping in, or busy doing other things.

Chasing the golden hour will give you the motivation to jump out of bed to catch that magical light. And you won’t regret it.

You will see beautiful scenes, and you will capture them with your camera. You can also bring your friends, family or even dates to keep you company. Or you can venture out yourself and enjoy some well-deserved peace and quiet.
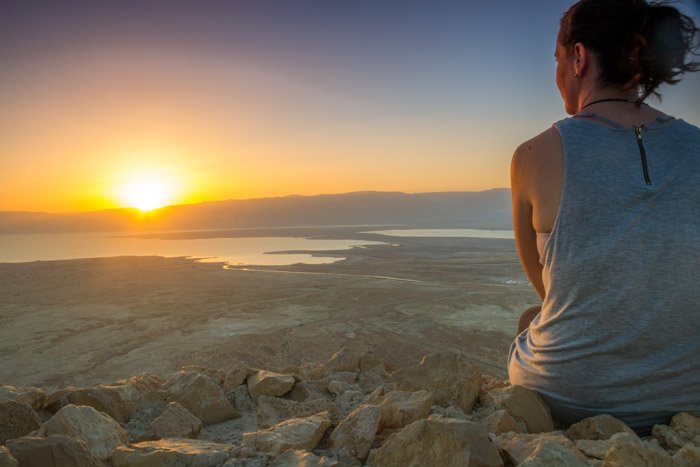
A woman watching the sunset in calm coastal location during the golden hour

Shooting during the golden hour has a lot of advantages. You can emphasise textures and get creative with long shadows. Try some backlight photography or have some fun creating silhouettes.

You will also enjoy some beautiful warm colors. Just take your camera and get ready to catch the golden lights of the sunrise and sunset!

--------------------------------------------------------------------------------------------------------------


How to Make $500 a Month From Your Photography Hobby with Microstock


Friday, November 26, 2021

What Is Focus Breathing?

Focus breathing affects filmmakers and can frustrate some still photographers too. It concerns focusing between the two extremes of your lens; the minimal focusing distance (MFD) and infinity.

To find out what focus breathing is, what it does and how to help it, read on.

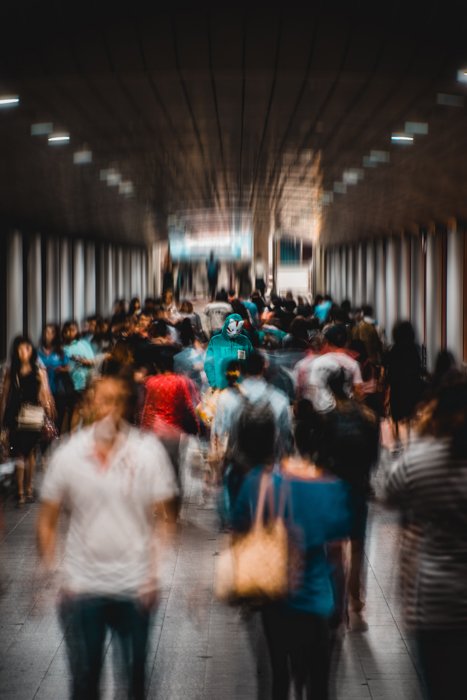
blurry street photo of a group of people walking through a subway station - focus breathing

What Is Focus Breathing?

When I first heard this photography term, I thought it had to do with control breathing. For example, focusing your breathing when you shoot using a telephoto lens to avoid camera shake.

Focus breathing (or lens breathing) is what happens, or seems to happen when you change the lens focus from one focus distance extreme to another.

This is especially true when going from the minimum focusing distance (MFD) to infinity. It also works oppositely.

Focus breathing is only possible when you change the focus distance while looking through the viewfinder. What you will notice is that the focal length looks like it is zooming in or out very slightly.

Is Focus Breathing an Important Issue?

This might be the first time you’ve ever heard of focus breathing. It is definitely something that I have never seen in a lens manual or guide from lens manufacturers. It has never cropped up as a question on a photography forum I have seen.

For photographers, focus breathing isn’t really an issue. Macro photographers might find it frustrating when trying to focus at the lens’ minimum focusing distance (MFD).

Photographers will see no difference in the way their camera slightly changes. This is due to a still photographer not having to worry about recording the focus change.

By that definition, focus breathing is an issue for videographers or those who use their DSLR cameras to film. It can be with prime lenses or zoom lenses alike.

When someone behind the camera changes their focus distance while filming with cine lenses, the movement is captured. That ‘focus breathing’ is captured in the scene they are filming.

Obviously, focus breathing is a distraction and a problem that needs to be considered, planned for and then solved. One of the reasons in specialty video cameras is they do not create this focus breathing problem.

They are very expensive in comparison. But the production value you receive in return is unparalleled.

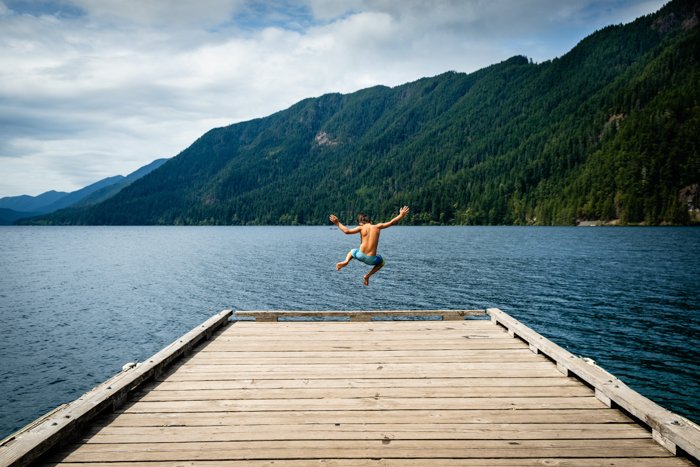
cool portrait of a man jumping from a wooden pier - focus breathing tips

What Can Be Done About Focus Breathing?

It might bother you, it might not. You might have never realized it even existed. Like the rest of us, you have no idea what it is. But you put it out of your mind and reframe your scene.

You can, of course, use a few tricks to stop this from being a problem. With focusing, different lenses give you varying qualities when used at the same focal length. This needs an example.

Let’s say you have the Canon EF 85mm f/1.4L prime lens and the Canon EF 70-200mm f/2.8L. Both lenses let you reach the 85mm focal length. But, 85mm prime lenses will give you better magnification.

We won’t go into it too much. There are factors that make prime lenses stronger in some cases when compared to zoom lenses. If you are interested, read our Prime vs Zoom Lenses article.

What I will say is this. Whether you use prime lenses or zoom lenses, there isn’t any constant degree on which to measure focus breathing. Neither is more affected than the other.  

Want More? Try Our Beginner Photography Course

Do you want to master the basics of photography so that you can take stunning photos in any situation?

If you don’t know which settings to use, you will often miss capturing beautiful moments.

But cameras are complicated and it’s hard to know where to start. That’s why we created this course.

Share with friends


Monday, November 22, 2021

Best Sunrise Photography Tips (Location, Settings & Gear!)

Tags: Photography for Beginners, Newbie Photography

If you are into landscape photography, you might have already questioned your decision to wake up early for taking sunrise photography.

These are the times you should remember the joy of adventure and how rewarding sunrise photography actually is.

Read on to learn how to take sunrise photos that are worth waking up for.

A beautiful sunset photo at sea

Why Go Shooting at Sunrise?

A lot of people ask me “why sunrise, can’t I just do a sunset instead?” Of course, you can, but there is one massive difference between the two. And it’s an unbeatable argument in favour of sunrise for me.

When you photograph in the evening, there are lots of people around. They keep walking into the frame and distract you in so many ways.

During the sunrise, you get alone time with nature. You can focus on your thoughts and feelings and express yourself better. Also, the golden hour stays longer than the blue hour.

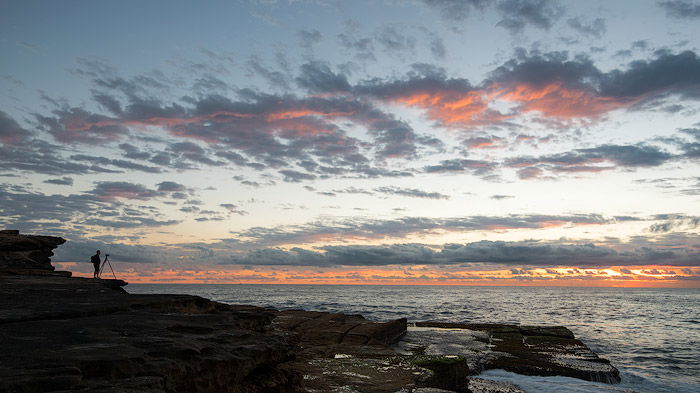
photographer taking a sunrise photo by the sea

Getting Ready For Sunrise Photography

So, you have decided to do sunrise, and it’s time to prepare. I recommend getting ready the night before. This way, you’ll get an extra 10 minutes of sleep and you will also significantly reduce the chances of forgetting something important.

Do not forget to plan ahead and go with the right equipment.

What Should You Take With You?

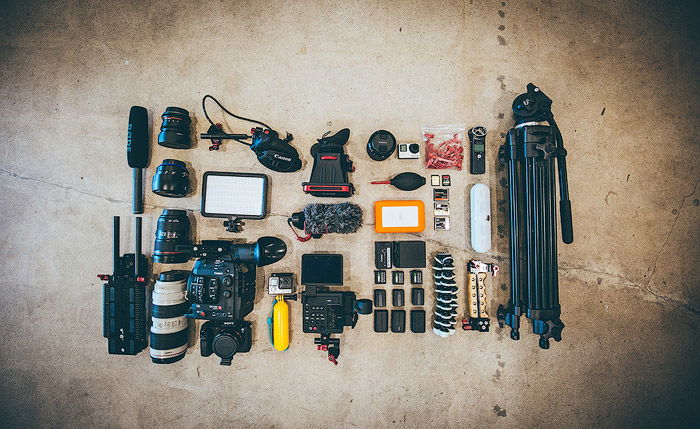
Here is a list of sunrise photography essentials to pack in your backpack:

  1. Camera with a memory card and a charged battery (+extra battery for the long exposures);
  2. Tripod (make sure to check the tripod plate);
  3. Snack (it’s early morning, remember?);
  4. Headlamp (you’ll wander in the darkness!);
  5. Your best lenses;
  6. Filters (CPL, Grading or ND);
  7. Remote control (if you have one).

Everything else is either optional or depends on the scenery and weather.

A flatlay of photography gear

How to Choose a Camera For Sunrise Photography

As the saying goes, the best camera is the one you already own. This fact is true to some extent. So, if you already have a decent DSLR camera, invest in higher quality lenses.

If you are a new buyer, here are a few things to consider:

  1. Dynamic range. Most modern cameras are good enough with high dynamic range and produce excellent colors. If you need the details, check DxOMark for sensor tests and comparisons.
  2. Long exposures. Your camera must be capable of capturing long exposures of at least 30 seconds. As far as I know, all DSLRs have this ability, so this rule applies mostly to smartphone cameras. It’s better to have a Bulb mode for even longer exposures too.
  3. Resolution. Regardless of what people think, megapixels are not that important. It plays a role in how much you can crop from the picture without significant quality loss. But if you are not going to print very large, you don’t need that many megapixels. My older Nikon D80 had 12 mpx, and I still have some photos I took with it in my portfolio.
  4. User experience. I recommend getting a mid-range DSLR camera. Lack of these commands is the most significant show-stopper for the cheaper cameras. You don’t want to miss the moment digging through numerous menus.

Best Cameras for Sunrise Photography

How to Choose a Tripod

Your tripod needs to be sturdy and well-balanced. It should be able to hold your camera against the wind. If you go hiking, your only option to reduce weight is to get a carbon fibre tripod but it comes at a cost.

I prefer Manfrotto and Slick tripods, they have always been great with zero issues.

However, you have a serious issue on your hand if you shoot seascapes and like to go into the water. It will probably ruin the tripod in a couple of months. If you’re photographing in an environment which ruins your gear, you should go for cheaper equipment.

I use Weifeng tripods all the time. They are cheap and provide excellent quality.

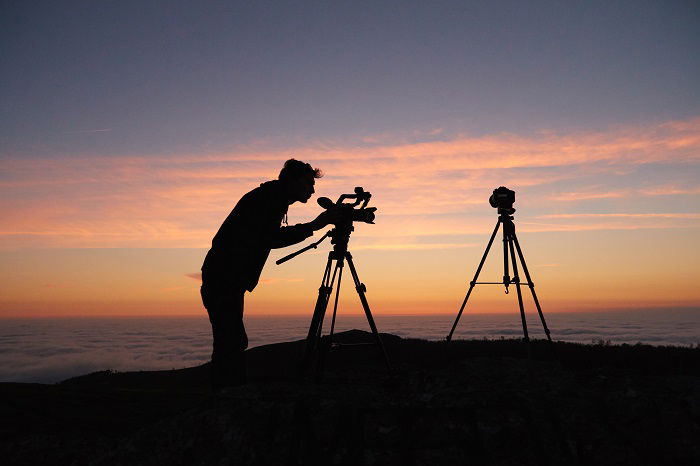
Silhouette of a photographer shooting with a DSLR on a tripod at sunset

How to Choose the Best Lens For Sunrise Photography

There are no strict rules about lenses, and you can get away with any focal length. Typically, photographers prefer wide or ultra-wide angles as their primary lens. I recommend having the whole range covered. Wide-angle + mid-range zoom + telephoto is an optimal choice.

If you are just starting out, you could get away with some general-purpose lens, like 18-105. With this type of lens, you will learn how to use different focal ranges and will know better what works for your style.

Here are a few recommendations:

APS-C:

  1. Canon EF-S 10-22mm f/3.5-4.5 USM
  2. Nikon AF-S 12-24mm f4 G DX IF-ED
  3. Sony E 10-18mm F4 OSS
  4. Tokina ATX-I 11-16mm f/2.8 CF

Full Frame:

  1. Canon EF 24-105mm f/4L IS USM
  2. Nikon AF-S Nikkor 24-70mm f/2.8E ED VR
  3. Sony FE 16-35mm f/2.8 G
  4. Sigma 24-105mm f/4 DG OS HSM Art

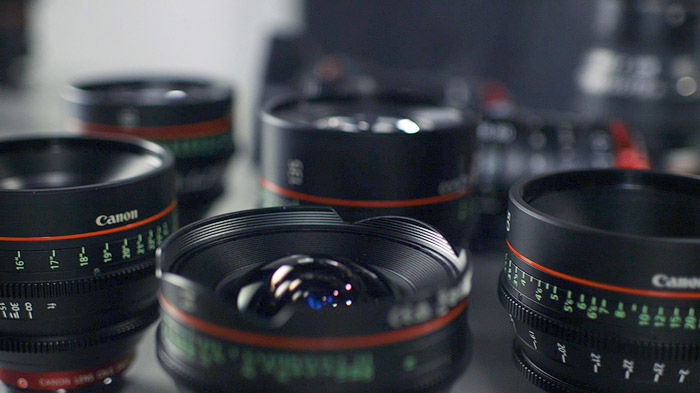
Various camera lenses

Best Weather Forecast Sites

Sunrise photography is all about light. And, as we all know, light depends on the weather to a great extent.

You need to learn how to plan to get the best sunrise landscape shots. Typically, I prefer a partly cloudy sky. I wouldn’t bother with less than 30% cloud cover for a general sunrise landscape.

There are, of course, different scenarios. For instance, for a waterfall or a forest, I would prefer a clear sky to increase the chance of getting sun rays beaming through the trees.

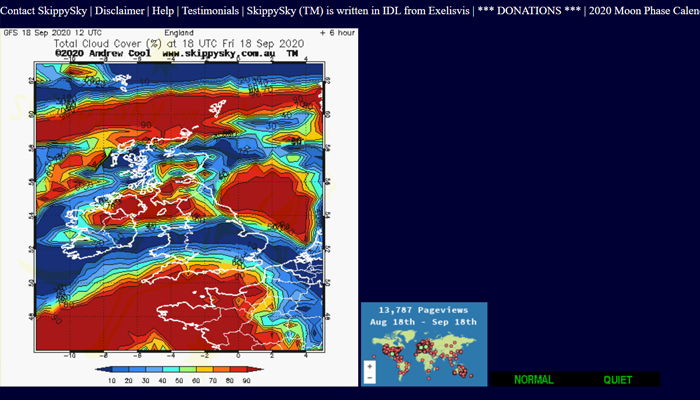
To figure out how early I have to get up, I use these two sites: The Weather Channel and SkippySky. The former has hourly cloud coverage, and the latter shows the type and thickness of the clouds.

A screenshot of a sunset photography app

SkippySky can look a little overwhelming, but you’ll figure it out fairly quickly. It also helps to predict if there is an opening between the clouds and the horizon. To get bright colors, you need high clouds. Low and heavy clouds rarely produce something spectacular.

All in all, you can never be 100% sure about weather conditions and have to try it out to see if it works.

The wind can also affect certain types of landscapes. For instance, don’t go to the cliff’s edge if there’s a strong wind.

Foggy weather can also play to your advantage photographing a forest covered in fog will produce unique and dramatic-looking images.

bad weather sunrise photography

How To Pick a Location

I usually start by looking at Google Maps. I use the query ‘*area name* sunrise’, or something similar.

Once I find some East-facing area (North-East and South-East also work), I look for photos in Google Images, 500px, and other sites, which include a location. This search gives me a general idea of what to expect from the area.

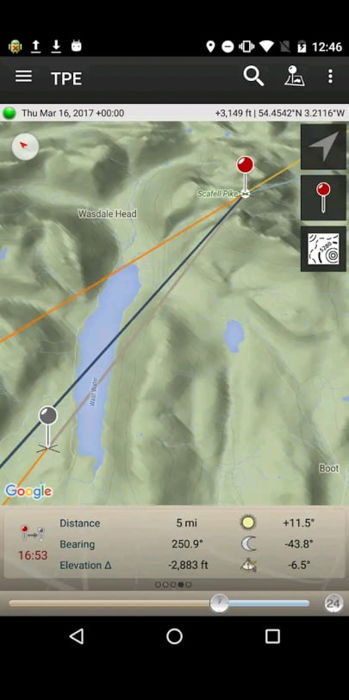
The Photographer’s Ephemeris app is also helpful for checking a location. You will see how light falls on a chosen spot almost anywhere on Earth.

A screenshot of the photographers ephemeris app

How to Shoot Breathtaking Sunrise Photos

Scout The Area In Daylight to Know Your Environment

The best way to prepare for the new area is to scout it before the sunrise. In the darkness, it could be hard to find a path, measure distance or see potential shooting spots.

So, if you get a chance, walk around the day before, take notice of the best places. Use some virtual reality app like Photopills or PlanIt! For Photographers to see the Sun/Moon/Milky Way positions for your future shots.

Arrive One Hour Before Sunrise to Get Everything Ready

Typically, you need to arrive well before the actual sunrise for several reasons.

First, you’ll have the ability to shoot the long exposure. Second, you’ll have some time to get your equipment ready.

The first light appears about 30-40 minutes before sunrise, but you can start creating long exposure photos even earlier than that. I’ve seen clouds painted red 60 minutes before dawn. Keep in mind that all faint colours will turn vivid and juicy on the final shot.

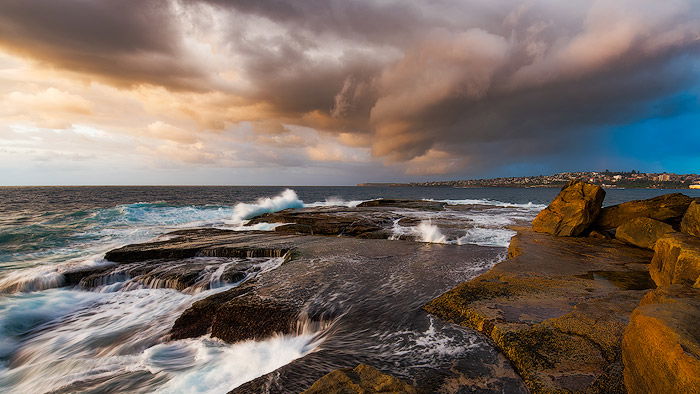
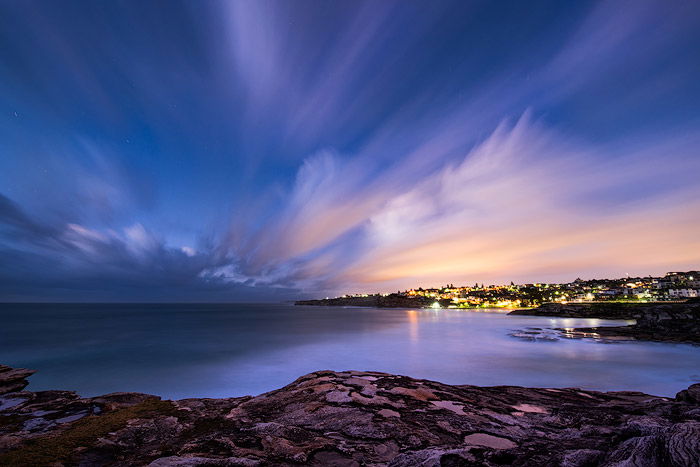
long exposure photo at sea before sunrise

Use a Headlamp to Find Your Focus

There are a few ways to focus your camera in the middle of the night, but the easiest way is to use your headlamp or a torch.

Pick an object around the hyperfocal distance, then lock the focus and shoot.

These are the steps you need to follow:

  1. Point your flashlight at some solid object.
  2. Focus the camera using that bright spot, pressing the shutter speed half-way down.
  3. When the camera beeps, it means it has focused, so release the button.
  4. Change the focusing mode to Manual so that when you press the shutter next time, the camera doesn’t change the focus.

Be sure to change back to the Autofocus mode once you zoom in or out because of the so-called focus breathing effect.

Shoot Long Exposures to Add Movement to Your Photos

The pre-dawn period works best for long exposures, and that’s the main reason to come early. The longer the exposure time, the more movement you can catch.

Typically, in the total darkness, 60+ minutes before sunrise, you could get a shutter speed anywhere from a couple of minutes for f/8 to 10 minutes or more for f/16.

Use your judgment and the sense of beauty to figure out how long you need to expose the photo for. The most common subjects for long exposure sunrise photography are clouds and water.

This is the time when using a neutral density filter is crucial. They reduce the amount of light that is hitting the camera sensor, thus making it possible for you to shoot long exposure without overexposing the picture.

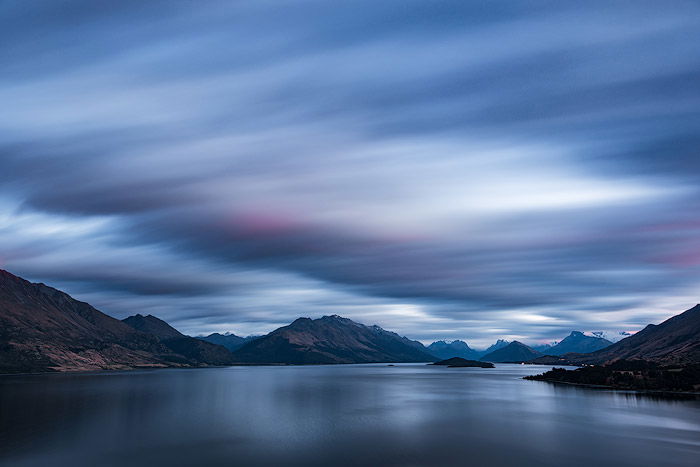
For the sky, you can expose as long as you like and the clouds will just turn into trails. For water, it is not as simple. Relatively calm water (river, lake) just smooths out with time and becomes perfectly flat at 30+ seconds.

Restless water, like the sea or the ocean, can turn into a foggy substance.

You can find a lot of useful tips on how to shoot long exposures in our course Infinite Exposures.

long exposure sunset at sea

Shoot Short Exposures to Freeze the Moment

If you only take long exposures, you are limiting yourself with just one technique. By shooting short exposures as well, you can freeze an interesting motion in time.

My best advice here is to keep experimenting, keep trying different approaches and styles.

A short exposure photo of a wave

Learn to Work With Light to Produce High Quality Images

Photographers must understand light, appreciate it and work together with it trying to take all the best out of it.

For instance, you have envisioned a photo, and the light is entirely different. Don’t be stubborn! Be flexible instead, adjust to the lighting conditions and act following the current state of nature. Learn to quickly change the whole course of the morning and adapt to the environment.

It’s best to photograph with the light source on the side or in front of you. The sun behind the photographer is the worst case as it fills in and hides all the details and textures.

Create a Starburst to Add Interest to Your Sunrise Photos

You’ve probably seen those starburst rays coming from the sun. It’s hard to believe how easy you can achieve just the same effect. Without going deep into the theory and the structure of aperture blades, below are a few steps to create a starburst effect.

  1. Clean the lens
  2. Hide the sun behind something dark and solid leaving just a fraction of it out
  3. Set aperture f/16 (f/11 is the minimum)
  4. Focus on something other than the Sun because bright light can confuse auto-focus
  5. Photograph, verify, repeat

Make sure you clean your lens properly, otherwise you’ll get ugly flares, which are hard to deal with in editing.

sunrise photography at sea with starburst

Make Use Of The Golden Hour to Add Warm Hues

Golden hour is a period of the best light. It starts right after sunrise and lasts for about an hour. Usually, it’s warm, bright, and casts long shadows featuring all the textures.

It’s best to photograph with the light source on your left or right so that the shadows are the longest and the land features are most prominent.

golden hour at a lake in autumn

Use Filters or Bracketing to Balance The Light

For sunrise photography, you need a solution that fixes the difference between land and sky exposure. The sky is typically much brighter, and it results in either an overexposed sky or an underexposed land.

To alleviate this issue, you have two options:

  1. Use gradual filters. This filter is a partially dark piece of glass. The darker part is positioned to darken a particular area of the photo.
  2. Do bracketing. Shoot several photos with different exposures, with exposure compensation values of -1,5; 0; +1,5. Combine these pictures later during post-processing.

Personally, I prefer the latter because filters have some disadvantages. First, they may have a color cast. Second, you need to carry a whole bag of filters. Third, it takes time to change the filter, and you may lose the moment.

To learn more about how to use bracketing in photography, check out our article here.

How to Find the Best Sunrise Photography Settings

Setting the Aperture

As with any other type of landscape photography, you typically shoot in either Manual mode or Aperture Priority mode. For landscape, you need a depth of field covering as much area as possible. That’s why you set the aperture to at least f/8 but I recommend to go with f/11-f/16.

Don’t go higher than that because you will start losing sharpness instead due to lens diffraction. In fact, some lenses start to get diffraction even at f/16. You’ll need to test and compare.

Setting the Shutter Speed

The shutter speed is a variable here, and it depends on the surrounding conditions. When you just start shooting 60 minutes before sunrise, the shutter speed at f/8 could reach 5-8 minutes easily.

Pro tip: To get shutter speeds longer than 30 seconds you would need either a release cable or remote control for your camera. Set the camera to Bulb mode, then fire the button and then press it again once the time lapses. The other way is to use the Wi-Fi module that appears in some modern cameras.

As the ambient light becomes stronger, the exposure time decreases gradually. You need to learn what shutter speed you need for specific objects to make them look great and then adjust your settings accordingly.

Choosing Your ISO

Every camera handles ISO differently, so it requires an experiment to determine the max ISO you can get away with. Please note that darker photos with high ISO will produce much more noise than adequately exposed pictures with the same ISO level.

In fact, you only need to manipulate ISO for the sunrise when there are some moving objects, like waves or birds. In all other cases, you can keep it at 100. I also recommend to keep it as low as possible for the long exposures because otherwise, it would produce a lot of extra noise.

landscape photography long exposure at sea

Sunrise is the most magical time of day when you can fully connect with nature. Even though there are many things you need to pay attention to, the magical atmosphere you can capture is always worth the effort.

Set your next alarm clock early and try it out! The tips above will help you to take stunning sunrise photos.

 ---------------------------------------------------------------------------------------------------------------

Free Photography Ebook

Three Tips for Maximum Photo Sharpness – Free Quick Guide


“Tack sharp” is a term that we use in photography.

We want our images to be as sharp as they can possibly be.

But how do we take sharp photographs? There is not a ‘getting it sharp’ setting on our cameras.

In this free guide, Jenn Mishra walks you through her three best tips for maximum photo sharpness.

--------------------------------------------------------------------------------------------------------------------

To get your "Photo Shutterbug" T shirt


Thursday, November 18, 2021

What Is Surreal Photography: 12 Examples

Tags: Photography for Beginners, Newbie Photography, Newbie Shutterbugs 

Surreal photography challenges its admirers to change their perspectives, question their values, and create something unforgettable. This unique genre has inspired many photographers to recreate their wildest dreams.
When surrealism was still young, photographers created their own worlds using darkroom tricks and optical illusions. Today, we can create our own peculiar worlds using real-life objects (e.g. Oleg Oprisco), editing programs (e.g. Rosie Hardy), or both.
Below, you’ll find 12 prime examples of surreal photography. The images, which are as diverse as their creators, are testimonies to the value of surrealism.
No matter how simple, complicated, or unusual the surreal photography is, it has the power to influence anyone who takes the time to observe it. 

Underwater Portrait

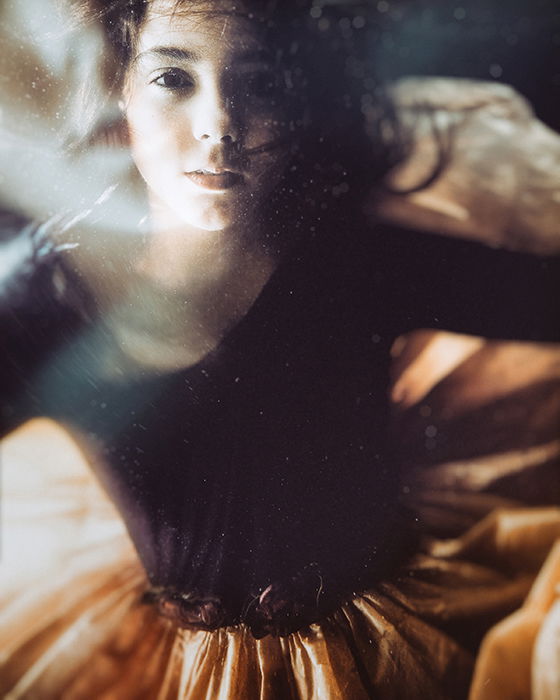
Velizar Ivanov’s work is both haunting and graceful. His portfolio is filled with surreal underwater photos, portraits, and heartwarming photos of family members.
To take this photo, Velizar asked his daughter to swim in an aquarium while he took photos through the front glass. This resulted in surreal, well-lit portraits. His daughter’s calm expression, outfit, and floating hair all create a dreamlike atmosphere, reminiscent of something you’d see on the cover of a fantasy book.

Velizar Ivanov surreal photography portrait of a girl underwater
Velizar Ivanov

Underwater Landscape

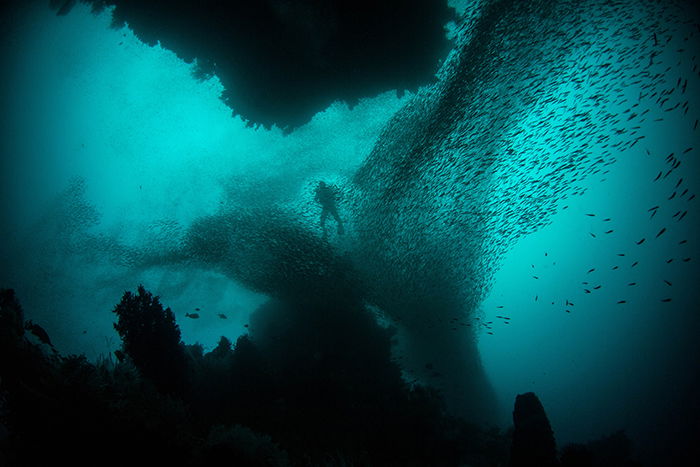
This real and unedited view was perfectly photographed by Alexandra Rose. The angle, composition, and monotonous colours all work together to create an underwater photography masterpiece. The most haunting thing about this image is the formation of the fish; together, they look like a very large tail devouring a scuba diver.
Surreal photography often features people and things submerged in water. Given the mysterious and unpredictable nature of water itself, this makes sense. Photographers like Brooke Shaden often use this technique to express fragility, change, and hope.

Stunning underwater surreal photography by Alexandra Rose
Alexandra Rose

Food & Drink

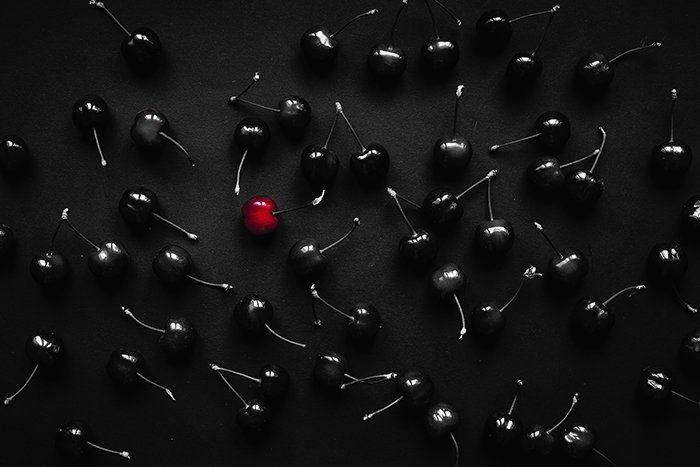
Simple colour correction transformed a food photograph into a surreal work of art. Elijah O’Donell cleverly desaturated almost every cherry and slightly increased the contrast to create an even more dramatic feel. The result is striking surreal photography whose story completely depends on your perspective. Is the cherry a reflection of loneliness, pride, or desperation?
Surreal photography allows room for the ambiguous, the strange, and the mind-boggling. Oftentimes, this leads to a lot of fascinating conversations with no definite answers. Sometimes, a simple editing tool is all it takes to create such discussions.
Elijah O'Donell overhead surreal photography of black cherries, one red, on a black table

Glamour

Closeups, discos, and aliens. These three words might come to mind when you look at this photo by Jill Heyer, who created a series of sparkling surreal photographs inspired by blacklight photography.
“We suggested that we could use the colors as sparkles to create a stunning galaxy feel. That is the outcome. We plan to do another series following real star signs on faces and bodies.”
With the help of glow-in-the-dark makeup, Jill created a series of unconventional beauty shots. Though the model‘s features are visible, her eyes are as dark as the background. The combination of obscure colors and almost inhuman features are what make this photo an ideal example of surreal photography.

Spontaneous Surreal Photography

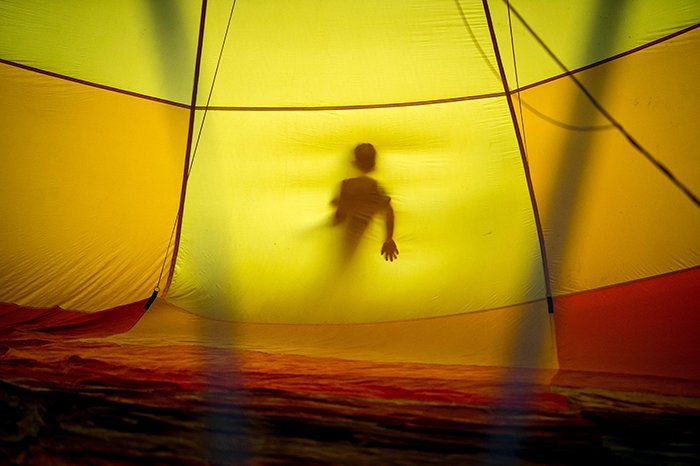
Like Alexandra’s underwater photograph, this surreal photography image wasn’t manipulated. Since we can’t see everything, we’re not sure what is going on. Was the subject modeling or playing? Where was this taken? These questions exist only because of that tent, which was strategically placed in front of the camera. Only Earl can answer them, but he wisely chooses not to. After all, guessing is much more fun than getting the real answers. (Sometimes.)
Maybe, if the tent-like material weren’t in the way, this photo would reveal a joyful child playing outdoors. By placing a barrier between the model and camera, Earl was able to create something spontaneous and surreal: a haunting figure slowly vanishing into thin air.
This is something we can all use in our own surreal photography. If you have a semi-transparent material, place it in front of a light source and experiment with various models. Your results will all have a hint of surrealism in them.
Earl Richardson surreal photography of a persons silhouette seen through a yellow tent

Landscape

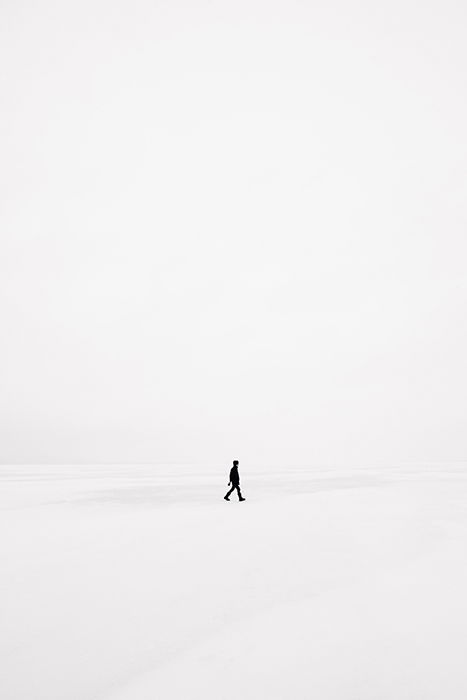
Emile Seguin’s photograph may be very simple, but it compels viewers to stare and wonder about the model, location, and style. This minimalistic approach to surreal photography isn’t as easy as it looks. Emile probably invested hours of editing work into this shot.
Bare landscapes like this are almost impossible to find in today’s world, which is why this photo stands out. Remove what the human eye is used to, and you’ll get results that will astound everyone. Removing mountains, buildings, and any other signs of life were Emile’s way of expressing isolation and an adventurous spirit.

 Emile Seguin surreal photography of a person walking through a stark white landscape
“I usually go on this lake with my kayak and my jet ski. This was my first time walking on it. Weird but very satisfying feeling.” – Emile Seguin

Photo Manipulation

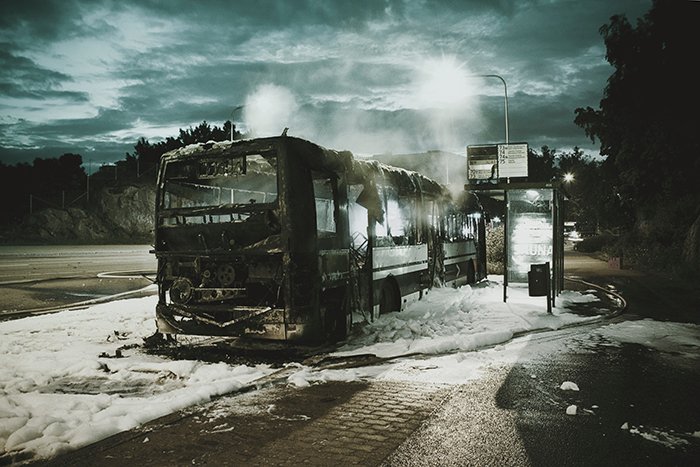
This post-apocalyptic surreal photography masterpiece by Hans Eiskonen is undeniably eerie. The details — rising smoke, snow, a cloudy sky, and other details — all speak of abandonment. However, the bus seems to be the only haunted subject in Hans’s universe. Other objects, like the street lamp, suggest remaining signs of life. Why is the bus rotting in a place full of people? We can only guess.
By expertly introducing unfamiliar concepts, surreal photography turns the world upside down. This is probably why dystopian worlds are so popular. We respond to this unfamiliarity with nothing but curiosity and admiration.
Hans isn’t the only photographer who relies on extreme photo manipulation to create such detailed photos. A large percentage of photographers — Rosie Hardy, Alex Stoddard, Kyle Thompson — do this to experiment with surrealism’s limitless possibilities.
Hans Eiskonen surreal photo of a broken down bus. surreal photography

Conceptual Surreal Photography

When you look at this photo, what do you see? A frustrated student trying to prepare for an exam, a girl getting lost in her own fictional world, or something completely different?
Surreal photography has various sub-genres, like conceptual surrealism, which focuses on multiple themes using multiple objects. Photos made for this genre are filled with striking details. Unlike Emile Seguin’s work, they’re far from simple. (This doesn’t mean that Emile’s work is inferior to this genre, or that conceptual surrealism is too complicated. In surreal photography, there’s enough room for both types.)
Laci Slezak’s portrait is filled with multiple themes and lots of detailed subjects. Since the model’s face is barely visible, it’s hard to tell what she’s trying to express. While this is something that would be seen as confusing in classic portraits, it’s lovingly embraced in surreal photography.

Laci Slezak surrealism photography of a girl sitting on a bed, books flying around.
Laci Slezak

Closeup Surreal Photography Portraits

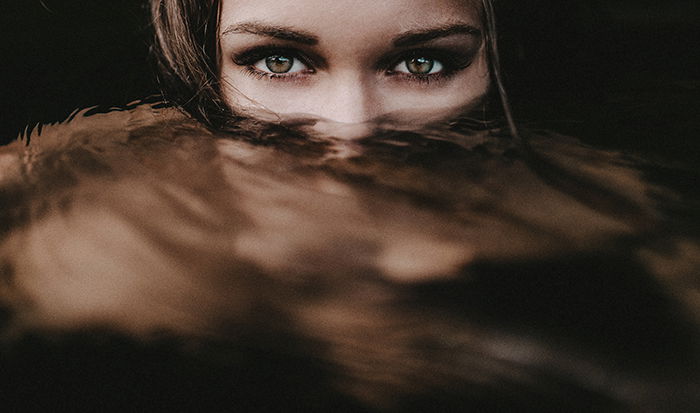
If it weren’t for the angle and concept, this photo would just be a striking portrait. However, Mickael Cresset chose to zoom in, conceal his model’s face with water, and shoot from an angle that emphasised the reflection’s movements. For these reasons, he’s a fantastic example of a surreal photographer.
Moving objects play an important role in surreal photography. Take, for example, the mesmerising beauty of long-exposure photography. Though we know what the subjects are, we can’t get enough of seeing them in silent motion. You can easily merge long-exposures with surrealism to create unique photographs.

Mickael Cresset close up portrait of a girl with the bottom half of her face underwater - surreal photography
Mickael Cresset

Conceptual Self-Portrait

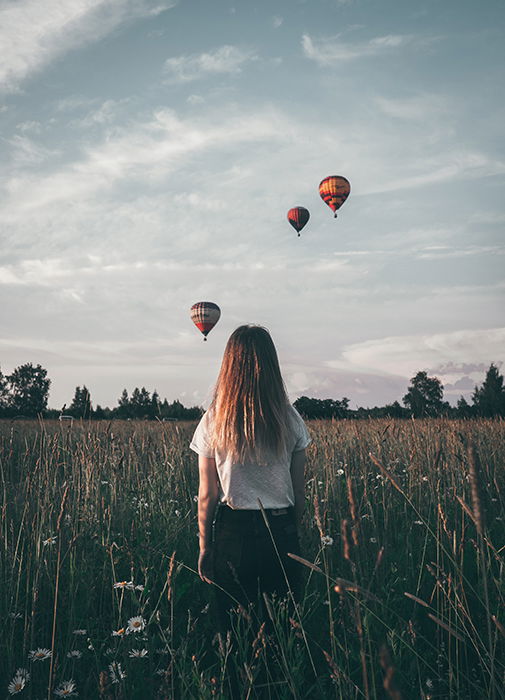
As you may have noticed, surreal photography is often filled with subjects that you wouldn’t see in your everyday life. In this photograph by Natalya Letunova, a girl is silently observing three hot air balloons. Had they not been there, this photo would look much simpler.
The addition of unusual elements plays an important part in surreal photography. You don’t always need expert editing skills to add interesting objects to your simple portraits. All you need is a big imagination and the willingness to learn.

Natalya Letunova artistic photo of a girl standing in a field watching hot air balloons in the sky - surreal photography
Natalya Letunova

Architecture

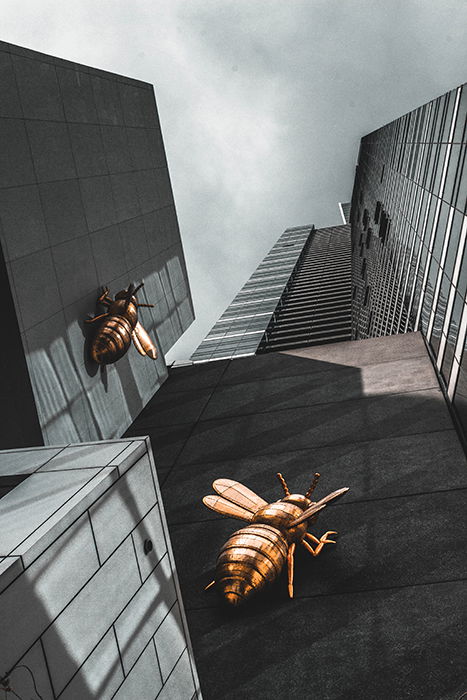
More often than not, surreal photography features unusually large objects. Oliwier Gesla did this using vibrant sculptures of insects, skyscrapers, and a cloudy sky. Though it looks like a manipulated photo, it’s actually real:
“I took this photo on my way to the Eureka Sky deck which I didn’t even end up going to because the price was a bit hefty. During this day in Melbourne, I only took about 10-15 photos but I can easily say that this one is one of the all-time favorite photos that I’ve ever taken.”
What stands out the most in this photograph are the insects, which glow in comparison to their surroundings. While the story is ambiguous, the aesthetic appeal is very clear. Oliwier chose to slightly de-saturate everything but the sculptures, creating a striking composition that could only appear in our dreams.

Oliwier Gesla photo of metal wasps scaling a skyscraper - surreal photography
Oliwier Gesla

Still Life

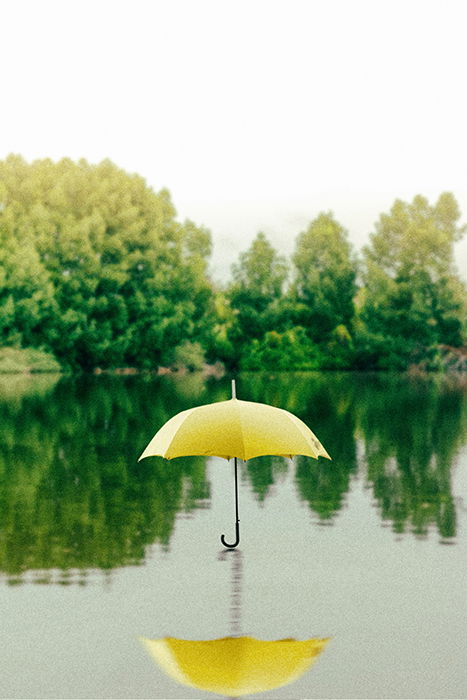
You don’t always need sculptures, abandoned buses, or levitating books to create impressive surreal photography. Saffu’s photo of a floating umbrella proves that simple objects can be fascinating, too.
Most of Saffu’s gallery is full of stunning travel photos of the Maldives. The photo below, an experiment with surrealism, is one of his most popular images. This proves just how well people respond to surreal photography and how little you need to make something unforgettable.

Saffu photo of a yellow umbrella floating above a lake - surreal photography
Saffu

Since the 1920s, surrealism has been astounding people all over the world. Back then, only a select few could experiment with it. Now, anyone with a camera can recreate their wildest dreams. This opportunity has allowed millions of artists to express their deepest fears, emotions, and secrets without saying them aloud. For this reason, surreal photography isn’t going anywhere.
The most beautiful thing about surreal photography is its openness to all kinds of artists. The photos above prove that no amount of minimalism, complexity, or strangeness can stop you from contributing to surrealism. If you have a dream, you have every right to turn it into a masterpiece. Why not start now?

----------------------------------------------------------------------------------------------------------------------

Free Photography Ebook

Creating Your Best Autumn Landscape Photographs – Free Quick Guide


Autumn is arguably the best time of year for landscape photography.

While the other seasons alter landscapes in their way, none are as pleasing as experiencing leaves changing color and falling to the ground, creating a gentle blanket of red, yellow, and orange.

The combination of the scenery and cool air is a beautiful gift from Mother Nature.


------------------------------------------------------------------------------------------------ 

Ebay Camera Deals!                               


I bought this film camera for approximately $35 in 2006.  The good news is
film cameras are still going for near that price today on Ebay.  Yes, you will 
need to wade through the listings to find the bargains - but they are there!
Click Here and enjoy the savings.