You're our chosen "blog follower" for the month of January. We hope you'll enjoy spending that "Benjamin".
FREE $100
I'd like to GIVE you one of these!
Tell your friends about following this blog, which automatically registers them for our February 28th pick. If they have any questions, just have them type this link into their web browser "www.bit.ly/3IHdDOr" and click ENTER.
How to Choose Horizon Placement in Composition
Tags: Shutterbug, Photography for Beginners, Newbie Photographer
When a frame is divided by a single, dominant line, more often than
not this is due to a Horizon. They’re fairly common in outdoor
photography, particularly landscapes.
If the photo is of nothing particularly interesting, this line can
become the dominant part of the photo for the way it separates the
frame.
Where to Place the Horizon and Why?
Firstly, I think it’s important to realise where
you don’t want to place the line, and that’s directly in the middle of
the frame. That’s not to say that you shouldn’t ever it, this just has a
tendency to divide the photo in half, creating an uneven photo.
The contrast between the two halves makes it look more like two separate photos.
Exactly where you place the horizon is completely up to you but it helps
to remember that, if a feature of a photo does nothing to improve it,
it has no place in the photo to begin with.
Here’s a photo where the horizon has divided the frame in two. Notice that it doesn’t really favour either half.
If you take the horizon and place it slightly lower in the frame, you
regain a feeling of stability which balances out the photo better.
You also remove the feeling of division and the whole photo starts to
come together as a single image made up of multiple elements, rather
than just two photos stuck together.
Have a look at the photo below to see what I mean.
If you were to decide that the top half of the frame was much more
interesting than the bottom, you may want to adjust your composition so
that the horizon is a lot lower in the frame.
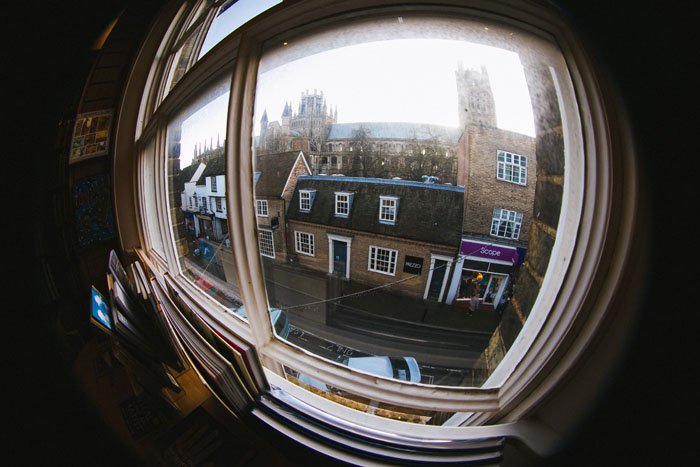
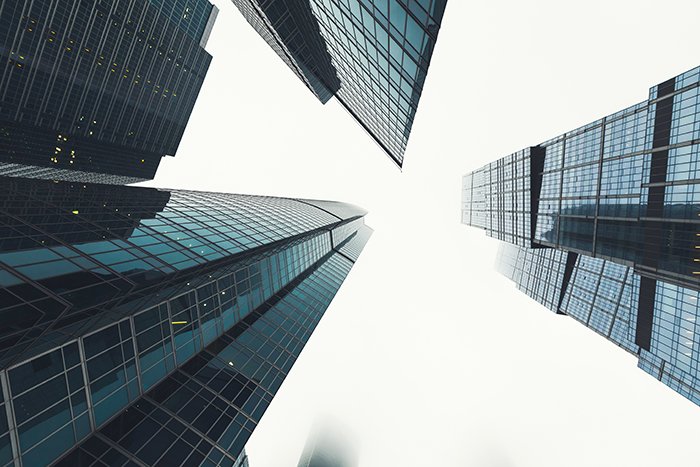
The photo below was taken from a tower in London on a rainy day with emphasis on the sky.
The cityscape adds an interesting texture to photo but holds much less
visual weight. It serves to make the man made city look small in
comparison to the powerful sky and weather.
This is one of the many interesting, extra feelings which can be evoked
when you consider the importance of different aspects of a photo and
adjust your composition accordingly.
The photo below was taken directly after the photo above and focuses largely on the ground, rather than the sky.
This photo contrasts greatly with the one above because it doesn’t evoke
the same feelings, instead focusing more on the colour and lines in the
city.
Your eyes are naturally drawn up the photo from the colour of the trees
and houses at the bottom of the frame to the sharp and jagged nature of
the buildings by the sky at the top.
An equally interesting photo but for different reasons, all because of
the decisions made over the placement of the horizon. Importantly
though, you’ll see that both images are stronger than the original image
which cut the photo in half.
If you want to include both the sky and the ground but don’t want to cut
the photo in half, I recommend changing the orientation to portrait.
Again, you’ll probably want to avoid placing the horizon in the middle of the frame but the decision is up to you.
I personally feel that the composition in the photo below is stronger
than any of the photos above as it includes the most interesting parts
of each photo.
The weather had changed slightly between photos, meaning that there was
less uninteresting sky in the photo. This certainly helped towards
finding the perfect balance between sky and ground.
It’s all about thinking it through and experimenting with what works for you.
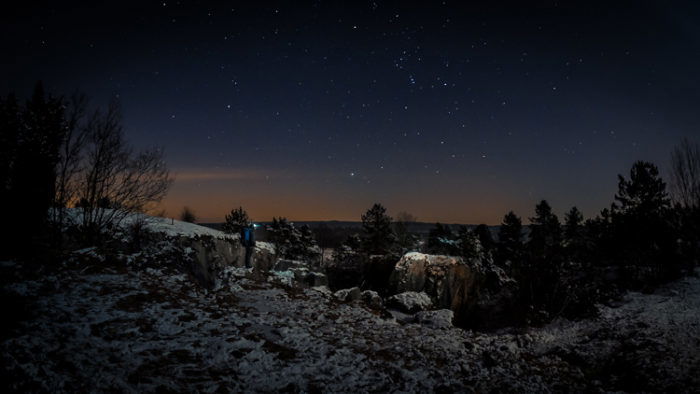
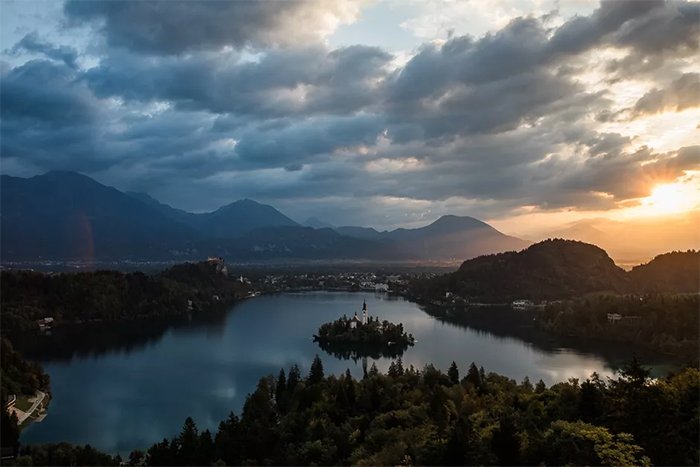
High Horizon
Now that we’ve covered why you want to include a high or a low horizon, let’s have a look at some examples.
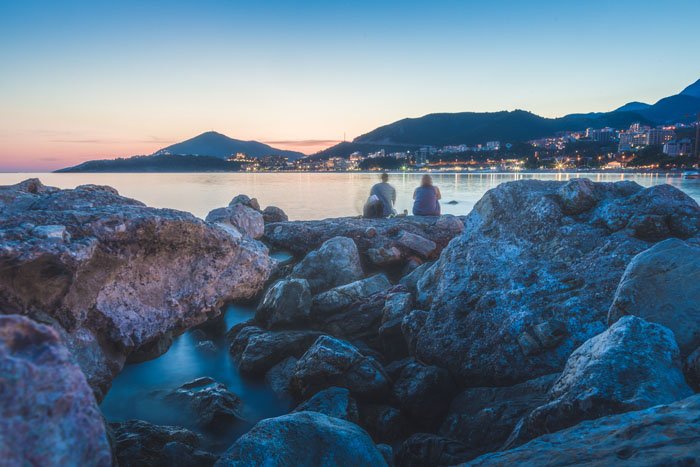
The high horizon in this photo was an obvious choice as the sky
was particularly plain and uninteresting on the evening that I took this
photo.
Realising this, I made a special effort to include the foreground a
little bit more to strengthen my photo. I found these strong, jagged
rocks which contrasted nicely with the sky while blending in with the
colour of the photo.
Below is an extreme example of a high horizon – I chose to include it
because it focuses the interest onto the subject and foreground below.
It makes it look as though the visual weight of the subject forces the
camera down, at the same time keeping the photo stable by remaining
straight across the top of the frame. There’s a lot going on in the
lower half of this photo and the inclusion of the sky would have
distracted from this.
Low Horizon
Photos of clouds from below can be pretty boring
and rely heavily on being ‘pretty’ for attention. If you raise your
angle, the clouds rely more on their shape and form to attract viewers.
Because I had a higher vantage point and the shape of the clouds was
particularly interesting, I chose to include as much of them as
possible, which meant using a lower horizon.
I included just enough of the ground to make the colour interesting and
complimentary to the colour of the sky, while focusing most of the
viewers attention towards the subject: the clouds.
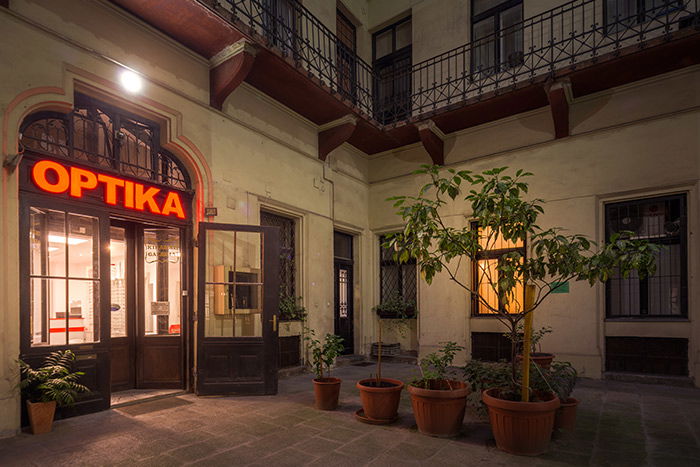
This is an example of a very low horizon. I chose to take the photo this
way not because I wanted to emphasis to be on the rather uninteresting
sky, but because I wanted to focus on the dominance of the building.
With the horizon that low, the feeling of balance is lost which draws
your attention towards the bold building standing on top of it. By
removing many other potential features from the frame, you focus the
attention onto one specific point – the building.
Do you want to compose stunning images, even in ordinary situations?
You don’t need an expensive camera or a beautiful location to do that… you need a broad range of composition knowledge.
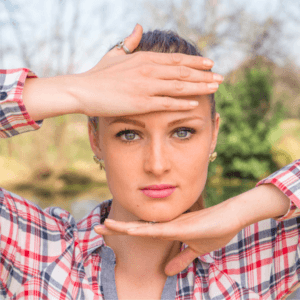
Where
do your eyes go to when looking at this picture? The eyes move
immediately toward her face, of course. The hands form a sturdy frame
that pushes your eyes toward the model’s face!
What is the purpose of a frame, you ask?
To emphasize your subject (to place focus on it)
To draw attention toward your subject (perhaps more of a forced drawing of attention to it – the same as leading lines)
To create a mood
To create a specific artistic effect
To remove clutter from around the subject (or to make it less prominent)
I often argue that this is likely the most abused rule of them all,
because people don’t really seem to understand that it exists.
The general rule is as follows:
The farther you place a single point of interest from the
centre of the frame, the more interesting it becomes, but the more
justification you need for it to be there.
When you place a single point in the centre of the frame, such as a
person’s face, it needs no justification for being there, but it’s by no
means interesting.
Conversely, when you place a single point way off into the corner, then it will portray a very different feeling.
Have a look at the photo below.
I wanted to display a feeling of loneliness and a great expanse by
placing the boat in the corner. This would not have been achieved if the
boat was in the centre of the frame.
Always consider what you’re trying to portray with your photos, as this will dictate your placement.
This is likely the first rule that you ever learned, as it’s probably
the most popular rule. The trouble is, some people treat it as gospel,
when in reality, it’s just a good guide.
The rule is as follows:
Divide your frame up into thirds – two equally spaced
horizontal and vertical lines. Then align important features in the
frame with these lines, and the intersect points.
While it’s a very good rule, and it will help to make your photo more
interesting, and add depth, it’s not a rule which should be followed
blindly. Just because the rule says so, doesn’t mean that you should.
The truth of the matter is that it all comes down to placement, like it
does with a single point. Too close to the centre and it’s boring, too
close to the edge and it’s too drastic.
The rule of thirds is there to guide you to a safe area of the frame,
where you’re not stepping on any toes, or making dramatic moves with
your composition.
While it’s a great rule, and one that you should all know about, you
need to consider what you’re trying to convey with your photo.
It can start to look very structured if you follow the rule blindly, and that appears to be quite obvious.
All too often people think it’s a good idea to place their horizon in
the middle of the frame, when in reality, this is just diving the photo
in half, and making it look dull.
Here’s the general rule:
If you were to decide that the top half of the frame is
much more interesting than the bottom, then you may want to adjust your
composition so that the horizon is low in the frame. And vice versa.
Find the interesting part of the frame, and adjust the horizon placement
to emphasise this.
It’s a great rule, and one you should absolutely follow, although most people don’t.
Think about it. How interesting is a plain blue sky in your photo, compared to what’s happening on the ground? Not very.
Triangle have a strong hold on your photos, although it seems that most people don’t quite understand exactly what they do.
It all comes down to the apex (Latin for summit, peak, tip, top, extreme end) of the triangle, and where that’s positioned.
The general rule is as follows:
Lines, paths, and points of interest in a photo, are
combined to create a triangle. The positioning and direction of this
triangle can change the perceived stability of a photo.
Because a triangle has so much control over the stability, you need
to be more careful about using the incorrectly, than not using them at
all.
For a photo of a building, you would likely have a flat ground at the
bottom, with an apex at the top, which appears to be very stable, but if
you rotate the angle of your camera, this will start to appear less and
less stable.
If you want to make your photo appear unstable, then this is a really powerful rule to be able to control.
There is some form of balance in every photo we look at, and it’s up
to us to determine whether we want a balanced, or unbalanced, photo.
Here is the general rule:
Balance is at the base of every composition; it
determines whether the photo is pleasing and harmonious to look at, or
rather uncomfortable and unresolved. It all comes down to visual weight
and placement, which decides whether the left side is heavier than the
right, or vice versa.
I won’t go into too much detail about balance, because you can read all about it here, but the general gist is that we look at a photo like a weighing scale.
If there’s too much going on, on the left, then the photo is unbalanced
to the left. Whether we want the photo be balanced or not us up to us,
but it pays to know why you may or may not want it to be.
A balanced photo is pleasing and harmonious, and unbalanced photo is
uncomfortable and unresolved. Which do you want your photo to be, and
more importantly, why?
The more aware you are of the effects of balance on your photos, the
better your photography will be, so it pays to think about how you want
to portray your image before you pick up your camera.
Degrees of balance is at the heart of every photo and can’t be ignored
so use it wisely, and remember, that any technique, if used to excess,
is going to lose its worth.
Fisheye lens photography is a genre that depends completely on one
thing: the extreme panoramic perspective created by the fisheye lens.
These lenses are wild beasts in the world of camera lenses, due to their huge field of view and strong visual distortions.
Some people love them, some hate them. Some consider them to be toy
lenses, with no real use other than creating funny and weird-looking
portraits. And others see them as a way to make a statement through a
distorted but eye-catching image.
A funny portrait of my oldest child taken with my fisheye lens.
In reality, fisheye lenses are much more than curiosities. They are a
very particular tool that can produce powerful effects in the hands of a
skilled photographer.
This article is all about how to master your fisheye lens so that you
can create strong and original images that will stand out from the
crowd with their unique characteristics.
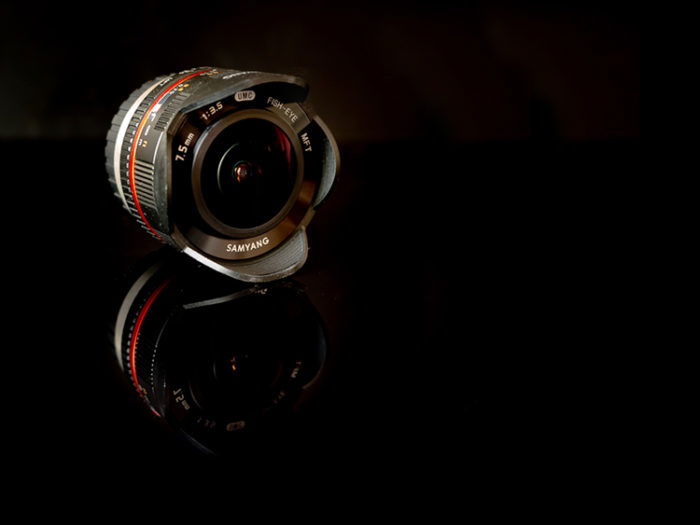
What Is A Fisheye Lens?
The Samyang 7.5mm f/3.5 UMC MFT Fisheye lens.
A fisheye lens is a type of lens that produces an extreme wide-angle
image with distortions that make straight lines appear curved.
As its name indicates, it is based on how a fish would see things
beneath the surface of the water, with an ultra-wide hemispherical view
of everything in front of it. By ‘ultra-wide hemispherical view’, I mean
precisely that the lens has a 180° field of view (which is half of the
360° of a sphere, hence the term hemispherical).
The term ‘fisheye’wasfirst usedto describe these kinds of photographic lenses in 1906 by Robert W. Wood, an American physicist and inventor.
While fisheye lenses will always project a circular image on the
camera sensor, they can be grouped into two families: circular and
full-frame fisheye.
A circular fisheye lens will project the whole hemispherical image
onto the camera sensor. A full-frame fisheye lens, however, will project
an image larger than the camera sensor. This leads to a non-circular
photo with a field of view smaller than 180°. The photo below shows a
comparison between images produced by the two kinds of lenses.
Comparison between circular (left) and full-frame (right) fisheye lenses. (Image credit: Wikipedia.)
Some Fisheye Lens Recommendations
Due to their huge field of view, fisheye lenses are usually found in action cams (e.g. GoPro cameras). Relatively cheap fisheye lenses are also available for iPhone and other camera phones (e.g. the Olloclip 4-in-1 set). And all the major camera lens manufacturers, such as Canon, Nikon, Olympus, Sigma, Sony, Samyang, etc., have a fisheye lens available in their catalog.
I own the fully manual Samyang 7.5mm f/3.5 UMC Fisheye
lens for my Olympus micro 4/3 camera and it is a joy to use. If you are
tempted to get a fisheye but don’t want to spend too much on it, do not
be afraid to go fully manual. Thanks to the very large depth of field,
manual focusing is actually quite a pain-free process.
[Note: ExpertPhotography is supported by readers. Product
links on ExpertPhotography are referral links. If you use one of these
and buy something, we make a little bit of money. Need more info? See how it all works here. — Ed.]
Fisheye Lenses and Optical Distortions
Fisheye lenses, together with rectilinear wide-angle lenses, have a
focal length less or equal to 24mm (equivalent to full-frame sensor
size). This means they fall into the ultra wide-angle lens category.
Rectilinear wide-angle lenses are built in such a way that straight
lines in the scene will be rendered straight (uncurved) in most parts of
the image, with increasing amounts of distortion towards the edges of
the frame.
In general, the shorter the focal length, the more difficult it is to
rectify the lens. Fisheye lenses always manifest a strong curvilinear
barrel distortion, as shown in the image below.
This image illustrates well the curvilinear barrel distortion typical of fisheye lenses.
Many people do not like the fisheye effect because they do not like
the resulting distortion in the images. In some cases, you can use
post-process methods, such as defishing techniques using Lightroom or
more specific software (e.g. IMADIO Fisheye-Hemi), to lessen the
amount of distortion, or remove it altogether.
In general, though, careful composition and choice of subject can
greatly reduce the visual impact of the fisheye distortion without the
need for extra editing, particularly with full-frame fisheye.
So, how does a fisheye lens work in practice? All you need to remember to start doing serious fisheye photography is:
The central part of the frame is less affected by the distortions
The more you close in on your subject, the larger the distortion in the resulting image will be
If you want a flat horizon, place it in the middle of your frame,
and crop the photo later on to satisfy composition rules, such as the
rule of thirds
Tilt the lens upward to achieve a concave horizon
Tilt the lens downward for a convex horizon
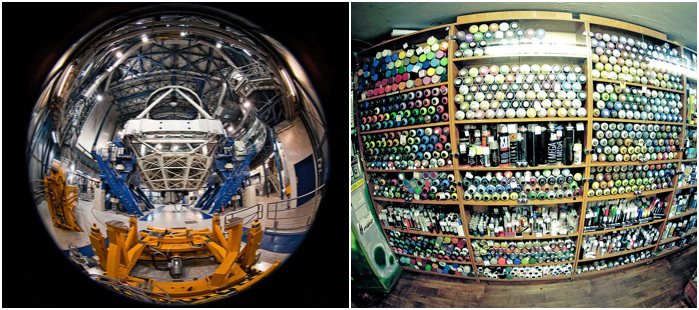
What Are Fisheye Lenses Good For?
In general, fisheye lenses are great travelling lenses for your
camera. Because they are generally fast and you can easily use them
indoors, they are great for taking photographs in museums, churches, and
monuments.
They are equally good lenses for walking around the city. Fisheye
lenses allow you to emphasise the height of buildings and monuments, as
well as capture wide birds-eye views looking down at the city from high
vantage points.
If you like the natural landscape, fisheye lenses are perfect for capturing wide panoramic views and also to photograph nocturnal landscapes and the Milky Way in all its glory.
One thing’s for sure—because they are quite different from any other
kind of lens, if you are stuck in a photographic rut, fisheye
photography is a great way to get your creative spark back.
Let’s take a look at a few subjects you can photograph with a fisheye lens, and how to get some strong effects.
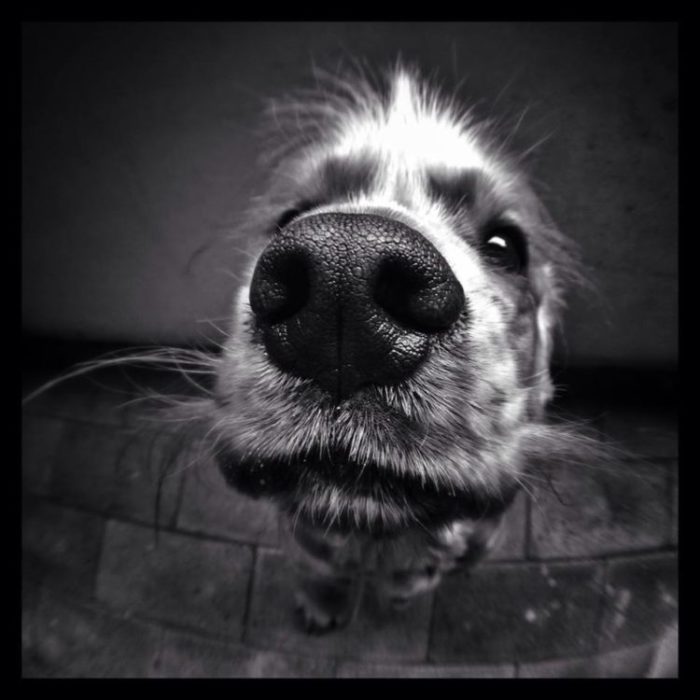
Fun and Weird Images
The most straightforward way you can use a fisheye lens is to create
funny and weird-looking images. Try to use the fisheye distortions when
photographing a pet’s nose from up close, as with the dog in the image
below. Big nose and begging eyes, teeny tiny body, great fun.
Having
your dog look at you is a great chance to use the fisheye distortions
to make his nose appear huge and his body look tiny. This photo of my
dog has been taken with the Olloclip 3-in-1 set on iPhone 5.
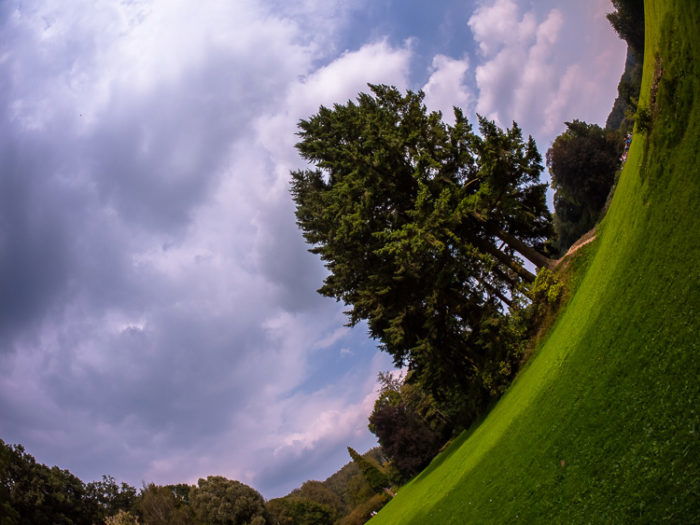
You can also tilt the camera upward or downward and rotate it to
create funny landscapes from your otherwise unremarkable city park.
A weird-looking landscape.
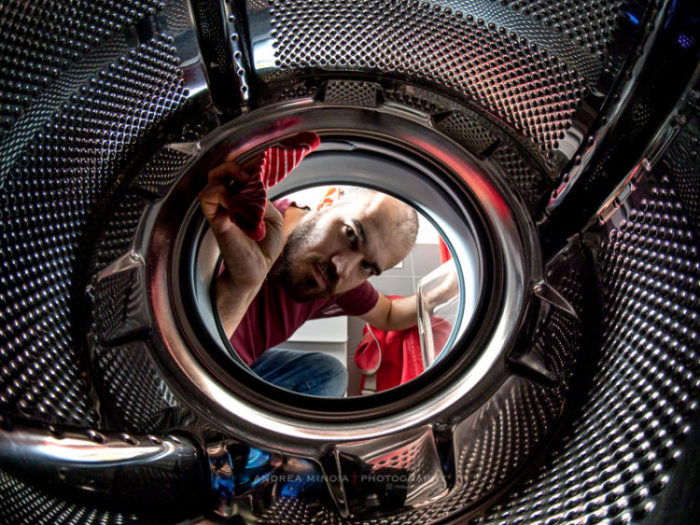
Finally, you can take advantage of the huge field of view and place your camera in small, secluded spots.
What about a selfie from deep inside your washing machine?
Just make sure the place is dry and remove your camera before washing
your clothes.
Note how, in the photo below, I managed to place myself
towards the centre of the frame, thus avoiding strong distortions on my
face.
A selfie from deep inside your washing machine is something you cannot easily do without a fisheye lens.
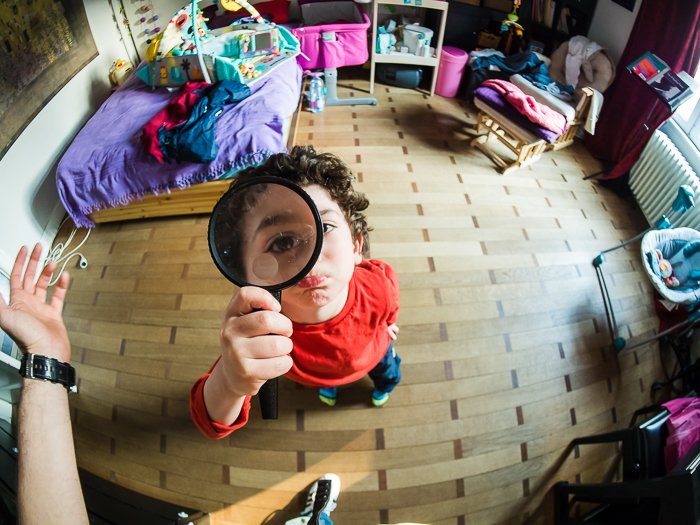
Portraits
Usually people will not be flattered by having you taking their
portrait with a fisheye lens—the nose will be too big, while the ears
and body will be too small. In short, you will mess up the typical
proportions of the face, particularly if you go for a headshot or for
close-ups.
But, in toddlers and very young children, face proportions are still
quite different from those of the average adult. Kids of this age have
small noses and huge, beautiful eyes in contrast to the rest of their
faces.
With a fisheye lens you can enhance these youthful proportions by making
the toddlers’ eyes even larger, particularly if shot in close quarters,
like from just beneath a car seat canopy.
Fisheye
portrait of my 4-month-old daughter. She was really amazed (or scared)
by the camera, so it was easy to get her eyes wide open.
Natural Landscapes
Of all subjects, perhaps the one that suits a fisheye lens best is a
natural landscape. This is generally because landscapes have no straight
lines in them. And if you place the horizon in the middle of the frame,
it can go unnoticed that you have used a fisheye lens.
This is a great way to avoid buying a wide-angle lens, particularly if you rarely shoot wide.
Natural landscapes with their lack of straight lines can be photographed nicely with a fisheye lens.
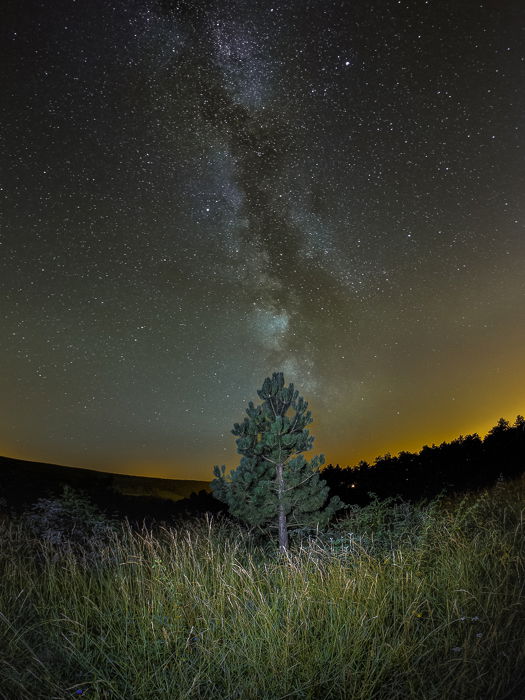
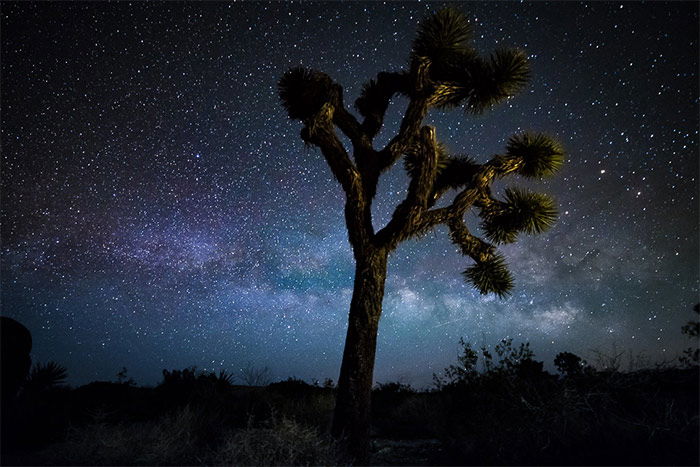
Fisheye lenses typically have a fast aperture, useful if you want to capture a large portion of the Milky Way
while having a strong foreground with a large and interesting subject,
like this small tree lost in tall grass shown in the photo below.
If
you have a fisheye lens, it’s worth spending few hours out under the
starry sky with it to capture images of the the Milky Way.
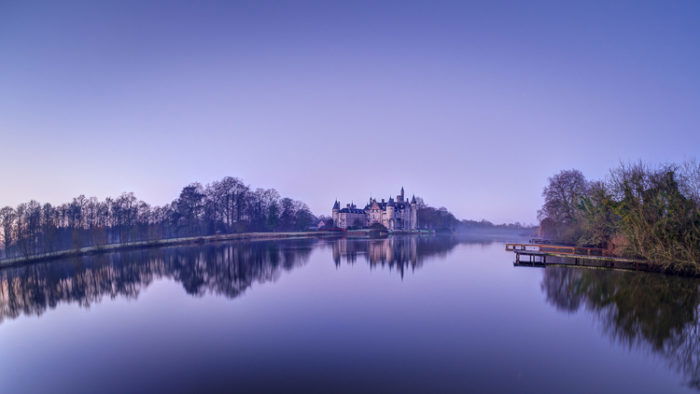
Sometimes, it is nice to have a curved horizon in a landscape, in order to create stronger lines that will lead the viewer toward the subject, as in this morning shot taken at the castle of Bornem, in Belgium.
By
curving straight lines such the horizon, the left bank of the channel,
and the dock on the right, the fisheye naturally draws the viewer’s
attention towards the subject: the castle.
Fisheye and the City
As I said before, if you are a fan of urban environments,
you should get a fisheye lens to capture monuments and tall buildings.
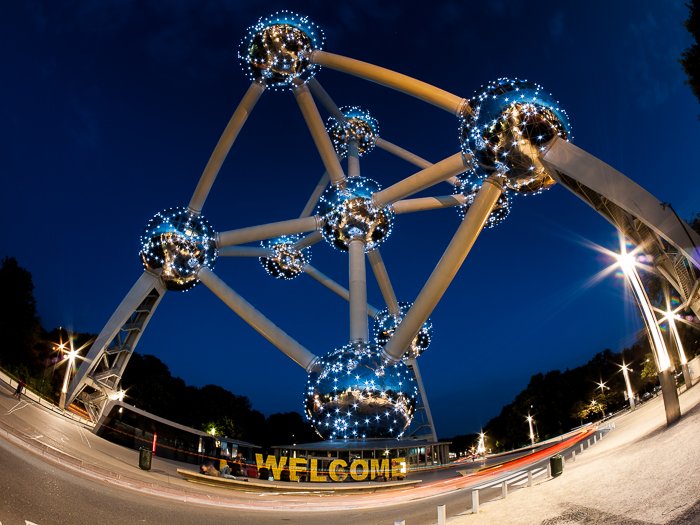
For instance, the Atomium is a world-famous monument in Brussels. It
also happens to be 102m tall.
To capture it entirely at 24mm (equivalent to full-frame), you have
to move back about 80m from it. With my fisheye I was able to get it all
into the frame from 15-20m away. The distortions helped create an
original image of this famous location.
The
Atomium. The fisheye helped to capture this 102 metre tall monument
entirely from just 15 metres away and the distortions worked to create
an original view of this world-famous landmark.
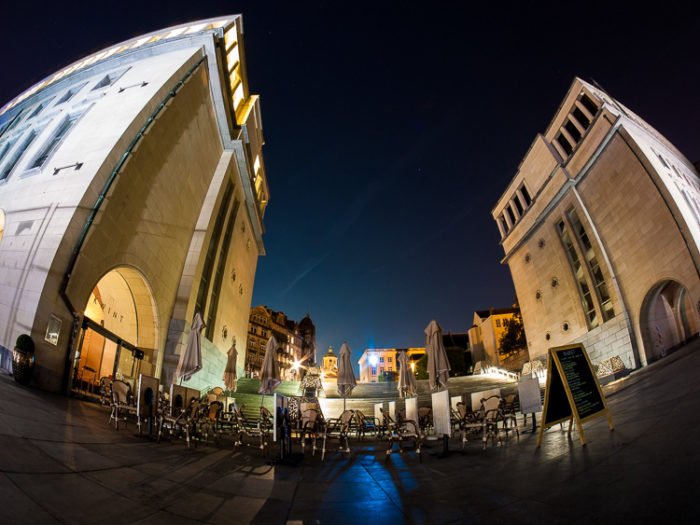
Another nice way to play with tall buildings is to use the
distortions to make them bend around the image as if they were huge
waves about to break.
Tall buildings warped, looking as though they’re huge waves about to break.
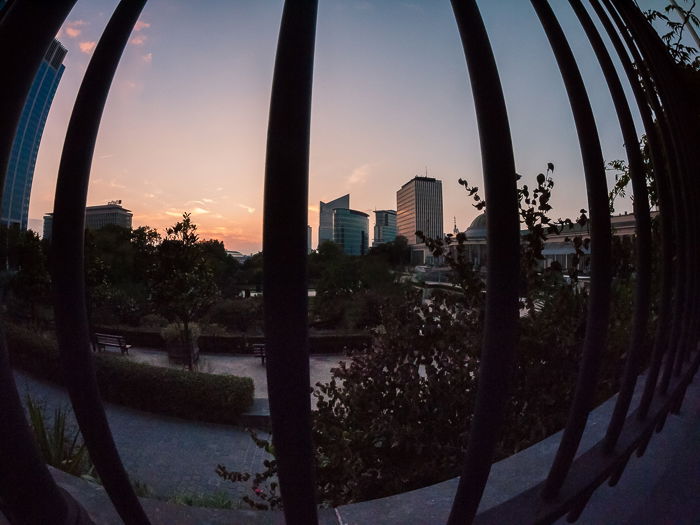
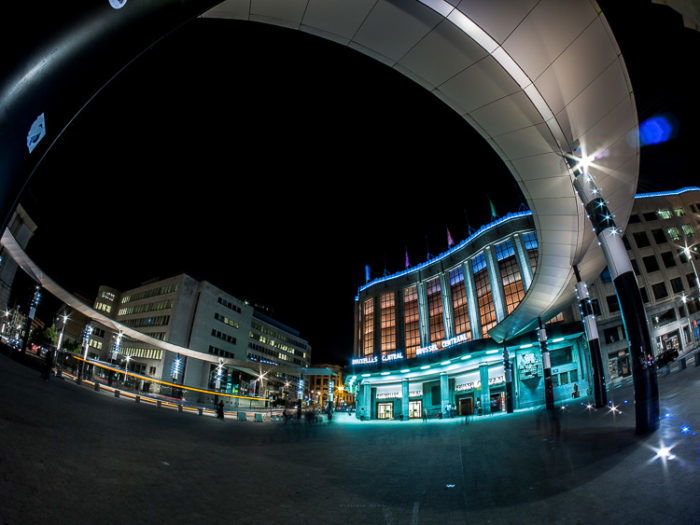
You should also take advantage of curved lines and amplify them to
create strong leading lines, like this circular platform roof in front
of Brussels Central Station.
Taking advantage of curved lines to create strong leading lines.
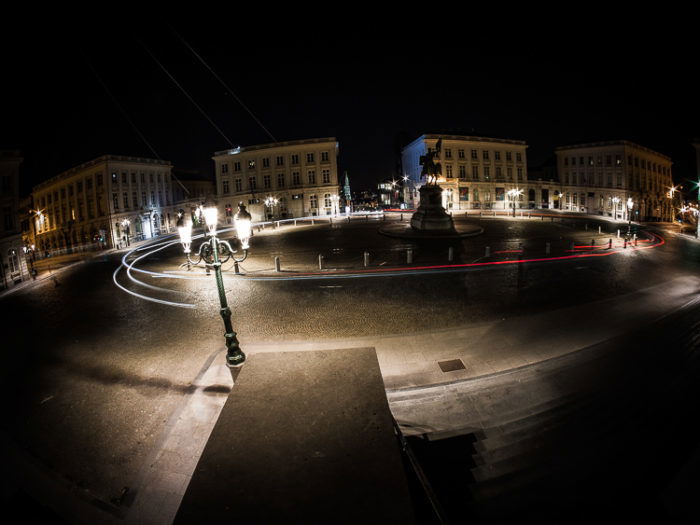
Finally, everybody shooting in the city has tried the classic photo
with night traffic light trails. Usually those trails are straight or
snaking into the distance following the road.
With a fisheye you can get a full roundabout into the frame and have
some space left to get circular trails. This creates a nice ‘traffic
light carousel’.
Turning a roundabout into a light carousel.
Before moving on to another subject, I would like to point out that I
didn’t find lens flares to be an issue, as these nocturnal cityscapes
(with their many street lights and other artificial light sources) show.
Interiors
You can do indoor photography with a fisheye and easily get
everything into a single image. I took this picture of a gallery in
Brussels, which has some nice interior architecture.
Interior of the Ravenstein gallery, near Brussels Central Station.
Bird’s-Eye Perspectives
It sounds funny to say, but you can get some great bird’s-eye views
with a fisheye lens. If you have access to a high vantage point, you can
have a nice panoramic view over the city.
I’m lucky to live in a tall building on top of a hill in Brussels. As
such, I found myself climbing to the building roof quite often with my
fisheye to take photos.
Sunset over Brussels.Brussels by night.
Need More Ideas?
Sports cars and motorbikes, as well as airplanes
are great subjects for fisheye photography, provided that you can shoot
from up close. People doing sports, like skaters in a skate park, also
make for interesting subjects.
The real limit in using a fisheye lens, though, is your creativity and willingness to explore different possibilities.
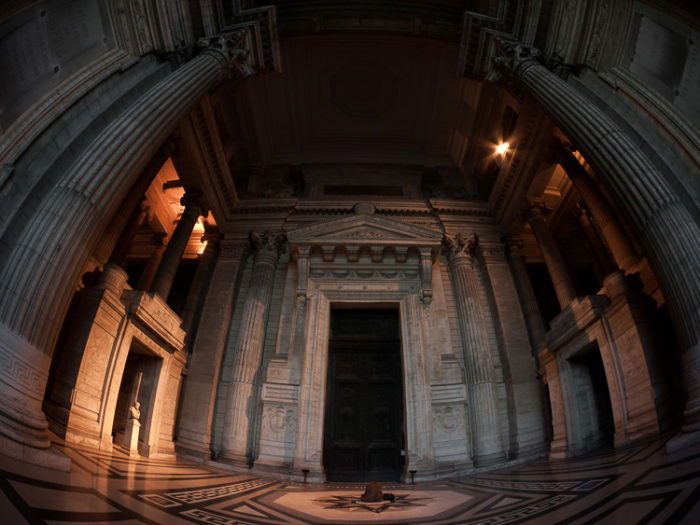
Are you into street photography? With a bit of luck you can do it
even with a fisheye lens. I managed to get a lucky shot of a praying man
in the hall of the Justice Palace in Brussels at night.
The great merit of the fisheye lens in this photo lies in the way it
highlights how huge the Justice Palace hall really is, compared with the
praying man in front of the large door. The lens’s distortion make it
seem as though his surroundings are stretching to dominate the space
above him.
The praying man, dwarfed by his surroundings.
The Major Drawback in Fisheye Lens Photography: No Filters
Working with fisheye lenses is not great if you are addicted to
photographic filters. As far as I know, no fisheye lenses can mount
standard filters. This is due to the bulging front element of the lens.
But you may find some custom made or DIY solutions.
Below, you can see an example of why you may need to use a filter with a fisheye lens.
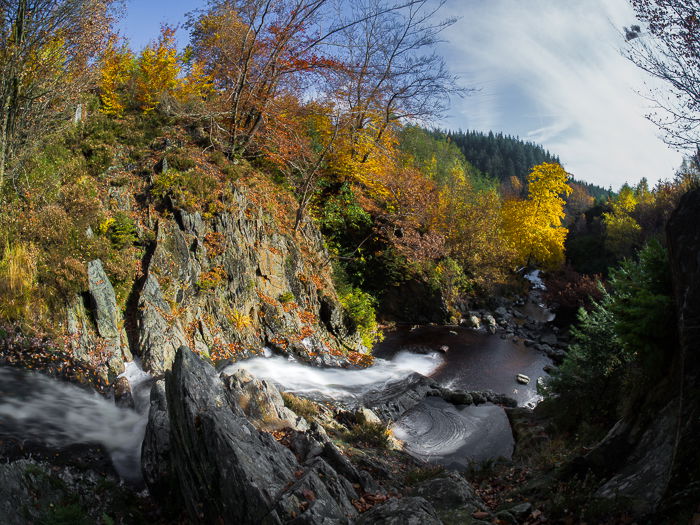
I took this photo from the top of the Bayon waterfall in Belgium.
The use of a fisheye lens provides a nice, dynamic view of the area. I
could combine many interesting elements, such as the water rushing down
the waterfall, the colourful foliage, and the streaky clouds in the sky
beyond.
The Bayon waterfall (Belgium). Olympus OM-D EM-10 with Samyang 7.5 f/3.5 MFT fisheye lens.
I wanted to have a scene that was dynamic, colourful, and large
enough to capture the grandeur of the place. From where I was standing, I
had to use my Samyang 7.5mm fisheye lens to do this.
I also wanted to incorporate the nice, silky look of motion-blurred water over rocks, which meant I had to take a long exposure.
How to Deal with the Problem: Two Workarounds
Placing a handheld filter in front of the lens may work with GND
filters but for long exposures this is a ‘no go’. Light leakage will be
unavoidable.
As mentioned earlier, because these wide-angle lenses have the front element bulging out, some, such as the Canon EF 11-24 f/4L USM,
have a rear slot for gelatin filters. Some people have taken to taping
small pieces from ND gelatin filters to the rear element of a fisheye
lens.
A focal point is one of the more straightforward composition concepts for a photographer to grab onto.
However,
many photographers don’t really understand what a focal point is and,
more importantly, how it works to their advantage.
A focal point
is most simply defined as the point of interest in an image and the area
that is the center of attraction for a viewer. In the fine arts, the
focal point is referred to as the point of interest that makes an
artwork unique. This is an exciting concept to carry over to
photography.
When you choose your focal point, you’re essentially telling a viewer where you want them to look.
Keep in mind that there are essential steps in the use of a focal point.
In this guide, Jo Plumridge provides you with an introductory lesson on focal points in photography.
Thursday, January 20, 2022
What Is a Wide Angle Lens (And When to Use One!)
Tags: Shutterbug, Photography for Beginners, Newbie Photography
As a photographer, you have a vast selection of lens options to
choose from. Those that show a vast portion of the scene are called wide
angle lenses. But do you need one? And which wide angle is the best
lens choice for you?
To tackle this question, let’s look at the different types of wide angle lenses available, and when to use them.
What Is a Wide Angle Lens?
First, we must clarify the meaning of wide angle.
The most common description is that a wide angle lens displays a
wider field of view than our vision. However, this doesn’t translate
directly to millimetres (mm) and degrees.
So, what focal lengths (in mm) can be considered wide angle? The
popular definition is that a lens below, or equivalent to 35mm is
considered a wide angle lens. This is roughly 65 degrees of diagonal
field of view.
Does a Wide Angle Lens Zoom?
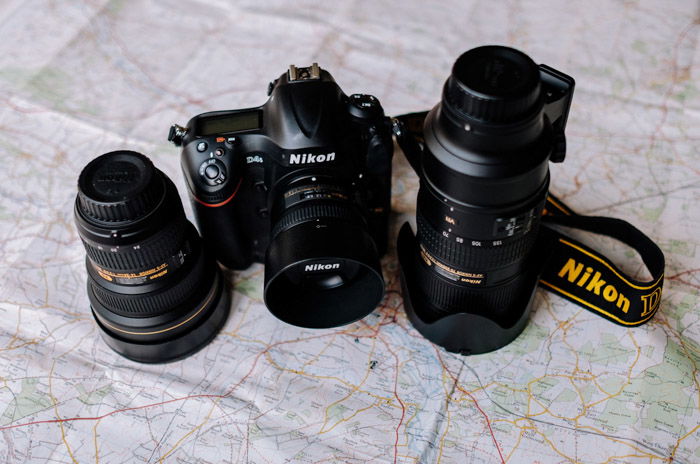
All lenses, including wide angle lenses, come in either a prime or a zoom version. A prime lens has a fixed focal length, meaning you can change your field of view by moving physically closer or further away.
Primes are generally lighter, faster, cheaper and produce better image quality. The Canon 24mm f/2.8 STM is a great example of a cheap and small prime.
A zoom lens has a variable focal length (zoom
range). Some all-around “travel” zoom lens options cover wide, standard
and telephoto focal lengths alike. Most zoom lenses are more specific,
giving you one or two of these.
Zoom lenses very versatile, allowing to keep your gear to a minimum.
But, generally, a zoom lens is heavier and more expensive, due to extra
mechanisms and glass inside the lens. Kit lenses are exceptions, they
are often quite small, but they come with serious compromises.
Zooms’ image quality is usually surpassed by prime lenses in the same
price range. They are a jack of all trades, master of none in
particular. The Canon EF 16-35mm f/4 lens is an excellent example for a professional wide angle zoom lens.
How Wide Is a Wide Angle Lens?
We have to make a disclaimer here. The camera that you use influences
how your lens will ‘look’. Smaller sensors crop out the centre portion
of any lens, resulting in a tighter field of view.
For simplification, all focal lengths mentioned here are full-frame
equivalent. If you want to know how these translate to your camera,
divide them by 1.5 (APS-C) or 2 (M4/3).
As I mentioned, by popular definition, wide angle means anything
below 35mm. But there’s still a lot of room for further specification.
Focal lengths between 35mm and 24mm are considered standard wide angle. Between 24mm to 16mm is what we usually refer to when saying wide angle. Focal lengths below 16mm are considered ultra wide angles.
The most popular wide angle zoom range is 16-35mm. Most kit or
standard zoom lenses go down to 24mm or 28mm. The widest lenses on the
market are 10mm (rectilinear) and 8mm (fisheye).
What Are the Three Main Types of Wide Angle Lenses?
In terms of distortion, we differentiate between three main sorts of wide angle lenses.
Fisheye Wide Angle Lens
Fish-eye lenses are special ultra-wide angle lenses. Their angle of view is usually 180°, allowing you to see half of a full rotation.
They have a distinctive, hemispherical type of lens distortion. They cram in as much information as possible. Thus, they don’t produce straight lines.
In terms of focal length, they are at the bottom of the scale.
Most action cameras, like the GoPros, also feature built-in wide fish-eye lenses.
Fish-eye distortion. Image by Phil Hearing on Unsplash
Rectilinear Wide Angle Lens
Rectilinear wide angle lenses are the other type. These are not free
from distortion either, but they keep lines (close to) straight.
You might still notice moderate barrel distortion on some. It is more
obvious in architectural images, where the lines bow outward, away from
the centre. But, it’s also easy to correct during post-processing.
Basically, any lens that’s not explicitly marked as fisheye is rectilinear.
You can get lenses with shorter focal lengths, but they are solely for cropped-sensor cameras (like the Sigma 8-16mm).
Keep in mind that you cannot compare a 16mm fisheye with a 16mm
rectilinear wide angle lens. Because of the distortion, the fisheye lens
will give a different, slightly wider image.
The Canon EF 28mm f/1.8 USM
is a good example of an all-around, rectilinear wide angle lens for
Canon. If you have the budget for it, I strongly recommend the Canon 24mm f/1.4L II lens. It’s one of my all-time favourites.
The lines here are straight. Photo by the Author
Tilt-Shift Wide Angle Lens
Although tilt-shift lenses don’t have to be wide angle lenses
necessarily, most are. Neither of the previously mentioned two lens
types allows you to correct for perspective distortion.
This type of distortion is especially prevalent in wide angle lenses.
It happens you’re not viewing two parallel lines directly from the
middle. With a standard rectilinear lens, they would converge.
Tilt-shift lenses take rectilinear a step further.
They project much larger images than the full-frame sensor. You can
move the lens on the plane parallel to the sensor both horizontally and
vertically. Thus, they can make converging lines parallel, or parallel
lines converge.
You also have the option to independently control (tilt) the plane of focus.
These lenses are extremely sophisticated and very expensive. They are
the most popular lenses among professional architecture and fine-art
photographers.
My favourite is the Canon TS-E 24mm f/3.5L. It’s a very versatile lens. You can even attach a teleconverter to make it a longer tilt-shift lens.
I corrected the perspective by shifting the lens
When to Use A Wide Angle Lens (with Recommendations!)
So, what is a wide angle lens used for? Wide angle lenses are
generally used for scenes where you want to capture as much as possible.
Landscapes, cityscapes, and architecture are the main categories that use a wide angle lens.
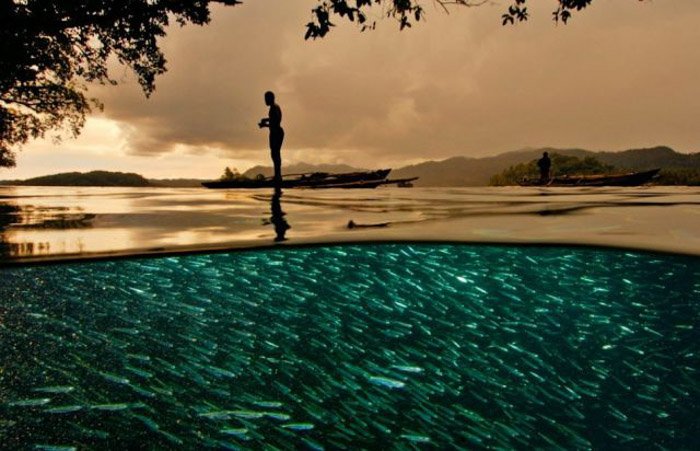
A fish-eye lens captures even more of the scene but is mainly used for artistic and creative purposes. They are wide enough to nicely capture the two-worlds scene that I am sure we have all seen and admired.
Be aware that you have to be very conscious of your composition to
work well with a wide angle lens. It is easy to fall into the trap of
showing too much.
Image by David Doubilet, National Geographic
Street Photography
I often use my wide angle lens forstreet photography. If I need to get closer to a subject, I move there myself.
As Robert Capa taught us, “If your images aren’t good enough, you’re
not close enough”. This can be a pain with wide angle lenses, as you
need to get in really close.
In turn, it can give a dramatic perspective and a sense of presence.
I recommend a fast 35mm or 24mm prime lens for street photography, especially in challenging lighting conditions.
Travel Photography
When you’re travelling, you don’t usually want to bring a lot of
lenses. Lighter gear means more room to pack other stuff or more
convenient travel. So, most photographers opt to choose a standard zoom lens, maybe an extra telephoto lens.
If you’re going to a place with a lot of landmarks, or vast
landscapes, I suggest you include at least a moderately wide lens. If
your kit lens goes as low as 24mm, it might be enough. (Keep in mind
that the 18mm kit lenses are equivalent to 28-30mm.)
I actually seldom bring a standard zoom lens when travelling.
Instead, I tend to rely on a wide angle prime lens and a short telephoto
prime.
My two favourite lenses for travel are the 24mm f/1.4 and the 85mm f/1.8. Sometimes I throw in the 40mm f/2.8 pancake lens because of its tiny size.
A 24mm view is usually enough for travel. Image by the Author
Architecture and Real Estate Photography
For these specific purposes, you’ll need to have a wide lens. An ultra-wide lens is recommended for interiors.
Aperture and build quality are not really of consideration here. What you need is a versatile, sharp and wide lens.
You might opt for a tilt-shift. They give you excellent image
quality, advanced controls, and distortion-free results – for a high
price.
Canon and Nikon both make fantastic tilt-shifts, often for astronomic
prices. Samyang, a third party manufacturer, offers less expensive
options which still give you a lot of value.
Landscape Photography
For landscapes, you inevitably need a wide angle lens. As you’ll
probably do it from a tripod, the aperture is not a very important
factor. Instead, size, weight, image quality and weather sealing are.
These fields (among other gear) require fast and wide lenses. You
have to be ready for numerous possible lighting and action situations.
Use wide angle lenses when you need to capture the all-encompassing
shot. Or, use it to get really close-up for dramatic angles – remember
Capa’s words.
You have several options.
You can choose a wide zoom lens. On the Canon and Sony sides, there are several 16-35mm f/2.8 lenses, which are very popular. Nikon makes a 14-24mm f/2.8, along with Sigma.
These are all versatile, well-built and provide adequate image quality, but are all serious investments.
Sadly, with zooms, you very rarely get below f/2.8. To capture moving
subjects in low light, you still have to raise the ISO quite a bit –
resulting in more noise.
The way I prefer is going with wide aperture primes. As mentioned,
I’m a big fan of the 24mm f/1.4 lens but there are other options. Most
brands make 35mm f/1.4 lenses. Tamron recently brought out their own, which I like a lot.
If you need wider, Sigma makes a 20mm f/1.4 lens. If you need even wider (rarely), there’s the 14mm f/1.8 – a unique lens, not challenged by anything else on the market, but not particularly suited for photojournalistic applications.
Photo by the Author
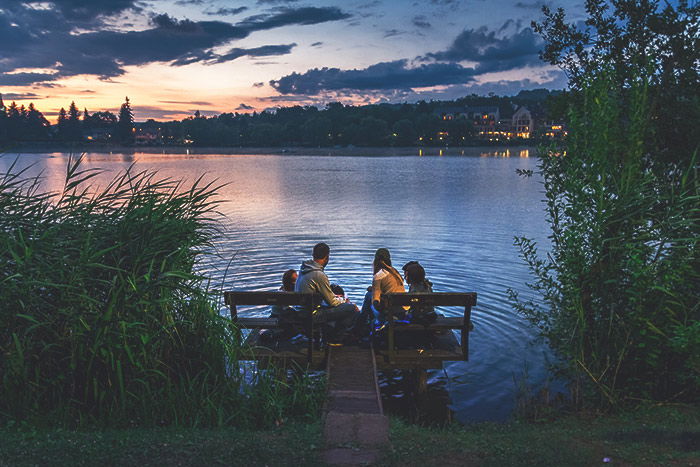
Night Sky Photography
If you want to photograph the night sky (maybe the Milky Way), fast
prime lens are the way to go, too, especially the aforementioned 14mm f/1.8 lens.
Follow our guide in the Milky Way Mastery course to know all about this field, and the use of wide angle lenses in it.
Photo by Josh Dunlop
Why Not Use Your Normal Lens?
You could use a multitude of lenses to try to replicate the view from wide angle lenses.
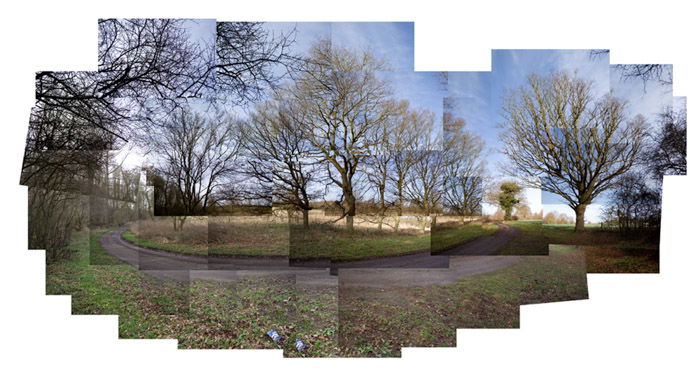
If you were to use a standard 50mm lens, for example, you would have
to shoot a few dozen images and stitch them together for a 16mm view.
Six to eight images may be enough to cover 28mm.
Here, you’ll need an editing program such as Adobe Photoshop or Lightroom.
If you have the time, the non-moving subject, and the effort required,
you can be quite successful with this. Your combined image will also
have a much higher resolution than a single shot.
There’s also a different consideration to stitching. You can use it to replicate the shallow depth-of-field look of large formats. There’s nothing to stop you from doing it with portraits or product shots.
The pioneer of this technique is Ryan Brenizer, a wedding
photographer from New York. He achieves impressive background separation
and wide angles simultaneously with it.
Of course, other photographers also borrow his trick. It takes time
to perfect (particularly with portraits), but the results are rewarding.
Photo by Kevin Landwer-Johan
Beginner photographers often neglect wide angle lenses. But they are
powerful tools of expression, providing options that no other lens type
is capable of.
Wide angle lenses can also pose challenges. Applying composition and exposure skills to wide angle shots can be harder than expected.
It’s important that you feel comfortable using your wide angle glass,
without overthinking it. Going with your flow almost always yields
great results. This way, your shots will be genuinely great and unique.
Most lenses are bought with a specific problem or need in mind.
Need
to photograph the eye of a fly? Buy a macro lens. Need a versatile
studio lens? Buy a 24-70 f/2.8. Need to photograph wildlife? Buy a
70-200 f/2.8. Bird photography? Buy a lens reaching up to 600mm.
The wide-angle lens is different.
It is often purchased because its owner feels that they have reached a plateau in their photography.
It’s time to grow in a different direction, they think. To try something new.
A wide-angle lens is perfect for that. It is unique in its capabilities and in the type of problems it solves.
Whatever the reason that you bought yours, I guess you are now thinking to yourself, “Well, this is it. I have it. Now what?”
That is what this guide is all about.
You can learn about using a wide-angle lens right here.


")
")
")
")
")

")
")