Thursday, November 24, 2022

 
Camera Angles


How To Effectively Use Camera Angles and Camera Shots


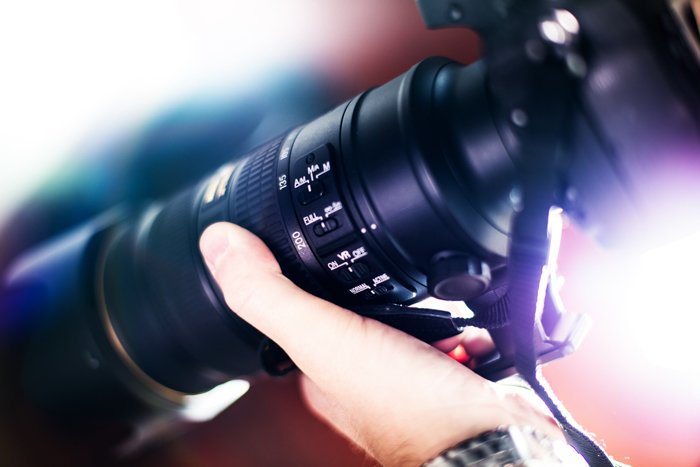
There is more to photography than just pointing and clicking. In order to create truly stunning images, you need to understand the power of camera angles in photography. Angles can make or break a photograph, and by using them effectively, you can take your photos from good to great. 

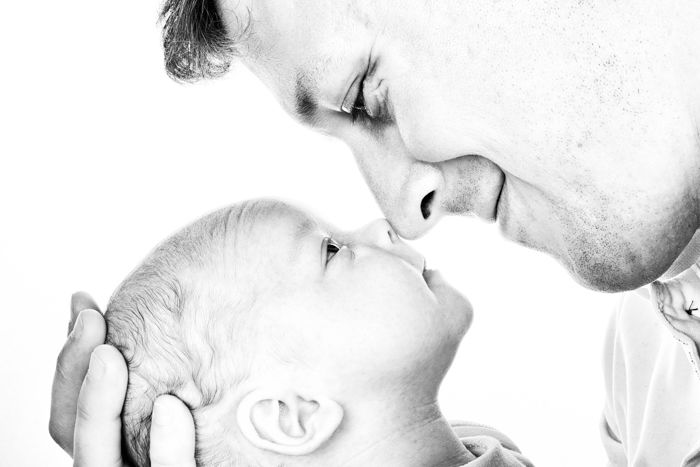
Take Eye Level Portraits for More Intimate Perspectives

A dark haired female posing for an eye level photo
Eye level is the simplest and most common photography angle. This is the most familiar perspective for us.
The first step is to look at the eyes of the person you’re photographing. Newbie photographers often use their own eyes as the guide for eye-level shots.
But in reality, you need to be in line with your subject’s eye. If you find yourself tilting your camera up or down, you’re doing it wrong.
Move your camera to match the height of your subject. If the subject is taller than you, turn on the live view on your screen and lift your camera above your head.
When you’re shooting a smaller person, consider crouching or even kneeling.
You should also pay attention to your subject’s head. Face angles are essential when it comes to eye-level shots. In most situations, you want your model to look away from the lens.
Ask them to fix their gaze on an object behind the camera. Doing so prevents them from looking awkward in your shots.
If you want intimate portraits, have them stare into the lens. Or you can ask them to look at your camera’s logo on top of the camera, instead.

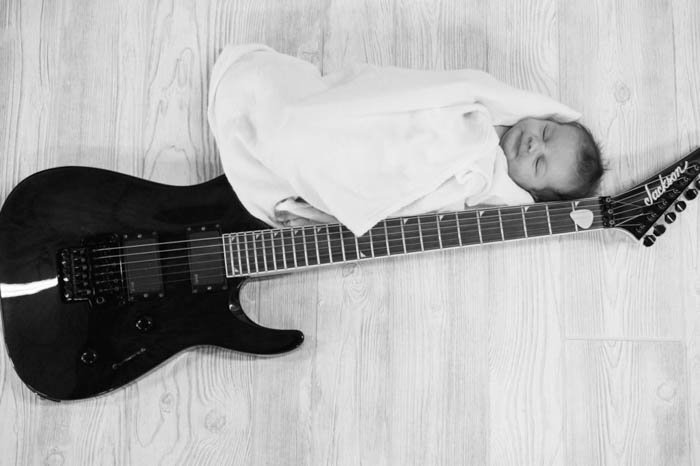
Try a Low Angle Shot to Make Your Subject Appear Huge

An amusing forced perspective portrait
Eye level can get boring if that’s the only perspective you use. You can always switch it up by using low angle shots, instead.
A low angle shot makes your subject look much bigger than they are. If you want them to look dominant in your image, then it’s the best perspective to use.
Low angles also make movement in your photo more dramatic. Since it makes legs look gigantic, anything your subject does also looks more intense.
That’s why movies use them a lot in action scenes.
But there is also a downside. Low angles are not the best option when it comes to portraits because it makes people appear unappealing since you’re shooting from below.
It can also make your subject look menacing because their bodies look out of proportion. Feel free to take some test shots and figure out if it’s the right perspective for your image.

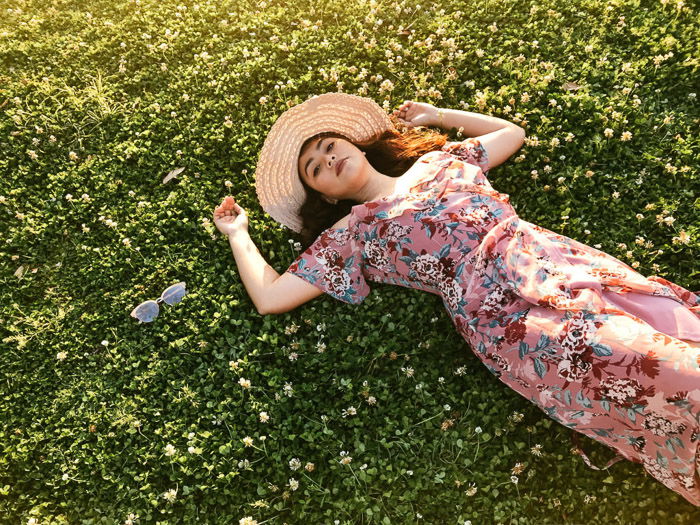
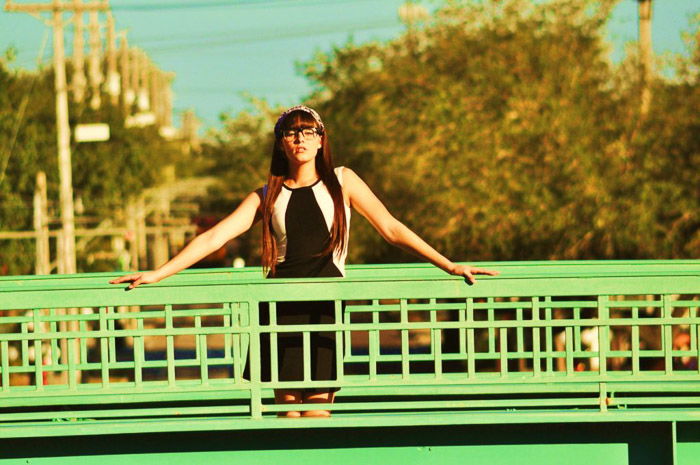
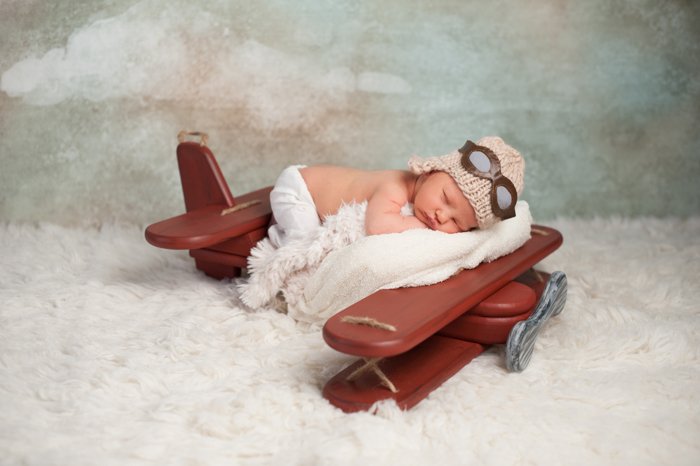
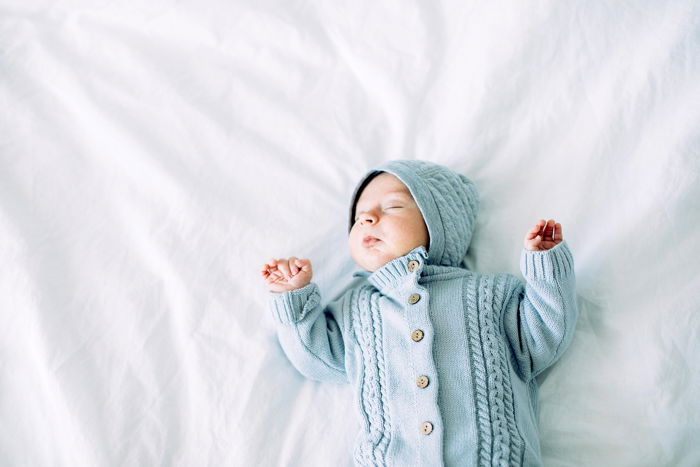
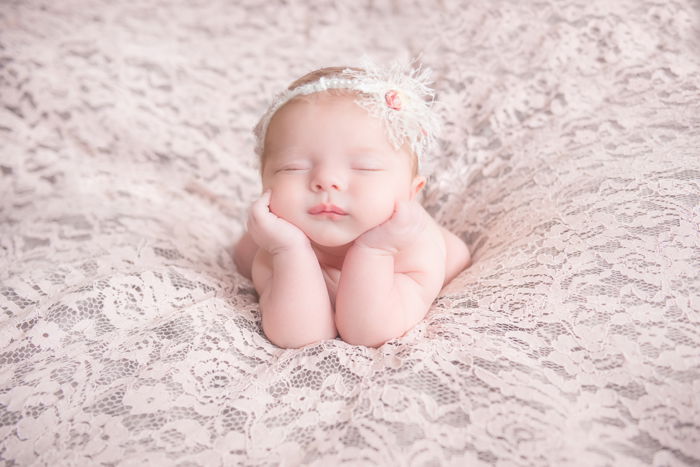
Go With a High Angle Shot to Include the Background

a female model posing on a small pier shot at a high camera angle
If you want to make a person look smaller than average, take a high angle shot. Since you’re shooting down on them, you make your subject look diminutive.
This perspective also evokes various psychological effects on the viewer. In most cases, it makes your subject look less powerful because they look small.
Its effect becomes more apparent when you’re shooting a few feet above them. It can also help convey childlike innocence especially if they’re staring up into the lens.
If you raise your camera a bit higher, this angle can create a perception of freedom. Why? Because shooting from high up makes people feel like flying.
You often see movies show epic shots of actors from a crane.

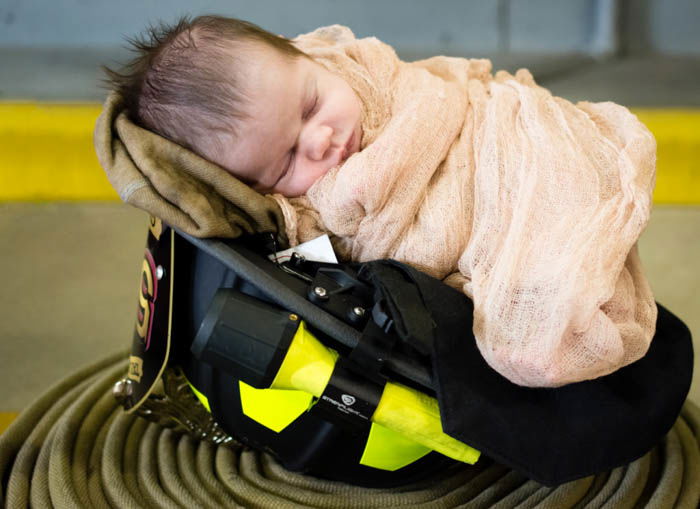
Use a Bird’s Eye View Angle With a Drone

A birds eye view camera angle of a man walking along traintracks
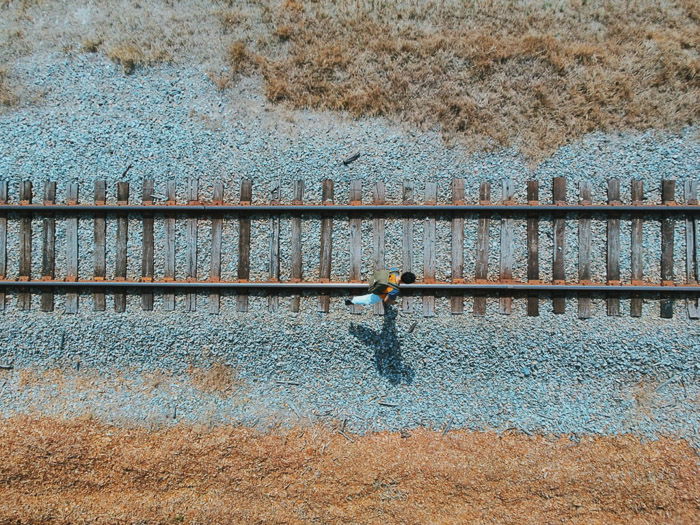
Ready to take your high angle shots to new heights? Consider using the bird’s eye view. As the term implies, this perspective involves taking photos from the sky.
The bird’s eye view is the same as the high angle shot. The only difference is that you’re taking photos from a considerable height.
These days, you can produce a bird’s eye view image using a drone. But you can also do it by going to the higher levels of a building and pointing your camera downward.
The bird’s eye view can make your subject feel significantly smaller than when you’re on the ground. This perspective can also make your audience feel like they’re looking at a diorama.
This unique perspective also covers more area since you’re farther away from your subject. So it’s the perfect way to document landscapes and architecture as well.

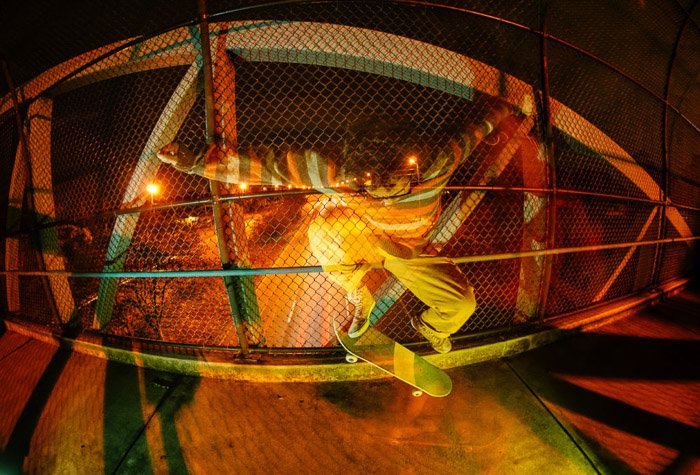
Use the Dutch Angle for Edgy Photos

A portrait of a female model lying down outdoors shot from high camera angles
The Dutch angle (a.k.a. tilted angle) makes images look edgy because it provides an unconventional perspective.
People expect photos to be straight all the time. When you tilt your frame, you grab your audience’s attention because it’s out of the ordinary.
This creative perspective has its roots in cinema. Since it makes your photo look unstable, it creates a feeling of discomfort. That’s why you see horror movies use it a lot.
But the dutch tilt doesn’t have to be menacing all the time. It could also make the action in your photo seem more adventurous and daring.
The tilted framing adds the illusion of motion. It enhances the movement of your subject. So it’s not surprising that you also see it in action scenes all the time.

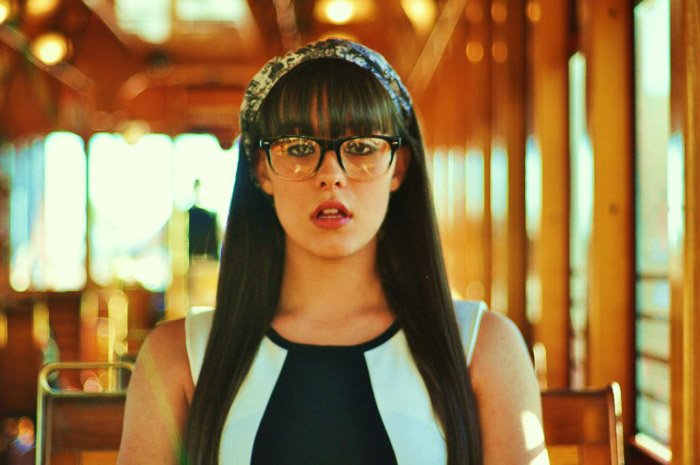
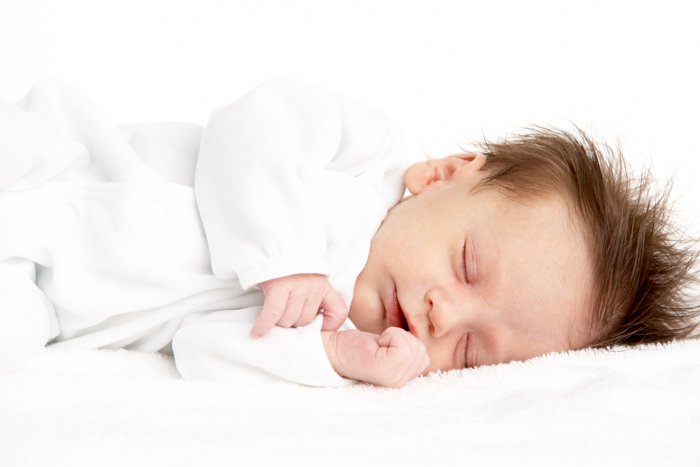
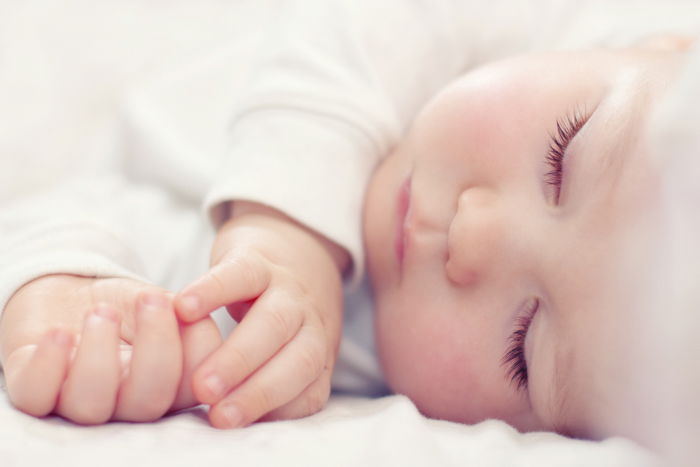
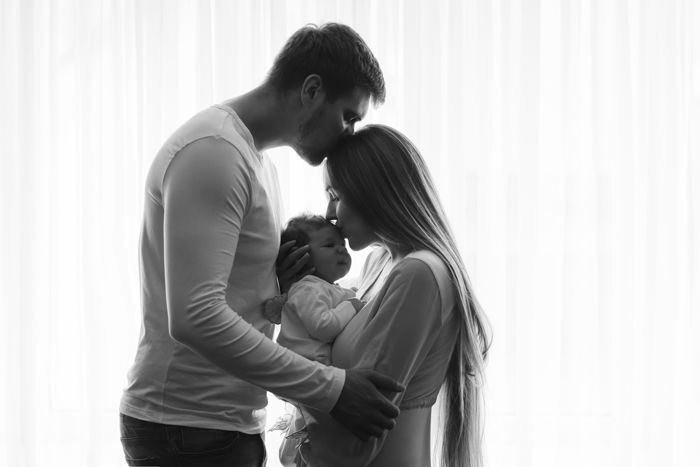
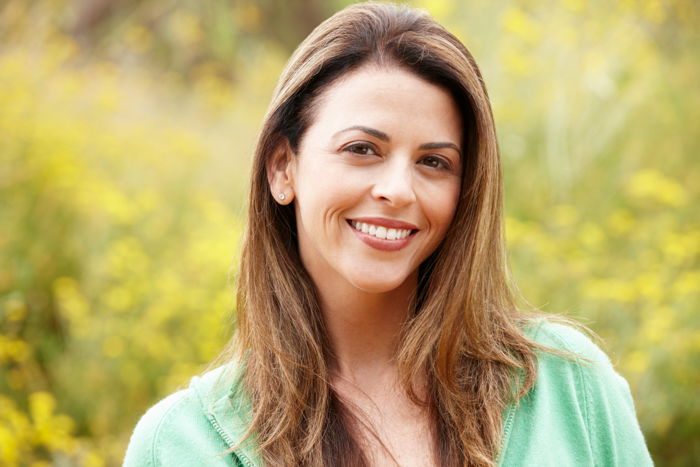
Take Close-Ups for Intimate Portraits

A portrait of a female model posing outdoors
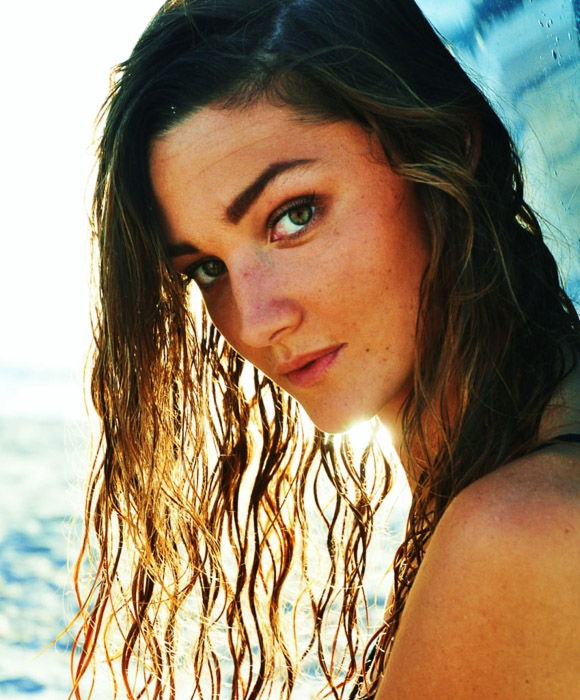
The close-up is among the most useful photography angles available. It provides the perfect distance between you and the subject.
It creates an intimate and friendly atmosphere in your photos. This angle is not confrontational, but it’s also not too distant.
When shooting portraits, think about the distance from a person when you’re talking with them. You shouldn’t be too far away that you have to scream.
But you also shouldn’t be too close that you’re invading their personal space.
Portrait photographers use close-up shots all the time. But it’s also one of the most common photography angles for still life photography.
It’s effective because it offers a perspective that matches how we look at objects in real life.

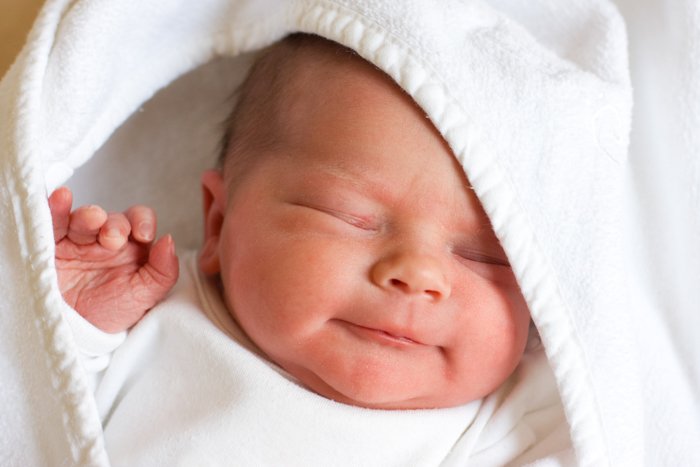
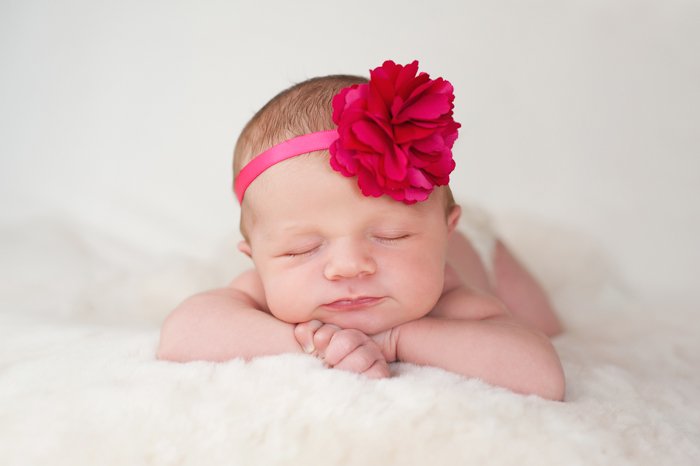
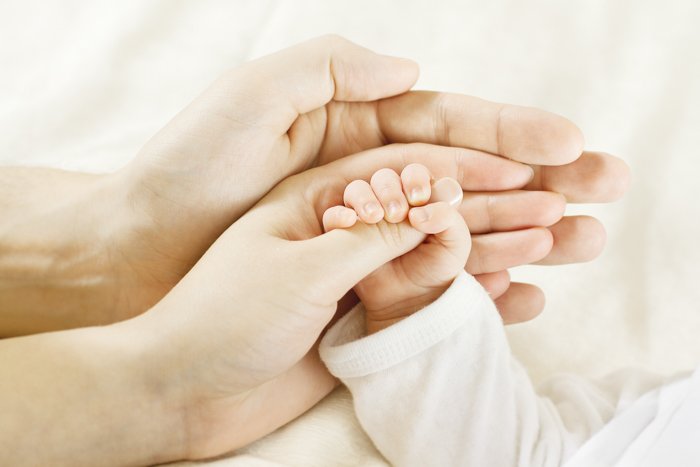
Take Extreme Close-Ups to Capture Facial Details, Like Eyes

A close up photo of a female models blue eye
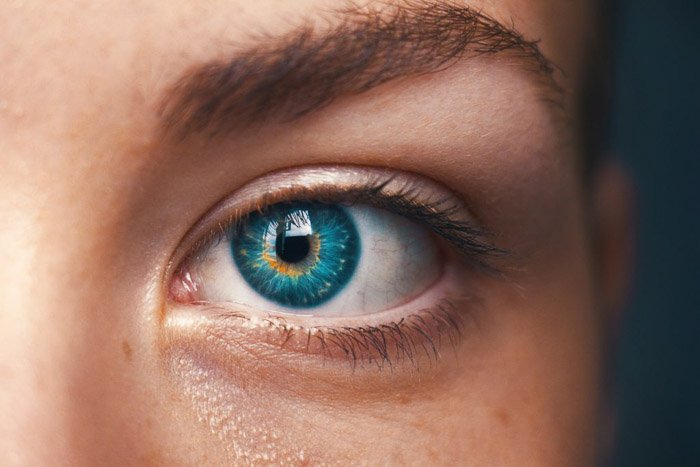
Extreme close-up (a.k.a. ECU) creates a more intimate space between the image and the viewer than an average close-up. It also allows your audience to interact with your photo in a more personal manner.
This angle lets people see finer details they wouldn’t otherwise.
The ECU has a lot of positive uses, but it can also have negative effects on your photos. Its distance can make people feel claustrophobic.
And since it’s confrontational, it may also create discomfort for some of your viewers. Most of all, focusing on one area prevents you from showing the rest of your subject. Keep this in mind when you’re composing your shots.

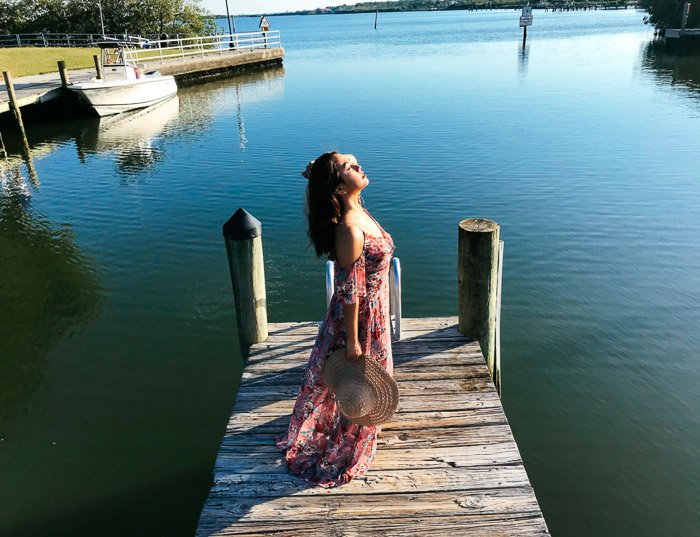
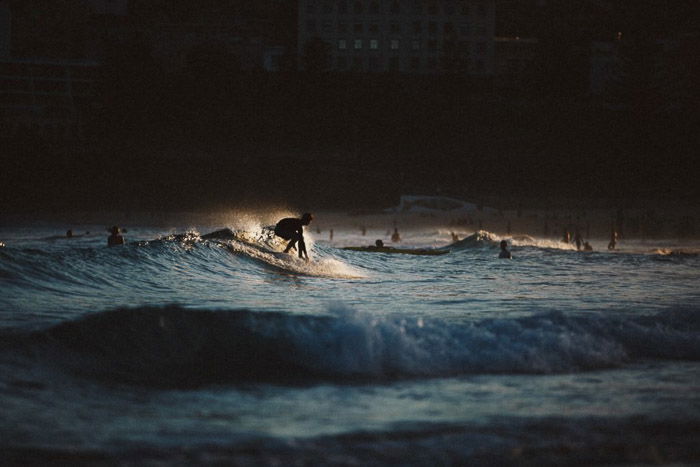
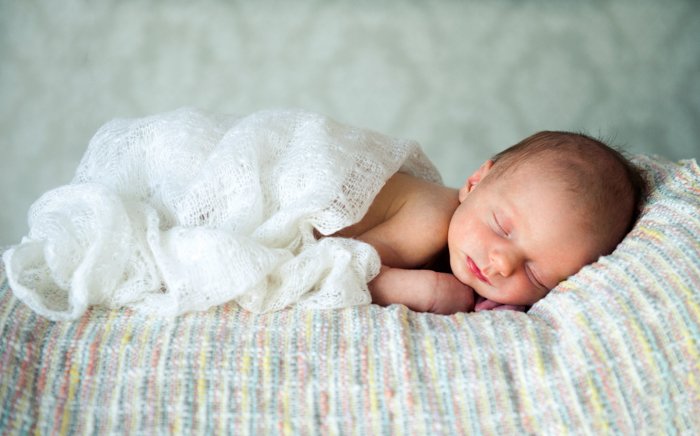
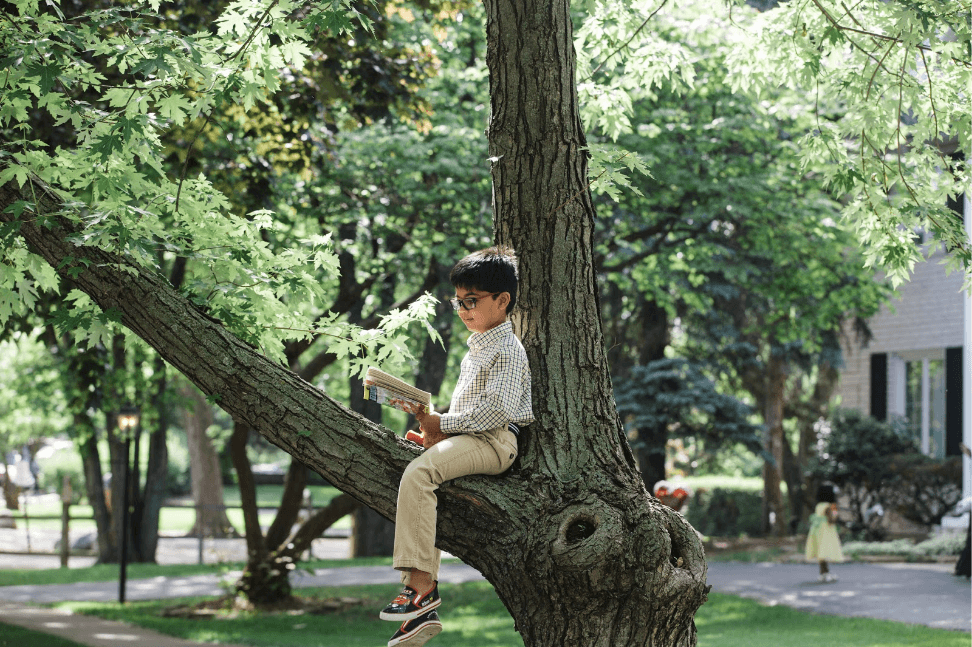
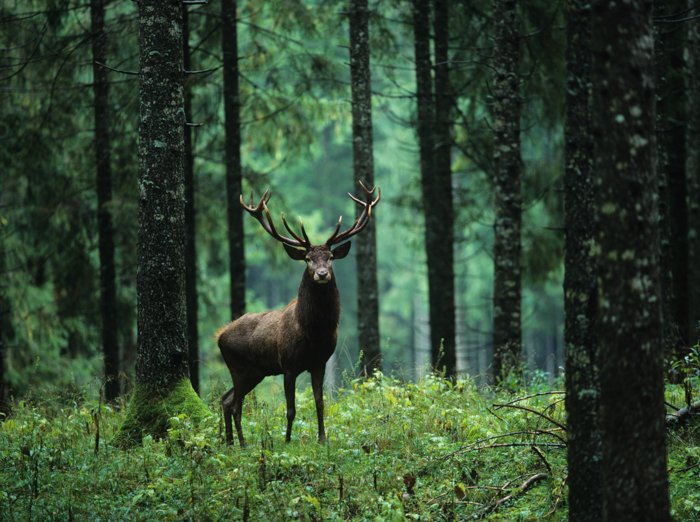
Use a Long Shot to Show the Subject’s Environment

A portrait of a female model posing on a green bridge with long shot camera angles
A long shot is a technical term that implies shooting from a distance. Photographers often use it to show the environment the subject is in.
You can use a long shot to photograph any place whether it’s a street or a hallway. Its primary purpose is to establish a scenario and provide people with more context of the location in the image.
If you want to take a long shot, the whole length of the person you’re photographing should fit within the frames.
You also need to show enough of the location to give people a clue where everything is taking place.

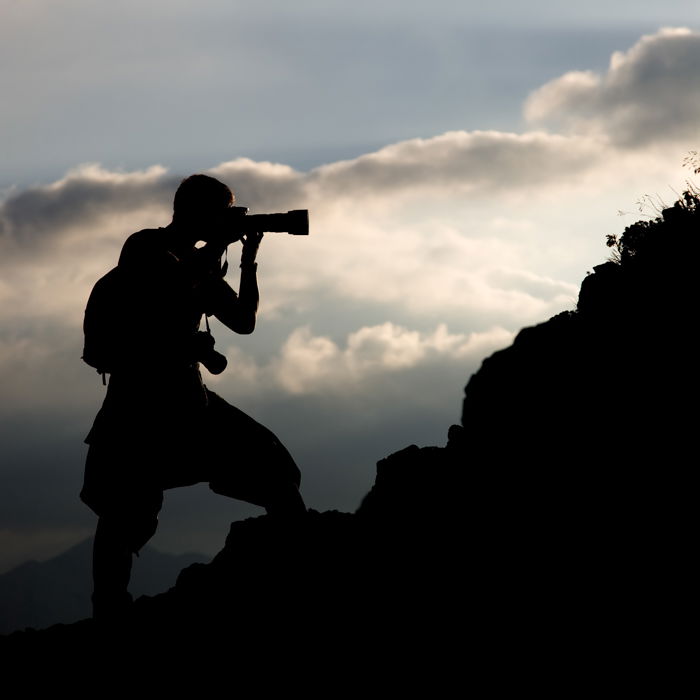
Try Extreme Long Shots to Add a Sense of Scale

A person surfing in low light
The purpose of an extreme long shot is to show the massiveness of the location as compared to your subject.
So if you’re shooting a person in a city for instance, then the buildings and the sky need to take up most of the space.
This angle works much like the regular long shot. The only difference is that your distance from your subject is now more considerable.
In other words, you should be far enough from your point of interest that it’s only a small section in your image.

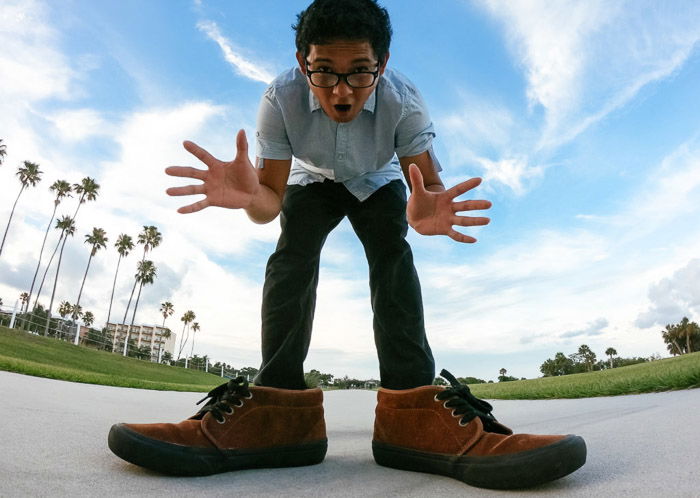
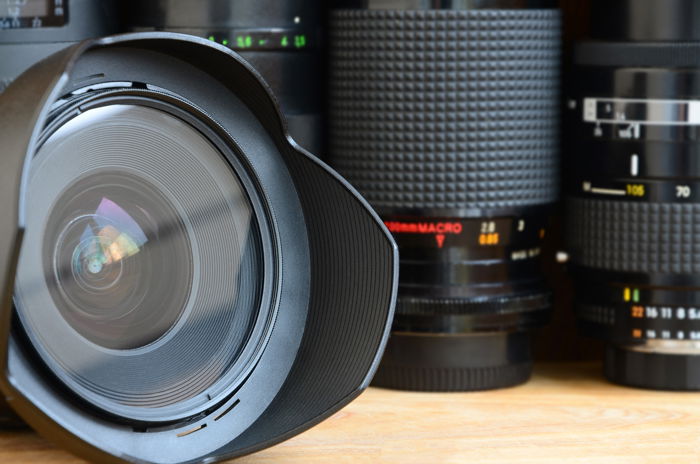
Take a Wide Angle Shot to Introduce Creative Distortions

A portrait of a skateboarder shot using perspective distortion
The wide angle isn’t so much about how you position yourself while taking a photo. Its magic lies in how it distorts the elements in your image.
So you can shoot with it from various perspectives and create a unique result every time.
For instance, you can use a wide-angle shot to make your subject appear bigger. It creates a similar effect to a low angle shot since it throws your subject’s limbs out of proportion.
But you can also use a wide angle for long shots. When you shoot from a distance, it tends to make your subject look smaller. So in this way, it makes the background look more prominent in the image.
Using wide angle also allows you to photograph beautiful landscapes and architectures. You can shoot more of the scenery since it covers a lot more space than a regular lens.

Your use of camera angles makes all the difference when creating exceptional photography. So take your time to learn them to help you engage your audience more.
Remember that it’s not all about the cool perspectives. It’s also how you make people feel about your images in general. 

-------------------------------------------------------------------------------------------

Bird Photography: Exposure, Angles, and Viewpoints


I bet you’re reading this because you love taking bird pictures.

You want to consistently create high quality, professional-level bird photographs (just like this one below).

The glorious beauty for you is that Photzy is bringing you the education that you need to step up your game.

Bird photography is a genre of the photographic arts that requires quite a bit of training to expect reasonable results.

That’s why we knew (here at Photzy) that a single guide wouldn’t get it down – so we devoted a free 10-part series toward this amazing skill.

Today we have part four, which is titled “Bird Photography: Exposure, Angles, and Viewpoints”.

There are definite tricks to getting the correct exposure!

Plus, if you can’t determine the best angle before the bird arrives, you might as well be at home watching Bird World on your TV.

Photographer and author Tobie Schalkwyk lays it all out for you—-

  • How to set up your camera
  • What environmental influences can throw your camera meter off
  • What metering mode to use and why
  • The ISO setting
  • How to “pre-empt” your exposure (SUPER IMPORTANT)
  • Why you should consider using bracketing
  • How the bird influences everything involved with exposure
  • Time of day considerations
  • Watching where the sun is
  • Using artificial light when necessary
  • The importance of background

Every point in this eBook will bring you closer to professional level bird photography!

Photo Credit: Tobie Schalkwyk

 
------------------------------------------------------------------------------------------------
 Sony® PlayStation 5, and other free prizes
 
Monthly SWEEPS  Sony®® PlayStation 5 

No purchase expected or required. To enter, simply complete our Official Entry Form and short survey. You could be this month's winner.  Get started here:  https://tinyurl.com/27ffwmh3


Friday, November 18, 2022

#Focal Length Comparison

10 Best Newborn Poses to Maximise Cuteness


Unfortunately, newborns can’t pose for you on their own – even if you ask politely!

Posing a tiny baby is entirely different from posing men and women. Newborn photography is a unique challenge that needs plenty of patience.

Here are 10 poses that photographers should know when posing a newborn for their photo shoot.

newborn baby in a white blanket  

Always Start With Safety Measures

Always prioritise safety when posing a newborn.

If you are a beginner, stick with simple poses. Work with basic positions and ideas. Then you can add variety by adjusting the hands and legs, your camera angle, the crop and varying props.

Newborns often need props because they can’t hold themselves up.

newborn baby in a cute helmet prop

You don’t need to spend thousands of dollars on fancy studio-level gear. But a few simple, inexpensive items make a big difference in the poses you can create.

Your first go-to item for newborn photography should be a beanbag. Of course, you can buy specially designed newborn beanbags, but a regular beanbag chair will work too.

Beanbags are safe, soft places that you can easily mould to prop the baby up. First, place a blanket or backdrop over the beanbag. Then, you can either adjust the beans inside the actual bag or place rolled-up blankets or towels to prop up the baby.

newborn baby posing on an interesting airplane prop

U-shaped nursing pillows are perfect for safely propping up the baby’s head.

Always keep an adult within arm’s reach. When in doubt, have someone hold the prop in place and composite the arm out later.

newborn baby poses next to a guitar

Let’s have a look at some of the best newborn poses.

1. On the Back Pose

Placing the baby on their back is a safe, simple pose. With a back pose, you don’t need more than a blanket and a soft surface. But you can add plenty of variety by using different props.

Back poses work well for swaddled babies, as well as newborns in their birthday suit! If the baby is nude, make sure you cover them with a blanket to keep it appropriate.

Once the baby falls asleep, you can add variety by taking shots at different angles.

You can try shooting the back pose from straight above. Also, by propping the baby’s head and feet up, you can get a sweet shot from the side without having to move the baby.

2. On the Side Pose

To place a baby on their side, use blankets, towels or the beanbag to elevate the head or feet as needed.

To emphasise those cute fat rolls, make sure the baby’s hands or blanket don’t cover their face.

Side poses work well both swaddled and unswaddled. Again, this pose is easy to work with.

By changing the camera angle, you can make it look like the baby is sitting upright.

Baby Sleeping on side on blanket

3. On the Tummy Pose

Placing the baby on their tummy is harder. Keep the baby in a natural position to make sure the pose is safe. Also, take care not to obstruct the baby’s face.

Prop the baby’s head up higher than their bum with a blanket or a u-shaped nursing pillow.

You can shoot the tummy pose from the side or above. Adjust the baby’s head gently so you can see the whole face if needed. Again, take care to keep the baby comfortable and in a natural pose.

Newborn side pose with a blanket

4. Lying on the Belly With Chin on Hands

This pose gives a dreamy appearance to your shots. The newborn will be on their tummy, with their hands under their chin.

Place a pillow under their baby’s hands, or arrange the props to raise their upper body.

Usually, you can curl the arms under their chin easily. But don’t expect those tiny hands to hold the head up. Instead, rely on the pillow to keep their head in place.

5. Newborn Froggy Pose

This pose is a composite done in Photoshop. Babies can’t hold this position themselves, and it’s unsafe to try putting a baby in the final pose shown in the image without any support.

For the first image, ask a parent to support the baby’s head from above, with the baby’s arms placed on their chin. Then, ask a parent to support the baby’s hands while placed under the baby’s chin for the second image.

Merge these two images in Photoshop and remove the parent’s hands.

It takes a while to create these kinds of images, but the result is cute and this pose is quite popular. Parents often ask for it.

This pose can be dangerous if the baby is not supported carefully, as this is not a natural position. So if the baby gets upset when taking the two images, it’s best to avoid this pose.

Baby in a froggy pose created by composite in Photoshop

6. Potato Sack Newborn Pose

For this pose, you will need some fabric to wrap and curl up the newborn. Being curled up is comforting for babies because this is how they were inside their mother’s belly.

This pose gives an intimate and wholesome image.

You can vary this pose as you wish with props. For example, try using little hats and headbands or any props that you think will work.

Make sure to support the baby from all sides. You can do this with a pillow or blanket. This will give a soft, warm and comfy feeling to your newborn photography.

potato sack pose with green blanket and green hat

7. Tucked in Bed

For this newborn pose, cover the baby with a blanket to show only their head and face. You can place the blanket under the chin, but covering a little can make the image cosier. Make sure not to cover the baby’s nose so that they can breathe safely.

Shooting from above is the best for this pose, as this way you can enhance the small size of the newborn.

Using a cute toy is a great prop for this scene. A toy is also great for scale. You can use the same toy for future photos to show how the child is growing. If you use the baby’s favourite toy, the baby will love recognising it in the image once they are older.

8. Getting Close and Capturing Details

These poses help enhance how small the baby is. It’s popular to take up-close shots of baby hands and feet.

You can use the parents’ hands to emphasise the size differences and capture a warm family moment.

Or, you could also focus on the face of a sleeping newborn to capture the calmness.

The possibilities are endless, but try not to rely only on this technique. Parents will want to make sure they also have images where you can see the entire baby.

Use this style as a part of your newborn portfolio to complement wider compositions.

Capturing a baby's hands with their parents

Close-up of baby's hands and face

9. Pose With One Parent

Your images should show the connection between the baby and their parents.

Parents love to have photos of them holding their baby. Taking shots of the baby with one parent at a time will help you capture their relationship with the baby and showcase their personality.

Ask them to hold the baby close to them. For example, you can ask the parent to give the baby a hug or a kiss. They can hold the baby up to their faces or make them laugh. Let the parent express their connection with the baby.

Baby posing with one parent

10. Pose With Both Parents and Siblings

Involving the whole family helps make the photo session a memorable moment. You should capture the joy this newborn is bringing to the family.

Pay attention to the poses of all the members. They should be relaxed and close to each other. A distant or uncomfortable pose will create tension instead of harmony.

Let siblings play with the baby and laugh together.

Pay attention to where the family members are facing. For example, by looking at the baby or having their eyes closed together, you can enhance their family unity.

If they are looking at the camera, it’s more like a documentary image. This can also work, but be careful to make sure you don’t lose the family’s energy by making the image too formal.

Baby posing with their parents


As a newborn photographer, you might meet babies who can easily get distracted. So, always prepare yourself for a long session because a lot depends on the baby’s mood.

Be careful not to move the baby too much, as you might then have to wait for them to settle. Instead, take as many shots as possible with only minor adjustments to your angle and the baby’s position.

Parents might have ideas in advance that you might not be able to do. Talk to the parents before and during the photography session and let them know if a certain pose is unsafe or if the newborn is not comfortable.

With these newborn photography tips, you’re ready to capture images that parents will love! 

--------------------------------------------------------------------------------

Five Tips for Fantastic Photos of Kids – Free Quick Guide


When it comes to photographing people, children will often be your biggest challenge.

Seasoned portrait photographers have their tricks when it comes to photographing kids.

Karthika Gupta has created an entire career out of family and child photography.

In this guide, she shares five essential skills for getting better photos of children.

Here is what you will learn:

  • How to make the subjects feel comfortable
  • How to generate real emotion and sidestep the fake smiles
  • That making the shoot fun equals success
  • How to learn to read the family dynamic
  • Why structuring the photoshoot is essential but being flexible is critical
  • Why you need to be aware during setup time
  • The positive effect of taking a break
  • The reasons why embracing the chaos will make you a better photographer of children and their families

It’s all here. Grab your copy below.

Photo Credit: Karthika Gupta

 
----------------------------------------------------------------------------------

Turn Your Passion into Profits!

  • Make an extra income from your Photography!
  • Turn your hobby into a profitable passive income
  • Upload and instantly sell to millions of potential buyers
  • Instant Access, Start Today no matter where you are in the world!
  •  Click Here


Thursday, November 10, 2022

#Focal Length Lenses

What Is a Telephoto Lens? (Why and When you Need One!)


A telephoto lens makes far-way objects appear closer to the camera. But, do not think to pull out a telephoto lens only when you need to capture something in the distance. If you did, you would be missing out on some of the biggest reasons to shoot with such a long lens.

In this article, we break down everything budding photographers need to know about telephoto lenses.

a silhouette of a man on a hill shooting with a telephoto lens


What Is a Telephoto Lens?

A telephoto lens has a focal length longer than the diagonal size of the image it takes. In everyday language, it can be any lens that has a long focal length.

Depending on who you ask, some say this length is 70mm or greater. Others would not consider a lens as telephoto until 80mm or 85mm. And others do not use the term until the mid-telephoto range above 135mm.

Telephoto lenses can be zoom lenses, such as 70-300mm. They can also be a prime lens, such as 200mm.

To bring subjects up close to the camera, telephoto lenses need many pieces of glass inside. This often makes them large and heavy. It also makes them expensive.

The long focal length results in a narrow field of view. The angle of view of these lenses is between 30° and 1°. This is useful when you cannot get close enough to your subject.

What Are the Different Kinds of Telephoto Lenses?

Telephoto lenses can be further divided into sub-categories based on focal length.

Lenses between 85mm and 135mm are considered short telephotos. These can bring an object in close and create background separation but to less of an extreme. These focal lengths are popular for portrait photography, product photography, and event photography. The lens offers more background separation without requiring the photographer to stand too far from the subject.

A 135mm to 300mm lens is often called a medium telephoto lens. These focal lengths are among the most popular. They offer a significant reach without a high price tag.

Lenses above 300mm are typically also referred to as a super-telephoto lens. These lenses offer the most reach. If you use a telephoto lens on a crop sensor, it can reach a focal length as long as 1000mm. This also means that they have a narrow field of view, from 8° to 1°. They are often expensive and used by professionals. They are primarily for shooting sports, wildlife, or the night sky.

Due to their size, for using super-telephoto lenses, you always need a tripod. There might be image stabilisation in them. But you will not be able to hold them so steadily that your images stay sharp. Most oversized telephoto lenses have a tripod collar to help support the lens’s weight.

For a quick comparison, look at these images below. The first was shot at 165mm and the second at 300mm.

What to Know About Telephoto Lenses and Sensor Sizes

A 300mm lens on a full-frame camera is a 300mm lens. But change the size of the sensor in the camera body and the angle of view that the lens captures also changes.

A crop sensor, such as an APS-C sensor or Micro Four Thirds, makes a telephoto lens appear to bring the subject even closer.

The optics in a lens projects the image onto the sensor. If that sensor is smaller, the image is cropped. Cropping the image makes that distant subject feel even closer.

That crop is why photographers who need to capture close-up images of their subjects sometimes prefer crop sensor cameras. This is even though full-frame cameras usually offer better image quality.

For example, for macro or wildlife photography, you may want to use a crop sensor camera. With one of these, you can reach longer focal lengths.

With Micro Four Thirds, the crop factor is 2x – which means a 300mm lens shoots like a 600mm lens.

That allows photographers to get up much closer with a smaller lens. But unfortunately, this can also mean lower image resolution and lower image quality.

an image of two football players fighting for the ball using a telephoto lens

How to Deal With Camera Shake

The camera settings that work with a wide-angle may create motion blur with a telephoto lens. That is because telephoto lenses are more sensitive to camera shake.

The magnification of the lens can exaggerate even the most minor camera movements, thus creating a blur. Telephoto lenses are also heavier, which means your hands are also more prone to shake.

As a general ‘rule’, the denominator on the shutter speed should be at or greater than the focal length when shooting handheld. With a 100mm lens, you should shoot at a minimum of 1/100 of a second. For 200mm, at a minimum of 1/200 of a second.

Heavier lenses may need an even faster speed. To shoot with a telephoto lens and a slower shutter speed, you’ll need a tripod. The rule isn’t true 100% of the time, though. Some stabilized lenses (or lenses attached to a stabilized body) can shoot a bit lower without the shake. This technology utilises gyroscopic sensors and motors to stabilise any movement in the lens elements. This way, it can prevent blur in lenses with longer focal lengths too. A lot of new camera models have in-body stabilisation (IBIS).

a closeup of a telephoto lens's manual settings

What to Know About Telephoto Lens Apertures

Like any lenses, telephotos are more expensive if they come with a wide maximum aperture. But here you cannot avoid buying an expensive one. With telephoto lenses, you usually need to use a fast shutter speed, so you will need a wide aperture. It’s necessary to keep up with the shutter and let enough light in. Also, a lower f-number usually means a better image quality.

Telephoto lenses often are zooms. The cheaper alternatives operate with a variable aperture. You can see it written like 70-300mm f/4-5.6. The more expensive ones have a fixed aperture (usually f/2.8 or f/5.6), and their widest opening likely depends on their focal length.

If you wish to use faster lenses, you can also opt for a prime telephoto lens with a greater f-number and macro capability. Prime alternatives often come with better image quality and macro capability.

a closeup of a prime lens with a macro lens in the background

How Telephoto Lenses Affect the Background

Sometimes, photographers choose a telephoto lens because of what it can do to the background of the shot. With a telephoto lens, the background appears closer to the subject than with a wide-angle. In fact, the longer the focal length is, the less exaggerated distances seem to be.

Lens compression is a result of standing further from the subject rather than the actual lens optics. Because of lens compression, a telephoto lens can help fill in the background with less empty space. Lens compression will also help the background to appear more blurred. A common misconception is that using a telephoto lens creates a shallow depth of field or creates more background blur.

A telephoto lens does not affect the math for calculating the depth of field. But, the background compression brings that blurry background closer. This gives the appearance of having more blur.

an image of a deer in a forest using a telephoto lens

How Telephoto Lenses Affect the Subject

The difference between the background of a photo shot with a wide-angle and one shot with a telephoto is significant. But the subject itself will also have some subtle differences too.

Like the distance between the subject and the background is compressed, other distances in the photo appear to be shorter too. A wide-angle lens will make the eyes, nose, and mouth appear farther apart in a portrait. With a telephoto lens, those facial features appear closer together. This typically creates a more flattering portrait.

The effect is the same for subjects other than portraits too. Remember that a telephoto lens makes distances seem shorter in the image. This is a kind of distortion called pincushion distortion, which is the opposite of barrel distortion. This can happen in zoom lenses and prime lenses too.

Due to the focal lengths, the angle of view of the telephoto lenses is relatively narrow. The lens sees a smaller part of the scene than the camera sensor would be able to detect. So it needs to stretch the image to fill the frame. This can be a bigger problem in cameras using a bigger, full-frame sensor. It’s more visible towards the edges of the image.

To avoid this distortion, you should do profile corrections during post-processing. If you want to create the sense that the objects in the photograph are closer together, use a telephoto. To exaggerate distance in your photography, use a wide-angle.

a portrait of a woman shot with a telephoto lens


Telephoto lenses are generally great for situations when you cannot get close enough to your subject. If you want to get a shallow depth of field or avoid barrel distortions, these lenses are also great for you. Experiment with different kinds of photography, and you are going to see what lenses you need. It can happen that you will not need a telephoto lens at all. But now you know what to use telephoto lenses for. 

---------------------------------------------------------------------------------

The Photoshoot Is Over: Now What?! – Free Quick Guide


As a photographer, you probably know that the photo shoot isn’t just taking pictures.

It lasts much longer than just this specific hour.

There are a lot of things that need to happen beforehand: countless exchanged emails, planning, organizing, buying props, searching for the perfect location, and also the less fun things like invoicing.

After all that planning, the last thing you want to do is have a misstep!

Today, we’ll be talking about what should happen after you come home from a photo shoot.

We’ll cover…

  • How and why to back up your photographs
  • How to select the pictures for editing
  • How to keep your files organized
  • How to implement a routine for editing and delivering images
  • Why it’s essential to have your gear in one place

Photo Credit: Brooke Cagle

-------------------------------------------------------------------------------------------
 Photo Income

Friday, November 4, 2022


The 50mm f/1.8 Lens Review & Guide

Tags: Shutterbug Photography, Rookie Photographer 


When it comes down to quality for price, bang for buck, a 50mm 1.8 is one of the best lenses on the market and an upgrade I would recommend to every new SLR user.
A very small investment of $105 for the Canon EF 50mm f/1.8, or slightly more for Nikon, will give you one of the best upgrades you can make to a camera.

The Right Lens for Your Camera

If you’re a Canon user, you only really have one choice, the Canon 50mm f/1.8, which I linked to above.
If you’re a Nikon user, it’s a little bit more complicated.

You actually have three choices depending on which camera you have.

If your camera has an autofocus motor, you can buy the Nikon 50mm f/1.8D AF.

The following Nikon cameras don’t have one:

  • Nikon D40
  • Nikon D40X
  • Nikon D60
  • Nikon D3000
  • Nikon D3100
  • Nikon D5000
  • Nikon D5100.

If you have one of the cameras mentioned, your camera body doesn’t have an autofocus motor built in; you have to buy a lens that does – marked with an ‘AF-S’.

Unfortunately for you, this is more expensive: the Nikon 50mm f/1.8G AF-S.

Now, regardless of whether or not you have an autofocus motor, you can buy the 35mm f/1.8, which will provide a better viewing angle on a crop sensor (you’re likely to be shooting on one of these) – Nikon 35mm f/1.8G AF-S.Blond female singer with a guitar

General Review

There are advantages of buying more expensive lenses, such as the Nikon ones listed above, as they have better build quality.
Before I upgraded, I used my 50mm regularly – extensive usage like this takes its toll on the plastic build (glass inside) and toy-like features. The lenses are very light and small; ideal if you’re looking to upgrade from your kit lens but don’t want to carry around a load of extra weight.
It’s true that you get what you pay for but, for a couple hundred bucks, you can produce some astounding results from these lenses.
The optics on prime lenses (no zoom) are usually much better quality; they’re not making as many compromises. With this, the price comes down, hence I endorse them so much.
Having used both the Canon and the Nikon, I can tell you that the focus does tend to suck on these lenses; they’re slow and inconsistent.
The small focus ring on each lens doesn’t help much with manual focus either and the focus tends to be quite loud – watch out for that if you shoot video regularly.
That being said, I’m looking back on these lenses after being used to using much more expensive lenses; my judgment has changed somewhat. You may not notice so much of a difference if you’re using cheaper lenses to begin with.landscape panoramic photo of green fields
Because of the crop factor on these lenses, the Canon feels more like an 80mm lens, the Nikon 50mm is more like a 75mm lens and the Nikon 35 looks like a 52.50mm lens.
If you do choose a 50mm lens and you’re shooting on a crop sensor, expect everything to be quite zoomed and remember, this isn’t necessarily a bad thing. They make ideal cheap portrait lenses in terms of focal length but expect to have to move back if someone asks for a group shot.
If you’ve been reading this blog for a while, you should have expert knowledge about how perspective changes at different focal lengths. As I mentioned in my post on the crop factor however, putting your full frame lens on a crop sensor body will not change the perspective – only crop it.
This is a good thing because the way we see through our own eyes is generally considered to be similar to about 45mm; by using a 50mm you’re quite accurately representing our natural view without compressing the perspective too much.
There are obvious downsides to cheaper lenses but don’t be put off. Once you’ve put a 50mm f/1.8 on your camera, you’re not going to want to take it off – I know I didn’t.
It’s a tool for every photographer’s arsenal and I personally don’t know anyone who has regretted the purchase. Enough of telling you why it’s so great, let me show you…creative water photography with colourful bokeh background

The Lens Guide

The very first thing you’ll notice about your new lens is the ability to shoot in much lower light without having to use the flash.
This is because of the wider aperture which allows more light in. If you don’t know your aperture scale, I suggest learning it. For now, let me tell you that if your lens went as wide as f/3.5 before, it now lets in four times as much light at f.1.8.
When I say wide, I’m talking about the size of the hole in the lens that the light passes through.
The photo below was taken indoors in a dark room at f/1.8 for 1.200 of a second at ISO 100.pet photo of adult Airedale terrier
The next thing you’ll notice is that the depth of field (DoF) can go remarkably shallow. This is because of the way the light passes through the lens at a wider aperture.
The wider the aperture, the shallower the depth of field. This can be used for creative effect – it works really well. A common problem with people who get a 1.8 is that they think it looks so good that it’s all they ever use; use it sparingly or it’ll lose its appeal.
Notice from the photo below that the glasses on the face are in focus but the end of the hat and chin are out of focus. This was also shot at f/1.8.man wearing glasses and baseball cap
In the photo above, you may notice the circular shapes of colour in the background – this is what’s referred to as Bokeh. Simply put, it’s the aesthetic quality of out-of-focus areas of a photograph.
Bokeh relates to how nice the background blur looks when out-of-focus.
When you’re shooting at wider apertures, the effect of the bokeh is accentuated; it will look a lot more prominent than anything you would have seen with your kit lens.
Because this is a cheap lens, made to a price, it’s not the highest quality (which you may see from the photo above) but, if you use it properly with distant light, you can produce some really nice effects.
Again, the photo below was shot at f/1.8.outdoors image of a grill in a garden
Selective focus with an f/1.8 is something that you may not have much experience with.
Because the depth of field can be made to look so shallow, it’s even more effective with this lens. You can focus the viewer’s attention onto a certain part of the photo, making them want to explore the rest at the same time.
It’s a powerful technique but, like everything, remember not to overdo it.portrait photography of three musicians during an outdoor concertWhen you’re shooting wide open, you’re going to produce some very soft photos. If you want these to be sharper, you need to narrow your aperture a fair bit.
I find around f/8 to be the sharpest point on my Canon 50mm f/1.8.
The photo below was shot at f/7.1 and manages to keep the whole of the subject in focus while making sure plenty of detail remained in the background – you can make out the burnt down pier.
Experiment with wide apertures at first but you may find that narrower ones suit your style a lot better.photo of male guitarist singing in outdoor setting with ocean background
As I mentioned earlier, the crop factor does make this lens appear more zoomed than you may want it to be. That can’t really be helped unless you opt for the 35mm – it’s really a matter of personal preference and budget.
It’s all about working with the gear you have at your disposal.
When I took the photo below, I had no tripod on me, just my 50mm lens.
Because I knew what effect this would have on my photos, I found a position that would work for me rather than simply giving up; I would usually have shot this photo with a wider angle.
I found a position on a dock further away and shot this photo at f/4.5 for 8 seconds – I was very happy with how it came out.
nighttime photography of boats in a harbor with water reflection of town lights
I’ve spoken a lot about f/1.8 but the lens aperture will go as narrow as f/22, which is fairly common.
This will give you a much deeper DoF so that you can have your background and foreground in focus.
The photo below was shot at f/22 for 4 seconds. As you can see, the deep foreground is in good focus and you can still work out all the minor details in the background on the pier.
It’s important to remember that this lens does have more uses than just low light photography or shallow depth of field.landscape photography of a pier with rocks in the foreground and boats in the background
Finally, as you start to collect more gear, you can use it to make your photos look even better.
A 50mm lens is great but, when you use it in conjunction with an external flash unit (and off camera transmitter for the photo below), you’ll get even better results.
Like I said before, it’s about working with what you’ve got – when you have a little bit more, it can become a lot easier (when you know what you’re doing) to get better shots.close-up of frozen berries covered in snow during the winter 

Camera Basics Series: Zoom Lenses Explained – Free Quick Guide


Buying lenses for your camera can be an exciting and overwhelming task.

There are so many to choose from, but how do you know which ones to invest in and which ones will work the best for you?

There are two general types of lenses for you to choose from – zoom lenses and prime lenses.

This guide will focus on zoom lenses, but it will also touch on the differences between a zoom lens and a prime lens.

It is important to know the difference between the two and what they both have to offer.

Here is what you will learn:

  • What is a zoom lens?
  • What is focal length, and how is it measured?
  • What are the differences between a zoom lens and a prime lens?
  • What are the advantages of a zoom lens? What are the disadvantages of a zoom lens?
  • How to decide which zoom lens is right for you.

Grab your free copy now.

Photo Credit: Garrett Morrow

 
----------------------------------------------------------------------------------------

Photography Books