Thursday, April 22, 2021

Being a Wedding Photographer


12 Best Things About Being a Wedding Photographer

Tags: Photography for Beginners, Wedding Photography,  DSLR


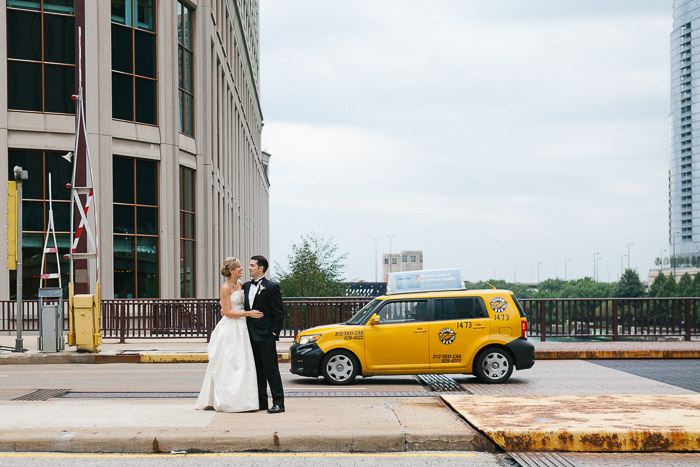
1. You’re Part of Someone’s Special Day

Weddings are truly one of the most special moments in a person’s life. There is so much emotion all around and people seem to really put away their differences (for the most part) and come together to celebrate as a family.
Being surrounded by all that love and warmth is something I really enjoy. The way a mom’s eyes mist up when she sees her son all grown up ready to start his own family, that instant when a dad realises that his little girl is not so little anymore, the first kiss between a married couple!
What can I say – I am a hopeless romantic at heart and really enjoy 
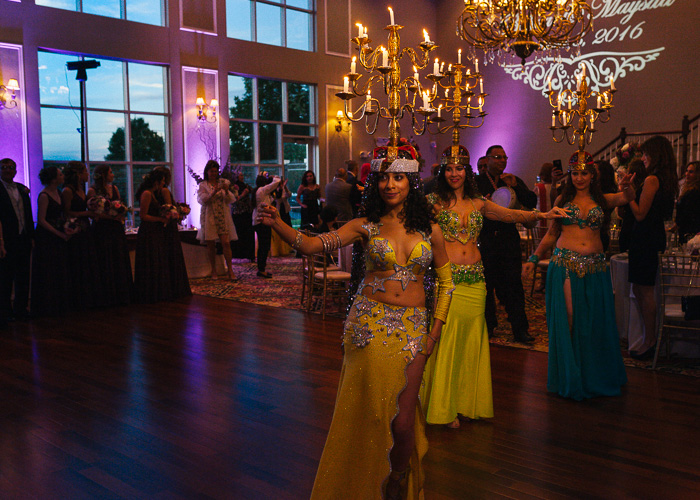
being part of someone’s special day. There is always something going on and each wedding I photograph is different from the previous one.
You get to spend the day capturing romance, laughter, joy, anticipation, excitement, and many other photographic moments for your clients. 

2. Wedding Photography Is About More Than Just Photos

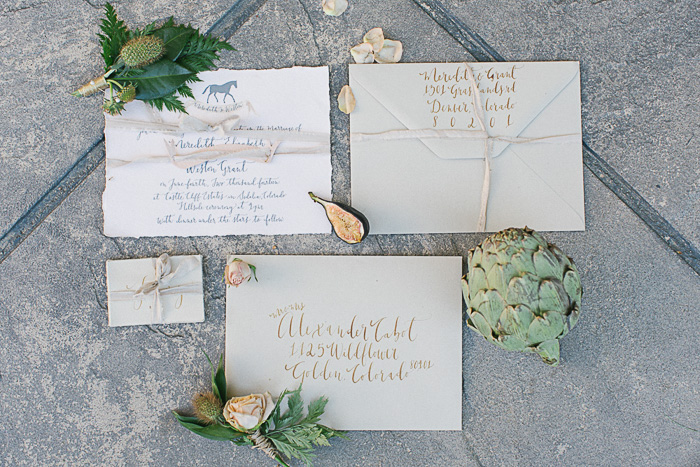
As a wedding photographer, I find myself wearing so many different hats throughout the day. I am working through many different styles of photography like candid shots, family portraits, environmental details, food and florals.
And I’m also using soft skills like relationship building, emotional support, coordinating family dynamics, easing last minute nerves and problem solving in a fast paced environment.
Sometimes bridal flowers don’t arrive on time or the bride is missing her shoes and cannot remember where she put them. A lot is happening and often at the same time.
My multi-tasking skills have definitely vastly improved since I became a wedding photographer. 

Beautiful moment of father kissing the brides head captured by the wedding photographer
Formal wedding photos as well as candid moments document a couple’s special day.

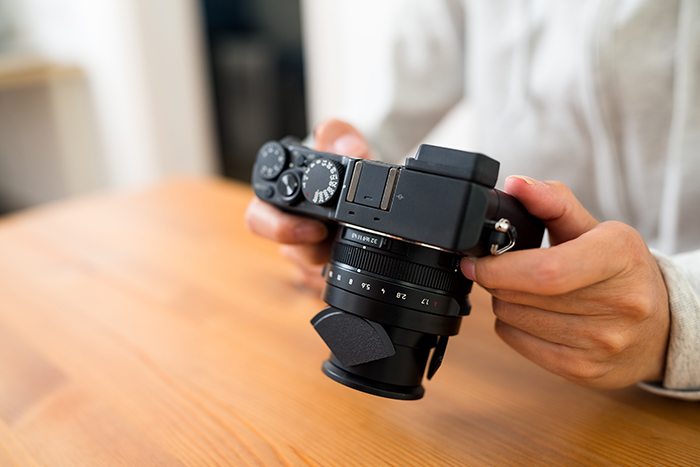
3. You’ll Develop Great Technical Skills

There is so much more to taking a photo than simply clicking the shutter. A lot of things need to align in terms of lighting, composition and subject matter. These are particularly important when you are taking wedding photos.
There have been weddings where I have had the perfect light, location and couple whereas other times everything that could go wrong, went wrong. Bad weather forced the ceremony to be moved to an indoor location with terrible lighting and I had to perfect using multiple off camera flashes very quickly.
Oftentimes you don’t have the luxury of analysing all the factors at your own pace. During a wedding, things move very quickly and you have to react to all that is happening with a sense of urgency.
Wedding days can also be long in terms of hours where you have to be fully functional both mentally and physically. If anything, photographing a wedding makes you stronger in terms of your technical, physical and emotional skills.
Making split-second decisions also become second nature as you learn problem solving skills with so much more confidence.

4. You’ll Recognise Story-Telling Photography Moments More Easily

Weddings are a treasure chest of multiple stories built in throughout the day. As you photograph a wedding, you learn to recognise when a beautiful story is being played out right in front of you complete with characters, outfits, props, emotion and action. You just need to know where to look.
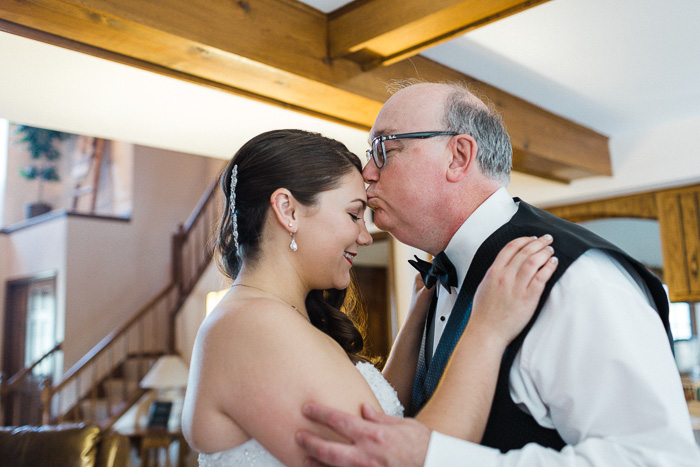
A father-daughter exchange, a bride reading a letter from her groom, a mother fixing her daughter’s veil, mother and son sharing a dance – these are just a few of the wonderful stories that you get to experience during a wedding.
Making sure you capture all these moments throughout the day will help you understand the art of visual narration and how to add depth to your photos so much better. 

Humorous wedding photo of seven groomsmen sitting on a wall, all wearing yellow socks
Some stories are just too hilarious to not capture via photos!

5. You’ll Build Relationships Within the Industry

The wedding industry is comprised of so many incredibly talented vendors and creatives. A wedding photographer is one of the most important people at a wedding.
Many of the vendors really look to the photographer to not only capture the couple with their product and/or service but also to showcase their work and talent in a professional light. Be good to the vendors you work with and you will make friends for life.
These people know and understand what it is like to work in the wedding industry and wedding market, and are always willing to go the extra mile for colleagues/peers who treat them right.
I have made so many amazing friends in this industry and have enjoyed building mutually beneficial relationships with many vendors. They are an amazing source of support, advice, and friendship!

Personalized wedding invitations displayed on stone
A lot of vendors put in a lot of hard work to make a wedding beautiful all around.

7. You’ll Become More Creative

Wedding photography can be a great way to explore and nurture your creativity. Doing something different and outside the box will get your work noticed among many other photographer who might be just happy with the status quo. Give yourself permission to explore your creativity.
Perhaps get the ‘safe’ shot and then try the same photo in a different light and technique. This sort of creative freedom of expression is really great for your growth as an artist.
And brides and grooms are always excited when they get to see themselves in atypical wedding photos.

A couple kissing in front of a textured wall with a single light source
Thunderstorms and lighting did not dull this couple’s love. We found a textured wall with a single light source and I created some of my best wedding bridal portraits.

Additionally, no two weddings are ever the same. Work is always interesting and challenging and never mundane or boring.

8. You’ll Have a Diverse Photography Portfolio

If you have been in the photography industry long enough, you know how competitive the market is. Photography is a field where the barrier to entry is relatively low based on the easily available technical education online and the price of an entry level DSLR camera.
It seems like every day thousands of people say they’re a photographer because they have a camera and took a 1-hour online class.
If you have been doing this for a while, you know that one of the toughest things about being a photographer is getting a steady stream of clients.
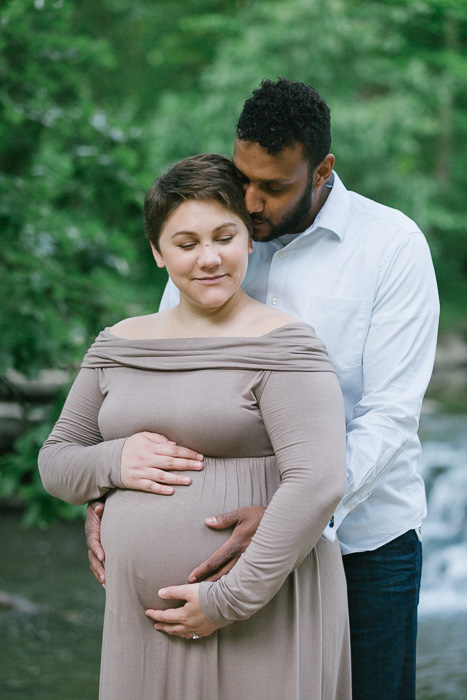
The good thing with wedding photography is that if you do a good job with a client, they are likely to keep coming back to you for more life events like maternity photos, baby photos, family and friends engagement photography etc.
And they will also refer you to their friends.

Romantic shot of a man embracing his pregnant wife taken by a wedding photographer
This lovely couple had me photograph their wedding and their maternity photos.

9. You’ll Expand Your Cultural Repertoir

I love photographing weddings of other cultures and traditions that are different from my own. They help me get insight into people from other cultures and make me so much more knowledgeable in how they think and behave.
Plus I get to interact with people from all walks of life and always walk away learning something new.
If you are a destination wedding photographer, then you get to travel the world to do what you love to do – can you think of a better way to earn a living?
Destination wedding gigs are certainly a lot harder to get and take a lot of work to get your name out there enough to be hired but it is completely possible. 

Dancers at an Arabic wedding
My first time in an Arabic wedding was such an incredible cultural experience.

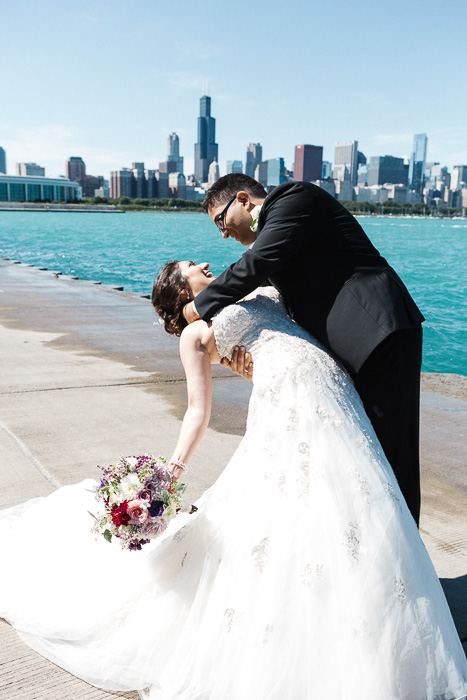
10. You Get to Photograph Happy Moments

People spend many hours preparing and getting ready for their big day. More often than not, professional hair and makeup is involved, fancy clothes are worn and people are happy and look beautiful not only from the outside but also inside.
The joy that radiates from a happy bride and groom is infectious and you cannot help feel happy and euphoric to photograph them on one of the most important days of their life.

Fun wedding photo of a couple embracing in front of a river
Every couple radiates a beauty from within on their wedding day. Strive to capture it.

11. Your Work Can Have a Significant Impact

Take away all the superficial elements for a moment and really think about what wedding photography is all about. It is the unique opportunity to capture an important day in someone’s life and give them the gift of freezing that moment in time for all eternity.
How often have you looked at your parents’ or even grandparents’ wedding photos and shed happy tears for the joy of being a part of that experiences via the images. The albums and photos you create for your clients become treasured family heirlooms that are passed down from generation to generation.
This intrinsic value is becoming more and more apparent as wedding photography is trending towards documenting the feelings and emotions of the special day as opposed to just a traditional wedding portrait taken in a studio setting. 

Sweet wedding day moment of a bride hugging her father in front of a fountain
My bride not only had a first look with her future husband but also her dad. He got to see his little girl in her wedding dress for the first time!

12. Your Schedule Will be Flexible (Mostly)

In most countries, weddings are very seasonal. This means that there are some months in the year where you will be really busy. But other months might be light in terms of photography work.
This can mean a break from photographing weddings and focusing on other aspects of your business like marketing and networking.
Additionally, if you have a family and kids, this means you can spend more time at home during the off-season. It can give help you achieve some work/personal life balance.

Wedding photography is truly an amazing gift that we photographers give to our clients. Do the best you can to give everyone a great experience when they have their picture taken. You’ll make people happy and appreciative of what you can do for them.
Beyond the money, the fame and the creative satisfaction, that’s the most exciting part of being a wedding photographer.


---------------------------------------------------------------------------------------------------------------------

PHOTOGRAPHY FREEBIE:

How to make money with your Photography even if you're not a Pro.

Copy & paste this link into your browser, click ENTER, and enjoy: 

https://mrdarrylt.blogspot.com/2020/01/how-to-make-500-month-from-your.html

                                                         or

https://www.photography-jobs.net/?hop=darryl54

 ----------------------------------------------------------------------------------------------------------------------

Visit me on Facebook and post your pictures.

https://www.facebook.com/Darryl-T-363867387724297/  
----------------------------------------------------------------------------------------------------------------------
Need a camera?  Try this link (Tri State Camera) for discounted prices:  https://ebay.to/2Smb1ho


Monday, April 19, 2021

6 Things You Should Know About Mirrorless Cameras

Photography for Beginners, Mirrorless Cameras, New Cameras


If you are shopping for a new camera, the hype of the moment is the so-called mirrorless camera.
But should you buy one? In this article, we will discuss 6 things you should know about mirrorless cameras.
Have a read and then decide if mirrorless is the way to go.

What Is a Mirrorless Camera?

As the name suggests, mirrorless cameras have no mirror. This is unlike digital single reflex cameras, better known as DSLRs.
The mirror has been in use since the 1950s, so why change it?
There are at least three good reasons to remove the mirror:

  1. no more delicate and complicated mechanism;
  2. reduces camera shaking;
  3. a more compact and light camera body.

An electronic viewfinder replaces the mirror system. This is a small, high-resolution LCD screen.
The image below shows old Olympus OM-1 (35mm film) and a modern Olympus OM-D EM-5 Mk ii.

Diptych showing the mirror in the Olympus OM-1 SLR camera (left). On the right no mirror is present the interior of the modern Olympus OM-D EM-5 Mk ii mirrorless camera
The mirror in the Olympus OM-1 SLR camera (left). On the right no mirror is present the 
interior of the modern Olympus OM-D EM-5 Mk ii mirrorless camera, and the sensor is visible.

A small disclaimer: I am a long time mirrorless camera photographer and enthusiast. I think they are the future.
But, if you are considering to go down the mirrorless camera road, you should know that it’s not all roses.

6. Mirrorless Cameras Are Smaller and Lighter Than DSLR: The Size Myth

The mirror (with all the other related parts) is not there anymore. This allows the camera body to be smaller and lighter than usual DSLR bodies.
This is particularly good for pro-graded gear.

The Myth

A mirrorless camera is the perfect camera to bring everywhere. They are small and light.
If portability is something you value, you should buy one of these cameras over classic DSLR ones.

And Now the Truth

This is historically accurate. The first mirrorless were Panasonic and Olympus cameras. They had no electronic viewfinder (or it was optional).
They also sported a micro four thirds, MFT, sensor. This is half the size of a full frame sensors.
But what about today’s mirrorless cameras?

One of the first Olympus mirrorless cameras: the EPL-2 with MFT sensor and no EVF.

Olympus is still working with the MFT format.
Other competitors like Fujitsu, Sony, Pentax, Nikon and Canon? They’re using APS-C and full frame sensors instead.
But the size of a full frame sensor should not change the size of the camera body in a significant manner, right?
True, but these cameras are ILC cameras. This stands for Interchangeable Lens Cameras.
The size of a lens determines the amount of sensor that is illuminated. This means it affects the size of the image the lens projects on the sensor.
Very compact and lightweight interchangeable lenses can illuminate MFT sensors.
But for full frame sensors? They need lenses that are as big as those used by DSLR full frame cameras.

The Olympus EPL-2 with the 14-42mm lens - mirrorless camera facts
The Olympus EPL-2 with the 14-42mm (28-84mm equivalent focal length on full frame, 
or EFL), a classic kit lens. The SD card is there to set the size scale.

An there’s another drawback. The camera body is nice and small. This means that the camera-lens system is unbalanced on the lens side.
This is tiring and annoying when photographing handheld with big lenses.
If you need an adapter, things get even worst. The heavy lens, in fact, will be pushed further in front the camera body. This will make an already unbalanced system worse.

Top view comparison of a 28mm wide angle lens on the old OM-1 (right) and on the OM-D EM-5 Mk ii (left).
Top view comparison of a 28mm wide angle lens on the old OM-1 (right) and on the 
OM-D EM-5 Mk ii with necessary adaptor (left). The lens sticks further out with the 
adaptor, moving the weight far from the camera body.

This also reduces the portability of a full frame mirrorless system. What you gain is only on the size and weight of the camera body only.
But to make things more ergonomic, the bodies are often not made as small as they could be.
Dedicated accessories even exist to make the body larger and easier to hold.
Below is a comparison between the Olympus OM-D EM-5 Mk ii and the EPL-2. You can see them with and without the accessory power grip for the OM-D.

Diptych comparison between the EPL-2 and the OM-D EM-5 Mk ii with and without power grip.
Comparison between the EPL-2 and the OM-D EM-5 Mk ii with and without power grip.

Removable battery grips are an interesting solution. It allows the camera to stay small when paired 

with small and lightweight lenses.
And ergonomics are improved when using heavy and long lenses.

Verdict

As you see the Size & Weight argument is not a particularly good one. Especially if you care about portability.
If this is your case, try a high end bridge camera such as the one from the Sony RX10 family. Add a fast superzoom lens and it can be a better solution.

Diptych of the OM-D EM-5 Mk ii with power grip Vs the Sony RX10 bridge camera - mirrorless camera tips
The OM-D EM-5 Mk ii with power grip Vs the Sony RX10 bridge camera

5. Mirrorless Cameras Are WYSIWYG Cameras

Mirrorless cameras have a much stronger advantage over DSLR. They are What You See Is What You Get kind of cameras. And this will make you improve faster as a photographer.
How? They always use the electronic viewfinder (or live view) to show you what the mirrorless digital camera sees. And the effects of changing camera settings (shutter speed, aperture, ISO). You see these in real time.
The video below shows the effects of changing the shutter speed in real time.

A gif showing settings applied real time to the scene displayed on the LCD or EVF.
Settings are applied real time to the scene displayed on the LCD or EVF.

This will help you understand the exposure triangle, aperture, shutter speed, etc.
It will also make it easier to work in manual mode, particularly for photography beginners.
Another benefit is that it will help you to manual focus in the dark. Especially if you are trying some astrophotography, nighttime or interior photography.
Overexpose the image to brighten the scene enough that it will be easy to focus. Then return to the proper settings for taking the photo.

4. Mirrorless Don’t Suffer From Light Leakage During Long Exposures In Daylight

If you have an optical viewfinder, light can enter your camera from it.
In the photo below, the image you see on the mirror is coming from what the viewfinder sees.

Light from the optical viewfinder of my OM-1 forms this image on the mirror.

Light leakage from the viewfinder is not usually a problem. But if you’re doing long exposures, you should cover it. Your eye will not block it and light can creep into the body ruining your image.
If you look at that strap that came with your camera, you will find a small black piece of soft rubber. That is what your camera maker wants you to use to close the viewfinder during long exposures.

The cover for the optical viewfinder of a Canon DSLR.

Since mirrorless cameras have no optical viewfinder, you don’t have to remember this. And you can’t do anything even under harsh midday sun(and I do infrared photography with a mirrorless…)

3. Battery Life Is Poor With Mirrorless Camera: The False Power Problem

Mirrorless cameras drain their batteries faster than DSLRs. Even if the rear LCD is OFF, it uses energy to power the electronic viewfinder.
On average, battery life for entry level mirrorless cameras is about 300 shots. The high end camera Sony a7 iii reaches an astonishing 700 shots.
Entry level DSLRs also allow you to take around 400 shots with a charged battery. Up to 1000 shots for the pro models (e.g., Canon 80D).
People seem to make a big deal out of that. To me, this is a false problem.
How many of us shoot more than 300 images without the possibility to replace the battery with a spare one? Do we need to shoot 900 photo with a single battery?
Also, as I said before, power grips are available for many high end mirrorless cameras. These allow you to use two batteries at the same time.
I do astrophotography with my Olympus OM-D EM-5 Mk ii. I am out there at night, in the cold and/or humid weather.
Even when I’m taking 200+ images of the starry sky, I never run out of battery. Even without using the power grip.

2. Mirrorless Have Fewer Accessories Than DSLR

That may be true, at least for MFT mirrorless cameras. Third party lenses are scarcer than in the DSLR world. There are only some from Sigma (3 lenses), Tamron (1 lens) and Samyang/Rokinon (>3 lenses).
Lens adaptors are usually available to adapt lenses with a different lens mount. You can pair mirrorless cameras from Canon and Nikon with existing DSLR lenses.
There may also be fewer models of flashes and remote shutters than those available for DSLR.
Once again, though, this is something of a false problem. Makers of camera accessories follow the market. And the mirrorless market is growing by the minute.
They will start building dedicated accessories and lenses soon.

1. Pros Don’t Use Mirrorless Cameras: The Quality Myth

This is the most common argument against mirrorless cameras. Professional photographers are still using DSLR.
That’s not true. There are many world-renowned photographers who have switched to mirrorless.
One of the first to do so was travel photographer Trey Ratcliff.
Other notable photographers include Andy Mumford and Phil Norton.
Image quality, today, is all about the lens and sensor (and electronics) combination. The mirror has no role in that. If you want to give the mirror a role, it’s the bad guy slapping around and blurring your long exposures.
There are many pro graded lenses out there for mirrorless cameras, so image quality is not an issue.
There are two very practical, reasons why most pros are still using DSLR cameras:

  1. They have spent a little fortune on photography equipment. Switching is expensive;
  2. People tend to associate small cameras with amateurs. And big, bulky DSLR with large lenses with professionals. If you are a wedding photographer with a small Olympus PEN-F, you will not attract many customers. And those you will get will give you weird looks.

Conclusion

If you are in the market for a new camera and you are interested to go mirrorless, here is what you should know:

  1. Mirrorless are not always the small and light package people say. The most compact ones are MFT mirrorless cameras. Their smaller sensor can be illuminated with small, compact, lenses;
  2. A mirrorless camera can make you become a better photographer. You will be able to see the effect of your settings in real time;
  3. Yes, mirrorless has shorter battery life than DSLR. But do you really need continuous shooting of more than 300 photos without changing the battery?
  4. There is a larger number of camera accessories and third party camera lenses for DSLR than for mirrorless. But the situation is changing as the mirrorless camera gains more and more market share;
  5. Image quality is on par with that of DSLR cameras. Many pro photographers (particularly travel and landscape photographers) have completely switched to mirrorless camera systems.


---------------------------------------------------------------------------------------------------------------------

PHOTOGRAPHY FREEBIE:

How to make money with your Photography even if you're not a Pro.

Copy & paste this link into your browser, click ENTER, and enjoy: 

https://mrdarrylt.blogspot.com/2020/01/how-to-make-500-month-from-your.html

                                                         or

https://www.photography-jobs.net/?hop=darryl54

 ----------------------------------------------------------------------------------------------------------------------

Visit me on Facebook and post your pictures.

https://www.facebook.com/Darryl-T-363867387724297/  
----------------------------------------------------------------------------------------------------------------------
Need a camera?  Try this link (Tri State Camera) for discounted prices:  https://ebay.to/2Smb1ho


Thursday, April 15, 2021

Ebay Camera Deals


----------------------------------------------------------------------------------------------------------------------------------------
Photo Shutterbug Black T-Shirt Front
https://teespring.com/photo-shutterbug?pid=328&cid=6276

Monday, April 12, 2021

How To Easily Find Abandoned Places for Urbex

Tags: Photography for Beginners, Urbex, Colonial Building


One of the most exciting types of photography you can try is urbex. Urbex stands for urban exploration. It describes finding locations in an urban setting that are interesting to photograph.

So now you might be wondering how to find abandoned places near you. In today’s article, you’ll learn exactly how to do this.

Photo of an old abandoned building
This old colonial building has been abandoned, but still looks amazing.

What Is Urbex?

Urban exploration is a lot more involved than looking around a city. In fact, some urbex photography occurs in places that aren’t strictly speaking urban.

The majority of urbex photography happens within cities though. The locations are places that have been abandoned. The following are popular types of photos to take in these locations.

  • Portraits – You can find some of the best backdrops for portrait photography in an urbex setting. Urban decay works very well. The natural lines in buildings, such as doorways, are great. And if you happen to be in an industrial complex, then lines of pipes might be a possibility.
  • Cityscapes – If the building you’re entering happens to be tall, the rooftop may offer a great view of the city. In fact, roof-topping is a sub-genre of urbex photography. It might actually be more popular than urbex itself.
  • Architecture – A lot of buildings have amazing architecture. Especially if the building you’re accessing used to be a factory or power station.
  • Abstract – Plants growing through the walls, dusty floorboards, or light coming through broken windows. These all make for great abstract photography. They can be a legitimate main subject for your photo.
Photo of the metropolitan cityscape of Shanghai
This cityscape of Shanghai was taken from the rooftop of an abandoned building. There was no
 lift, so it meant climbing around 60 floors up the stairs.

Which Abandoned Places Near Me Work Best?

An abandoned factory will work better than an abandoned family home in suburbia. That factory might be harder to gain permission to enter though.

The following list only reflects what would be interesting from a photography perspective. Gaining access to such places will be covered later.

  • An industrial building – Even abandoned, these might still under guard. There is a decent chance some form of security is still present. The opportunity for unique photos in these places is a big draw though. Think of power stations, factories or even oil rigs at sea.
  • A theme park – The abandoned theme park is a classic in the horror movie genre. It goes without saying this will also translate to photography as well.
  • An apartment block – There are some places that have half-finished apartment blocks. The company building them usually ran out of money and abandoned them. Asia has quite a lot of these that are relics of the 1997 Asian financial crisis. Eastern Europe also has a few.
  • A house – In some places, you can find abandoned houses. Even modern houses can be interesting to photograph when they’re empty. The best houses are those that are older.
  • Stately home – In some countries there are old stately homes or even castles that have been abandoned. They can sometimes be like time-capsules into the past. You might even find old newspapers lying around. Take extra care when accessing a building like this.
Photo with the use of light painting technique inside an abandoned building
Techniques like light painting can work well when juxtaposed against an abandoned building.

Safety When Exploring

An important aspect of urban exploration is your own safety. You’ll need to look at this from the point of view of wearing the right clothes, and personal safety.

Equipment You’ll Need

The following is a suggested list for exploring abandoned buildings. These places have plenty of hazards that could cause injury, so look to bring the following.

  • Shoes – These should be sturdy boots, even with steel toe caps. They need to protect your feet from things like broken glass, or rusty nails.
  • Jeans – Again to protect from sharp objects bring jeans. Should you be in a hot country you could choose different trousers, but you need to cover your legs.
  • Long sleeves – A long sleeve top appropriate to the climate you’re in.
  • Mask – Old buildings may have air that you should not be breathing. Dust, mold or even 
  • asbestos all pose a potential risk.
  • Phone – If things go bad, your first method to get help will be your phone. Make sure it’s charged.
  • First aid kit – Again a precautionary measure to take in a place that could be risky to be in.
  • Torch – A light source for a dimly lit room may well let you see risky objects on the ground so you can avoid that area. A headlamp is the best option here.
Photo of an abandoned house with sepia filter
Abandoned buildings will have signs of decay like overgrown weeds.

Personal Safety

Abandoned buildings have plenty of risks. With the right gear, you can minimize the risk of personal injury. The worst can still happen.

You could hurt yourself badly enough that it might be difficult to get out of the building. This could occur through falling through floor boarding or getting bitten by a snake.

Abandoned places where you’re on your own are also good places to get mugged, so it might be worth packing some mace.

The best protection against all of the above is to bring a friend. Probably another photographer who also knows the risks. They can help should you get into trouble.

How Can I Find Abandoned Places Near Me?

It costs money to build a building, and if you do so you want to get use out of that building.

It goes without saying that most buildings will be occupied. Finding abandoned buildings isn’t easy. You’ll need to try some of the methods below to identify a building.

Portrait photo of a model inside an abandoned building
Abandoned buildings often work very well for portrait photography. Make sure you and your 
model are prepared for the conditions in the property.

Join an Urbex Group Online

There are plenty of urbex photographers out there. One of the best ways of finding out about urbex locations is to visit places other urbex photographers have visited before.

Online forums can help with this. You can also use the following sites that work as databases for urbex photographers.

  • Shothotspot – This site is a great resource. The caveat is it’s only as good as how active the urbex community is in a location. A search for the town I live in South Korea brings up zero results, and yet I know of abandoned buildings in this town.
  • Abandoned places – A similar site that offers a database of locations. It also has images taken of such places. You can’t search any location in the world. You need to select the galleries. From there you can select various locations found around the world. To select pictures, navigate using the buttons on the photo wheel.

Local Knowledge

Nothing beats local knowledge, that’s true of any form of photography. This is especially true when it comes to urbex.

You can gain local knowledge by visiting urbex forums and websites. If you can join a local photographer that’s even better. Having someone with you will also give you that added safety.

Photo of a girl playing the accordion on the stairs of an abandoned house
This photo is a result of local knowledge. I passed this building regularly by bus, and could see 
it was abandoned.

Explore by Yourself

The last option is to explore yourself. This is the most time consuming and risky. It can also be the most rewarding if you can find a location and be the first to photograph there.

Of course, this isn’t easy to do, and in some parts of the world, this might be almost impossible. There are some things you can do to improve your chances.

  • Economically deprived – Areas of the country that have fallen on hard times are more likely to have abandoned buildings. Look to visit these areas, and then look for signs that a property has been neglected.
  • Overgrown – Vegetation overgrowing in a property is a good sign that the property has been abandoned. At this point, consider asking people in neighboring properties if the building you’re looking at is indeed abandoned.
  • Online search – Looking for abandoned buildings can be like looking for a needle in a haystack. This is true even in areas that have suffered and economic downturn. Look to property websites with telltale signs like “below market value” or “immediate possession”. Most of the time properties sell slowly because there is a chain of people looking to buy and sell. If the property is empty this chain won’t exist.
Photo with the use of light painting technique inside an abandoned building
You can experiment with unique ideas and concepts with abandoned buildings.

Accessing Buildings for Urban Exploration

Get permission before accessing a building. This means you’re legitimate. If you choose not to do so, any risks you undertake are yours.

This website does not endorse breaking the law.

Photo of an abandoned building at nighttime
Nighttime can provide really interesting conditions to photograph inside.

How to Seek Permission for Urban Exploration

There are several options open to you here. Finding the owner of the building and asking is not always easy.

  • Trace the owner – One of the easiest ways to trace the owner will be tax records. This may be a person but could also be a bank. Once you have this, you have the person responsible for the property. You can now ask that person for permission to enter the property.
  • Inform the police – If you’re unable to trace the property owner, then the next approach is to contact the police. They likely know the building is empty. Inform them of your intention to enter the building, and they can then give you permission. You are now on the right side of the law.
  • Purchase the property – The most extreme option is to take over possession of the property yourself. If you were able to track down the owner this will be easier, as you can make them a direct offer. Keep in mind things like any unpaid tax on the property. If you can’t find the owner, a court may allow you to take procession of a property, if it’s proven to be abandoned.

Final Tips for Exploring Abandoned Buildings.

The following are some strategies to use when engaging in urban exploration.

  • Pack light – Don’t carry massive amounts of camera gear. This makes it more difficult to move around old abandoned buildings. Remember that the flooring and stairs may not be stable.
  • Leave no trace – This is one of the main rules of urban exploration. If you gain access, take photos but leave the place as you found it.
  • Lights – It’s important to see where you’re going. Pack headlamps and torches, and make sure to take extra batteries with you.

So now you’re all set with all the information you need to kick start your urbex adventure. Have you explored abandoned places before? What were your experiences? Was it easy or difficult to gain access to the abandoned building?

We would love to hear your experiences on finding abandoned places near you. Feel free to share your thoughts and photographs in the comments section of this article.


---------------------------------------------------------------------------------------------------------------------

PHOTOGRAPHY FREEBIE:

How to make money with your Photography even if you're not a Pro.

Copy & paste this link into your browser, click ENTER, and enjoy: 

https://mrdarrylt.blogspot.com/2020/01/how-to-make-500-month-from-your.html

                                                         or

https://www.photography-jobs.net/?hop=darryl54

 ----------------------------------------------------------------------------------------------------------------------

Visit me on Facebook and post your pictures.

https://www.facebook.com/Darryl-T-363867387724297/  
----------------------------------------------------------------------------------------------------------------------
Need a camera?  Try this link (Tri State Camera) for discounted prices:  https://ebay.to/2Smb1ho


Friday, April 9, 2021

10 Tips For Better Indoor Photography – From Lighting to Settings

Tags: Photography for Beginners, Natural light, Photography


When I first started indoor photography, I was afraid of the limitations. As a natural light enthusiast, I wanted to have as few restrictions as possible.

When I discovered the positive sides of this genre, I was able to pinpoint my creative weaknesses. It helped me strengthen the skills I already had.

Indoor photography is a flexible genre for several reasons:

  • There’s usually some kind of artificial light to use it to take unique photographs;
  • It doesn’t demand a massive budget; and
  • It’s open to photographers of all kinds.

How do you take good indoor pictures? Here are 10 photography tips on how to get better at shooting inside.

Woman checking the photo on digital camera.

10. Play With High ISO Numbers

Indoor photography lighting can be very complicated. Especially when it’s almost dark outside. To take sharp photographs, you’ll have to increase your ISO number. As scary as it might sound, it won’t ruin your photographs.

So what is the best ISO setting for indoor photography? In general, ISO 100 or 200 can work well if you are using a tripod and you have enough brightness.

If you are shooting from your hand, you have to raise your ISO to 800 or 1000. Sometimes even higher, as you will notice from my camera settings below.

I took the photos above on a gloomy day. I used both natural window light and artificial one.

These are the camera settings I used:

  • Aperture: Æ’/2.5
  • Shutter speed 1/20
  • ISO 5000

Though every camera is different, most modern ones have a high noise tolerance. Using my Canon 5D Mark III, I can take all kinds of indoor photographs without making them look too grainy.

The camera I used before this, a Canon 60D, produced a little more grain when I played with ISO. But this effect created a cinematic feeling that complemented my photographs.

living room interior

9. Focus on Insignificant Details

Indoor photographs can look very simple, especially if you’re shooting in an empty or abandoned space. To make up for this, you can add eye-catching elements to your compositions.

Many of us don’t have studios. But you can create your own using things you see every day. Search vibrant objects that you could turn into subjects, foregrounds, or backgrounds.

Have a look at your surroundings. What do you usually take for granted? Could you use that item in a photograph?

Here’s an example from my own life: I have a few plants on my table. I appreciate them for what they are or use them as subjects in my portraits.

Plants make amazing foregrounds, especially when it comes to simple indoor photographs.

A girl posing indoors covered by plants

8. Use Indoor Artificial Light Whenever You Can

What is the best lighting for indoor photography? Many photographers would say that natural lighting.

But I say that any indoor lighting you have can give you fantastic results!

My experiments with simple artificial light led to my favourite portraits. I’ve never used professional studio lighting in my life. But I believe in the power of simple light sources.

A few examples are lamps, torches, and phone screens. Regardless of their simplicity, these objects are great to add a spark to your photos.

You can use artificial light not only for brightening your subject. It can also help you to focus better. When I take self-portraits in dark locations, I have to make sure that the autofocus feature captures the right details.

To do this, I flash a torch on my face until the camera finds me. Once this is done, I can take photos like the one above.

Use artificial light sources to get the right focus. It can add more depth to your photographs. It also helps to familiarise yourself with different lighting techniques.

And when you do get your hands on professional studio equipment, you’ll already know what to do!

Atmospheric indoor portrait of a girl pushing her face against a window pane

7. Know the Best Times of Day for Shooting Indoors

Natural light is very limited at indoor locations. If you want to get as much light as possible indoors, shoot at these times of day:

  • Midday: Shooting outdoors during this time results in very harsh and unflattering photos. But midday light looks fantastic indoors. Place your subject in front of a curtained window to get the most flattering results.
  • Golden hour: You might already be familiar with this magical time of day. It is shortly after sunrise and before sunset. The diffused light is perfect for every photography genre.
  • Twilight: After sunset, the sky takes on a pinkish hue. Combined with artificial lights, this can become the perfect background for mysterious silhouettes.

interior lit by natural light

6. Make the Most of Every Room

Every room has its beauty. The white walls of an empty room can be used as backdrops for classical portraits or still life. A cluttered room can reflect your subject’s personality. It can add a touch of colour to your background, or be the subject itself.

Every indoor location can be a great place for a photoshoot.

When you take photos indoors, observe every room. Find details to include in your compositions. Think about how to get good lighting in that specific room.

Sometimes, this might only mean taking photos next to a well-lit doorway. You don’t have to overthink it.

Train your eye to see potential in every indoor space. You’ll notice a great improvement in your work.

Light from an open door.


5. Create Your Own Indoor Photography Resources

DIY projects should be your best friends. Besides being fun, these projects are very helpful and budget-friendly. If you want to take your indoor photography to the next level, you must experiment with them.

If you don’t have the time for complicated DIY projects, stick to simple hacks. They change your photography in no time.

You can use foil to light up your subject’s features if you don’t have access to a reflector. If you want to add a dreamy look to your photos, you can cover your lens with cling film.

And if you want to create a studio of your own, you can put up a tablecloth behind your subject.

Another example is placing an object in front of a sheet of paper taped to a window. This will create a soft lightbox effect.


4. Describe Atmospheres Through Diptychs

Indoor photography is often associated with warmth and cosiness. If you are not shooting product photos, you might try to intensify the atmosphere in your work.

This is even more important in portrait photography. This genre relies on emotions to tell compelling stories.

One of the best ways to capture an atmosphere is to photograph various sides of it. When you have a few photos that you like, turn them into diptychs (a collage of two photos). They tell a more wholesome story.

This will give your photographs more personality and make them more relatable. It also gives your viewers a clearer idea of your subject.

Watching out for diptych-worthy moments will make you more appreciative of indoor photography. By wanting to tell deeper stories, you’ll be more aware of details, spaces, and subjects that most people would ignore.

Combined, these things will have a positive impact on your work.

Diptych indoor photography ideas of a coffee cup and a girls face

3. To Fit Everything, Use a Wide-Angle Lens (Or Create a Panorama)

There’s only so much you can fit into your camera lens when it comes to indoor spaces. With a prime or zoom lens, you’re going to have to step back a bit. Then you can capture both your subject and their surroundings.

You might not be able to do so because of the room’s size. In cases like this, use a wide-angle lens.

If you can’t afford a wide-angle lens, make panoramas instead. Panoramas are a bunch of different photos stitched together in Photoshop. They’re great for people who want to create detailed compositions that resemble medium format photos.

They’re also great for those who enjoy taking landscape-like photos of indoor environments.

rustic indoor photography ideas

2. Use Backgrounds to Describe Your Subject

Besides complementing your subject, backgrounds should reflect their personality in some way.

This is much easier to do indoors because we associate buildings with homes. They have objects that play a big role in our personal lives.

If you’re planning to take indoor portraits, make sure you get to know your model’s space. Ask them what items they care about most. What part of their room do they love the most? What do they enjoy doing in the comfort of their own space?

Using this information, position your subject in a way that will reveal both their expression and their favourite items. Including these things in the background will make your photos stand out.

If you’re planning to take photos of objects, animals, etc., you can do something similar. For instance, my cat likes watching snowflakes while sitting on windowsills. To capture her curiosity, I took a closeup next to the window.

I also photographed the snow itself so that the viewer would have a better idea of what she’s so curious about. I made the two photos into a diptych to tell a short story.

Diptych of a cat by a window

1. When All Else Fails, Use Windows

Indoor photography is often challenging. Especially when you don’t have a lot of experience with artificial light, backgrounds, and projects. If you start to feel frustrated, just take photos next to a window.

Windows are the best source of natural light. They also make fantastic foregrounds and backgrounds. You can never go wrong with them.

Here are ways you can use them to enhance your compositions:

  • Foregrounds: place your subject behind a window to create beautiful reflections
  • Backgrounds: place your subject in front of a window to create a soft, backlit look
  • Subjects: on their own, windows can look very eye-catching, especially during the golden hour

Woman looking at the city from window at night.

Indoor photography overflows with frustrating obstacles that outdoor photography doesn’t have. When I began this genre, I was afraid of getting bored, taking silly photos, or not making the most of my creative time.

Then I realised how freeing those obstacles were. I found ways to make indoor photography both enjoyable and challenging. The DIY projects, various lighting setups, and artificial light helped me in the process.

You, too, can enjoy the perks of being an indoor photographer. All you have to do is get up, grab your camera, and photograph something that catches your eye. Before you know it, you’ll be having fun and taking fantastic photographs.


---------------------------------------------------------------------------------------------------------------------

PHOTOGRAPHY FREEBIE:

How to make money with your Photography even if you're not a Pro.

Copy & paste this link into your browser, click ENTER, and enjoy: 

https://mrdarrylt.blogspot.com/2020/01/how-to-make-500-month-from-your.html

                                                         or

https://www.photography-jobs.net/?hop=darryl54

 ----------------------------------------------------------------------------------------------------------------------

Visit me on Facebook and post your pictures.

https://www.facebook.com/Darryl-T-363867387724297/  
----------------------------------------------------------------------------------------------------------------------
Need a camera?  Try this link (Tri State Camera) for discounted prices:  https://ebay.to/2Smb1ho


Monday, April 5, 2021

Best Camera Settings for Portraits


------------------------------------------------------------------------------------------------------------------

PHOTOGRAPHY FREEBIE:

How to make money with your Photography even if you're not a Pro.

Copy & paste this link into your browser, click ENTER, and enjoy: 

https://mrdarrylt.blogspot.com/2020/01/how-to-make-500-month-from-your.html 


 ----------------------------------------------------------------------------------------------------------------------

Cash App Earn Money.  Just copy & paste this link into your browser, click "ENTER" and 

follow the easy steps:  bit.ly/3g2Ghhi


----------------------------------------------------------------------------------------------------------------------------------------
Photo Shutterbug Black T-Shirt Front
https://teespring.com/photo-shutterbug?pid=328&cid=6276

Thursday, April 1, 2021

9 Impressive Mirror Photography Ideas to Try Yourself

Tags: Photography for Beginners, Portraits, Models


1. Use Artificial Light to Enhance Your Model’s Features

A portrait of a glamorous blonde model reflected in a Hollywood vanity mirror
A Hollywood vanity mirror will cast an even amount of light on your subject. Mirrors like this 
are ideal for glamour photography or behind-the-scenes shots. If you’re a DIY fanatic,  
you can make your very own vanity mirror.

One of the best things about mirror photography is that it offers unlimited possibilities. As long as you have access to a mirror, you can take photos wherever and whenever you want.
If you want to stay in, experiment with different outfits, and take great photos with a limited amount of light, you can easily do so. You just need to work with artificial light and DSLR camera settings that are usually not needed during the warmer months.
Artificial light can enhance your subject’s features. As you take photos, make sure you manually change your photos’ colour temperature and ISO.
Colour temperature will let you fix unflattering tones and ISO will help you take sharp photos in locations with limited light.

2. Use Manual Focus for the Sharpest Results

A diptych portrait of a brunette female model reflected in a mirror
Depending on the concept of your shoot, you might have to deal with a lot of busy foregrounds and backgrounds in your compositions.
Because of this, autofocus might capture the wrong subject or not be able to focus at all. Especially if you’re working with a small f-number like f/1.2. You can avoid this by switching to manual focus.
Manual focus will let you capture exactly what you want. If you don’t use it regularly, it will feel very awkward at first. Don’t let this bother you!
It’s also likely that the mirror you use will create distortions on your model’s face. These will be noticeable only when you zoom into your photo, so they shouldn’t be a problem.

3. Create Space in Small Rooms by Using Large Mirrors

A diptych portrait of a brunette female model reflected in a mirror
Both of these self-portraits are mirror reflections. I was able to freely flip my hair because 
the camera was standing a few metres away from me.

Small spaces like elevators have mirrors to give the illusion of more space. You can use this trick to your advantage when you shoot in small rooms.
If you live in a small apartment, you can use a large mirror to take mirror images of your subject from a distance. This is especially handy if you use a zoom lens, which typically isn’t practical to use indoors.
You can also use large mirrors to create more space between yourself and your model. This will make them feel more comfortable and give them room to pose without worrying about bumping into your camera.

4. Shoot Through Multiple Mirrors to Create a Surreal Effect

A diptych portrait of a brunette female model reflected in several mirrors while applying make-up
There’s a lot you can do with multiple mirrors. In this photo, the mirrors are emphasising the model’s beauty routine. You could use exactly the same setup and perspective to take a surreal infinity effect photo.

Surreal photography is all about otherworldly concepts and stories inspired by fairytales. Some surrealist photographers, like Rosie Hardy, use their photo editing skills to create unusual photos.
Others, like John Dykstra, use props and their imagination to create unedited masterpieces.
You don’t always need incredible editing skills or props to create surreal photos, though. With use of mirrors (at least two), you can focus on different angles of your model’s face and reflect objects that wouldn’t be visible in a photo with one mirror.
Here, you can also different reflective surfaces for better images.

5. Take Photos of Yourself and Your Model at the Same Time

A diptych portrait of a brunette female model with the photographer reflected in a mirror
This is actually a self-portrait that I made using two separate photos. If you want to take 
conceptual photos of yourself, you’ll need to invest a little more time and patience in 
your photoshoot.

Portrait photography tends to focus on those standing in front of the camera. Anyone behind it should be invisible. Mirror photography is an exception to this rule, as you can take photos of both yourself and your model in the mirror.
You can use this technique to add depth to your creative self-portraits. It can also be used to create more space in a photo or to fill in empty areas in your composition.
Make sure you use this technique sparingly, though. The more you use it, the more unoriginal your concepts will be.
Try creative these self-reflection portraits with broken mirrors for some added creativity.

6. Take Your Mirror Outdoors

Surreal mirror photography shot of a female model in an overgrown field, holding a mirror over her ace which reflects more overgrown foliage
There are lots of exciting outdoor locations that you can enhance with the help of a mirror. You can use it to cover parts of your model’s body, reflect a beautiful location, or even use it to improve your landscape photography skills.
I recommend using a small mirror outdoors. Carrying a large mirror is impractical. And it will make your photo shoot significantly more inconvenient than a normal one with smaller props.

7. Recreate Fun Road Trip Photos in a Car

A female driver checking her reflection in the car mirror
You don’t need to go on an epic road trip to take exciting travel photos. If you have a car, you can recreate travel photos by simply having your model sit in it. No driving necessary!
Use a side mirror or rear view mirror to focus on your model. Make sure the background (preferably an eye-catching location) is visible, too.
This will give dimension to your photo and create a sense of adventure.
the reflection of a young woman in the side mirror of a driving car

8. Take Atmospheric Self-Portraits

A portrait of a brunette female model reflected in a mirror
Mirror selfies have become so popular that they’re no longer interesting, but this doesn’t mean you can’t use them to create original self-portraits.
Instead of focusing solely on yourself, try to create an atmosphere using objects next to your mirror. The photographer in the image above used her bedroom to create a cozy and pleasant feel.
While most of the objects in her photo aren’t sharp, they still complement her pose and reflect her personality (no pun intended).

9. Use a Small Mirror to Create Abstract Portraits

An abstract portrait of an eye reflected in a mirror
Abstract portraits are unconventional and striking. They can be used to create photos that resemble paintings or simply highlight one part of your model’s face, like the eye in the photo above.
You can use a handheld mirror or a prism to experiment with this effect. A prism might make reflections appear more distorted. You’ll also have to focus very carefully to get sharp results.
A handheld mirror will reflect more of your subject’s face and make it easier for you to focus on them.
Since both of these mirrors are affordable and accessible, I recommend experimenting with both.

Mirror photography will help you appreciate unusual perspectives, try out new photography styles, and add more depth to your photos.
Even the simplest mirror can help you take your portraits to the next level.
So what are you waiting for? Grab a mirror and start shooting!


---------------------------------------------------------------------------------------------------------------------

PHOTOGRAPHY FREEBIE:

How to make money with your Photography even if you're not a Pro.

Copy & paste this link into your browser, click ENTER, and enjoy: 

https://mrdarrylt.blogspot.com/2020/01/how-to-make-500-month-from-your.html

                                                         or

https://www.photography-jobs.net/?hop=darryl54

 ----------------------------------------------------------------------------------------------------------------------

Visit me on Facebook and post your pictures.

https://www.facebook.com/Darryl-T-363867387724297/  
----------------------------------------------------------------------------------------------------------------------
Need a camera?  Try this link (Tri State Camera) for discounted prices:  https://ebay.to/2Smb1ho