This ebook is FREE and yours for the taking. We routinely post one
"freebie" per week. But, maybe this weeks' selection doesn't quite
cover your particular interest in photography. Maybe Landcapes,
Portraiture, or Travel photography are your preference.
If so, just click on the link at the bottom of this page, "Amazon
Kindle Unlimited". They have a 30 day FREE trial. You can access any
of the Titles above (and more) free of charge for 30 days. Enjoy!
Viral video - Cell phone video, Inspiration for you videographers considering a topic for
your next project. 7,344,375 views on Facebook. Your video may receive
more.
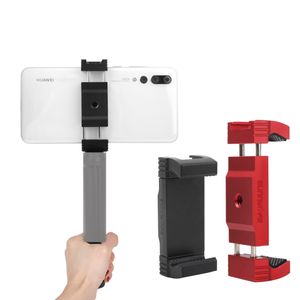
You want to make your own
cell phone movie, but don't know where to start? Where do you find a
good clamp clip tripod?
Try this link:https://bit.ly/31Y7Obh
...then post your video on social media.
How to Get Started Making Extra Money with Your Nature Photography
Photography is expensive, there’s no doubt about that. Nature
photographers have it bad, though, especially if you’re buying long
telephoto lenses for wildlife. The Canon 200-400mm lens will set you
back $11,000 – ouch. So it’s no wonder that many people want to make it
in photography and start monetising their work. But can you make money
with your nature photography?
Making money from your photography isn’t easy, and it doesn’t get any
easier as a nature photographer either. There’s less demand, and more
people doing it. That means increased competition for a smaller slice of
the pie. If you want to make money from your nature photos, then you
must realize that it’s not easy by any means – but it’s also not
impossible.
I’ve been working as a professional nature photographer for about six
years now. What I’ve learned over my relatively short career so far is
that you need to think outside the box to stay ahead of the competition.
A bit of a cliché statement maybe, but one that you’ll have to embrace –
especially if you want to be a full-time photographer.
But you’re probably reading this wondering how you can make a bit of
extra cash from your photos on the side, rather than an entire
life-altering career move. Well, that I can help you with! Let’s take a
look at some of the main ways you can start to make money with your
nature photography.
Prints and Other Products
The first print I ever sold was in 2008. That’s eight years ago now,
and I’ve been doing it ever since. To the surprise of some, people do
buy photographs to hang on their walls. This isn’t a space reserved
solely for paintings.
Personally, I have my photos printed and framed myself, but you can have this process automated by dedicated web hosts. Zenfolio is
a popular choice amongst photographers for a website, and they offer
the ability to have orders automatically fulfilled by printing labs.
This means you can sit back and relax, selling prints from your website.
Beauty and picturesque scenes sell better as prints, rather than action-packed shots.
It’s not just online though. You can sell prints in the real world
too! Head to a market or trade show, set up a stall and get selling.
It’s great fun talking to customers about your work and to sell your
photos this way. Doing just a couple of shows a year can buy you a new
camera or lens, so that’s something to think about.
What sells best? Well, I find the more traditional wildlife
photography like; clean bokeh shots, cute animals, or dramatic scenes.
You’re looking for something that someone will want to look at over and
over again. After all, when was the last time you moved a framed picture
in your house? They stay up for a long time.
Workshops
If you really know your way around your camera and can take a
decent photograph, then this is something you could consider. Day
workshops offer clients tuition in photography, let them know your
secrets and just help them to take a better photo and understand their
equipment. It’s a popular move amongst photographers nowadays, and
almost everyone trying to make a living out of nature photography is
offering workshops.
The best thing about it is that you can set your own hours and choose
when you work. You can fit sessions in on the weekend around your
full-time job, and have a little extra money coming in on the side. All
of this helps to take the sting out the costs of new photography kit.
There are different types of workshops you can offer. Some
photographers partake in one-to-one guiding days, showing clients
different locations for landscapes or wildlife sightings while imparting
photographic knowledge. Others may rent out a blind they have built to
view a particular animal (see image above), something that is often in
high demand by those who don’t have the time to create such
possibilities themselves.
Sell Stock Images
The stock photography industry is depleting day by day,
unfortunately. It used to be the case that you could make a five-figure
salary, or more, from stock photography alone. Maybe not just as a
nature photographer, but you could definitely make big bucks in
comparison to nowadays.
But with the rise of microstock, photographers are seeing their
earnings decrease. On top of that, many stock websites are taking
increased percentages as a commission, leaving photographers with little
left of the few sales they may still make.
Despite that bleak picture, there are specialist nature photography stock agencies you can submit to. The likes of Nature Picture Library
still sell well, at least in the UK, and photographers are able to make
a decent income from them. However, they are very selective about who
they work with – you need something unique in your portfolio to be
accepted.
Selling to Publications
This is where there is definitely still money. Selling images to
newspapers or magazines can be pretty lucrative indeed – the trick is
making it a regular gig. Publications are often looking to buy not just
one photo, but a sequence of photos that tell a story. That’s where your
best chance to get published sits.
Selling to newspapers and other publications can be a good source of income.
Working with a press agency to get your photos syndicated and in
front of the right people is the best way to go about it. While you can
contact publications yourself, you’re likely to be ignored and if your
photos are used you may have to spend months chasing them for
payment. Press agents take the stress out of it. There are plenty around
the world, and they’ll take a commission (usually 40-50%) of the sale
price for their services. I work with
Press
agents take the stress out of it. There are plenty around the world,
and they’ll take a commission (usually 40-50%) of the sale price for
their services. I work with REX Features, but there are plenty out there such as Caters News and Associated Press.
If you think you have a good, fresh sequence of images then send some
low-resolution copies over and you’ll soon find out if they are sellable
or not.
Here are just some ways that you can make money as a nature
photographer. It takes work and dedication, especially if you want to
make it a full-time job. It’s definitely not the path everyone will be
able to take. But, there’s no harm in trying to make a bit of extra
money at first and seeing where it takes you. You just have to take that
first step.
Share this article.
Gaining Confidence to Charge Properly for Your Photography
So many of us are awkward about money – especially asking for it. A
few years ago I was just starting out as a “professional” photographer. I
did a free session just for the experience. The family insisted on
paying me something even though I kept declining. They gave me $20. I
couldn’t help but think, “is that all I’m worth?” I was happy to do it
for free, yet $20 felt like an insult.
There were a lot of questions tangled up in that $20 session. Are my
photos good enough to charge money? What is the right price to charge?
How do I tell them my price when I feel so dirty about money? Why don’t
they value me more?
I knew that I had to work through these questions or just forget about charging money at all.
Let me share with you how to:
Know what to sell (a service, prints, or digital)
Set your prices (to fund your hobby or go full time)
Get over the dirty feeling you have when talking about money
This
was one of my first and cheapest photo sessions, but also one of my
most memorable. It
rained the whole time and we had to keep ducking back
into our vehicles to stay dry.
A riddle
When I first started out and my prices were low, people would tell me
that my prices were too high. And now that my prices are five times
higher, people keep telling me my prices are too low. Why is that? I’ll
tell you at the end.
First, the truth about prices
You will set your prices based on assumptions you have. Many of those assumptions are wrong, which leads to wrong pricing.
I promise you that:
The market is not over-saturated with photographers.
Cheap photographers have not driven down prices for the rest of us.
People do value photography and will spend good money on it.
I
charged this family four times more for their next session and they
gladly paid because they
loved their first set of photos so much. I even
got a call from the dad saying how much he liked
the photos. And dad’s
never want to pay for photos!
What do you really want?
There is little use in discussing pricing if you don’t have an end
goal in mind. You need to begin by asking yourself what you really want.
Do you even want money? If so, do you want a little money to fund
your photography hobby? Or, do you want enough money to count as income?
Money is a tool to get other things. So the question is, what do you want?
Don’t charge anything at all
Don’t feel as though you must charge for your photography. You might
get sucked into the idea of making money with your photography just
because so many other photographers do.
If you love photography for it’s own sake, you don’t necessarily need to make money doing it.
Keep your life simple and chase photography for it’s own sake. Go
ahead and share your photography as a gift with no concern about money.
Figure out what you’re selling
If you do want to earn money with your photography, you need to decide what you’re selling and why.
You could sell sessions, digital files or prints (or any combination of these).
Don’t let anybody tell you what you must offer. Make your own decision.
Here are some examples of what you could sell.
Photograph events and then sell digital files or prints.
Do photography sessions (newborn, family, etc) and then sell digital files or prints.
Take photographs of your own ideas and then sell fine art prints or digital stock photography.
Create a price list for whatever you offer and then you’re ready when people ask how much you charge.
How to set your prices
I prefer to keep everything as simple as possible, so here is my model for how to set your prices.
What do you want to make per month?
How many sessions would you like to do per month? Or, how many prints or digital photos would you like to be selling per month?
Suppose you would like to earn $1000 per month and you would like to
do four sessions per month. You’ll have to charge $250 per session (but
also consider your expenses).
Perhaps you want to earn $500 per month by photographing one event
and selling digital images. If you price your digital photos at $10
each, you’ll have to sell 50 of them.
How about full-time income? Suppose you would like to earn $4000 per
month. You could do 8 photo sessions at $500. Or, you could do a couple
of weddings per month.
Play with the numbers based on how much you would like to make and how much work you want to put out.
Hovering
on the line between amateur and professional, I just loved the fact
that I could take
pictures and make a little money doing it.
What should amateurs charge?
Don’t assume that because you are an amateur you should charge less.
You could be as fine a photographer as the pros – maybe better.
Just keep in mind how much you would like to make and how much work you want to put out.
Some amateurs like to photograph sporting events and then sell digital files or prints through an online gallery. Others like to do photo sessions for their friends. Some sell a few of their prints here and there. It’s often just a way to make a little extra money to spend on new lenses and camera bags.
Consider how much money you would like to make and set your prices accordingly.
How to get over the dirty feeling you have when talking about money
There are many reasons you might feel awkward about money.
If you haven’t set your prices in advance you’ll feel thrown off when
somebody asks you. You’ll feel hesitant or doubt yourself. So set your
prices and be ready to tell people what they are.
Confidence plays a role in setting your prices.
Are you ready to charge?
A lot of people just need to know if they are ready to charge money for their photography.
If you take good photos then you are ready. If you don’t take good photos then you’re not.
Get feedback from other photographers about whether your photos are
good. Ask them how you could improve. When you get to the point that you
feel confident, or almost confident, then offer your services with a
price tag.
Photograph an event and sell digital photos. Or offer family photo sessions. Whatever it is, see if people are willing to pay. You’ll know you’re ready when your photos are good and people begin paying.
At this point you may know you’re a good photographer and how much
money you would like to make, but deep inside something tells you you’re
not worth it.
Are you worth it?
I often see photographers charging low prices for their incredible
photography because they don’t feel worthy of charging more. They have
many reasons for their low prices, but they’re mostly just excuses.
Underneath is a sense of inferiority – a sense that they themselves are no good. If this is you, then you need to get out of your own head and prove yourself wrong.
There are countless photographers doing the work they want and charging what they want. Why not you?
Get out of your comfort zone
and make trying new things a part of your lifestyle. You’ll gain
confidence more quickly and overcome those voices that put you down.
But will people really pay?
Yes, people will pay. A lot.
You’ll hear a lot of people saying that everybody is running to cheap
photographers and it’s putting the higher priced photographers out of
business. But it’s not true.
Yes,
a lot of people go to cheap photographers. It’s natural to seek out
lower prices when we can. But that doesn’t mean that people never spend lots of money.
Have you ever noticed that people have two polar reactions to the
money they spend? People love to brag that they got a great deal. But
they also love to brag about how expensive something was. People are
funny creatures and you’ll learn a lot about us by paying attention to
what we do with our money.
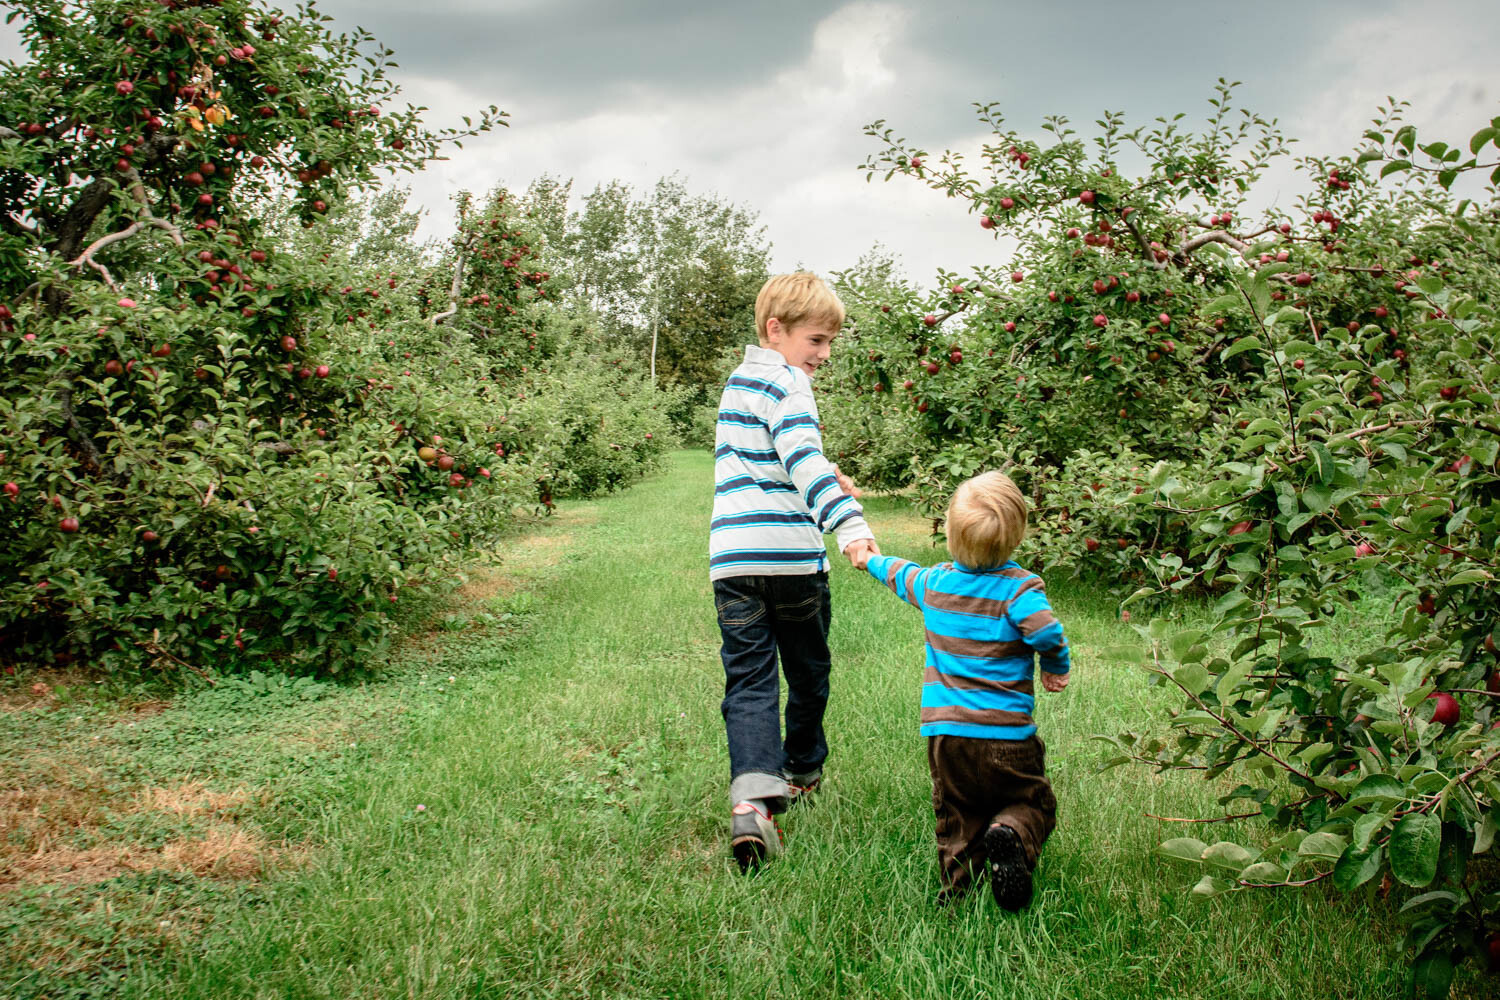
My family is even willing to pay more for apples, just for the experience of picking our own.
Cheap commodity or something meaningful?
Remember that curious thing I told you in the beginning? When I first
started out and my prices were low, people would tell me that my prices
were too high. But now that my prices are five times higher, people
keep telling me my prices are too low. Why is that?
In the beginning, I priced my photography as a cheap commodity.
Nobody wants to pay a high price for a commodity. We all want the price
of things like food, insurance and fuel to go down, not up! I priced my
photography to be the sort of thing that is cheap and is found anywhere.
But later on, when my prices were higher, my photography began to
appeal to people who thought differently about photography. They valued
it as something truly meaningful to them – not as a cheap commodity like
toothpaste. They valued it like a fine bottle of wine and were happy to
pay more for it.
Some people don’t value photography, and it’s just a commodity to
them. However, others do value it and are proud to seek out a talented
photographer and pay good money for their work.
The subject of my photography, and the words I use to talk about my
photos, speak of meaning rather than cheapness. My prices have come to
reflect the true value of my photography.
From a purely business perspective, my prices are probably still too
low. Even some of the people who hire me say that I should charge more
than I do (and they prove it by giving me generous gratuities).
So why don’t I charge even more? Because, like many of you, I
struggle with that voice inside that says, “are you crazy? Nobody will
pay that price.” However, the people who hire you and I will keep
proving that voice wrong.
Share this article.
Wedding Viral video - Cell phone video, Inspiration for you videographers considering a topic for
your next project. 10,875
views on Facebook. Your video may receive
more.
You want to make your own
cell phone movie, but don't know where to start? Where do you find a
good clamp clip tripod?
Try this link:https://bit.ly/31Y7Obh
...then post your video on social media.
How to Create a Wedding Day Photography Timeline Quickly and Effortlessly
A wedding day photography timeline can help streamline the order in which you photograph a wedding.
From when the couple is getting ready all the way until the dance
party, the timeline helps to keep everyone, especially you, on top of
how the day unfolds.
It doesn’t matter if the couple has a coordinator or if the venue has
a planner. A wedding day photography timeline will make sure that you
are ready for the next big event.
Portraits of the bride and groom at two different times during the day.
Why You Should Create Your Own Timeline
As the photographer, you need time during the wedding day to be able
to capture all of the essential details, moments, and events that unfold
throughout the day.
If you want to have even a little bit of control with the photography, you need to have a timeline made.
Creating
the timeline gives you control over how much time you have during any
part of the day.
Like the getting ready, where you can have the time to
photograph the details.
Having a specific timeline for photography is priceless not only for
you but the couple as well. It can help the bride to schedule her makeup
and hair team.
The timeline also allows the bridal party to know where to be at what
time. It also helps with family members who need to know when the
extended family portraits are.
A wedding timeline can help you choose or prepare for each of the important portraits during the day.
Not only does the timeline help you anticipate what is next during
the wedding day, but also makes you look more professional because you
know what is coming next. You aren’t scrambling asking the couple what
is next.
The wedding timeline can serve as a guideline for you during the
wedding day. A directive ensures you get all the necessary photos of the
day without questioning when or if you’ll have time to get them.
That way, you won’t miss the ring or shoe shot, or the photo of the bride with her favorite uncle.
The timeline lays it all out for you – the couple, the guests and the
bridal party. It even outlines the other vendors who will be working
alongside you, such as the videographer or planner.
Take advantage of any downtime during the day. This gives you the opportunity to create
something unique and different.
It’s best to have the timeline made as soon as you know all of the major details of the wedding day.
Send it to your clients with at least a month in advance. Doing so
gives them the time to make any last minute changes if necessary.
Confirm the wedding timeline at least a week before to make sure the day unfolds as planned.
Answer These Questions First
The following questions are important as they determine how you are going to schedule each portrait event of a wedding day.
Some of the questions will have to be answered by the couple and other questions are for you to answer.
All of them equally important to the timeline!
If not, will there be enough light after the ceremony to take the bride and groom portraits?
If the couple is doing a ‘first look’, will they want bridal and family portraits following the portraits?
If the couple is not doing a ‘first look’, then the family portraits
will have to be done separately. Also, bridal party portraits may have
to be done separately as well. Is the couple okay with having these
portraits separate?
Are the locations for the portraits far from the ceremony or reception venue?
What it comes down to is whether the couple is deciding to have a
traditional wedding or a ‘first look’ (when the couple sees each other
before the ceremony).
Photography timelines are vastly different for each, which I will explain in more detail below.
It Doesn’t Have to be Fancy
The wedding photography timeline doesn’t have to be made in Adobe
Illustrator (although you could do that). A simple Word document, or
equivalent, would work just fine.
Having this schedule gives the couple a chance to look over the timeline and if need be, make changes of their own.
The following questions are important as they determine how you are going to schedule each portrait event of the wedding day.
Also, you’ll want to create a template of some sort since you’ll be
creating more timelines as you continue to grow your business. Once you
get more experience creating these timelines, it will get easier and
easier to fill in the details.
Traditional Wedding Day Photography Timeline
A traditional wedding means that a couple will not see one another
before the ceremony and portraits get taken after the service. It
usually isn’t a problem.
However, it is important to note if there will be enough light after
the ceremony or if you will have to photograph the couple using
artificial lighting.
This couple opted to keep their wedding day traditional. Portraits were scheduled right after the
ceremony.
The easiest way to create the wedding photography timeline for a
traditional wedding is, begin with the times of the two most important
parts of the wedding day: the ceremony and the reception.
From there, you will be able to work your way back and schedule the times for the rest of the days’ essential details.
The same couple also decided to have sunset photos after dinner and toasts.
Say, for example, the ceremony begins at four o’clock in the
afternoon, and the reception starts at seven o’clock. Begin with writing
the ceremony time down first, and work your way backward until you
reach the ‘getting ready’ part of the day.
‘Getting ready’ photos can lead into the bridal portraits seamlessly.
Example Timeline for a Before the Traditional Ceremony
Working backward in time from the ceremony, a sample wedding day timeline may look like this:
04:00 pm – BRIDE AND GROOM ARE MARRIED
03:00 pm – Travel time to ceremony location and allow the bride to
have touch-ups and get ready for the ceremony. Photos of the ceremony
location and details. Candid photos of guests arriving
02:45 pm – Portraits of the groom with his family
02:00 pm – Portraits of the groom with groomsmen
01:00 pm – Portraits of the bride with her family
12:00 pm – Portraits of the bride alone and with bridesmaids
11:00 am – Photography coverage starts
10:00 am – Getting ready
Even if you may not be photographing the ‘getting ready’, due to
collection choice or otherwise, it’s good to have a general layout of
the day.
This
couple kept their wedding traditional. There was no more light after
the ceremony and we
prepared for that because we had a timeline.
Example Timeline for After the Traditional Ceremony
Once you have the bulk of the day laid out, it’s time to schedule all of the events after the ceremony.
It can look something like this:
05:00 pm – Portraits of the family with the couple after the
ceremony. This can be either at the altar, ceremony location or
somewhere close by.
05:45 pm – Portraits of the bridal party altogether with the couple.
06:00 pm – Bride and groom portraits
06:45 pm – Arrive at the reception location. Take detail photos of the reception set up.
07:00 pm – Reception time
10:00 pm – Photography coverage ends
Knowing when family portraits will be done can help keep everyone on schedule.
At the Reception
During the reception, it’s good to consult the coordinator or planner
to ask what their scheduled timeline is. When there is no planner or
coordinator, go to the DJ booth and consult with them.
The reception is much more relaxed than the rest of the wedding day.
Here, you can follow the timeline that the other vendors provide so that
you can focus on getting great photos of the dancing without the
pressure.
Work with your clients to outline which portraits are the most
important for them. That way, you carve out enough time for those. The
remainder can be filled in throughout the day.
For example, if the couple isn’t interested in having family
portraits after the ceremony, fill the time with more bridal party
photos or extend the couples’ portrait time.
Ask
your clients if they want sunset photos or if they will be having
something special during the day.
This way you can include it into the
timeline.
Each wedding timeline can differ. Beginning with the ceremony and
working in reverse will give you the quickest way to lay it all out.
‘First Look’ Wedding Day Photography Timeline
Again, even though the couple will be seeing each other before the
wedding, it is quick and easy, to start with the ceremony time.
We’ll keep the same times for this example so that you can compare
the two. Refer back here when you are creating your clients’ wedding
timeline.
‘First look’ before the ceremony.
‘First Look’ Example Timeline for Before the Ceremony
The ceremony begins at four o’clock and the reception begins at seven o’clock.
04:00 pm – BRIDE AND GROOM ARE MARRIED (Ceremony)
02:45 pm – Bridal Party Portraits with the couple
02:00 pm – Bride family portraits and groom family portraits
12:30 pm – Bride and groom ‘First Look’ and portraits
10:00 am – Getting ready photos
A timeline can change somewhat depending on ‘light’ situations. The
afternoon sun is very harsh, especially for outdoor photography. You’ll
want to avoid setting this time for the bride and groom portraits unless
necessary.
In my experience, this is more often the case.
The above is a typical wedding timeline and even with the harsh light, you can opt for a covered or
indoor location.
‘First Look’ Example Timeline for Before the Ceremony with Formals After
When your couple chooses to only do the ‘first look’ before the
ceremony, and then do the formals later in the day, the wedding day
could look something like this:
04:00 pm – BRIDE AND GROOM ARE MARRIED (Ceremony)
02:00 pm – Couple portraits alone
01:30 pm – Bridal party portraits with the couple
01:00 pm – Bride family portraits and groom family portraits
12:30 pm – Bride and groom ‘First look’ only
10:00 am – Getting ready photos
This couple had their ‘first look’ and formals before the ceremony. They also had formals after
the ceremony during sunset.
‘First Look’ Example Timeline for After the Ceremony
From here, the post-ceremony timeline would look something like this:
05:00 pm – Portraits of the family with the couple after the
ceremony. This can be either at the altar, ceremony location or
somewhere close by.
05:45 pm – Cocktail hour at the reception venue
06:00 pm – Photograph reception details and other candids during this time
07:00 pm – Reception time
There are many different timelines because every wedding event is
unique. Depending on your style, you might schedule the portraits
earlier or later in the day.
Perhaps
you’re photographing on a beach and want beautiful sunset photos. You
may choose to take pictures of the couple earlier, and again during
sunset.
Stick to the Timeline But Also be Flexible
Keep in mind that setbacks happen more often than not during wedding
days. Fortunately, you have a handy wedding timeline. Due to the way it
is set up, you have the option of rearranging and moving things around
if necessary.
An example of this would be if a groomsman is running late to the
bridal party portraits, you can begin with the bridesmaids. Or if the
bride is late for the portraits or ‘first look,’ you can switch to the
pictures of the groom with his family instead.
We didn’t have time before the ceremony to take the full bridal portraits so we opted to do them at
a later time.
Having the timeline in mind during the wedding day will make these
setbacks easier to overcome. You can reassure your clients that you will
still get all of the photos that are of utmost importance to them.
Template for Quick and Easy Wedding Day Photography Timeline
Creating timelines doesn’t have to be a grueling task. Use the below
template to help you effortlessly create quick and easy wedding
photography timelines. It works for both traditional or non-traditional
weddings, and begins with the ceremony and working backward.
Once you’ve created your timeline, make sure to confirm all of the
details with your couple. Sure, things can change on the day, but it is
still essential for the couple to sign off on it.
Be sure to send a copy to the wedding planner or coordinator as well.
That way, everyone is on the same page in regards to the timeline of
how the day will unfold.
As the photographer, it’s important that you, your clients, and team, are all on the same page as the day unfolds.
Taking the time to create a timeline of each significant photographic
moment during the day will save time and keep you in control of the
photography.
Work with the coordinator or DJ for the reception events. Add these to the timeline, even if they
might be changed on the day.
With time and experience, you’ll be creating wedding timelines quickly and effortlessly!
Do you have trouble with wedding day photography timelines? Are their
extra things you would consider? Share with us in the comments below.
Share this article.
How to Photograph Family and Bridal Party Portraits Quickly at Weddings
Wedding days are filled with details. While the bride and groom
portraits are the most important pictures you’ll photograph during the
day, family and bridal party portraits come at a close second.
These tips help you photograph family and bridal party portraits
quickly and beautifully, giving your guests great photos without taking
up valuable time.
If you have time during the bridal party photos, get creative!
Family portraits
Make use of a consultation to speak with your clients before the
event to find out if any of their parents are divorced and note this
down on a wedding info sheet.
I lead with this because it can change the order in which you
photograph family portraits, especially if there are parents who choose
not to see each other.
Unfortunately, this is a reality and should be handled with care.
Ask about divorced parents before the wedding because it can affect family portraits.
During the consultation process, you should also create an itinerary
so that you have at least 30 minutes for family portraits. The more time
you have, the more variety in posing you can get, however, 30 minutes
is enough time to capture the family.
Both family portraits in the same location.
When photographing wedding family portraits before the ceremony, make
sure you confirm if both the bride and groom families will be present
or if you will be photographing them separately.
Either way, this list provides different combinations to use with each family; all achievable in under 15 minutes.
Build portraits by adding people gradually.
Bride/Groom with parents (If they are divorced, photograph with new spouses or simply keep them separate portraits)
Bride/Groom with entire immediate family, including brothers, sisters, including spouses and children
If grandparents are present, take another photo of the entire family including grandparents
Bride/Groom with mother
Bride/Groom with father
Bride/Groom with nieces and nephews only
Bride/Groom with siblings
Bride/Groom with grandparents
Bride/Groom with important uncles/aunts/extended family
Build portraits by adding parents and without moving them, add in the rest of the family.
Keep the portraits of the extended family until the end.
They may be eager to get family portraits after the ceremony but make
sure that you express to them that the most important photos are of the
immediate family.
Of course, make sure to ask the bride and groom if there is anyone in
the extended family that is a must-have during the family portraits.
At small weddings, you might have a chance to photograph all of the guests with the bride and groom.
Take photos of each family individually and don’t forget to add the bride or groom.
The family portrait formula
To do this and all of the family portraits quickly, follow this formula:
Find a big space with a neutral or pleasing background, like pretty
landscaping, an interesting building, or a clearing in the
venue/location. One great option is to photograph close to the ceremony
where family members are all together and present. This helps keep
people from wandering off and missing out on the portraits.
Begin with the family that is present. For example, if the groom’s
family is ready, begin with them so that you don’t waste time waiting.
Set up the bride and groom in the center, tummy to tummy, holding the
bouquet. From here, build out until you get the entire family in the
photo. Remember to also take photos of the bride and groom with their
respective families alone.
From there, it is easier to keep the bride or groom in the center and add or remove people as needed.
Always show a connection by
having people put their hands on the arm of the person next to them or
if they are spouses, holding hands. Putting hands on the shoulders of
children or holding their hands also helps.
For babies and children under 3, they are best when being held as
sometimes they might be too small if they are standing in the portrait.
If you have time, photograph both options.
Both families are in one portrait.
Family portraits are the ones that guests always download the most as
many family members do not live nearby. Weddings act as a mini-reunion
for families, which is why it’s important to get solid portraits of
them.
Grandparents are very important guests, make sure to take portraits when they are present.
Taking family portraits using the formula above ensures that you can
work quickly and not take up time from the cocktail hour or even the
bride and groom’s portraits!
Connect family with hands to arms or on shoulders.
Once you take the solid portrait of the family, if you have time, get creative or have fun with it.
Get a photo of the family hugging or siblings doing something funny.
Doing this also helps keep the mood light and ensures that everyone has fun during the family portraits.
Bridal party portraits
Bridal party photos should take
anywhere from 45 minutes to one hour to photograph to get as much
variety as possible. Begin photographing the entire bridal party
together to ensure that no one is missing and everyone is present.
Begin with photographing the entire bridal party together.
A few quick tips for bridal party portraits
Make sure that all boutonnières and bouquets are ready and each
person has their flowers pinned or in hand. Place bouquets at belly
button height because this keeps the arms slightly bent, and the flowers
visible without being too high or too low.
For the groomsmen, ask them to take out all of their belongings from
their pockets as this can create hard to edit shadows on the pants. If
there is something special, like a gift from the bride or groom to their
bridal party, take a photograph of that too.
Take the following series of photos for the entire bridal party portraits:
Bridal party standing in line – placing bridesmaids on bride’s side
and groomsmen on the groom’s side is a classic and sure portrait of the
entire bridal party. Place the tallest people on the outside as they can
distract from the bride and groom if they are shorter. Then line them
up according to height.
Create a ‘u’ shape forward or try to use a ‘v’ shape to create more depth.
Stagger the bridal party and turn some people away from the center,
creating more depth in the portrait. You can sometimes have the
bridesmaids interlocking arms or the groomsmen holding shoulders or
leaning against each other. Try different ideas with them standing.
If you have access to chairs, place a couple in front to create
differences in height and create a similar portrait but with a few
people sitting. It makes a much more interesting photo.
If there are steps, use them to stagger the bridal party across, keeping the bride and groom center.
Get a photo of the bridal party walking toward the camera having fun.
Ask the bridal party to mix and get a group photo of them having fun.
Get a group hug if the bridal party isn’t too large. Doing so
creates authentic smiles and breaks-up the stiffness or seriousness of
the portraits.
Bridal party portraits should be fun and keeping the mood light always helps.
If you find yourself having a hard time getting them to focus, try
letting them know that the faster you photograph the portraits, the
faster they can get to the party.
This usually motivates them to cooperate faster.
Once you have the entire bridal party portraits, take photos of the
groomsmen. The bride can take a break to touch up makeup, take a sip of
water, or rest for a moment.
Groomsmen usually want to get the portraits over as quickly as
possible so beginning with them makes everything run smoothly. If you
have a second photographer, ask them to take the groomsmen aside and
photograph them while you focus on the bride to cut time as well.
Photographing
the bridesmaids and groomsmen separately is much more fluid and can be
more fun. Have them line up, hug, do something funny, and take
individual photos of the bride or groom with each person.
Have fun during bridal party portraits.
Take individual photos with each person in the bridal party.
Make sure to take waist-high portraits as well as full-length with
enough room around the frame just in case they print the photo at
different sizes that may crop the image.
Try and keep the bridal party photos in one location so that you don’t have to move so many people around.
Another tip is to photograph the bridesmaids and groomsmen separately
earlier in the day and come together after the ceremony for the larger
portrait.
Sometimes this can save time as well.
Extended family bridal party portraits
After the ceremony, as guests congratulate the couple, do not get
caught in the trap of photographing extended family portraits. Make sure
to let the guests know that during cocktail hour or the reception, you
will have more time to photograph guests with the couple.
Extended
family photos during cocktail hour saves time from the bride and groom
portraits or
other events during the wedding day.
The reason for this is because taking portraits of guests with the
couple immediately after the ceremony, or while the guests are
congratulating the couple, can cut time from the family portraits.
It is okay to get candid/photojournalistic photos during this time of the couple with the guests.
Photos during the reception for extended family is very ideal.
However, make sure to get a few before heading to the location where
you are taking the family portraits. This gives you time to set up and
get your camera ready for the quick family portraits.
Keep a checklist
Use the Notes app on your phone or carry a printout of a checklist
with all the combinations to use to photograph the family and bridal
party portraits. Doing so helps you keep track of what you’ve already
photographed and what you need to do, so you don’t waste time wondering
what comes next.
Weddings are all about the guests, and the guest list is meticulously
planned, so make sure you take the extra step and ask the bride and
groom if there are any guests they specifically want photographing.
Doing so makes all the difference when they look through their final
images. Make sure to include these VIP guests in your checklist and note
when would be a good time during the day to get their portrait.
Once you have more wedding experience, these portraits become easier
and quicker to set up, photograph and pose. Soon you’ll be doing them in
under 15 minutes, giving you more time to experiment and get creative!
Put a family member or someone close in charge
It can be stressful making sure all the family members and bridal
party are present where and when they need to be. This stress should not
fall on either the bride or groom.
On the day of the wedding, find someone who is a family member or
bridal party member who is familiar with both sides of the family be in
charge of making sure that all family members and bridal party are where
they need to be during the portraits.
Since they know who the key players are, this helper can cut time by
making sure everyone who needs to be in the portraits is present, making
the portrait time more fluid.
Take photos of gifts the bridal party receives from the couple.
Keep the portraits moving
Sometimes, you’ll have to wait on
a family member or bridal party member, and that is okay. You always
want to make sure the bride and groom stay as calm and stress-free as
possible. When this happens, keep the portraits moving.
For example, if the groom’s family isn’t ready, then begin with the
bride’s family. If you’re waiting for a bridesmaid, take individual
shots first and then move on to the groomsmen.
Making sure the portraits continue allows the person who is missing
to arrive, all the while you are still creating beautiful portraits for
the bride and groom.
Allow the bridal party to have fun.
If there is a circumstance where someone essential is missing or
unavailable for the photos, ask the bride and groom to move the portrait
session to a different time.
Perhaps you can do the bridal party portraits during the cocktail
hour or carve out some time during the reception to get family
portraits.
If you have access to chairs use them to pose the bridal party or family.
Make sure to note any changes to the portrait sessions and anyone
still to be photographed. Ensure that you get the photo during the day
to help the bride and groom feel less stressed and more confident in you
to achieve all the crucial portraits.
Family photos and bridal party photos are a huge part of every
wedding day and can be stressful when trying to pose large groups of
people.
Using these tips can help these portraits to be more streamlined so
that the guests, as well as the bride and groom, can enjoy the party.
You’ll get fabulous portraits that everyone loves without having to take up too much time.
Do you have any wedding portrait tips you’d like to share? If so, leave them in a comment below.
For more information on wedding photography, read this article on What Are the Real Responsibilities of a Wedding Photographer or What to Bring to Photograph a Wedding Besides Your Photo Gear