Wednesday, October 26, 2022

When to Use a Narrow vs Wide Aperture


Using a narrow vs wide aperture can make the difference between a good and a bad picture. In this article, you’ll learn about arguably the most important setting on your camera, the aperture.

So let’s open up and shed some light on the subject! 

What Is Aperture?

The aperture is the hole in the lens that lets light through. This hole can be controlled to be larger or smaller. This will cause a number of different effects.

The most obvious is that more light will come into the camera at a faster rate. So what more can be said about aperture?

  • Diaphragm ring – Aperture can be controlled by a ring within your lens, every lens has this ring.
  • f-number – The f-number determines how large the aperture will be. Larger numbers imply a smaller aperture. Smaller numbers imply larger apertures. A large aperture would be f/1.8, while f/22 is considered small.
  • The lensPrime lenses will always have the largest apertures. They can be as large as f/0.85! The largest aperture available on zoom lenses is f/2.8.
  • Exposure value – Aperture is one of the 3 settings that controls the exposure value. An exposure value of 0 is considered correctly exposed. The other settings are ISO and shutter speed.
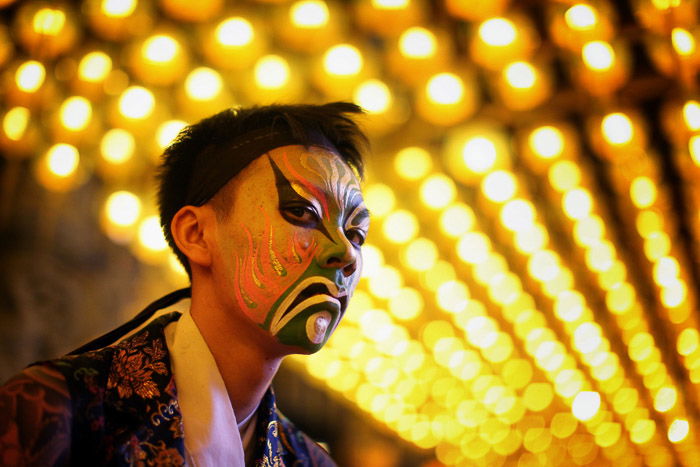
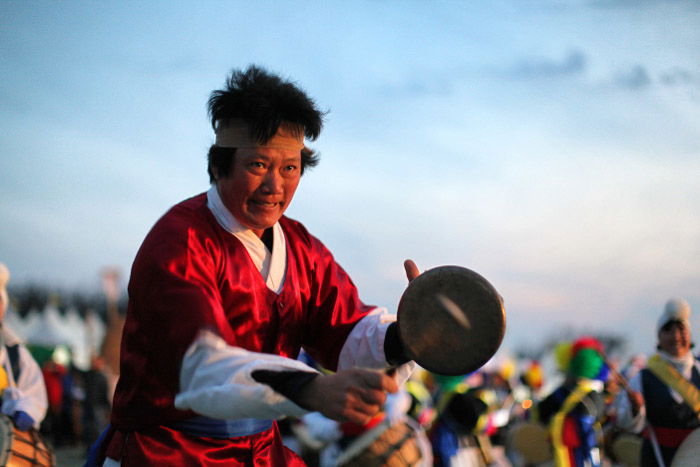
A man dressed up for carnival with distinctive bokeh background created using a wide aperture
One of the main effects of the wide aperture is the distinctive bokeh background you can see
 in this image.

Wide Aperture

The use of a wide aperture goes beyond how quickly light comes into a camera.

An aperture of f/2.8 is considered a large aperture. For some of the below effects to be in evidence you’ll need this aperture or even larger.

Depth of Field With Wide Aperture

When you focus your camera you’ll pick an area of the photo to focus on. This, for example, could be a person in a portrait photo.

Depending on the aperture setting on your camera the area in front of and behind your focal point will also be in focus. A large aperture will produce a shallow depth of field.

This will make only the main subject sharp. And the area in front and behind the subject will be out of focus.
A sports star in action, separated from the background through the use of a wide aperture.
In this photo, the main subject is separated from the background through the use of 
a wide aperture.
Subject Isolation

This means a large aperture is perfect for subject isolation using focus. This works 

well when the subject is placed in the middle of a tunnel.

The subject will now pop out of the frame, and the background will be blurred.

Bokeh

If the main subject is sharp, there can be a large portion of the photo that isn’t. This area is often referred to by photographers as bokeh.

If there are no objects behind the main subject this area of the photo won’t be noteworthy. 

This might happen if the background is a simple blue sky.

When the background is a line of trees, a tunnel, or street lights, you’ll see a pleasant bokeh background. When there are points of light this will manifest itself in the form of light globes.

Creative Bokeh

It’s possible to do even more with bokeh. You can create shaped bokeh such as hearts, stars 

or electric bolts. To do this you’ll need to cut a black circle from some paper.

Then cut the shape you desire into the black circle and make sure it is in the center of your 

black disc of paper. Place it over your lens and shoot away.
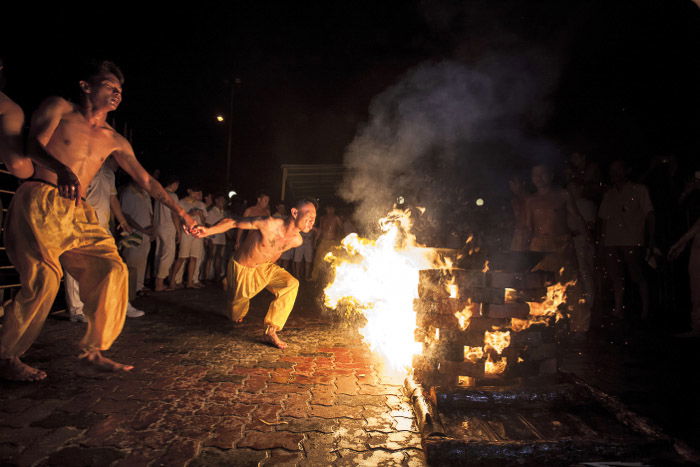
A performance by a bonfire at night shot with a wide aperture
Photographing at night will almost certainly mean using a large aperture.

Low Light Photography

A good fast lens is a must have when it comes to low light. It’s true that cameras perform 

better at high ISOs these days, somewhat mitigating the need for a large aperture.

That said, without a large aperture you’ll often be struggling for light, especially when it 

comes to night street photography.

Get a good quality 50mm lens with a large aperture and you’ll be set for most low 

light settings.

Action Photography

Action photography is about fast shutter speeds, but wide apertures play a part here as well. That wide aperture allows light to enter the camera quickly enough to ensure a fast shutter speed is achievable.

Action photography often means sport, which can make using a large aperture tricky. That’s due to the shallow depth of field, and because the main subject is moving in a dynamic environment.

This can mean the subject moves out of the focal sweet spot. When you get the action photo right with the large aperture it will look amazing.

Look to use the camera’s focus tracking function. It’ll help you keep your subject focused.
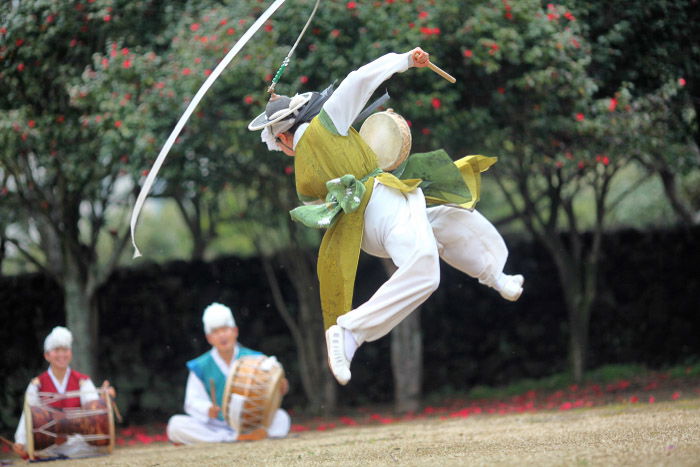
A traditional dancer in mid air - wide vs narrow aperture
This photo uses a large aperture, and that allowed a fast enough shutter speed to capture this 
dancer mid air.

Narrow Aperture

At the other end of the scale is a narrow aperture. This means an aperture of f/16 or smaller. It should be noted that you wouldn’t normally use an aperture this small for landscape photos.

The sharpest focus is usually achieved at f/8 or f/11 depending on the lens. The following are ways in which narrow apertures can benefit your photography.

Depth of Field With Narrow Aperture

If elements in the foreground and background of your photo are important, and you want them to be focused you’ll need to use a narrow aperture.

The effect of this narrow aperture is a large depth of field, with most areas of the photo being in focus. If you have a line of people and you want them to all be in focus, for example, you’ll need to use a large depth of field.

Aperture for Landscape Photos

As mentioned most landscape photos should be photographed at that lenses sweet spot aperture, often f/8. This calculation changes when there are strong foreground elements that you want to be in focus, then a narrower aperture is needed.

If you focus on an object very close to the camera even using a small aperture might not be enough to keep the background sharp. Bracketing your images for focus is an option.

Focus stacked images can then correct focus problems in post-processing.
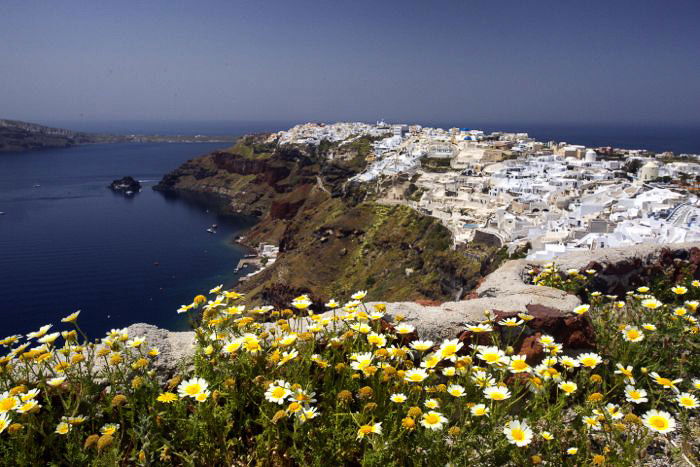
A stunning coastal landscape photo used an aperture of f/16, so that background would be more in focus.
This landscape photo used an aperture of f/16, so that background would be more in focus.

The Starburst Effect

The starburst effect can only be achieved by using a small aperture. It will cause a point of light to have spikes.

The type of diaphragm your lens has will affect the number of spikes produced. If the diaphragm has an even number of blades, then the number of blades will also equal the number of starburst spikes produced.

If the number of blades is uneven you will get double the number of spikes. This means that 9 blades will produce a starburst with 18 spikes.

It’s possible to produce the starburst effect from street lights, and even the sun. Look to follow these steps to be successful at this technique.

It should be noted there is a starburst filter you can use to create spikes. But it looks better and more natural using this method.

  • Street lights – You’ll need a tripod since small apertures and street lights mean a long exposure at night. Experiment with the aperture a little, the smaller the aperture the longer and thinner the spikes will be.
  • Sunlight – Photographing the whole sun won’t produce a good starburst effect, the likelihood is that the sun will overexpose your photo if you’re aiming at it. It’s also not good for your eyes, unless the sun is near sunset. This means finding ways of reducing the amount of sun photographed. That means blocking the sun. This could be by using leaves on a tree, clouds as they pass the sun in the sky, or the horizon line as the sun begins to set.
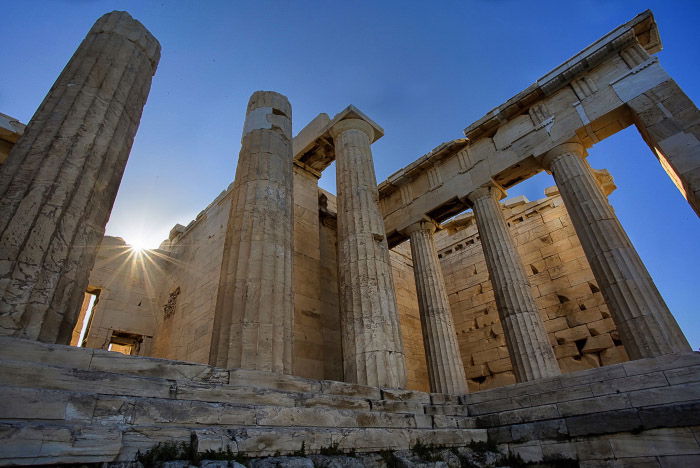
A photo of classical ruins - wide vs narrow aperture
This photo shows how hiding the sun behind an object you can use a small aperture to create 
the starburst.

Slow Shutter Speed

As with action photography, slow shutter speed is not controlled by the aperture. Using a small aperture, especially into the evening will result in slow shutter speeds.

Slow shutter speeds in conjunction with small apertures can in interesting for cityscapes. You’ll get traffic light trails from cars, and starburst effects from the stationary street lights.

Other effects that you can get from slow shutter speed are the flattening of water, or making white water appear like silk.

These photos taken in rural areas often during the day will require a small aperture. This is in order to get long exposures between 1 and 20 seconds to achieve the effect.

Panning may also need a narrow aperture, the shutter speed of around 1/20th is not too slow though. A smaller aperture gives you a larger depth of field to use.

This is useful with a moving object and can result in a sharper focus on the object you’re panning.
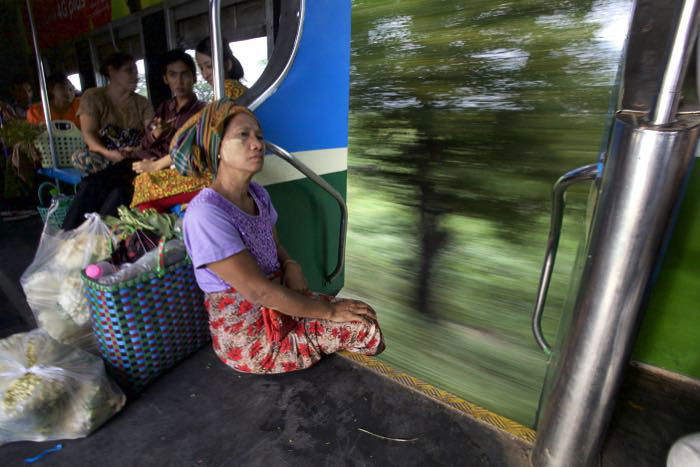
A woman sitting on a moving train - wide vs narrow aperture
In order to slow the shutter speed down to create the motion blur, a small aperture was needed.

Learning about using aperture is really important for your photography. It’s a setting with a great deal of creative potential. You need to know about its relationship with shutter speed as well.

A lot of photographers will use aperture priority mode for many of their photos. It speeds up changing your settings, and aperture is that important.

How do you use aperture in your photography? Do you use aperture priority, or do you go fully manual? We’d love to see example photos that have used aperture for creative effects.

Please leave your thoughts and photos in the comments section of this article. 

 ---------------------------------------------------------------------------------------
Camera Basics Series: Aperture Explained – Free Quick Guide


Aperture, like shutter speed, is an essential building block in understanding how light reaches our camera’s sensor for us to create the perfect photograph.

Learning about aperture can be confusing at first and can trip up the most experienced photographers, but it does get easier to understand with patience and practice.

It can be rare to hear the term aperture being used outside of photography, but at its purest form, the word aperture means an opening, a hole, or a gap.

If we think about this in relation to photography, we can understand that the aperture is simply the opening in a lens that allows light to travel through the lens and into our camera.

In this guide, we will discuss:

  • What aperture means
  • What a diaphragm is and how it works
  • How aperture affects our photos
  • How aperture is measured in our cameras
  • How aperture size affects our depth of field and how to control it

Understanding the aperture is a core photography skill, and you can master that skill today!

Grab your copy now!

Photo Credit: Angela Fulks

 
---------------------------------------------------------------------------------------------------
                           
                                                                  Advertisement:

Turn Your Passion into Profits!

  • Make an extra income from your Photography!
  • Turn your hobby into a profitable passive income
  • Upload and instantly sell to millions of potential buyers
  • Instant Access, Start Today no matter where you are in the world!
  •  Click Here


Sunday, October 23, 2022

   #Photography Life, Photography Tips                                                                     


by Darryl T.

Sorry for the late post this week.  As you know, I usually post every Thursday.  I've had an unwanted guest at my house recently and he didn't want to leave.  Some of you know him.  His name is Arthur, Arthur Ritis.  Here are some "Freebies" to compensate you for my being late. 

How to Pose a Model and Create a Composition – Free Quick Guide


If you like taking pictures of people, there is one skill that you can learn that will make your work immediately better.

Author Ludmila Borosova tells you what she discovered.

“When I started taking photography seriously, I was always focusing on the wrong things like getting a new camera body or a new lens and experimenting with various editing styles.

I would go around town looking for promising models that could potentially make it on the cover of our local magazine.

While factors such as these have some power over your masterpiece, if you’re looking for a nice shot of somebody, it doesn’t matter if they have been in a beauty pageant.

Everyone is beautiful in their way, and trying to meet the standards of society isn’t going to get you exciting photographs.

What does work is learning how to pose different kinds of models and how to work with their body features to complement your composition.”

That skill gets you noticed!

Ludmila walks you through her beginner posing tips right here.

Get your copy now!

Photo Credit: Ludmila BoroÅ¡ová


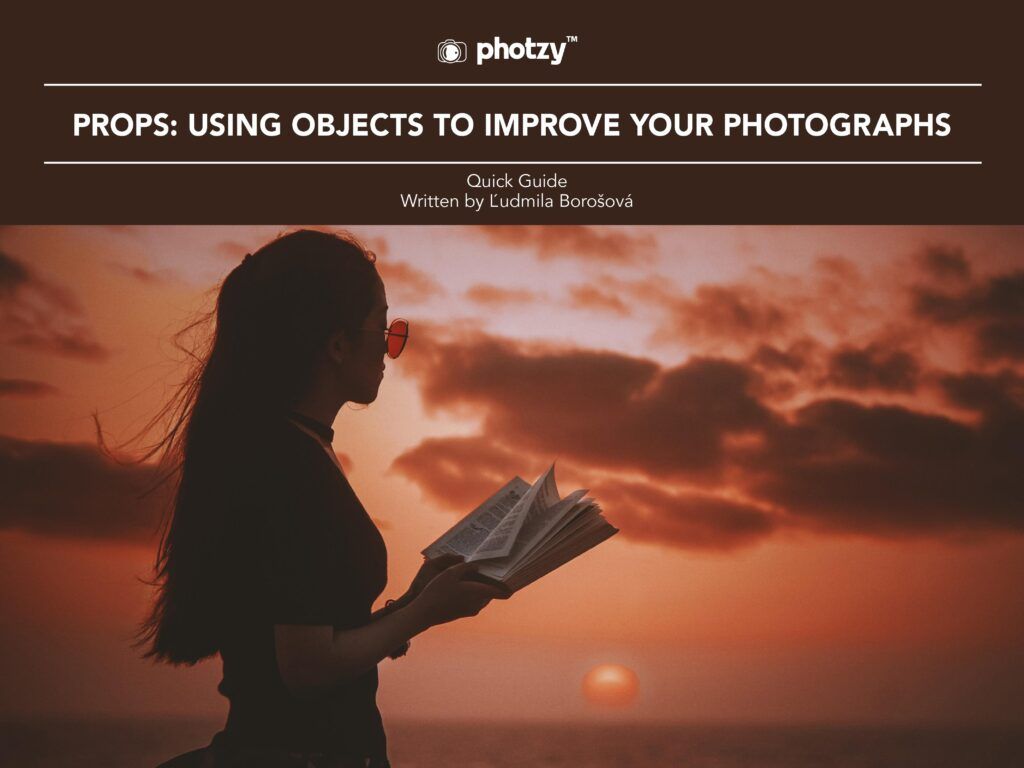
Props: Using Objects to Improve Your Photographs – Free Quick Guide


You’re a creator.

You always feel a need to be seeking ways to bring out the beauty in your photographs.

Oftentimes in photographing a subject, you’ll create a nice portrait just with what you have.

But other times, you’d like to spice things up or open a whole new aspect of your photography world.

A popular way of doing so is by adding props!

Props can create a huge difference in your photographs because they add an element of storytelling!

Today, author Ludmila Borosova will cover…

  • What are props?
  • Why should you use them in photography?
  • Her favorite props for portraits
  • How to find and acquire props inexpensively

Let’s get to it!

Photo Credit: Aziz Acharki


Camera Settings for Pet Photography – Free Quick Guide


If you’re a photographer and own a pet or pets, we are about to say something you already know.

You want to capture stunning pictures of your pets!

You probably are also partially in the know that pet pictures are not as easy as some may assume.

In this guide, author Jo Plumridge takes you through the steps of a successful pet portrait session.

She will discuss…

  • Choices of camera gear
  • Lighting options for both indoors and outdoors
  • Camera settings to get you started on the right path
  • And finally, some composition tips and suggestions

If you love animals and want to photograph them, this is the place to start.

Grab your camera and enjoy the read!

It’s waiting for you below.

Photo Credit: Jo Plumridge


Photo Income  
 

Wednesday, October 12, 2022

#Telephoto

12 Secrets For Better Candid Street Photography


Candid street photography captures unique and authentic moments in time. This street photography sub-genre is a challenge. So many components need to be right to make it work.

Read on to learn some of my secrets for creating your own perfect candid street photograph.

What Is Candid Street Photography?

Candid street photography is imagery of people shot from the street without them realizing. This sounds a bit creepy. If done with sensitivity and skill, candid street photos tell a valuable story about the people around us. And how we connect with each other.

As soon as we’re aware that someone is taking our photo, our face and body change. It’s difficult to discover the true personality behind the mask.

Keen to capture real emotion and vulnerability in your photographs? Then candid street photography is for you.

1. Minimal Gear For Candid Street Photography

Keep your camera bag light for your candid street photoshoot. Stick to a couple favorite lenses (I use a 50mm and 70-200mm). Unless you’re planning on staying in one spot, leave your tripod at home.

Restricting your gear means you have fewer decisions to make and you can move around easier and keep a low profile. Feeling brave?

Take your camera with a prime 35mm or 50mm lens and leave your bag at home.

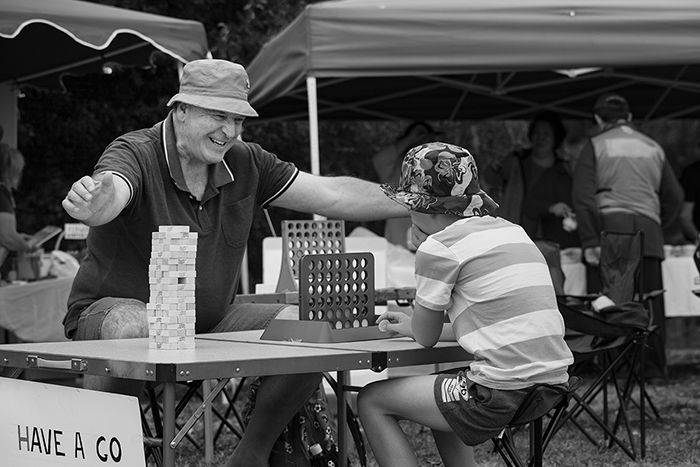
candid street photo of a father and son playing connect four outdoors
Heather Milne

2. Photographing Ground Level Candid Photos

The best thing about taking candid street photos at ground level is that you get to sit down on the job. Find a comfortable dry spot with three or four different viewpoints.

This is a good way to be unobtrusive and capture interesting expressions.

The biggest challenge with ground-level street photography is the movement of legs walking past. This can get in the way of the perfect shot.

Use this challenge to your advantage by incorporating moving bodies as a frame for your subject.

3. Dress Down and Blend In

Standing out in the crowd is the last thing you want to do when creating a candid street photo. Blending in with your surroundings is essential.

Wear plain clothing that reflects your environment to avoid attention and maintain anonymity. My standard uniform is jeans, tee-shirt, and sneakers for comfort.

High fashion is definitely not my priority when taking candid street photography!

4. Creating Street Portrait Photos With Patience

The biggest lesson I’ve learned in candid street photography is the importance of patience. I put my trust in my intuition, and sense when something is about to make a good candid street photo. Then I wait.

Sometimes this involves waiting for a long time, but it’s worth it! Slowing down and being patient is useful in many ways.

Take the time to practice your manual settings and observe the changing light. Look at how the pedestrian and vehicular traffic is flowing. Try out your lenses and test different compositions.

The longer you wait, the more likely you are to see the connections between people. This is how you catch intriguing facial expressions, or beautiful movements.

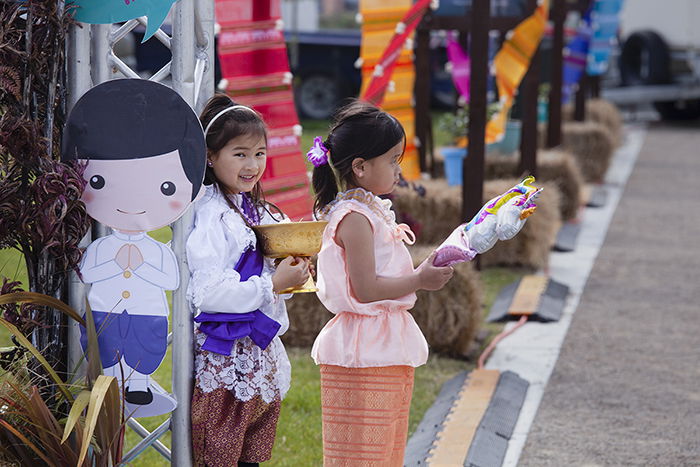
candid street photo of two little girls holding festival objects
Heather Milne

5. Accepting Mistakes In Candid Photos

Going against the rules? Making mistakes? Embrace your photographic faux pas with candid street photography. The decisive moment doesn’t always happen in the perfect light with the perfect background.

Learn how to incorporate movement and problematic lighting in your photographs so that they work to your advantage.

Understand how to convert photographs to black and white if you have color or light issues. And experiment with cropping to draw the viewer’s eye to the subject.

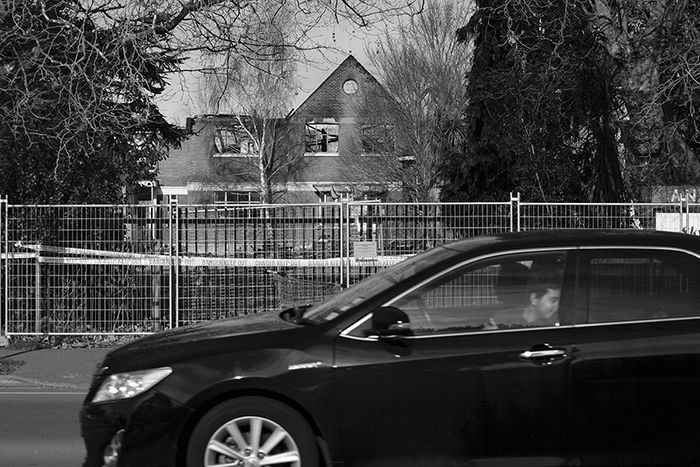
candid street photography of a car driving by an old building
I made this photograph in the middle of the day in bright sun. The car drove past just at 
the ‘wrong’ time. Once I converted it into black and white, it became a happy mistake.
Photo by: Heather Milne

6. Get Close Up With Your Candid Street Portraits

The best way to capture a candid moment is to get close to your subject. This feels daunting when you’re new to street photography. Start by using a zoom lens and photograph inanimate objects to get comfortable with the concept.

Candid street portraits don’t have to be made from the front. You can capture emotions and vulnerability by photographing people from the side or back.

Body language tells strong stories in portraiture. Look for hunched shoulders, people holding 

hands, or interesting head angles.

7. Build Familiarity With Your Street Scene

One way to focus on your subject for the perfect candid shot is to be familiar with your environment. We understand the light and weather patterns of our home towns and know where interesting people hang out.

Use this knowledge to your advantage. You’re likely to intuitively know the camera settings and composition to use in a familiar setting.

This means you can really concentrate on observing expressions, behavior, and body language of people for great candid photos.

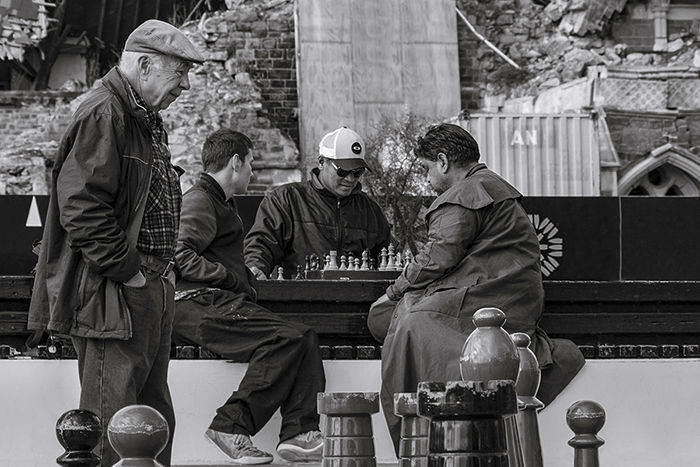
candid street photo of people playing chess outdoors
A very familiar scene in my home town.         Photo by: Heather Milne

8. Stay Friendly and Approachable

Have a clear idea of the purpose of your photographs so that you can respond honestly to any queries. Be prepared to show people their photos if they ask.

My personal code of ethics dictates that I’ll delete a photograph of a stranger if they ask me to. Taking sneaky photos from behind trees and hidden corners looks dodgy. But you also don’t want to be too obvious in the middle of a scene.

Position yourself somewhere in-between (which is easier said than done!). Keep an open mind and calm presence, and trust your instincts if you’re uncertain whether to squeeze the shutter or not.

9. Be Quick And Smart With Your Candid Photo Camera Settings

Candid street photography often consists of long periods of waiting interrupted by very fast and sudden bursts of clicking. When you’re squeezing the shutter, it pays to know exactly what settings you need to use, and how to change them fast.

If a person is moving out of the shade and into the sun, you might need to quickly change your shutter speed. If something interesting is happening in the background, the depth of field might need to change. Practice makes perfect.

Keep working with manual settings until the process becomes automatic for your hands and brain.

It might feel easy to stick to auto settings. Over time you’ll master the control and create candid photographs with a quality that auto settings just can’t produce.

candid street photo of a group of children drumming outdoors
Quickly shifting clouds meant I had to repeatedly change my settings while I tried to capture the scene in front of me. Photo by:Heather Milne

10. Increase Your ISO And Embrace The Grain

It took me a long time to acquiesce and increase my ISO for street photography. I was such a stickler for ISO100 and was reluctant to change it regardless of the light conditions.

The result was a number of dull street photographs made under shop awnings and on cloudy days, which required additional post-production. Technological advances mean that you can increase the ISO setting without compromising the quality of the photographs.

When I tweaked the ISO to between 200 and 400, a new world of candid street photography opened up. I was able to better capture candid facial expressions and keep the shutter speed fast to ensure sharp photographs.

I also like the slight grain that the higher ISO produces in street photography. I avoid increasing it beyond ISO 640.

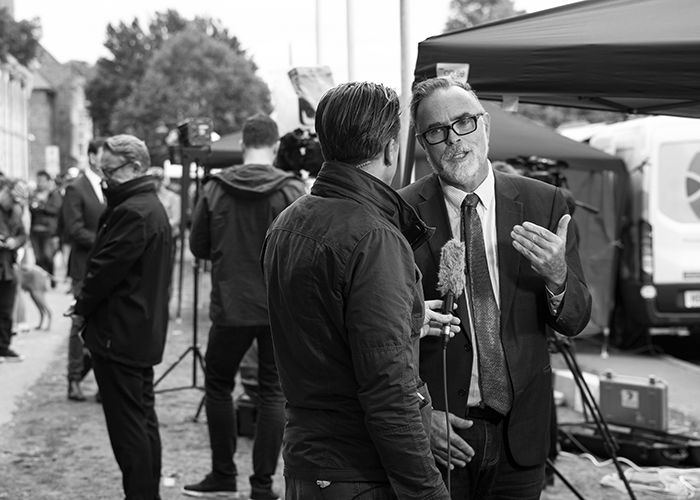
candid street photo of a group of journalists and news reporters speaking outdoors
The light was fading as media from around the world reported on a terrorism attack in my 
city. I pushed up my ISO to keep the shutter speed fast so the images were sharp. 
Photo by: Heather Milne

11. Be the Tourist

Still nervous about taking candid street photographs? Telling yourself you’re a tourist from out of town is a great way to give yourself permission and confidence to make street photographs.

It’s also a useful technique to observe your environment and the people with a fresh approach.

12. Tell the Story

A powerful tool when making candid street portraits is to have a clear narrative in your head. This takes practice because often the moments are fleeting. Learn about what is happening around you.

What are you observing and sensing? What can you smell? What are people saying or singing? If you understand the story, you’ll become an expert at recognizing decisive candid moments.

This helps you communicate what you’re experiencing with the viewer of the photograph. It’s also useful if you’re putting together a series of photographs.

Candid street photography plays an important role in storytelling, photojournalism, and documentary photography. The responsibility to get it right is significant.

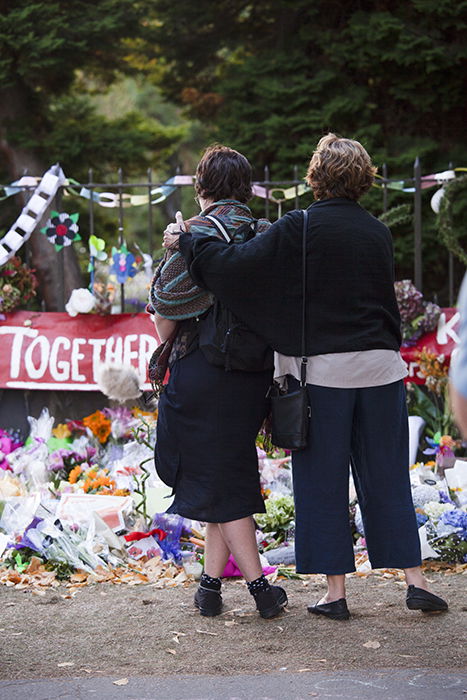
candid street photo of two women comforting each other by a memorial
Heather Milne

Candid street photography is perfect if you want to create an original photograph that tells a story and can’t be replicated.

You’ll avoid complications of artificial lighting, fancy lenses, or self-conscious models, and you’ll experience the freedom of movement and diverse themes and subject matter.

Take on the challenge and learn how to use your camera to share stories and history with candid street photography.

---------------------------------------------------------------------------------------
 

Is There Female Representation in Photography? – Free Quick Guide


You don’t have to be a history buff to know that the women of the world have always had a tough haul in life.

Even today, there are still human beings persecuted for the sole reason of being female.

We all hope that someday that changes.

For the moment, we wondered about the representation of women in the area of photography.

Do they have equality? Do they feel like their work is considered equally essential? Are they able to access the same professional opportunities?

We asked the author and photographer Jo Plumridge to look into these questions for us.

In this week’s eBook, she shares what she discovered.

Are you as curious as we were?

Click below.

Photo Credit: Dorothea Oldani

 --------------------------------------------------------------------------------------



                                                                Advertisement

Long time Friends and New Comers to this blog can get the "Friends" offer for a Capital One Credit Card.  The Holidays are just around the corner, so NOW is the perfect time to see your pre-approval status with no risk to your credit score.


Capital One Cards  


Your friend  (that's me) thinks you’ll love
a Capital One card.

Thursday, October 6, 2022

#4K

10 Types of Street Photography You Should Know

 
width=


People new to the genre might think street photography is easy to define. You could say that street photography is when the street is the location and subject. But that’s far too simplistic.

There are, in fact, many types of street photography. And there are many street photographers with unique and distinct styles. Street photography doesn’t have one set of rules. It is flexible and open to interpretation.

We’ll take you through some of the different types of street photography. It’ll provide plenty of inspiration. And by the end, you’ll be ready to head out onto the pavement to shoot your own street photography.

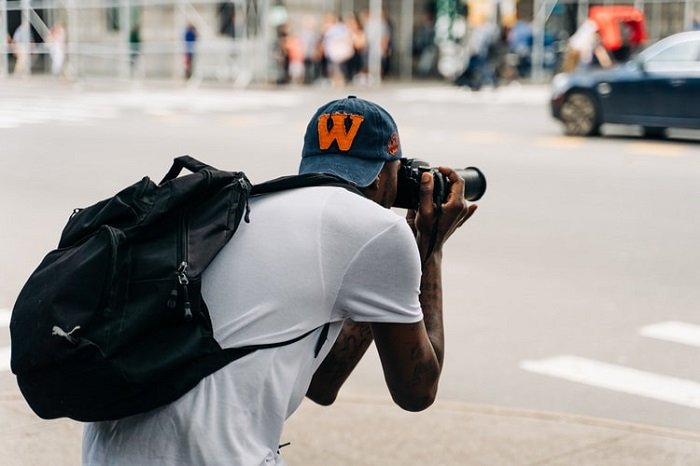
Man bent over and looking trough a camera taking a photo in the street.
Photo by Gabriella Clare Marino 

10 Types of Photography You Should Know

The street is an environment familiar to us all. If you live in a city, you have to navigate your 

way through a maze of streets every day. There are streets we live on. And streets that are new 

to us.

But not all streets make us feel the same way. There are some we like. And some we don’t 

like. A vibrant street with lots of people can make us feel excited. Or a desolate avenue can 

give us the creeps. And streets, like flowing rivers, change as time moves forward.

These are the 10 types of street photography you should know. We’ll provide links to some 

of the finest master street photographers so you can get inspired. By the end, you’ll be ready 

to pick up your camera and pound the pavement.

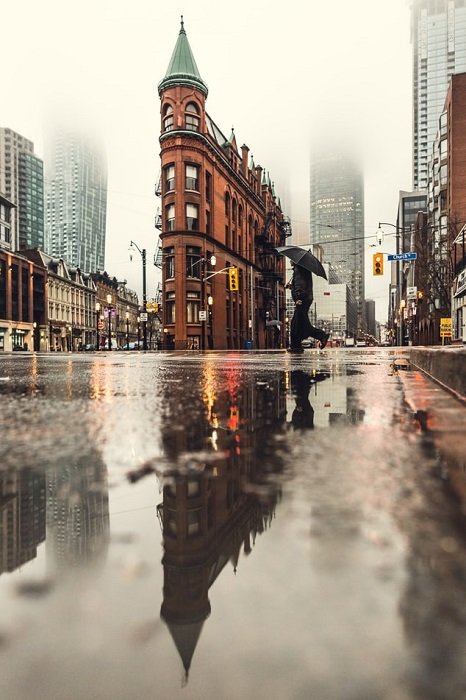
A low-perspective shot of a building and its reflection in puddles on a rainy street scene
Photo by Matthew Henry

1. Unobtrusive Street Photography

An unobtrusive street photographer is someone that does not interfere with the world 

around them. They have no part to play in the scene in front of them—they merely 

observe.

These photographers want their presence to go unnoticed. They stand back and blend 

into the background. And their minimal impact allows the scene to play out as naturally 

as possible.

It’s not possible to disappear completely. But it’s about becoming an accepted and 

non-threatening presence. It’s not about hiding—it’s about blending in.

The unobtrusive strategy allows photographers to capture everyday life on the street. 

This approach allows them to get candid shots without intruding on people’s personal 

spaces.

The photographer’s lack of impact allows street life to continue as if they weren’t there. 

The street photographer observes the unmediated chance encounters. And they capture 

the real moments as they flow by.

The art is in picking subjects and timing the shots. You need to be observant and patient. 

Forcing the shots could disturb the natural balance. People will become aware and 

self-conscious.

This type of street photography lends itself to photojournalism and documentary shooting.

Both disciplines call for natural and true-to-life street photos.

But it’s also an art form in its own right. Candid street photography can freeze a moment 

in time. They can bring back old memories or ignite our imaginations.

Master: Robert Doisneau

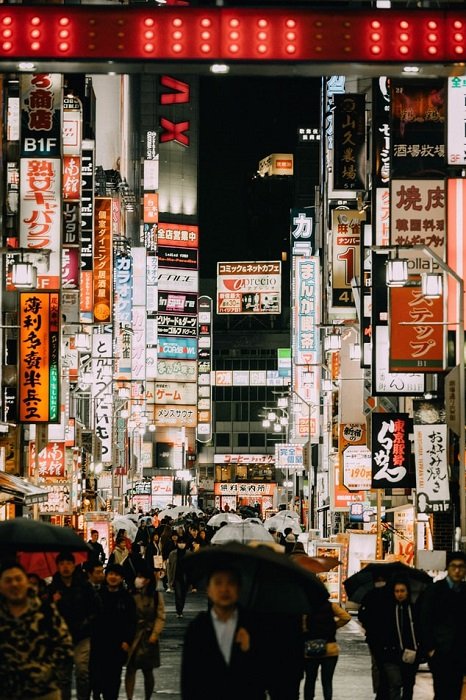
People with umbrellas walking down a pedestrian street in Japan filled with store signs at night
Photo by Harold Wainwright

2. Intrusive Street Photography

The intrusive street photographer has the opposite approach. They’re not happy to sit 

back and watch the world float past them. They want to make waves and be involved.

They still need to blend into the scene—but not to go unnoticed. The intrusive photographer 

pursues active inclusion. They take to people and make themselves known.

The intrusive style can produce vibrant images alive with energy and tension. The shots are 

candid but in a way that is more contrived than unobtrusive photography.

It doesn’t blend so well with traditional documentary photography. But it’s perfect for 

photographers interested in gonzo journalism. With gonzo, the journalist becomes part of 

the story.

This style of photography has been used to document dangerous groups. The photographer 

attaches themself to football hooligans or fringe political parties.

This type of street photography is less about waiting for something to happen. It’s more 

about making something happen. These photographers are brave. And often a little bit 

crazy too.

Master: Bruce Gilden

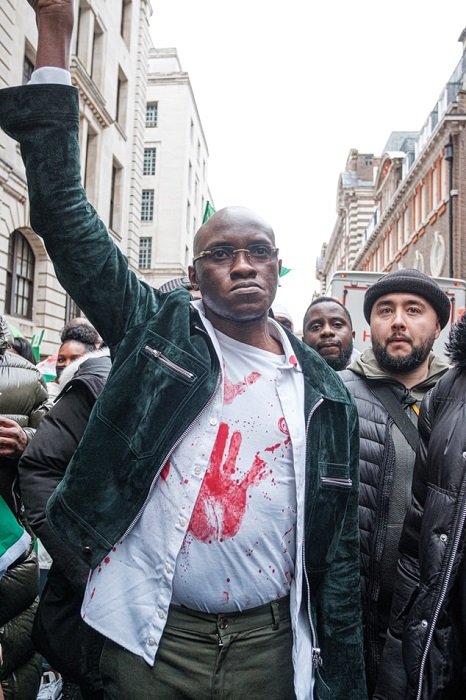
A Black man with his arm lifted in the air as a sign of protest waling with a group of people in the street
Photo by Ehimetalor Akhere Unuabona

3. Raw-Style Street Photography

The raw style of street photography is about finding what’s underneath the surface. 

These photographers have a no-holds-barred approach. They expose the dark reality of 

street life.

Not every street is a picturesque boulevard lined with market stalls and old men reading 

newspapers. There are dark alleys and streets you shouldn’t walk down at night.

These are the locations of the raw street photographers. Their subjects are the barflies 

and the drunks, the prostitutes and the johns, the homeless and the hopeless. They’re the 

ones ignored and swept away.

Raw photographers bring them back into focus. They lift the rug and expose everything 

society has swept underneath.

It’s not always easy to look at. And this type of street photography does raise some 

issues about ethics. People are often caught in dangerous or compromising positions.

The goal is rugged realism. But is there a human cost to this art? And do the ends justify 

the means?

Master: Weegee

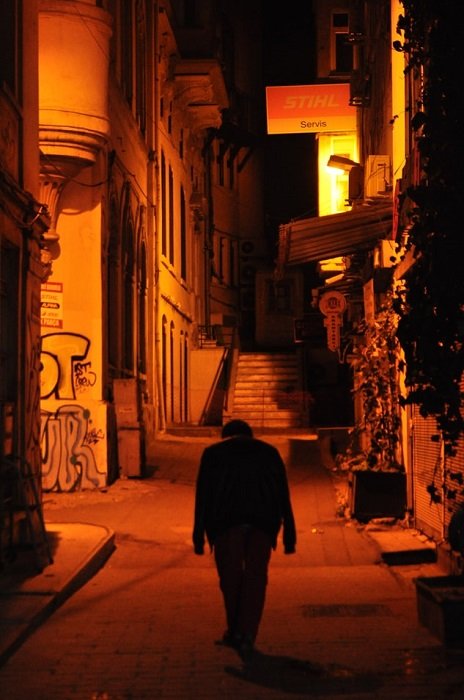
A raw style street photograph of a dark silhouette in an empty alleyway with their down with red and orange lighting
Photo by Aliagha Shirinov

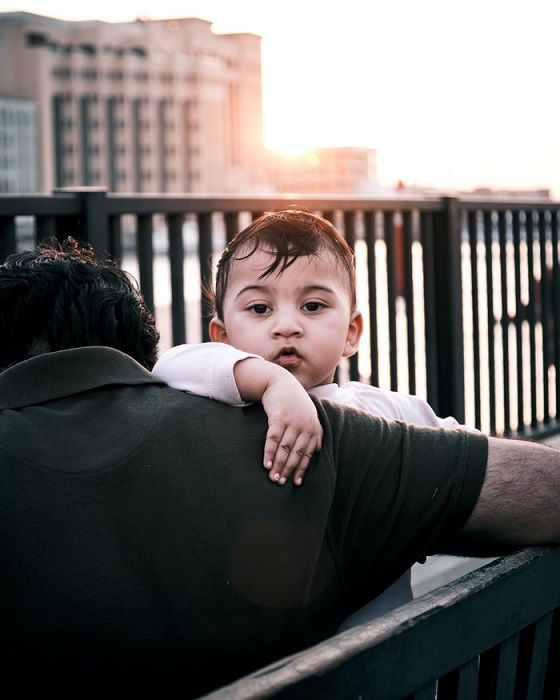
4. Street Portraits

Many people wouldn’t put portraits and street photography together. Portraits are 

often associated with studio photography. These days they are seen as something 

used for mugshots and resumes.

But street portraiture is a fascinating type of street photography. The street can be 

used as a location for portraits. Or you can find new faces for portraits as you walk 

out on the sidewalk.

Rosie Matheson is a contemporary portrait photographer who uses street settings 

to add meaning and flavour to her work. It’s not just about the person. Her street 

portraits are about the location.

People as subjects have always been an intriguing element in street photography. They 

bring warmth to an abstract world. A pair of eyes are like a lighthouse in a sea of concrete, 

helping the viewer connect to the scene.

Street portraits can be staged or candid. That is a decision for the photographer to make. 

It depends on their style and what they want to achieve.

Master: Robert Frank

A street portrait of a child looking over the shoulder of a man
Photo by Farah Abouel Seoud

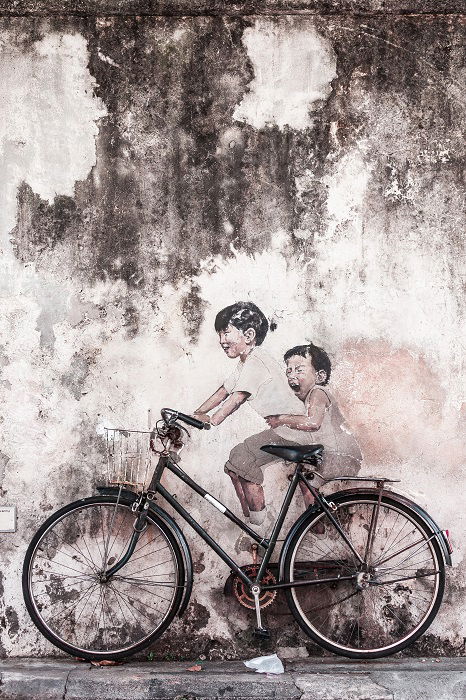
5. Fine-Art Street Photography

Fine art and street photography aren’t usually considered associates. The former is about 

beauty and precision. The latter is about the hustle and bustle of the urban jungle.

But the street can be the setting for photography that focuses on beauty. It can be used as 

the canvas on which the photographer can paint their picture.

With many types of street photography, the content of the photo is important. But with fine 

art street photography, the photo itself is the important part. The image is the subject.

The fine art photographer finds beauty in the urban landscape. They use their skills 

of composition and framing to shoot captivating images.

The process of shooting this kind of street photography can be painstaking. Every detail 

is considered, and the camera placement has to be exact.

Master: André Kertész

A black-and-white fine-art street photograph of two children sitting on a bike against a wall and laughing
Photo by Yaopey Yong

6. Fashion Street Photography

When people think about fashion, they think about studios and catwalks. But in reality, 

the main fashion catwalk is the street. That’s where most people see us wearing the clothes 

we like to wear.

Modern fashion photographers are well aware of this. They use the street as a backdrop 

for their fashion photography.

The main focus is still the clothes. But the urban scenery adds meaning to the 

photographer’s imagery. Certain locations have associations you can use to make 

clothes appeal to different demographics.

The clothes you see at fashion shows are conceptual. They can often look strange or 

even funny. But the street is the catwalk we’re all familiar with. They’re full of clothes 

we relate to, recognize, and understand.

Master: Joshua Woods

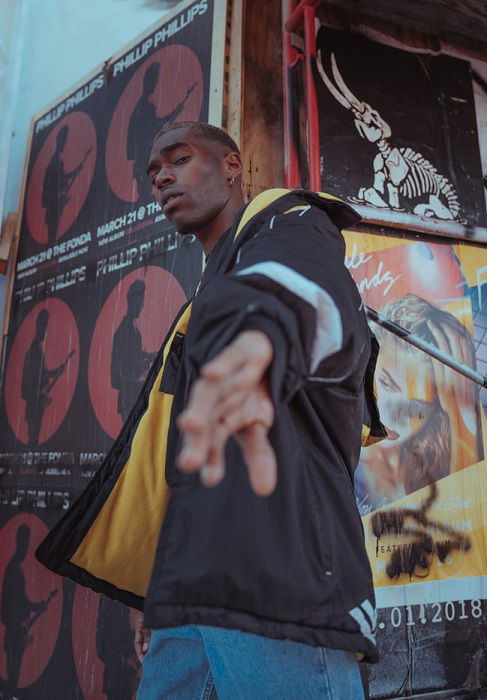
A fashion street photo of a man with an urban background and his hand reaching down to the camera
Photo by Mark Adriane

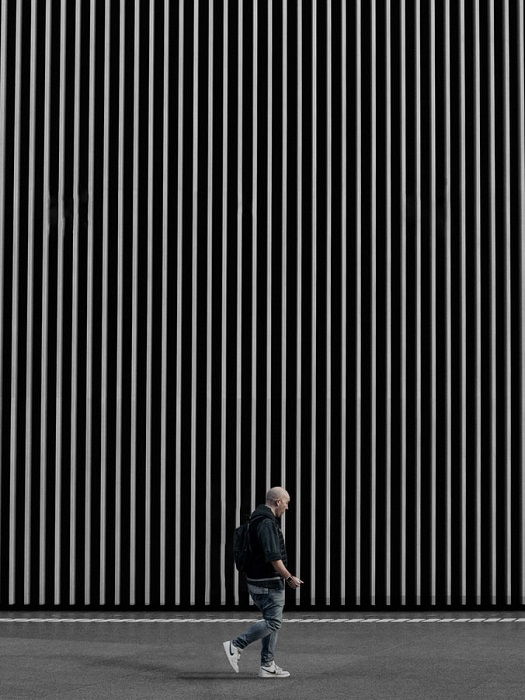
7. Geometric Street Photography

The street can be a busy place. Cars and cyclists race past. People rush here and there. 

It can seem like a mess of movement. But if you stop and look, you’ll find hundreds of 

shapes and patterns.

These shapes and patterns appear naturally in an unnatural world. They could be shadows 

or paving slabs. They could be the railing on a flight of stairs or the intersection of two walls.

Geometric street photography has a distinct lack of clutter. It has a minimalist philosophy. 

The images are stark. The lines are clean, and the shapes are clearly defined.

Many types of street photography focus on the things that move. But geometric 

photography looks at static patterns. The photographer lets the world flow past them 

while they look for shapes.

Urban architecture offers many opportunities to the geometric photographer. Modern 

and postmodern buildings often use straight lines and sharp angles. They create an 

urban minimalist landscape of geometric shapes and patterns.

Master: Henri Cartier-Bresson

A man walking by a large wall with thin graphic white lines on a black background
Photo by Brad Starkey

8. Smart Street Photography

It might seem unfair to call one type of street photography smart. Every style has artistic 

merit. But smart street photography holds a particular element that makes us think. It might 

be something clever or something funny.

These street photos often have a feeling of self-awareness. The photographer has a sense 

of humour. And the imagery has elements of satire.

The imagery is derived from how the photographer sees the world. There’s a cynicism 

that exposes the contradictions of modern life.

Smart street photography isn’t something easily achieved. And it’s not just about 

worldview. The photographer needs to be patient and persistent. They need a camera 

around their neck 24/7.

Master: Gary Winogrand

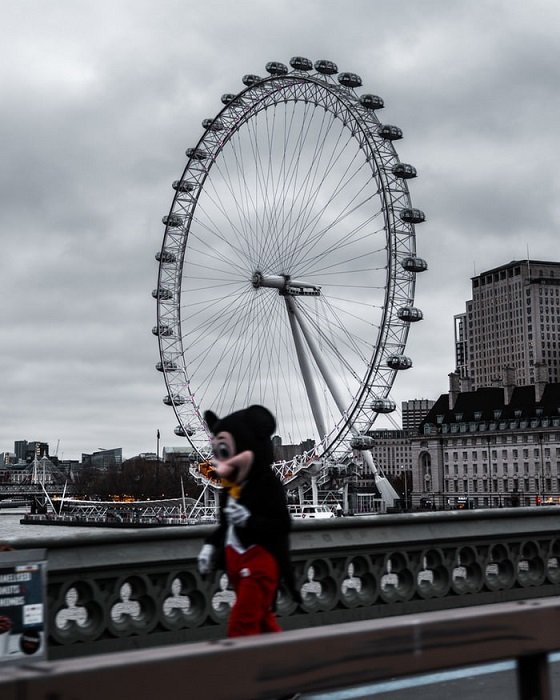
A photo of the London Eye in the background with a blurred person in a Mickey Mouse costume walking by in the foreground
Photo by Brad Starkey

9. Abstract Street Photography

Abstract street photographers aren’t unobtrusive or intrusive. They step back from 

the street and see it in its purest form. They’re not looking at the moving elements, 

the cars or the people. They’re looking at a combination of shapes and patterns.

These photographers actually want a simplified image. Like fine art and geometric 

photography, it’s about the imagery rather than the subject.

Abstract street photography is about shape and form. People can be involved, but they 

are only part of a constructed image. The shapes can be hard and rough, like concrete 

or soft and smooth like rain on a window.

Composition is the key to abstract photography. The urban landscape is full of unique 

shapes and forms. And the street photographer finds the stripped-down aesthetic beauty 

within the scene.

Master: Saul Leiter

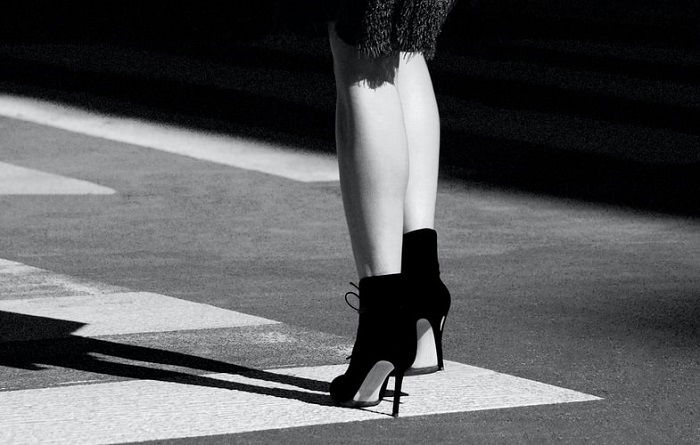
A black-and-white abstract photo of a woman's lower legs and feet in high heels on a street sidewalk
Photo by Chris Barbalis

10. Modern Street Photography

Modern street photography focuses on aspects of life peculiar to the modern world. 

It’s not as simple as taking a picture of a street scene today. That would be a 

contemporary street photo. But that’s not modern street photography.

People are not always the subject. The focus is more on shapes and images that 

symbolise modernism. It’s often the things that we know will change with time. It 

could be the shape of a new car model or a toy fad that’s already nearing its sell-by date.

Like smart photography, there is a sense of self-awareness. The photographer knows how 

times change. And how the new becomes dated in the blink of an eye. Modern street 

photography is about knowing you’re in a fleeting moment of history.

Master: Matthew Wylie

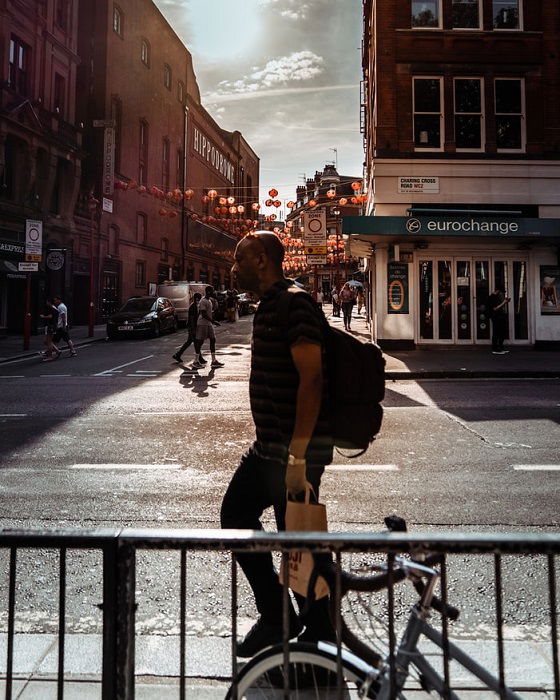
A backlit photo of a man walking by on the sidewalk on a sunny day
Photo by Brad Starkey
 

It’s hard to define street photography. It isn’t limited to one style. There are 

many types of street photography, all distinct and different. But they all find beauty and intrigue in the street.

Every street photographer has a distinct approach. They each find street 

photographs in different places, where street action flows fast or slow. But 

the results can be captivating all the same.

I hope this post has inspired you to hit the pavement and shoot street 

photography. Whatever your style, the street is a fascinating place to 

grow your photography skills.

Are you looking for new ways to shoot?  Click Here