Thursday, April 28, 2022

#World, Images

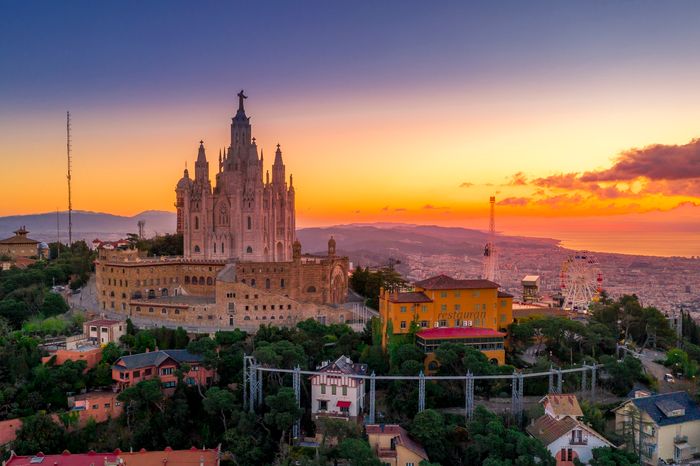
Best Sunrise Photography Tips (Location, Settings & Gear!)


If you are into landscape photography, you might have already questioned your decision to wake up early for taking sunrise photography.

These are the times you should remember the joy of adventure and how rewarding sunrise photography actually is.

Read on to learn how to take sunrise photos that are worth waking up for.

A beautiful sunset photo at sea

Why Go Shooting at Sunrise?

A lot of people ask me “why sunrise, can’t I just do a sunset instead?” Of course, you can, but there is one massive difference between the two. And it’s an unbeatable argument in favour of sunrise for me.

When you photograph in the evening, there are lots of people around. They keep walking into the frame and distract you in so many ways.

During the sunrise, you get alone time with nature. You can focus on your thoughts and feelings and express yourself better. Also, the golden hour stays longer than the blue hour.

photographer taking a sunrise photo by the sea

Getting Ready For Sunrise Photography

So, you have decided to do sunrise, and it’s time to prepare. I recommend getting ready the night before. This way, you’ll get an extra 10 minutes of sleep and you will also significantly reduce the chances of forgetting something important.

Do not forget to plan ahead and go with the right equipment.

What Should You Take With You?

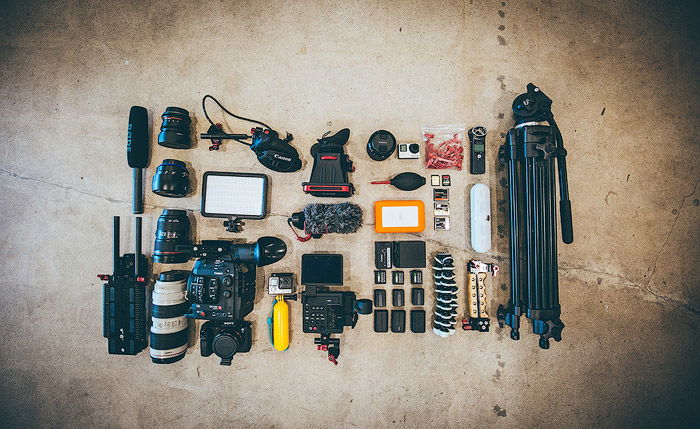
Here is a list of sunrise photography essentials to pack in your backpack:

  1. Camera with a memory card and a charged battery (+extra battery for the long exposures);
  2. Tripod (make sure to check the tripod plate);
  3. Snack (it’s early morning, remember?);
  4. Headlamp (you’ll wander in the darkness!);
  5. Your best lenses;
  6. Filters (CPL, Grading or ND);
  7. Remote control (if you have one).

Everything else is either optional or depends on the scenery and weather.

A flatlay of photography gear

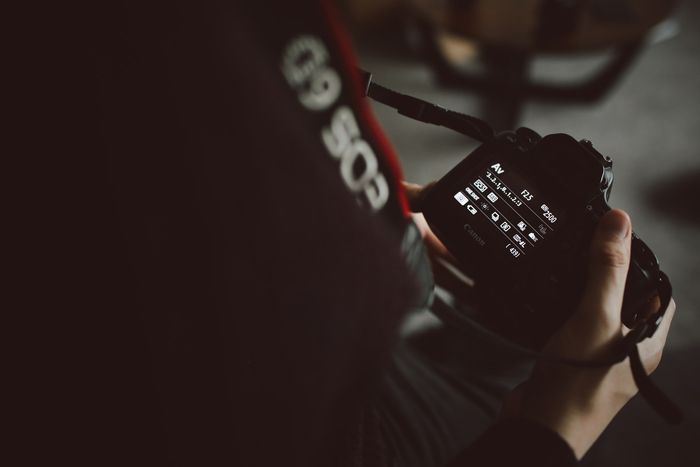
How to Choose a Camera For Sunrise Photography

As the saying goes, the best camera is the one you already own. This fact is true to some extent. So, if you already have a decent DSLR camera, invest in higher quality lenses.

If you are a new buyer, here are a few things to consider:

  1. Dynamic range. Most modern cameras are good enough with high dynamic range and produce excellent colors. If you need the details, check DxOMark for sensor tests and comparisons.
  2. Long exposures. Your camera must be capable of capturing long exposures of at least 30 seconds. As far as I know, all DSLRs have this ability, so this rule applies mostly to smartphone cameras. It’s better to have a Bulb mode for even longer exposures too.
  3. Resolution. Regardless of what people think, megapixels are not that important. It plays a role in how much you can crop from the picture without significant quality loss. But if you are not going to print very large, you don’t need that many megapixels. My older Nikon D80 had 12 mpx, and I still have some photos I took with it in my portfolio.
  4. User experience. I recommend getting a mid-range DSLR camera. Lack of these commands is the most significant show-stopper for the cheaper cameras. You don’t want to miss the moment digging through numerous menus.

Best Cameras for Sunrise Photography

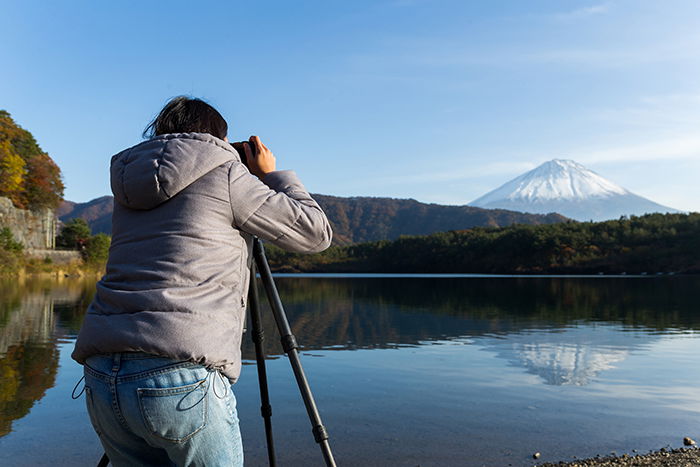
How to Choose a Tripod

Your tripod needs to be sturdy and well-balanced. It should be able to hold your camera against the wind. If you go hiking, your only option to reduce weight is to get a carbon fibre tripod but it comes at a cost.

I prefer Manfrotto and Slick tripods, they have always been great with zero issues.

However, you have a serious issue on your hand if you shoot seascapes and like to go into the water. It will probably ruin the tripod in a couple of months. If you’re photographing in an environment which ruins your gear, you should go for cheaper equipment.

I use Weifeng tripods all the time. They are cheap and provide excellent quality.

Silhouette of a photographer shooting with a DSLR on a tripod at sunset

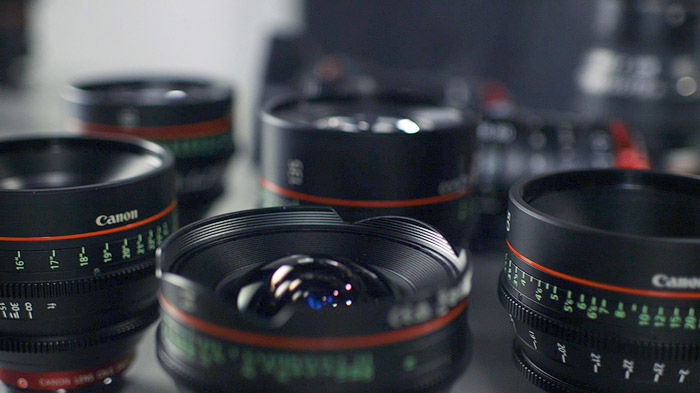
How to Choose the Best Lens For Sunrise Photography

There are no strict rules about lenses, and you can get away with any focal length. Typically, photographers prefer wide or ultra-wide angles as their primary lens. I recommend having the whole range covered. Wide-angle + mid-range zoom + telephoto is an optimal choice.

If you are just starting out, you could get away with some general-purpose lens, like 18-105. With this type of lens, you will learn how to use different focal ranges and will know better what works for your style.

Here are a few recommendations:

APS-C:

  1. Canon EF-S 10-22mm f/3.5-4.5 USM
  2. Nikon AF-S 12-24mm f4 G DX IF-ED
  3. Sony E 10-18mm F4 OSS
  4. Tokina ATX-I 11-16mm f/2.8 CF

Full Frame:

  1. Canon EF 24-105mm f/4L IS USM
  2. Nikon AF-S Nikkor 24-70mm f/2.8E ED VR
  3. Sony FE 16-35mm f/2.8 G
  4. Sigma 24-105mm f/4 DG OS HSM Art

Various camera lenses

Best Weather Forecast Sites

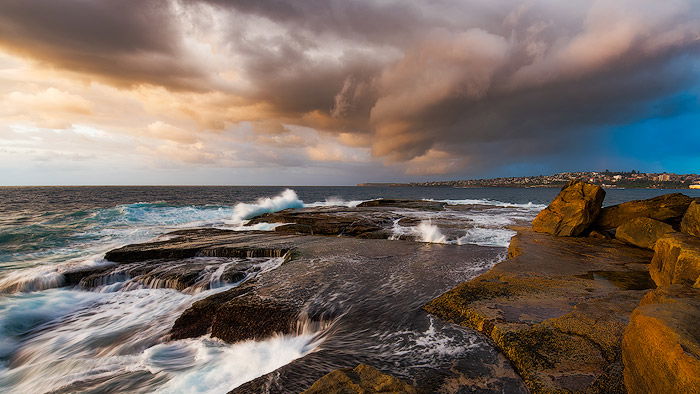
Sunrise photography is all about light. And, as we all know, light depends on the weather to a great extent.

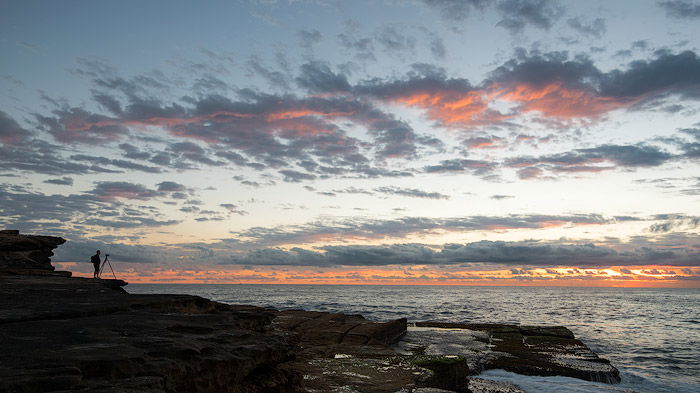
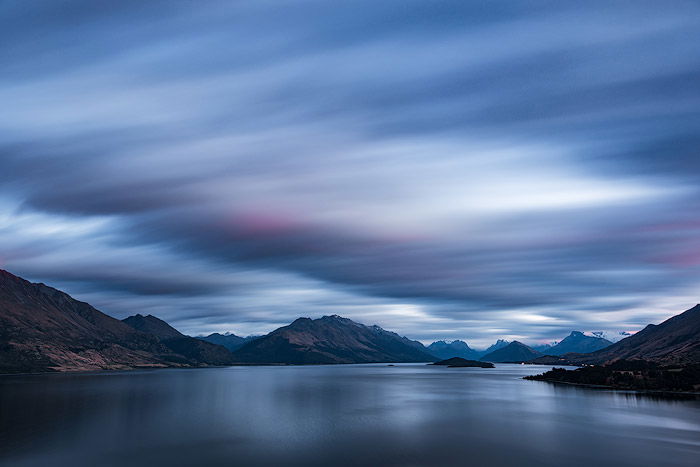
You need to learn how to plan to get the best sunrise landscape shots. Typically, I prefer a partly cloudy sky. I wouldn’t bother with less than 30% cloud cover for a general sunrise landscape.

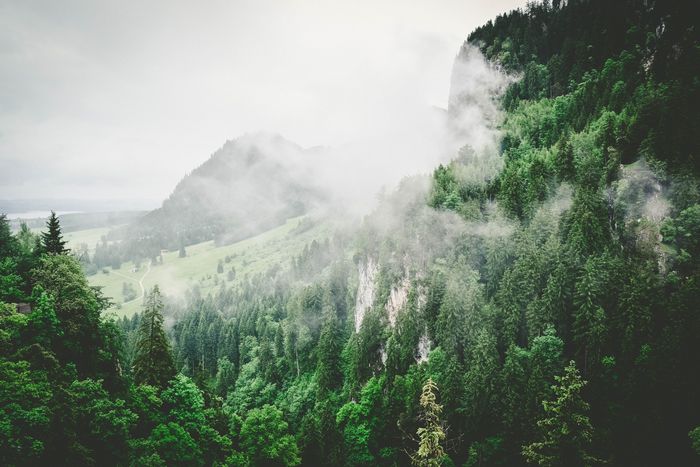
There are, of course, different scenarios. For instance, for a waterfall or a forest, I would prefer a clear sky to increase the chance of getting sun rays beaming through the trees.

To figure out how early I have to get up, I use these two sites: The Weather Channel and SkippySky. The former has hourly cloud coverage, and the latter shows the type and thickness of the clouds.

A screenshot of a sunset photography app

SkippySky can look a little overwhelming, but you’ll figure it out fairly quickly. It also helps to predict if there is an opening between the clouds and the horizon. To get bright colors, you need high clouds. Low and heavy clouds rarely produce something spectacular.

All in all, you can never be 100% sure about weather conditions and have to try it out to see if it works.

The wind can also affect certain types of landscapes. For instance, don’t go to the cliff’s edge if there’s a strong wind.

Foggy weather can also play to your advantage photographing a forest covered in fog will produce unique and dramatic-looking images.

bad weather sunrise photography

How To Pick a Location

I usually start by looking at Google Maps. I use the query ‘*area name* sunrise’, or something similar.

Once I find some East-facing area (North-East and South-East also work), I look for photos in Google Images, 500px, and other sites, which include a location. This search gives me a general idea of what to expect from the area.

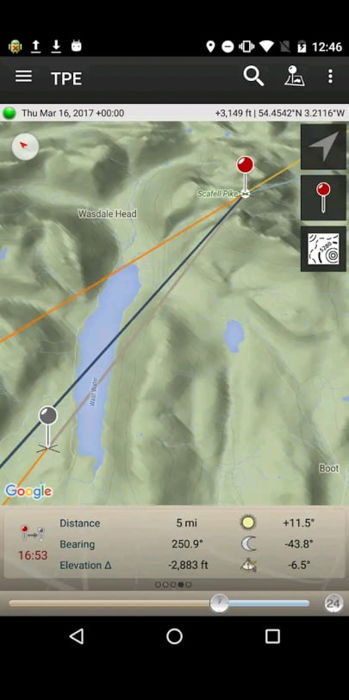
The Photographer’s Ephemeris app is also helpful for checking a location. You will see how light falls on a chosen spot almost anywhere on Earth.

A screenshot of the photographers ephemeris app

How to Shoot Breathtaking Sunrise Photos

Scout The Area In Daylight to Know Your Environment

The best way to prepare for the new area is to scout it before the sunrise. In the darkness, it could be hard to find a path, measure distance or see potential shooting spots.

So, if you get a chance, walk around the day before, take notice of the best places. Use some virtual reality app like Photopills or PlanIt! For Photographers to see the Sun/Moon/Milky Way positions for your future shots.

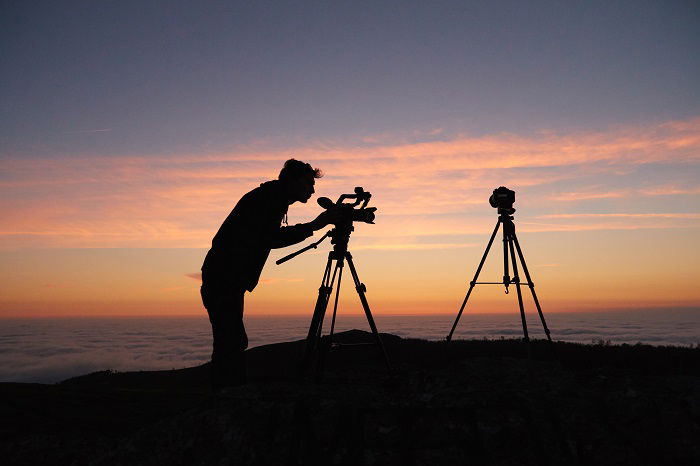
Arrive One Hour Before Sunrise to Get Everything Ready

Typically, you need to arrive well before the actual sunrise for several reasons.

First, you’ll have the ability to shoot the long exposure. Second, you’ll have some time to get your equipment ready.

The first light appears about 30-40 minutes before sunrise, but you can start creating long exposure photos even earlier than that. I’ve seen clouds painted red 60 minutes before dawn. Keep in mind that all faint colours will turn vivid and juicy on the final shot.

long exposure photo at sea before sunrise

Use a Headlamp to Find Your Focus

There are a few ways to focus your camera in the middle of the night, but the easiest way is to use your headlamp or a torch.

Pick an object around the hyperfocal distance, then lock the focus and shoot.

These are the steps you need to follow:

  1. Point your flashlight at some solid object.
  2. Focus the camera using that bright spot, pressing the shutter speed half-way down.
  3. When the camera beeps, it means it has focused, so release the button.
  4. Change the focusing mode to Manual so that when you press the shutter next time, the camera doesn’t change the focus.

Be sure to change back to the Autofocus mode once you zoom in or out because of the so-called focus breathing effect.

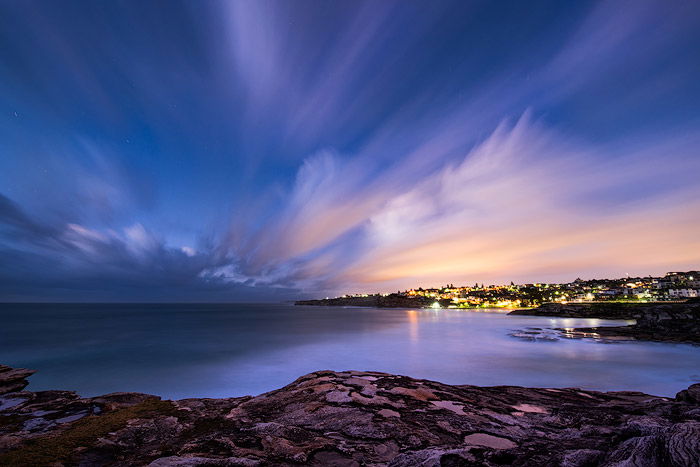
Shoot Long Exposures to Add Movement to Your Photos

The pre-dawn period works best for long exposures, and that’s the main reason to come early. The longer the exposure time, the more movement you can catch.

Typically, in the total darkness, 60+ minutes before sunrise, you could get a shutter speed anywhere from a couple of minutes for f/8 to 10 minutes or more for f/16.

Use your judgment and the sense of beauty to figure out how long you need to expose the photo for. The most common subjects for long exposure sunrise photography are clouds and water.

This is the time when using a neutral density filter is crucial. They reduce the amount of light that is hitting the camera sensor, thus making it possible for you to shoot long exposure without overexposing the picture.

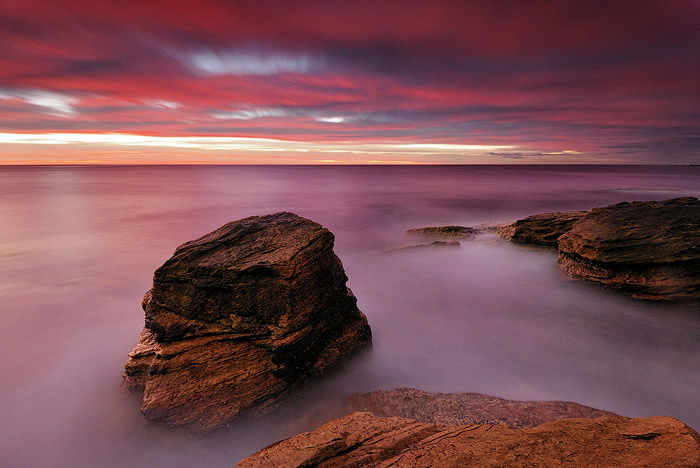
For the sky, you can expose as long as you like and the clouds will just turn into trails. For water, it is not as simple. Relatively calm water (river, lake) just smooths out with time and becomes perfectly flat at 30+ seconds.

Restless water, like the sea or the ocean, can turn into a foggy substance.

You can find a lot of useful tips on how to shoot long exposures in our course Infinite Exposures.

long exposure sunset at sea

Shoot Short Exposures to Freeze the Moment

If you only take long exposures, you are limiting yourself with just one technique. By shooting short exposures as well, you can freeze an interesting motion in time.

My best advice here is to keep experimenting, keep trying different approaches and styles.

A short exposure photo of a wave

Learn to Work With Light to Produce High Quality Images

Photographers must understand light, appreciate it and work together with it trying to take all the best out of it.

For instance, you have envisioned a photo, and the light is entirely different. Don’t be stubborn! Be flexible instead, adjust to the lighting conditions and act following the current state of nature. Learn to quickly change the whole course of the morning and adapt to the environment.

It’s best to photograph with the light source on the side or in front of you. The sun behind the photographer is the worst case as it fills in and hides all the details and textures.

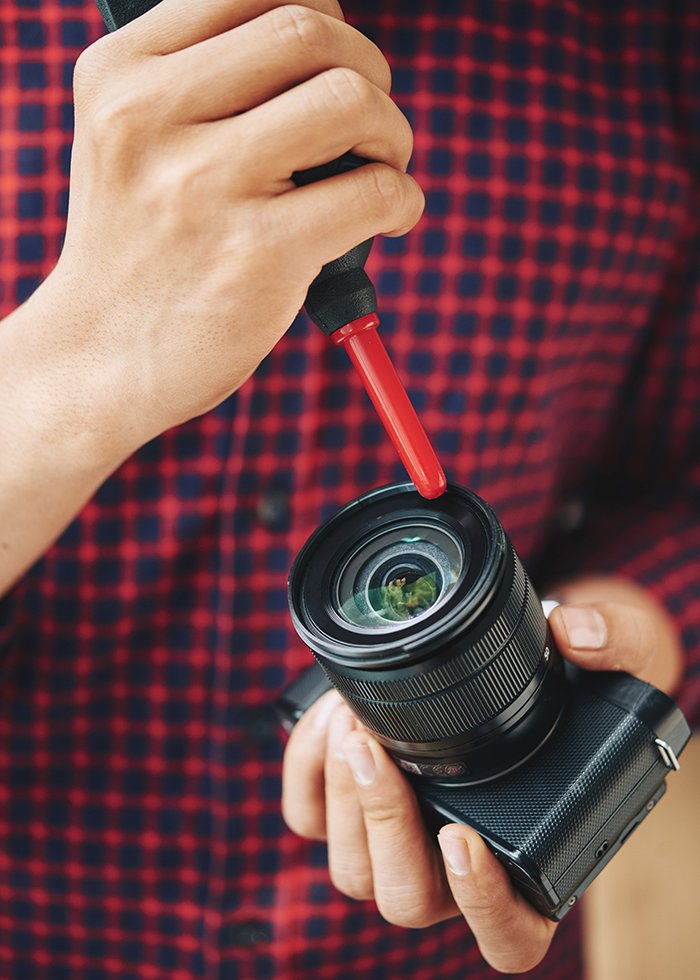
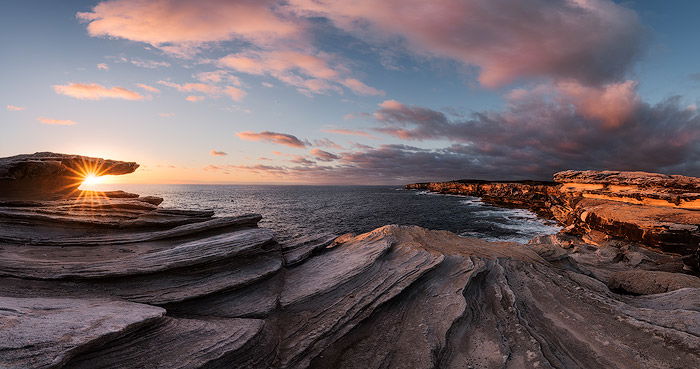
Create a Starburst to Add Interest to Your Sunrise Photos

You’ve probably seen those starburst rays coming from the sun. It’s hard to believe how easy you can achieve just the same effect. Without going deep into the theory and the structure of aperture blades, below are a few steps to create a starburst effect.

  1. Clean the lens
  2. Hide the sun behind something dark and solid leaving just a fraction of it out
  3. Set aperture f/16 (f/11 is the minimum)
  4. Focus on something other than the Sun because bright light can confuse auto-focus
  5. Photograph, verify, repeat

Make sure you clean your lens properly, otherwise you’ll get ugly flares, which are hard to deal with in editing.

sunrise photography at sea with starburst

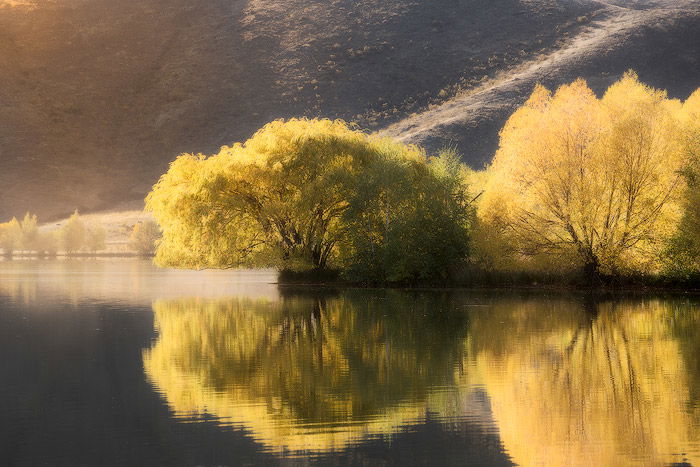
Make Use Of The Golden Hour to Add Warm Hues

Golden hour is a period of the best light. It starts right after sunrise and lasts for about an hour. Usually, it’s warm, bright, and casts long shadows featuring all the textures.

It’s best to photograph with the light source on your left or right so that the shadows are the longest and the land features are most prominent.

golden hour at a lake in autumn

Use Filters or Bracketing to Balance The Light

For sunrise photography, you need a solution that fixes the difference between land and sky exposure. The sky is typically much brighter, and it results in either an overexposed sky or an underexposed land.

To alleviate this issue, you have two options:

  1. Use gradual filters. This filter is a partially dark piece of glass. The darker part is positioned to darken a particular area of the photo.
  2. Do bracketing. Shoot several photos with different exposures, with exposure compensation values of -1,5; 0; +1,5. Combine these pictures later during post-processing.

Personally, I prefer the latter because filters have some disadvantages. First, they may have a color cast. Second, you need to carry a whole bag of filters. Third, it takes time to change the filter, and you may lose the moment.

To learn more about how to use bracketing in photography, check out our article here.

How to Find the Best Sunrise Photography Settings

Setting the Aperture

As with any other type of landscape photography, you typically shoot in either Manual mode or Aperture Priority mode. For landscape, you need a depth of field covering as much area as possible. That’s why you set the aperture to at least f/8 but I recommend to go with f/11-f/16.

Don’t go higher than that because you will start losing sharpness instead due to lens diffraction. In fact, some lenses start to get diffraction even at f/16. You’ll need to test and compare.

Setting the Shutter Speed

The shutter speed is a variable here, and it depends on the surrounding conditions. When you just start shooting 60 minutes before sunrise, the shutter speed at f/8 could reach 5-8 minutes easily.

Pro tip: To get shutter speeds longer than 30 seconds you would need either a release cable or remote control for your camera. Set the camera to Bulb mode, then fire the button and then press it again once the time lapses. The other way is to use the Wi-Fi module that appears in some modern cameras.

As the ambient light becomes stronger, the exposure time decreases gradually. You need to learn what shutter speed you need for specific objects to make them look great and then adjust your settings accordingly.

Choosing Your ISO

Every camera handles ISO differently, so it requires an experiment to determine the max ISO you can get away with. Please note that darker photos with high ISO will produce much more noise than adequately exposed pictures with the same ISO level.

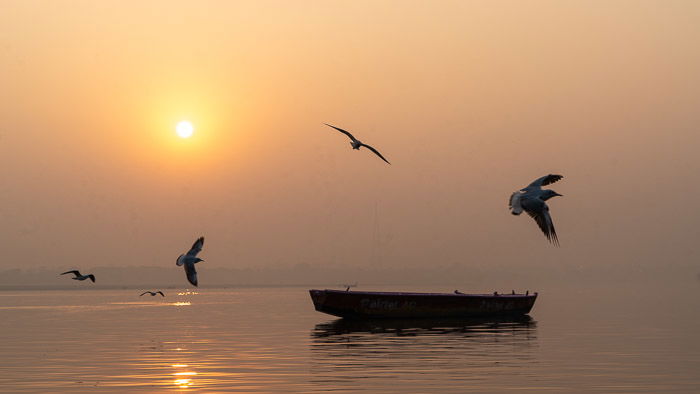
In fact, you only need to manipulate ISO for the sunrise when there are some moving objects, like waves or birds. In all other cases, you can keep it at 100. I also recommend to keep it as low as possible for the long exposures because otherwise, it would produce a lot of extra noise.

landscape photography long exposure at sea

Sunrise is the most magical time of day when you can fully connect with nature. Even though there are many things you need to pay attention to, the magical atmosphere you can capture is always worth the effort.

Set your next alarm clock early and try it out! The tips above will help you to take stunning sunrise photos.

Want More? 
 
-----------------------------------------------------------------------------
FREE Photography Ebook
 

What Is the Difference Between White Balance & Color Balance – Free Quick Guide


White balance and color balance are intrinsically linked in the digital photography process.

When you adjust the white balance settings within your camera, you’ll also be able to control the color balance within your image in post-processing.

Essentially, color balance is the post-processing extension of the white balance camera function.

However, the white balance can also be changed in post-processing when the original camera file is raw. So there are differences between the two.

This guide will look at white balance and color balance, how they both work, and their differences. Here’s what we’ll cover:

  • White balance versus color balance
  • What is white balance?
  • What is the color balance?
  • Color balance in post-production

Grab your copy now!

Photo Credit: David Zawita


---------------------------------------------------------------------------------


Monday, April 25, 2022

How to Take Sharp Photos – 13 Timeless Tips

 Tags: Shutterbug Photography, Rookie Photographer

Imagine you wake up at 4 am and go on a trek to take fabulous sunrise photos. You come home with a camera full of photos you are excited to go through. You transfer your images and start going through them. Then you realize, they are all blurry or unfocused.

One of the essentials of good photography is clarity. If images are blurry, they are useless. And there is only so much you can do in post-processing. Of course, some photos are intentionally blurry for effect. But in general, sharpness can make or break a photo.

Taking sharp photos is easy when you know how. If you are wondering how to take sharp photos, these timeless tips will help you in your efforts. They are all very simple, with no Photoshop involved. 

Photograph of Lao karst mountains. 

13. Use a Tripod

When a fast shutter speed isn’t an option and your subject is stationary, it’s usually best to use a tripod.
This holds the camera steady and the various spirit levels on a good tripod will ensure that you still manage to get a level photo on uneven ground.

If you don’t have a tripod, try setting it on a level surface. Or, try to steady yourself by leaning against something. Try to breathe slowly and gently so that your movements don’t cause the camera to shake.

photo of a camera on a tripod

12. Use a Remote Release

Even with a tripod, the click of the shutter button can cause camera shake. This might not seem very noticeable to you right now. But, especially at long shutter speeds, it can make a big difference in whether you get a sharp photo or not.

The best way to combat camera shake is to use an external trigger, like a remote control or a cable release. There are many inexpensive options available in the market.

Another option to avoid camera shake is to use a timer. Putting a self-timer for even just 2 seconds will give the camera time to steady after you press down the shutter button. So when the shot takes, it will be sharp.

camera with a remote release

11. Use Mirror Lock-Up

Another source of camera shake is the movement of the mirror.

If you read the post on DSLR cameras, you will know that SLRs have a mirror that reflects the image into the viewfinder. Every time the shutter is released, the mirror flips up so that the light hits the sensor, and the image is created. When the mirror flips up, it can cause slight vibrations that move the camera system. This can also cause a blurry image.

Luckily, most DSLRs have a mirror lock-up setting. This keeps the mirror up in the retracted position so that when you press the shutter, it doesn’t move. This will help in creating a crisp image.

close-up photo of a camera's LCD screen

10. Shoot in Burst Mode

If you’re having trouble holding your camera steady to take sharp photos, try shooting in Burst mode.

This way your camera will shoot many shots at the same time. Pick an image from the middle with the least camera shake. You will usually get 1 or 2 sharp images from the bunch.

close-up photo of a camera settings menu

9. Pay Attention to Focus

Take the camera off auto selection and manually select the points on which you wish to focus, or use your camera’s focal lock. This will also help when you want to have a shallow depth of field.

When taking a photo of a person, I recommend focusing on the eyes. This is where our own eyes are naturally drawn to. If the eyes are in focus, you’ll generally get a good photo.

When using a camera on a tripod, I like to switch my camera to ‘Live View Mode‘ and digitally zoom in 10X to where I want to focus. Then, focus manually. Zooming in really helps in getting the correct focus.

If you use autofocus, switch to single point autofocus. Usually, the camera will try to create an image that is as sharp as possible. But if you switch to single point autofocus, the camera will focus on one point, such as the centre, and make that as sharp as possible.

Another tip to have sharp images is to press the shutter down halfway after you compose your shot. Once the focus is adjusted correctly, then press all the way to capture.

Woman takes a photo with her camera.

8. A Good Lens is Key

You might have a fancy camera, and you may be amazing at photography. But, your photos are only as good as the lens they pass through.
When you buy your first camera, I recommend upgrading to an inexpensive prime lens as soon as you can. A prime lens is a lens that has a fixed focal length and can’t zoom. You’ll find an immediate improvement in image quality as prime lenses are designed with only one job. They don’t have to compromise to cover a range of focal lengths.
I recommend a 50mm or 35mm 1.8.

A sharp photo of a forest with mountains in the background

7. Keep Your Lens Clean

A great lens is no good if it’s dirty. Smudges and fingerprints on your lens can affect your photos.

But remember, dust on the front part of your lens won’t make a difference to your image. It is the dust on the rear part of the lens, the part that is inside the camera, that can make a huge difference in your photo. If you aren’t getting clear images, remove your lens and check if there is any dust. Clean it carefully with a soft cloth or brush.

Cleaning a camera lens.

6. Turn on Image Stabilization

If you’re lucky enough to have stabilization in your lens, turn it on. In this mode, the camera tries to stabilize your image when you are shooting without a tripod. This will allow you to shoot at slower shutter speeds and narrower apertures.

If you’re using a tripod, remember to turn it back off. If the camera tries to stabilize the image when there is no shake, it can have a negative effect on your photos and actually make it more blurry.

5. Use a Fast Shutter Speed

When trying to take sharp photos, the last thing you want is motion blur. This is the most important step so make sure you get it right. In general, the faster your shutter speed, the sharper your photo will be.

As mentioned in our post on shutter speed, as a rule of thumb, the average person can take a sharp, unblurred image by setting the speed to a fraction of a focal length.

For example, if you want to take a photo at 30mm, you would set the shutter speed to 1/30 of a second. A slower shutter speed increases the chance of motion blur.

It’s worth noting, however, that this rule is only relevant to full-frame cameras. For a crop sensor, due to the magnification effect, you would be better off choosing a shutter speed of 1/45 of a second.

photo of a girl standing outdoors taking a photo

4. Use Your Base ISO

Set your camera ISO to as low as it will go, usually between 100-200, where you get the sharpest photos. The higher the value, the more noise there will be.

For really clear, crisp photos, you want as little noise as possible. Just remember though, that a low ISO will mean you might have to increase your shutter speed to maintain the exposure. It is all about finding a balance between the two settings. This will give you a properly exposed shot that is also sharp.

A sharp photo of a string of colorful flags with a mountain in the background

3. Find Your Lens’ Sweet Spot

The sharpest point in your lens is usually 2 or 3 stops smaller than the widest aperture. For most lenses, this will likely be between f/8-f/11. But too small an aperture can cause lens diffraction, which can also negatively affect sharpness. If you don’t understand aperture, I suggest you go back and read this post now.

Using a wide aperture gives you a shallow depth of field, which also results in a lot of blur. When you get to about f/8, you’ll find that the images are much crisper as the majority of what you’re shooting will be clearly focused.

Close-up photo of a hand holding a lens

2. Take Advantage of Light

To get sharp images, the more light the better. This will allow you to keep your shutter speed fast, your ISO low, and your aperture small. In addition, many cameras have trouble focusing in low light situations.

When I can’t use daylight but still want a really sharp photo, I use an off-camera flash. I try to bounce it off a wall or ceiling to make the photo feel like there was good natural lighting.

Lighting is key to taking sharp images.

photo of a guy holding a camera - sharp photos

1. Shoot in RAW

Shooting in RAW has many advantages: you can still adjust a lot of settings after you’ve taken the photo. One of these settings is sharpness.

If you are editing your images on Lightroom, you can increase the sharpness in the Develop module. Just go to Develop > Detail > Sharpening. If you are editing on Photoshop, you can add the unsharp mask. Just go to Filter > Sharpen > Unsharp Mask.

When done properly, it can add a really good final detail to a photo. But make sure not to overdo it! Photos that are too sharp are a strain to look at.

A sharp photo of a church in Barcelona at sunset

Taking good photos depends a lot on how sharp you can get them. No one wants to see blurry photos. If you are struggling with finding the right way to do it, just follow these tricks on how to take sharp photos.

Remember that every slight movement makes an impact. So even if it doesn’t seem like it will make a big difference, the final outcome will for sure reflect it. 

------------------------------------------------------------------------------

FREE Photography Ebook

Three Tips for Maximum Photo Sharpness – Free Quick Guide


“Tack sharp” is a term that we use in photography.

We want our images to be as sharp as they can possibly be.

But how do we take sharp photographs? There is not a ‘getting it sharp’ setting on our cameras.

In this free guide, Jenn Mishra walks you through her three best tips for maximum photo sharpness.

You may well be surprised by what she has to say!

Here is what she covers:

  • How the camera settings affect the sharpness of your picture.
  • Using the autofocus options on your camera to achieve maximum sharpness every time.
  • How to post-process your photos to create a sharper image in your final output.

This is a fabulous guide, and you don’t want to miss it.

Photo Credit: Jenn Mishra

 
Still want more?
 
-----------------------------------------------------------------------------


Thursday, April 21, 2022

#Photography Poses for Women

30 Best Female Poses for Portrait Photography


There are all kinds of female poses out there that can make or break an image. It’s important to experiment with different posing techniques to keep your images diverse.

Here are 30 of our best female poses and photography tips that can teach you how to pose models effectively. 

30. Hands in the Air

A Young girl posing for a portrait

If you like dreamy female poses, this one’s for you! The model needs to raise her hands. She can close her eyes, lean on an arm, or look at the sky. Make sure her expression looks relaxed and natural.

You can shoot against the light to make your portraits look dreamier.

29. Flip Hair

Female model posing for a portrait photo outdoors

All your model needs to do is flip her hair. Ask her to close her eyes so that you don’t end up with awkward facial expressions!

Make sure you use a fast shutter speed to take sharp photos. If you like dreamy portrait photography, you can use a slower shutter speed. This will create motion blur.

This is a very common female pose, but it’s still something you can include in a few of your photos.

28. Rest on Hand and Look Up

Female model posing for a portrait photo outdoors

This is a relaxed pose to try at the end of your photoshoot. Ask your model to put one elbow on a table and rest her head on her hand. Next, she should look up at the sky.

This will create a sparkle in her eye. It will also create an even amount of light on her face. These two factors will allow you to take well-lit and dreamy portrait photos.

27. Lean on a Wall

Female model posing for a portrait photo outdoors

This is a casual but effective female pose. Your model should stand with her back straight in front of a wall. Next, she should lean her head on the wall. This needs to be very subtle so her neck doesn’t bend back too much.

You can add sunglasses or other accessories to make this pose stand out.

26. Look Over Shoulder

Female model posing sensually for a portrait

Your model should look over her shoulder as she stands or sits.

This is a very common female pose in portrait photography. It works well in almost any location and lighting setup. Female poses like this create a feeling of confidence and superiority.

25. Rest on a Soft Surface

Female model posing for a portrait

This is one of those relaxed photography poses that’s perfect for any model.

Your model should sit on a comfortable surface. This can be a bed, a table, or a couch. She can rest her head on both of her hands. She can also look into the distance or look at your camera.

For this female pose, you can shoot at eye level or go slightly higher. Shooting at eye level will make your model look comfortable. Shooting from a higher angle will create a feeling of sensitivity or vulnerability. These emotions work very well in emotive portrait photography.

24. One Hand on Hip

Close up of a sexy female model posing with hands on hips

This is one of the most confident female poses out there. Your model should put one hand on her hip. The other hand can hold something, like a drink. She can also put her free hand on her leg to create a more relaxed pose.

This pose will accentuate your model’s curves and make her look cool.

23. Knees Up, Hands on Feet

Dreamy portrait of a female model

This is an effective female pose for studio portrait photography. You’ll need to use a comfortable stool for the best results.

Your model should bring her knees to her chest. She should also rest her head on her knees and put her hands on her feet. This is an elegant pose that’s ideal for dancers. You can also use it in surreal or conceptual portrait photography.

Feel free to add props to this pose. Flowers, curtains, and smoke bombs can all make the pose look more elegant.

22. Hands in Pockets

Female model posing for a portrait photo against a brick wall

If you’re looking for casual standing poses, this idea is perfect for you. Instead of standing awkwardly in front of the camera, your model should put her hands in her pockets. This will instantly make her look edgy.

Standing female poses like this are often used in lifestyle photography. You can use it as often as you like without making your pictures look boring.

21. Casually Place Elbows on Table

Female model posing for a portrait photo outdoors

Casual poses are ideal for lifestyle or studio photography. You might also like to use them in minimalistic portrait photography.

For this pose, all you need is a table and some fun props. Your model should put her elbows on the table and tilt her head to the side. This will make her look relaxed. You can put a book, a drink, or some fruit on the table to tell a story about the model.

20. Squat (AKA Baddie Pose)

Blonde girl posing for a portrait photo outdoors

This is one of the most popular female poses on social media. You might have seen it on Instagram, where celebrities like Kylie Jenner like to use it often. It can give your portraits a cool, edgy look.

All your model has to do is squat. Ideally, she should lean on one leg and stretch the other one out. This will create a balanced pose and make her look slimmer.

19. Lie on Floor

Female model lying on a floor

This is one of the simplest female poses you can use in your photoshoot. Despite its simplicity, it’s very effective for all kinds of portrait photography.

Your model should just lie on the floor. She can put her hands in her hair, lift a leg, or do anything that makes her look casual and relaxed.

18. The Cosy Pose

Female model posing for a portrait photo outdoors

If you’re looking for more female poses for autumn or winter, this one’s for you! The model should cross her arms. It should look like she’s hugging herself.

To make this pose look more relaxed, make sure your model closes her eyes and slightly lifts her head.

17. Hands in Hair

Female model posing for a portrait against a yellow wall

This is a common pose for those who want to learn how to pose as a model. You can use it in photoshoots with beginner or test models who need more experience. It’s simple and works well with every body type!

The model should put both hands in her hair. She can also slightly lift her chin to look more confident.

16. Stretch Arm Out Towards Lens

Female model posing for a portrait photo outdoors

This is a great female pose for creative portrait photography. It’s an easy way to make your photos stand out without trying too hard. It’s also a very easy pose for all kinds of models.

All your model has to do is stretch her arm out towards your lens. She can hold something, like a cup, as she does this. Use a large aperture and focus on the model. This will keep her face in focus but blur out her hand, creating a foreground.

15. One Leg in Front of the Other

Female model posing for a portrait photo

There are many standing model poses out there. This is a popular one that can make any female model look great.

Ask your model to put one leg in front of the other. She can lean on her back leg and raise her front leg a little bit, as pictured above.

14. Hands on Cheeks

Close up of a blonde model holding her head

This is a great female pose for portrait photography close-ups. Your model should put both of her hands on her cheeks. The more symmetrical, the better.

She shouldn’t push on her face too hard to avoid unflattering marks.

13. One Hand on Mouth

Female model posing for a portrait in a cave

This is a variation of the previous pose. This time, your model should gently place only one hand on her mouth. She can also tilt her head to the side and slightly open her mouth.

This female pose is great for emphasising hands, nails, and lips.

12. Sit on Chair, Toes Pointing Out

Blonde girl drinking coffee in a living room

Take a few photos of your model sitting on a chair or couch with her toes pointing out.

Her legs should be slightly bent to create a flattering curve on her body. She can turn away from the camera to create a sense of mystery.

11. Lie on Stomach

Tattooed girl lying on her stomach

This is an easy female pose for indoor portrait photography. Have your model lie on a clean surface, such as a wooden floor.

She should lift her legs up behind her. This will make her look relaxed.

10. Hide Under Duvet

A girl wrapped in white blanket

Some female model poses require the use of props. These are often simple and affordable. You can use them over and over again to make your photography poses stand out.

Ask your model to wrap a duvet around herself. You can experiment with different facial expressions

9. Lie on Side

Female model posing in bed

Ask your model to lie on her side. She can rest her head on her arm and look straight at the camera.

This is one of the best model poses for casual pictures.

8. Lie on the Edge of a Bed

Three girls lying on a bed with legs in the air

This is a great pose to add to your list of fun photography poses. It will work wonderfully if your female model has long hair.

Ask her to lie on a bed or a couch. Her head can be on the edge so that her hair can flow downwards. This will emphasise her hair length and give you very creative results.

7. Take a Few Steps Forward

Female model walking in the middle of a road

This is a common pose in lifestyle portrait photography. Focus on your model, making sure you lock the focus. Then, ask her to move a few steps forward. Move with her so that all of your photos remain sharp.

The model can either look at you, straight ahead, or down.

6. Put One Leg on Top of the Other

Female model posing for a portrait photo in a cafe

You should try this pose at least once during your photo session. It can give your model a boost of confidence and make your portrait photos look striking.

All the female model has to do is put one leg on top of the other. She can put her arm on the bent knee and rest on her hand for a more relaxed look.

5. Lean Back

Dreamy portrait of a pretty girl

This is a pose that you can combine with other portrait poses. Your model should stand sideways to your camera and slightly lean back. She shouldn’t lean on anything.

This will accentuate her curves and make her look elegant.

4. Hands Behind Neck

Female model posing for a portrait photo outdoors

This is a great pose for elegant female photos. Your model should look straight at the camera while she holds her neck with one or two hands. Make sure she does this gently so that she doesn’t look aggressive!

When you take close-up photos, try to shoot at eye level to avoid making your model’s face look too large. This is a female posing technique you should keep in mind at all times!

3. Hide Behind a Scarf

Girl hiding her face in a scarf

You can use this to emphasise the colour of your model’s eyes. All she needs to do is hide behind a scarf or a colourful piece of fabric. Ideally, it should complement her skin tone and eye colour.

You can use a zoom lens to make this model posing trick comfortable for your model. This way, you won’t get uncomfortably close, and she’ll have lots of space to experiment with different expressions.

2. Sit Sideways to the Camera and Look Forward

Female model posing for a portrait photo outdoors

Take photos of your model sitting with her side to the camera. She should look straight ahead as you shoot her profile.

This is one of the most striking portrait poses for atmospheric and dreamy photos. Try shooting from a distance so that you can capture the model and her surroundings at the same time.

1. Pull Hair From Both Sides

Female model posing for a portrait photo outdoors

If you like playful female model poses, you’ll love this tip! This will work best if your model has medium-length or long hair.

Ask your model to pull her hair from both sides. She can also experiment with different facial expressions.

The female model posing tips this list are great for all kinds of portrait photography. You can use them as posing guides in every portrait photo shoot you have.

The more female poses you experiment with, the more diverse and eye-catching your photos will look. This will make your subjects feel more comfortable when they work with you.

Most importantly, it will give your portrait photography portfolio the boost it deserves.

Want More? 

Five Strategies for Better People Pictures – Free Quick Guide


Sure. We get it! Photographing people, especially when you’re starting, is scary and difficult.

Trust us. We’ve all been there.

However, you can ease some of that anxiety by going into your photo shoot with a plan of execution.

It also doesn’t hurt to have a few simple pro tips in your pocket.

Photzy Author Ludmila Borosova spends many of her days photographing the beautiful people of Eastern Europe.

She knows how to get the shot when it counts and how to do it efficiently and creatively.

In this guide, she will share with you five tips to immediately improve your people photography.

How great is that?

Grab your copy here!

Photo Credit: Ludmila BoroÅ¡ová

-----------------------------------------------------------------------------