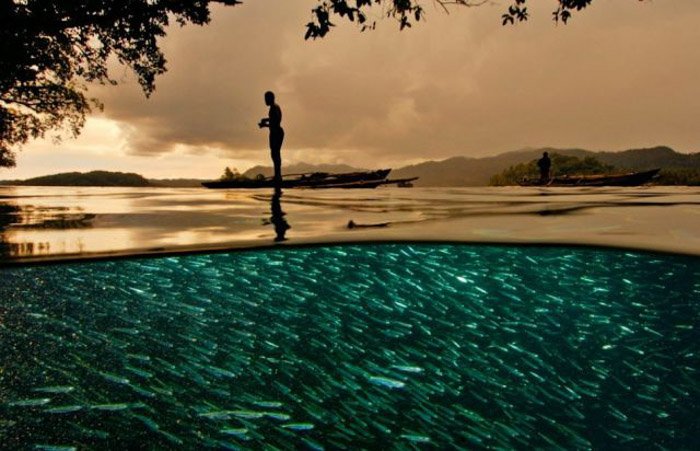
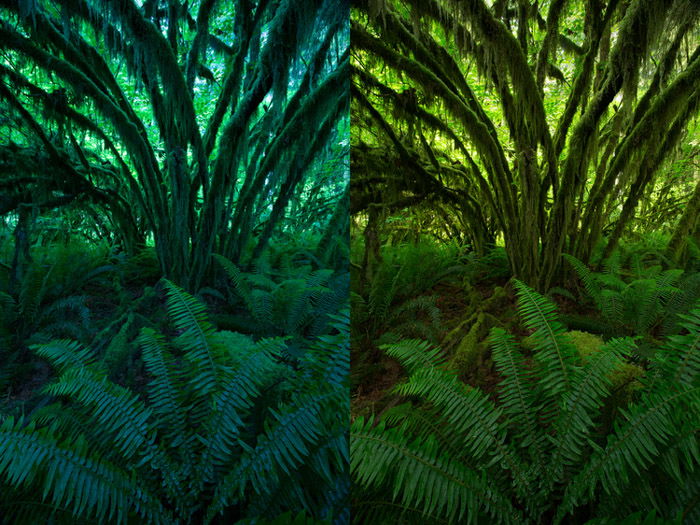
You can also combine these subjects with other genres. For example, you can include props or animals in your water photography.
You can also take self-portraits next to silky-looking water. The more photography subjects you experiment with, the more original your photos will look.
Find an Appropriate Location to Avoid Damaging Your Equipment or Getting Distracted
When you pick your favourite subject, you can start looking for appropriate locations.
Make sure the location is safe and has plenty of room. The more
spacious it is, the more room you’ll have to shoot water photography
from creative angles. Be aware of tourists, drones, and anything else that could get in the way.
Also, keep weather changes in mind. Most smooth water images are
taken on peaceful days. If you’re taking pictures of a waterfall on a
windy day, the water might end up damaging your equipment.
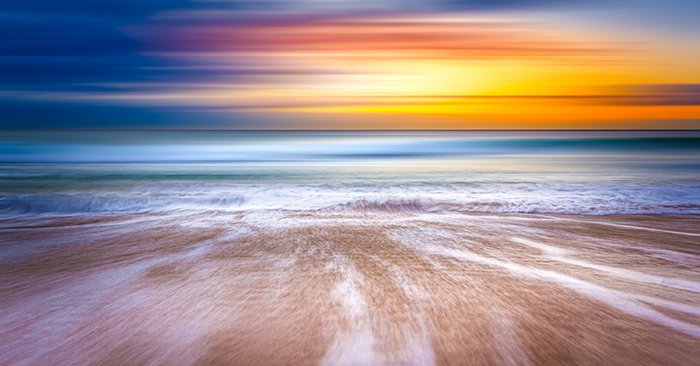
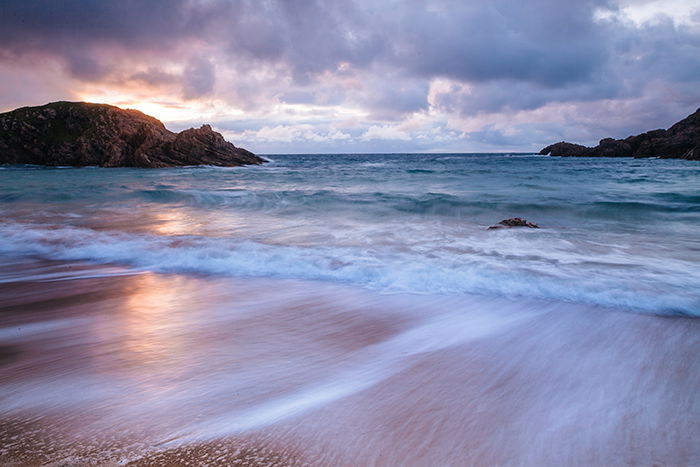
The lighting also has to be decent for you to take professional-looking water photography. Try photographing water during the golden hour or the blue hour.
You can use all of the water pictures in this article as a reference. You’ll notice that most of them have dramatic and vibrant skies. This feature is why they stand out from the photos in the water photography genre.
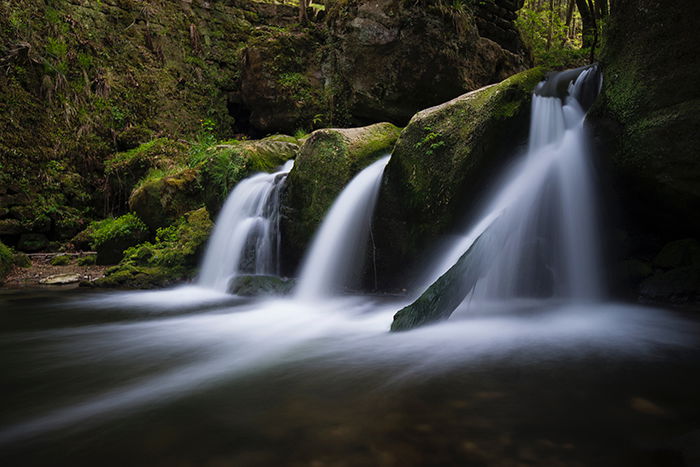
Find a Focal Point That Tells a Story About the Water
This doesn’t need to be a complicated process. Your goal is to find
something that complements the water and tells an interesting story.
For example, you can add people or objects to your composition. This will create depth and give viewers more to observe when they look at your pictures.
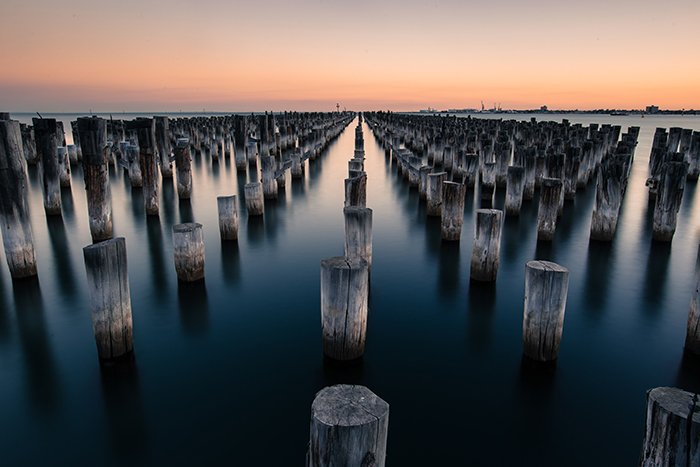
In the photo above, the photographer chose to create symmetry using the wooden poles. The water isn’t the main subject of the image, but it complements the entire landscape.
The focal point is the group of wooden poles, which stand out more when surrounded by smooth water.
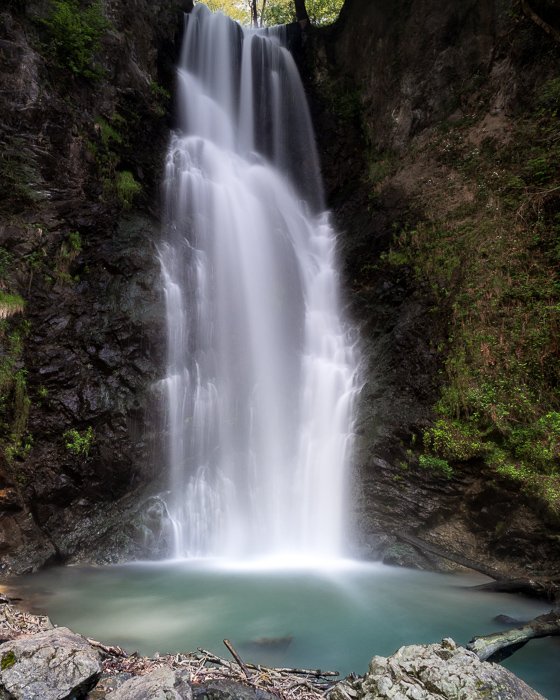
Use a Slow Shutter Speed to Create That Soft Misty Effect
When you take soft photos, you need to keep two settings in mind:
Shutter speed:
The slower it is, the silkier the water will look. You should
experiment with different speeds because every photographer has specific
preferences.
Aperture:
A large aperture (e.g. f/1.2) creates more background and foreground
blur. This is great for close-ups. A small aperture (e.g. f/16) captures
more details. This is ideal for landscape photos.
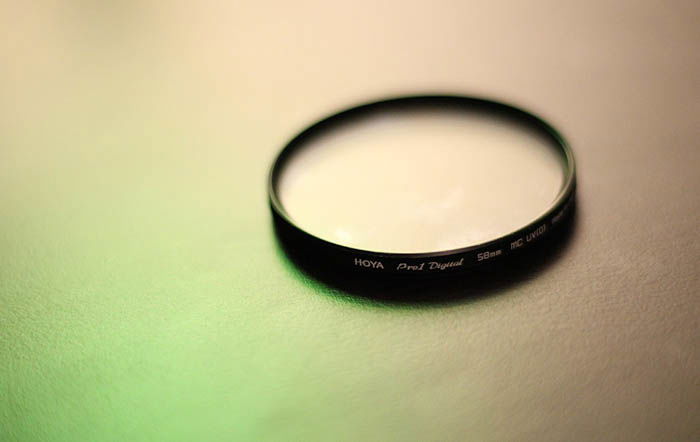
Use a Neutral Density Filter to Take Professional Water Photos
A neutral density filter (or ND filter) is every landscape photographer’s best friend.
This filter prevents underexposure and overexposure. Even if you’re taking photos on a bright day, your photos will look well-lit and neutral.
ND filters are essential in long exposure water photography. Because
of all the movements and reflections, your photos might look
overexposed.
The water might look too dull or vibrant compared to its surroundings. ND filters fix this instantly.
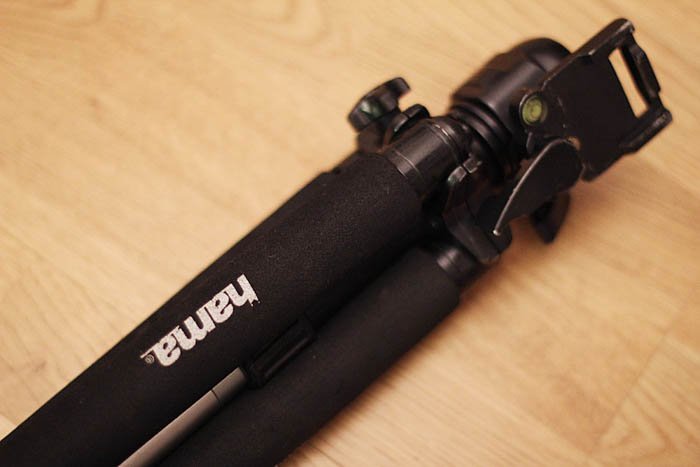
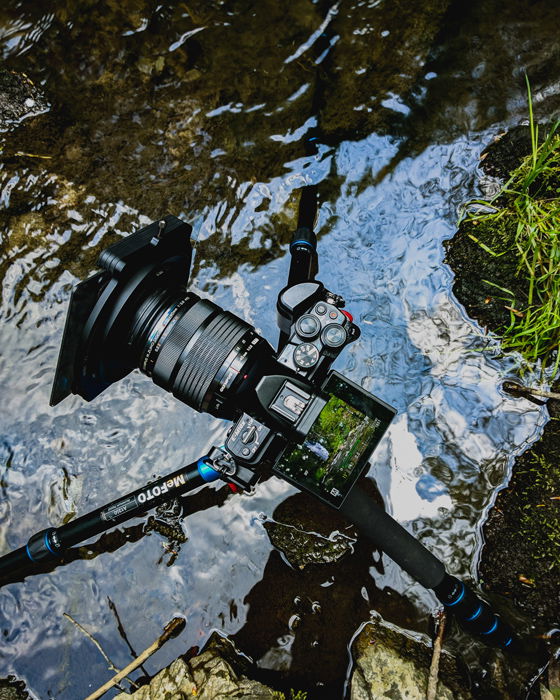
Always Use a Tripod and a Remote to Avoid Unnecessary Motion Blur
Water photography usually focuses on the movement of water and clouds only.
If your entire image is blurred, it will look abstract. There’s nothing wrong with this, but it’s not ideal if you like traditional landscape photography.
To keep your photos steady, use a tripod and a remote. A remote will
let you take pictures without touching your camera. This will prevent
any unnecessary movements from happening.
If you don’t want to invest in a remote, you can use a timer instead.
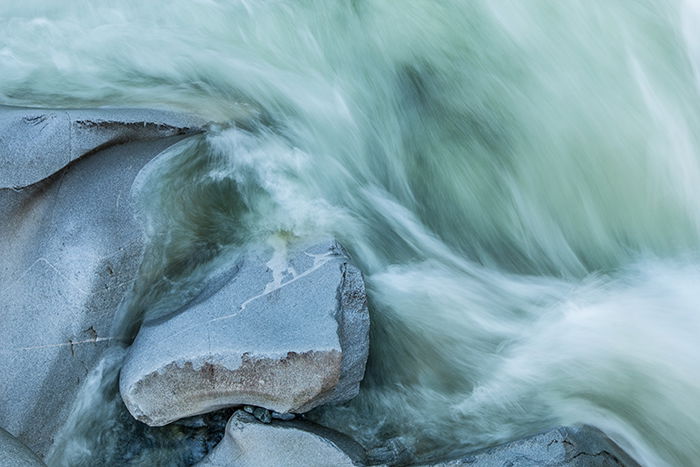
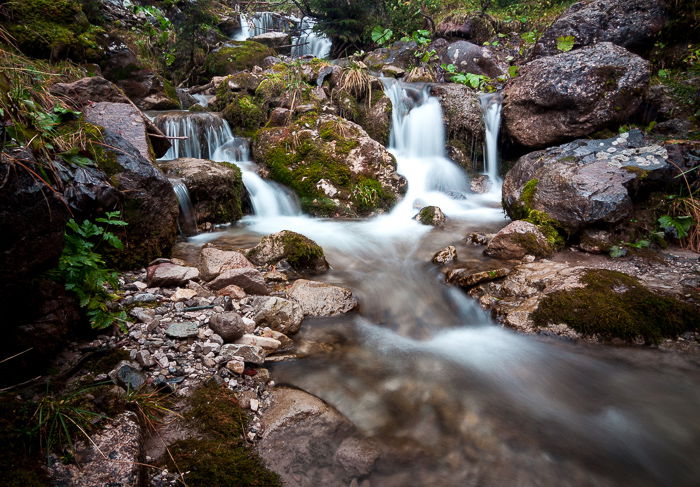
Try Different Angles to Create Captivating Water Images
There are millions, if not billions, of silky water photos out there.
If you want to make your photos look original, you need to think
outside the box.
This means experimenting with different angles. Take unconventional
photos of water. Break the rules. The more unusual ideas you work with,
the more eye-catching your photos will be.
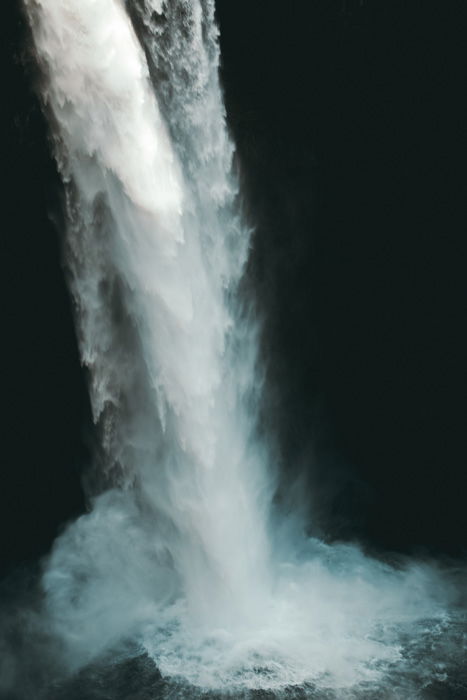
The image above is an excellent example of creative thinking. Most long exposure photographs are vast and atmospheric. Close-ups aren’t as frequent.
The photo above focuses on the movement of the water and the
stillness of the rocks. The composition and colours all make it an
original example of water photography.
Should You Try to Photograph Reflections on Bodies of Water?
It’s challenging to capture proper reflections
in long exposure photography. Your reflection will likely get lost in
the movements. This will make it look abstract and blurred.
If you want to capture sharper reflections in water, you need to use faster shutter speed. You don’t have to use a tripod, but it could help you take sharper photos.
Common Water Photography Questions
How Do I Make Water Look Misty in Pictures?
For a slightly misty effect, place your camera on a tripod and use slow shutter speed.
Try photographing water in different locations and shoot from
different angles. All of this will bring you closer to shooting
beautiful and misty images of water.
How Do You Get the Silky Water Effect?
The silky water effect is a result of long exposure photography.
You can achieve this by using a slow shutter speed. The slower it is, the silkier the water will look.
How Do You Take Pictures of Flowing Water?
You must use a tripod when shooting flowing water. This will help you take pictures that aren’t entirely blurred.
You should also use slow shutter speeds and an ND filter to make everything in your photograph look professional.
What Is the Best Shutter Speed for Waterfalls?
It depends on how silky you want the waterfall to look. The slower the shutter speed, the more abstract the water will look.
Some photographers set their shutter speeds to 4s, 15s, and even 30s. You can experiment with different speeds to find one that complements your style.
Water is an indispensable part of our lives, but it’s also a photogenic subject.
To make it look soft and dreamy, all you need is slow shutter speed, a
tripod, and patience. Remember to try shooting from unusual angles to
develop your unique photography style.
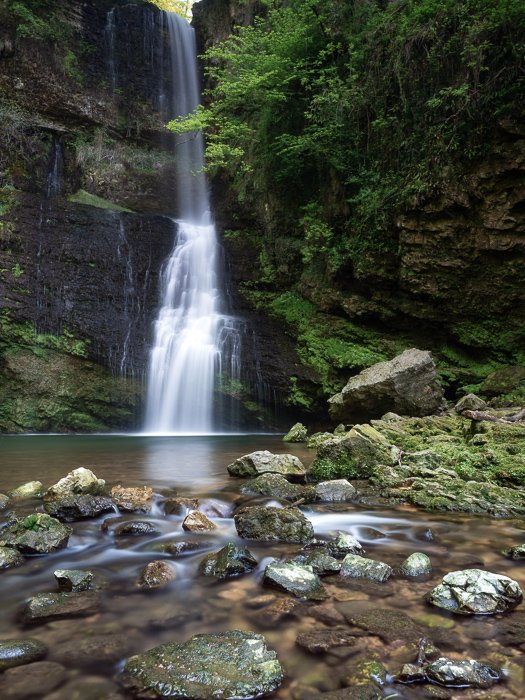
Waterfalls are one of nature’s wonders for landscape photography. When I’m in front of a waterfall, I want to get smooth, silky water and motion blur with a long exposure. That can be tricky.
In this article, I’ll share seven tips for breathtaking waterfall photography.
Stay Safe When Photographing Waterfalls
Photographing waterfalls can be a dangerous field. You will find
yourself in slippery terrain when learning how to photograph waterfalls.
Every rock, leaf and tree is wet, muddy or full of moss and lichens. So
keep in mind to constantly watch your step.
Depending on the season, water streams and waterfalls can be big and
powerful. The moving water can make you lose your balance or drag your
equipment away.
The closer you get to a waterfall, the more water spray and airflow there will be. Your camera gear and equipment can be damaged while capturing the perfect shot.
To keep your camera safe, use a plastic bag to protect the front lens or any filters. I found a practical solution with hair shower caps found in hotels. They’re very light and get the job done.
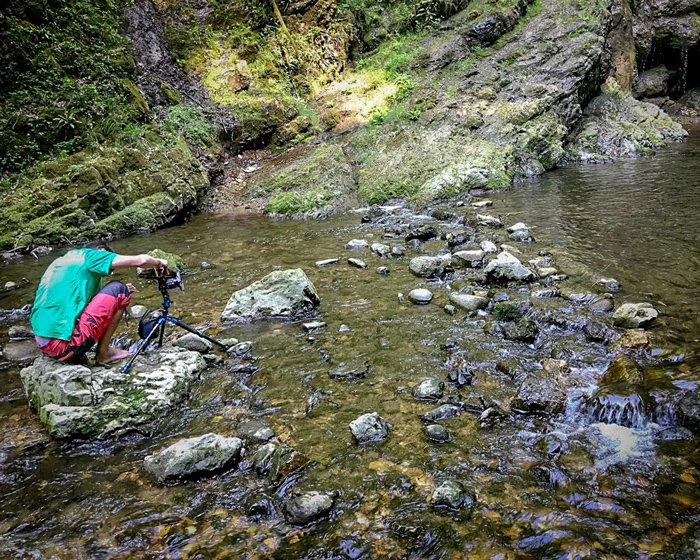
Try Composing Your Shots From the River
It’s an old truth: if you want good photographs, you need to move your feet.
The problem with water photography is that you are moving in wet and slippery terrain. So, before you go in, take all the precautions needed.
You might find a rock in the river that will be great for the foreground or as a platform for your tripod. You can often find a better angle in the river to give your beautiful waterfall photography all the justice it deserves.
Another good reason to wet your feet is the composition. There is a high probability that the waterfall photography composition will work better from the river. You can use the stream itself as an element of interest guiding towards the waterfall.
A good solution, if you don’t like to wet your feet or legs, is to use fishing boots. Some you can even hook to your belt or, even better, overalls. That way you can immerse yourself to your waist.
What Gear Do You Need for Waterfall Photography?
Tripod
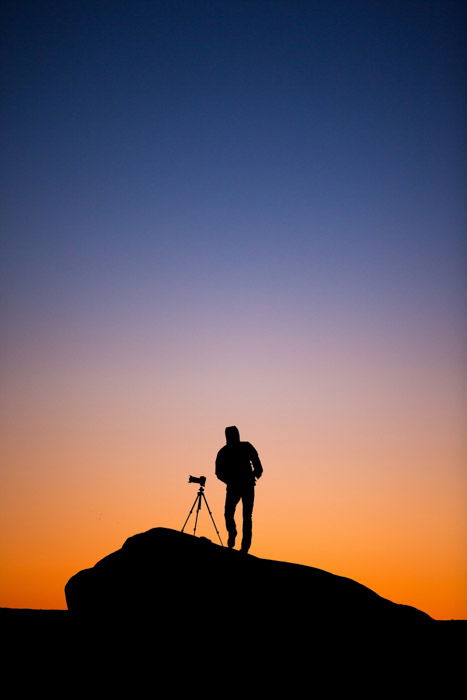
The first accessory for water photography is a sturdy tripod to avoid camera shake.
It’s typical for my tripod to be in the middle of the stream with
rushing water everywhere. It’s absolutely necessary to have a firm
anchor for the camera. It’s better to have spikes at the end of the tripod’s legs for mud.
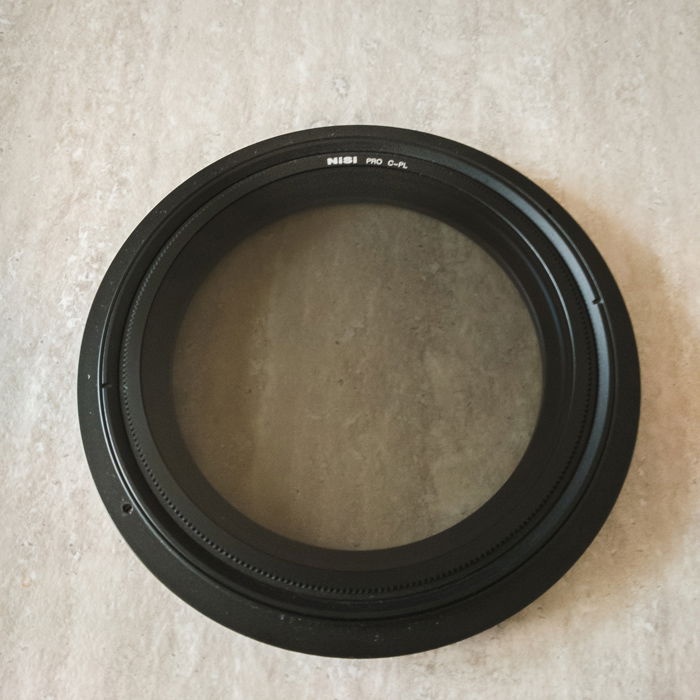
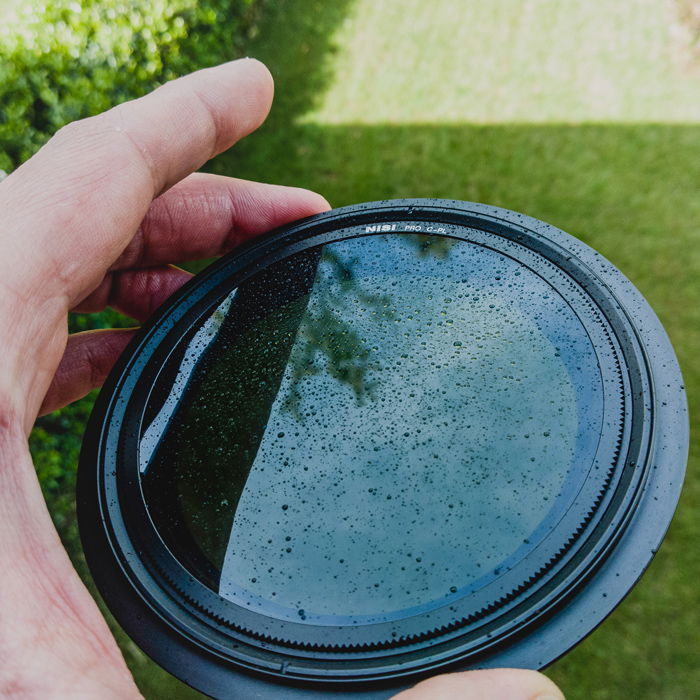
Using a circular polarizing filter or CPL is fundamental for landscape photography, especially for water photography in general. With a CPL
you can get interesting exposure times because you’ll lose almost a
stop of light. These exposure times are what make long exposures
possible.
The CPL removes reflections from non-metallic surfaces. This means it
will eliminate the reflections from leaves and water pools. You will be
able to see the bottom of the stream and the rocks below the water with
their beautiful colours.
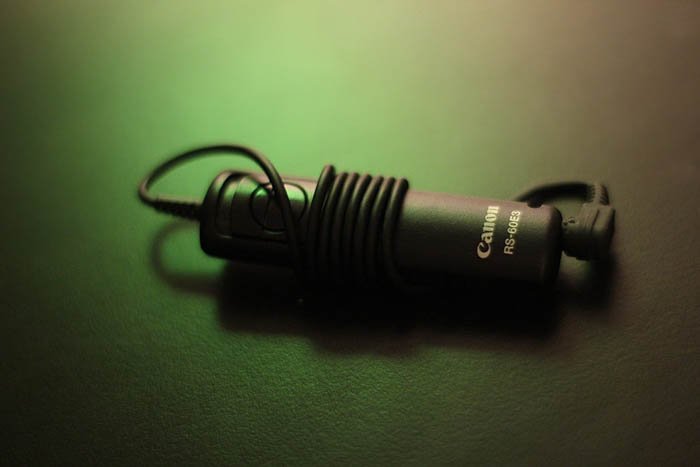
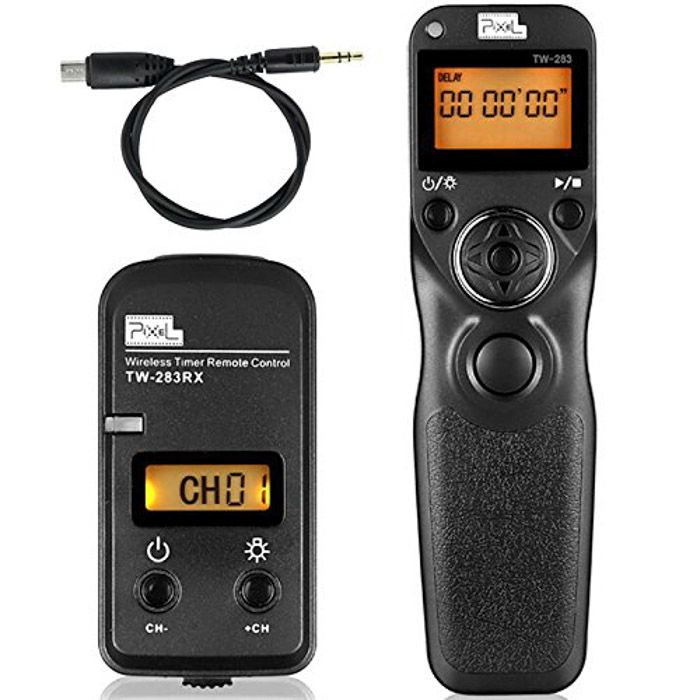
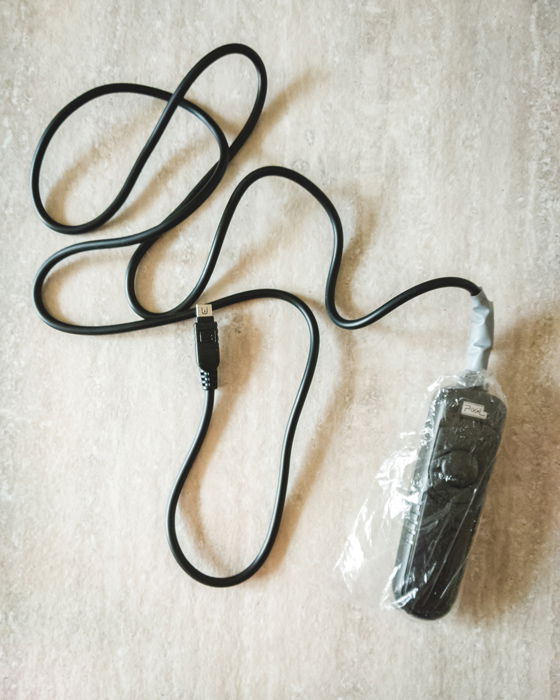
Remote Shutter
Another necessity is a remote shutter. This will prevent blurry images.
With a remote camera shutter, you don’t have to be so close to your
camera all the time. I can always use a 2-sec delayed shot, but I prefer
an old-fashioned remote with a cable.
It cost me a fraction of the ones that use radio waves, Bluetooth, IR
or WiFi, and it doesn’t need batteries. You can also wrap it in a
little plastic bag secured with duct tape, and you’ll have no worries if
it falls in the water.
Lens
There is no perfect lens for photographing waterfalls. As in any other photographic field, lens choice is part of the composition you want.
A wide angle lens lets you fit more elements into your image. For
example, if you want to frame your subject with a tree or you want to
include a rock formation.
Using a telephoto lens, or a lens with a focal length of more than
50mm, can add a unique perspective. Focusing on detailed rocks or
another interesting element with the waterfall in the background can add
interest.
Neutral Density Filters
You might be wondering, what ND filter do I need for waterfalls? ND filters are not strictly required but can be useful in long-exposure photography.
If you are shooting waterfalls, you are most likely in a tight canyon,
in a low light scenario. Using ND filters lets you shoot with slow
shutter speed. It could be a 20-30 seconds exposure. If you go with a
very dense filter like 10-stop ND filters, it could be slower shutter
speed.
But you have to be careful if you decide to use a Neutral Density
filter. The image will be very smooth and silky water movement, but
everything else will be blurry. You will also lose details in the
waterfall.
Graduated Neutral Density Filters
In some cases, I also use a Graduated Neutral Density (GND filter)
to control the light hitting the camera sensor. I use these when my
scene is not completely in the shade, and I need to manage the sunlight.
This way, I can decide which element to emphasise and which to hide.
How to Compose Waterfall Shots
When you first arrive at your waterfall, don’t set up your camera and
tripod straightaway. Instead, walk around, bend down, change your
perspective, change your point of view, etc.
I walk around to check where I can easily and safely go and try to
look at every angle. Next, I grab my camera, and I repeat the same
thing. I try to look at every corner, especially if it’s my first time
in that place. I climb rocks and fallen trees. I approach the location
and leave it several times.
If I’m not shooting a waterfall exposed to light, I have the time to
find and improve my composition. The light or rather, the shadow will
not change much. It will always be manageable.
What I always worry about is an anchor point in the foreground for
the viewer’s eye. Something that will guide them in reading the image
from the foreground to the waterfall. This point of interest could be an
autumn leaf, a beautiful rock with green moss, or the shape of the
stream. There is always a sort of S-curve composition with streams and
rocks.
Next, I try to avoid the sky. As mentioned before, you are in a tight
canyon. All the scene could easily be in the shade. It might be
difficult to manage the correct exposure with a triangle of light at the
top.
I always use the rule of thirds, and I try to put elements on those four points.
After exploring the composition, I set up my tripod and camera. I choose a focal point, usually a rock or a detail in one of the lower thirds, and I let the magic begin.
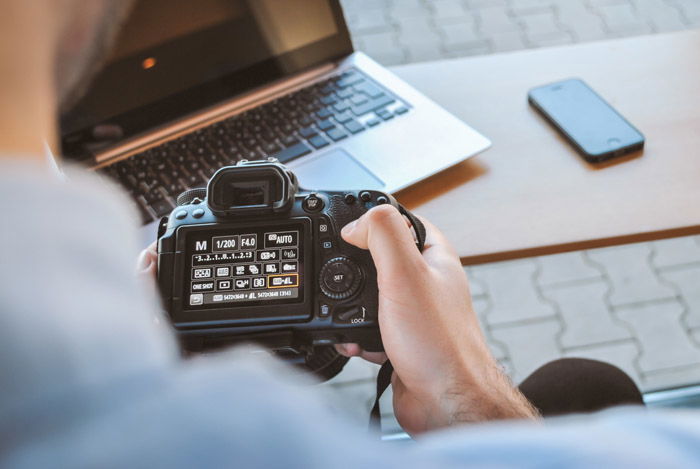
Camera Settings for Perfect Waterfall Photos
You might be asking, how do you photograph waterfalls with a DSLR?
Shooting in Aperture Mode or Manual Mode
is a matter of taste. I usually find myself in Aperture Mode. By
shooting at f/9.0 or f/10 or even more, I have a large depth of field.
This ensures everything is in focus. If you decide to use manual mode,
start with the lowest ISO (this is ISO 100).
But what is the best shutter speed for waterfalls? I use slow shutter speed to make the water appear silky smooth.
Now comes the CPL. I spin the filter four or five times to be sure of
the effect. I prefer to spend some time testing the effect, so I check
the live view of the camera while its spinning.
I also make sure that my main elements are in focus. And I take more
test shots whether I have to do additional fine-tuning. I look over for
the foreground, the light reflections, the greens from vegetation.
I
try to manage the highlights and the whites right in the field; you
can’t manage them in post-processing. If I burn the highlights, I cannot
recover them in Lightroom.
These are so important for the waterfall and all its details. Even
silky water can have fascinating details like tiny water drops. These
can give impact and movement to the image.
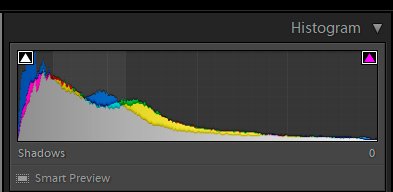
Overall, I try to have a well balanced and truthful histogram. It
will most likely be a little to the left, to the shadows. But, that is
okay as it’s consistent with the scene.
If the histogram shifts to the right, I try to change the light
coming to the sensor using a GND (Graduated Neutral Density) filter. The
beauty of modern filter holders is that they can turn 360 degrees. This
allows us to shape the light as we want.
I put on a Neutral Density filter only when I am sure I want to smooth the water’s movement and have the right amount of motion blur.
An exposure time of four or five seconds is plenty for a stream or
fall with a good amount of water and movement. If the result is okay,
then I take another last shot. That’s the shot that I have built myself
with a simple but effective mental and practical process.
But, how do you take waterfall pictures on iPhone?
On the native camera app on the iPhone, turn on Live Photos. This
feature that lets you take a series of photos and turns your shot into a
short video clip. This feature also lets you apply various built-in
effects on your native camera app, including long exposure. After taking
a live photo, apply the “long exposure” effect to your image. Your
iPhone will automatically apply the effect on your photos.
Using Live Photos is a simple way to create long exposure shots, but
there is no guarantee the shot will come out well. To have more control
over your images, use a third-party app.
What to Watch Out for in Waterfall Photography
You can shoot waterfalls in any weather conditions.
I prefer to avoid heavy rain because I have to face the splashes of
water that come from the waterfall. The raindrops can turn everything
into a real nightmare.
It’s a constant game of patience. I put the camera in position, and
the front lens or ND filter will be completely wet. So I dry it and try
to protect it. When I’m ready to shoot, the little drops return to ruin
everything.
In short, protect your lens, but be ready to clean it up many times if you shoot when it’s raining.
There
is another aspect to keep in mind when you want to take pictures of
waterfalls, especially if you want a long exposure waterfall photograph
and motion blur.
You can divide waterfalls into two broad categories. Those that are at low altitude and those that are higher up.
In late spring the waterfalls of low or medium altitude are more
loaded with water. The snow up high is melting down and flowing rapidly
in the streams. So the waterfalls will be more scenic but also more
dangerous.
Waterfalls that are higher up in altitude can be icy. You have to
wait until summer when the snow at high altitude melts so you can see
them full of water.
However, in the summertime, the heat can cause river levels to decrease, so low-altitude waterfalls can dry up.
My favourite moment to go hunting for waterfalls is in autumn after a rainy day. The temperature has already started to cool down, and it’s raining more often. This will increase water flow.
Autumn
also helps with those vibrant and intense colors. The leaves begin to
fall from trees, and they turn red, orange, yellow. They are an
excellent point of attraction for compositions. Using the CPL accentuates these bright colors.
These are my tips for beautiful waterfall photography. Remember that
you are going into nature so your primary goal should be safety.
Be cautious but enjoy the beautiful spectacle of nature on your own,
with your friends or with other photographers. Have fun and enjoy your
time photographing!
Wildlife photography relies on many different photography accessories to get that magic shot. Every photographer works with different accessories, but some are universally useful.
As a wildlife photographer myself, I can say the DSLR
accessories listed below should be in everyone’s bag. These will help
you significantly improve the quality of your wildlife photos.
Camera Bag
A camera bag is a necessity for wildlife photographers. It will safely carry your camera and accessories. And it will protect your photography gear from the elements.
If you carry around big items, such as a laptop or long telephoto
lenses, make sure to check measurements and look for a bag that is big
enough for everything.
I personally use the YAAGLE Oxford backpack when I am out to shoot wildlife.
It is big enough to hold two telephoto lenses at the same time.
It also has a tripod holder with a quick release strap. This is really
handy. It will make your life as a wildlife photographer much easier.
Your tripod will always be within easy reach.
In fact, many camera bags don’t have this feature.
Another really great camera backpack is the Lowepro Fastpack BP 250 AW II.
It also comes with an external tripod holder and won’t break the bank.
It has a rain cover and is big enough to hold three wide angle lenses,
two camera bodies, and other small camera accessories.
If you are looking for even more space then the Lowepro Whistler BP 450 AW XL Pro Grade is for you. It’s the perfect choice for wildlife and adventurer photographers.
It can hold a pro DSLR (such as the Canon EOS-1DX Mark II or Nikon D4s),
up to three lenses, external flashes, action cameras (such as GoPros),
outdoor gear (such as ropes, binoculars and torches) and other personal
items.
As a wildlife photographer, you should be able to walk or hike long distances freely, so a good camera backpack is just a must!
Tripod
A sturdy tripod is another must-have item for wildlife photographers.
It’s especially useful if you are shooting under poor light conditions
with very long shutter speeds.
There is no chance to get blur free images when using a shutter speed below 1/60s. Not even the calmest hands can manage that.
This is where a tripod comes in handy, to avoid camera shake during
exposure. When using a slow shutter speed, even the slightest camera
movement can cause blurriness.
As far as models go, I recommend the Manfrotto Traveler BeFree Tripod is for you. It’s a very steady all-round tripod, very compact and lightweight, and it has a beautiful design.
It’s suitable for both macro shots and for ground-level photos.
A tripod will allow you to get photos that you never could have
otherwise. Before buying a tripod, you could also visit a local camera
store to eye up different options. You might even be able to try them
before purchase and see if they’ll do the job for you.
Filter
Filters not only protect the surface of your lens, but also help you get higher-quality images in difficult light conditions.
Choosing the right camera filter is not always easy. Here are a few types of filters useful for wildlife photography:
UV-Filter
Like all filters the UV-filter protects your lens from dirt,
moisture, dust and scratches. They also block out unwanted UV light and
reduce haziness in images taken in very bright sunny conditions. UV
filters are also usually quite cheap.
Polarizing Filter
Polarizing filters are mainly used by landscape photographers to add
more contrast to their images, reduce reflections and darken skies. They
also increase overall colour saturation.
Another good reason to buy a polarizing filter if you’re shooting
wildlife is that it will allow you to reduce the haziness in your
images. Haze is something landscape photographers often have to deal
with.
Neutral Density Filter
These filters are useful in really bright light conditions. They help
prevent overexposure. ND filters are also helpful when the contrast
between shadows and the highlighted areas is too great for a good
quality shot.
Cheap neutral density filters often lead to ghosting. Be sure to buy a
high-quality density filter to receive the best image possible.
Also, make sure you know the size of your lens before you buy a filter. Some filters are available in 52mm, 62mm, 72mm or 105mm.
You will usually find the needed filter size on the back of your lens
cap. Your filter will also need to be cleaned every now and then. This
will affect the image quality if your filter is dirty or full of
fingerprints.
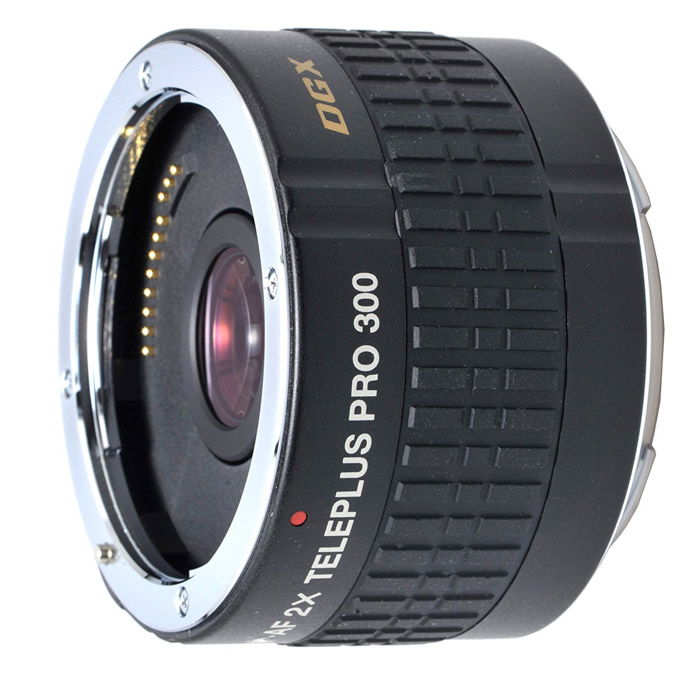
Tele-Converter
If you work with long focal lengths to photograph wild animals, a
tele converter is another must have. The main idea behind a tele
converter is that it will extend the focal lengths of your lens.
Tele converters come in different factors. These vary from 1.4x to 2x.
For example, if you are using a 200mm prime lens combined with a tele
converter that has a 2x multiplication factor, your 200mm lens will
become a 400mm lens. If you combine a 200mm lens with a 1.4x tele
converter you will get a focal length of 280mm.
So with a 1.4x tele converter you will get an extra focal length of 40%.
And with a 2x tele converter you will double up your focal length.
Pretty cool, right?
Yes it surely is! Tele converters unfortunately also have a few disadvantages.
Using a tele converter will automatically decrease the maximum aperture
value of your lens. This means if you are using a 1.4x tele converter,
you will lose one stop. If you use a 2x tele converter, you will lose
two stops.
Also, tele converters generally tend to reduce the sharpness of your
images. To avoid that, use high quality tele converters to still have a
great overall image quality.
If you are a Canon user and want to double up your focal lengths, the Canon EF 2.0X III Tele Converter is a good choice.
For Nikon users I would recommend the Nikon Auto Focus-S FX TC-20E III tele converter. Like the Canon one, it’s capable of producing excellent sharpness.
When taking images of calm wild animals, a tele converter can be a very
useful camera accessory. It will let you photograph subjects without
disturbing them.
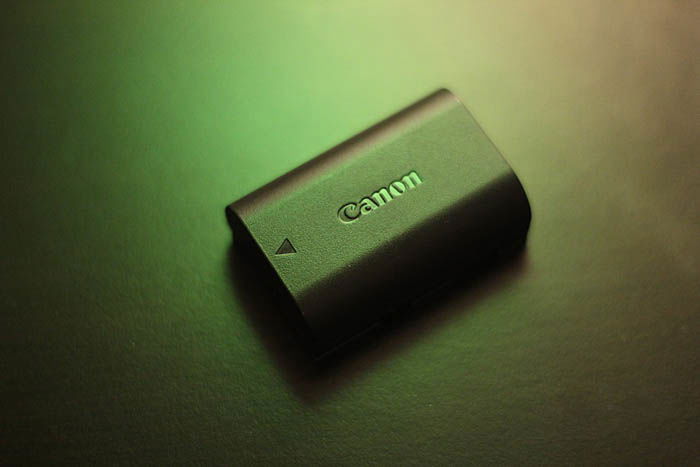
Spare Batteries
Imagine you are on a photo trip and you suddenly realise that you
forgot to charge your batteries. That’s every photographer’s worst
nightmare.
To avoid it, bring along an extra fully charged pack of batteries. If
you’re shooting in the cold, this is doubly important as batteries tend
to drain faster at lower temperatures.
Also, if your batteries are old, they hold less power. So plan for that as well.
I would recommend not buying cheap third-party batteries to save money.
They might not be compatible with your camera body and could cause
damage to your camera. And you risk losing your warranty.
So if you’re using a Canon camera, use Canon batteries. Same goes for the other brands, Nikon, Sony, etc.
Another great way to provide your camera with more power is to use battery grips.
Battery grips also provide more comfort, as it will be much easier to
hold your camera. Some models even have small compartments to store
memory cards or a remote shutter release.
For example, if you shoot with Canon, the Canon Battery Grip BG-E16 is a great choice if you want to double your shooting time.
For Nikon users, I would recommend buying the Nikon MB-D15.
With a battery grip you are on the safe side. You will have twice the
battery life you usually have and won’t need to stop in the middle of a
shoot to change batteries.
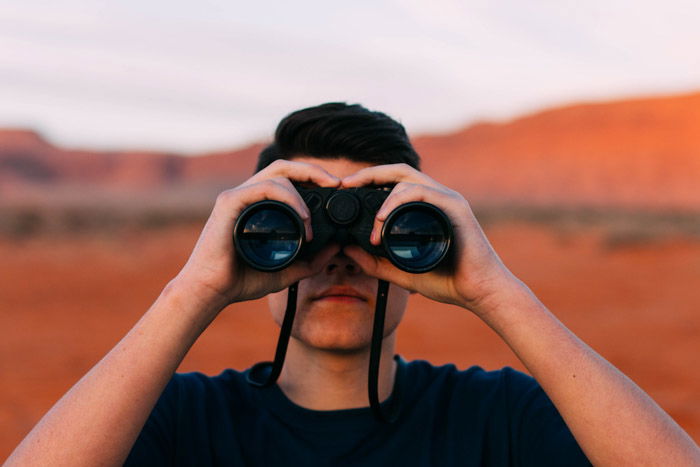
Binoculars
As an outdoor photographer, you should definitely invest in a pair of high quality binoculars.
When it comes to wildlife photography, these are a must for birding and wild animal observation.
I use them when I want to photograph an animal species that I haven’t
photographed before. Staying in the background at first with my
binoculars allows me to observe them and find out more about their
behaviour.
Binoculars come in different magnifications, and all of them are
identified by 2 numbers. So a 10×42 binocular will have a magnification
power of 10. This means that the object of matter will appear 10 times
closer than it would normally.
The second number refers to the diameter of the binocular lens.
Binoculars with a larger diameter number allow more light to pass into
the glass. The will appear much brighter, clearer and you will have a
better viewing experience in total.
But mind that the larger the diameter number, the heavier the binocular will be.
For outdoor photographers I would recommend buying binoculars with a magnification power between 7x to 10x.
Make sure your binoculars are also waterproof. This way you’ll be able
to observe animals under bad weather conditions like snow or rain.
Before buying binoculars online always check the reviews. These will
help you decide on the best pair. Also, some binocular stores offer the
option to test the binoculars before you buy them.
I would definitely recommend that. It’s a good way to make sure the binoculars fit your eyes right and are comfortable to use.
Here are a few binoculars that I would recommend.
From 50$ to 100$: Wingspan Optics Spectator 8X32 Gosky 10×42 Compact HD
From 100$ to 300$: Nikon 8252 ACULON A211 10-22×50 Zoom Binocular Celestron 71332 Nature DX 8×42 Bushnell Legend Ultra HD M-Series 10x 42mm Binoculars
From 300$ to 600$: Nikon 7548 MONARCH 7 8×42 Binocular Vortex Optics Viper HD Roof 10×24 Prism Binocular
From 600$ to 1000$: Nikon MONARCH HG 10X42 Swarovski CL Pocket 10×25 Binoculars Green
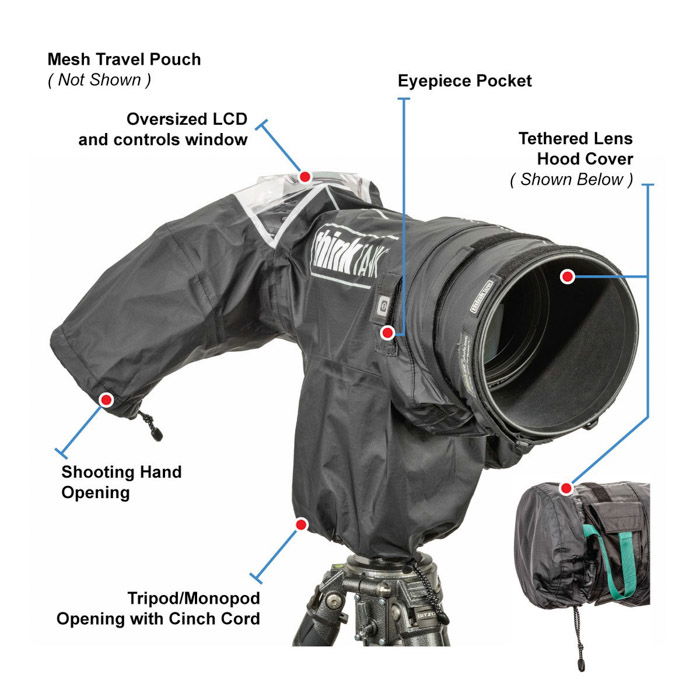
Rain Cover
There is no way around using a rain cover for your camera when the
weather’s bad. Water can easily harm the electronics of your camera. A
cover will protect your gear from rain, snow, fog or other humidity and
atmospheric influences that mother nature throws at you!
For photographers who use tele lenses, I would recommend the LensCoat® RainCoat 2 Pro.
This provides perfect protection for your camera and your tele lens,
not only from rain and snow, but also from sand, dirt, dust and salt.
The LensCoat® RainCoat 2 Pro is very easy to fit on your camera. You
will still be able to access to the camera and lens controls.
It is built for lenses ranging from 200mm to 400mm focal lengths.
If you’re on a tighter budget, I would recommend the OP/TECH rainsleeve. It is very cheap and fits lenses up to 18″ L x 7″ diameter. Photo Blind
Wildlife photography can be quite challenging. As a wildlife
photographer I know how hard it is to approach wild animals. I also know
that it can also be very rewarding once you get that shot you’ve been
dreaming of.
How close you can get to the animals always depends on the certain
species you want to photograph. Some wild animals tolerate the presence
of humans while others don’t.
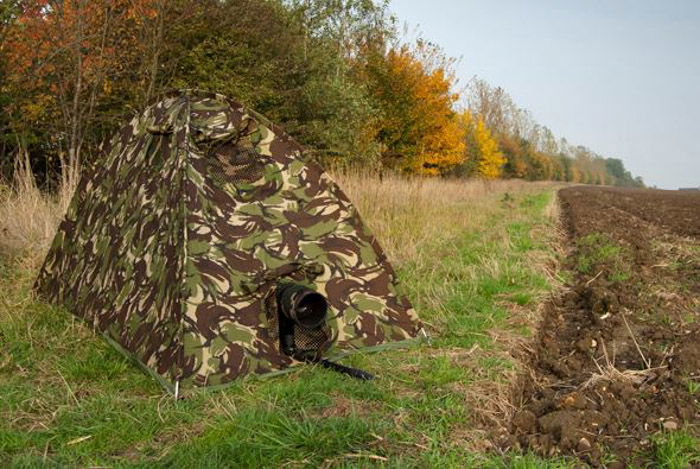
Using a photo blind will definitely increase the chances of getting
close to wild animals. It’s especially god for photographing shy
animals. It allows you to become invisible to them.
Also if you’re photographing endangered species, a photo blind is necessary to avoid disturbing them.
Photo blinds typically have a camouflage pattern. This way you can blend
in better with the wildlife that surrounds you. They also have gaps and
windows where you can stick out your lens.
Some photo blinds provide more space than others, and those are usually
more expensive. Having more space does mean more comfort, or even the
possibility to share with another photographer.
I personally use the B.I.G. Bird Watching photo blind. It’s really easy
to set up and you can use it under different weather conditions as it’s
made out of high quality waterproof material.
It’s not too expensive either and has everything you could need to get close to wild animals.
Additional Memory Cards
I would recommend every photographer always bring along additional
memory cards. Just to have enough storage space in case your other
memory cards are full.
Memory cards often have limited capacity. If you are shooting in RAW, I
would definitely recommend buying a memory card with at least 32GB
storage space.
Always find out first which format your camera requires before buying a
memory card. The most usual memory card format is SD (Secure Digital).
Less common memory cards are CompactFlash cards, CFast cards and XQD
cards.
Also, don’t buy a memory card with huge capacity like 64GB. I would
recommend buying two 32GB memory cards. Just imagine having bought a
64GB memory card that you lose on a photo trip.
If you own a lot of memory cards, a memory card wallet can be a great way to store all of them.
This list of accessories can go on and on. There’s many things that a wildlife photographer needs and as you take more and more pictures of animals, you’ll start figuring out what YOU need.
But these 10 accessories are a must-have for any beginner. And they will
cover most of your needs as a wildlife photographer even as you get
more advanced.
They’ll help you improve the quality of your pictures, save your spine, and allow you to approach those skittish animals.
In short – these items will make your life easier as a wildlife photographer.
In the field of wildlife photography there are common techniques, and
suggestions, that would apply to any type of animal that you want to
photograph.
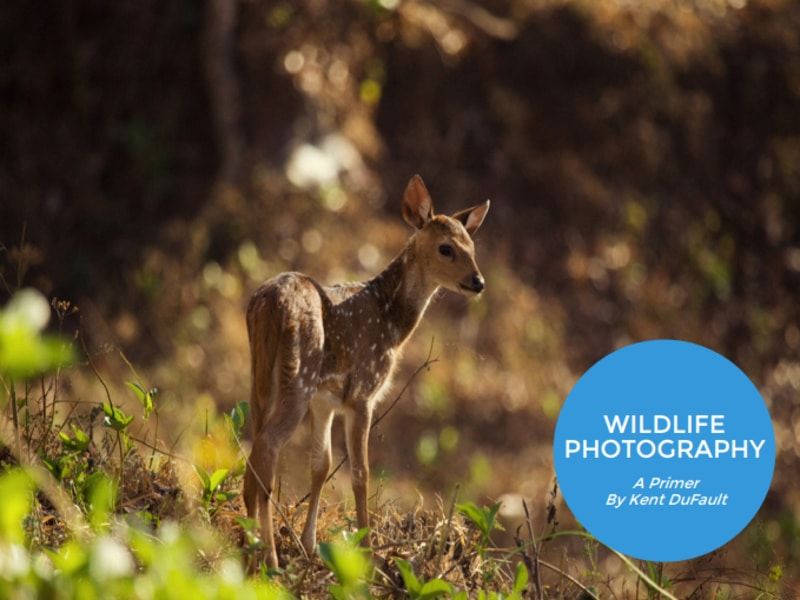
And that is what this week’s FREE quick guide is all about.
“Wildlife
Photography- A Primer” is meant to give you the information that you
need to get started creating a stunning wildlife portfolio.
Here is what you’ll learn in this FREE guide-
The importance of preparation, research, and patience
Equipment selection (you don’t necessarily need a super telephoto lens)
Camera settings to achieve optimum quality
What a ‘blind’ is and how to use one
The importance of your clothing
Whether to use a flash- or not
How to protect your gear against the elements
This
guide, by Kent DuFault, also includes critiques of existing wildlife
images, so that you can learn from the mistakes, and accomplishments, of
others.
The Ultimate Guide To Wildlife Photography (89 Best Tips!)
by E.P.
What Is Wildlife Photography?
This is one of the most challenging areas of photography. You are dealing with animals that don’t take model direction.
Not only do you need to have superb technical skills, but also know how to expose, frame, and compose well.
You will find that some animals are approachable to some extent, and
others will require a telephoto lens to get any kind of photographic
evidence.
Safety for the animals and for yourself is key. Never put yourself or
any wildlife in harm’s way to get a great image. Protect the animals in
their habitat, too.
If you are wondering how to go about starting your wildlife
photography journey, then keep reading. We will touch on what to look
for in wildlife photography and how to improve on a few simple ideas and
compositions.
In the end, we shall look at the post-processing side of things. This
area makes sure that your images are as good as they possibly could be.
Have fun, experiment and keep practising. Your images could one day win wildlife photography awards.
Your camera is your tool for capturing amazing wildlife photography.
Any DSLR will capture images, but there are a few specific settings that
will definitely help you.
The ability to shoot in raw is one of the most important tools your
camera needs to have. Raw images will give you significantly more
details to play with than jpeg.
They are more than 8x bigger in terms of size, as they hold much more
data. Any local adjustments are changed without loss of quality.
Read our list here for the best cameras for wildlife photography.
Chances are that you will own and mainly use a DSLR. They offer you the most amount of settings, lenses, and accessories.
DSLRs are also better at auto-focusing, fast and continuous shooting
and high ISO capabilities. All of these are perfect for capturing moving
subjects in wildlife photography.
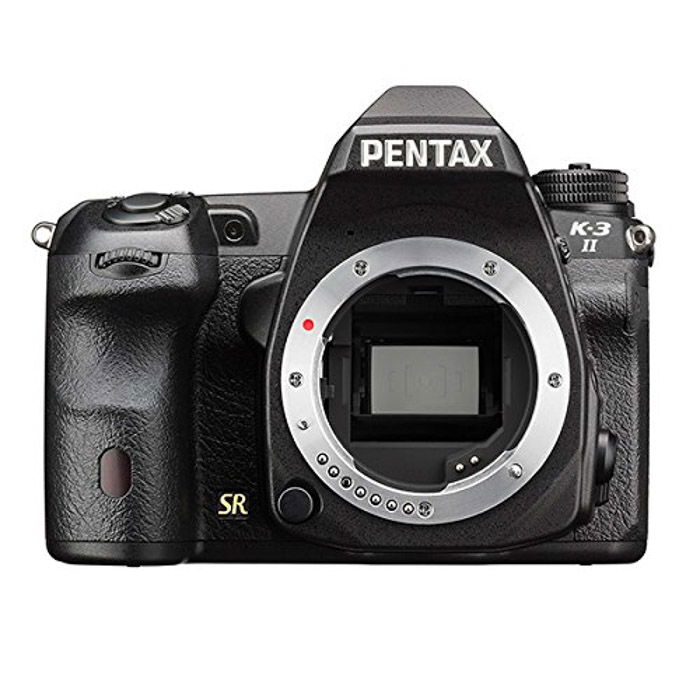
For the beginner, the Pentax K-3 II is a solid choice. This camera comes well protected from the elements with its 92 seals.
It also has image stabilization for those moving animals. Read a full list of DSLR recommendations here.
If you are serious about wildlife photography, you will find that your images will benefit from more than just your camera.
Accessories help you take better images. They help you stay comfortable so you can stay out, photographing for longer.
The accessory that you won’t be able to live without is a bag. It
allows you to carry all of your photographic gear, but also other items,
such as clothing and binoculars.
Our recommendation is the YAAGLE Oxford backpack, as it lets you carry two telephoto lenses together. It even has space for all your other items.
You might not want to photograph some animals using a 50mm lens. You
can’t even get close enough to some animals to photograph them.
The solution to this is a remote shutter release. This allows you to release the shutter without touching the camera.
This piece of equipment is also great for long exposures. Touching
your camera while the shutter is open for extended periods of time could
create shake, ruining your image.
That is the last thing you want for that once-in-a-lifetime shot.
Some are wireless systems, and others don’t require batteries and cost
less than $10.
A camera bean bag can be extremely helpful in wildlife photography.
It is helpful to use in scenarios where a tripod won’t work. For
example, you can place it on a fence post, on a rock, or the ground.
Many times, it is easier to shoot from your car. A camera bean bag
helps stabilize your camera and still take sharp photos without a
tripod.
In addition, it is easier to get down really low on a camera bean bag than on a tripod.
To read how else a camera bean bag is useful, and how to make one at home, read the rest of this article.
Clothing is one of the most important areas of wildlife photography.
They will protect you during the harshest weather conditions.
They will keep you warm when it is cold and dry when it’s rainy like
England in April. You will need to know what conditions you may
encounter so that you can dress accordingly.
These clothing items have extra pockets for small amounts of gear
needed at a moment’s notice. The more comfortable you are in the wild,
the higher the chance of your happiness.
This means staying out longer taking stunning wildlife images. Read more about our clothing recommendations here.
When you are starting out in a new field of photography, you don’t
want to spend all your money. At least until you are sure you will stay
interested.
This is why we suggest this list of gear items for those on a
budget. One area that can really save you money is a teleconverter.
This little lens-shaped item fits between your lens and your camera
body. Its purpose is to multiply the focal length of the lens you are
using alongside it.
For example, if you are using a 24-70mm lens, a 3x teleconverter will turn the lens into a 72-210mm lens.
You now have a telephoto lens without spending the money on a telephoto lens. Neat, huh?
There are many equipment items that will really help your wildlife photography.
Where, when, and under what weather conditions are important questions. For harsh weather conditions, a lens rain cover will protect your camera and lens. This allows you to shoot outside without worrying about your equipment.
Other essential pieces would include a tripod, ensuring camera-shake
free images and allowing you to work in low-light conditions.
Invisibility is possibly the most desired attribute for photographers
across all photographic fields. Imagine the photos if this were
possible.
Hides are a great way to make yourself unseen to the naked animal eye. They come in all shapes, sizes and camouflages.
A great possibility is a canvas dome hide. This system is fast to set
up, easy to transport, and easy to move in case of frustrating birds
flying away.
Read here on what choices are available and how they will help your wildlife photography.
Sorry to burst your bubble, but there is no best lens for wildlife
photography. There is only the best lens for your wildlife photography.
It all comes down to what you are going to be photographing with the
lens. If you are photographing animals in motion, then a fast lens is
what you will need.
A wide-angle lens will suit you better if you are aiming to capture
an animal in its natural habitat. If you have lenses already, then you
may not need to invest much, or at all.
A teleconverter can extend the lenses that you have, into something closer to a telephoto lens.
A telephoto lens will get you closer to your subject. This is great
for photographing those animals that have a taste for wildlife
photographer served fresh.
It also allows you to close the gap between the subject and the background, which gives an interesting perspective.
Prop your camera on a tripod, and you can get closer to the action without risking any limbs.
Typically, telephoto lenses range anywhere above 85mm. Any lens that
can reach a focal length of 300mm or more is a super-telephoto lens.
Both range from affordable to very expensive. If you don’t think you
will use a telephoto lens a lot, but want to try it out, get a
teleconverter.
If you’d prefer to stay away from the action, get the lens and bask in safety.
An interesting lens option is a wide-angle lens. These typically have a wider field of view than what we call standard lenses.
If a standard lens is 50mm, then a 35mm and 24mm lens are slightly
wide-angle. For the real benefit, you need to look at lenses of a focal
length between 11mm and 24mm.
The field of view for these ranges from 84° to 120°. 120° is a third of a 360° panorama, just to put it into perspective.
These lenses will give you some distortion, especially closer to the
edges. This is due to the sensor trying to squeeze in all the extra
field of view information.
A great way to spot and follow birds and animals is by using scopes
or binoculars. This saves you time and effort so that you don’t have to
pack up and move each time the animal does.
They will allow you to see them from afar, without disturbing their
natural habitat or daily life. This way, you can make sure they are not
just posing for the camera.
Most wildlife photographers use binoculars that are at least 8x
(magnification 8 times). The larger the magnification, the more trouble
you will have keeping it steady.
They can cost anywhere from $100 to $2000, and the scopes can cost
even more. Secondhand is also a viable option for those on a budget.
Making sure your camera is prepped correctly saves you valuable time.
You want to tweak your camera settings when you are photographing, not
starting from fresh.
This could get you that perfect shot, where the other version of you is still moving the dial back to ISO 100.
One area that you shouldn’t overlook is aperture priority (A, Av).
This is a tool that allows you to set the aperture, and the camera changes the shutter speed automatically.
This way, you only need to worry about what aperture you want to
shoot at. This can save valuable time, rather than trying to change
everything manually.
Do this when you first get to a location, even before seeing any animals.
Use the light around you to get the settings you need. Read here for all the details you will need.
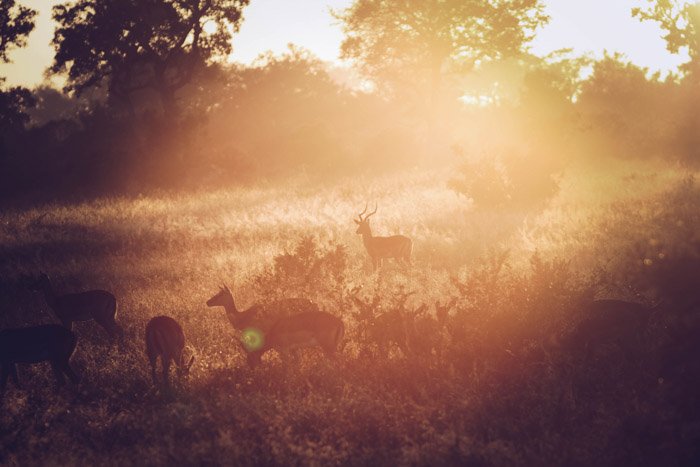
Bird photography needs a different set of skills. They spend their
time in the air and prefer to hide away on top of buildings, or in
trees.
Birds tend to be fast and dramatic when they are out in the open.
Auto ISO combined with a minimum shutter speed will work wonders.
Auto ISO means that your camera will choose the ISO automatically. It
will change as needed. As the light changes and the scene becomes
brighter, this will drop, and vice versa.
A minimum shutter speed comes down to what you choose. If you choose 1/1000th of a second, the ISO will set itself accordingly.
There are many camera settings you can utilize for all kinds of
captures, not just wildlife photography. You might feel a little
overwhelmed at first.
Our recommendation is to not get caught up in all of these settings
in the field. You will waste valuable time in doing so, missing many
great shots.
Use the programmable custom function buttons for help. Preset these when you get to a location, with a few different variables.
Let’s say one with a wide aperture (f/4 instead of f/16), and another
focusing on shadowy areas (-2 EV). This way, you can change your
settings in one simple move.
Read here on how to do that, and 4 other great ways to improve your wildlife photography.
For fast-moving subjects, AI Servo works well as it keeps track of
where your subject is moving to. It refocuses every time the subject
drops out of focus.
You can even make a custom preset so that your wildlife photography is at its best. Read here for how to do that.
There are plenty of reasons why you should try wildlife photography.
The number one reason is that it’s going to be challenging, so you will
learn a great deal.
As there are many niches for photographing wildlife, there is
something for everyone. It has a big enough variety for photographers
with different skill sets.
Humans are very much still connected to nature. We are fascinated by
it. Wildlife photography offers us that step back into nature.
For the other nine reasons why you need to start, look here.
After you have found a location and/or subject to photograph, it is
time to go through the golden rules. You need these to be a good
wildlife photographer.
Their purpose is to ensure you are ready to get out into the field
and start photographing. The last thing you want is to feel unprepared.
One of the golden rules looks at your passion for wildlife. You won’t
get far if you really don’t like your subject or locations.
Dedication comes from working towards something you are passionate
about. Your photographs will fall flat if there is no motivation.
Read the other nine golden rules here, in this article.
The do’s and don’ts of wildlife photography are here to help you.
They provide you with more information on what is possible in this field
of photography.
Do respect the animal and its habitat. This means that you need to
put yourself in a position where you do not create any stress for the
animal.
This might be successfully hiding, keeping your distance, and not
running up to them asking for a dual selfie. Animals aren’t into the
whole Snapchat thing.
For all the do’s and don’ts, read the article here. It will help you become a better wildlife photographer.
Going on a safari can be an exhilarating experience to get fabulous
wildlife photos. But, there can be many unexpected challenges, too. For
example, the heat, harsh light, and dust. Not to mention, the fact that
most of your shots will be taken from the back of a safari vehicle.
Read this article to be prepared and get helpful secret tips like why
you should take two cameras and how to take photos in the bright
light.
Now that you have some understanding of wildlife photography, let’s
improve. Hopefully, you have already been out and tried a few of our
tips already.
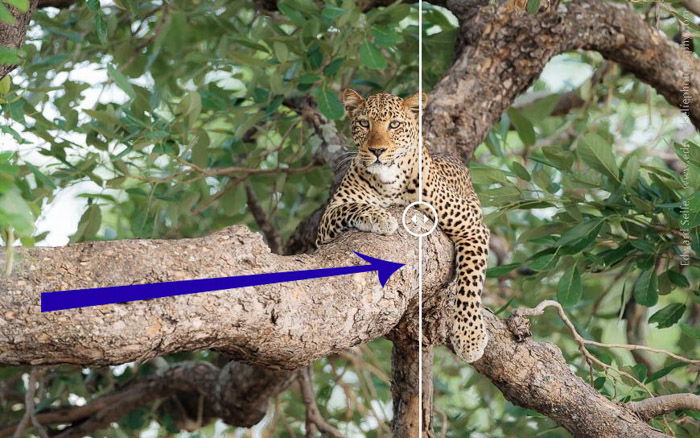
One way to make powerful wildlife photography is to simplify the focus.
Another way you can do this is to use the centre autofocus option
along with AI Servo mode. This will ensure a sharp, focused subject.
Then you are free to compose the image as you see fit.
Read our article here for the other nine tips on better wildlife photography.
There is always something we as photographers can do better. Either
it is our weakest skill, or we are moving from a different area of
wildlife photography.
The more animals you photograph, the more you realize that action is a
huge part of this field. We need to freeze these moments that the
animals give us.
The fast action is best captured with fast shutter speed. This allows
you to freeze the moment without motion blur. 1/1000th of a second or
higher is perfect.
Read our other tips here on how to improve your wildlife photography.
Another way to capture wildlife photography is to utilize macro
photography. This field allows you to get really close to a subject.
Macro photography is created by the use of a macro lens and/or the
use of a macro converter. It is even possible to reverse the lenses you
already own.
This type of photography is perfect for insects and capturing details of animals. If you can get them to stay still, that is.
Read this article on how to successfully utilize macro in your wildlife photography.
Extreme weather conditions can make you feel ‘urgh’ about having to
go outside to photograph. Just know, this is a great opportunity to
capture great shots.
For one, many other photographers will stay at home, drinking hot
cocoa. This reduces your competition, allowing you those unique images.
You will need to dress appropriately. Your gear needs to be protected
and overall, and your comfort level needs to be somewhat high.
Read all the information you need for extreme weather conditions. It also gives you tips on how to look after your gear.
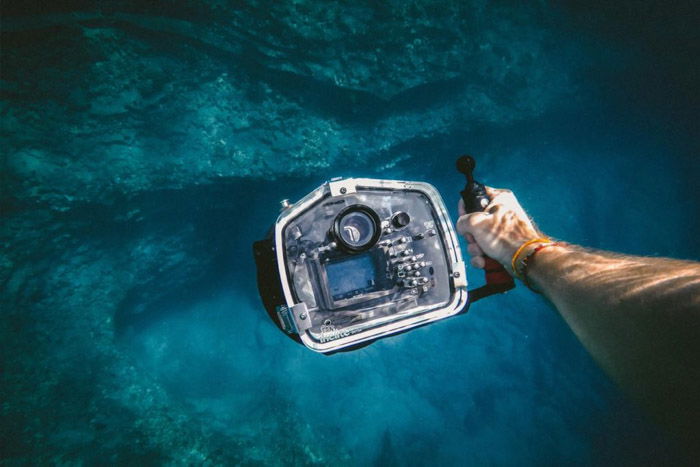
Underwater cameras are made specifically for taking photos under the ocean, sea and even lakes and rivers. They open up the way to explore a whole new world.
But out of the many available in the market, which is the best for you?
The Fujifilm FinePix XP130 is the best value for money. But our top pick would be the Olympus Tough TG-5. Check out this article to find out why, and see the rest of the list of top 12 underwater and waterproof cameras.
Obviously, do not get into the water without finding a way to protect
all of your camera gear. That would be a very expensive mistake.
Camera housings are not cheap. They need time and knowledge to maintain, but they are necessary items.
There are waterproof cameras that allow you to photograph up to
certain depths. But they don’t offer you the same control as a DSLR or
mirrorless system.
All the information you need is here, in this article.
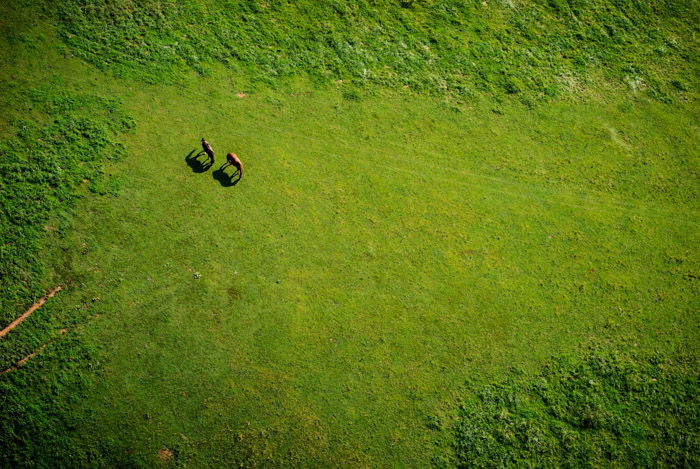
Another way to photograph animals from top-down is to do so with a
helicopter. This is no means a cheap way to photograph, but it is
special.
To get effective images from the eye in the sky, you really need to
know your camera equipment. This is before setting out on that
high-flying machine.
You will need to work fast. Keep your eyes open; check both sides of the helicopter as eat, and west will differ greatly.
Read here for all the tips you will need on capturing great photographs from the sky.
Compositions relate to how the objects and subjects are put together
or ‘composed’ in the frame. We are in control of how all of the visual
elements connect.
This is either down to your physical location, your perspective, and your camera gear. Namely the camera and lenses.
The composition that most wildlife photographers use is the rule of
the thirds. This is a go-to composition to make the image more
interesting.
Using negative space is also a great way to frame a scene. Negative
space pushes the focus towards the subject and makes the animal stand
out more.
Read more here and give it a go on your next expedition.
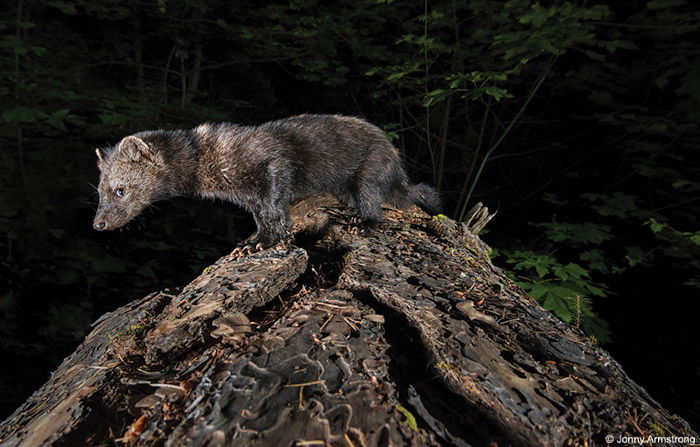
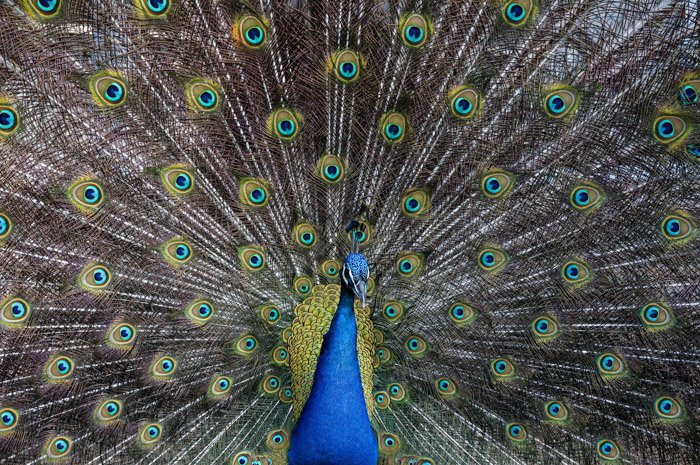
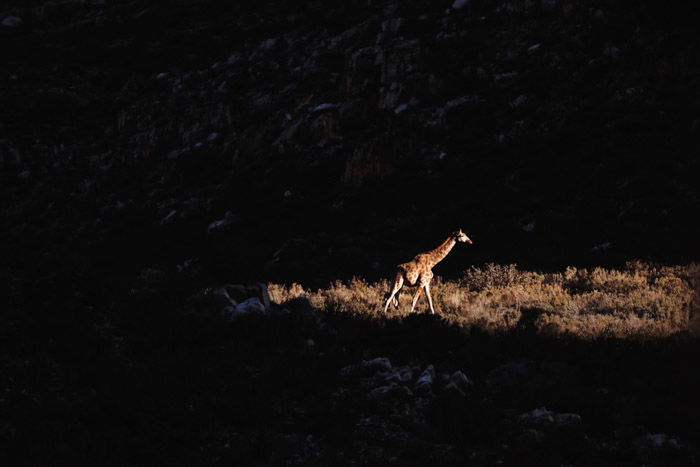
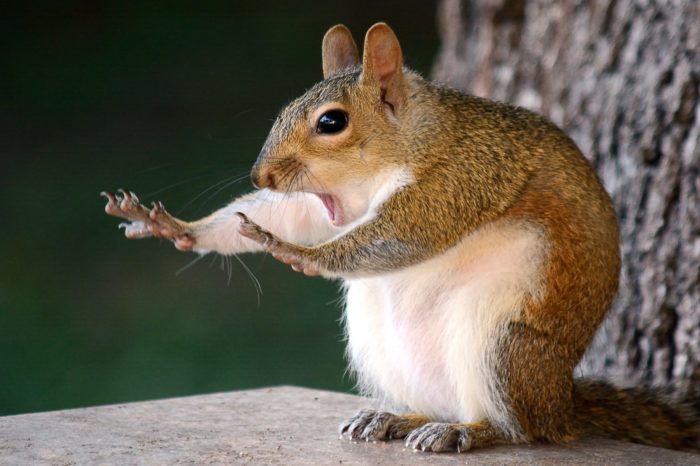
You’d be lucky to see an animal make a funny expression, but you’d be even luckier to manage to capture it. Taking funny animal pictures seems almost impossible to master. So, a good funny animal picture is quite an accomplishment.
The number one priority during wildlife photography is safety.
When we talk about safety, we want to make sure you not only look
after yourself but also the subjects of your images. Anxious animals are
dangerous.
Our biggest tip here is to be mindful of your surroundings. Not only
of the animals but the environment you are in. You could slip and fall
in the middle of nowhere.
Read all of the tips on being safe, here, in this article.
Approaching wildlife needs careful consideration. It not only stops
the animal from being anxious and acting unpredictably. But it also
ensures your next great shot.
There are two ways you can quietly earn the trust of your subjects.
One is to sit and wait for the wildlife and animals to come to you or
your focus area.
This allows them to do so naturally, so you keep the scene organic.
It also means that you don’t spend all of your energy running around.
For the second tip, you need to read the article here.


 I
try to manage the highlights and the whites right in the field; you
can’t manage them in post-processing. If I burn the highlights, I cannot
recover them in
I
try to manage the highlights and the whites right in the field; you
can’t manage them in post-processing. If I burn the highlights, I cannot
recover them in 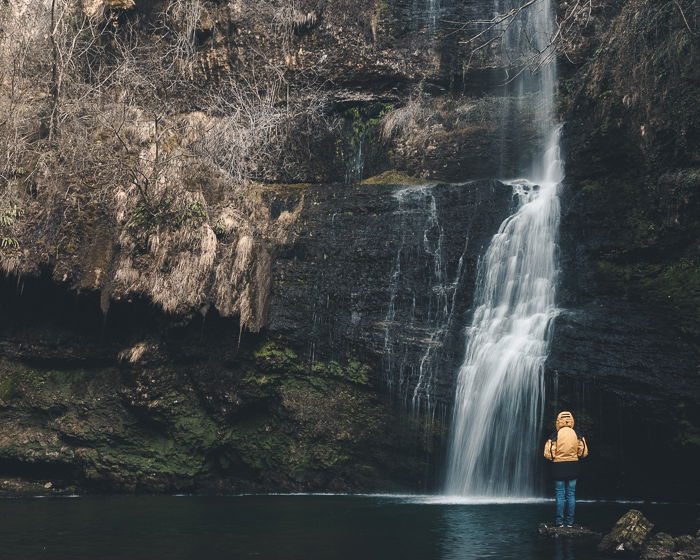
 There
is another aspect to keep in mind when you want to take pictures of
waterfalls, especially if you want a long exposure waterfall photograph
and motion blur.
There
is another aspect to keep in mind when you want to take pictures of
waterfalls, especially if you want a long exposure waterfall photograph
and motion blur.