
Sorry I missed posting since last Monday. I've been feeling a little "under the weather" and had to take some time off. I'm now feeling fine, and back in the saddle. I think you'll like this post as much as I enjoyed researching it.
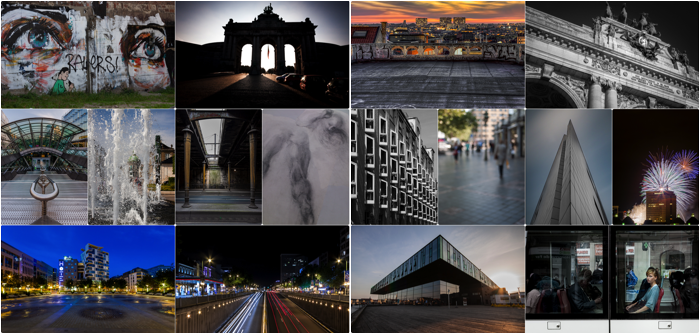
18 Secrets for Taking Awesome City Photography
Cities are the most beautiful, vibrant and ever-changing playgrounds for photographers. City photography is not only about breathtaking skylines and cityscapes, though.
It is easy to play it safe and limit yourself to the classic tourist snapshots. Or to be overwhelmed and try to shoot everything that moves or stands tall.
In this article, I will share 18 tips to help you to take breathtaking city pictures.
Golden Rules for the Urban Photographer
Be Safe
Every city has its fair share of crimes. Ask the locals and tourist offices for places a tourist should avoid. Keep in mind that what seems like a nice, common street by day can be a risky area by night.
Be aware of what is going on around you. Try not to attract too much attention by walking around with lots of equipment. If you are not on a professional assignment, you may ditch your expensive pro gear. Take more modest-looking bridge or compact camera instead.
You won’t compromise much image quality, and you’ll be safer. It’s always a good idea not to go out on your own but bring a friend or two when it gets dark.
Be Respectful of Others
The city is not your home studio, and the people you see are not there posing for you. Be respectful and not imposing or threatening.
Some street photographers like to jump at people’s face with a flash to get candid reactions. Like Magnum photographer Bruce Gilden. Not everybody is comfortable enough to do this with strangers in the street. And it’s not legal everywhere either.
Stay Comfy
Urban photographers hit the streets for many hours at a time in all weather conditions. Dress comfortably, stay warm in the winter. Make sure to dress in layers and have good shoes.
If you are carrying heavy equipment, a backpack is more comfortable than a shoulder bag.
Keep Looking and Experimenting
Look up, look in front, now to the left, to the right and also give a good look behind you. Scan the city for small details, hidden patterns, interesting people and situations.
The best thing about city photography is that you cannot plan your pictures. There is always something new, even if you try to photograph the same location every day.
City Photography Gear
If you are visiting a city for tourism, a good zoom lens is far more important than the kind of camera you are using. A travel zoom lens for DSLR and mirrorless cameras is often all you need. They will allow you to shoot both cityscapes and candid portraits.
Bridge cameras with power zoom, such as Sony RX10 with its 24-200 f/2.8 lens, are great all-around cameras for the city. The fast aperture is also great for indoor use.
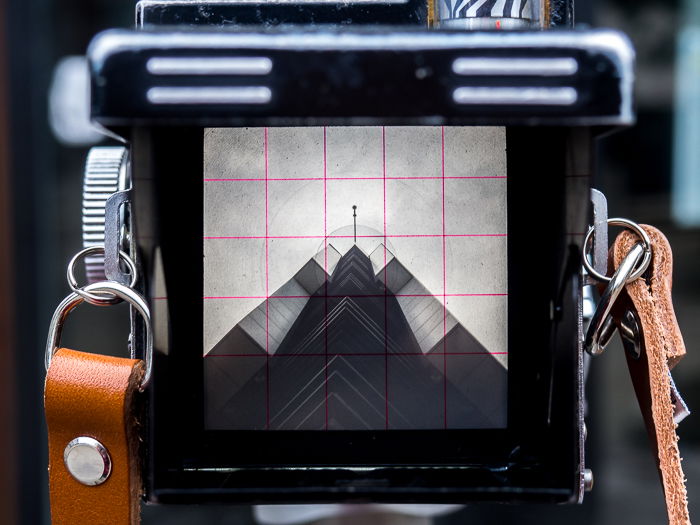
But a TLR camera is also a great prop to show the city in a different way. I love to photograph the city through my Yashica Mat TLR camera and create more unique images.
Smartphone cameras are best used for the casual shot and for some work in street photography, as they are small and do not attract too much attention.
A travel tripod, such as the MeFoto RoadTrip S and the Gorillapod, is also a nice thing to have. Especially if you are after some night shots. Unfortunately, some cities have laws against the use of large tripods in the urban environment.
If you are unsure but you really want to bring the shot home, set up the tripod. But if you are asked to leave, don’t make a fuss. Sometimes a monopod is more accepted.
A circular polariser can remove glare from the streets and cobblestones in wet weather.
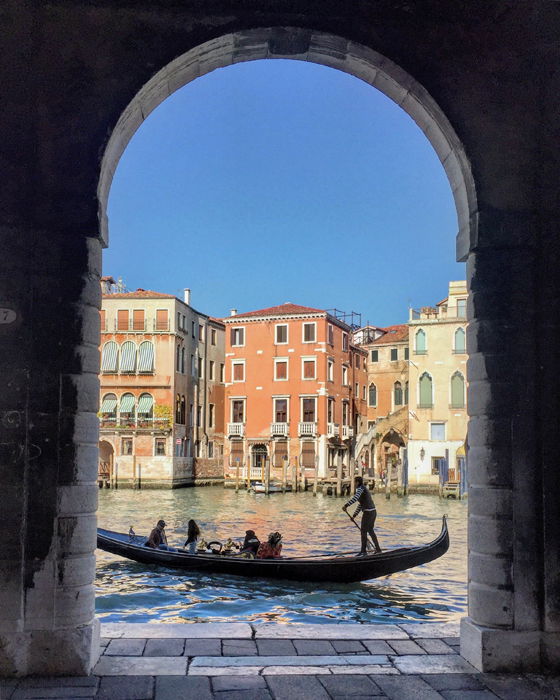
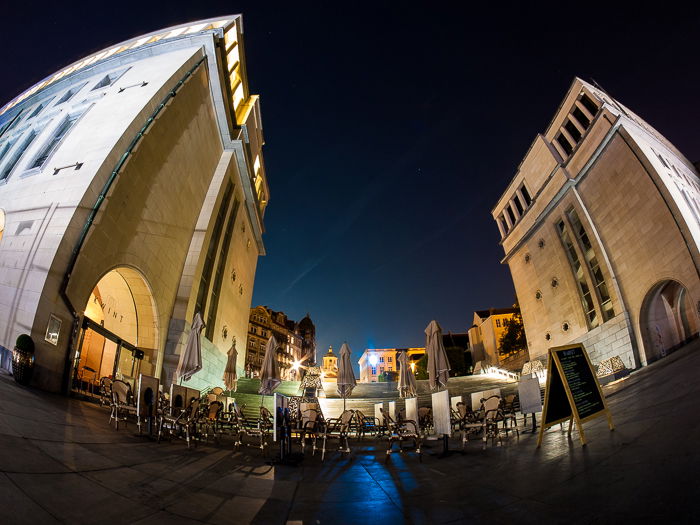
18. Frame Your Photos Through Archways
Shoot your image through archways so that it has a nice frame around it. In general, there are archways in older parts of the city. Sometimes you have to wait for the right time to get the perfect shots.
You can also look for interesting shadows that the sunshine generates through the arches.
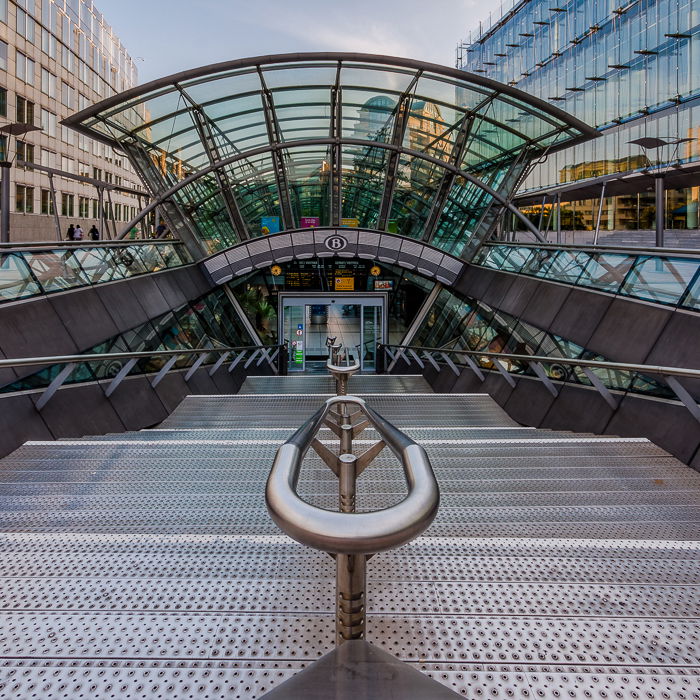
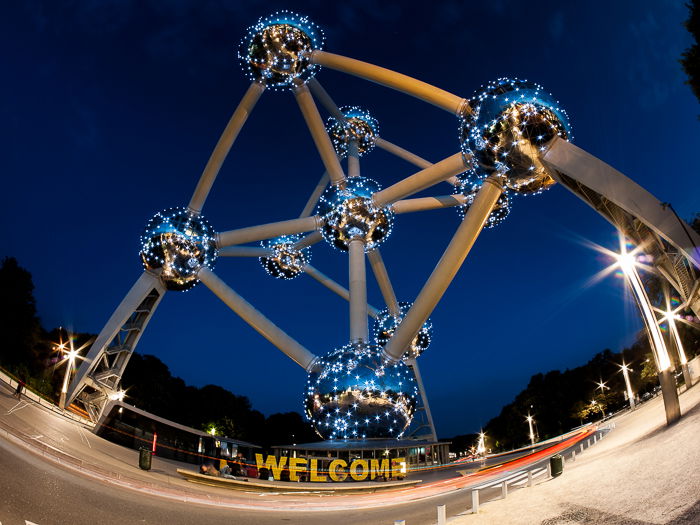
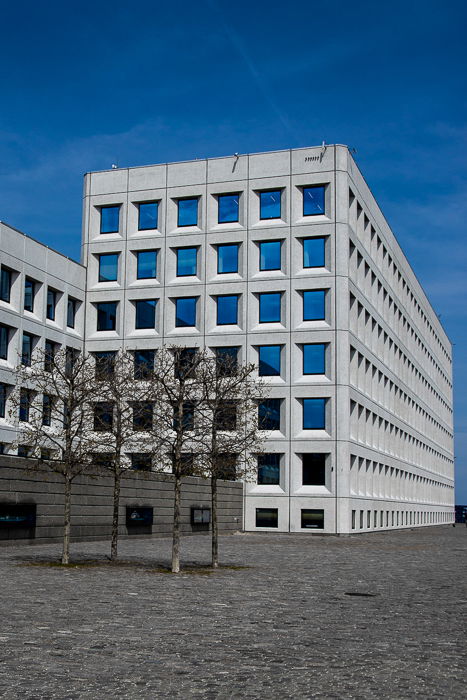
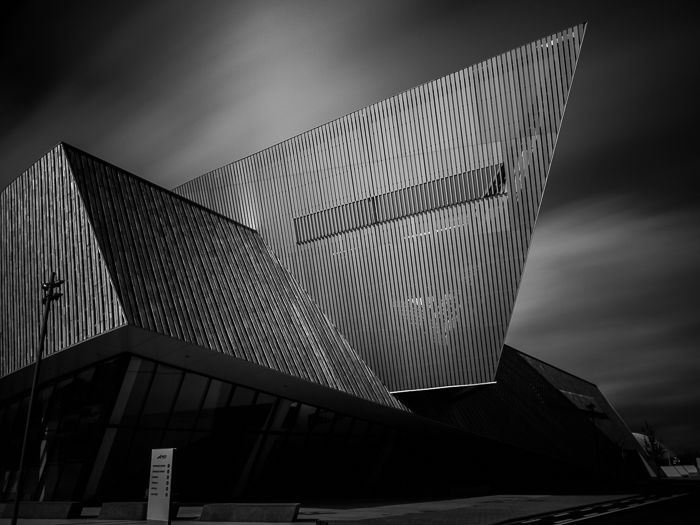
17. Focus on Architecture Photography
The most obvious kind of photography you can do in the city is architecture photography. Every city has famous landmarks such as monuments, buildings, churches and so on.
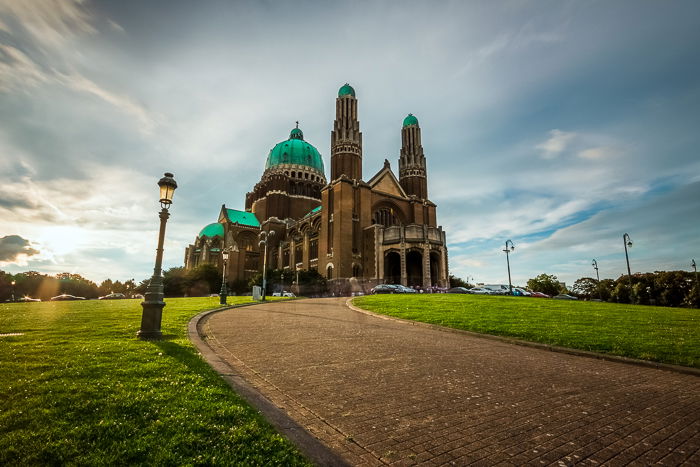
A wide-angle lens is a must for capturing an entire building. But you will get some distortions in the image. If you can, try to put some distance between you and your target to reduce perspective distortions.
A careful composition can help to make the building more imposing. I did this by increasing lens and perspective distortions in the image below.
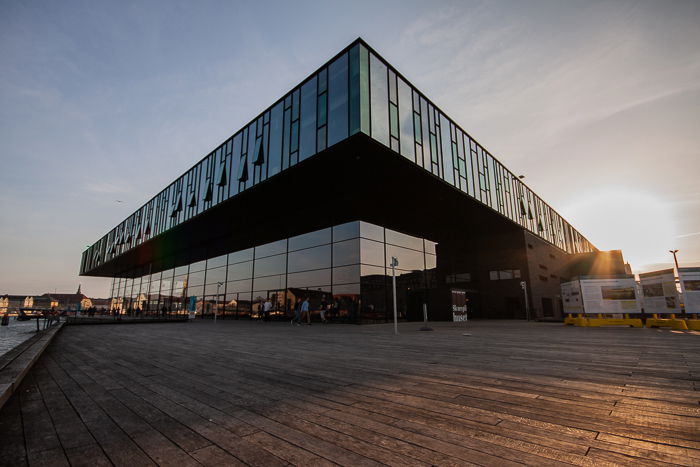
Famous landmarks are not the only kind of interesting architecture you can find. Look around for shops, train stations, modern corporate buildings and so on.
Focus on the typical architectural style of the city you are in. New York and Rome have very different buildings. But they are both iconic, and everyone would recognise them in city photography.
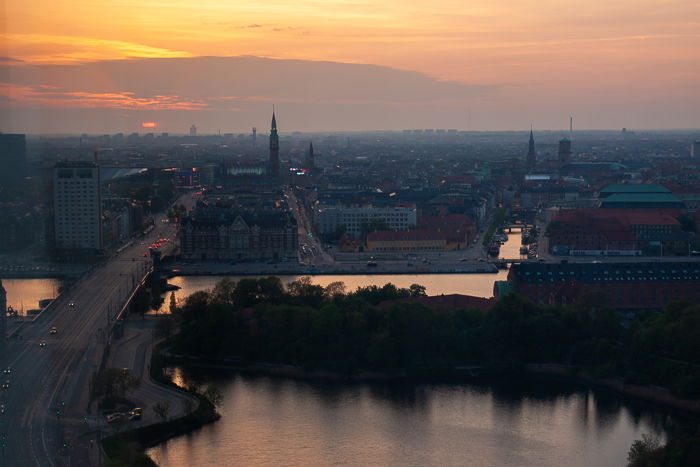
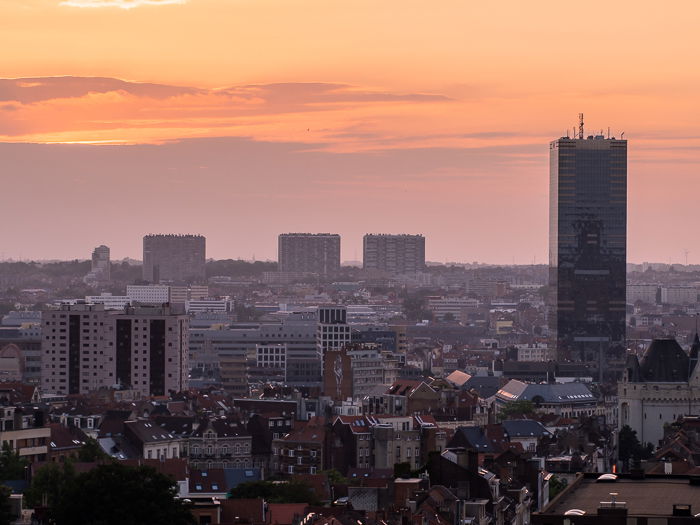
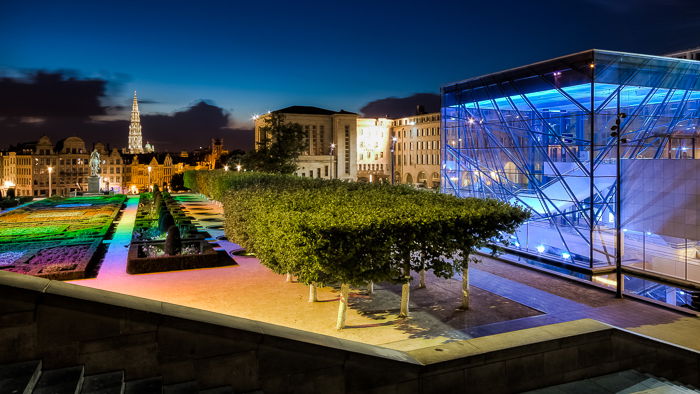
16. Shoot Cityscapes
There are two kinds of cityscapes: the skyline, where you see part of the city from a distance. And bird’s-eye views over the city.
Skylines require to put some distance between you and the city. A famous example is New York’s Manhattan skyline seen from across the Hudson River. Or the City from across the Tames in London.
Bird’s-eye views are taken from rooftops and high vantage points. Some monuments, hotels and buildings also give access to a panoramic terrace.
Keep in mind that no every city has a nice skyline. It is always worth to climb up to a higher spot and get a new perspective about the city.
I’m lucky enough to live in a tall building on top of a hill in Brussels, and I like to sneak on the roof to take breathtaking images of the south part of Brussels.
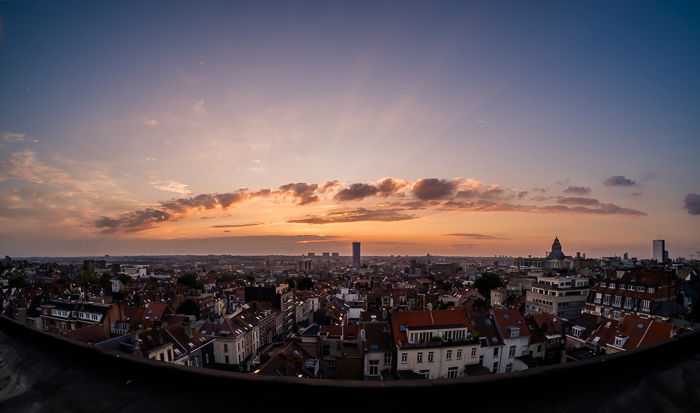
Sometimes, though, it is nice to zoom in a little to isolate some interesting buildings.
15. Take Day to Night Shots
This technique is very particular. It consists of photographing the same place for many hours at a regular interval. All the images are then combined together to display the passing of the day, from morning to night. Photographer Stephen Wikes is a specialist of this technique.
Day-to-night works best on large cityscapes, where you can create a smooth transition. Less time consuming alternative is what I call Golden2Blue (from the golden to the blue hour).
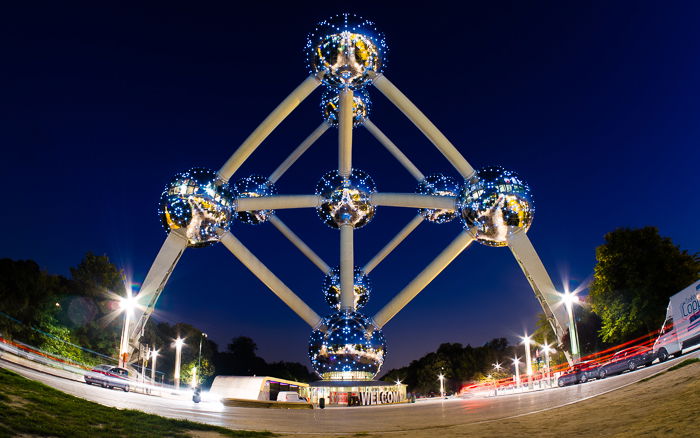
14. Shoot Fisheye Photography in Cities
Fisheye lenses are often considered toy lenses because of their distortions. But you can use them for serious photography to create interesting city images.
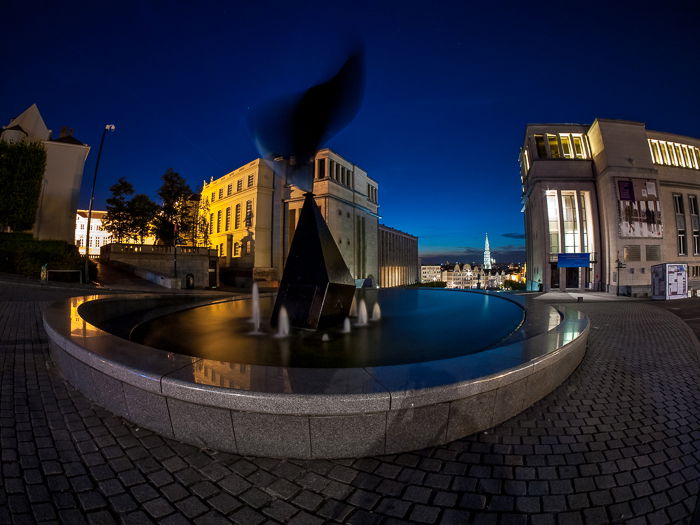
Fisheyes are compact and light lenses. They have very wide fields of view, are quite fast and have very large depths of field. Focus is not something to worry about. Even with manual lenses such as the Samyang 7.5mm f/3.5 MFT fish-eye lens I own.
We have written in detail about fisheye photography before. To summarise, it is all about understanding lens distortions and working with those to create more dynamic images.
The increased distortions make the leaning building effect less disturbing. It’s handy when photographing a building from close range.
13. Focus on Colors
Colors are everywhere. Try to look for matching colours in your scene. Some cities such as Rome, Venice or Nice have amazing pastel colours everywhere.
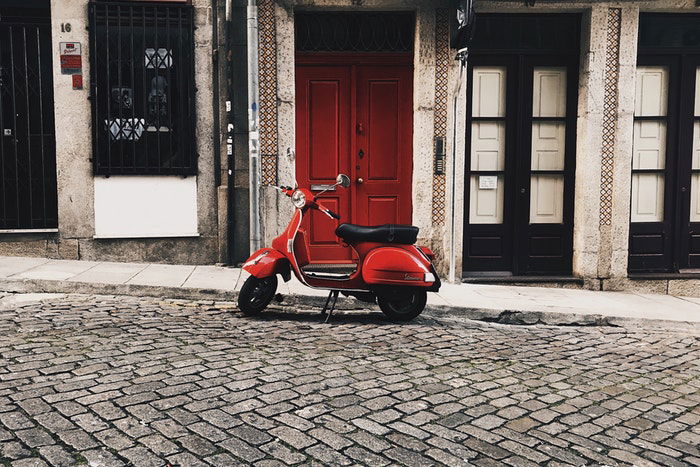
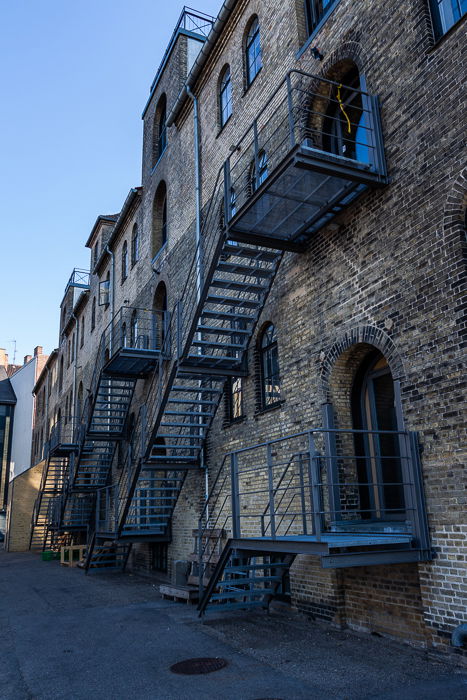
12. Focus on Details
Buildings are nice and easy to spot. But look around for those interesting details that are everywhere to be found. This can be anything new from an ivy coated building to funny street art.
When I stroll around a city, I always look into empty courtyards or abandoned streets. You never know what hidden gem you may find in there.
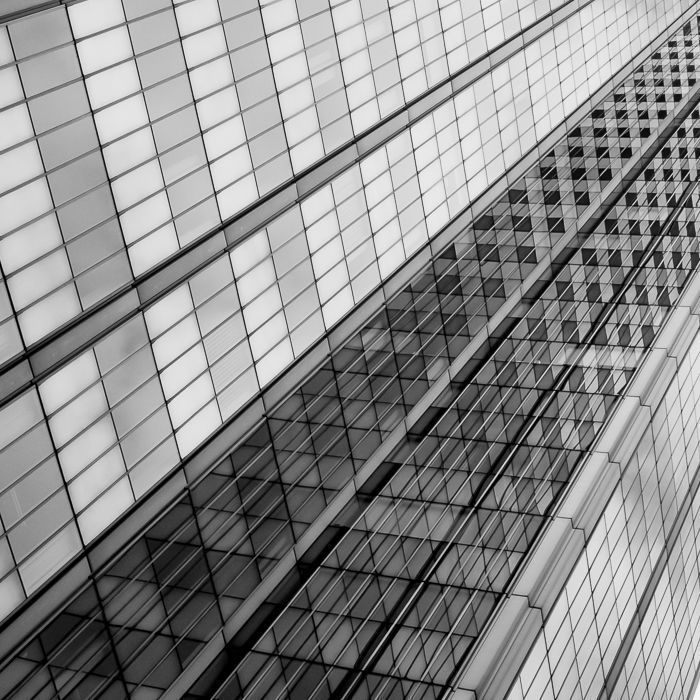
11. Focus on Patterns
Patterns are another exciting.subject in city photography. In harsh daylight, it’s better to focus on patterns rather than cityscapes. Take advantage of the strong contrasts due to the hard light.
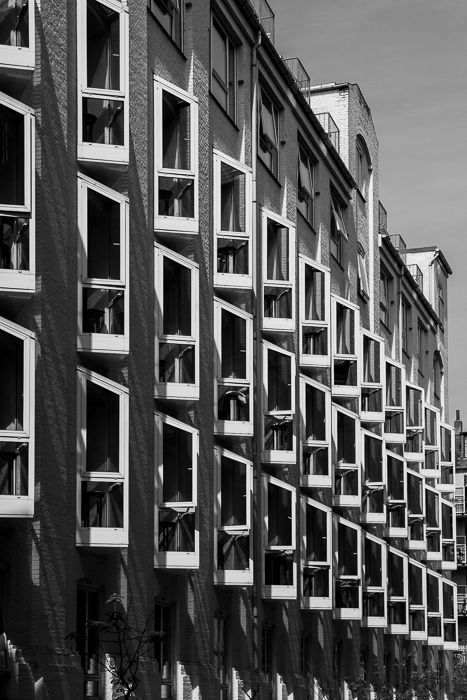
Windows can reflect the sky. In the cloudless and sunny afternoon, I managed to get both a pattern and matching colours in this image.
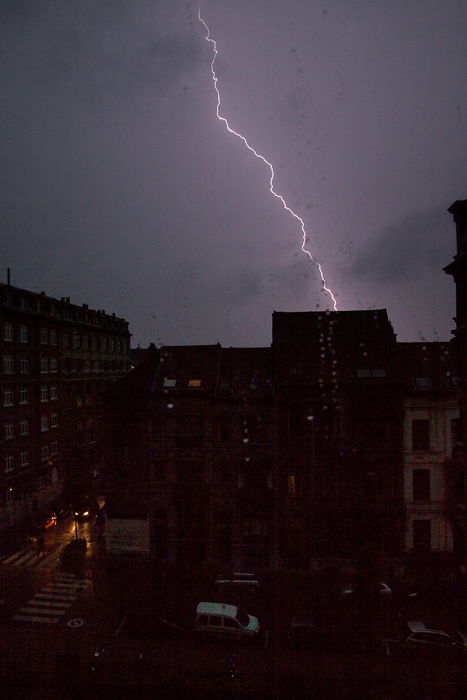
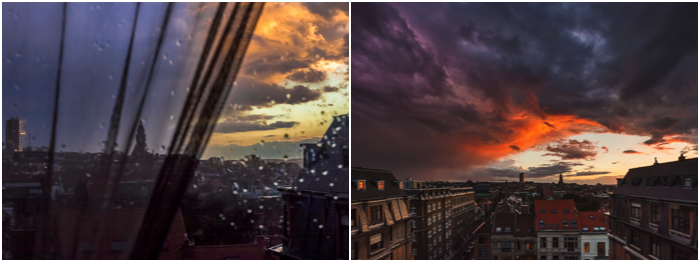
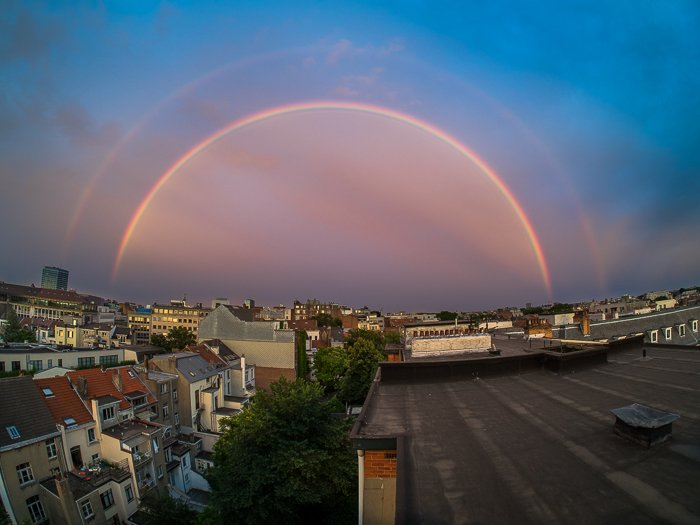
10. Focus on the Weather
Weather can have a huge impact on your city photography. Brussels is not known for its thunderstorms. But I was lucky enough to catch a bolt of lightning striking somewhere across the street.
Bad weather at sunset creates spectacular skies. It will make your cityscapes stand out.
And what about a double rainbow over the city?
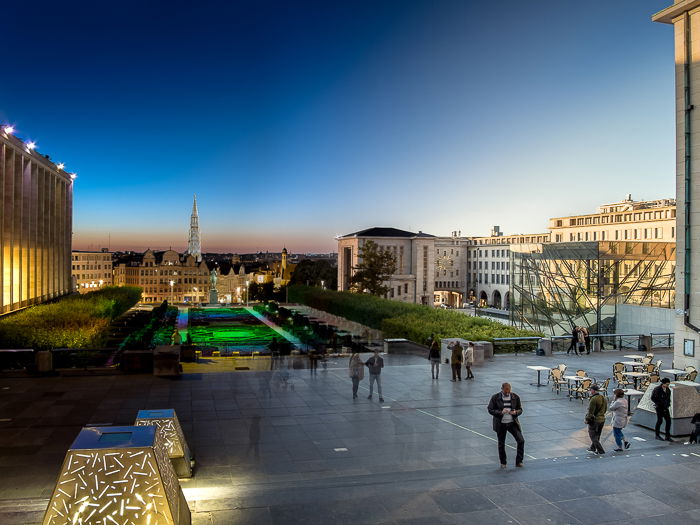
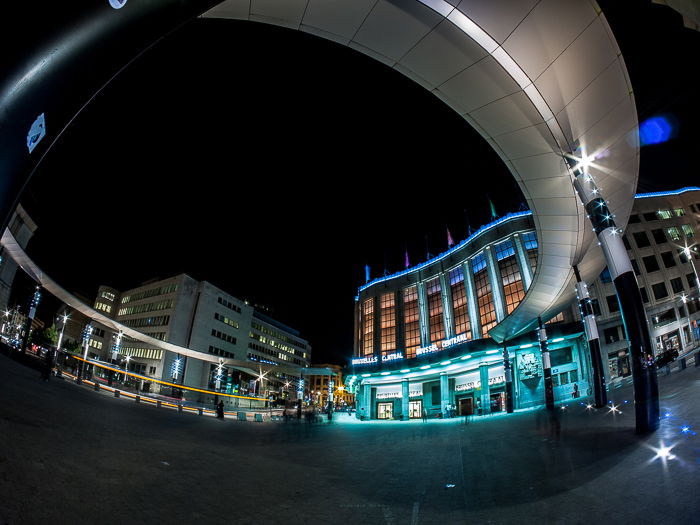
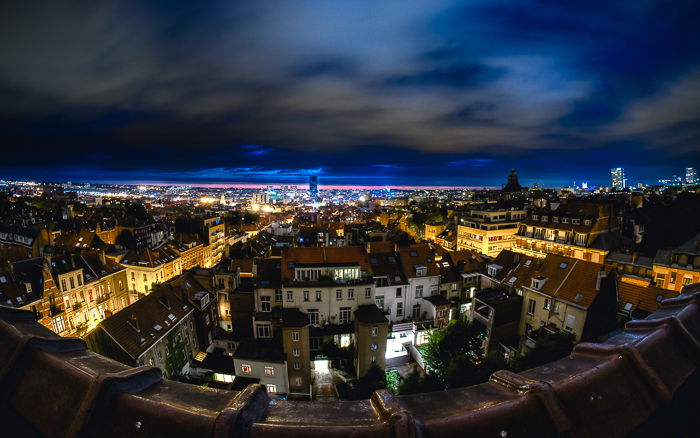
9. Take Golden, Blue and Night Hours Shots
To photograph the city with plenty of details during these times of the day, you need a tripod. But the results are well worth dragging your tripod around.

At night the city transforms thanks to all the different lights. Yellows from the older parts of the city and bluish from the modern areas.
Sometimes you will find some light displays at monuments, buildings and squares.
And the night is the realm of the light trail from the traffic. Photograph at night down a road to get the classic car trails. Or you can be more creative and use a fish-eye to capture an entire roundabout and its carousel of light trails.

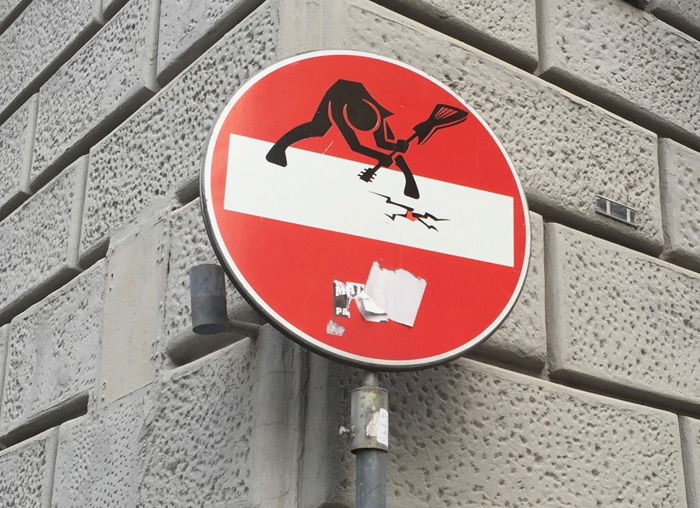
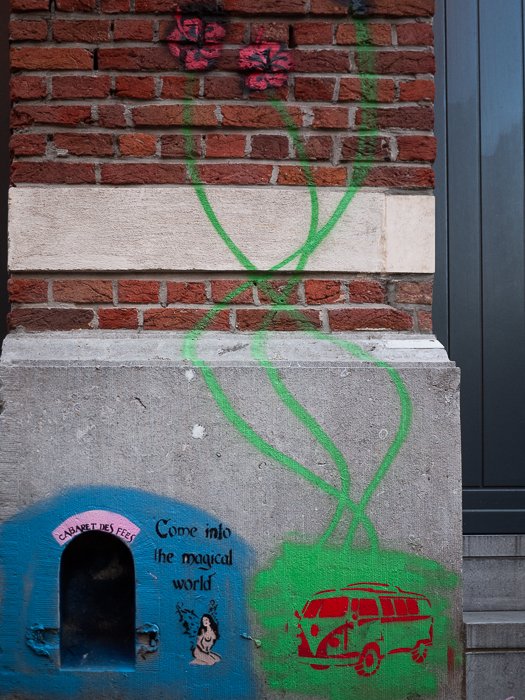
8. Look for Interesting Graffiti in the City
There is no city without graffiti. Most of them are quite pointless and not interesting, but some are very nice and artistic.
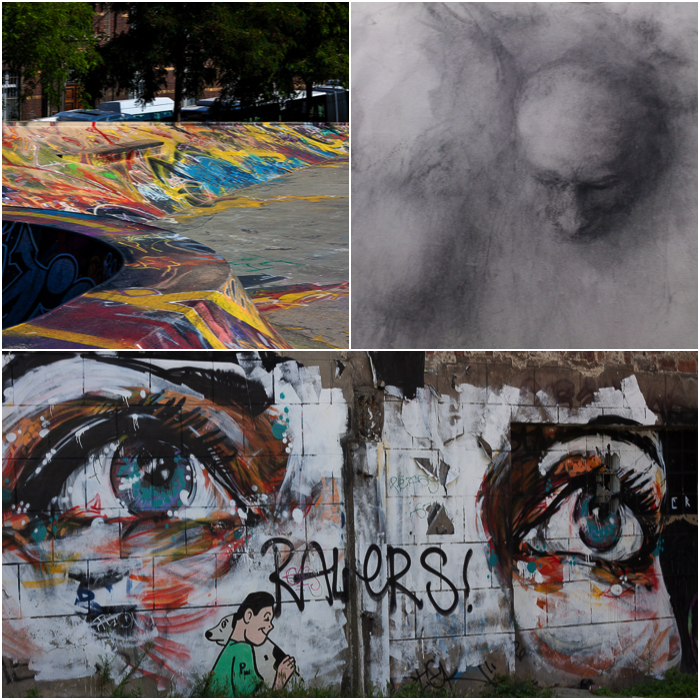
The best ones, though, are often quite small and unexpected, so keep an eye out while you wander the streets. Many cities are now very liberal about street art.
Vienna has a canal where graffiti is legal, and the artists repaint the walls every now and then. Brussels has a comic strip walk with walls depicting comic book characters. Florence has street signs decorated with funny figures.
And not to mention Banksy! The famous British street artist who left his signature work in cities all around the world.
Look for street art and interesting graffiti in every city you visit. Who knows, your hometown might have a few interesting pieces that you didn’t know about.
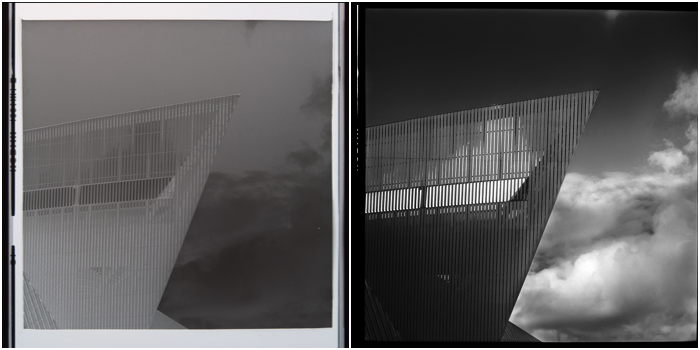
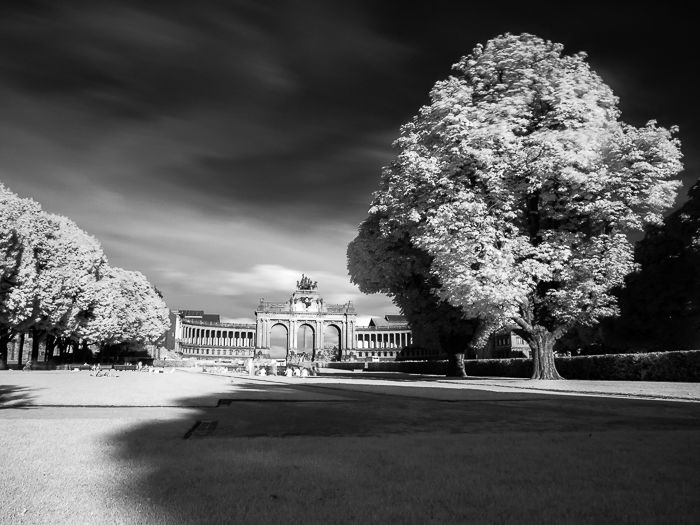
7. Use Infrared Photography in Cities
You can use infrared photography to add a wow factor to your city pictures. You may create fresh images of touristic spots. Also, it is interesting to see how materials look like in infrared light.
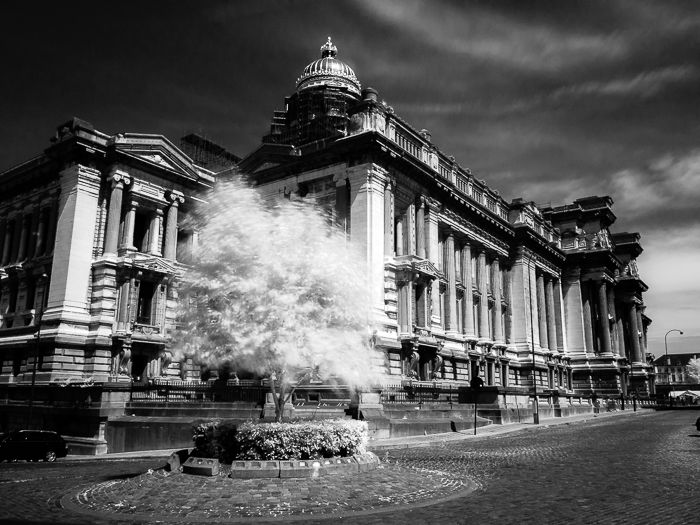
To start, all you need is an infrared filter such as the Hoya R72 and a sunny day. With unmodified cameras, infrared photography means doing a long exposure photograph. So you will need a tripod.
Parks are great locations for infrared photography. The most surprising effects are on tree leaves and grass.
If you are curious about this technique, read our detailed article about infrared photography.
6. Shoot Long Exposures in Your City Photography
Long exposures are great in the city because all passers-by and moving traffic will be invisible in your image. You can do long exposure in daylight by using strong neutral density (ND) filters and a tripod.
The classic image is a black and white building with interesting architecture. It is standing against a dynamic sky with fast-moving clouds that will introduce movement to your image.
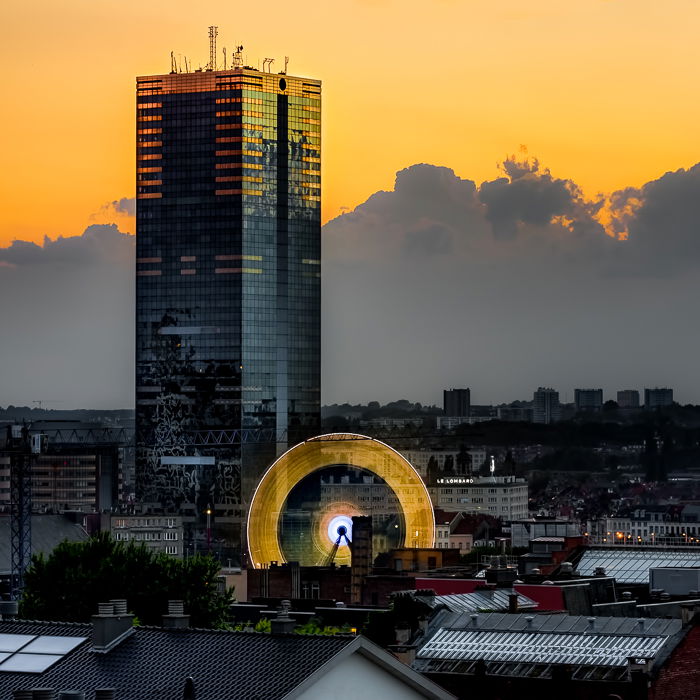
You can also combine a standard exposure with one taken with an ND filter. In the image below, I wanted to get the movement from the slow turning ferry wheel. I combined exposure for the city and the sky with a long exposure taken with a 10-stops ND filter.
The reason to combine the exposure was that the clouds were nicer in the short exposure.
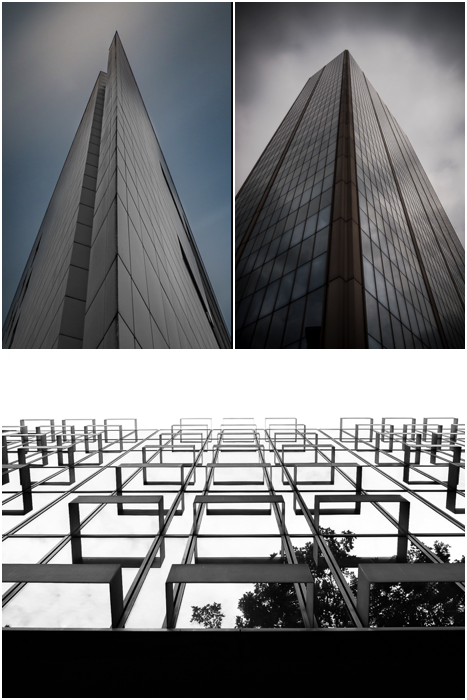
5. Look Up
As I said, you should always look out for interesting subjects and angles. But don’t forget to look straight up at building facades for interesting shapes and patterns.
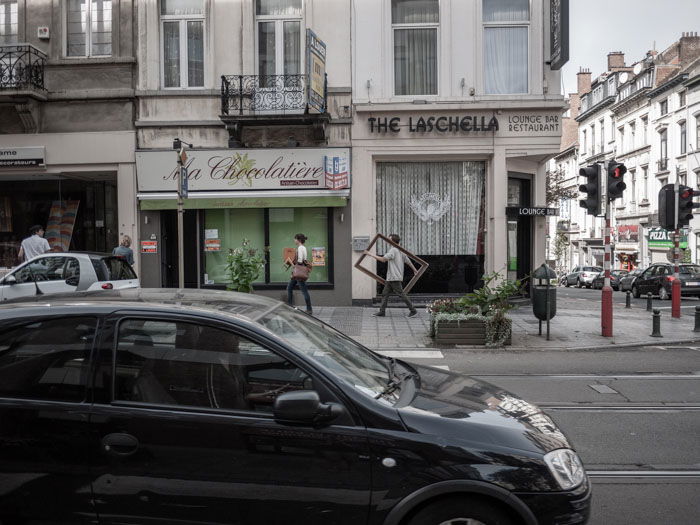
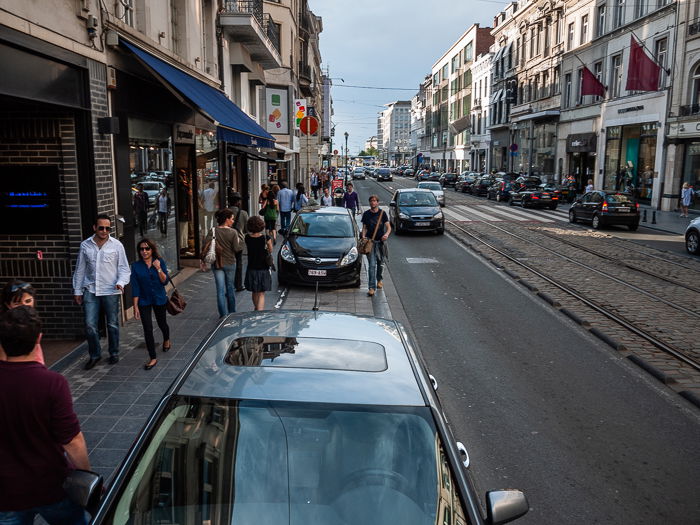
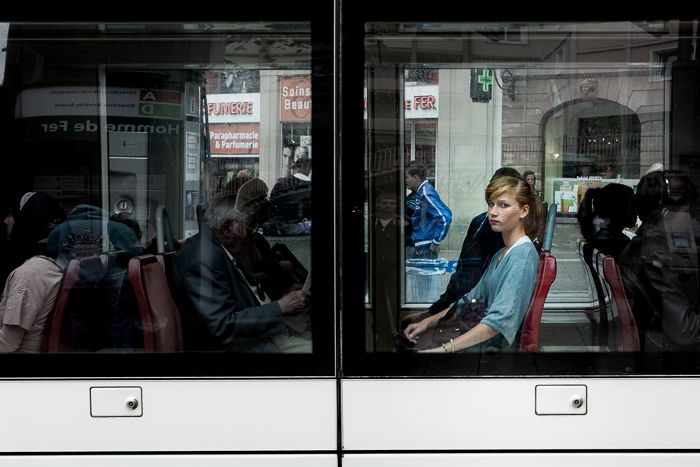
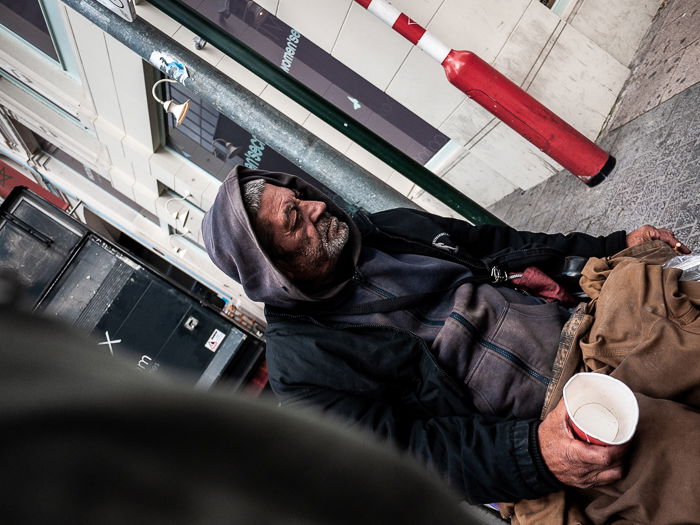
4. Include People in Your City Photography
People are a big part of the city. They are everywhere and are interesting subjects. But remember: they are not buildings, nor are they there to pose for us, so be respectful.
Avoid photographing children or jumping in people’s face even if you are after candid portraits. Don’t photograph them just because they look weird or to ridicule them. Instead, try to build a story or convey a message.
It is easy to photograph people in touristic places as they are used to seeing other people photographing around and tend to ignore you. Also, smaller cameras can help you go unnoticed when you shoot street photography.
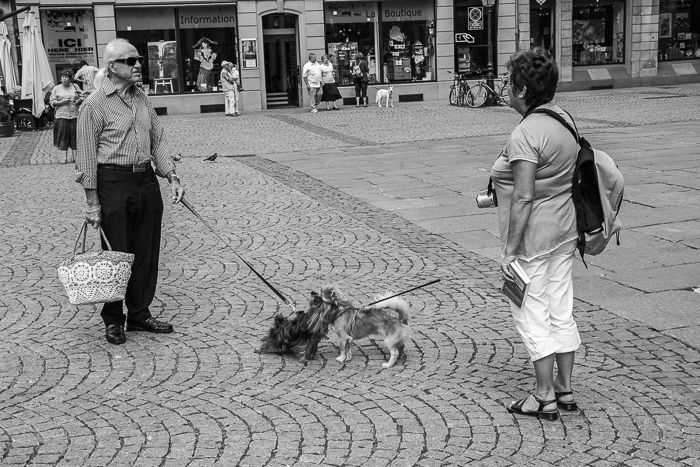
Photographing people can be intimidating. If you are shy, try practising with street artists (leave them a tip afterwards). Or photograph people that are on buses, trams, cars or trains.
You can also shoot from the hip. This means that the camera is at your hip and you aim and shoot blindly to go unnoticed. This requires a bit of practice, but autofocus can make things easier.
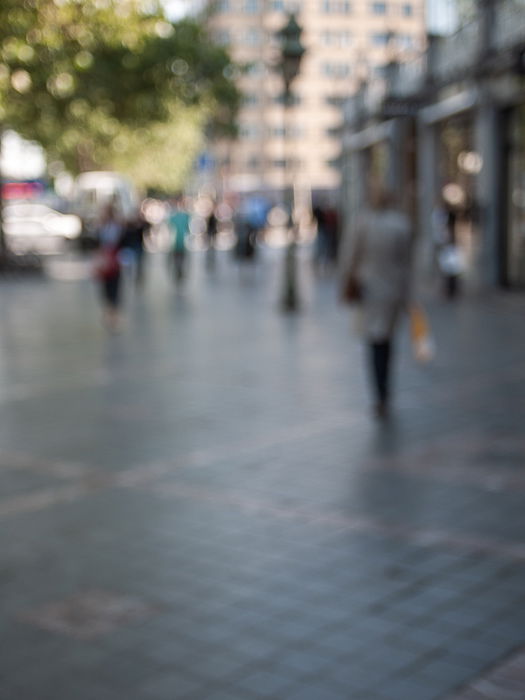
You can get more creative and photograph people in silhouette or out of focus.
3. Look For Reflections in the City
Cities are full of reflective surfaces: puddles, fountains, windows, glass, steel. Reflections are everywhere. You just need to find them.
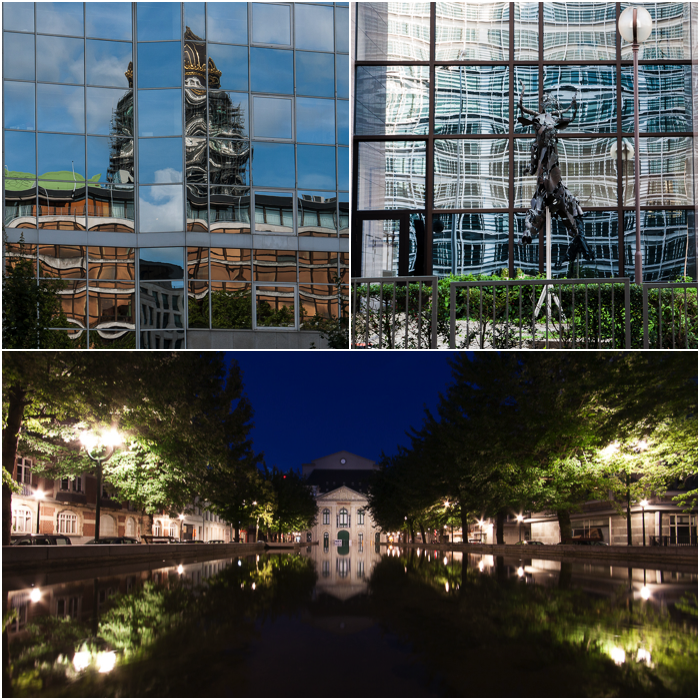
It is not rare to have multiple reflections interacting together, creating interesting patterns. This is often the case with modern buildings and skyscrapers with plenty of windows.
I love shooting after a rainy day and try to find puddles with interesting reflections. Water surfaces such as small ponds can also get you exciting shots.
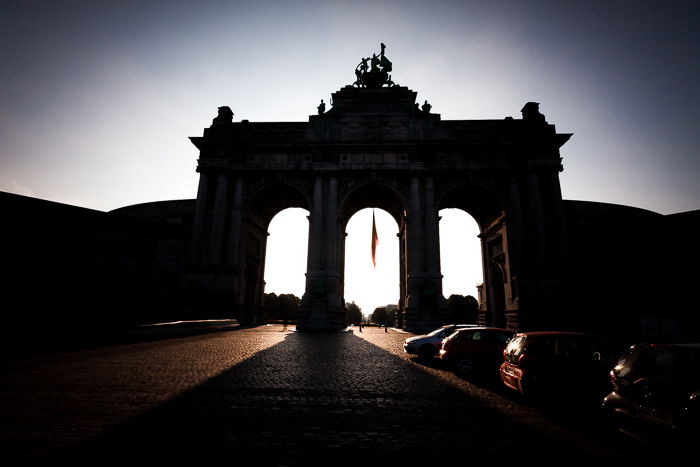
2. Capture City’s Silhouettes
I like to capture the city’s silhouette against the bright sky. This way, I can focus more on the shape of the skyline, rather than on the building details.
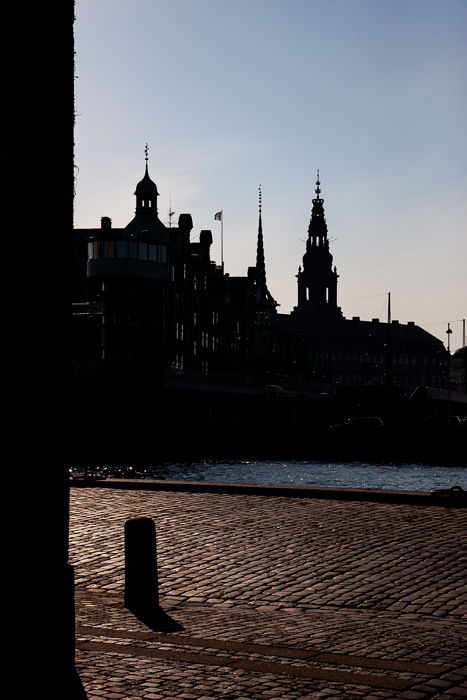
Sometimes the interplay between light and shadows is what makes an image interesting.
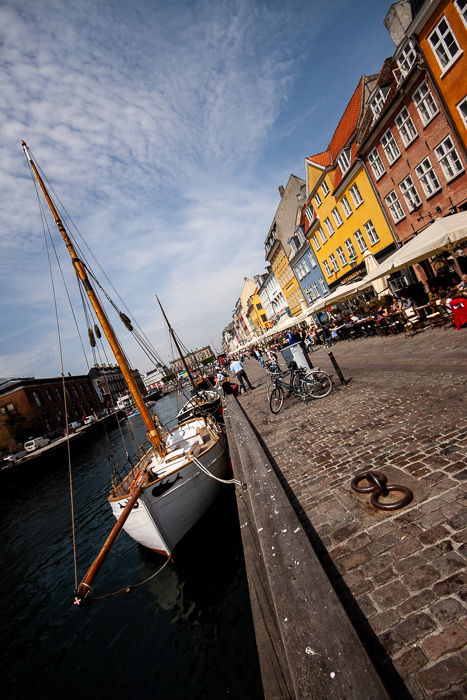
1. Work the Angle
Don’t photograph only at eye level! This is the prime cause of boring images, particularly in touristic spots. Low angles can make for an unusual composition.
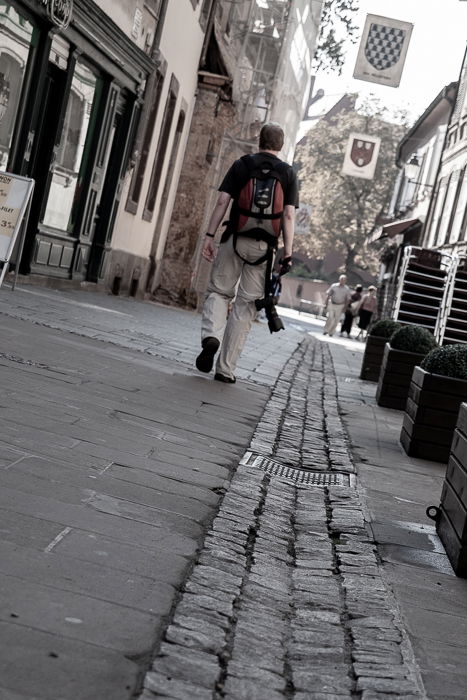
The low angle in the image above, the tilt and the line in the pavement add interest to an otherwise common image.
Below is the most iconic place in Copenhagen: the Nyhavn canal. This is the tourist spot of that city, because of the colourful houses, the channel and the restaurants.
By tilting the camera, I was able to get a more dynamic and interesting composition.
Whether you are photographing in your city or you are visiting a new one, keep experimenting. Try to find new compositions even at touristy spots.
There are plenty of things you can try that I haven’t mentioned here. If you are not feeling confident enough, just take one classic shot of your subject before moving on with more creative ideas.
Keep an eye on shadows and patterns! Look straight down at the street from a high point of view rather than into the distance. Experiment with panning, intentional camera movements, and more.
And, above all, be safe and have fun.
--------------------------------------------------------------------------------------------------
Four Best Tips for Shooting Dramatic Cityscapes – Free Quick Guide
No comments:
Post a Comment
Note: Only a member of this blog may post a comment.