Thursday, March 31, 2022

9 Ways to Create an Interesting Background in Your Photos

Shutterbug Photography,  Rookie Photographer

Why Is It Important to Have an Interesting Background?

You may have noticed by now that there are no photos of models on a white background on this site.
There’s a good reason for this. I find these photos boring and unimaginative. The shooting environment isn’t conducive to interesting photography.
The way I see it, every single pixel in a photo bares equal importance with the next. It’s your job as the photographer to ensure that every part of the photo looks good.
When you start to make your backgrounds more interesting, you’ll find that people spend more time looking at them. More often than not, they do this without even realising.
There are plenty of ways to do this. We’re going to have a little look at a few methods now.

Bokeh

This is a term used quite frequently on this website. I’ve spoken in detail about in this post. Essentially, it’s the aesthetic quality of the out-of-focus areas of a photograph. If you have a close subject, a distant background and a wide aperture, you magnify the bokeh effect.
Check out the photo below.
The soft circular blur in the background is an example of good bokeh. In this photo, the background has as much appeal to the viewer as the subject – the BBQ. I really like using a strong bokeh as the softness is very appealing and easy to look at.
An image of a barbecue and a tire swing as an Interesting Background

Lights

When light shines directly into the camera’s lens and the aperture isn’t too wide, you can end up with some really cool ‘star’ effects on the light source.
As well as lighting up the background and providing interesting detail, the subject is also lit up in a way that don’t typically see.
Use the lighting to illuminate your background and provide a point of interest. Arrange your lights so that they provide details to the most important parts of your background.
An image of a woman with an Interesting Background

High ISO

If you’re shooting at night, in order to reveal any detail in your background, you’ll need to raise your ISO.
Even in the photo above, I used an ISO of 1200 as it allows us to make out the finer details, attracting the viewer to the photo.
The photo below was shot with an on-camera, external flash unit at ISO 1600 and an aperture of f/2.8. As you can see, this has produced a very shallow DoF but, by providing more detail, has turned a simple photo of a man on a street into much more than that.A shot of a man with a road as an Interesting Background

Rule of Thirds

As you can probably see from the photos I’ve use so far, I like to adhere (roughly) to the rule of thirds when trying to include an interesting background.
The rule basically dictates that photos should be split into 9 equal parts divided up by two equally-spaced horizontal lines and two equally-spaced vertical lines. The important features within the frame should intersect with these lines at some point.
This allows me to include a background that people can actually see.A shot of a man looking off camera with wood as an Interesting Background

Background Subjects

There’s no reason why your background shouldn’t be another subject, like my example below.
This, believe it or not, was a candid photo. The foreground subject was looking in the same direction as the background subject. The moment he looked towards my camera that I took the photo.
This contrast in subjects’ interest makes you wonder where to look – no longer is it a simple photo of a person.
Contrast in background and foreground is key here.A shot of man with a woman in the background

Lines

I’ve written in depth about horizontal, vertical, diagonal and converging lines in photography and the power that they convey, directing the viewer’s eyes in a certain direction. I recommend that you read about that in further detail.
The great thing about using lines in your background is that they’re remarkably subtle – you may like the background in my photo but, without mentioning lines, it’s hard to pinpoint exactly what it is that interests you.
Once again, there’s contrast present in the photography and, this time, it’s also present in the background – the lines are sharp and soft.A shot of a man in a bathroom

Paths

The great thing about paths in photography is that, if you include a subject as well, together, they can provide dynamic tension.
By this I mean that your eyes don’t know whether to go up and down the subject or along the path, which causes a tension in your eyes. This is a superb trick to convince your viewer to look at the photo for longer without them even realizing why. The added sense of wonder keeps the viewer entertained.A shot of a girl in a field as an Interesting Background

Background Focus

Sometimes, I like to use a frame within a frame to focus the attention towards the background.
In the photo below, I’ve used two parts of a banister to act as a sort of tunnel, directing the attention towards the subject.
Frames do an excellent job of providing context to a photo while adding a soft border by providing an out-of-focus blur around the edge of the primary subject.A woman holding a microphone with an Interesting Background

Color

This is at the end of the list because it’s probably one the easiest techniques to implement, especially if the colours you’re using in the background contrast with those in the foreground, as mine do below.
Contrast is the most important point to make here; if your background and foreground are too similar, they merge into one, ceasing to be two effective and different points of interest. I love using color in my photography when possible as it really helps to make the photos stand out from the rest of an album.A shot of a water drop with an interesting bokeh background
 

For more great photo tips; Hot Photography Books

 ----------------------------------------------------------------------------------------

Tuesday, March 29, 2022

depositphotos_54556961-stock-photo-stack-of-money-dollars - International  Products CorporationReaders 

Thank you for over 1,090,000 blog visits this month.  As you know, for the past 2 months we've been giving away $100 to one randomly chosen, lucky blog follower in the hope of increasing the number of visitors who regularly follow our posts.  We know that our posts are being read and the blog is being viewed, and we thank you for visiting us.  However, we are discontinuing the monthly one hundred dollar give away March 31, 2022 due to the small increase in the number of "Followers" we've received.  This Thursday, 3-31-2022 will be the last day we give a lucky blog follower $100.  We are still posting free articles and giving away free photography ebooks.  We will probably resume the $100 give away later in the year (October).  We are giving away $100 two days from now, but that will be the end of this campaign until autumn of this year.  Thanks again for visiting us and please enjoy the free ebooks and articles.  If you want to know how this last $100 give away works please visit here:

https://mrdarrylt.blogspot.com/2021/12/free-100-id-like-to-give-you-one-of.html

                                                                 Update 

Rhonda Jones is our lucky blog follower for the month of March.  Enjoy spending that "Benjamin" Rhonda!

-----------------------------------------------------------------------------------            


Monday, March 28, 2022

How to Make an Infinity Curve for Product Photography

Tags: Shutterbug Photography,  Rookie Photography

When you look at e-commerce images, do you ever wonder why you can’t find where the floor ends and the wall starts in the background? This is because product photography often uses a photographic term called the infinity curve.

In this article, We will show you how to create an infinity curve (or infinity cove) you can use for product photography at home or in the studio.

A record player on top of a table against a white background

What is the Infinity Curve?

In simple terms, infinity curves are seamless backgrounds that do not have lines or corners. The main use of an infinity curve is to create a clean photo background with no corners. That way, your main subject is the only element in the image where your audience’s eyes can gravitate.

To help you envision what they do, we’ll compare it with an example of a regular background containing a wall and a floor.

An analogue phone against a background with seams

And now, here’s an image with an infinity curve. As you can see, it has a smooth transition that you can’t see where the floor ends and the wall starts.

An analogue phone against a white background with infinty curve background

How Do You Make an Infinity Curve for Product Photography?

It’s common for a photography studio to have what’s called a cyclorama or an infinity cove. It’s usually made of wood, drywall, concrete, or similar construction materials.

Unfortunately, an infinity cove can be difficult to build, even for seasoned DIYers. The entire construction process needs a lot of equipment, not to mention various skills that will most likely require a team of people.

Infinity coves are also notoriously difficult to maintain. Since people step on them all the time, they often get dirty. Consequently, they often need to be repainted to retain their clean appearance.

Thankfully, there are other ways to build infinity coves apart from concrete, drywall, or wood. The best option is to use seamless paper as your background.

When people talk about the infinity curve, they often think about large cycloramas in studios. But product photographers use smaller options that are only as big as a table when taking pictures of small products.

Normally, photographers would often use a still-life table which you see below.

Flower vase sitting on top of a still life table

For Small Products

But you don’t have to buy one to create an infinity curve for product photography. All you have to do is set up a small table against the wall. Tape the upper part of the poster board to the wall, let the lower half rest on the table, and tape it so it doesn’t move around.

A succulent plant against a white background

For Medium Products

The poster board background is perfect for small products, but how about medium-sized ones? This time, the best option is to use a seamless paper background.

Seamless paper backgrounds come in various sizes. For tabletop product photography, the most appropriate size is 4 ft  (1.22 m) because it fits most tables.

White seamless paper covering a table with a pink telephone on it

To set up your seamless background for medium-size products, you will need a background stand. The kit often comes with two stands and horizontal rods you can connect depending on the length of your seamless paper.

background stand kit against a white background

If you have an eight-foot seamless paper, you will need to attach all the rods. But since you are only using a 4 ft option, you only need to connect two to three—just enough to run the length of your background. Once you attach all the rods, insert them into the background tube.

Closeup of horizontal rods being connected

Now, open up your two stands and set them about 4 ft apart. Grab the background and align the holes at the tips of the horizontal rods with the tips of the stands. Once the seamless paper is in position, screw the butterfly nuts to the stands to secure the background.

A closeup of the background stand setup

For Large Products

For large products, you will need longer, seamless paper. The best option for you would be an 8 ft (2.4 m) background.

Setting up an 8 ft seamless paper is technically the same as what you would do with a 4 ft version. The only difference is you will need to connect all the rods in your background stand kit to create an 8 ft pole.

You also do not need to use a table for your large backdrop anymore. Instead, you can let it drape down to the floor. Lay down at least 4 ft length of the seamless paper on the floor. That way, you have enough space to position your product to take photos.

Record player against a white background

Using a large white seamless paper creates a heavenly space appearance because it bounces a lot of light around. The clean background also ensures that your product stands out.

When using a large seamless paper, consider taking off your shoes and walk on the floor with your socks on. That way, you do not end up with messy shoe prints all over your background.

The corners of the seamless paper also tend to curl. To avoid this issue, you can use sandbags to weigh down the corners and the middle of the background. Alternatively, you can use tape. But we do not recommend it because there is a good chance you might end up tearing the paper.

Sandbags on top of seamless paper

Care and Storage

Using seamless paper for infinity coves is an affordable option. But since your background is made of paper, you need to be careful with it all the time.

We already mentioned earlier to not step on the background with your shoes on if possible. But you also need to make sure you do not place your products too close to the background curve. Otherwise, there is a good chance you might rip it.

If you need to store your background, make sure to do so vertically. That way, you don’t have to worry about the paper ending up with creases that are difficult to remove in Photoshop.

A row of colorful seamless paper

If you do not need to use infinity coves all the time, then seamless paper backgrounds are your best option. They are not only cheap but also easy to set up, even in a small room.

The best reason to use seamless paper is that it does not limit you to single color background. All you have to do is swap out the background, and that’s it! Apart from using white, you can use just about any other colour from yellow to black without repainting.

Of course, the seamless paper does have its limitations. But as long as you take care of it, it can last you a long time. And most of all, you do not have to pay a lot of money to use it.

------------------------------------------------------------------------------------


Thursday, March 24, 2022

How to Choose the Right Camera Settings for Portraits

Tags: Shutterbug Photography, Rookie Photographer


Choosing camera settings for portrait photography can be difficult. And knowing which lens is best is even more so.
Let’s take a look at each basic setting to know and lens options so that we can clear up some confusion for you.
A young girl in pink ballet dress dancing on a dark stairwell - best settings for portraits 

Which Lens?

Before we even talk about camera settings for portraits, let’s discuss the lens. Many focus on the camera brand and model.
But the piece of gear that has a major effect on the final look of a photo is the lens.
It’s hard to know whether you want a telephoto lens, a mid-range prime lens, or a wide angle. To be honest, it often comes down to personal preference and what you have envisioned for the final look.
If you want a classic portrait look with a very soft bokeh, use a telephoto. The 70-200mm/f2.8 is a great example of a solid lens for this look.
If you’re tight on space or want to have the background play a bigger role in the photo, try a 50mm or 85mm lens.
If you’re looking for a more dynamic and off-beat effect, try a wide lens for portraits! You do need to keep in mind subject placement in the frame, though.
The lens distortion will be much stronger with a wide angle. It will become more noticeable on the edges of the frame.
I also encourage renting lenses before purchasing. A lens can cost just as much as, if not more than, your camera body.
A diptych photo of a bearded man in white and a dark haired girl in maroon jumper - camera settings for portraits

Shooting Mode

You know what I’m going to say here. First, you need to get out of Auto mode!
You want to be shooting in full Manual mode. It gives you the most control and consistency. This can be tough at first, though. If you’re not quite ready to take the leap to Manual mode, try switching to Aperture Priority mode.
This will give you control over aperture. And it will let the camera choose the shutter speed. The ISO is set to what best fits your shooting conditions.
By controlling the aperture, you’re ensuring that you have a nice shallow depth of field. You’re most likely going to be doing outdoor portraits with a good amount of light. The shutter speed won’t be as much of a priority.
If you’re in conditions with low light, you’ll want to either be on a tripod or use Shutter Speed Priority. Keep in mind that you’ll need to check your focus to make sure that it’s on your subject. The aperture will be determined automatically by your camera.

Aperture

You’ll find that an f-stop of 2.8 or lower is the best aperture for portraits. The reason for this is that it creates a shallow depth of field.
Using a shallower depth of field directs the viewer’s eye. It blurs everything except the focal point. In portraits this should always be the eye closest to the camera.
By having everything else in the image off-focus, even if subtle, it also creates a flattering look. The skin in the rest of the face is a bit softer.
By having the rest of the face a tiny bit softer, it also makes the eyes pop a bit more. This helps create a connection between subject and viewer.
If you want both eyes in focus, you can position your subject’s face so that it’s looking straight at the camera. Both eyes are about the same distance from the lens.
If you’re doing a couple or group, use a bigger f-stop – somewhere around 5.6 or so. That way, you’ll get each person in focus.

A diptych photo of a dark haired woman posing in a kitchen and a grey haired smiling woman - camera settings for portraits

Shutter Speed

If you’re in full sunlight, shutter speed won’t be a big factor. Typically, you want to be using a speed faster than 1/100th to avoid hand shake.
If you’re using a flash, you’ll most likely need shoot no faster than 1/200th of a second so that the flash unit syncs in the correct way.
Of course, if you’re not using a flash then you can use faster shutter speeds and be fine!
If you want to capture some motion, the ideal speed will depend on how fast the action being photographed is. To capture some motion blur, you’ll want to shoot as slow as you can to avoid hand shake.
This can be as low as 1/50th of a second for those with a steadier hand. A bit of experimentation will help find your ideal speed.

Metering Mode

Spot metering is usually the best for portraits. It gives you control over exactly what area is exposed properly. Spot metering will read the light in the center spot of the frame, and use that to evaluate your exposure.
If you’re not using a flash, then this point will most likely be your subject’s face. If you are using a flash, then you’ll want to expose for the background. Then the flash will illuminate your subject’s face.
A portrait of a family of 4 smiling and holding hands while walking in the countryside

ISO

Higher ISO is more light-sensitive and lower ISO is less so.
Higher ISOs always increase the appearance of grain, so keep that in mind. To avoid grain, you always want to use as low of an ISO as possible. I like to stay at either 100 or 200, but you can push the ISO higher if the light is low.
Different cameras will handle grain differently. An ISO of 800 in one camera may look clear, while another camera may be very grainy at ISO 800.
You’ll want to test out your camera in different light conditions. Try different ISOs before you’re at a shoot with a client.

Portrait photography can be incredibly varied and experimental. There are many options for gear and camera settings for portraits. These can be overwhelming!
Playfulness and experimentation are key in finding your groove.
But the basic settings and guidelines above will get your portrait photos started off on the right foot. 

-------------------------------------------------------------------------------------

The Photographer's Guide to Posing: Techniques to Flatter Everyone

The Photographer's Guide to Posing: Techniques to Flatter Everyone 
 Click Here ----> Hot Photography Books
--------------------------------------------------------------------------------------

Monday, March 21, 2022

 # People, Images

12 Dos and Don'ts of Family Portrait Photography

Tags: Shutterbug Photography, Rookie Photographer

A family photo shoot is a big responsibility for a photographer and can lead to some stressful situations.

However, when you know certain tricks, taking family portraits becomes fun and enjoyable.

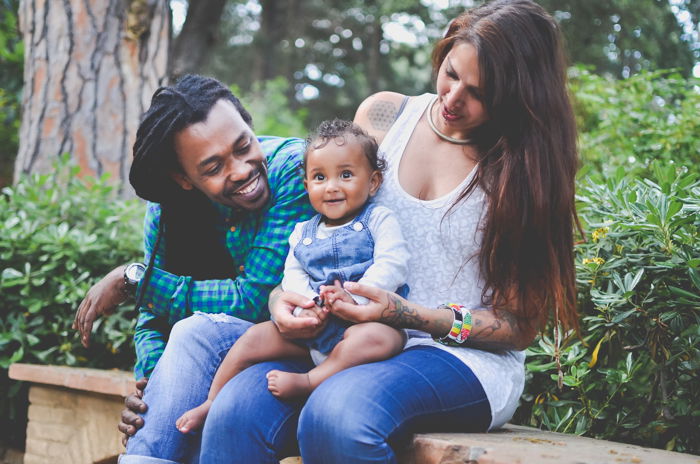
They are a great opportunity to take photos that convey lots of love and joy.

I have put together 12 Dos and Don’ts that will help you successfully start with family portrait photography.

Family portrait photo of a couple and small baby sitting on steps outdoors. 

1. Tell Them What to Do to Make Posing Easier

If your clients are enjoying themselves, you’ll have a higher chance of beautiful family photos.

You might find a family that is experienced in photo shoots and who like posing in front of the camera. But it is not common.

Posing is not a natural thing for most people. Some of the family members (if not all of them) might feel a bit uncomfortable. This discomfort will appear in the photo and make it look fake.

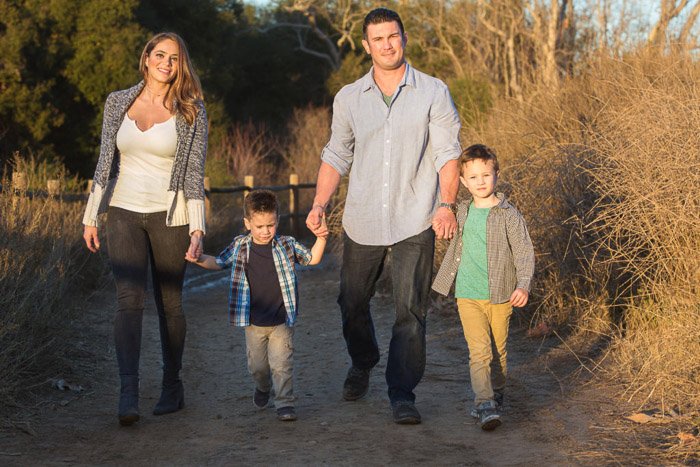
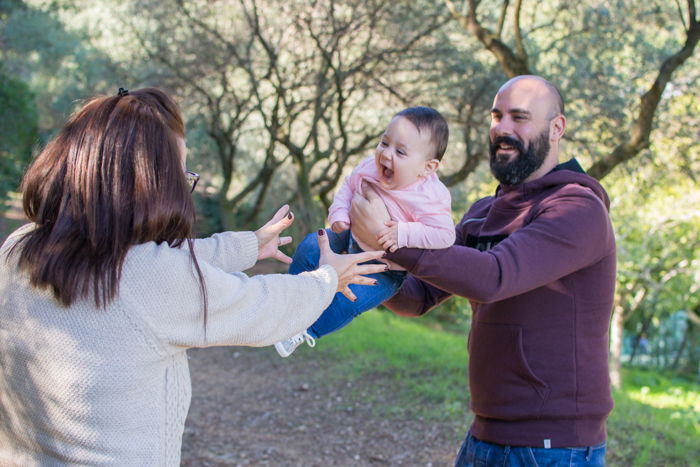
Instead of directing and ordering them to pose, organise the session and plan things for them to do.

Ask them to walk, run, dance, play, lean on a wall, or hide behind a tree and peek from the sides. You could make them hug each other, make shapes, play games etc.

Take candid photos while the family is having fun. Your images will look beautiful and will also remind them of the great time they spent together.

Family portrait photo of a couple and small baby walking outdoors by bushes and trees.

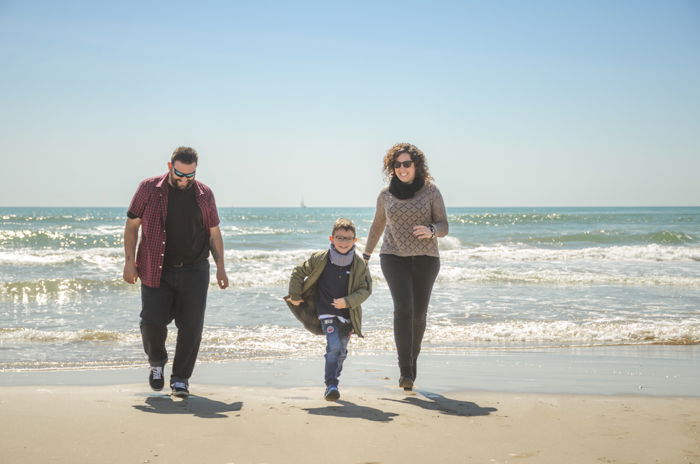
2. Do Not Pose Your Clients Facing the Sun to Avoid Unwanted Shadows

If you can, avoid having the family looking towards the sun or strong light sources. A lot of people still believe that taking photos with the sun at the back of the subject is not right.

You might think that posing with the sun in front of them offers more light, but the end results can be extremely unflattering. Ugly shadows will appear under their eyebrows, nose and neck.

Direct sunlight is also not ideal because it’s a hard light. It makes the skin look older and less smooth as it enhances small flaws.

On top of that, the family will be annoyed by the light shining into their eyes. They will either close their eyes or squint until the torture is over. To avoid all this, just have them turn around.

Another way to avoid direct sunlight is to shoot family portraits in soft lighting conditions.

You can get great images if you choose a time of the day which is not too close to midday. Capture the family during a nice sunset and see how much it softens the light.

Or simply have the photo shoot in a shadier environment or during a bit cloudy day.

If you choose the first option, when it comes to settings, pay attention to exposure. Take into account the backlight entering into your sensor.

If you are shooting in semi-automatic mode, one trick is to meter the image using Matrix Metering (in the case of Nikon. Evaluative Metering for Canon cameras). Then overexpose 0.3 steps.

For Manual shooting, you can meter the light using the spot metering on the family. In both cases, the family will be well exposed and the background overexposed.

But as the important thing here is the family, a slightly burnt background is a fair price to pay for avoiding photos with closed eyes.

A family photoshoot of a couple and small baby posing on the beach

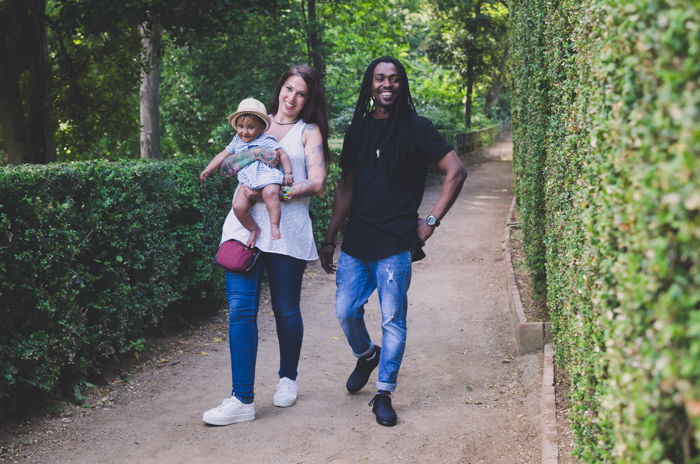
3. Communicate and Engage With Your Clients to Make Them Enjoy the Session

Most families don’t pose for professional photos often. They are not used to it and might feel a bit awkward.

You usually want natural-looking family photos. Besides the technical aspects of photography, you should also take special care to make the family feel comfortable with you.

I play and talk with the kids as much as I can. With the adults, I start a conversation about random subjects until I find something they like and we go from there.

I ask questions like how they met each other and encourage them to tell their story. This is a great step towards building rapport. Ask them personal but discreet questions.

I avoid potentially stressful subjects such as politics or job situation. I prefer talking about travelling, holidays or hobbies.

I also make it clear that if they don’t like a pose or feel strange doing something, they don’t have to do it. All they need to do is say the word and we’ll do something else.

Knowing that they are in control and won’t be forced to pose one way or another builds trust and makes them more comfortable.

Establishing a good relationship is important because you are a stranger to them. And they need to show intimate and personal moments and feelings in front of you.

Family portrait photo of a couple and small baby leaning on a wall

4. Pay Attention to the Surroundings to Keep the Shooting Comfortable

Before pressing the shutter release of your camera, you need to take care of a lot of things. For example, composition, camera settings for the right exposure, and checking that your models are feeling fine.

It’s easy to forget that there are other things you also need to be aware of.

For example, if you are at the beach, you don’t want them to get their shoes wet by a surprise wave. Or you can’t tell them to move backwards without checking first if they are going to collide with something.

It is good to get used to always paying attention to the environment. Then it gets natural to do it.

Family portrait photo of a couple and son walking on a beach

5. Tell the Family How to Pose to Get the Look You Want

There’s always a chance that a family of three will interpret your posing directions in different ways.

If this happens, the situation can turn into a mess. Each person would be doing a different thing.

To avoid this, simplify your instructions and try to make them as precise and clear as you can.

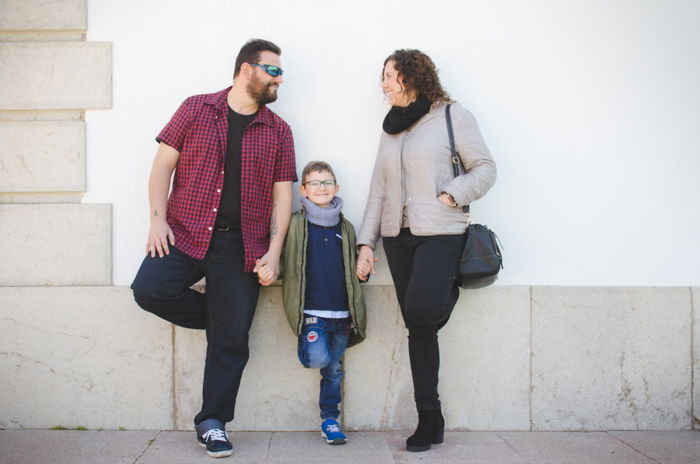
Use your body to show how to pose, where to stand and so on. You can even go ahead and demonstrate poses yourself first if you can.

For example, I always show my clients how to lean against the wall by doing it myself first.

If you need to add instructions, use short sentences and reference objects instead of direction.

Avoid “to the right” or “to the left”. Your clients won’t know if you are talking about your right or their right.

Instead, you can refer to objects that you have around: “Turn towards the tree”, “Look at the sea”.

Family portrait photo of the legs of a couple holding their babys hands leaning against a wall

6. Do Not Go Overboard With Editing to Create Timeless Images

Family photos are meant to last for a long time. They are the type of images that we want to keep and check years later or show to the grandkids.

For that reason, I recommend avoiding trendy editing styles and effects. These will probably look weird or unappealing twenty years down the line.

Your aim is to create timeless images. So stick to classic editing styles and simplicity.

This doesn’t mean you can’t add a personal touch. But before finishing the editing ask yourself if you will like this photo 20 years from now. If the answer is yes, perfect! If not, try to simplify the editing.

Family portrait photo of a couple and son leaning against a wall

7. Keep an Open Mind About the Results to Be Prepared for Changes

This is especially true if you are working with kids in the family photo session.

You might have a list of photos to take that, in your brain, work really well. But if the family doesn’t like them much or the kids feel like doing something else, you should adjust to the situation.

It is always better to take a beautiful unplanned photo showing a happy family than a forced one where you can see they are feeling uncomfortable.

Family portrait photo of a couple and son sitting on outdoor steps

8. Use Burst Mode to Make Sure You’ll Capture the Best Moments

Every photographer knows the terrible feeling of taking a group photo just to later realise there’s something wrong with it.

Someone had their eyes closed or otherwise wasn’t ready for the picture to be taken.

For that reason, with family photography, don’t put all your eggs in one basket. Taking several photos increases your chances that at least one will have everyone coordinated.

You can set the camera to shoot in burst mode to take a sequence of images, just like in a sporting event.

Remember to adjust the shutter speed to avoid unwanted blurriness due to movements. Something around 1/250 s is a good starting point for this type of action.

Family portrait photo of a couple playfully passing their baby

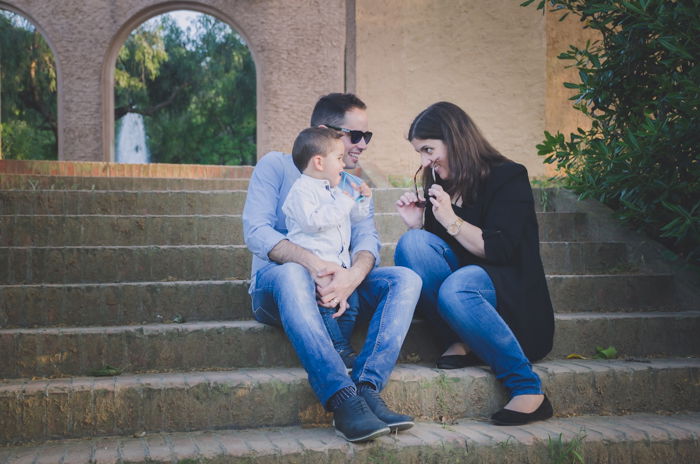
9. Use the Environment to Add a Little Extra to Your Photos

It is not unusual to feel a bit weird posing in front of a camera in the middle of a park or a street. When it comes to outdoor family photos, you can use anything around to help them get over any initial awkwardness.

You can tell them to lean on a tree or a wall, sit on a bench or even on the floor (first make sure that it is clean enough). Keep an eye out for any natural frames, which will add a bit more to the composition of the image.

Location scouting that involves the family is a great idea. You can choose a location together that they like based on their memories.

It can be where the couple got engaged, where they first met, or where their children took their first steps. If they are connected to the place, your family portraits are going to be more joyful.

Sweet family portrait of a father and son posing by trees

10. Do Not Set Your Aperture Value too Low to Avoid Blurring a Family Member

Portraits have a special vibe when you manage to get your models sharp and the background blurry.

You can create this effect by setting a low aperture value (a small f-number). Using an aperture around f/2.8 will give you a beautiful blur.

However, there’s a risk to it. If your models move, they might be partially or completely out of focus. This is true also for specific body parts of the same person. If your model looks to the side, one eye could be in focus while the other is blurry.

Family portrait photo of a couple posing with their baby outdoors

If you want the whole family to appear sharp in the photo, you might need to increase the aperture number. Choose a value around f/8.

You might not get the background blur effect as strongly as you wanted, but everybody in the family will come out sharp.

Family portrait photo of a couple and son sitting on a bench outdoors

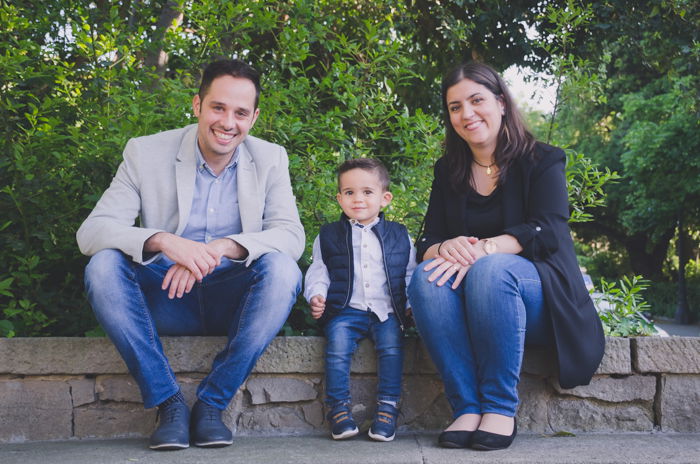
11. Offer Family Photo Outfit Advice to Bring Harmony to your Pictures

One of the most common questions before the photo sessions is: “What should we wear?”

The idea is that all the family members should look coordinated to convey a feeling of togetherness.

This doesn’t mean they have to be dressed in identical clothes. It means wearing the same style of clothes. All of them can look casual, or wear elegant clothes and with similar colours or shades.

I always recommend they wear natural shades and avoid bright colours that stand out. The person wearing it will catch all the attention in the photo (unless this is what you want).

The same can happen with big illustrations or signs on T-shirts which are quite eye-catching. Unless it adds to the photo, avoid them.

Family portrait photo of a couple and son sitting on a wall outdoors

12. Meet at a Convenient Time for the Kids to Avoid Hard Times With Them

This might complicate the organisation process, but respecting the natural rhythm of the kids makes it totally worth it.

Tired, sleepy or hungry kids are difficult to handle. It is almost impossible to have them cooperate or even make them look happy for the photo.

I usually try to combine a good time for the kids and a frame of time with beautiful light.

This means that sometimes I arrange the photo sessions early in the morning. Kids are awake, just had breakfast, and I can use the morning golden hour.

But each family is different and their schedules will be different, so I adjust the photo session to each one.

A portrait of young boy

With family photo shoots, you need to show both your best technical and social skills.

You have to adjust camera settings to get a good exposure. Learn how to use back light and natural light, adjust the depth of field to get the desired effects and so on.

You also need to have the right equipment for family photography.

However, above all, you need to make the family feel comfortable to show their love for each other.

If you keep all these points in mind your family photos will surely become wonderful memories. Kids grow up so fast. Besides being fun, your portraits will freeze a little part of the family’s life! 

--------------------------------------------------------------------------------------------

 FREE Photography Ebook

Are You a Photo Visionary? Breaking Out of Conformity! – Free Quick Guide


In this age of the smartphone, it’s said that everyone thinks they are a photographer.

These days, becoming known as a master of photographic art takes a bit more than just learning how to point and click.

When you look back through history at the great Masters of Photography, you’ll see that they all broke the existing mold.

They step away from what everyone else was producing to create timeless and stunning images that broke out of conformity.

If you want to be numbered among them, you will need to develop your style as a photo visionary.

So, how can you do it?

Well, if it were easy, everyone would – but this guide will set you on the right path!

Here is what we will cover:

  • Knowing Art History
  • Finding a New Way to Look at Things
  • Smashing Genres Together
  • Breaking All of the Rules

Are you ready to stand out from the crowd? 

Let’s go!

Your free copy is here.

Photo Credit: Rhiannon D’Averc

 
----------------------------------------------------------------------------------------
 
Lady Shutterbug Next Level Womens Tri-Blend Tee front mockupPhoto Shutterbug Next Level Men's Long Sleeve Tee front mockup  
View these shirts here: bit.ly/3h5HuEF
 

Friday, March 18, 2022

How to Take Fun and Natural Family Portraits

Tag: Shutterbug Photography

Nothing holds a deeper place in one’s heart than beautiful family portraits with loved ones. This can be anything from photos of the entire family or just portraits of a couple.
The photographer’s goal is to ensure that the bond and connection between each member of the family shines through every image.
Often times, posed shots can appear static and stiff. Natural family portraits are the ones that capture true personality. As a photographer, this is what you should be aiming for.
Here is how to make sure you get those fun, spontaneous moments at your next family shoot!
couple with baby

The Experience Makes the Difference

Family photography is possibly the most widespread and well-known photographic niche. Making your work stand out is just as important as producing beautiful, captivating photography.
The experience you offer your clients goes hand-in-hand with what kind of portraits you will produce – and how much fun you can bring out of your subjects!
The vibe sets the tone.
Through my own experience, I’ve noticed many of my first-time clients approach a photo shoot as a very stressful ordeal. It certainly doesn’t have to be like that.
A great way to change up that experience is to welcome your clients with a warm, optimistic, energetic, and friendly personality.
Don’t jump right into photographing. Ask your clients how they’re doing, maybe offer them a beverage. Reassure them that the photo shoot will be easygoing. And don’t forget about the kids! Ask them what they’re most excited about to ease their nerves.
Try to amp up the excitement about how much fun they’re about to have in front of your lens.
All of this helps ease any tension the family in front of your lens may be feeling and leads to more relaxed and spontaneous photographs.
photo of a pregnant couple with the man kneeling in front of the woman, kissing her belly

Get to Know the People You’re Photographing

A big part of photography is psychology.
The best way to figure out how to bring out your clients’ character is to know their personality in the first place. Whether during the consultation for the photo shoot or the session itself, you absolutely need to get to know your clients on a very personal level.
Ask them questions about what they do, what they like, and what really brings that spark out of them. Even when you’re working with a group of people, ask everyone what relation they have to one another or what their favorite memory is.
From there, you can gauge how to bring the spontaneity out of them.
Some people are easily amused and very happy, telling a silly joke can get the natural laughter to come through in the shot. Others are a bit shyer, and some words of encouragement and comfort can aid in pulling a smile out of the subjects.
You can figure all of this out if you take the time to get to know your clients.
family portrait of a couple and their dogs

Lens Choice Is Important

The lens you choose will affect how adventurous your fun and natural photographs become. It will dictate how out-of-the-blue some of the photographs can be.
If you are photographing with a 50mm, you’ll have to be fairly close to your subjects. This means it may take a little bit of coaxing to get those natural moments out of them.
On the other hand, if you’re photographing with a telephoto or zoom lens, you can position yourself farther away. This might allow you to capture very spontaneous moments more easily.
Your clients won’t feel like you’re there, which might make them more comfortable.
wedding photo of a couple lying on rocks near the sea

Be Ready to Adapt

As photographers, we really are constantly changing and adapting to the situations at hand. Your family portrait shoot is no different.
Adapt yourself to what your clients feel most comfortable and confident with, whether it be how you speak to them or your demeanor.
With children, see what the child likes and adjust yourself to better match with what makes the kid excited to be photographed.
If your clients bring a dog, acclimate to the situation and adjust your surroundings to bring the best out of the family’s beloved pooch.
photo of a couple on a beach with the sun setting in the background

Make Them Laugh

Tell some jokes, play some music – allow your clients to forget the formalities of a photo shoot.
Your aim is to disassociate your clients from any preconceived notions of what a photo shoot should be like. This is possibly one of the best methods of pulling character out of a subject.
Try creating a fun distraction. This will let them escape the “I have to be posing right now because my picture is being taken” mindset.
Playing music helps subjects relax, especially adults who have favourite songs that bring an emotion out of them.
Make silly faces for kids to get them to laugh, or tell a wild joke for their parents.
Create an environment fit for conversation and friendship, rather than a stale client and photographer situation. This way, the facial expressions of your clients will show that they trust you, they’re enjoying themselves, and are feeling completely at ease.

Posing Children – Make It a Game

father and son photo
What kid doesn’t love games? The key to photographing children is to make the photo shoot more like a game. Often parents can stress out their kid by telling them to behave during a photo session. That can make some of the images look uncomfortable.
Children do not hide their emotions like an adult can, it’s written right on their faces. As such, turning posing into a game or something fun is a great way to turn the mood around.
Kids love showing off to someone new. Next time you pose a little boy or girl, ask them to show you how good they can stand on one foot. Or ask them to act out their favourite television character.
The more you engage and the more you make posing something fun, the better the shots.
Great pose ideas include playing with flowers, spinning in a circle, or show off their teeth! Take advantage of what children do naturally when posing them.

Posing Couples – Capture the Love

photo of a couple embracing
Couples come to a photographer to have their romance commemorated for a reason. Bring out the love by asking the couple how they met, their favourite things about each other, or beautiful memories that they both share.
When posing a couple, the more romantic, the better. Ask them to kiss one another, pick each other up, smile and laugh, pretend that the photo shoot is an epic date.
The key here is to capture the electrifying bond between the two!
Great pose ideas include kissing, hugging, and cuddling.

Posing Pets – Get Them to Play

photo of a woman and her dogs
When posing owners with pets, have the owner play and kiss their furry family member like they would at home.
Posing owners with their pets for family portraits can be challenging. You cannot direct a dog or cat like you can another person.
This hindrance can actually work brilliantly to your advantage. All the photographs will be naturally fun and spontaneous. Instead of trying to control the uncontrollable, let go of your expectations entirely.
Have the owners of the pets play, kiss, and talk to their furry companions as they would at home, and capture the love that ensues as a result!
Much like kids, take advantage of natural behaviors that pets exhibit.
Great pose ideas include belly rubs, hugs, and kisses. A good trick to encouraging a kiss is to hide a dog treat in the owner’s mouth and the dog will lick their lips.

Expect the Unexpected

photo of a couple gazing at each other
Photographing families with children and pets will never go as planned.
No matter how much you try to plan the shots, the likelihood of the shoot not going as planned is great. Children and pets are unpredictable, and as such, your predictions will probably be proven wrong.
Don’t be discouraged! Take this as an excellent opportunity to flex your photographic muscles and creativity.
Expect that you’ll attend the photo shoot and have to change your entire plan. With this in mind, you can focus on simply bringing the personalities out of your clients by engaging with them.

Keep Their Heads Together

family protrait of a couple kissing their newborn son
When aligning families, keeping their heads as close together as possible looks best.
A compositional trick that you can incorporate into your family sessions is keeping their heads as close together as possible. This is because that intimate proximity portraits affection the best in a static image.
You have to remember that photographs do not move. As such, you have to tell the story through one frozen instance.
If you focus on human body language and psychology, the closer you are to someone, the more feelings you have towards them. If everyone is close together, the photograph oozes with feeling.
Keeping everyone together is also good for composition. This way, you can have some control over spontaneity with a big group.
Depending on what lens you use, you can make sure that there is little chance for any of your subjects to move past your lens and cause you to miss a key moment.
Photo of a pregnant couple standing on rock formations by the beach. The woman is wearing a long pink dress and they are embracing.

Be More Spontaneous Yourself

How a photo shoot flows starts with you – if you become more spontaneous and less stringent, so will your clients. Be imaginative and fun yourself, come up with silly poses and ideas on the spot and act them out!
Professional photographers do this all the time, contrary to popular belief. This is your time to shine too.
If you see the family you’re photographing not really digging the poses or ideas you have planned, mix it up completely and try something new and fresh. They will appreciate the difference and you’ll love the new photographs you’re capturing.
As a photographer, you’re always learning something new. You can absolutely get a brand new inspiration bug during a fun and natural family portrait session!

Bonus Tip: Don’t Just Focus on the Faces

family portrait detail of a couple holding hands
It’s natural to focus on the face and expression and miss the details. But these are important too!
Photographers have to break out of the habit of focusing only on faces. Some of the details can create an equally powerful and sentimental photograph.
If you see a couple holding hands, zoom in on those hands and capture that connection. If you see a child find a lady bug, use the lady bug in the photographs.
The small stuff can have a big impact. 

---------------------------------------------------------------------------------

Another FREE Photography Ebook

Camera Settings for Portrait Photography – Free Quick Guide


Are you ready to take the next big step with your photography?

Virtually everyone begins their photography journey photographing static unliving objects. You know we’re talking about – landscapes, barns, and such.

However, almost all of us catch the bug at some point to start photographing people.

Portraits are challenging and very rewarding.

However, if you’ve never done it before, where do you start?

That’s where this guide comes in.

Jo Plumridge has over twenty years of experience photographing portraits. She is going to lay out the basics of getting started photographing people.

You’ll get some suggestions on the following:

  • Equipment
  • Camera settings
  • Lighting
  • Posing
  • Backgrounds

If you are dreaming of photographing people, this is where you start!

Get it here.

Photo Credit: Fantastic B