Monday, March 29, 2021

Top Self Portrait Boudoir Photography Tips


What Are Boudoir Self Portraits

Due to the difficult nature of self-portraits, many photographers shy away from the idea. This type of photography can be very beneficial to you and your company.

Self-portraits are not about vanity or attention-seeking. They are a way to put yourself in your clients’ shoes. And they also give you the freedom to try out new ideas.

Photographing yourself can be helpful to learn different lighting and posing without having to hire a model. It can be also therapeutic for creativity.

I contacted Beth Claire of Lost Highway Imaging, one of the best self-portrait photographers in the industry, for her top tips.

Sensual self portrait boudoir photography of a female model with red hair
Image by Beth Claire

How to Overcome Common Boudoir Self-Portrait Challenges

The first time you attempt a self-portrait, whether boudoir or not, it is important to clear your day. It is more time consuming than you might expect and you want to be able to give yourself space to not feel rushed.

Checking on the clock will only add to the stress. If you are not experienced with hair and makeup you may want to hire an artist. This will give you the full effect that your boudoir clients would receive. Why not pamper yourself for the day!

It is important to do a dry run without a stylist so the pressure is not on you the day of your styled shoot.

Sensual self portrait boudoir photography of a female model posing in a lavish interior
Image by Beth Claire

Claire suggests using a tripod versus propping your camera on a bench or dresser table. It is easier to keep the frame stable and you will have more flexibility on where you are shooting.

In the past, I have attempted to put my camera on a table or chair and it never had the stability for framing the area as my tripod. A big portion of self-portraits is having patience.

It will take practice to get your focus right, so take your time to avoid frustration.

Sensual self portrait boudoir photography of a female model posing in a lavish interior
Image by Beth Claire

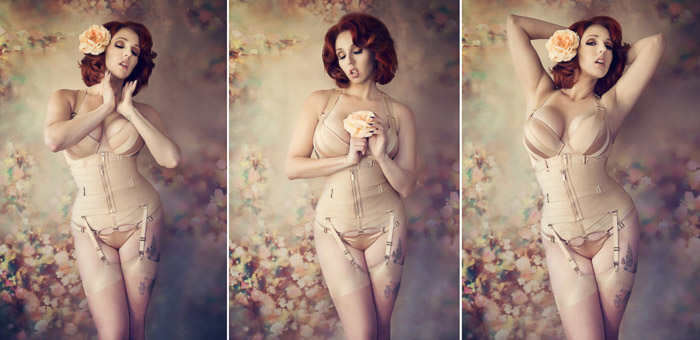
Changing up posing will give you the options to show movement and fluidity in your posts.

Sensual self portrait boudoir photography triptych of a female model posing in a lavish interior
Image by Beth Claire

Equipment for Self Portrait Boudoir Photography

Before you begin you will need to see what equipment you have to work with for the shoot. I have tried using the timer on my camera. But I recommend a remote or something similar.

The back and forth will indeed lead to a cardio workout. The exhaustion will show in your images.

Claire uses a CamRanger unit. She has used a remote and intervalometer in the past. Remember if you use a push button remote you will have to hide it in one of your hands.

Some cameras do have built-in intervalometers. Before you start, you will want to check your manual.

Dreamy self portrait boudoir photography of a female model posing in a mermaid tail by the sea
Image by Beth Claire

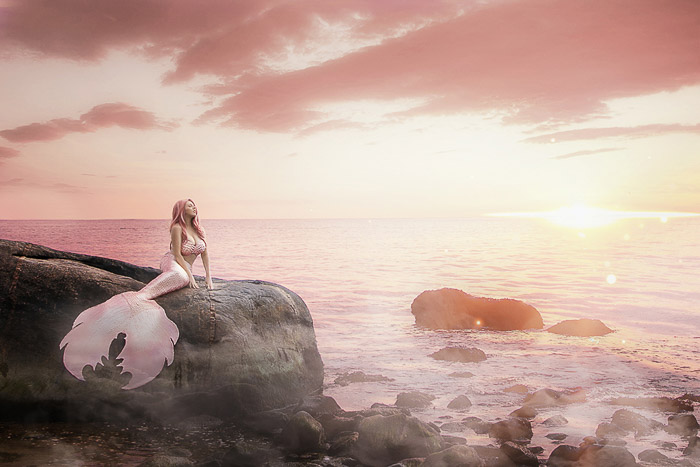
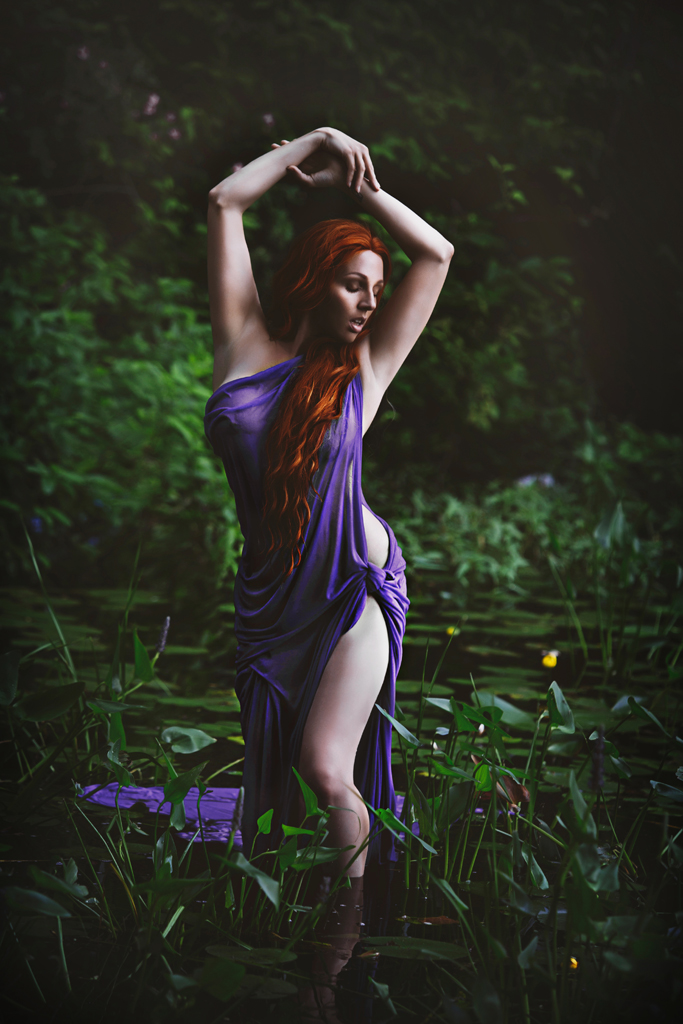
If you’re setting up images on location such as at the beach, take an assistant with you. In the image above, Claire creates her own silicone mermaid tail.

Silicone tails are difficult to get into. Jumping down off the rocks to readjust in case of a tripod fall would be difficult. Having an assistant to sit with your camera when you are in a themed set up will help.

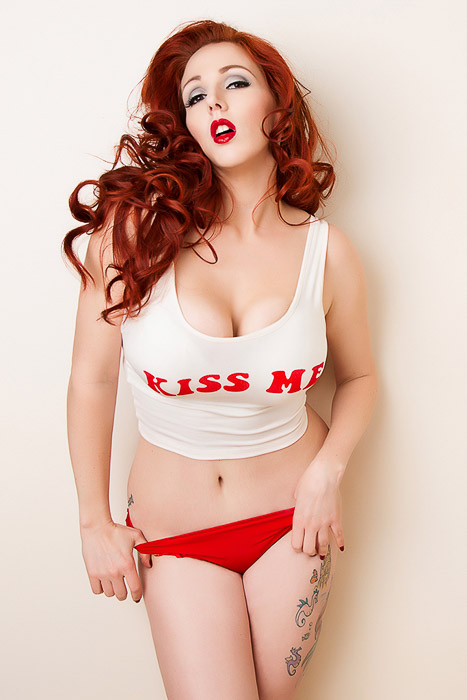
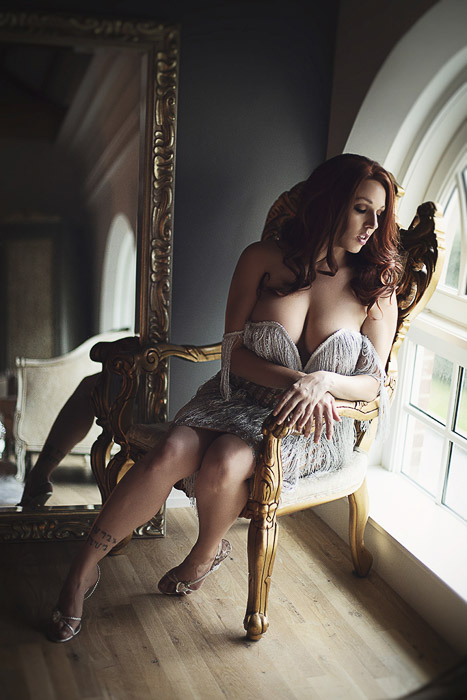
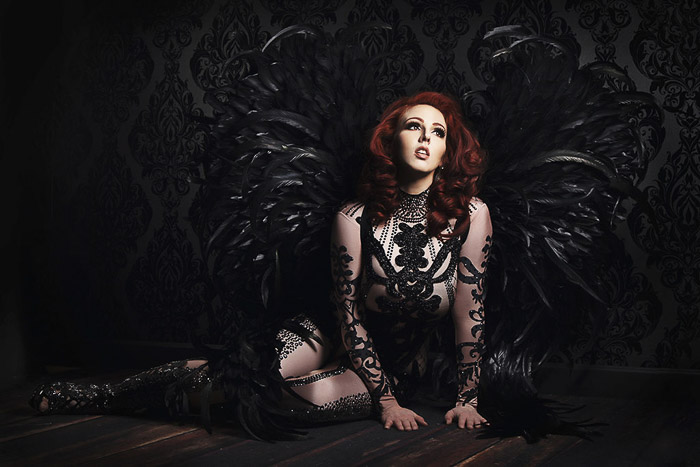
Use props such as mirrors and textured wardrobes such as this robe to help give your portrait an advantage. In this image, Claire can add drama all while hiding any remote or trigger in her shot.

Setups do not have to be difficult or time-consuming. A robe, a mirror, and a strobe gave Claire all she needed to capture this dramatic portrait.

Atmospheric self portrait boudoir photography of a female model posing in a Gothic style interior
Image by Beth Claire

Focusing is probably the most difficult aspect of self-portraits. If you are looking for a specific depth of field it can be helpful to place a mannequin or other object in the spot. This will give you something to focus on before you step into the frame.

She even suggests using kids toys for a stand-in model.

When shooting on a bed, you can use brightly colored tape in the shape of an X for a focal point. If a stand-in is not an option, it will be important to give yourself a little more depth of field than you would normally shoot.

Until Claire gained more experience with self-portraits she started out with an f/5.6.  She now shoots reliably at f/1.8 without any issues.

In the beginning, it was helpful to have this wiggle room in case the focus was not right on to start.

Atmospheric self portrait boudoir photography of a female model posing in a Gothic style interior
Image by Beth Claire

She prefers the Cam Ranger since she can often select the focus point directly on the screen of your device.

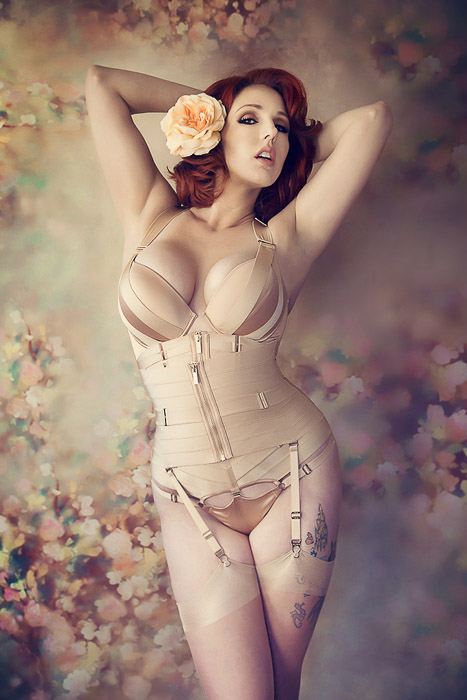
Choosing Your Self Portrait Wardrobe

It is important to choose a wardrobe that makes the storyline come alive. And that also makes you feel good. You will most likely be alone during your self-portraits so chose pieces that you will not need assistance with.

Unless you have a friend near, lacing up a corset may be too difficult and become frustrating for your first time. Chose items that make sense to you instead of what you feel would be more acceptable.

If you are more into Calvin Klein underwear, use this. Don’t struggle with a bodysuit that is itchy and uncomfortable.

Atmospheric self portrait boudoir photography of a female model posing in a Gothic style cabaret stage
Image by Beth Claire

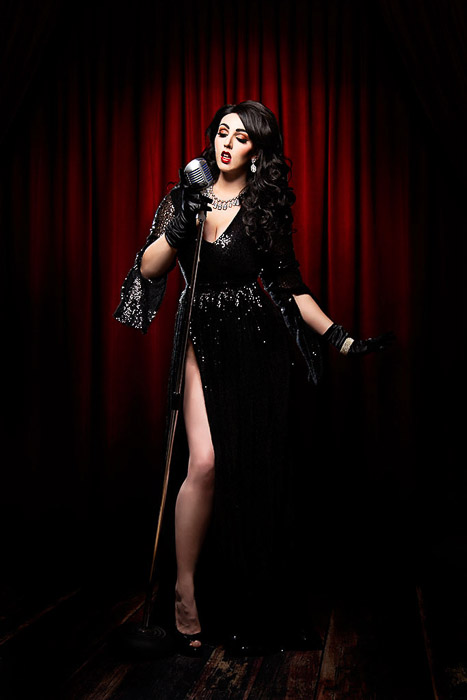
Image Selection for Self Portraits

Unlike a client session, self-portraits may not produce as many usable shots. Expect to take twenty to thirty shots for every one that will work. This is mainly true in the start of your self-portrait career.

Plan to walk away with one or two great shots the first time around rather than filling an album. The intent for this is more to practice until you get the hang of your own style in this new genre.

If you are nervous about lighting or posing it may help to pose just as you would with your own clients. Create your posing and lighting flow just as you would with one of your clients during a normal rotation.

This removes the guesswork of lighting and posing. And it creates content for your client group. It is a great way to blog and interact with your VIP groups. Let them know you put yourself in their shoes.

Your clients will appreciate that you understand how nerve-wracking a session can be. And that you can relate.

Sensual self portrait boudoir photography of a female model posing with doughnut against pink background
Image by Beth Claire

Get Creative with Self Portraits

The great thing about self-portraits is the freedom of creativity. You are not bound to a specific look so this is the time to get all those ideas into your camera.

When working with clients you may be nervous to attempt a new look and waste your clients time. Hiring models is a great way. But it also costs money for their time.

Self-portraits give you the flexibility to add a new dramatic look, try out new poses, or even a brand new style.

Creative self portrait boudoir photography of a female model in unicorn costume
Image by Beth Claire

Once you get your focus down, you can start playing with other options such as themed styles. Claire creates a shoot with holiday-themed ideas to put to her VIP groups.

This gives her clients the visual of what her setups will be for a Halloween session for example. Adding in strobe lighting will give a dramatic look to your session as well.

You may want to wait on artificial lighting until after a few tries. That way you are not overdoing it your first time around.

Image by Beth Claire

After you gain experience, chose a variety of looks to test out new ideas. If you normally love to shoot in lingerie, next time chose a themed look. You’ll get more diversity in your self-portrait portfolio.

Avoiding Mistakes During Self Portraits

A common mistake of first-timers is sticking to the same poses and angles for the entirety of the shoot. Change it up in each shot to see which you prefer.

You would never take 30 shots of your clients in the same pose. Why do this with your own session?

Getting frustrated throughout the shoot if you feel it is not going the way you had intended is another mistake. Take a few deep breaths and walk away for a moment.

This is not a client shoot where the money is on the table. This is for your own personal creativity. Unless you are creating a calendar project you will have plenty of time to get it right.

Another mistake is to be judgmental of yourself. Self-portraits take time and patience to learn. Your first attempt may in your mind be a failure but it is just a stepping stone to the next session.

It is important to be kind to yourself during a self-portrait photography session. This kindness applies to every step of the process from getting dressed to reviewing the back of your camera.

During the session, take a step back and look at yourself the way you would your clients. If you would not judge them for stretch marks, cellulite or weight, why judge yourself?

Image by Beth Claire

No matter when you start or how many images you may get from your first shoot, you will gain a new respect for photography and your clients.

It opens your eyes to your shooting space, lighting, posing choices and much more. Self-portrait boudoir photography can lead you to a whole new world of options for your business.


---------------------------------------------------------------------------------------------------------------------

PHOTOGRAPHY FREEBIE:

How to make money with your Photography even if you're not a Pro.

Copy & paste this link into your browser, click ENTER, and enjoy: 

https://mrdarrylt.blogspot.com/2020/01/how-to-make-500-month-from-your.html

                                                         or

https://www.photography-jobs.net/?hop=darryl54

 ----------------------------------------------------------------------------------------------------------------------

Visit me on Facebook and post your pictures.

https://www.facebook.com/Darryl-T-363867387724297/  
----------------------------------------------------------------------------------------------------------------------
Need a camera?  Try this link (Tri State Camera) for discounted prices:  https://ebay.to/2Smb1ho


Thursday, March 25, 2021

30 Unique Animal Photography Examples to Inspire You

Tags: Photography for Beginners, Pets, Golden Hour


30. Take Glowing Photos During Golden Hour

Stunning wildlife portrait of a deer shot during golden hour- best animal photography examplesThere’s a lot you can do with animal photography during golden hour.

Golden hour occurs after sunrise and before sunset. You can use it to take photos from all kinds of angles. All without worrying about overexposing or underexposing your photos.

29.  Use Window Light to Take Moody Photos of Your Cat

Atmospheric close up photo of a black cat with focus on its eyes - cool animal photography examples
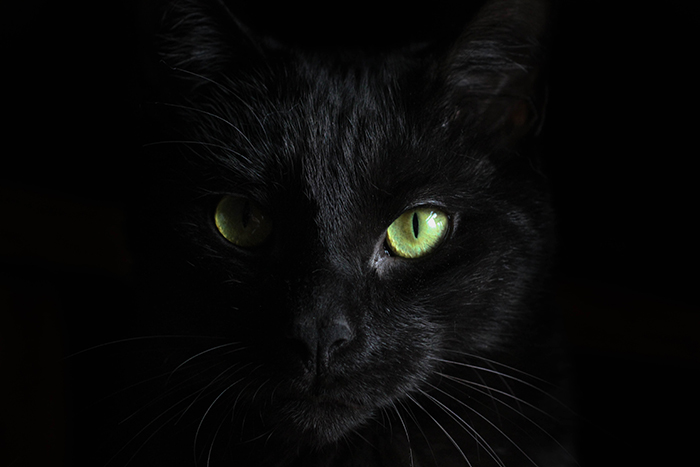
You don’t need a lot of
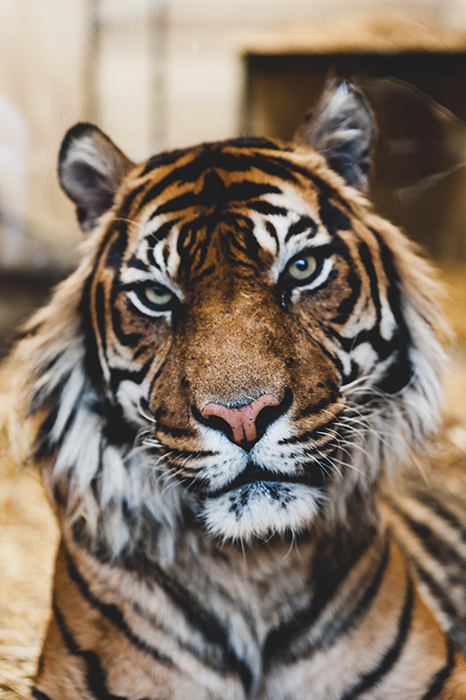
 professional equipment to take professional photos of animals. If you have a pet, you can practise by using window light.

Instead of using direct window light, use different angles.

Side lighting, the one that lights half of your subject’s face, can create a beautiful gradient.

28. Focus on the Eyes to Make Your Photos More Expressive

Atmospheric close up photo of a tiger with focus on its eyes - cool animal photography examplesJust like portrait photography, animal photography relies on the eyes.

To take expressive photos, get on the animal’s level and focus on its eyes. For the best results, make sure the animal looks directly into the lens.

You can do this by capturing its attention with rewards or harmless sounds.

27. Use a Zoom Lens to Capture Unique Moments

Atmospheric close up photo of a cheetah sleeping - cool animal photography examples
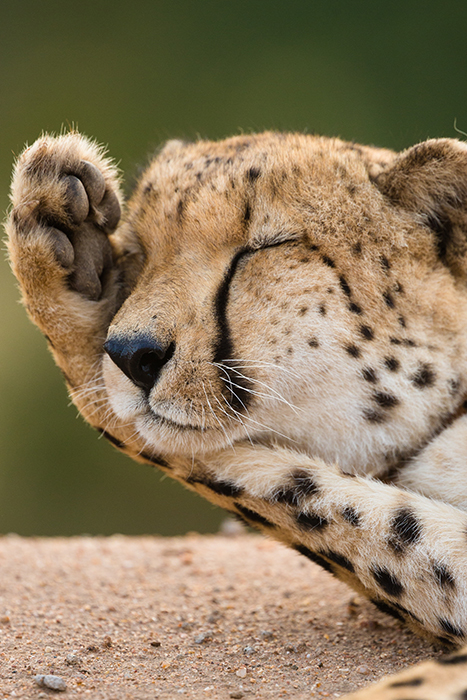
If you want to become a professional animal photographer, you need to invest in a zoom lens.

You can use zoom lenses to take sharp photos of animals from a distance.

This will come in handy if your subject is too far away to catch up with or if they’re dangerous.

26. Use Shutter Speed to Take Incredible Action Shots

Energetic action photo of a dog running on the beach - cool animal photography examples

To take detailed photos of your pet in action, you need to familiarise yourself with shutter speed. Shutter speed will determine how quickly your camera takes a photo.

The right shutter speed will allow you to take all kinds of action shots.

This is ideal for owners of energetic pets who can’t sit still for a photo!

25. Put the Focus on Your Subject Using Aperture

Sweet close up photo of a rabbit outdoors - cool animal photography examples
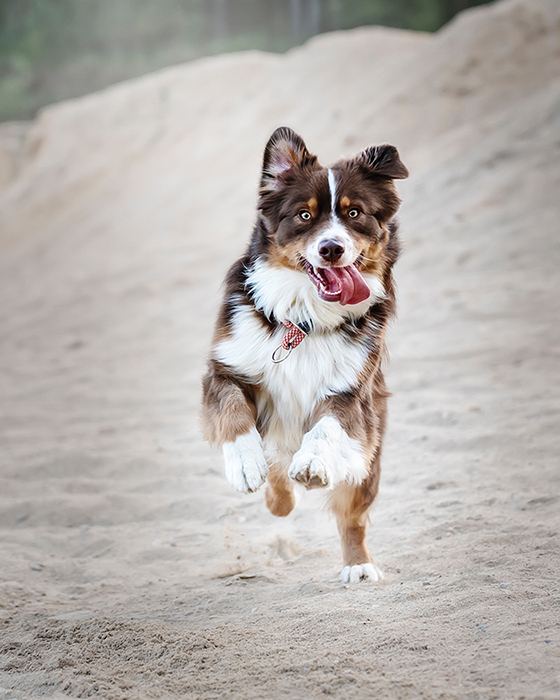
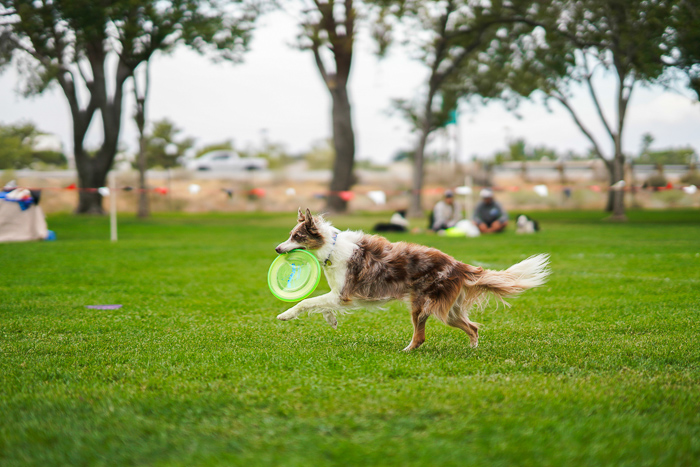
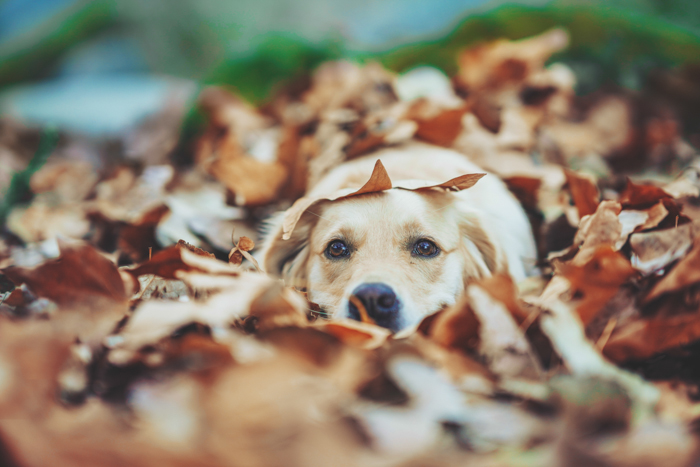
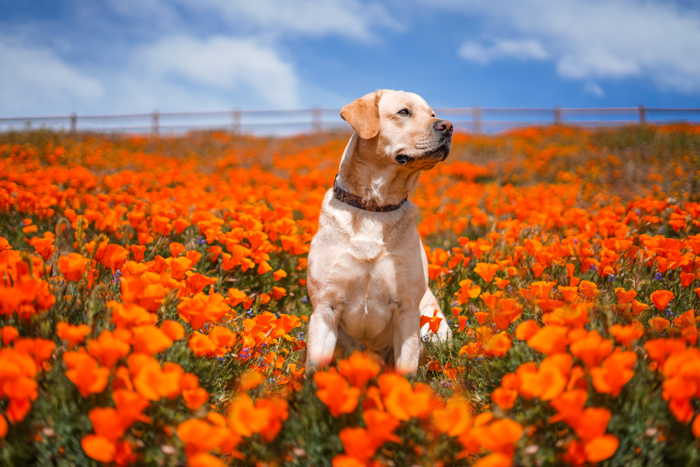
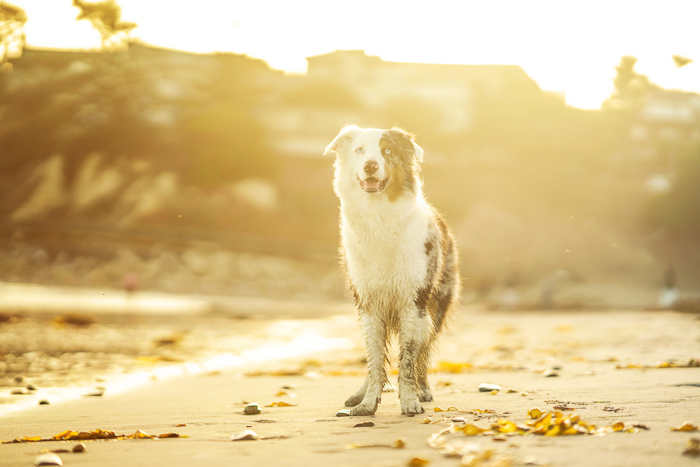
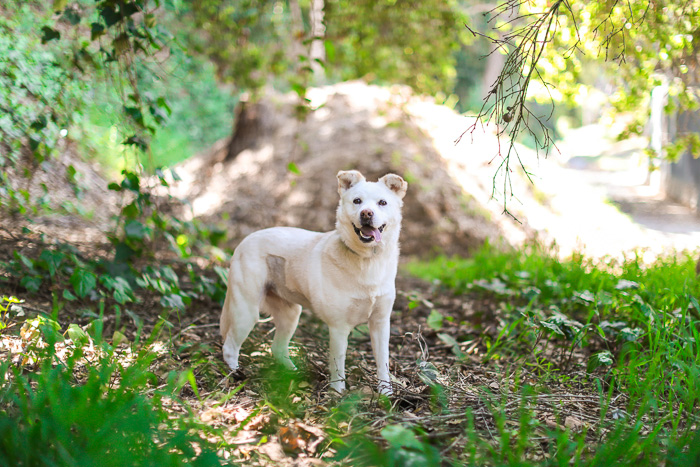
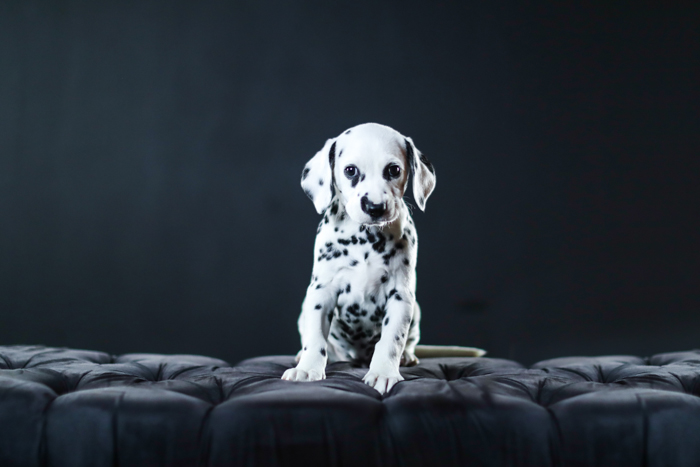
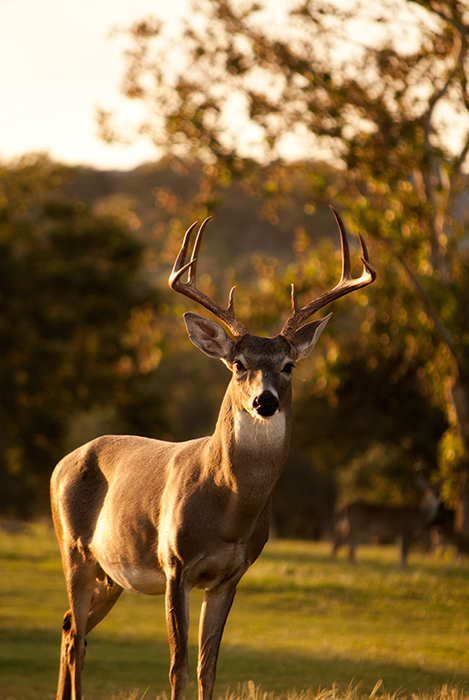
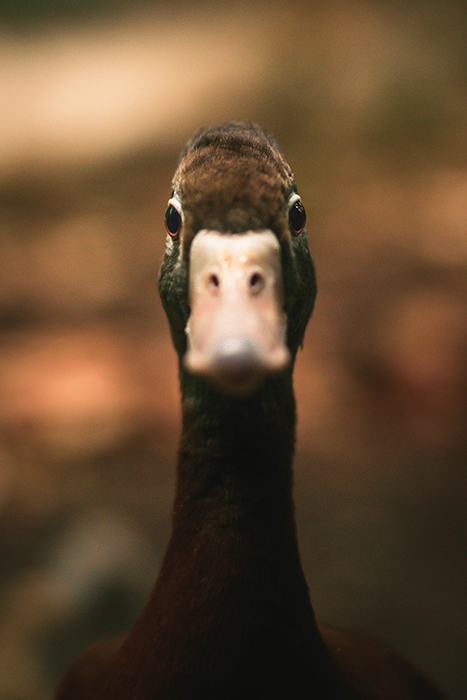
A blurred background like the one above is easy to achieve.

Look for a number on your lens. It might say something like f/1.8, f/5-6.3, etc. This is the largest possible aperture you can work with.

The larger the aperture (or the smaller the number), the blurrier you can make your backgrounds.

An aperture of f/1.2, for example, will result in a soft backdrop like the one above.

This will help you blur out distractions and focus on your subject.

24. Document the Relationship Between Animals to Make Your Photos More Emotional

Cool close up wildlife photo of two puffins standing on a rock - cool animal photography examplesNo photo is complete without a story. To make your animal photos more emotional, tell stories through your subjects.

The best way to do this is to photograph them interacting with one another.

For example, it seems like the Atlantic Puffins in this photo are talking to each other.

Finding moments like this isn’t easy, but it will help you find potential in simple interactions.

23. Find Patterns and Similar Colours in Simplicity

Cool overhead photo of a curled green snake - cool animal photography examples
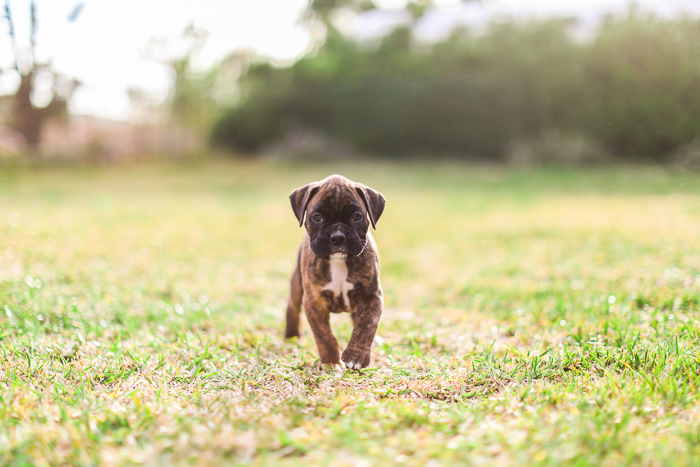
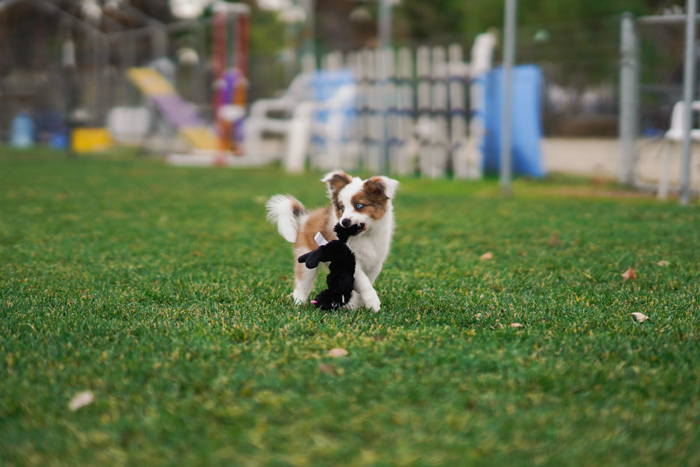
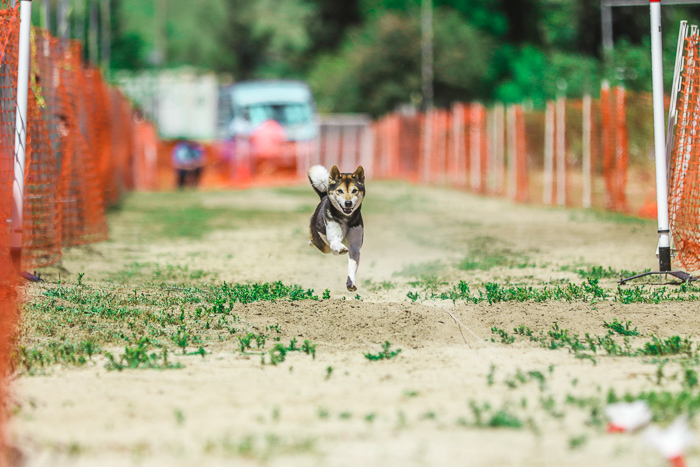
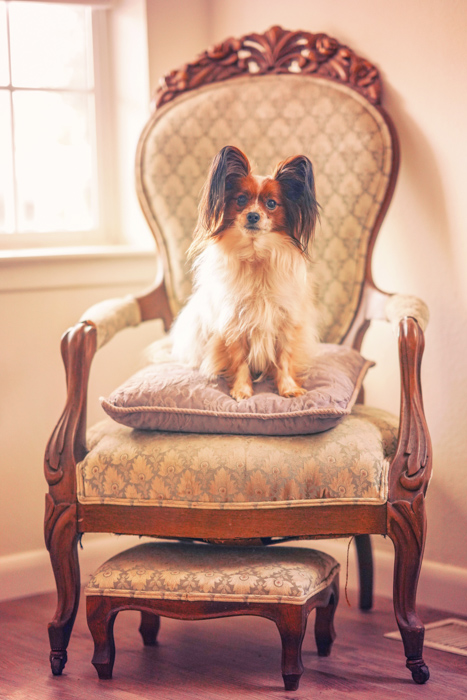
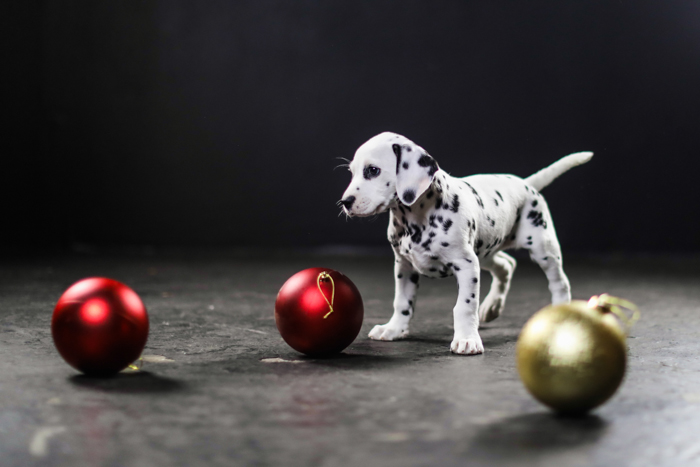
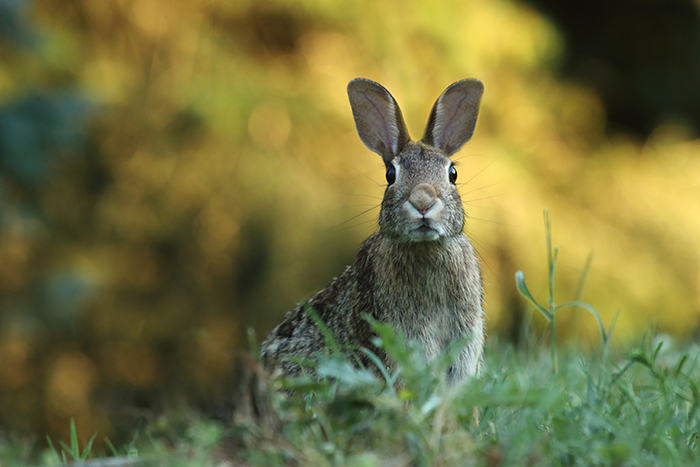
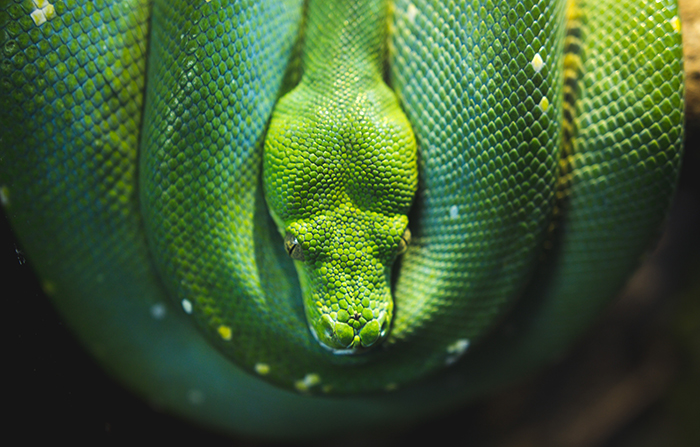
Some of the best animal photos are simple and pleasing to the eye.
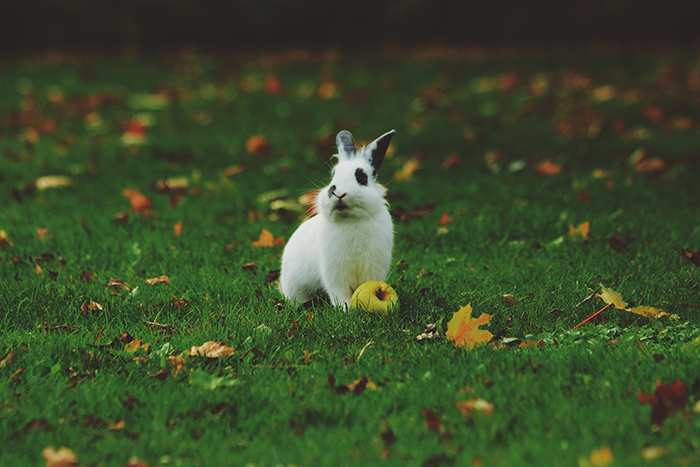
Most animals have some kind of beautiful pattern that deserves to be photographed in the best light.

Find these patterns, colors, and lines to take breathtaking images.

22. Take Photos of Animals with Their Favourite Things

Sweet wildlife photo of a rabbit on grass - cool animal photography examplesEvery animal has something it loves, be it a specific food or a toy. Documenting this is an easy way to make your animal portraits more personal and interesting to look at.

If the animal is a pet, its favorite item will also make it feel comfortable in front of your camera.

21. Take an Epic Group Photo of Horses Using a Wide-Angle Lens

Epic photo of three wild horses - cool animal photography examples
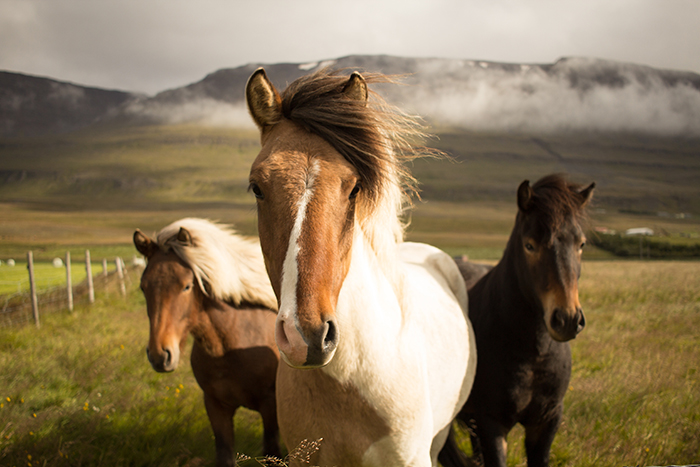
Horses are majestic creatures, especially when they’re together.

Take photos of them using a wide-angle lens. This will let you capture as many details and surroundings as possible.

20. Capture an Animal Mid-Yawn for Amazing Results

Cool photo of a lioness yawning - cool animal photography examples
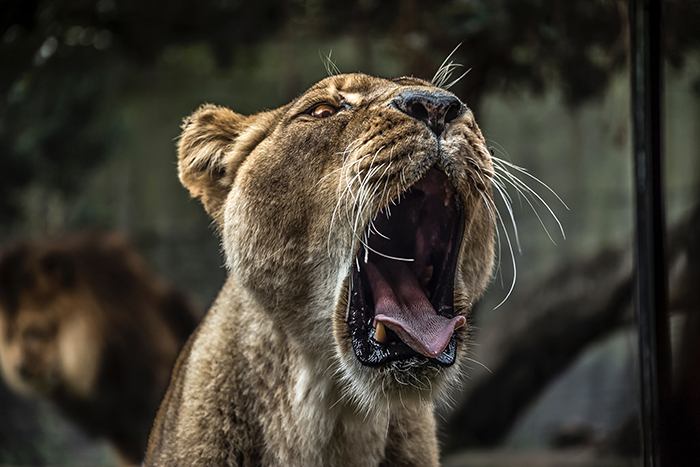
Yawns can help you take hilarious or impressive photos of animals.
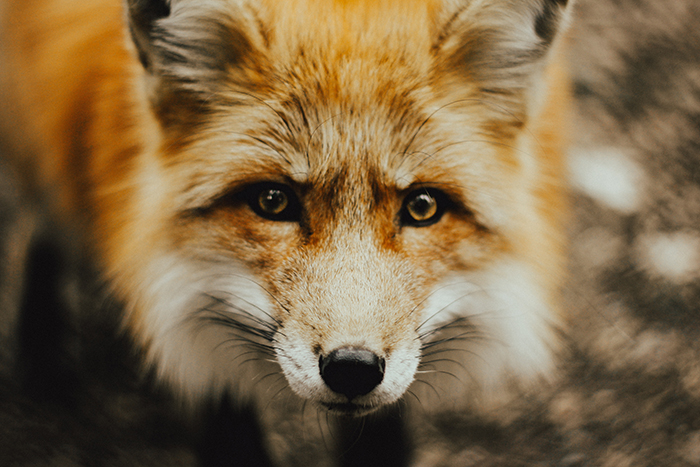
To sharply capture something as quick as a yawn, you need to be familiar with shutter speed. Check out idea #25 to find out more.

19. Take Photos of Animals to the Next Level Using Your Editing Skills

Atmospheric wildlife portrait of a fox - cool animal photography examplesEditing is an essential part of any photography style. Even if you don’t like Photoshop, you can still use it to enhance your photos even a little.

Editing is great for restoring shadows in dark photos. You can mute highlights in overexposed shots and correct distracting colors.

18. Take Stunning Detailed Photos of Highland Cattle

Atmospheric wildlife portrait of a highland cow - cool animal photography examples
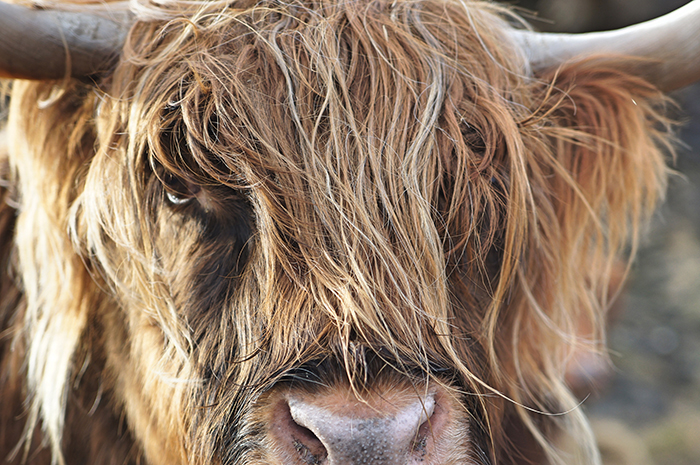
Using a zoom or macro lens, you can take amazing photos of Highland Cattle.
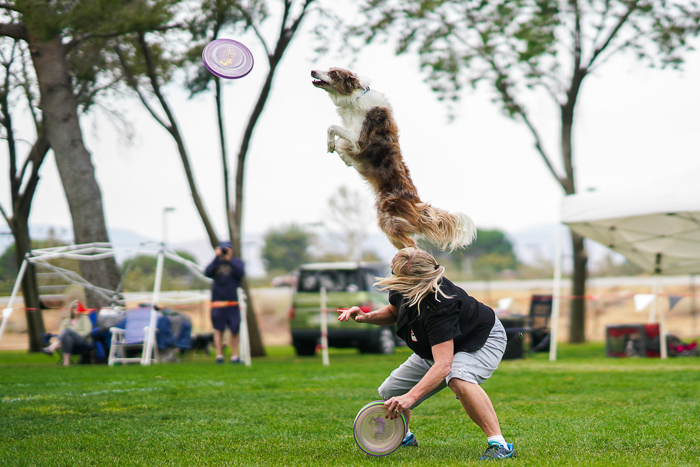
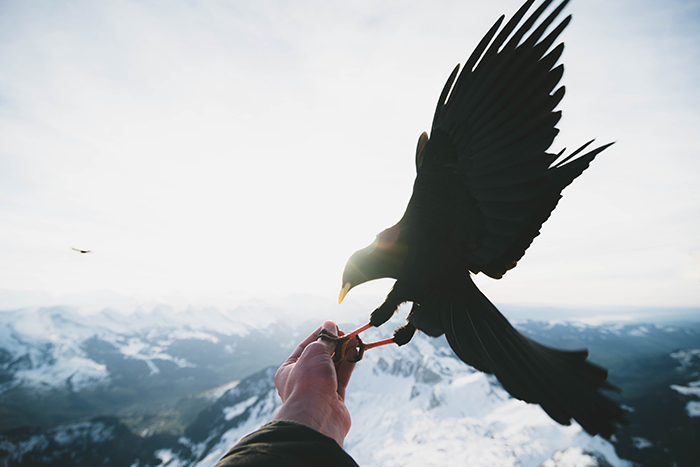
These creatures are known for their majestic horns and furry bodies. These features are great for taking otherworldly photos.

17. Interact With Animals to Take Unique Outdoor Photos

Atmospheric wildlife portrait of a bid of prey landing on someones hand - cool animal photography examplesWhy not include yourself in some animal photos? Photos of animals interacting with people or their owners are unique and heartwarming.

Make sure the animals you’re interacting with won’t bite your hand off!

16. Take Photos Using Backlight to Create Magical Silhouettes

Sometimes, details aren’t that important. To capture an atmosphere, take photos using backlight. This is light that shines behind your subject.

This will create a silhouette that you can use to emphasise specific shapes.

15. Take Perfect Animal Photos Using Foregrounds

A close up wildlife shot of a squirrel hiding among grass - animal photography examplesForegrounds are located close to the
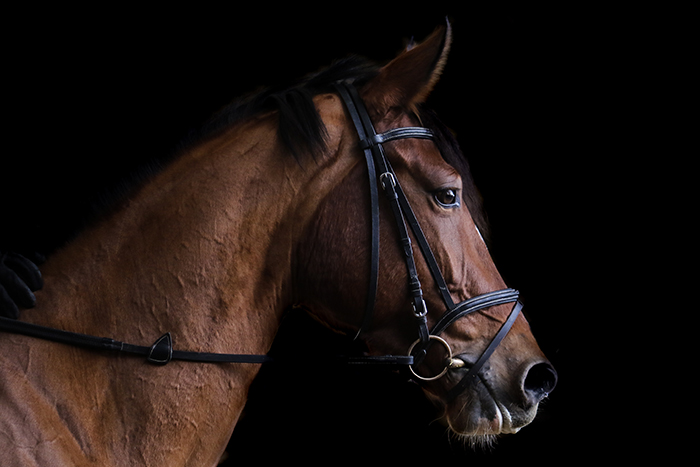
 camera lens. With a large aperture, they usually get blurred out.

This makes them the perfect tools for simple yet eye-catching animal photos.

Use simple foregrounds, like grass and branches. These will add depth to your photos and put the spotlight on your subject.

14. Take Professional Photos of Horses Using Natural Light and a Black Background

Professional Photos of Horses Using Natural Light and a Black BackgroundA black background can make any photo look professional or moody. One of the best things about black backgrounds is that they’re affordable and very easy to set up!
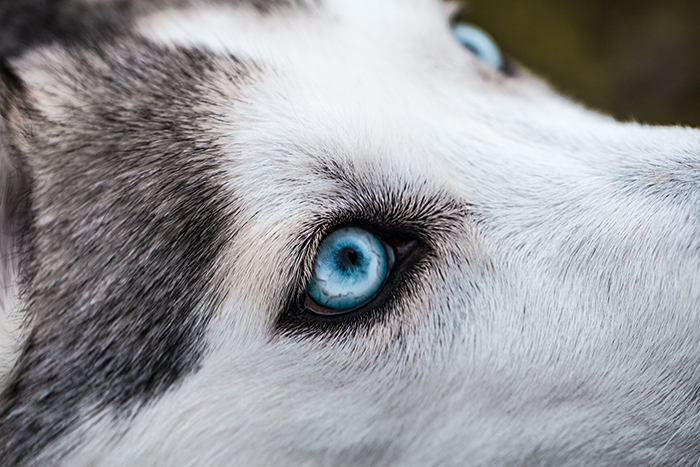
This is perfect for horse photography, which often revolves around elegance and strength.

13. Use a Macro Lens to Photograph Your Pet’s Eyes

A close up of a blue eyed husky

Animal eyes are so detailed. It’s impossible not to take unflattering photos of them. You can use a macro lens for your camera or phone to take amazing photos of eyes.

You can even turn this into a project where you photograph animal eyes exclusively.

12. For Sharp Animal Portraits, Use Manual Focus

Wildlife portrait of a duckIf you used autofocus to photograph the duck in the picture above, your camera would probably focus on the beak.

I recommend using manual focus when you want the sharpest results possible. Especially when you’re working with calm animals like ducks and turtles.

11. Have an Adorable Outdoor Photo Shoot With Your Pet

Adorable Outdoor Photo Shoot With a small brown dog
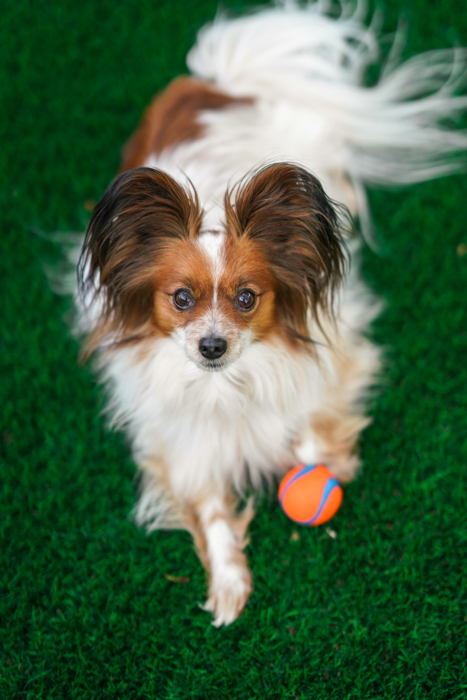
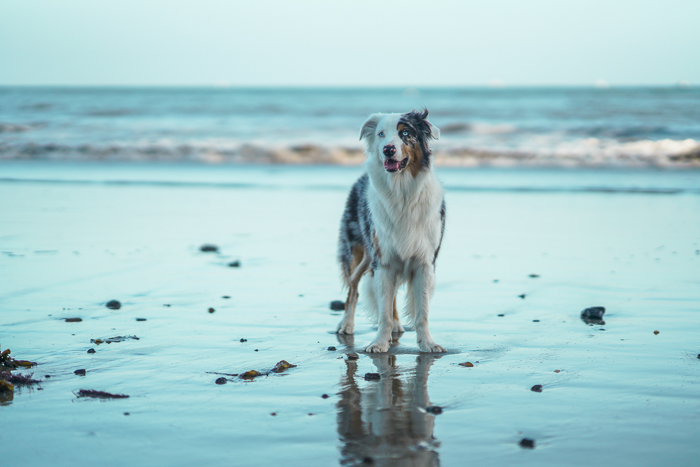
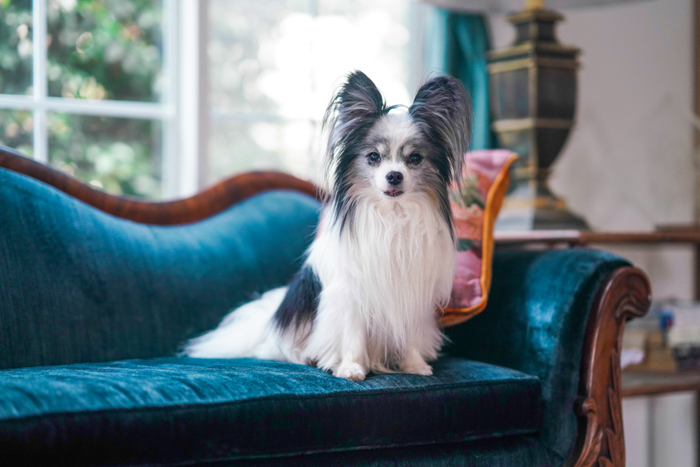
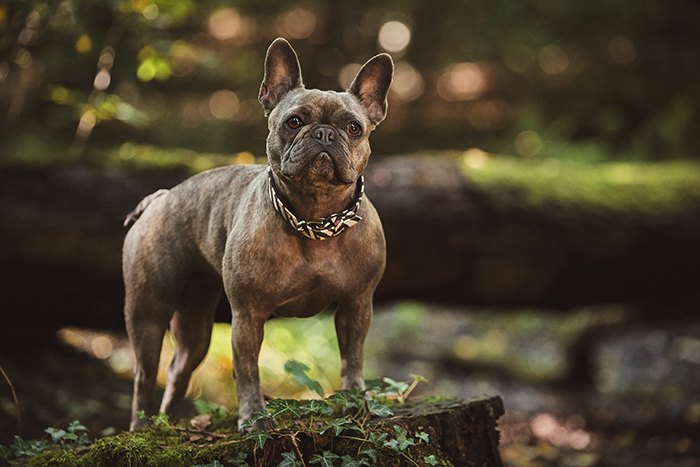
You don’t need to go far to improve your animal photography.

If you have a pet, practice by having photoshoots with it as often as possible.

Shoot outdoors to get better at working with a variety of natural light.

10. Use Unusual Angles to Take Outstanding Animal Portraits

Atmospheric portrait of a lion against black background
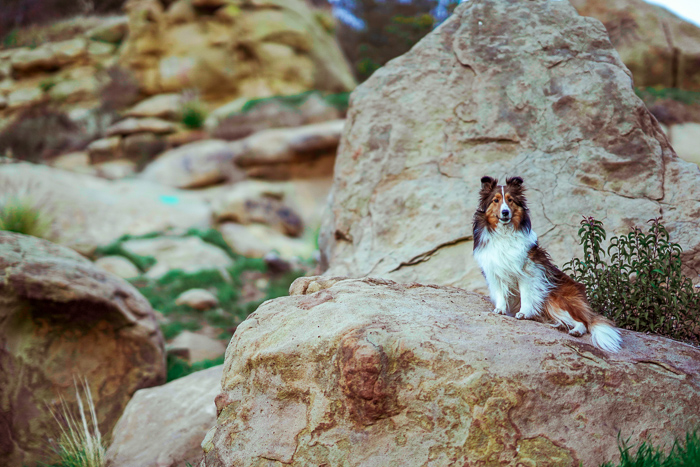
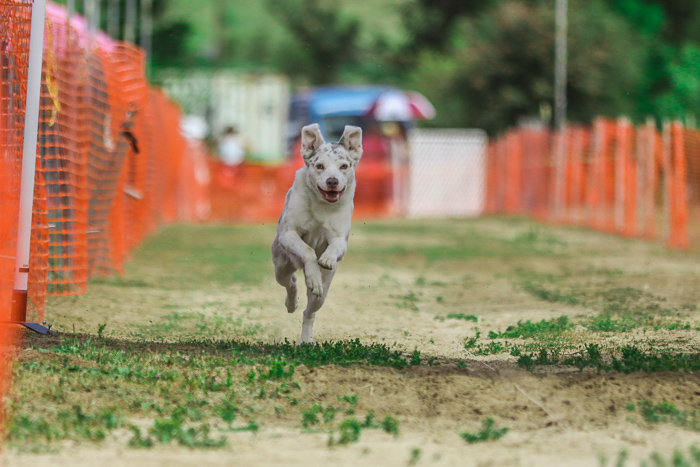
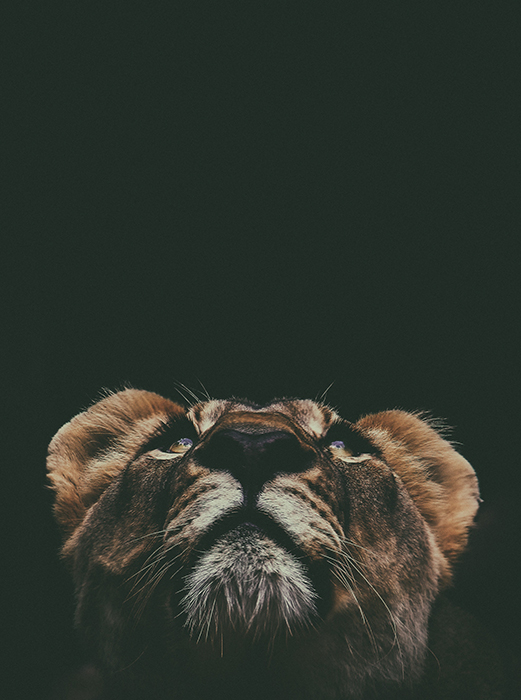
Animals look good from every angle. Feel free to experiment with different points of view.
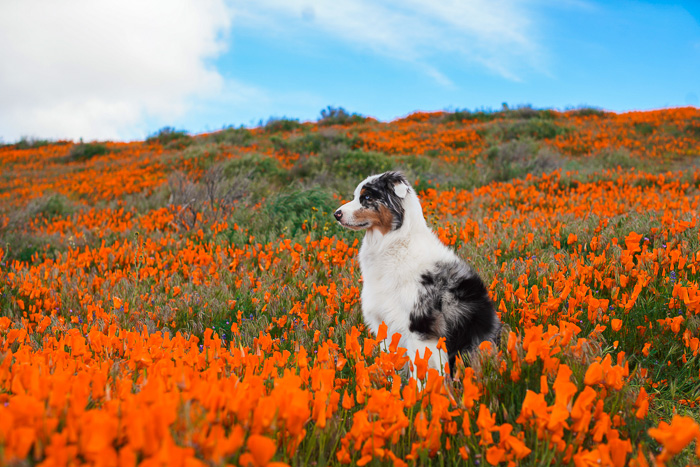
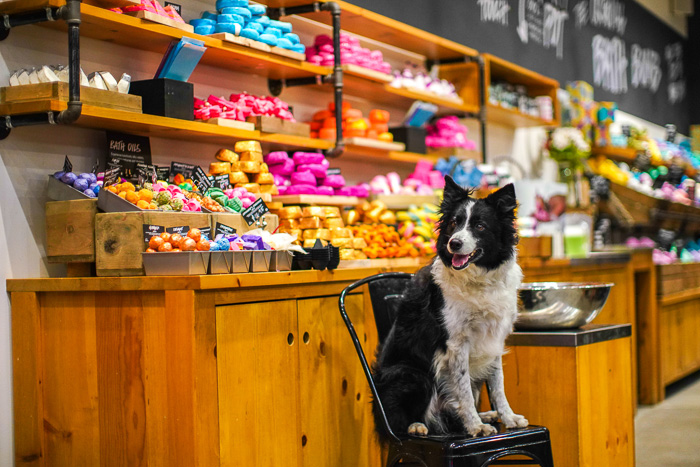
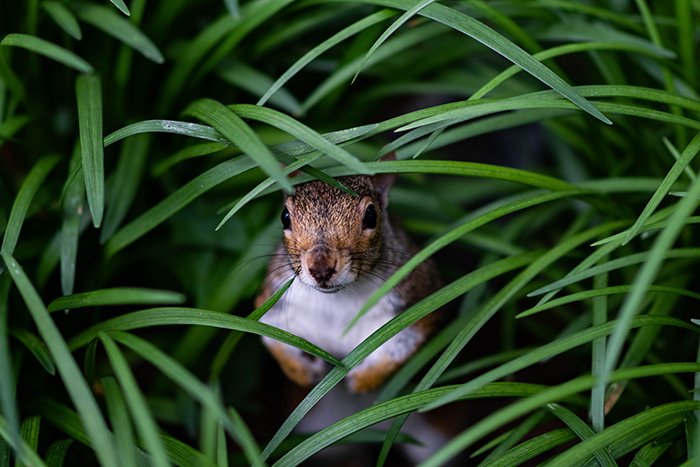
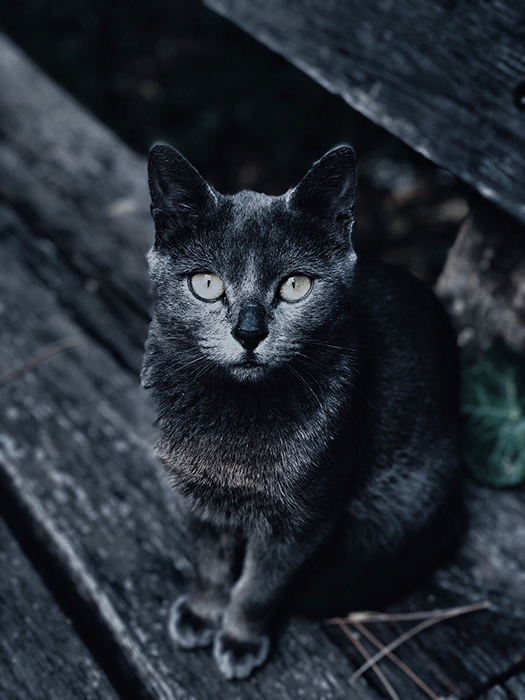
The more unusual the angles, the more unique your photos will be.

9. Slightly Desaturate Your Photos to Put the Focus on Your Subject

Overhead photo of a grey cat outdoorsSome locations are overly colorful. This can make it difficult to make an 
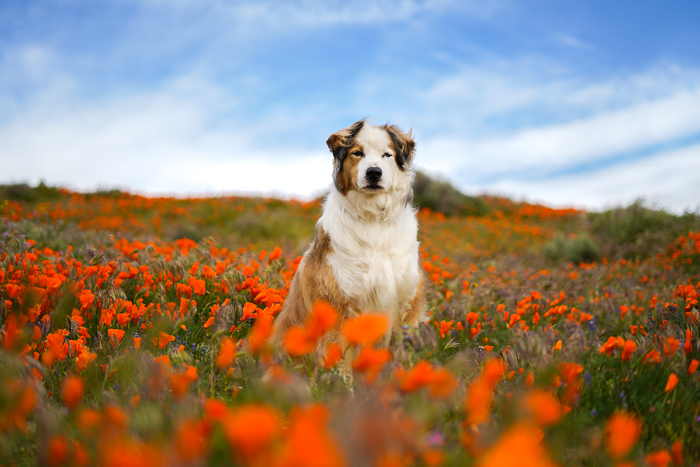
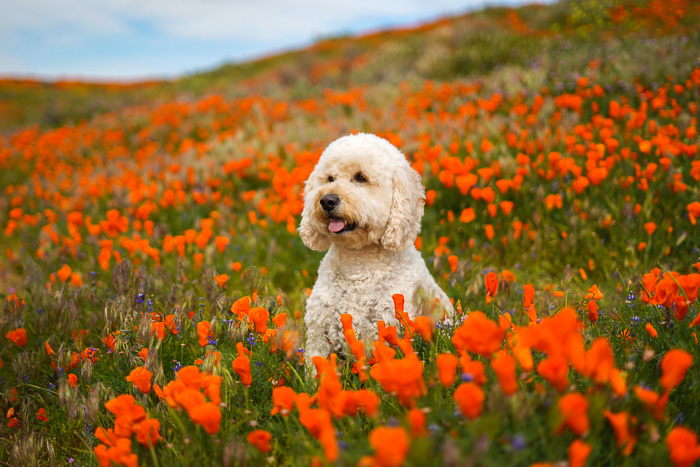
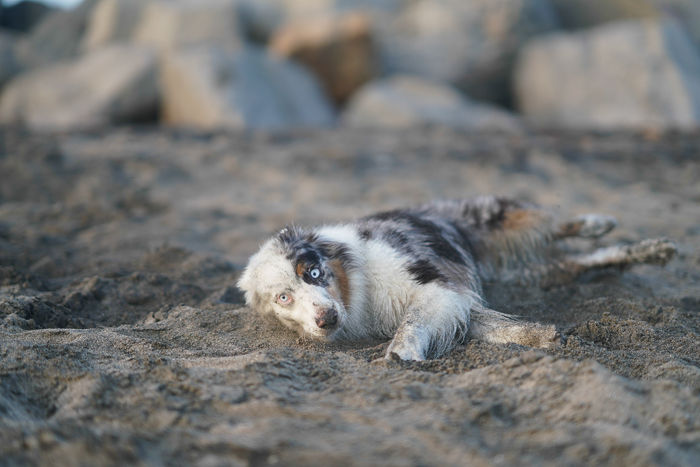
animal stand out. This doesn’t mean you can’t shoot in those locations.
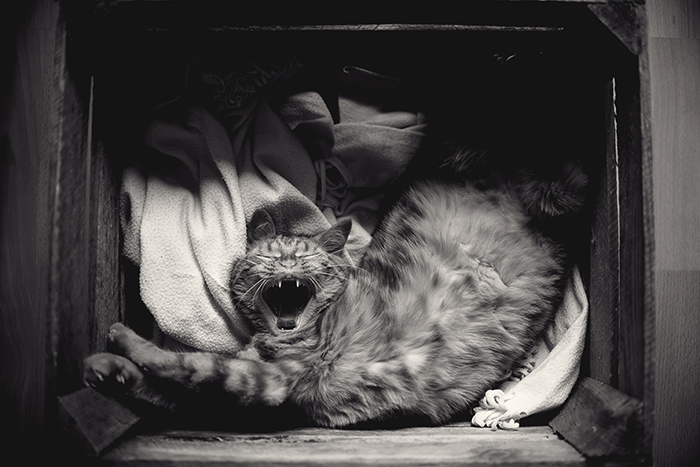
You can use your editing program to desaturate your entire image. Or you can make specific colors stand out less.

8. Take Funny Photos of Your Pet Sleeping in Its Favourite Place

funny photo of a yawning cat - cute animal photosFunny animal photos are a necessity. One of the most efficient ways to take funny photos is to use your animal’s sleeping patterns as inspiration.

Some animals, especially cats, have unusual sleeping preferences that are the perfect excuse to take great photos.

7. Use a Disposable Camera to Take Amazing Underwater Photos

Atmospheric wildlife portrait of a swimming polar bear underwater - cool animal photography examples
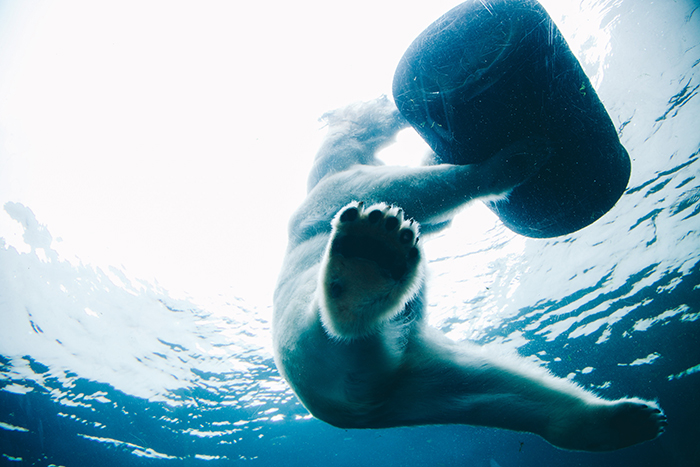
It’s unlikely that you live in a place with constant access to polar bears. But you can still take impressive underwater photos of different animals.

Disposable underwater cameras cost as little as $15. These can quickly improve your analog photography.

6. Take Enchanting Photos of Your Dog in an Outfit

Adorable puppy wearing clothes - cool animal photography examples
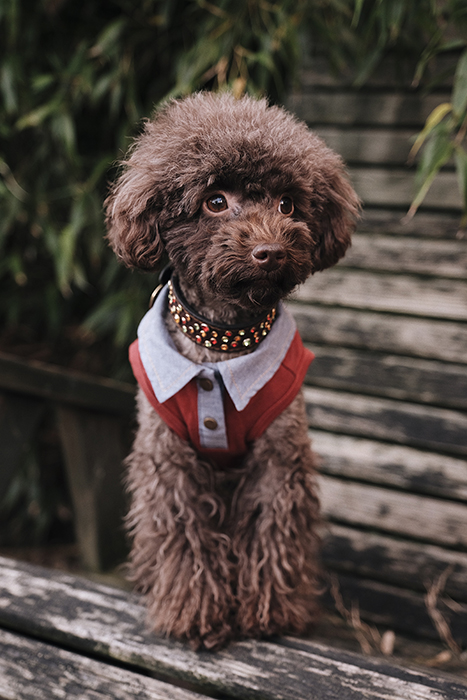
Sometimes, all you need is a collection of adorable dog photos. Thanks to the uniqueness of different dog outfits, it’s easy to take stunning photos of the same dog.

This will probably not give you photos worthy of being published in National Geographic. But you’ll get better at using light and take some cool Instagram images.

5. Take Funny Closeups Using a Wide-Angle Lens

Adorable close up of a Labrador puppy - cool animal photography examples
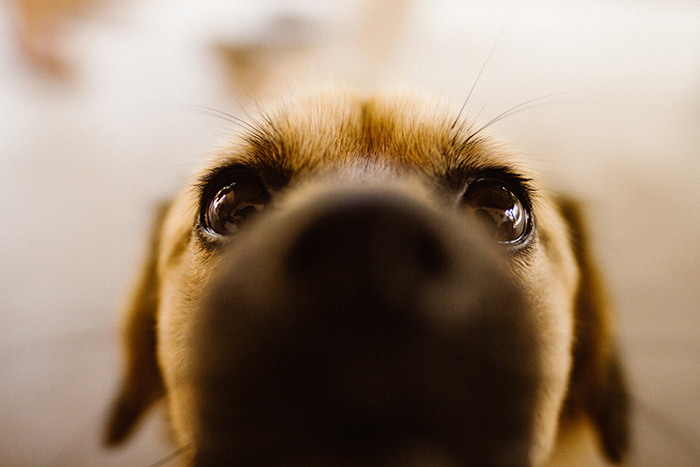
Another way to make the most of animal photography is to take funny closeups.

To do this, all you need is a wide-angle or macro lens. Use one that will capture both an animal’s eyes and nose.

Get as close to the animal as possible, making sure its eyes are in focus.

4. Improve Your Candid Photography by Going out and Finding Interesting Situations With Animals

Adorable shot of seals sleeping on stone steps - cool animal photography examples
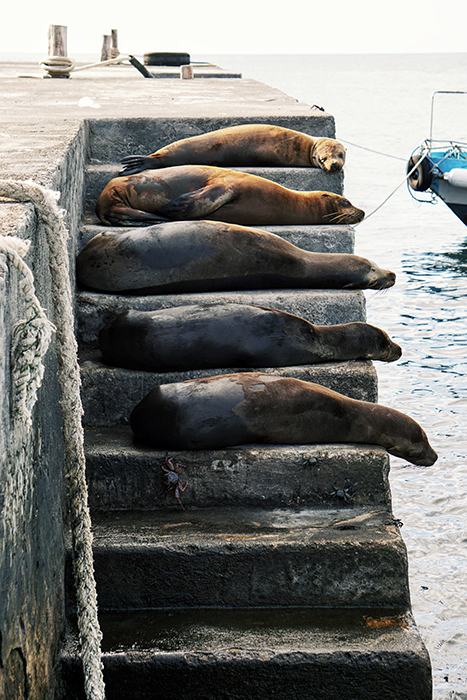
Finding unique situations isn’t easy, but it’s definitely a great excuse to spend more time outdoors.

Observe different animals and their quirks. You might come across something as interesting as the sleeping seals in the photo above!

3. Experiment With Different Formats to Make Your Animal Portraits More Interesting

Atmospheric wildlife portrait of an American Eagle - cool animal photography examples
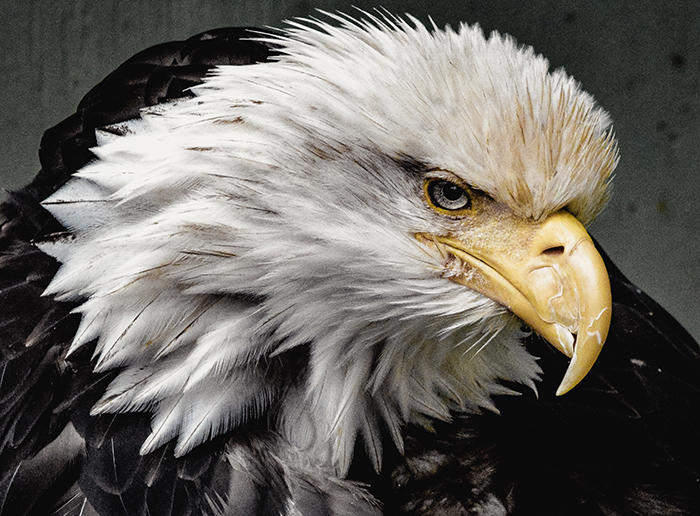
You can make a simple photo look more interesting by cropping or enlarging it. Some photos look better as panoramas. Others look more appealing when they’re cropped.

Experiment with different formats to find a few that enhance your compositions.

2. Convert Your Photos to B&W for Eye-Catching Results

Atmospheric wildlife portrait of a turtle swimming underwater - cool animal photography examples
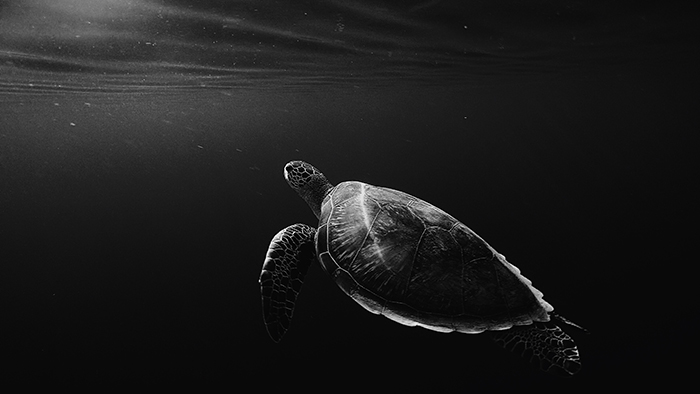
If slight desaturation isn’t enough, you can shoot in, or convert to, black & white.

High contrast photos look even more amazing in b&w. If your photos are flat, make sure you add contrast to them before you convert them to b&w to avoid unflattering results.

1. Capture Your Pet’s Quirks to Make Your Photos Both Adorable and Unique

Cute animal photo of a labrador puppy sitting outdoors with a flower in its mouth - cool animal photography examples
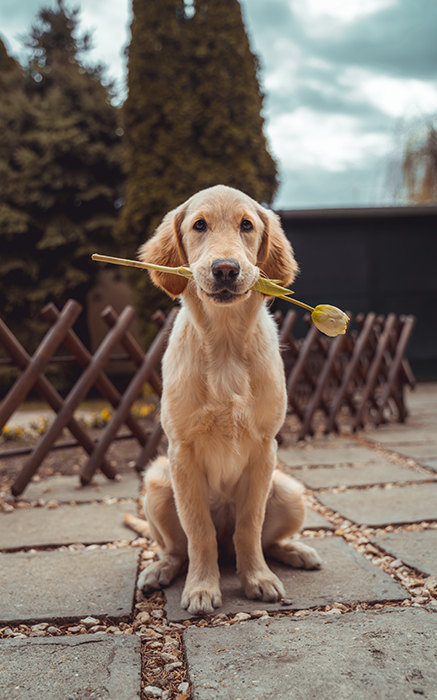
In addition to having weird sleeping patterns, animals have a bunch of unique quirks.

Photograph your pet carrying unusual things, playing with “toys” that aren’t mean to be played with, and running around in their favorite place.

You can take this further by taking a self-portrait with them!

Animal photography is open to animal lovers of all kinds.

Whether you’re a cat person, a dog lover, or a wildlife photography enthusiast, you can enjoy this genre whichever way you like without missing out.


---------------------------------------------------------------------------------------------------------------------

PHOTOGRAPHY FREEBIE:

How to make money with your Photography even if you're not a Pro.

Copy & paste this link into your browser, click ENTER, and enjoy: 

https://mrdarrylt.blogspot.com/2020/01/how-to-make-500-month-from-your.html

                                                         or

https://www.photography-jobs.net/?hop=darryl54

 ----------------------------------------------------------------------------------------------------------------------

Visit me on Facebook and post your pictures.

https://www.facebook.com/Darryl-T-363867387724297/  
----------------------------------------------------------------------------------------------------------------------

Need a camera?  Try this link (Tri State Camera) for discounted prices:  

https://ebay.to/2Smb1ho


Monday, March 22, 2021

Best Exposure Settings for Pet Photography

Tags:  Photography for Beginners, Pet Photography, Exposure


Pet photography is one of the best niches of the craft. From the beautiful galloping horses to sweet bouncy puppies, animal photography is both a captivating endeavor and a difficult one.

The first step of becoming a great photographer is nailing the exposure. This can be a bit difficult when capturing pets. You have to factor in the fact that the animals move. They will not sit still for you.

That’s why we’ve put together this guide to finding the right exposure settings for your pet photography.

Acton shot of a dog running with a frisbee outdoors - pet photography exposure settings 

What Is Exposure?

Let’s start with the basics. Exposure is the brightness or darkness of a photograph. Every photographer strives to achieve what is known as ideal exposure. That’s an image that has the right amount of brightness to it!

In an ideal exposure, your whites still have details and your blacks aren’t too dark. If your whites are too bright, your image is overexposed. If your blacks are too dark, it’s underexposed.

Cute pet portrait of a boxer puppy on grass - exposure settings for pet photography

Exposure is made up of three key components: ISO, Aperture, and Shutter Speed. This is basically the formula, all three of those added together equal your exposure.

But what do they all mean?

Cute pet portrait of a dog lying on a sandy beach - exposure settings for pet photography

ISO

The ISO is your camera’s sensitivity to light. The lower the ISO number, the less sensitive the camera is to light (but the less noise the photograph has).

The higher the ISO number, the most sensitive the camera is to light (but the more noise the photograph has). Noise happens because the camera is trying to fill in information that it does not know.

This is why something that is completely black may have red, green, and blue speckles. The camera is trying to fill in the missing information.

ISO is the numbers on your camera that range from 100 – 126000 and higher.

Action pet portrait of a dog jumping for a frisbee - exposure settings for pet photography

Aperture

The aperture is the window in the lens that controls how much light does (or doesn’t) hit your sensor. It’s a hole really. I like to call it a window because it can ‘open and close its curtains’ in order to control the light impact.

The aperture mimics how the eye works. Think of a cat. When a cat is sitting in the dark, its pupil is very wide and round. Nature intended this to allow the cat to use the available light in order to expose the scene and see in the dark.

When a cat is sitting outside in bright sunlight, the pupils turn into a very narrow slit in order to let less light in. That way the cat can see the whole frame without the light being too bright!

The aperture also has a secondary use. When this window is wide open, something changes in the depth of field. It gets more shallow.

Depth of field is how much of your image is in focus. A deep depth of field indicates that both the foreground, subject, and background are in focus (and not blurred).

A shallow depth of field is when just the subject is in focus and everything else blurs away.

Cute pet portrait of a Labrador dog lying among autumn leaves - exposure settings for pet photography

Shutter Speed

The shutter speed is how fast your camera takes the photograph. The higher the shutter speed number, the more frozen the action will be (but the photograph will be darker).

The lower the shutter speed number, the more motion blur your photograph will have (but the photograph will be lighter).  

Shutter speed is the numbers on your camera that range from 1/-15 to 1/8000. 1/2000 – 1/4000 are the best to freeze action. 1/300 is great for portraits. Anything lower than 1/100 will begin to slow the camera down a lot.

Now, to break down the tricky aspect of it all. All three of these individual components make an image darker or brighter individually. It’s good to keep the following in mind.

  • The higher the ISO level, the brighter the image. The lower the ISO level, the darker the image.
  • The higher the shutter speed, the darker the image. The lower the shutter speed, the lighter the image.
  • The wider the aperture, the brighter the image. The narrower the aperture, the darker the image.

Cute pet portrait of a brown and white puppy on grass - exposure settings for pet photography

The ISO controls light sensitivity, the shutter speed controls motion, and the aperture controls depth of field.

So, how can you use this in the field?

General Exposure Guideline for Pet Photography

The easiest way to both practice exposure and to find the right exposure for your photo shoot is to eliminate one factor and only focus on the other two.

Set one of the three components at the level you need it to be at and work the other two around that.

Pet portrait of a brown and white dog resting on rocks - exposure settings for pet photography

For the most part, I use my aperture as my baseline. I prefer very shallow depths of field, so therefore I leave my aperture open all of the time.

As mentioned above, a wide aperture equals a brighter image. My ISO and shutter speed now need to be adjusted accordingly.

You’ll want your ISO at a lower level. Depending on the kind of photographs you are capturing, your shutter speed will either be fairly high for action or in the mid-range for portraits.

If you’re photographing dog sports that feature lots of action and moving objects, you’ll want to have a different baseline. Your baseline will be your shutter speed, as that controls motion.

You then adjust your ISO and aperture to account for higher shutter speeds equating to darker images.

Cute pet portrait of two sheltie dogs sitting on grass - exposure settings for pet photography

It’s okay to chimp in order to figure out if you’re exposing properly. Chimping is a photography term given to checking your camera review screen in between taking photographs.

Some photographers like to be a bit mean to others about it, which is pure silliness. You should be checking your camera LCD, especially with a client, to ensure you’re capturing the images properly.

All cameras have a light meter in the display when you look through the viewfinder, whether it be electronic or not, or use the LCD screen.

This meter is just a little line with numbers and marks on it, along with an arrow that moves up and down.

The ‘ideal’ exposure can be found in the center point of the line, everything to the left is too dark and to the right is too light.

The arrow will move from side to side and settle somewhere depending on how your adjustments to one of the three components changes the exposure of the image.

Use this line as a guideline. It is not perfect and it is not a tell-all, so don’t rely on it exclusively.

Some Basic Exposure Settings

Here is an exposure guide for some of the most common circumstances you’ll likely find yourself in as a pet photographer!

Cute pet portrait of a brown and white puppy on grass - exposure settings for pet photography

The type of equipment you use will also affect your exposure settings. Every lens has a different aperture width (F-stop on the lens barrel).

The smaller the number, such as f/1.2, the wider the aperture. The larger the number, such as f/22, the narrower the aperture.

Every camera body is different as well, cameras have different maximum ISO levels, different performances at the same ISO levels, and have maximum shutter speeds.

The combination of equipment you use will be affecting how you handle the three components to the exposure formula.

Look at the below information as a general aid that you will then tailor to your specific tools.

Sunny Days

Cute pet portrait of a brown dog sitting in a field of orange flowers - exposure settings for pet photography

Most people who don’t do photography think that the ideal is a bright sunny day! But once you start actually taking pictures, you’ll find that sunny days are the most difficult to work with.

The sun acts as a super bright spotlight and it is directly overhead. Ideal spotlights are placed at eye level or lower and aimed upwards.

This causes shadows that you may not want. And the shadows are super dark while the highlights are super bright. But fear not, there are ways to expose for this.

Firstly, your goal is going to be to dim the super bright frame caused by the sun. If you’re like me and want a shallow depth of field, set your ISO as low as it can go. The lowest in DSLRs is 100 primarily and the lowest in mirrorless systems is 50.

Set your shutter speed as high as it can go (for the most part, the fastest shutter speed is 1/8000). See how the exposure looks from there.

Then adjust them accordingly. In some situations, it may be too dark.

Action pet portrait of a dog running at an agility competition - exposure settings for pet photography

If you’re doing portrait photography for pets, you have leeway to keep your ISO as low as possible and just lower your shutter speed.

If you’re photographing action, you’ll want to prioritize having a fast shutter speed. You might need to raise your ISO a bit higher (which is okay).

On nearly all cameras (whether you have a Nikon, Canon, or Sony), the ISO won’t start showing any form of noise or quality loss until much higher levels. For shutter speeds for action, anything about 1/2000 tends to be great.

If you pair your lens with an ND (neutral density) filter, you’ll be able to work with extremely wide apertures in the brightest of days.

Neutral density filters are filters that can modify the amount of light that enters your camera. This allows you to shoot at your desired aperture without worrying about it being too bright outside.

ND filters make life a thousand times easier if you have to photograph a white or light colored pet outside in bright sunlight! Or to be able to shoot with a very low aperture number during the noon sun.

Action pet portrait of a dog running at an agility competition - exposure settings for pet photography

This brings me to my next point, pet colors. For animals colored in any color besides white or black, the exposure will be pretty even and fairly easy to achieve.

If you’re photographing an all-white dog or an all-black dog, life might get a bit more difficult. For a white dog, you’ll want to underexpose and darker your frame a bit more. A black dog will need to be slightly overexposed and lighten the details of the fur.

If you’re capturing a pet that has both black and white on them, choose the predominant color and the color most seen on the face. Keeping faces bright is a big component of animal photography. Viewers relate with the face more than anything else.

Cloudy Days

Cute pet portrait of a brown and white dog sitting in a field of orange flowers - exposure settings for pet photography

Cloudy days are akin to a massive softbox placed over the sun. The light becomes diffused and spreads very easily. You won’t be plagued with harsh shadows and highlights, and everyone will look very soft.

If anything, this is kind of a perfect blank canvas for photo editing. The colors may be a bit more muted, but this is an easy fix in post.

You should care more about your shadows and highlights. That’s more difficult to fix. 

Cute pet portrait of a white dog sitting in a field of orange flowers - exposure settings for pet photography

For cloudy days, I tend to keep my settings all fairly even. Middle ground with ISO, middle ground with shutter speed. There is a lot of leniency with high shutter speeds or high ISOs. 

Don’t be afraid to sit in the ISO 400 range and shutter speed 1/3000 range. That’s a good combination. Pair with a wide aperture and you are golden.

I can usually keep these numbers even with an aperture of F/2.8.

Cute pet portrait of a black and white dog sitting in a field of orange flowers - exposure settings for pet photography

Pets that are very light colored or dark colored stop being a problem as well!

Keep in mind that if the sky is too cloudy, you won’t have a sunset hour. The world will simply get dark very, very fast.

Golden Hour

Cute pet portrait of a black and white dog standing on a beach during golden hour

The golden hours include the first hour after sunrise and the last hour of light before sunset. What makes this lighting situation so ideal for photography is the sun’s positioning relative to what you are photographing.

Due to the sun beginning its speedy rise or setting in the sky, the light source is now closer in relation to your subject. It is also going through more of the earth’s atmosphere at this low angle.

When this occurs, soft diffused light is produced. The golden hour casts a warm color temperature as well. You can enhance or correct this via post-processing in Lightroom or different software.

This warm color lends itself to being a flattering illumination upon any subject of your choosing.

Cute pet portrait of a black and white dog standing on a beach at evening

You can adhere to cloudy day exposure guides. You’ll want to dark your frame just a bit (lower ISO level) at the beginning of the golden hour. And then raise your ISO levels slowly as the golden hour nears its end!

Remember, you have a short window, so work fast.

What About Uneven Lighting?

Cute pet portrait of a white dog standing in a forest

Sometimes your lighting is uneven, or spotty. There are lots of shadow spots, maybe due to a tree, and lots of bright ‘hot spots’ (due to no cover).

Much like exposing for a pet that has both bright and dark colored fur, you need to prioritize one or the other.

Prioritize whatever part the pet is standing on. If the pet is in the shadows, expose for the shadow, and vice versa!  

Indoor Natural Light

Cute pet portrait of a small brown and white dog sitting on a fancy chair indoors

Indoor lighting is where things can get a bit trickier. You don’t have the sun to base your exposure off of, indoors, everything tends to be much darker or in low light.

You’ll be working with high ISO levels and lower shutter speeds.

Cute pet portrait of a collie dog sitting on a chair in a store

Most indoor lighting tends to be a form of fluorescent or tungsten and can run pretty warm. The warmth of the lamp will darken your frame. Especially if you’re shooting at night with less natural light from a window.

This is where the kind of pet portraits you’re capturing really matter. If you’re doing portraiture, you’ll have your shutter speed likely fairly low, like, around the 1/400 – 1/800 range.

This is in order to keep your ISO as low as possible so that noise doesn’t come out. Your ISO will likely still linger around the 1000+ range.

Cute pet portrait of a small brown and white dog sitting on a fancy chair indoors

If you’re capturing action, things get a bit harder. You will still need to prioritize your shutter speed in order to freeze the frame. As such, your ISO will rise.

The nifty trick about shutter speed is that if you pair it with burst mode / continuous shooting mode on your camera settings, you can actually lower it a little bit. Just make sure to shoot in burst (multiple images in a row)!

Generally, you’ll want your shutter speed higher than 1/800 for true action shots.

Indoor Studio Light

Cute pet portrait of a dalmation puppy sitting on a fancy chair indoors

If you include a studio light, everything will be a lot easier for you. The studio light (or multiple lights) can brighten a room to whatever level you need to achieve a perfect exposure.

At that point, you don’t even need an exposure guide from us. You can set your exposure to exactly what you need and either brighten or dim the lights to fit your need.

If you’re shooting with strobes or flashes, your shutter speed will be limited. You don’t want the camera to take a photograph faster than the strobe can flash!

Usually, your shutter will be limited around 1/250 max. Continuous lights don’t have this issue.

Cute pet portrait of a Dalmatian puppy playing with Christmas decorations


Much of exposure really is dependent on your own individual circumstance and toolkit. We hope that these photography tips can help you find the right settings that suit your needs! 


---------------------------------------------------------------------------------------------------------------------

PHOTOGRAPHY FREEBIE:

How to make money with your Photography even if you're not a Pro.

Copy & paste this link into your browser, click ENTER, and enjoy: 

https://mrdarrylt.blogspot.com/2020/01/how-to-make-500-month-from-your.html

                                                         or

https://www.photography-jobs.net/?hop=darryl54

 ----------------------------------------------------------------------------------------------------------------------

Visit me on Facebook and post your pictures.

https://www.facebook.com/Darryl-T-363867387724297/  
----------------------------------------------------------------------------------------------------------------------
Need a camera?  Try this link (Tri State Camera) for discounted prices:  https://ebay.to/2Smb1ho