Monday, June 28, 2021

How to Photograph Shy Children

Tags: Photography for beginners

When you’re photographing children, you’ll sometimes encounter ones who reveal their shining personality off the bat, show lots of expressions, and overall, just love the camera.  Then there are times you’ll get a young subject who is weary of strangers or even hides from clicking black boxes that are pointed at them!

So what can you do?

Aside from rescheduling until the child grows out of his shyness (that’d be funny), there are a few things that I do during my lifestyle photography sessions that you can try out.

Introduce yourself

If this is your first time meeting your little subject, show them the courtesy that you’d show an adult.  Tell them who you are and what you will be doing.  My suggestion is:  don’t put too much focus on the photography.  Instead, focus on all the fun you’ll be having and what activities you’ll be doing together.

Annie Tao Photography Photographing Shy Kids shooting from a distance

Give some space

When there are shy children, I start my sessions with a long lens (usually my 70-200mm f/2.8) so I can have some distance from them.  That will allow me to get some shots from a distance while giving kids time to warm up.

Annie Tao Photography Photographing Shy Kids toddler hiding behind moms legs

Show interest

No matter what the age of your subjects, treat them with respect.  Talk to them.  Ask them questions. Engage.  Interact.  Kids are incredibly in-tune to genuine interest.  If they see you having a good time, they will more likely join in.

Annie Tao Photography Photographing Shy Children comfort

Let them be themselves 

As opposed to children who are temporarily shy around strangers, some children are naturally quiet and introverted.  There is nothing wrong with capturing who they are!  If they are hiding behind mommy’s legs or quietly sitting by a tree, why not capture that?  Not every photo of a child needs to be of them smiling or laughing.  For more tips on this, read “Don’t Wait For a Smile”. Sometimes kids will open up after they feel the pressure is off of them to perform in front of the camera.

Annie Tao Photography Photographing Shy Children being themselves

Let them have a comfort object

If you find out your young subject is shy, allow the parents to bring a comfort object to their session, like a lovey, blanket or favorite toy.  Sometimes just having that well-loved object can put the child at ease.

Annie Tao Photography Photographing Shy Kids holding lovey

And lastly…

Smile

Simply put, if you don’t look friendly and approachable, children won’t warm up to you very easily.

In my photography career, I’ve had several clients contact me to warn me how their child is shy, hates the camera and will literally run from me when they see my camera!  I am happy to say that I’ve never had a shoot where a shy child didn’t warm up and do wonderfully during the shoot.  (Knock on wood!)

My love of children is transparent, so making kids feel comfortable comes naturally.  Now I am sharing my tried-and-true formula that has worked for me for many years.  I hope this will work for you too! 


-------------------------------------------------------------------------------------------------------------

PHOTOGRAPHY FREEBIE:

How to make money with your Photography even if you're not a Pro.

Copy & paste this link into your browser, click ENTER, and enjoy: 

https://mrdarrylt.blogspot.com/2020/01/how-to-make-500-month-from-your.html

_____________________________________________________________________

Play Station $50 code.  Just copy & paste this link into your browser, 

click "ENTER" and follow the easy steps:  bit.ly/3g2Ghhi


Friday, June 25, 2021

How to Start Shooting in Manual Mode (Photography Basics)

Tags: Photography for Beginners 

Shooting in manual mode is like driving a car. If you only use an automatic shift, you cannot drive a manual car. However, if you learn how to drive manual, then you can do both. Photography newbies and professionals are the same. They use the same camera, yet their final photos look very different.

By using manual mode, a whole new level of possibilities will open up for you.

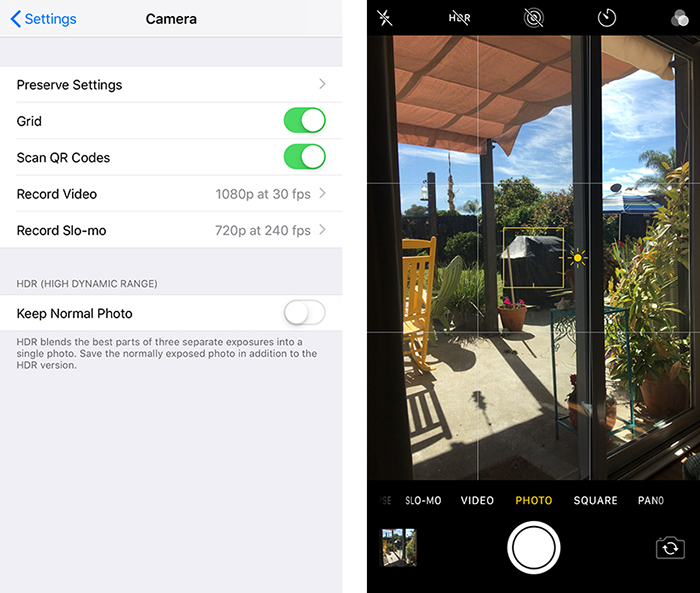
Now, set your camera to ‘M’ and follow the points below.

an image of a stunning coastal cityscape 


Why and How to Shoot in Manual Mode?

Manual mode gives you total control. It is tempting to let the camera control all of the settings. However, when you photograph in automatic mode, the camera will use settings that you might want to change. Moreover, you are not learning anything about photography.

When we talk about settings, we are looking at the exposure triangle. The triangle consists of three camera settings. These are aperture, ISO, and shutter speed. These directly influence how much light comes from your scene. They also add special techniques, such as differential focus and subject freezing.

If you wanted to capture bokeh, you need to know about differential focus and a wide aperture. To capture motion blur, you need to know how to use long or slow shutter speed.

Manual mode lets you harness the camera’s power, allowing you to change the settings as the scenes and subjects change.
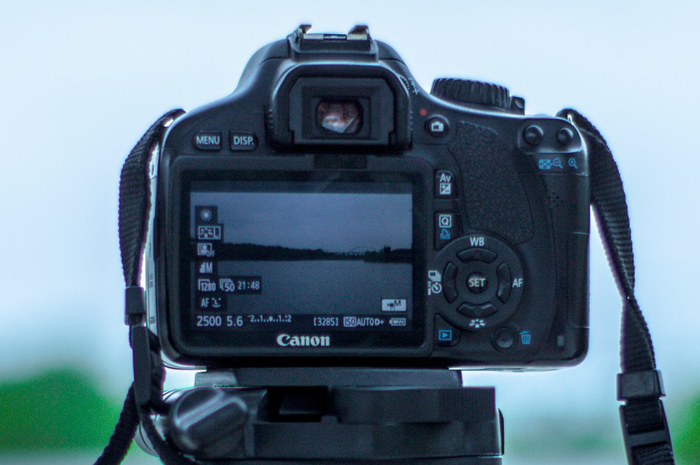
A flat lay of different camera parts

1. Light Meter

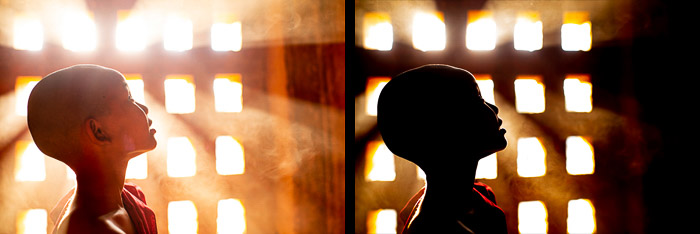
When you look through the viewfinder, you will see a line of numbers at the bottom. They will look something like this: 2…1…0…1…2+ (Canon) or +2…1…0…1…2- (Nikon).

This is the light meter, and when aligned with ‘0’, you know that your photo will come out properly exposed.

This is only if you are going for that specific effect. For example, let’s say that you are correctly exposing one part of a building where the sun hits. The shaded part has some detail, but you want none.

The sunny part of the building is still well lit if you bring the exposure down. So this is what you do to make the shadows (and the entire image) darker.

The light metre is a great guide, but you can use it as you wish. Do not be too dependent on it. Sometimes you do not have to rely on the in-camera light meter as it meters an average or a centre.

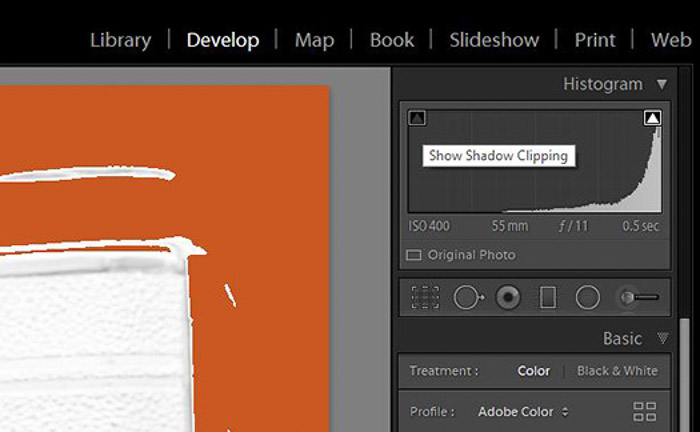
When you are shooting RAW and low ISO and highlight and shadow inequalities, it is always worth going against the rules and underexposes the scene with 1 or 2 stops. You can correct it in Lightroom afterward.

an image of a dslr camera in manual mode

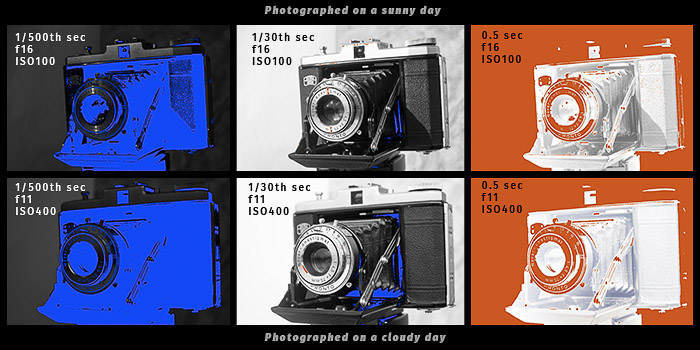
2. Exposure Triangle

The exposure triangle helps us understand more about light.

Apertures rise from f/1.4 to f/2.8 and go all the way to f/22. So shutter speeds could be 1/125 s or 1/250 s and all the way to 1/4000 s. The same goes for the ISO, which jumps from 100 to 200 and keeps going to 3,200.

3. ISO

ISO is your camera’s sensitivity to light, with a typical range of 100-1,600. Some cameras can go as low as 50 or 64 and reach as high as 12,600, but these are found in costly and full-frame camera bodies.

The lower the ISO number, the less light is hitting your sensor.

More light is needed at the lower ranges to get a good exposure, meaning more light for the higher ranges—the lower the number, the better the resolution and quality of your resulting images.

Higher ISO numbers allow you to photograph in low light conditions, yet these settings bring more grain.

DSLR cameras can cope well with high ISO numbers as their sensors, processors, and large pixel sizes can cope with the digital noise. However, as a rule, use an ISO with a value as low as possible.
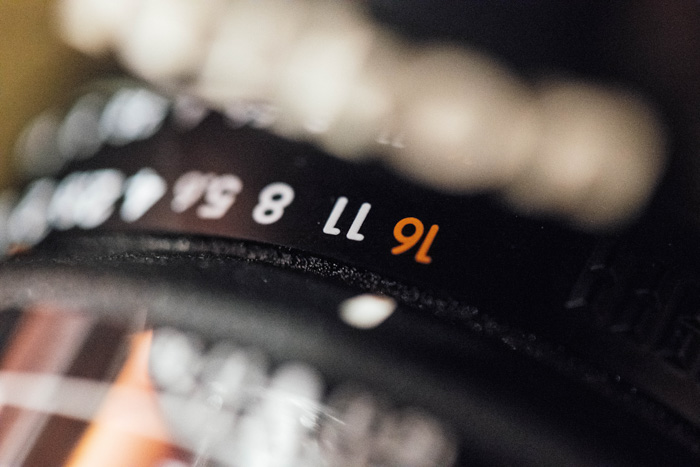
an image of a man walking towards a lake at sunset

4. Aperture

The aperture is the hole inside your lens, which acts as the ‘iris’ similar to your eyes. A wide or low-number aperture, such as f 2/8, will have a very small focal length. This means that only a small part of the subject will appear clear wherever you place your focus.

A narrow aperture, such as f/16, will place the entire scene in focus, as it has a large focal area. Landscape photographers use a narrow aperture to show the foreground and background as clear and sharp.

With a large f-number (narrow aperture), you have to consider the diffraction effect. When this happens, the finest details of your photograph will not be sharp anymore. This is the reason why small details of your photographs blur when using a large f-number.

The lower the f-stop, the more light is allowed to enter your lens, and therefore, hitting your sensor. To keep my ISO value down, to retain quality, I shoot live musicians with a wide aperture. This gives me more usable light.

A high f-stop number gives me less light to play with, which means that longer exposure is needed. To create images with a bokeh background, you would use a wide aperture.
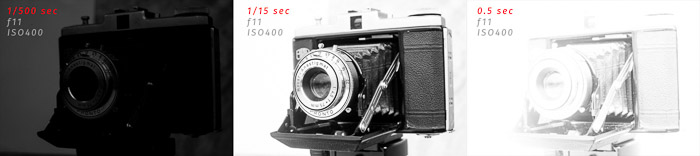
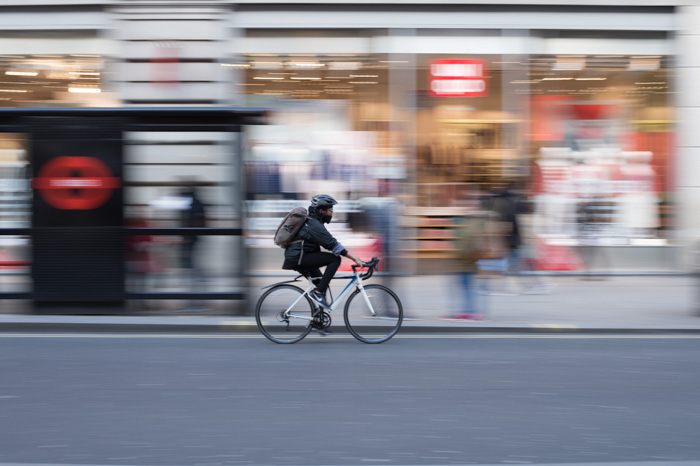
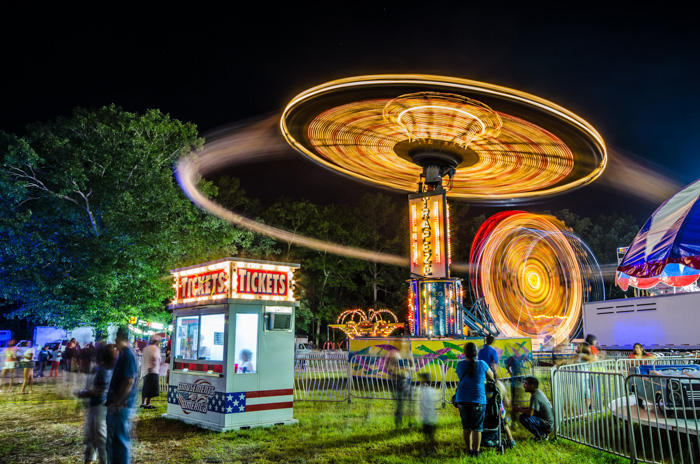
A close up of the manual mode settings on a camera

5. Shutter Speed

Your shutter speed refers to the amount of time your camera’s shutter stays open. The longer it stays open, the more light enters your scene and, therefore, your image.

These numbers are shown in fractions of a second, where 1/250 s is a typical value.

Your shutter speed affects the sharpness of your subject. Slower shutter speeds allow more light and allow more blur from your subjects, especially when you capture motion.

A faster shutter speed lets in less light but gives you a sharper image as the subject is ‘frozen’.

A cyclist riding down a roadway with blurry background behind

6. Combining All the Settings

Well, the numbers do have a pattern, and they are chosen so. Look at the aperture, for example, and see if you can spot it. A typical range would be f/1.4, f/2.8, f/4, f/5.6, f/8, f/16, and f/22. So the numbers almost double every time.

The ones that don’t (f/4 and f/22) are often the previous two numbers added together (or thereabout).

The same goes for ISO, where the numbers double each time. 100 goes to 200, then 400, 800, 1,600 and finally 3,200. Shutter speed follows suit with 1/125, 1/250, 1/500, 1/1000.

Each of these numbers is one stop. They either add or subtract one stop’s worth of light from your image. The reason we show them in a triangle is that they all work together.

For example, you have a correct lighting scene at ISO 100, shutter speed at 1/125 s, and an aperture of f/16. But what happens when the sun disappears behind a cloud? The scene got two stops darker. This means you need to add two more stops of light into your settings for correct exposure.

Atmospheric shot of a fairground ride at night


This is everything you need to know about how to shoot in manual mode and how to take your first photographs with it.

Your aim is to get correct exposure from your scene, and your camera gives you three settings to do so.

These three manual camera settings also let you capture the scene in several different ways. It takes a little time to get confident, but you will be shooting in manual mode in no time.


-------------------------------------------------------------------------------------------------------------

PHOTOGRAPHY FREEBIE:

How to make money with your Photography even if you're not a Pro.

Copy & paste this link into your browser, click ENTER, and enjoy: 

https://mrdarrylt.blogspot.com/2020/01/how-to-make-500-month-from-your.html

_____________________________________________________________________

Play Station $50 code.  Just copy & paste this link into your browser, 

click "ENTER" and follow the easy steps:  bit.ly/3g2Ghhi


Monday, June 21, 2021


Here are a few more of my Pictures.  Yes, these are re-posts, but I like them 
and enjoy sharing them with you.  
 
 
 Got photos you'd like to share?  In the month of  May (last month) we had 190,811 visitors.  So far this month we've already had 305,224 visitors (as of the date of this post).  So don't be shy.  Go ahead and strut your photographic 
stuff for all the world (or at least those visiting this blog) to see.  Keep it "family friendly" please. NO nudes or porn!  Click on the pictures above to enlarge them.  This will give you an idea of how good your photos will look here. And before you go, be sure to take advantage of the "FREEBIE" below. Thanks for stopping by.

-------------------------------------------------------------------------------------------------------------

PHOTOGRAPHY FREEBIE:

How to make money with your Photography even if you're not a Pro.

Copy & paste this link into your browser, click ENTER, and enjoy: 

https://mrdarrylt.blogspot.com/2020/01/how-to-make-500-month-from-your.html

_____________________________________________________________________

Play Station $50 code.  Just copy & paste this link into your browser, 

click "ENTER" and follow the easy steps:  bit.ly/3g2Ghhi


Thursday, June 17, 2021

Best Alternatives to Lightroom – RawTherapee | Capture One | DxO | Darktable

Tags:  Photography for Beginners, Lightroom, Darktable, Capture One


Adobe products are the industry standard for photographers all around the world. But what about alternatives to Adobe Lightroom? Firstly, are there any that can hold water to this organising and editing masterpiece, and secondly, if so, what are they?
For those of you who haven’t tried Lightroom yet, it makes processing your RAW and jpeg images a breeze. It is very user-friendly, holds all your images in its own library and meets most of your editing needs.

NB: The old versions of Lightroom are no longer available. Lightroom (4, 5, 6) has been renamed Lightroom Classic, and only available on subscription. The days of buying (and keeping) the software outright are gone. To use Lightroom CC or Classic, you have to pay.

Adobe Lightroom

Let’s look at what makes Lightroom great. Right off the bat, Lightroom is a RAW converter. It will take your RAW images from your camera and let you see them all immediately.
Why is this a bonus? Well, most computer users will know that previewing RAW images on your desktop is almost impossible. Lightroom lets you see all your images in one handy area. This is great for quickly previewing and culling.
Not only can you edit your images in every way you can imagine (exposure, highlights, shadows), Lightroom also lets you play with HSL (Hue, Saturation, Luminance) in all areas of your image. If using curves is more your thing (like Photoshop), then Lightroom has those too.
Don’t forget to be impressed by the Presence area, which lets you sharpen your images, or add more detail for that retro look.
One of the biggest and most helpful areas in Lightroom is the masking tool. Here, you can single out areas of your image for more selective editing.
If you just want to focus on the background, this is what you should use. Select areas with this tool, and then tweak your image using the editing sliders.
Lightroom has a fantastic amount of things you can do (HDR rendering, panoramas, lens distortion) which we can go into completely here. If you would like to know more, please read our complete guide to Lightroom here.
For a comparison on Lightroom Vs. Photoshop, this is is the article for you.
A person working editing photos at a laptop on a desk - best Lightroom alternatives

Lightroom Vs. RawTherapee

RawTherapee is a high end, open source editing tool that serves as a Lightroom alternative. It has a similar workflow, such as allowing processed images to be sent to other programs for further editing.
It is also non-destructive, meaning the users can retrieve the original file at the click of a button. It is a RAW processor, just like Lightroom. It allows you to see your images immediately, not after clicking through each individually.
What this program falls short in, however, is that it won’t sort your images into folders for you. You need to do it manually or find another way. Once there, you can apply colours and ratings to separate as you wish.
Fujifilm camera users like using this program as their RAW files can be challenging to work with. RawTherapee works well in this area, building a strong network of enthusiasts and followers.
Its interface is like Lightroom, yet it will give you a learning curve to follow. Once you put the time in, you will be rewarded well. The best thing about this program is it’s a free Lightroom alternative and available for Windows, OSX and Linux here.
Overall : ★★★★☆
It is free and very similar to Lightroom, but it lacks in a library, storing your images for efficient editing.
Screenshot of using RawTherapee editing as an alternative to Lightroom

Lightroom Vs. Capture One

Capture One is a program by camera company Phase One. They do things differently, but very professional. If there was one program to use as a direct Lightroom alternative, then Capture One would be it.
It isn’t cheap, but then, neither was Lightroom before the subscription concept. It is an impressive tool and offers a huge feature set, meaning there isn’t much at all that you cant do here.
One huge benefit to Capture One is the ability to import Lightroom catalogs. This is great if you feel some of your selected catalogs need a different idea of tweaking. Also, if you get sick of Lightroom, your time and energy setting up the catalogs are not wasted.
Lightroom is simple and easy to use. Capture One presents your editing tools in a visually appealing manner, which are extensive as they are impressive.
This is a pro editing software tool, not for the faint-hearted. Most users won’t use the full capacity of option available and might find it overkill.
I myself found it a little difficult to navigate as I am very used to Adobe programs, but I easily forget I had the same issue in the beginning with Lightroom. Swapping editing programs will come with a learning curve, as is to be expected.
It is available for Windows and Mac, with a free trial available (before you splash out big time) here.
Overall : ★★★☆☆
Difficult to navigate but beautiful to use. Also, the yearly price was substantial compared to Lightroom.
We have a more detailed article on Capture One vs Lightroom to check out too!
Screenshot of using Capture One for photo editing as an alternative to Lightroom

Lightroom Vs. Darktable

Darktable is almost the exact opposite of Capture one. It is a free Lightroom alternative, open source and looks closer to a Lightroom bootleg than any other program. Like Capture One, it supports RAW files from over 400 different cameras.
Again, it is non-destructive, allowing you to keep the original file and reverting back to it easily.
Something else that is like Lightroom is the array of exporting possibilities. Here, you can export images straight to Facebook and Flickr, or send them directly in an email. A great addition to your chaotic workflow.
Something that Photoshop has but Lightroom lacks (except in copying/pasting of settings) is automating repetitive tasks. This can speed up your editing process significantly.
If you would like to give it a try, downloads for Linux, Mac and Windows are available here.
Overall : ★★★☆☆
Darktable makes repetitive tasks a breeze, and exports directly to websites, yet it doesn’t retain nearly as much detail compared to Lightroom.
Screenshot of using Darktable photo editing software - Lightroom vs Darktable

Lightroom Vs. DxO Photo Lab

Photo Lab by DxO is the third professional software editing program, behind Lightroom and Capture One. It works well as a Lightroom alternative, but it also works well with it, Adobe Bridge or the Apple’s Photos editing application.
What we like is that the editing features are all in one place. This saves time trying to find specific editing tools dotted all over the place. They are easy to use and very responsive, but the best area comes from noise reduction, which is highly rated.
This program comes with the Nik Collection Plugins. This gives you seven amazing preset looks to your images.
The biggest negative here is that you can’t make local adjustments to your images. You need to use another editor for that, which defeats the object of an alternative if you need Lightroom to operate.
Saying that, it does have a few intuitive areas that are similar to Lightroom. The Automatic Repair tool copies the Spot Removal tool. The Control Points, Brush and Graduated Features are also similar, if not the same in Lightroom.
You can find DxO Photo Lab here, giving you a trial before you buy option for Windows and OSX.
Overall : ★★★☆☆
DxO falls short in its ability for local adjustments, yet it is intuitive in the actions it does have.
Screenshot of using DxO Photolab photo editing software - Lightroom vs DxO

Lightroom Vs. Affinity Photo

Affinity Photo calls itself the future of photo editing. It has a huge toolset, specifically designed for creative and professional photographers alike. It provides you with the capacity of local adjustments, but it also allows you to create full-blown multi-layered compositions.
This makes it sound like a Photoshop and Lightroom alternative.
Like Lightroom, you correct and enhance images with Levels, Curves, Blacks and Whites, White Balance, HSL, Shadows and Highlights. Also, they are non-destructive tools, allowing you to switch back to the original image.
Affinity Photo also provides an advanced lens correction system and a great noise reduction tool.
What really makes this a great software choice are its extras, where others on this list fall behind. HDR merging, Panorama Stitching, focus stacking and batch processing are all possible. There is nothing you can’t do.
The only negative point I came across was the import time. Lightroom imports your images fast, provides you with a preview while it works in the background. Affinity Photo takes a long time to process hundreds of images. This means you can’t do anything until its finished.
Available for OSX and Windows here, and there is a free trial allowing you to test drive the software beforehand.
Overall : ★★★★☆
Affinity Photo was slow compared to Lightroom, but in other areas, it gives Lightroom competition.
Screenshot of using Affinity Pro photo editing software - Lightroom vs Affinity Pro

The chances that you already use software is high. Either you use an older version of Lightroom or Photoshop or even use Apple’s Photos app for very simple adjustments. We recommend that you use anything rather than nothing.


-------------------------------------------------------------------------------------------------------------

PHOTOGRAPHY FREEBIE:

How to make money with your Photography even if you're not a Pro.

Copy & paste this link into your browser, click ENTER, and enjoy: 

https://mrdarrylt.blogspot.com/2020/01/how-to-make-500-month-from-your.html

_____________________________________________________________________

Cash App Earn Money. (to buy more photo gear)  Just copy & paste this link into your browser, 

click "ENTER" and follow the easy steps:  bit.ly/3g2Ghhi


Monday, June 14, 2021


How Do You Know If an Image Is Underexposed or Overexposed

 Tags:  Photography for Beginners, Image 

Underexposure or overexposure can happen when your camera is not set correctly. Most often on any auto mode, modern cameras will not produce images with extremely poor exposure.
In these series of photographs, I have purposely used settings to demonstrate:

  • underexposure,
  • correct exposure,
  • and overexposure.
A triptych of an old film camera demonstrating underexposure, correct exposure, and overexposure in photography
© Kevin Landwer-Johan

I photographed this camera outdoors on a cloudy day. The tone range between the darkest and brightest parts of the photo is not extreme. In the middle photo, only a few highlight areas appear a little overexposed.
Wherever you stand on the issue of correct exposure, you should know how to tell if a photo, or parts of a photo, are underexposed or overexposed. Overexposure occurs when your camera’s sensor doesn’t record any details in the brightest parts of an image.
Underexposure occurs when your camera’s sensor doesn’t record any details in the darkest parts of an image. Your camera is able to display information about detail loss. Or you can see it in software such as Lightroom and Photoshop.
The histogram is an easy way to view the exposure information or exposure level on your camera or computer monitor. Histograms show you a graphical representation of the tonal values in your photo.
If your histogram graphic is showing a spike at the left or right edge this represents high contrast. You have underexposed and/or overexposed pixels. There will be no detail visible in the extremely dark and/or light parts of the image.
Your camera may also have a highlight alert option for when you are reviewing your photos. This is also known as the ‘blinkies’. In this view mode, you will see the areas of your photo with no highlight details flashing.
Some cameras will allow you to manually set a limit for when the highlights will blink so you must check this is set correctly.
This information will help you discern if your exposure is acceptable to you. I do not believe that having detail visible in all the highlights and/or dark areas is necessary for every photo I make.
Screenshot of a well exposed image of fishermen beside the histogram
Here is a good example, I wanted the fishermen in this photo to appear as silhouettes. I also knew there would be no detail in the sun.
The contrast range in the composition is just too great for my camera’s sensor to record detail in both the darkest and brightest areas.
You can see the histogram spike on both the left and right showing there is no detail in the shadows and the sun. I still consider this photograph to be well exposed.

What Range of Tones Can Our Cameras Record

Our eyes can see a broader range of tone than most cameras currently available can record. The human eye is capable of seeing about 30 stops of light. This is the ‘static contrast range.’
At any one time, we can only see about ten stops of light. This is the ‘dynamic range’ of our eyes as it changes over time. Our brains constantly make adjustments so what we see is ‘well exposed.’
Modern digital cameras (like Nikon, Canon, etc.) vary in how many stops of light they can capture. The best full frame cameras only capture 13 to 14 stops in test situations. Some claim this differs in ‘real world’ or ‘real life’ situations.
The most extreme range is limited to the lowest ISO setting. At higher ISO settings the dynamic range is reduced.
This photo of a market vendor in Mandalay, Myanmar, contains detail in the majority of the image because the tone range is not so broad.

Correctly exposed portrait of a market vendor in Mandalay, Myanmar
© Kevin Landwer-Johan

No matter what camera you are using, you need to make decisions concerning proper exposure. Taking photos in high contrast situations, when the light is harsh and bright, you need to make more careful choices.
Your eyes may be able to see detail in the highlights and shadows, but your camera may not be able to record as much as you can see.

How Do You Choose Your Exposure

To make a choice of how your photos are exposed, it is a requirement to be in control of your camera.
I prefer to set my exposure using manual mode, not in program mode. This gives me more control and accuracy with the camera settings and exposure adjustment than if I am using any of the auto exposure modes.
When the camera is in any of the auto or semi-auto exposure modes it is programmed to give a correct exposure based on middle grey.
Unless you override these settings you will not have so much control over how your photo is exposed. In high contrast situations, the camera on auto would probably expose the photos unsatisfactorily.
This photo of fishermen on Inle Lake in Myanmar may have resulted in an exposure like this with an auto exposure setting.

A portrait of fishermen on Inle Lake in Myanmar at sundown
© Kevin Landwer-Johan

Including the sun and the sun’s reflection in my composition increases the tone range dramatically.
The digital sensor cannot record detail in the brightest and darkest areas in the same exposure because the tone range is too broad.
I chose to expose this photo so there was some detail in the shadow areas and none in the sun and its reflection.

A portrait of fishermen on Inle Lake in Myanmar at sundown
© Kevin Landwer-Johan

I used my spot meter to read the light from the fisherman’s trousers who was closest to me. My exposure was at 1/2000 sec, f8 and ISO 400, which was a little less than my exposure meter indicated as correct.
I chose to underexpose a little so the two men appeared somewhat as silhouettes.
In high contrast situations particularly, you must carefully choose how you make your exposure reading. This will influence whether your photo is well exposed in the most important parts of the composition or not.
In this photo, I wanted some detail in the men and water. I also wanted some colour in the sky. That is why I took the exposure reading from his trousers. These were a fairly neutral tone.
Had I taken a spot meter reading from his white shirt with the aim of seeing it white in my photo, most of the photo would then be overexposed.
Even though his shirt is white, because the sun is behind it, all I can see of it is in shadow. The shirt will not show as being clean white because it is reflecting less light than if the sun was behind me.
Find a mid-tone to make a reading from. This will help you choose the best exposure settings for your image.

What Is Middle Grey and Why Is It Important

Middle grey is the tone halfway between black and white. Exposure meters are calibrated to this standard tone. When you compose a photograph and there are extremely light and dark areas you will not have an exposure which is overall correct.
You will have loss of detail in the highlights and/or dark areas. This is because the light value in those areas is too far removed from middle grey.

A screenshot of three exposures of the same subject with hard lighting, and three in soft lighting
© Kevin Landwer-Johan

Here is an example with three exposures of the same subject with hard lighting, and three in soft lighting.
I have taken screen grabs from Lightroom with the highlight and shadow clipping turned on the Develop Module.
A screenshot of correcting exposure in the develop module in lightroom
I took all the top row photos at f16 and ISO 100 and I varied the shutter speed.
The bottom row photos, made on a cloudy day, show the differences when photographing in lower contrast conditions. I took those at f11 and ISO 400 with shutter speeds corresponding to the top row of photos.
The orange represents overexposed areas. The blue represents underexposed areas with no detail recorded.
The middle photos are the closest I could get to an exposure with minimal highlight or shadow detail lost.
You can see some detail loss in the darkest areas. There’s also a tiny amount of highlight detail lost on the lens.
How much detail you lose or keep varies from camera to camera, depending on the quality of the sensor. Modern sensor technology allows you to capture a much broader range of tone either side of middle grey.
This means less chances of overexposed and underexposed photos. A modern sensor is able to record more detail in darker and lighter areas of a composition.

Use Underexposure and Overexposure For Mood

You can influence the feeling conveyed in your photos by purposely choosing how your set the exposure.
Underexposing part of a photo can create more drama and intensity in a photograph. Overexposing will produce a much softer, gentler look and feel.
Look at these two very different exposures of this frangipani flower.

An underexposed photo of a frangipani flower
© Kevin Landwer-Johan

My exposure settings of the lighter image were 1/60th of a second, f2.8 and ISO 400. I exposed the darker image at 1/250th of a second, f2.8 and ISO 400.
I also post-processed them differently to accentuate the different mood I wanted to convey.

An overexposed photo of a frangipani flower
© Kevin Landwer-Johan

Boost It in Post

Modern camera sensors are so much more capable of capturing a broad tonal range than film ever has been able to.
This means that if you want to render images as underexposed or overexposed you may need to use post-processing techniques to assist you in the amount of light that you want to have.
In Lightroom and similar photo processing software you can accentuate the contrast levels. Drag the Black and the Shadow sliders to the left to make dark areas of a photo darker. Sometimes the Dehaze slider will help darken up an image.
Dragging the Exposure slider to the left will affect the whole of the image. Adding contrast in this way will make photographs look as if parts or the whole picture is underexposed.
Be careful if you are making extreme changes. Taking any of the sliders to their extremes can cause an image to start breaking down or prevent you from having a realistic image. Visible posterization can appear in dark areas which are not completely black.
This photo of a novice monk in a temple in Baga, Myanmar, I measured the exposure from his face. In the original on the left, there is detail visible in his skin and much of the background.
When I post-processed the photo I added contrast by using the dragging the sliders in Lightroom as outlined.

A diptych portrait of a novice monk demonstrating overexposure vs underexposure in photography
© Kevin Landwer-Johan

Alternatively, dragging the Highlights and Whites sliders to the right will brighten the lighter areas in an image.
Similarly, you can use the Dehaze slider, dragging it to the left. Dragging the Exposure slider to the right will lighten the entire photo.

Any reasonable quality digital camera is capable of producing an acceptably correct exposure.
Choosing the darkest area of a composition to make an exposure reading from can mean the lightest areas of the photo are overexposed.
Choosing the lightest area of the image to make an exposure reading from can mean the darkest parts will be underexposed.

An underexposed photo of a cow at a temple
© Kevin Landwer-Johan

If you want to make perfectly exposed photographs all the time, you need to consider the contrast range. That is one of the most important photography tips for good exposure.
Compositions that are entirely low contrast give you an even exposure more easily. With high contrast, you’ll have a harder time getting an evenly exposed photograph.
Concerning yourself too much with making perfectly exposed photographs can lead to rather dull images. If there’s little contrast, the mood will also be missing.


-------------------------------------------------------------------------------------------------------------

PHOTOGRAPHY FREEBIE:

How to make money with your Photography even if you're not a Pro.

Copy & paste this link into your browser, click ENTER, and enjoy: 

https://mrdarrylt.blogspot.com/2020/01/how-to-make-500-month-from-your.html

_____________________________________________________________________

Cash App Earn Money. (to buy more photo gear)  Just copy & paste this link into your browser, 

click "ENTER" and follow the easy steps:  bit.ly/3g2Ghhi


Saturday, June 12, 2021

... a few shots taken in Forest Park, St. Louis, Missouri

Tags:  Photography for Beginners, St. Louis, Missouri


The temperature today hit 94 degrees. Still, it was a pleasant day for photography until I found this.  
I will never understand how people manage to miss four trash cans, and leave their trash on the  ground...in a Public Park. 
 
 Got photos you'd like to share?  In the month of  May (last month) we had 190,811 visitors.  So far this month we've already had 173,902 visitors.  So don't be shy.  Go ahead and strut your photographic 
stuff for all the world (or at least those visiting this blog) to see.  Keep it "family friendly" please. NO nudes or porn!  Click on the pictures above to enlarge them.  This will give you an idea of how good your photos will look here.  'til next time, happy shutter bugging!   


-------------------------------------------------------------------------------------------------------------

PHOTOGRAPHY FREEBIE:

How to make money with your Photography even if you're not a Pro.

Copy & paste this link into your browser, click ENTER, and enjoy: 

https://mrdarrylt.blogspot.com/2020/01/how-to-make-500-month-from-your.html

_____________________________________________________________________

Cash App Earn Money. (to buy more photo gear)  Just copy & paste this link into your browser, 

click "ENTER" and follow the easy steps:  bit.ly/3g2Ghhi


Friday, June 11, 2021

How to Take Good Instagram Photos

 Tags: Photography for Beginners, Smart Phone Photography

4 Simple Smartphone Photography Tricks That Work for Instagram

Phone cameras are impressive these days. Before all else, get familiar with tools at your disposal that will make a big difference in your photos.

Avoid Using HDR Mode

Using HDR mode can make photos look fake and over-processed. With Instagram, it’s all about looking naturally gorgeous.

Underexpose Your Photos a Bit

Highlights get easily blown out on phone cameras. It becomes impossible to bring any detail to those highlights in your editing. To avoid this, underexpose the photo a bit. Brightening up shadows is much easier than trying to get detail in a blown out window. To underexpose, touch and hold a bright spot in your image for your camera to adjust its exposure setting.

Use the Grid

Turn on your phone’s grid to help guide your compositions. You can find the grid in Settings > Camera.

Adjust the Exposure Manually

You can touch and hold to select a point of reference for exposure, but you can then select to raise or lower the exposure manually!

When you touch and hold, a yellow box appears in the reference area for exposure. Next to the box, you’ll see a sun and a vertical line.

Touch and drag the sun up or down to manually adjust exposure.

Plan Your Posts Ahead of Time to Ensure Consistency

Each individual photo needs to be eye-catching. But you also need to consider the overall look and feel of your Instagram feed.

Are there certain colors, patterns, or themes that run throughout every photo? Keep your feed’s branding in mind when you’re taking a photo and editing it.

To avoid any bad decisions in the spur of the moment, it’s a good idea to plan out your posts ahead of time.

Even planning out a general idea of what you’ll post will help to create some consistency for your audience.

A triptych of cool instagram photos
Consider your feed and the look or feel you want to create.

Use Natural Light to Stay Authentic

Instagram is not just about beautiful photos. It’s also about authenticity. Photos that look natural will automatically feel more authentic to the viewer.

Whenever possible, avoid using flash or artificial light. Instead, take full advantage of natural sunlight.

Your photos will feel more natural. And sunlight can also create beautiful effects that can’t be mimicked by flash (such as sun flares).

Even cloudy days can create beautiful images. Don’t get discouraged by gloomy skies!

A smartphone screenshot of a portrait of a female model on Instagram feed - how to take good instagram pictures
Natural light will always feel the most authentic, so take advantage of sunlight!

Photography During the Golden Hour for a Soft Look

Speaking of natural light, the time of day is going to be crucial. Early morning and late day light is golden, soft, and creates a magical feel.

Midday light is bright. It lends itself to more contrast and has cooler tones.

If you’re looking to get a specific effect, you may need to visit the location where you want to shoot to make sure to be there at the perfect time.

A smartphone screenshot of a landscape photo on Instagram - how to take good instagram pictures
Good timing can take a photo from just pretty to pretty amazing.

Best Compositions for Instagram Photos

Do you want your subject in the dead center? Or is your subject peeking in at the edge of the frame?

Here are a few ideas for composing your photos for more impact.

A smartphone screenshot of changing composition settings on Instagram - how to take good instagram pictures

  • Rule of thirds. This is a classic rule of composition. Place your subject along one of the lines of a grid that divides the image into nine even spaces. Make sure to turn on the grid feature on your phone. The grid overlay will help you out!
  • Leading lines. Elements that create strong lines can direct your eye to the subject of a photo. These leading lines add interest and help to immerse the viewer. A common way to create a leading line is by using a path or dirt road. This will point your viewer to the subject.
  • Negative space. Negative space is the empty space around a subject. Leaving a large amount of negative space in the photo can emphasize scale, simplicity, or emotion.
  • Symmetry. Symmetry is an instant way to add impact to a photo. Be sure to take the photo straight on, rather than at an angle. This will make the symmetry as perfect as possible.
A smartphone screenshot of a cool portrait on Instagram - how to take good instagram pictures
The bridge creates a strong leading line to the subject in the yellow rain coat.
A smartphone screenshot of a minimalist landscape on Instagram - how to take good instagram pictures
Negative space above the trees makes this a strong image of a simple setting.
A smartphone screenshot of a cool portrait on Instagram - how to take good instagram pictures
Symmetry is created with the steps and arches, and the subject in the center helps to add scale without throwing off the symmetry too much.

Use Perspective to Add Depth to Your Images

Not everything interesting is right in front of you! Don’t miss opportunities that are all around. Look up, look down, look behind you.

Changing perspective and finding unique angles to familiar things can spice up an otherwise boring photo.

Consider moving closer to your subject, too. Photography a subject up close will emphasize the distance between it and the background. This will add depth and interest.

A smartphone screenshot of a cool portrait on Instagram - how to take good instagram pictures
Look up, down, or behind you to change your point of view!

Editing for Instagram

There are more Instagram filter apps than ever before for editing your photos on your phone! You can always edit within Instagram itself. But the editing tools are more limited.

Some other great photo editing app options are:

  • Snapseed has an impressive variety of tools to edit photos. The interface is also very user-friendly.
  • VSCO is a modern take on editing. It has clean and trendy filters you can apply and adjust. Known for a strong community, VSCO is a top option for serious Instagrammers.
  • A Color Story is all about bright whites and pops of color! If that fits with your feed’s look, then this is the perfect app to try.
A smartphone screenshot of editing photos on Instagram - how to take cool instagram pictures
Snapseed’s tools are easy to use and varied.

No matter what app you use for editing, be sure to check exposure, clarity, contrast, and color (saturation, light temperature, tint). Then move on to more creative adjustments.

When applying your edits, stay consistent with the look of your brand. That way your feed will have a coherent flow.

To save time, you can edit a batch of photos at a time. That will make planning ahead much easier, too!

Cell phone cameras these days can create beautiful Instagram-worthy photos, but only if you know how to use them.


-------------------------------------------------------------------------------------------------------------

PHOTOGRAPHY FREEBIE:

How to make money with your Photography even if you're not a Pro.

Copy & paste this link into your browser, click ENTER, and enjoy: 

https://mrdarrylt.blogspot.com/2020/01/how-to-make-500-month-from-your.html

                                                         or

https://www.photography-jobs.net/?hop=darryl54

 -------------------------------------------------------------------------------------------------------------

-------------------------------------------------------------------------------------------------------------

Need a camera?  Try this link (Tri State Camera) for discounted prices: 

 https://ebay.to/2Smb1ho

_____________________________________________________________________

Cash App Earn Money.  Just copy & paste this link into your browser, 

click "ENTER" and follow the easy steps:  bit.ly/3g2Ghhi