Monday, May 29, 2023

#Amateur Photographers, Basic Photography

The 5 Levels of Amateur Photographers (Which are You in?)

Many amateur photographers quickly lose interest in photography. They can struggle to get started or get easily frustrated. This is especially true for those who make the leap to DSLRs. It’s much harder than it seems to capture what you see.

Digital SLRs are very popular these days, but most people seem to be unaware of the effort it takes to master photography.

Wondering how far you are from becoming a professional photographer? I’ve put together a little guide of the five different levels that you pass on the way. Read through and leave a comment below, letting us know where you’re at!


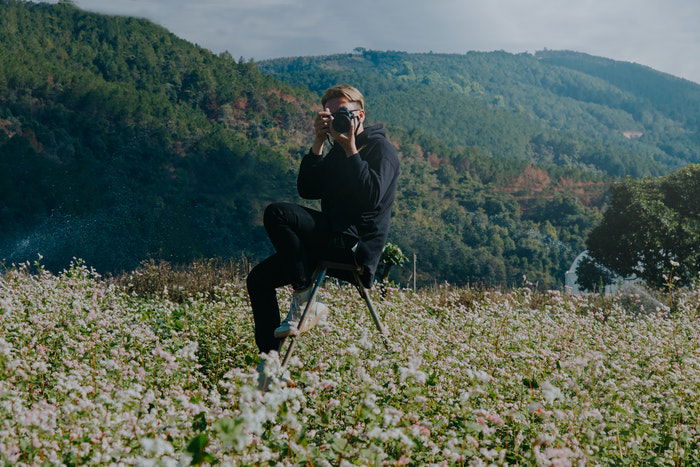
Level 1 – The Blind Amateur Photographer

  • You’re very new to photography, unsure of how any of it works, and you’re not very good.
  • You spend the majority of your time shooting on Full-Auto mode, and some of the presets, such as ‘portrait’.
  • You bought your camera a few years ago, but don’t remember really using it in the past year or so.
  • Photography isn’t what you thought it would be, and you’re not in any real hurry to learn more.
  • You would be happy if you could just capture what you see.Cute little girl with a camera sitting on a bed 
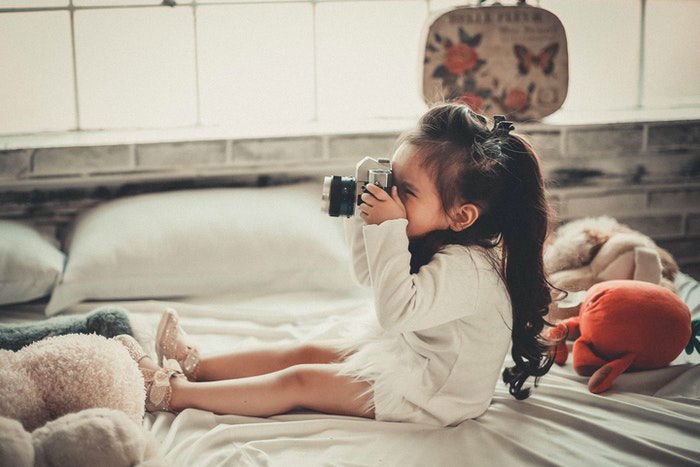
  • Photo by Kha Ruxury from Pexels

Level 2 – The Confused Amateur

  • You know to not use full auto mode, but your knowledge of the other dials is pretty minimal.
  • You tried learning aperture once, but you can’t remember whether a higher number gives you more or less light, and what a shallower or deeper DoF is.
  • You stopped using pop-up flash, claiming you don’t like flash photography, not realising there was much more you could do with the right gear.
  • You want to learn, but again, you don’t know where to start.
  • You buy the wrong gear, such as an 18-270mm when you should have purchased a 35mm f/1.8.
  • You’re using free editing software which will come back to bite you.
Photo of an outdoors fashion shoot
Photo by LĂȘ Minh from Pexels
 

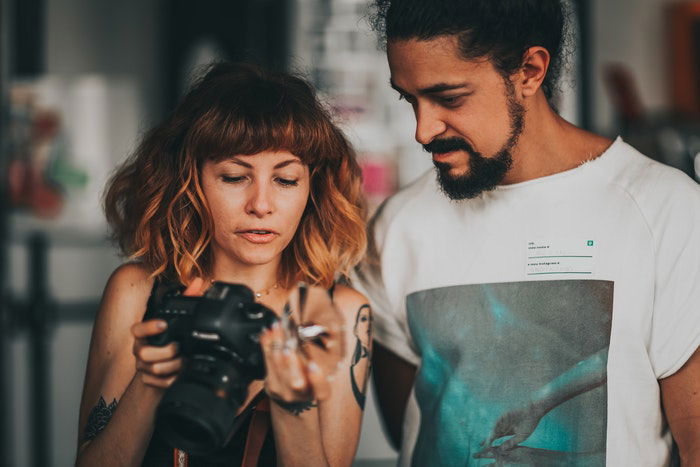
Level 3 – The Promising Amateur


You have a full understanding of how exposure works, after finding some direction.
  • You go out for the simple purpose of taking photos, and nothing else.
  • You’ve taken some great photos recently. You look back at your pictures from a year ago and wonder why you liked them so much.
  • You start to carry your camera with you more, seeing more opportunities to take a photo.
  • You’re finally investing in the right gear, and this includes quality post-processing software.
Amateur photographer in a field of flowers
Photo by Min An from Pexels

Level 4 – The Wise Amateur

 
  • You finally know everything you need to about your camera, such as metering modes and white balance, leading you to take better photos.
  • You’re starting to build a good portfolio or strong images.
  • You realise the importance of an external camera flash and start using one more often, learning how it works.
  • You’ve found the niche that you have the most fun with, and you’ve started to excel in it, leaving other niches behind.
  • People start to ask you to bring your camera. Whether it’s to a party or a gathering, you’re known for taking good photos.
  • You’ve had a taste of quality photography gear, and you want more of it.
Woman holding a camera and showing the screen to the man next to her
Photo by Matheus Bertelli from Pexels

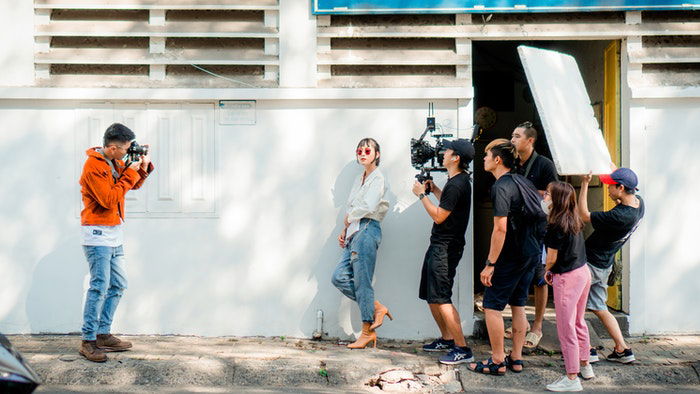
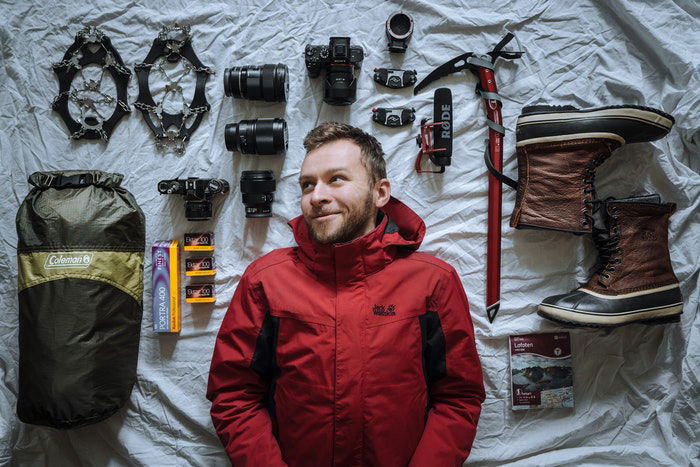
Level 5 – The Obsessive Amateur

 
  • You’ve moved on to more advanced techniques. These challenge you further and increase your skills.
  • Perhaps you’ve invested in a way to take your flash off-camera. This is difficult to learn but will improve your photos.
  • You’ve started to teach your friends too, who are only at level 2.
  • You excel even further in your niche. If you’re into fashion, you start working with makeup artists and models. If you’re into landscapes, you start traveling more to find them, etc.
  • You’ve been noticed, and offered your first photography job.
  • You start to seriously consider photography as at least another way to earn a living.
  • Your camera has become like an extra limb to you.
Man laying next to camera equipment laid out on a bed
Photo by Simon Migaj from Pexels

There’s a process that every amateur photographer goes through before reaching the pro level. Although it’s by no means an exact science, you can see that some steps can’t be missed.

-------------------------------------------------------------------------------

What Makes a Good Photo? – Free Quick Guide


Since photography is an art and also a commercially viable product, there are numerous answers to this question.

What makes a good photo in one respect might not be so good in another. Or not be so good in someone else’s eyes.

However, there are general standards in each genre of photography that are considered essential for creating a good photograph.

This guide will examine a few important attributes of the following photography genres that help make a picture good.

Here are the genres covered:

  • Portraits
  • Street Photography
  • Sports
  • Landscapes
  • Close-up and Macro
  • Architecture

Click below to grab your exclusive copy and enjoy!

Photo Credit: Kent DuFault


Sunday, May 21, 2023

 #Basic Photography,

Types of Portrait Photography You Should Know

Today, we’re going to guide you through various portrait ideas. There are many different types of portrait photography to experiment with.

Portrait photography is about capturing people and their personalities. But portraits often go beyond a photo of a smiling person. So, get creative and find the genre that fits your subject! 

1. Traditional Portrait Photography

A traditional portrait often depicts the subject looking at the camera. Classic portrait photography is posed. It helps people look their best. Photographers usually shoot conventional portraits in a studio with a formal photography backdrop.

This genre also tends to favor the most traditional portrait composition. This means the head-and-shoulders crop rather than a full-body portrait. But that’s not always the case.

Traditional portraits usually come to mind when thinking about the portrait genre. This type of image has been around for a long time. But it remains popular because combining poses and studio lighting creates flattering images.

A sub-genre of the traditional portraits are formal portraits. They apply the same poses and studio setting but wear formal or business attire.

Traditional portrait of a woman posing in front of a pink background

2. Lifestyle Portrait Photography

Lifestyle portraiture is the polar opposite of traditional portraits. Yes, it’s still a portrait of a person (or many people). But lifestyle portraits capture people in an everyday environment, often doing ordinary things.

This photographic genre works in an environment familiar to the subject instead of a studio. For example, you can take lifestyle portraits in someone’s home. Lifestyle portraits aren’t posed in the traditional sense.

A lifestyle photographer often has a limited time frame to capture a series of portraits. Plus, lifestyle photographers will usually direct the subjects. For example, they may ask siblings to jump on a bed or ask a family to give each other a group hug.

Clients that choose lifestyle photography like the genre because it resembles real life. Lifestyle family photography also captures the interaction between family members. This way, you can create some touching memories.

Three women wearing face masks for a lifestyle portrait

3. Fine Art Portrait Photography

The fine art portrait genre is controversial. Artists debate what classifies something as fine art. Fine art portraits can include anything. You often see artists use visual techniques to make their images pleasing to the eye. The characteristics of fine art portraits come down to context, concept, and storytelling.

Jovana Rikalo is a great artist for fine art portraiture inspiration. She creates her own universe. And you, the viewer, get to decide the narrative and context of her characters.

The secret to fine art portraits is to get creative. Try out-of-the-box photography techniques that make sense in your head!    

------------------------------------------------------------------------------


Flash vs. Natural Light: Comparing and Contrasting Techniques for Portrait Photography – Free Quick Guide   

Download Your Free Guide Now →                                                                               
                                                                                               

                                                           Advertisement:


                               I blame BIDEN!         Unisex Classic Pullover Hoodie 


                      State your beliefs about the economy without saying a word.


                                         I blame BIDEN shirt    Click Here  


Friday, May 12, 2023

 #Photography Basics, Photography Tutorial

My photo  

by Darryl T.

Photography Life

Articles about photography can be interesting - but boringly long.  Photography Tutorials have the same problem.  While researching photography resources, I stumbled across a digital "gold mine" of photography tips.  It's called "The Open Library".  You can literally access dozens of photography tips, tutorials and related resources FREE of charge.  Below are some of the many titles available to you.

Cover of: Practical photography by McCoy, Robert A.   Cover of: Photography by Henry Horenstein, Russell Hart   Cover of: Advertising photography by Allyn Salomon  Cover of: Photography (Teach Yourself)    Cover of: Digital photography by Tom Ang  Cover of: Digital photography for dummies by Julie Adair King   Cover of: The technique of bird photography. by John Warham   Cover of: Wedding Photography. by Jonathan Hilton Cover of: Outdoor Photography 

Remember, these are just a few of the dozens of "photography for beginners" titles available FREE of charge.  In addition to posting free photography life articles on my blog, I love finding "best of" freebies for my readers to access.  Enjoy, and feel free to pass these along to your friends on social media. You can find them here: 

https://openlibrary.org/search?page=8&q=Photography&mode=everything 

--------------------------------------------------------------------- 


(Shameless Plug:  Be sure to check out my videos near the bottom of this page.  If you like what you see You can visit my Photography video site on Rumble.com via this link: 
https://tinyurl.com/4hs6br2n 
While you're there, please smash the "follow" button so you'll be notified when I post new content.  Thanks for watching).  

 #Basic Photography


10 Film Cameras in 2023

These are 10 film cameras that are widely respected and much loved by the film photography community. There are plenty of other cameras that I could add to this list, but 10 is more than enough for most people’s camera collections.
I get into the habit of buying too many, and then only using my favorites, so trust me, 10 is enough. The list is also narrowed down by format, because although I’d love to put a polaroid camera on there, it’s near impossible to find film for them!
If you’d like to learn more about film photography, click here, or here.

10 of the Best Film Cameras

Olympus Pen

When I was putting this list together, I was trying to decide between the Olympus Pen, Trip, and OM-10, all of which are excellent and notable cameras. I decided on the Olympus Pen though because of its unique format.
It takes 35mm film, but it will take 72 exposures on a single roll of 36 exposures. How? It’s half frame. You point the camera at a landscape, and it takes a portrait photo, taking up just half of the frame.
It was the first half frame camera produced in Japan and was considered portable, hence the name, Pen.Olympus Pen - must have film camera
There are many different versions of this camera, the majority of which are rangefinders (remember to take the lens cap off!), but there are also some SLR versions called the Pen F. These cameras are great fun and one that I’ve owned for a couple years now.
They’re so legendary in fact, that you’re probably familiar with the digital reproduction, even if it doesn’t stay true to the original half-frame format.

Nikon F

The Nikon F first appeared in 1959, as Nikon’s first SLR camera. It marked a change of direction for the company, moving away from rangefinders, into what they saw as the future; SLR.
A huge range of lenses soon became available, as well as accessories, such as remotes, flashes, bulk film magazines, scientific attachments, and even a polaroid back.
The camera has a good reputation of being well made, reliable and easy to use, with a wide range of high quality lenses. It’s really the lenses that sell any camera for me, and with the bayonet mount on the Nikon F, the selection was (and still is) vast.Nikon F - must have film camera

Canon AE-1

The Canon AE-1 was produced by Canon for nearly 10 years, which sounds a bit absurd when you consider our throwaway culture these days, but that’s just down to how good, and how popular this camera was.
Originally produced much later than the Nikon above, in 1976, it was Canon’s first affordable TTL (Through The Lens metering) cameras, which added autoexposure modes as well as shutter-speed priority, which we’re all familiar with today.
Because of the low cost, and added features, it became one of the most popular cameras of the time. This means it’s not hard to find them today.Canon AE-1 - must have film camera

Hasselblad 500C/M

With the exception of the shape, this was a completely new camera for Hasselblad. It changed how the camera worked with a new shutter which would allow flashes to sync at all shutter speeds.
The whole idea with Hasselblad is that it’s interchangeable, and with 6 different lenses, 4 film backs, and 4 viewfinders, there were plenty of options available.
The 500 series was first introduced in 1957, but it wasn’t replaced until the 500C/M came into production in 1970, bringing with it an interchangeable focusing screen and an improved automatic back.
Hasselblad are synonymous with quality and they make some of the most expensive cameras available today, in digital format. There’s even a few Hasselblads in space still from the Apollo missions.
Trusted for their quality, they were popular in their day, and coveted now, only slightly harder to use. They take 120 film, which only takes 12-16 exposures on a roll, and development can be expensive and annoying.
Hasselblad 500C/M - must have film camera

Pentax K1000

If you’re looking for bells and whistles, then look somewhere else. This camera was aimed towards the amateur photographer market, and it was first introduced in 1976. It continued to be manufactured for over 20 years, even though it was out of date by the time it was released. Why?
Because there was no program mode, nor aperture or shutter priority, or even a self-timer, mirror lock-up, or DoF preview. These were very popular cameras with students because they were cheap, a great way to learn, and lasted for ages.
There’s plenty around, so finding one shouldn’t be a problem.
Pentax K100 - must have film camera

Widelux

Compared to the other cameras on this list, it’s nowhere near as famous but has a real wow-factor in my books. It’s a panorama camera which takes 35mm film, which works by swinging the lens from one side of the camera to the other.
If you follow the actor Jeff Bridges, then you may be aware that he’s an avid photographer who uses one himself. He even published a book full of photos in 2004.
They’re good fun, and cost between $500-1000 on eBay. Their 150-degree viewing angle makes for some awe-inspiring photos, even if the camera itself is a little hard to use.Widelux - must have film camera
eBay price: $500-$1000

Holga

With the regeneration of film photography and iPhone apps that mimic the same effect, such as Hipstamatic and Instagram, Holga has taken on a whole new lease of life, along with a very similar rival camera, the Diana.
Both are part of the Lomography movement, using cheap plastic lenses and film to produce some very interesting effects. Like the Hasselblad, it uses medium format 120 film, which is annoying to get developed, but there’s also a 35mm version available now.
The cheap manufacturing produces vignetting, light leaks and blurs, which has helped people to fall in love with the nature of film photography again.

Leica M4

What can I say about the Leica M4? It’s an absolute classic and a symbol of quality for film photographers everywhere. But it ain’t cheap. It was first introduced in 1967, it’s a rangefinder camera with a home in every good, self-respecting photographer’s collection.
The name Leica alone is synonymous with quality, but the M4 makes the name much more notable. The camera continued to be produced until 1975, but the market for Leica’s has such high demand. With not too many people really wanting to sell theirs, you’re looking at around $2000 for one.Leica M4- must have film camera

Rolleiflex E TLR

The Rolleiflx E TLR (Twin Lens Reflex) is very different in design to most modern cameras because it requires you to look straight down towards the ground and into the camera, to see a projection of the image.
Two lenses are used, the first is used to capture the image onto film, and the second is used to display the image to the photographer.
This particular model was first produced around 1956, and looks like a typical grandpa camera, with its old styling and Zeiss lenses. Look for the 2.8 models, which incorporated an f/2.8 aperture, which allowed for more light into the lens. A true must-have.Rolleiflex E TLR - must have film camera

Minolta SR-T 101

This is a camera close to my heart, and one that I’ve owned two of. The first one was dropped and damaged the light meter, so I replaced it while waiting for it to be repaired.
It was first brought into production in 1966 and was produced for 10 years, with only very minor changes. The easy-to-use light meter in the viewfinder makes exposure very easy. And the pin sharp lenses make for some spectacular images.
I recommend the 35mm f/1.7. I honestly can’t recommend this camera enough. 

You can find nearly all of these camera brands and more on Ebay. Go to the Ebay web page,

type the brand name you want in the search box which says, ("Search for anything"). To visit Ebay, 

simply Click Here.

----------------------------------------------------------------------------

Seven Photo Composition Skills That You Need to Master – Free Quick Guide


Everyone wants to be a better photographer. And we will tell you straight up that if you can master these seven skills, you will be on your way to becoming the best photographer you can be.

Take a dozen photographers that all have the same camera model and lens. Put them in front of a subject and tell them to take pictures.

There is only one thing that can differentiate them: their mind. How they compose the pictures that they are taking.

Composition is your secret tool to becoming the best photographer that you can be.

Here are the seven crucial composition skills that we will discuss:

  • Patterns
  • Balance
  • Negative Space
  • Grouping
  • Closure
  • Color
  • Light and Shadow

Click Below to Grab Your Copy Right Now!

Photo Credit: Aaron Burden

 
(Shameless Plug:  Be sure to check out my videos near the bottom of this page.  If you like what you see You can visit my Photography video site on Rumble.com via this link: 
https://tinyurl.com/4hs6br2n 
While you're there, please smash the "follow" button so you'll be notified when I post new content.  Thanks for watching).  


 #Basic Photography


Dusk Photography

Below are some fantastic "dusk" photographs taken by Markruse17 on Pinterest.

This contains an image of:   This contains an image of:   This contains an image of:   This contains an image of:    

Want to see more of his fantastic work?  You can visit him here on Pinterest:  

markruse17

Markruse17

Tuesday, May 2, 2023

 #Basic Photography, Natural Light

How to Master Natural Light Portraiture

I love working with natural light, I always have. Even more so now that our digital cameras have sensors so incredibly capable of making images in extremely low light. Making portraits using natural light only is a good skill to learn so you can make photographs anywhere. Here are some tips to help you mast nature light portraiture.

How to Master Natural Light Portraiture

Be aware of the quality of light

When you want to make a series of portraits using only natural light, you first need to be aware of what the light is like at your chosen location and the style of portrait you want to make. Is the quality of light hard or soft?

If it’s a bright sunny day and the light is harsh (hard), you will get portraits with a much different look and feel, than if the sky is cloudy and overcast. Morning and evening light will give your portraits a different quality (soft light) as will photographing your subject indoors and using light from a window.

How to Master Natural Light Portraiture

Soft side light from a window.

Hard sunlight can be quite challenging to work with, but can produce some good results if you style you portrait well. If you’re working in open sun it can be helpful to have a reflector on hand and a friend to assist you so dark shadows can be reduced. 

What kind of photo do you want?

Having a concept in mind for the type of photo you want will give you a better chance of success. If you’re heading out to make some portraits on a sunny day and have an idea of making some soft dreamy romantic photos, this will be difficult. But if you want to make some photos to illustrate the idea of a journey in a hot country the light will be your friend and support your idea.

How to Master Natural Light Portraiture

Bight, harsh sun in the middle of the day.

Cloudy days provide a soft light that’s generally easier to get a more even exposure. The flat light tends to render a softer feeling to portraits.

So if you’re making portraits with natural light on a cloudy day, you will have more success if your concept is for a gentler look. Photos taken under a cloudy sky and later converted to black and white work well as the tone range will be more limited than on a sunny day.

How to Master Natural Light Portraiture

Portraits on a cloudy day.

Use light to your advantage

If the sky is heavily overcast you will find it challenging as the light will be very dull. On days when there’s not such thick cloud you will notice the light is still soft, but brighter and more vibrant (less flat,) so nicer for making portraits. Be careful of your exposure settings if the clouds are moving and the light value is frequently changing.

Finding a shaded space and making use of naturally reflected light will help you achieve a different look on a bright sunny day. This is not the same as the light you have on a cloudy day. Light reflecting off a wall close by or light-toned pavement, (cement rather than asphalt or dark paving,) will fill in shadows on your subject’s face and produce a more even, lively result.

How to Master Natural Light Portraiture

Light reflecting off a nearby white wall provided fill light for this portrait. 

Placing your subject so they are slightly inside a shaded area, but close to the bright sun, 

can allow the reflection of the sunshine to have a very helpful effect in lighting your subject. 

So long as your subject is not too far away from the bright light you can make use of the

 reflection to add a more interesting dynamic to your portraits.

The Golden Hours

Of course, making portraits with the rich morning or evening sunshine (often called 

Golden Hours), or even subdued light can produce very pleasing portraits. Be careful

 though not to have your subject look directly ahead into the sun as they will typically 

make an unpleasant face. Backlighting or side lighting your subject at these times can 

be more effective and more comfortable for your subject. Diffused morning and evening

 light is lovely to work with as it is soft yet can still be quite rich and warm toned.

How to Master Natural Light Portraiture

Diffused early evening light.

Try new things

I’ve loved making natural light portraits for many years, but I also enjoy developing 

my technique by trying new ways of working. If you enjoy a particular aspect of 

photography, stick with it, develop what you do. But don’t just do the same thing 

every time.

If you like making portraits in natural light on a cloudy day because you find it 

easier, sometimes try shooting on a sunny day. Stretch yourself to learn some new 

technique. You may discover something new, a new way ot working that you really 

enjoy.

How to Master Natural Light Portraiture

Portable natural light studio

I have a portable natural light studio I love to take into the mountain villages here 

in northern Thailand. We’ve even started including it in some of the workshops we 

run and our customers love the professional looking results they can achieve. My 

outdoor studio only requires that we have space to set it up, (just a few square meters

 is enough,) and a sunny day for the best light, but I do use it on cloudy days too. 

The best thing about it is having control over how the sun lights my subjects. I set it up

 so the sun is behind the backdrop. Above the backdrop is a fine gray nylon screen to 

filter the sunlight. The light reflects off the ground which is a light colored earth and 

works well with Asian skin tones, or a large plastic sheet. I have more recently introduced


 a large reflector too and am achieving some very pleasing results.

How to Master Natural Light Portraiture

The light coming from behind the backdrop is providing great light on these subjects’ hair

 as a rim light, and on their faces via reflected light.

Image: The portable studio behind the scenes.

The portable studio behind the scenes.

How to Master Natural Light Portraiture

Your turn to try it

Next time you head out to make some portraits try something different with the light. If 

you prefer sunshine, make some in the shade as well. If you prefer a cloudy day challenge 

yourself to go out in the middle of the day when the sun is shining and find a location where 

you have some good light. Remember, the only time you cannot make a photo is when there 

is no light at all. 

---------------------------------------------------------------------

What to Do When Faced with Low Light – 

Free Quick Guide


Every photographer that has ever lived since the inception of photography has battled this

 one consistent challenge.

What challenge, you ask?

Low lighting is photography’s nemesis.

It is the sole reason that camera manufacturers are singularly obsessed with improving their

image sensors.

Until the perfect digital sensor is invented—if ever—we photographers must work with low

 light.

And that is the topic of this gorgeous and perfectly written photo guide by Jenn Mishra.

Jenn gives you her top five tips for dealing with low lighting—tips that anyone at any level

 can use.

Are you interested in mastering the art of low-light photography?

Click below to read about it!

Photo Credit: Jenn Mishra