Sunday, September 24, 2023

 #Basic Photography, Amateur Photography

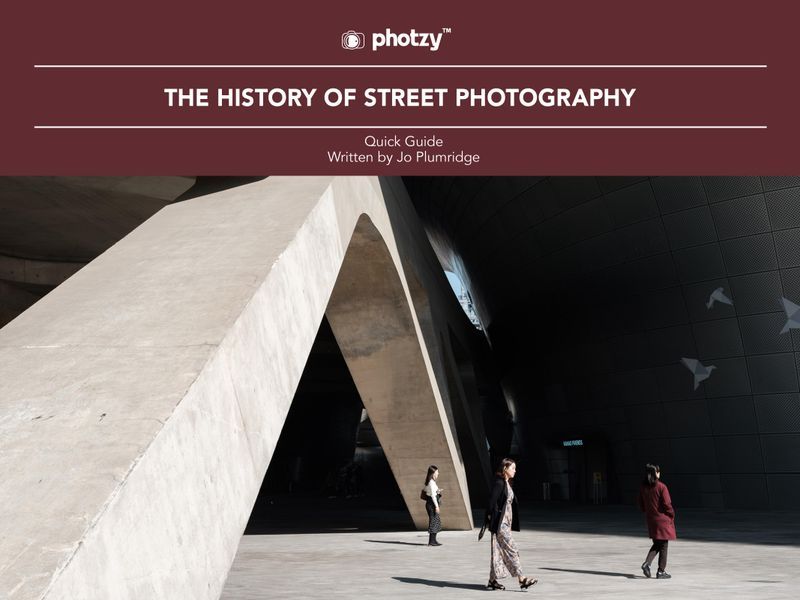
Famous Portrait Photographers You Should Know


Portrait photography is one of the oldest forms of photography. And nearly 200 years on, portraiture remains one of the most popular pursuits within the art form.

This is the history of portrait photography told through the lens of great portrait photographers. We’ll look at the best past and present portrait photographers.

Our journey starts with the great portrait photographers of times past. Then we’ll look at the best portrait photographers of today before finishing with the rising stars of portrait photography. It’s a journey that’s sure to inspire your own portrait photography.

Portrait of Dr. Martin Luther King Jr
Martin Luther King Jr. by Yousuf Karsh

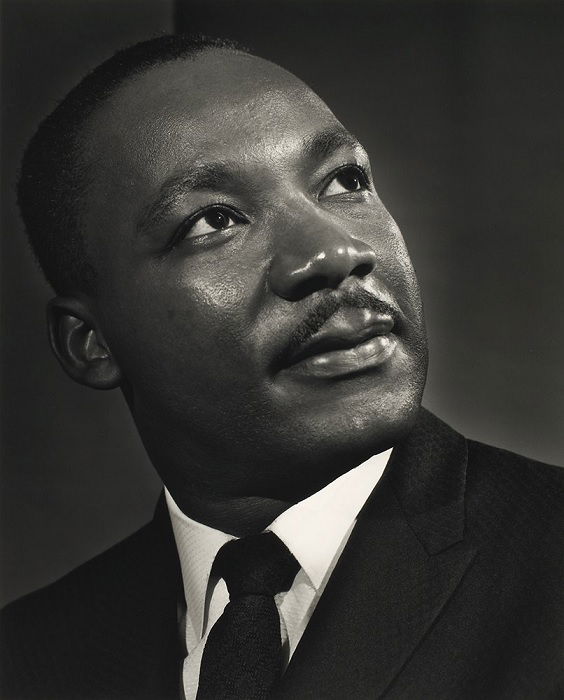
Portrait photographers have been at the vanguard of the photography craft. They’ve documented some of history’s most famous and infamous individuals. And they brought photography into the mainstream.

Portrait photography has given us the protagonists of our shared history. They’ve connected us to presidents, prime ministers, and stars on the stage and screen. Their portraits are hung in prominent galleries all over the world. And they’ve graced the covers of Time, Vogue, and Rolling Stone. These faces have become part of public consciousness.

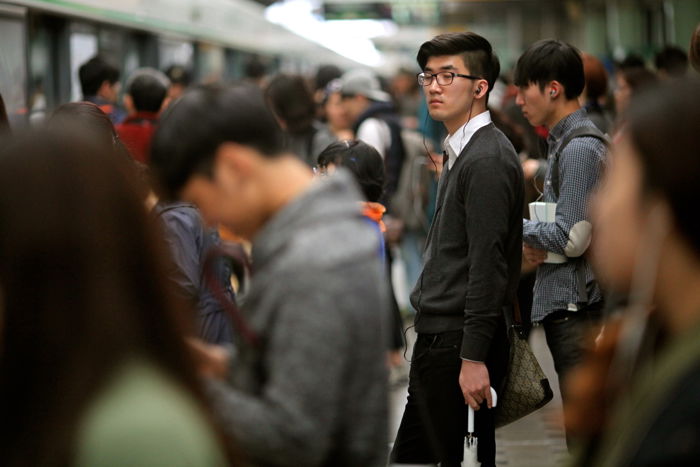
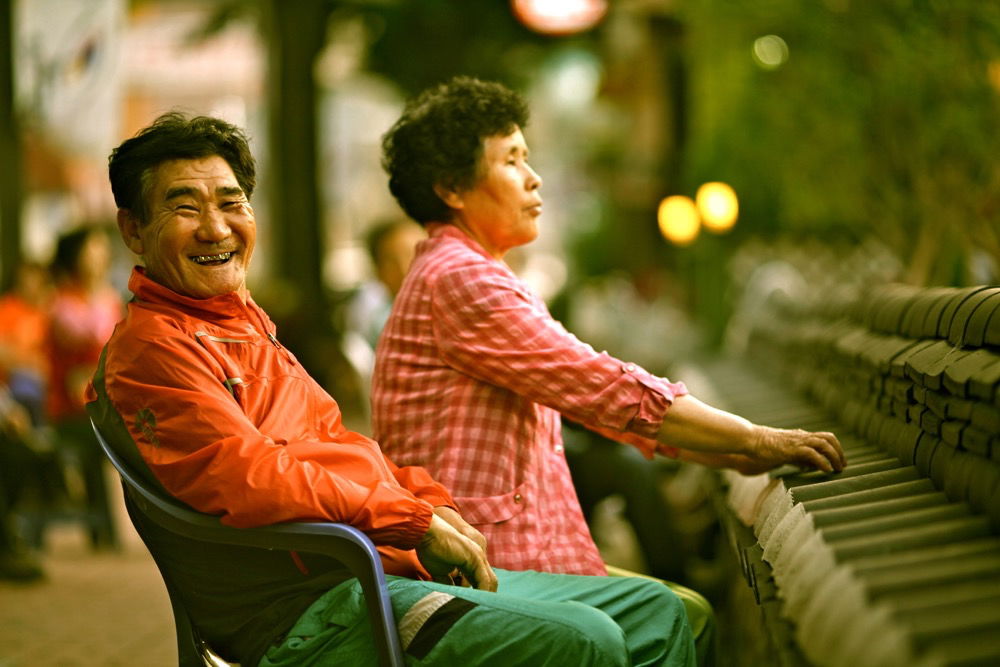
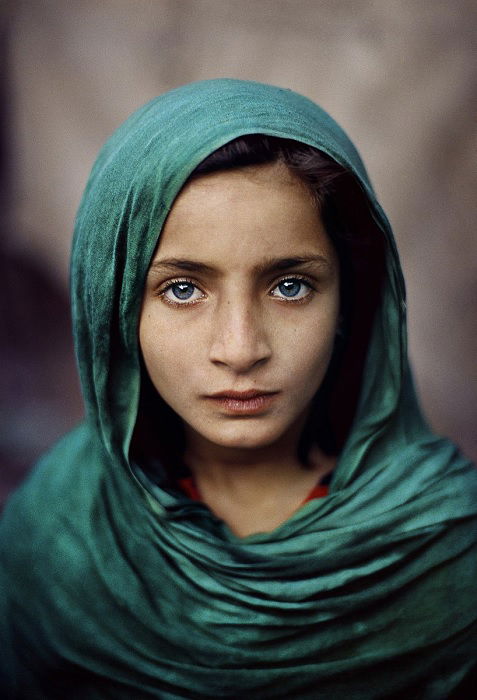
But portrait photography isn’t just about the big names. Portraits are about people. And portrait photographers use their cameras to tell personal stories. They capture the spirit of the people they encounter, from farmers to fishermen and businessmen to bandits.

As well as being a discipline in its own right, portrait photography is a feature in many types of photography. Portraits play a significant role in fashion and editorial photography. And you’ll find portraits everywhere, from photojournalism to wedding photography.

Portrait photography endures because we love characters. We want to know the players in the stories humans tell. And the best portrait photographers let us look at hearts and souls laid bare on celluloid. Portrait photography allows us to connect with people we may never know.

Portrait of young girl in Afghanistan
“Afghan Girl with Green Shawl” by Steve McCurry 

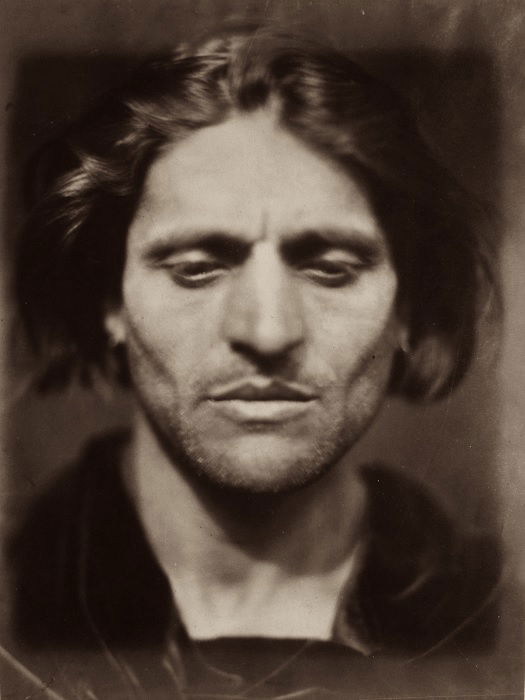
1. Julia Margaret Cameron (1815-1879)

Sir John Herschel by Julia Margaret Cameron

Julia Margaret Cameron was a true trailblazer of portrait photography. Not only was she a woman thriving in a man’s world, but she also developed her own style of portrait photography. Her style wasn’t appreciated in her own time, and many criticized her work. 

But over the years, her portraits have been praised for their genuine intimacy. Her portrait photos are softly focused with a natural feel. They were at odds with the stale and static portraits of the Victorian era.

Her subjects were the great and the good of upper-class Victorian society. Her most prominent subjects were Charles Darwin, Henry Taylor, and Sir John Herschel.

See more of Julia Margaret Cameron’s work here.

Tintype portrait of a man
“Lago” by Julia Margaret Cameron 

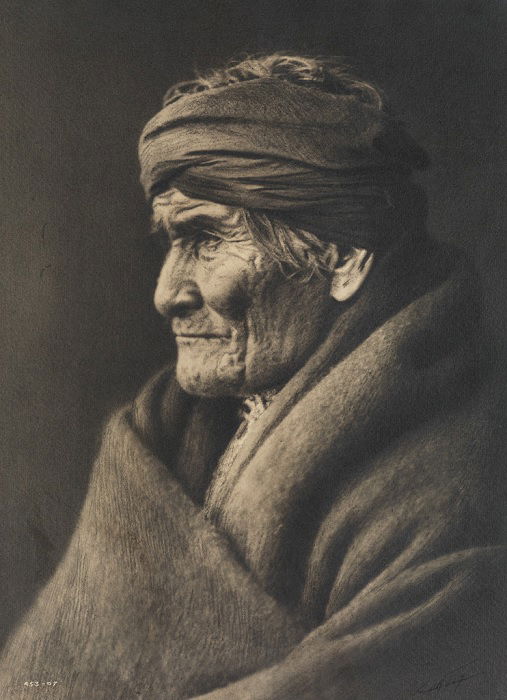
2. Edward S. Curtis (1868-1952)

Portrait of Native American girl
“Qahatika Girl” by Edward S. Curtis

Edward S. Curtis is one of the most important names in American photography. He was a photographer working in the American West near the turn of the century. His portrait collection is an important historical archive.

Curtis photographed hundreds of indigenous people from various tribal groups across America. They include the Hopi tribes in the southwest and the Inuit peoples in the north.

His subjects include names eternally linked to the myth of the Wild West. The portraits of Geronimo, Red Cloud, and Chief Joseph are particularly special. 

Check out Edward S Curtis’s masterworks here.

Portrait of Geronimo wrapped in a blanket
Geronimo by Edward S. Curtis

3. James Van Der Zee (1886-1983) 

James Van Der Zee was an essential part of the Harlem Renaissance of the ’20s and ’30s. His portraits are stylish and well-crafted. But his work also serves as a historical document for a significant moment in African-American history.

Van Der Zee used his camera to document the fashions and figures of a black culture revival in New York. His portraits show a middle-class African-American society. It’s a self-confident community that was thriving culturally.

Some of his notable subjects are dancer Bill “Bojangles” Robinson and civil rights leader Marcus Garvey. He worked mainly in a studio, using lavish props and set dressings.

This James Van Der Zee collection is the best way to see Harlem in its heyday.Black and white print of lady in a white dress“Lady in Chair” by James Van Der Zee 


4. George Hurrell (1904-1992)

George Hurrell is a portrait photographer from the golden age of cinema. As the official photographer of MGM Studio, his portraits captured some of Hollywood’s most iconic actors and actresses.

Hurrell’s celebrated list of subjects includes everyone from Clark Gable and Humphrey Bogart to Joan Crawford and Marilyn Monroe.

The archetypal celebrity photographer, his portraits are intensely glamorous. His collection strengthens the legend and mystique of this timeless Hollywood era. His style is dramatic, with strong contrasts between light and dark.

If you love Hollywood glamor, this George Hurrell collection is a must-see. 

5. Angus McBean (1904-1990)

Audrey Hepburn lifting sunglasses
Audrey Hepburn by Angus McBean

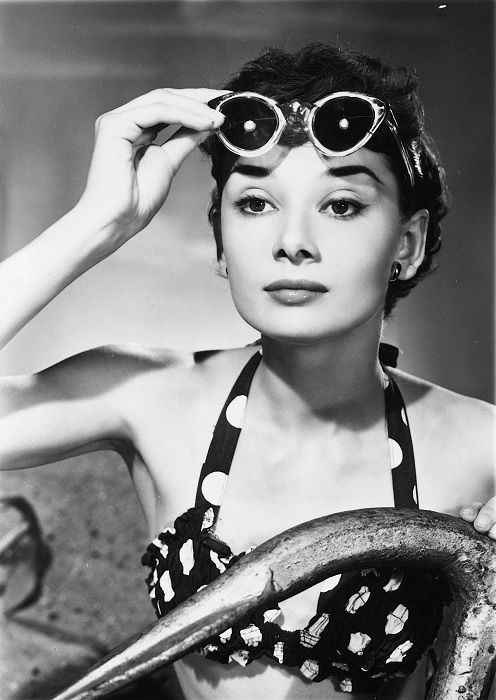
Angus McBean is often overlooked when it comes to lists of the most famous portrait photographers. But he shouldn’t be. His portraits were wholly original, blending a sharp style with surrealism and wit.

McBean’s style was less polished and more earthy than his contemporaries. His lighting was sharp and dramatic, which he used for a darker tone in his work. He wasn’t afraid to add surrealist elements or humor, even when working with Hollywood stars.

As a celebrity portrait photographer, he worked with A-listers like Audrey Hepburn, Vivian Leigh, and The Beatles.

This is the perfect book if you want more portraits from Angus McBean.

Model emerging from dead leaves
Hanae Mori by Angus McBean 

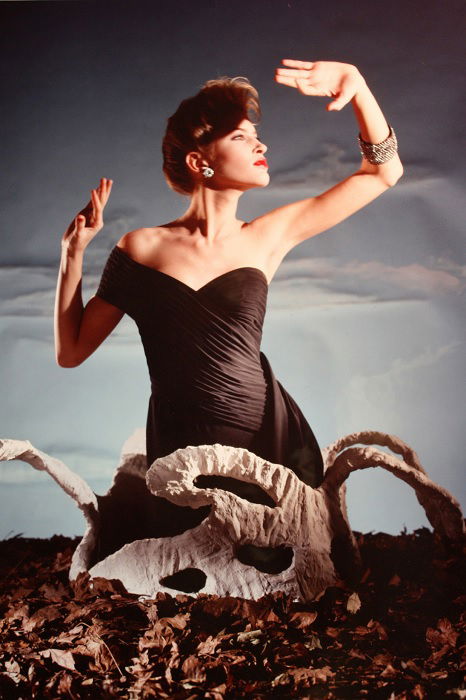
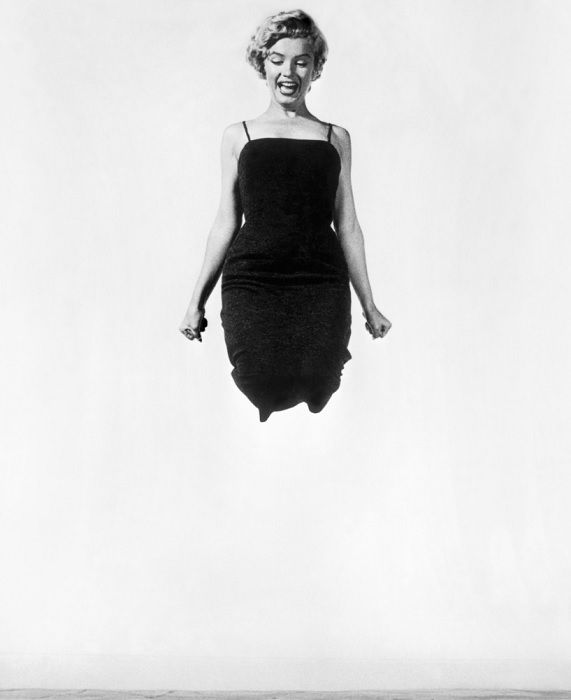
6. Philippe Halsman (1906-1979)

Portrait of Muhammad Ali
Muhammad Ali by Philippe Halsman

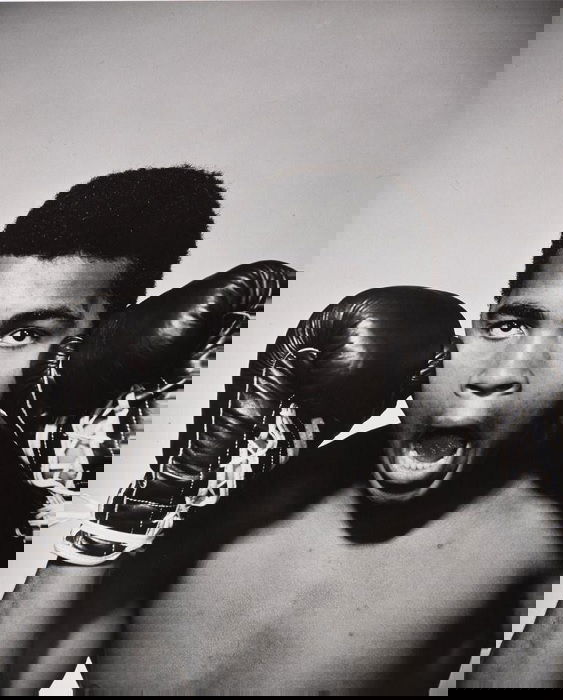
Philippe Halsman was one of the first great portrait photographers to inject a sense of fun into his work. He had close connections to surrealist artists and was a long-time collaborator with Salvador Dali.

His portraits are joyful and exuberant. His subjects are often snapped in mid-air as they jump and dance before the camera. But despite the humor, there’s always a personal warmth to his images. His portrait photos are uniquely personal.

As well as Salvador Dali, prominent subjects include Albert Einstein, Marilyn Monroe, and Muhammad Ali. His skill behind the camera also led to a career as a fashion photographer.

Click here to see more of Halsman’s Jump collection. Or maybe you prefer his book of portraits.

portrait of Marilyn Monroe Jumping
Marilyn Monroe by Philippe Halsman

-------------------------------------------------------------


Camera Settings for Portrait Photography – Free Quick Guide


Are you ready to take the next big step with your photography?

Virtually everyone begins their photography journey photographing static unliving objects. You know we’re talking about – landscapes, barns, and such.

However, almost all of us catch the bug at some point to start photographing people.

Portraits are challenging and very rewarding.

However, if you’ve never done it before, where do you start?

That’s where this guide comes in.

Jo Plumridge has over twenty years of experience photographing portraits. She is going to lay out the basics of getting started photographing people.

You’ll get some suggestions on the following:

  • Equipment
  • Camera settings
  • Lighting
  • Posing
  • Backgrounds

If you are dreaming of photographing people, this is where you start!

Get it here.

Photo Credit: Fantastic B

--------------------------------------------------------- 

(Shameless Plug:  Be sure to check out my videos near the bottom of this page.  If you like what you see You can visit my Photography video site on Rumble.com via this link: 
https://tinyurl.com/4hs6br2n 
While you're there, please smash the "follow" button so you'll be notified when I post new content.  Thanks for watching).  


Sunday, September 17, 2023

 #Basic Photography, Amateur Photography 


1. Street Photography Ideas: Choosing a Theme

A theme will give your photos cohesion, which of course will make them work better as a set. The right theme will make each individual photograph stronger.
What kind of themes could you choose? Below are some photography project ideas you can easily be applied to the area where you live.   

  • Transport – Transport is something we all use, so why not make this the theme of your street photography? Subways, buses, even bikes give you options you can explore photographically. Should you choose something like the subway, seek permission first from the relevant authorities.
  • Markets – Many people congregate in markets, which makes them a great place to practice street photography. Will you concentrate on one specific market, or look to visit all the markets that happen in your area? Perhaps you will look at only one type of market, for example fish, and photograph fish markets in numerous locations.
  • Location – The previously mentioned humans of New York project had its roots in a location. Why not look at a photography project similar to this, only from where you live? A study of your local area will be a rewarding way of really finding out about where you live, through the people who live there.
Portrait of a man in a fish market holding a lobster.
Locations like a fish market can be great for photography project ideas, and they’re full of 
personalities. 


2. Use Experimental Compositions

The use of a unique composition in every photo will make your work strong and recognisable. Projects are often about keeping one thing constant, and varying the rest of your content.
The use of a strong composition is one such project you can pursue, and once again here are some photography project ideas for this.

  • Half face – Street photography is all about people. Why not go with an unusual composition of a half face? This type of photo has a detail element to it, and works well with a varied mixture of different faces.
  • Minimal – Most street photography shows photos that have a lot of elements in them, in other words they are often busy. How about going in the other direction with street photography that has a minimalist tone? The use of photos against the sky, or against a wall are ways of getting this result.
  • Body parts – Another photography project idea you could use is photographing a specific body part. The obvious thing for most people to photograph is the face, but how about a project where you only photograph hands?
Street photography of a man riding a bicycle with blurry background.
Panning is a great way of creating a photo with a minimal feel, with the blurred out background. 

3. Use Light and Shadows

Using light and shadows is the hallmark of all good photography. When it comes to street photography both people and buildings can cast strong shadows, that can be used effectively for your work.
The photos you create will have strong light contrast, which will really make them pop.
How can you best achieve this? Read on and find out.

  • A shard of light – This can be used as a type of spotlight on the face of your subject. Look for places that have a gap in the roofing, or an archway that the sun shines into. The background should not be lit up by the sun for this approach to work. Now set your exposure value to around -2 or even -3, and when someone walks into the sunlight take their photo. The result should create a low-key photo, with a black background, and a correctly exposed face.
  • Cast a shadow – You don’t need to be a lord of light to cast a shadow! You just need to visit locations at the correct time of the day. The shadow will be longer just after sunrise, and before sunset, so factor this into your decision on when to photograph. Websites like suncalc can also help you plan when to visit a location, so you are getting the sun in the right direction. You can aim to photograph shadows of people, or perhaps use strong shadows on a wall to frame a person who is walking past that wall.
Black and white street photography of a group of people talking.
Sunlight reflecting off cobblestones can work very well for against the light photos with 
silhouettes. 

4. Striking Silhouettes

Once again using the light, silhouettes can look great in your photos. Photos like this are sometimes described as contre-jour, which is French for against the daylight.
This is exactly what these photographs are. To produce them you need to be photographing against a strong light, usually the sky. To get good results with this form of photography you will want to get strong silhouettes, with defined shapes.
When photographing against the sky this will almost certainly require you to photograph from a low angle, and up towards the sky.
The exception is a shiny surface, such as cobblestones when they reflect the light. In this case it’s an advantage to photograph from a higher angle.
Silhouettes will work very well for street photography, and you will get great subject isolation by doing this.

Photo of people in a waiting room.
This photo shows a clear contrast in styles. There is also a story to this image, modern society is 
hypnotized by screens! 

5. Contrasting Styles

High contrast makes for great photos, but contrast is not simply restricted to the light. Look for other forms of contrast in the world around you, and you’ll have some great street photography.
How can you explore the concept of contrast with your photos? Take a look at the following and decide if you can make that happen where you live.

  • Colors – The use of color combinations like red/blue or yellow/purple can lead to some stand out photography. Not every area will allow for this type of photography, but places like the blue city of Johdpurr are great for exploring this type of photography.
  • Old vs New – Can you find people wearing old traditional clothes right next to people wearing modern ones? This can be an exciting photography project that you can use to explore the culture of your home area.

6. Photography Project Ideas With Numbers, the 365 or 52!

One of the greatest photography project ideas of recent times were the 365 and 52 projects. Those not familiar with them, these are projects where you take daily or weekly photos for one year.
Now of course this can be applied to any form of photography, so why not have some fun and use this for your street photography! 

  • 365 days – This is intense, and not for everyone. Taking one photo per day sounds straightforward, yet it can be gruelling. The key is planning ahead, and saving the easy photos for when you’re busy or not feeling well.
  • 52 weeks – The less demanding cousin of the 365 project, this is a fun one to play around with. You can make this slightly more interesting by choosing a weekly theme, or perhaps changing the theme once per month.
Street Photography of a crowd of people waiting for a train.
Life is a daily grind, so choose your year long project with care.

7. Lighten the Mood

Why so serious? Street photography is about all life, and there are fun moments to be had wherever you photograph.

Juxtaposing a background against your main subject can be one way of adding humour to your photo. The scene needn’t even be funny, capturing a scene that shows the warmth of a genuine smile isn’t easy but will be a great street photo.
A word of caution here though. Capturing a photo which is funny because it puts someone else in a bad light could lead to confrontation later on if that person sees the photo and is unhappy with the result. 

Street Photography of a man and woman sitting outdoors.
The smile brings a lot of warmth to this photo.

8. Experiment With Slower Shutter Speeds

Your camera is a creative tool, and the ability to control the shutter speed allows for some more dynamic photography project ideas. This entails the application of panning and motion blur to street photography, techniques that will bring your photos to life through movement.
Typically you’ll not want to use too long a shutter speed here, experiment with exposures between 1/10th and 1/2 a second in length. 


Panning – In this case you’re going to follow the movement of a person, or perhaps a cyclist. The idea is to blur out the background, while keeping the object you’re following sharp. Depending on how fast the person or object is moving you will set the shutter speed accordingly. Typically panning photos are around 1/20th second.

  • Motion blur – The alternative way of adding motion to your scene is to keep the background steady, and capture the movement of people with a slower shutter speed. You’ll likely need a tripod for this, so you’ll have a hard time not standing out. However the results can be very interesting. Don’t use an overly long exposure, or the people in your photo won’t show up.
Street Photography of a crowd of people waiting for a train.
Adding some motion blur to your work can create a much more dynamic image.

9. Look for the Decisive Moment

Well this is the essence of good street photography isn’t it? Yes it’s possible to get good street photos without this magical x-factor, but the really great photos are about that decisive moment. This is not an easy skill to master, as a lot of it is instinctive.
That said putting yourself in the right position to get that photo will allow you to, and with it the instinct will develop. 


Fishing – One way to get the decisive moment is to wait for it to come to you. This is a lot like fishing, as you need to be patient. In fishing you could be waiting hours for one fish to bite, and well this could equally be the case for your decisive moment photo if you choose the location and wait for the action.

  • Quick on the draw – Alternatively you can model yourself on those western movie shoot outs, where you need to be quick on the draw. Visiting places like markets where decisive moments are frequent is a good place to practice what needs to be a lightning quick reaction.

Photo of a woman with umbrella walking over a bridge as pigeons fly up.

10. Make It a Portrait

A great project to try when doing street photography is a portrait based one. There are many personalities out there on the street.
You’re not really looking at decisive moment so much with this type of photo, but capturing the emotion on the person’s face will give you much better results. Should this be a project you want to try, the following are a few tips for making it more successful. 

------------------------------------------------------------------------------------------------

  • The approach – This project is going to require you to ask permission to take a photo of your subject. Working out who to approach, and how to approach that person will improve your chances. The chances of success are higher with people who are alone. Be polite and professional. Having a business card and explaining your project is a great idea.
  • Build rapport – Having gained permission your next objective is to get to know the person. Ask about their day, and what they’re doing there. The more you know the better your chances of composing a photo that really shows that person’s personality.
  • Look for the light – Having an agreement to take a person’s photo means you can control the light, and make a much better portrait. Using the ambient light that’s in your scene, and attempting to get some light in the person’s eye are both desirable aims.
Black and white portrait of a man with cap and beard.
Taking portrait photos means you will have to ask permission, though you can choose some 
great faces! 

Which of These Photography Project Ideas Will You Use?

No doubt you’ve delved into some photography project ideas in the past. Have you ever tried one with a street photography angle? Now is the time to get out and put together a body of work on just one subject.

-----------------------------------------------------------------------------------

Free eBooks to Help You Unlock the Secrets of Street Photography 

Download now → To become a street photographer in the truest sense requires skill, artistic intent, and a clear vision for the outcome. In this guide, author Jo Plumridge gives you the history of street photography so that you can better understand how to be a street photographer in the truest sense.

Download now → A lot of people find photographing strangers unnerving for the fear of being confronted or being objected to while taking photos in such a situation. This guide by Karlo de Leon will teach you how to approach this situation with confidence.

Download now → Kent DuFault discusses two methods to capture street photos, with practical tips that you can follow. The last section summarizes some handy tips that you should keep in mind when doing street photography.
Download now → In this guide, photographer Diane Wehr categorizes street photography into three major genres: classic or candid street photography; street portraits; and geometric street photography. Learn the differences between the three with some excellent examples to follow along.

Download now → In this special feature, Kent DuFault interviews Portuguese street photographer Vasco Trancoso. Learn useful tips and get insight into Vasco’s thought process as he creates some of the world’s most dazzling street portraits being done today. 

-------------------------------------------------------------------------------------- 

(Shameless Plug:  Be sure to check out my videos near the bottom of this page.  If you like what you see You can visit my Photography video site on Rumble.com via this link: 
https://tinyurl.com/4hs6br2n 
While you're there, please smash the "follow" button so you'll be notified when I post new content.  Thanks for watching).  


Wednesday, September 6, 2023

#Basic Photography, Amateur Photography 

How to Effectively Use Camera Angles in Photography

  
There is more to photography than just pointing and clicking. In order to create truly stunning images, you need to understand the power of camera angles in photography. Angles can make or break a photograph, and by using them effectively, you can take your photos from good to great. 
 

Camera Angles in Photography for Intimate Perspectives: Taking Eye Level Portraits

A dark haired female posing for an eye level photo
Eye level is the simplest and most common photography angle. This is the most familiar perspective for us.
The first step is to look at the eyes of the person you’re photographing. Newbie photographers often use their own eyes as the guide for eye-level shots.
But in reality, you need to be in line with your subject’s eye. If you find yourself tilting your camera up or down, you’re doing it wrong.
Move your camera to match the height of your subject. If the subject is taller than you, turn on the live view on your screen and lift your camera above your head.
When you’re shooting a smaller person, consider crouching or even kneeling.
You should also pay attention to your subject’s head. Face angles are essential when it comes to eye-level shots. In most situations, you want your model to look away from the lens.
Ask them to fix their gaze on an object behind the camera. Doing so prevents them from looking awkward in your shots.
If you want intimate portraits, have them stare into the lens. Or you can ask them to look at your camera’s logo on top of the camera, instead.  

Try a Low Angle Shot to Make Your Subject Appear Huge

An amusing forced perspective portrait
Eye level can get boring if that’s the only perspective you use. You can always switch it up by using low angle shots, instead.
A low angle shot makes your subject look much bigger than they are. If you want them to look dominant in your image, then it’s the best perspective to use.
Low angles also make movement in your photo more dramatic. Since it makes legs look gigantic, anything your subject does also looks more intense.
That’s why movies use them a lot in action scenes.
But there is also a downside. Low angles are not the best option when it comes to portraits because it makes people appear unappealing since you’re shooting from below.
It can also make your subject look menacing because their bodies look out of proportion. Feel free to take some test shots and figure out if it’s the right perspective for your image. 

Go With a High Angle Shot to Include the Background

a female model posing on a small pier shot at a high camera angle
If you want to make a person look smaller than average, take a high angle shot. Since you’re shooting down on them, you make your subject look diminutive.
This perspective also evokes various psychological effects on the viewer. In most cases, it makes your subject look less powerful because they look small.
Its effect becomes more apparent when you’re shooting a few feet above them. It can also help convey childlike innocence especially if they’re staring up into the lens.
If you raise your camera a bit higher, this angle can create a perception of freedom. Why? Because shooting from high up makes people feel like flying.
You often see movies show epic shots of actors from a crane. 

Use a Bird’s Eye View Angle With a Drone

A birds eye view camera angle of a man walking along traintracks
Ready to take your high angle shots to new heights? Consider using the bird’s eye view. As the term implies, this perspective involves taking photos from the sky.
The bird’s eye view is the same as the high angle shot. The only difference is that you’re taking photos from a considerable height.
These days, you can produce a bird’s eye view image using a drone. But you can also do it by going to the higher levels of a building and pointing your camera downward.
The bird’s eye view can make your subject feel significantly smaller than when you’re on the ground. This perspective can also make your audience feel like they’re looking at a diorama.
This unique perspective also covers more area since you’re farther away from your subject. So it’s the perfect way to document landscapes and architecture as well. 

Use the Dutch Angle for Edgy Photos

A portrait of a female model lying down outdoors shot from high camera angles
The Dutch angle (a.k.a. tilted angle) makes images look edgy because it provides an unconventional perspective.
People expect photos to be straight all the time. When you tilt your frame, you grab your audience’s attention because it’s out of the ordinary.
This creative perspective has its roots in cinema. Since it makes your photo look unstable, it creates a feeling of discomfort. That’s why you see horror movies use it a lot.
But the dutch tilt doesn’t have to be menacing all the time. It could also make the action in your photo seem more adventurous and daring.
The tilted framing adds the illusion of motion. It enhances the movement of your subject. So it’s not surprising that you also see it in action scenes all the time.

Take Close-Ups for Intimate Portraits

A portrait of a female model posing outdoors
The close-up is among the most useful photography angles available. It provides the perfect distance between you and the subject.
It creates an intimate and friendly atmosphere in your photos. This angle is not confrontational, but it’s also not too distant.
When shooting portraits, think about the distance from a person when you’re talking with them. You shouldn’t be too far away that you have to scream.
But you also shouldn’t be too close that you’re invading their personal space.
Portrait photographers use close-up shots all the time. But it’s also one of the most common photography angles for still life photography.
It’s effective because it offers a perspective that matches how we look at objects in real life. 

Take Extreme Close-Ups to Capture Facial Details, Like Eyes

A close up photo of a female models blue eye
Extreme close-up (a.k.a. ECU) creates a more intimate space between the image and the viewer than an average close-up. It also allows your audience to interact with your photo in a more personal manner.
This angle lets people see finer details they wouldn’t otherwise.
The ECU has a lot of positive uses, but it can also have negative effects on your photos. Its distance can make people feel claustrophobic.
And since it’s confrontational, it may also create discomfort for some of your viewers. Most of all, focusing on one area prevents you from showing the rest of your subject. Keep this in mind when you’re composing your shots. 

Use a Long Shot to Show the Subject’s Environment

A portrait of a female model posing on a green bridge with long shot camera angles
A long shot is a technical term that implies shooting from a distance. Photographers often use it to show the environment the subject is in.
You can use a long shot to photograph any place whether it’s a street or a hallway. Its primary purpose is to establish a scenario and provide people with more context of the location in the image.
If you want to take a long shot, the whole length of the person you’re photographing should fit within the frames.
You also need to show enough of the location to give people a clue where everything is taking place. 

Try Extreme Long Shots to Add a Sense of Scale

A person surfing in low light
The purpose of an extreme long shot is to show the massiveness of the location as compared to your subject.
So if you’re shooting a person in a city for instance, then the buildings and the sky need to take up most of the space.
This angle works much like the regular long shot. The only difference is that your distance from your subject is now more considerable.
In other words, you should be far enough from your point of interest that it’s only a small section in your image. 

Take a Wide Angle Shot to Introduce Creative Distortions

A portrait of a skateboarder shot using perspective distortion
The wide angle isn’t so much about how you position yourself while taking a photo. Its magic lies in how it distorts the elements in your image.
So you can shoot with it from various perspectives and create a unique result every time.
For instance, you can use a wide-angle shot to make your subject appear bigger. It creates a similar effect to a low angle shot since it throws your subject’s limbs out of proportion.
But you can also use a wide angle for long shots. When you shoot from a distance, it tends to make your subject look smaller. So in this way, it makes the background look more prominent in the image.
Using wide angle also allows you to photograph beautiful landscapes and architectures. You can shoot more of the scenery since it covers a lot more space than a regular lens

Your use of camera angles makes all the difference when creating exceptional photography. So take your time to learn them to help you engage your audience more.
Remember that it’s not all about the cool perspectives. It’s also how you make people feel about your images in general. 

---------------------------------------------------------------------------------- 

Using Dynamic Angles for Ultra Impact – Free Quick Guide


Good composition is a key aspect of every photo that’s worth looking at. Producing a strong composition, no matter what your subject is, makes for a more interesting photograph.

The popular rules of composition in photography are used frequently for a reason. Applied well, they captivate a viewer’s attention for longer. But they can become a little tired if overused. 

This is why it’s important to keep experimenting with the common composition rules but also implementing other, less-used rules, and that’s where dynamic angles come into play.

In this guide, you will learn how to make use of dynamic angles for ultra-impact in your photos. 

Experimenting with camera angles can add a fresh perspective to your compositions, especially when photographing ordinary subjects.

Here is what’s covered:

  • The importance of understanding composition so you can effectively break the rules
  • Use the space you’re given and fill up that frame with your dynamic angle
  • Utilize the camera format
  • Carefully select your lens focal length
  • Don’t always stand rigid; get down, or get up on something
  • Practice your creative intuition

Ready? Grab your reserved copy below.

Photo Credit: Kevin Landwer-Johan

 --------------------------------------------------------------------------------

(Shameless Plug:  Be sure to check out my videos near the bottom of this page.  If you like what you see You can visit my Photography video site on Rumble.com via this link: 
https://tinyurl.com/4hs6br2n 
While you're there, please smash the "follow" button so you'll be notified when I post new content.  Thanks for watching).  


Saturday, September 2, 2023


 Happy Labor Day Weekend Everyone!


Labor Day outdoor chef 


                                                                                           Happy Labor Day 


 Monday is Labor Day