Saturday, October 30, 2021

9 Great Tips for Taking Cloudy Day Photography

Photographers tend to shy away from overcast weather. But, a cloudy day is an excellent time for stunning photography.

These fluffy formations can help give you a great shot! In this article, we’ll tell you all the tips and tricks to great cloudy day photography.

a shot of clouds against a blue sky

1. Change Your Camera Settings

Cloudy day photography settings are different than what you would use on a clear or overcast day. Every time your light changes, you need to change your settings. If you are shooting in a cloudy environment, your light source (sun) will hide and reveal itself often.

This can be a pain if you need to stick to a strict timescale. As a rule of thumb, the clouds are going to pull 2-3 stops of light from your scene.

You know about Aperture Priority and Shutter Priority, but what about setting your ISO to automatic? Find it in your camera, and go one stop before ISO 100. It should say ‘A’ where the numbers are.

Your other settings will stay the same, but your ISO will increase from 100 to 400 or 800, depending on the light. Keep in mind that you need to use manual mode.

When shooting in soft light or with cirrostratus clouds, you should use the Sunny 16 rule. It helps you find the best exposure setting with the available lighting conditions.

Remember, when you shoot in RAW, it is always better to underexpose if it is hard to meter the light well. You can edit it easier than an overexposed shot afterward.

a landscape shot of a river cutting through a mountain range with clouds and sky above

2. Add Sky Definition With Cloud Formations

You may find a great landscape scene, but it can look boring without certain elements.

Clouds are the easiest things to wait for and use as interesting details in your photo. Clouds add texture, shape, and form – some even look like animals.

Take advantage of a cloudy day and use it to create unique compositions.

an image of a mountain in the background with green hills in the foreground and blue sky and clouds above

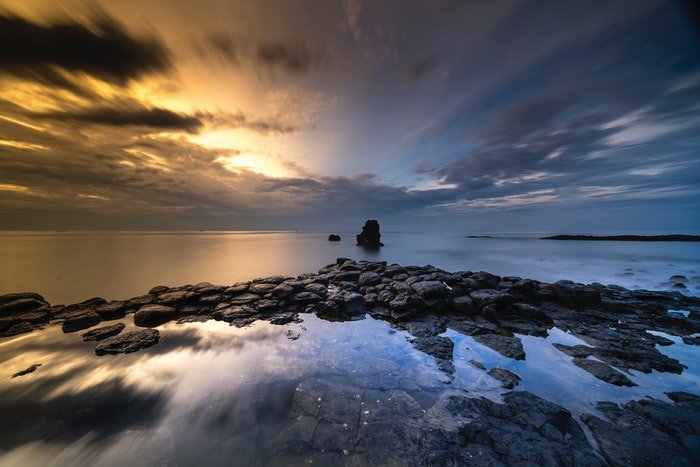
3. Add Movement With Long Exposures

Long exposures are great at any time of the day or night.

Clouds add texture, shape, and form already. Capturing them with a long shutter speed adds movement to your scene. The results are abstract and painting-like effects.

The mood could be calm or give the viewer a sense of urgency – such as the build-up of a storm.

Place your camera on a tripod, and use a shutter speed of five seconds or longer. Use ND filters and remote. Do not forget to focus before applying the filter. Make sure to use Live View.

a long exposure photograph of clouds above water and rocks

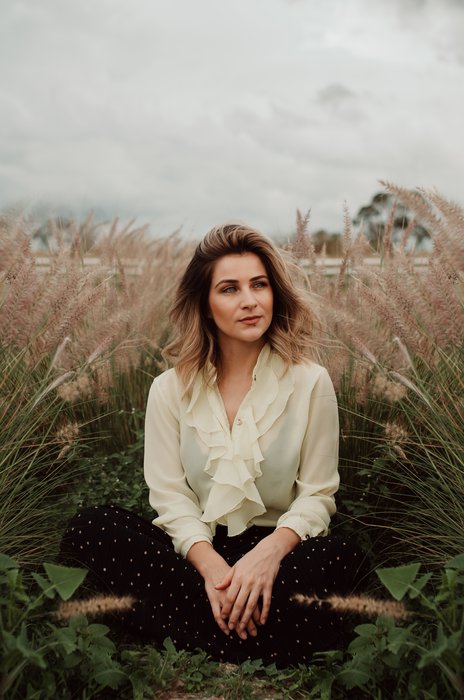
4. Take Advantage of Diffused Light and Shoot Portraits

The best reason to do cloudy day photography is the light. An overcast sky creates diffused light. This means, even light is falling over your entire scene.

Bright sunshine and well-defined clouds create strong light and powerful shadows.

The clouds act as a diffuser, making the light nice and soft. It is the perfect time for fashion and portrait photography. The soft light condition smoothens the skin out.

Also, overcast is good if you have to shoot interior and architectural pictures because it is beneficial for dynamic range.

a cloudy day portrait photograph of a woman sitting in a wheat field

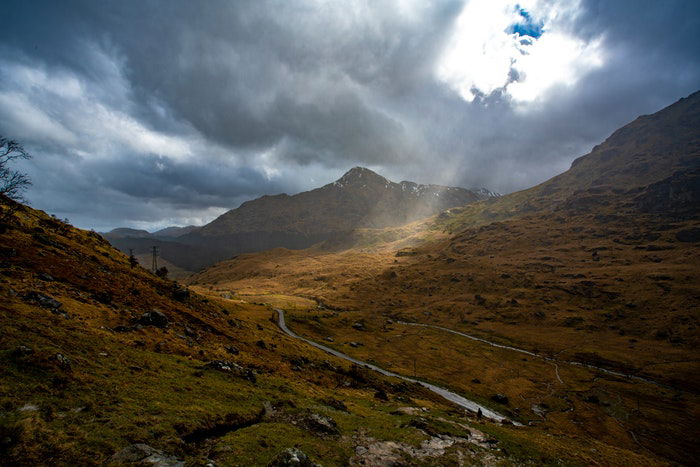
5. Create a Mysterious Atmosphere With Sun Rays

Sun rays add more interest to a scene and the sky. You can only capture sun rays on a cloudy day.

When the sun hides behind a cloud, it will shine these beautiful shots of light around it.

You will need to meter on the cloud to ensure the scene is not overexposed or blown out.

cloudy day photograph of a ray of light cutting through clouds onto a valley

6. Create Stunning Cloud Photos With Wide-Angle Lenses and Filters

Bring a wide-angle lens when capturing cloud photography. Combined with a narrow aperture, it will help you add dramatic effects and detail.

Using ND and CPL filters can also enhance your cloudy day photographs. ND filters come in handy for daylight long-exposure shots. A CPL filter will help you manage reflections in the scene.

wide angle image of a city street with skyline in the background and blue skies with clouds above

7. Create Contrast With Clouds and Cityscapes

Cities and clouds can make you think of a fantasy story with a metropolis floating in the sky. Clouds can be in contrast to the buildings.

You can even capture sunbeam lines outlining certain aspects of a scene. Or the soft light conditions can create evenly lit images of buildings,

Wait for fog or a bunch of low clouds and capture the skyscrapers peeking out.

Using CPL filters can enhance your photos as they bring out the clouds. Then, boost up Clarity sliders when you edit your shots in Lightroom!

a photograph of city skyscrapers peaking through the clouds

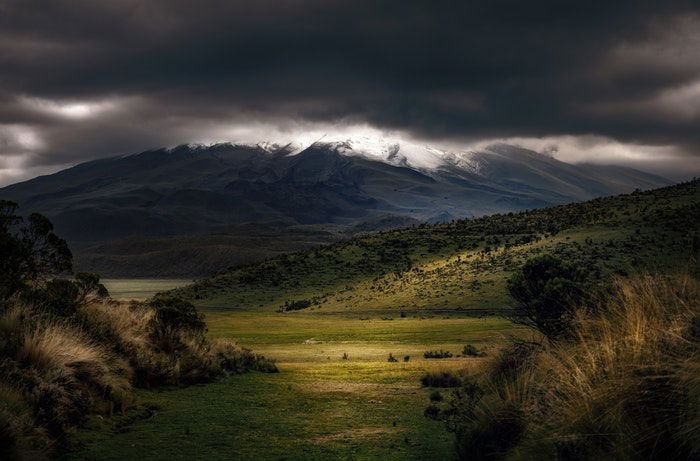
8. Photograph Light Pools

Cloudy days can offer you a multitude of scenes and settings that allow creativity in your landscape photography. One of my favourite cloudy day photography scenes is with light pools. The sun passes through a group of clouds. As it passes a gap, a sunray beams down.

You can capture a scene where only part of it is exposed or appropriately highlighted.

Meter on the lit area, and capture the glimpse focusing on the scene you can see. Do this rather than the darker parts for a genuinely compelling scene.

an image of a valley with dark clouds above and a light pool in the foreground

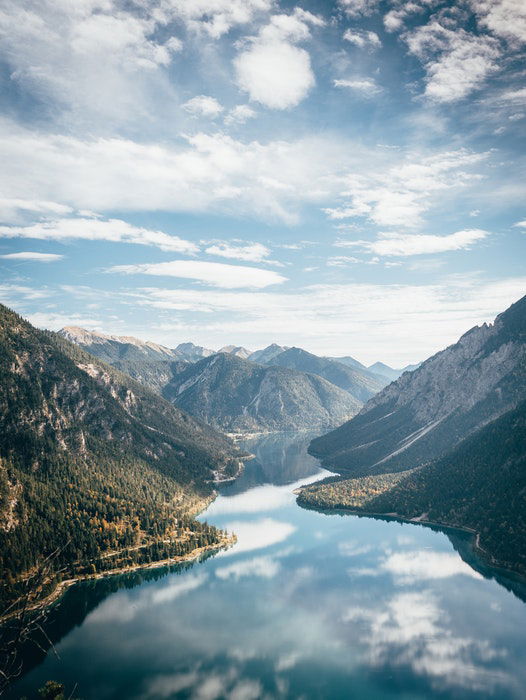
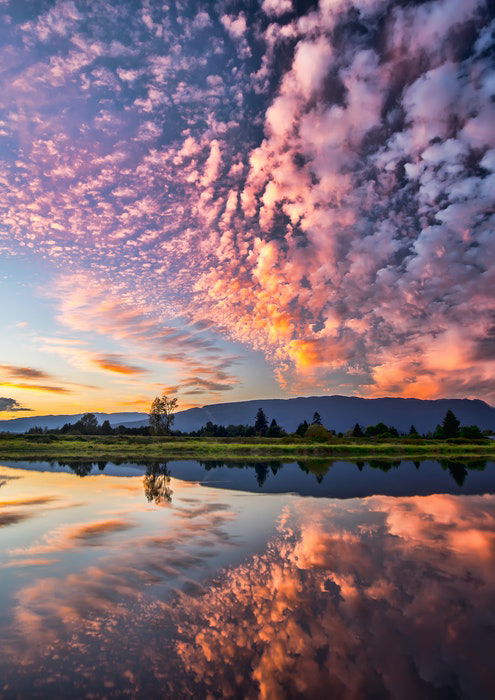
9. Capture Cloud Reflections

Clouds look great not only in the sky but also as reflections in the water. Find lakes, ponds, or even shiny buildings to capture cloud reflections.

This way, you can add more depth to your scene and create exciting compositions. Look for symmetry or shapes that result from the clouds and reflections.

a photgraph of clouds above reflected in a lake below with pink hues

A gloomy day or overcast weather might not look inviting but can offer great photography opportunities. Take advantage of the diffused light and the cloud formations.

Create long exposure cloud photography or use the clouds to add texture to your scene. Find creative ideas to compose your photos even on overcast days.

--------------------------------------------------------------------------------------------------------------

5 Tips for Success When Starting Out in Night Sky Photography – Free Quick Guide


Tuesday, October 26, 2021

5 Best Techniques for Black and 

White Still Life Photography 

Tags:  Photography for Beginners, Newbie Photography


Black and white still life photographs are beautiful in their simplicity. Still life 

photography is all about inanimate subjects. You can photograph food, flowers

ornaments, toys. Anything that doesn’t move.

Read on for my top 5 tips to get the most out of your black and white still life 

photography.

Black and white close up image of a rose
Photo by Jack Hawley 
 

1. Learn to Think in Black and White

Planning and researching a black and white still life photo shoot is essential. The 

process requires a bit of brain re-wiring. That way, you’ll ‘think’ in black and white 

and choose the right objects, lighting, and story for your photo.

Check out work by famous still life photographers to help with this.  

Grand masters such as Edward Weston and Karl Blossfeldt were pioneers 

of photography. They created unique works of art in black and white from 

everyday objects.

Give yourself time and space. Create a rough sketch about the way you 

want your photo to look.

What are the first features of the object that catch your eye? Make notes of the  

lines, textures, or tones you want to emphasise.

A black and white still life photo of a Blossfeldt-inspired Centaurea Cineraria
My Blossfeldt-inspired Centaurea Cineraria. f/8, 1/8sec, ISO100. © Heather Milne

2. Enhance Textures and Shapes With Lighting

Without colour getting in the way, you can play to the great strengths of black 

and white – texture and shape. Look to see where lines intersect and how light 

accentuates different textures.

Think about this throughout the black and white still life photography 

process. From selecting your subject matter and photographing it, to 

post-production and presentation.

I prefer to use low key lighting with either natural light from a window 

(on a cloudy day), 

or a soft sidelight. I often experiment with and without a reflector. Then I 

review the photographs in post-production. That way, I can see which version 

works best for texture and shape.

Move your subject around and see how it catches the light from different angles. 

Sometimes a subtle move of half a centimetre can make a big difference.

Black and white still life photography can often feel quite physical. You’re 

moving back and forth from the camera to the subject matter!

A black and white still life of a brussels sprout.
My take on a Brussels Sprout. f/7.1, 1/2 sec, ISO 100. © Heather Milne

3. Turn Simple Objects Into Art With B&W Photography

You’re making a photo without people or movement. But that doesn’t mean that 

you can’t tell a story. Consider shapes of leaves at different stages of their life 

cycle. And how grey tones can convey emotion into the photograph.

Black and white photos of flowers reveal the true beauty of their lines and shapes. 

Black and white flower photography is a great starting point for monochromatic 

still life photography.

The style and texture of a weathered shoe in black and white tell us about their 

owner. Even without a human in the photograph.

Antique objects look beautiful in black and white photographs. And you can 

enhance their story by using warm or sepia monochrome tones.

Look around your home or garden. See what subjects you can find that tell 

a personal story. Even the most mundane object can become a work of art. 

All it needs is the right texture and shape with careful lighting and 

post-production.

Have a go at some of these black and white still life photography ideas:

A black and white food photography shot of baked beans and bread on a wooden tray
© Heather Milne

4. Use Simple Compositions to Make B&W 

Still Life Photos Stand Out

Black and white photography is all about shapes, lines, and textures. It’s 

important to use a very clear and simple composition that doesn’t distract from 

these elements.

With still life photography, I tend to be a stickler for the rules of thirds and odds

And the golden triangle and ratio.

If you’re uncertain of your composition, remove something from the frame. Or 

take a step back to include more negative space.

A black and white food still life shot of vegetables
© Heather Milne

5. Use the Colour Sliders to Enhance Black and 

White Still Life Photos

When it comes to black and white still life photography, clicking the shutter 

is only part of the process. Fine-tuning images in post-production is the 

important final step.

Clarity adjustment, dodging and burning, and spot removal are standard 

techniques to tidy up your photo in Lightroom or Camera Raw. But the 

tool I use most with my black and white still life photographs is the

 HSL (hue, saturation, luminance) colour slider.

Moving individual sliders up or down gives you great control of light and shadows. 

It can transform your photograph by defining textures and shapes and even 

changing the focal point.

Adjust Blacks, Whites, and all the Greys In-Between

Like most black and white photography, it’s important to include ‘true black’ 

and ‘true white’. Plus a full range of greys.

Adjusting the HSL sliders is an easy way to lighten or darken parts of a photo. 

And you’re doing this without over-using the dodge and burn tools.

Still life photographs can be quite complex. Get familiar with zooming in and 

out of your image (ctrl, +/- or cmd, +/-) to check the black, white, and grey tones. 

Make sure they work together in harmony.
A screenshot of adjusting the HSL sliders on Lightroom

Adjust Colour Sliders to Change the Mood

Moving the HSL colour sliders can change the mood of a photo. Do you want to 

tell a story about the strength, clarity, and bold qualities of a flower in black and 

white? Try adjusting the sliders to show contrast and definition.

For a more subtle approach that portrays a flower’s fragility, try softer greys and 

less contrast.

There’s no ‘right’ or ‘wrong’ with this method, and it can be quite a subjective 

approach. Try different versions and review them with fresh eyes the next day.

If in doubt, less is always more!

A black and white close up of garlic flowers
Garlic flowers converted to black and white, with no adjustment of 
HSL colour sliders. © Heather Milne
Garlic flowers with green, yellow, and orange HSL colour sliders adjusted.
Garlic flowers with green, yellow, and orange HSL colour sliders 
adjusted. © Heather Milne

Photographing still life in black and white provides great creative opportunities. 

I’m always surprised at the beauty of a still life scene when the colour is removed.

Keep it simple; start with objects you’re familiar with. Experiment with whatever 

light and equipment you have on-hand.

Push the boundaries with your black and white still life photography, and don’t be 

afraid to get a bit arty!


------------------------------------------------------------------------------------------------ 

Ebay Camera Deals!                               


I bought this film camera for approximately $35 in 2006.  The good news is
film cameras are still going for near that price today on Ebay.  Yes, you will 
need to wade through the listings to find the bargains - but they are there!
Click Here and enjoy the savings.
------------------------------------------------------------------------------------------------