Friday, February 26, 2021

What is Focal Length? (And Why it Matters in Photography!)

 Tags: Photography for Beginners, Focal Length, Zoom Lenses
 

One of the most important aspects, when you buy a lens, is the focal length. This lets you know how close you need to be in relation to the subject you are capturing.

A longer focal length is necessary for objects further away. A smaller focal length captures more of the scene in front of you. To understand focal length in four, easy steps, read on.
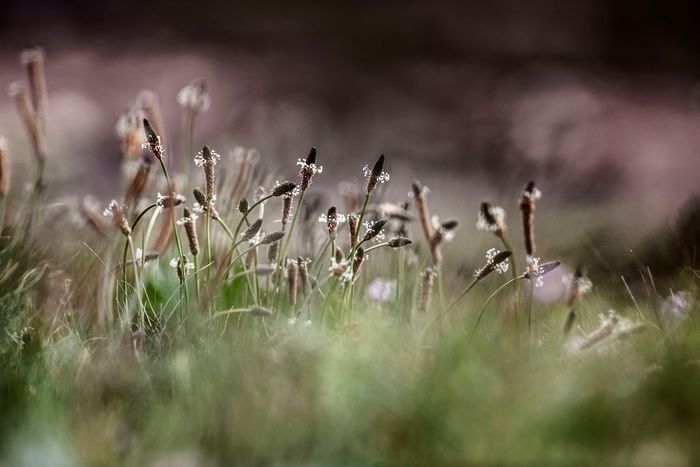
Photo of a field with flowers 

Why Focal Length Is Important?

Knowing what focal length means in relation to your camera is very important when it comes to buying lenses. Read this post to find out what different lenses are used for. You’ll see which ones are right for you, how to use them creatively, and all the technicalities.

Lenses are divided into two categories based on whether they can zoom. There are the ones that have a fixed focal length (prime lenses). And there are those that have a variable focal length (zoom lenses). In general, prime lenses are sharper and often have a wider aperture. These are great for low light conditions.

Zoom lenses allow you to use one lens to cover a range of different photography fields. One lens means less time spent searching for and changing lenses. There are advantages and drawbacks to both types of lenses. So, having a mixture of them gives you versatility and power.

We can use the human eye as an example. Its focal length varies between 17mm and 25mm, depending on who you ask and who you examine.

We have an approximate field of view of over 180°. This is different from the 90° angle of view from a lens, which is down to the fact that we have two eyes.

The area that we actively perceive is smaller, similar to a 40-50mm lens. That’s why the 50mm is called the ‘standard’ focal length.
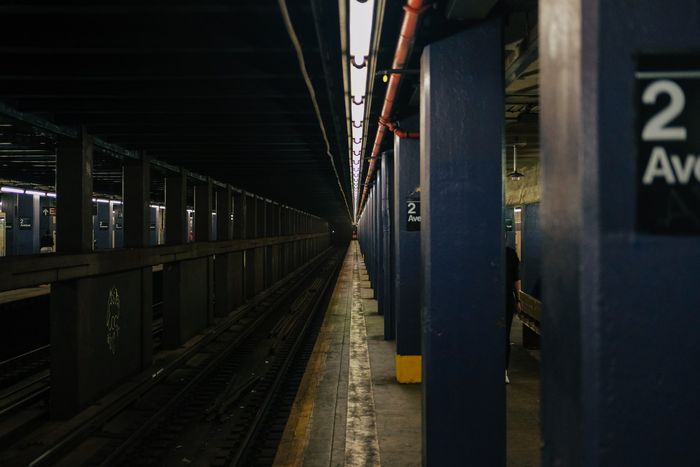
Photo of a subway station in low light

What Does Focal Length Mean?

The focal length of the lens determines how ‘zoomed in’ your photos are. The higher the number, the more zoomed your lens will be.

It is often misunderstood that the focal length is measured from the front or rear of the lens.

In reality, it’s the distance between the point of convergence in your lens and the camera sensor. This is the case of simple lens designs (like Double-Gauss). There are also plenty of complex optical designs that work differently. In many cases, that distance is not equal to the focal length.

The key takeaway is that the focal length of a lens is identical to the focal length of a single lens that would provide the same field of view.

Take a look at the diagram below that explains this.
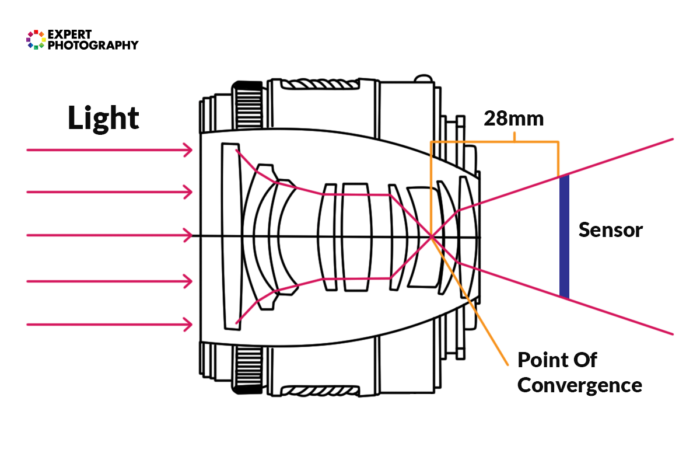
A diagram showing the point of convergence in a lens

You might ask: why do we use complex, multi-element designs and large lens housings if a single lens will also provide an image for much cheaper?

There are many reasons for this. First, to use a lens for photography, you need to make that lens focus somehow. This, on its own, doesn’t require multiple elements. But it does require a mechanism that allows the user to move the lens closer to or further away from the sensor. If designers want to seal off the moving element, it means two more elements on the front and on the back.

Second, an image coming from a single lens is not nearly as clear as you’d expect. Because of different wavelengths being present at the same time, colours shift very noticeably, causing a distracting effect. Special elements and coatings are necessary to counter this. And even in complex designs, the issue doesn’t disappear.

These elements, however, might introduce additional geometric distortions to the image. So, even more lens elements are needed potentially. In some expensive lenses, you’ll find aspherical elements. They, too, are there to provide a cleaner image with more detail and less distortion.

Zoom designs are a whole new world. They often use more than a dozen lens elements, sometimes even 20.

Ultimately though, their angle of view and focal length can be compared to single lenses. Hence, we’re able to use focal length as a measurement of “zoom”, and angle of view.

Different Focal Ranges and What They’re Used For

Ultra Wide Angle and Fisheye (14-24 mm)

These lenses are often considered speciality items. Usually, they are not included as part of a starter kit. They create such a wide angle of view that can feel unnatural to work with at the beginning. This is down to the lens having to fit more of the scene into the image than what your eyes can see at once.

Ultra wide-angle lenses are often used in event and architectural photography. They help to get a lot into a photo when shooting in a confined space.

These lenses are not suitable for portraits. They enhance the perspective so much that facial features can look unnatural.

Landscape photographers and adventurers, however, love them. An ultra-wide lens is able to distort perspective in ways that these genres value. In a landscape scenario, it’s possible to have a flower in the foreground be larger than the mountain in the background, while still fully including both in the frame.

When used for journalistic scenes, ultra-wide-angle lenses can provide a dramatic, interesting angle. Especially if you’re close enough to the subject. A 16-35mm or 14-24mm zoom, for example, is a crucial tool in the bag of a press photographer. These focal lengths can be found in the lineup of most manufacturers.

You might recognise the work ‘rectilinear’. Rectilinear wide angles project an image in which the straight lines remain straight. Fisheye lenses distort the scene into a spherical shape.

If a lens is not designated as fisheye, it’s more likely rectilinear, as that’s the standard. Fisheyes are rather special tools. Apart from fisheye DSLR lenses, they’re most commonly included in action cameras, such as GoPros.

Their angle of view is the largest among all lenses, often reaching 180 degrees diagonally.
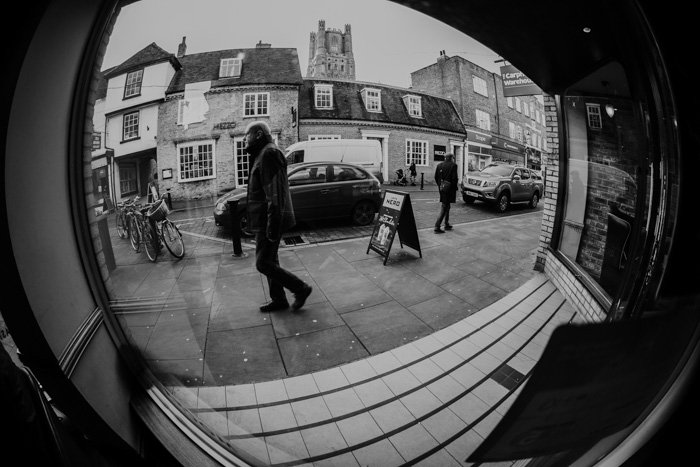
A black and white image of a street scene, shot using ultra Wide Angle focal length

Wide Angle (24-35 mm)

This is where you’ll find most kit lenses for full-frame cameras start. 24mm is the point at which the distortion that appears to stretch the side of an image stops appearing unnatural.

Wide-angle lenses are used by photojournalists for documenting situations. This is because they are wide enough to include a lot of the context, whilst still looking realistic.

Nature and landscape photographers love them for the same reason.

The widest lenses commonly used in movie production also fall into this range of focal lengths. Their field of view is ideal for showing plenty of the environment. But thanks to the wide aspect ratio, subjects can be far enough away to not appear distorted.
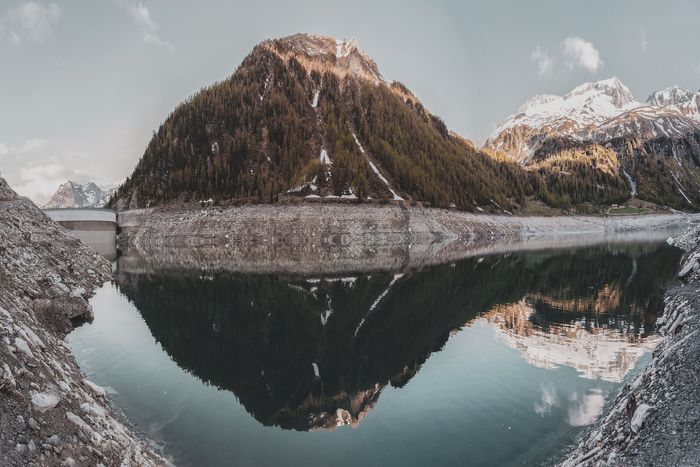
Photo of a mountain reflecting on a waterscape

Standard (35mm-70 mm)

It’s in this range (at about 45-50 mm) that the lens will best reproduce what our eyes see (excluding peripheral vision). I like to use this range when shooting on the street or with friends in a closed setting. Examples would be at the dinner table or the pub.

Standard lenses as called standard for a reason – these are the most common lenses, in both prime and zoom format.

Their focal lengths can be used for virtually anything, from nature to action.

A standard lens such as a 50mm f/1.8 is an excellent, inexpensive addition for a camera. It will provide excellent results. A prime lens will always provide better results than your kit zoom lens, as it is built with a single purpose. It does one job well.

Kit zooms also fall into this category. They usually cover a zoom range of 18-55mm (on crop cameras) or 28-70mm (on full-frame and film cameras). Both of these zooms cover the entire standard range, as well as some wider angles.
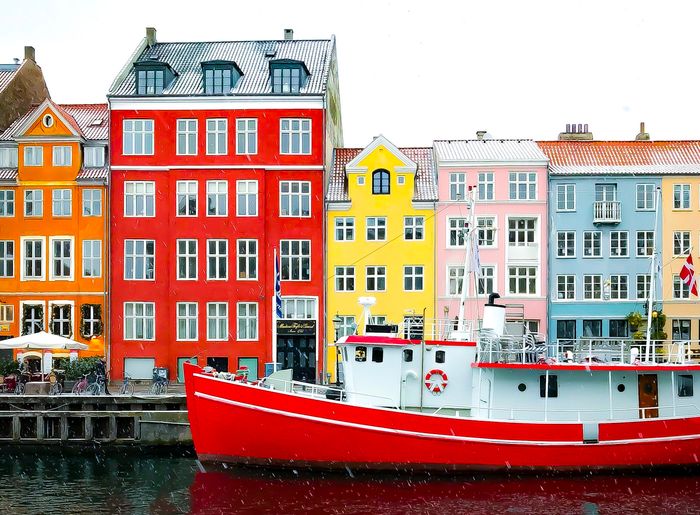
Photo of a ship with colorful houses in the background

Short Telephoto (70-105mm)

This range is often where kit lenses stop. Here, you’ll start to get into the range of telephoto lenses and portrait primes (around 85mm). This is a good range for portraits as the perspective of the lens will make human faces look natural.

Most short telephoto lenses separate the face from the background, without completely isolating it.

A large proportion of dedicated macro lenses also falls into this category. This is because short telephotos are long enough to provide enough working distance. But they are short enough to not make huge macro lenses. Their fairly natural perspective also plays a big role in this.
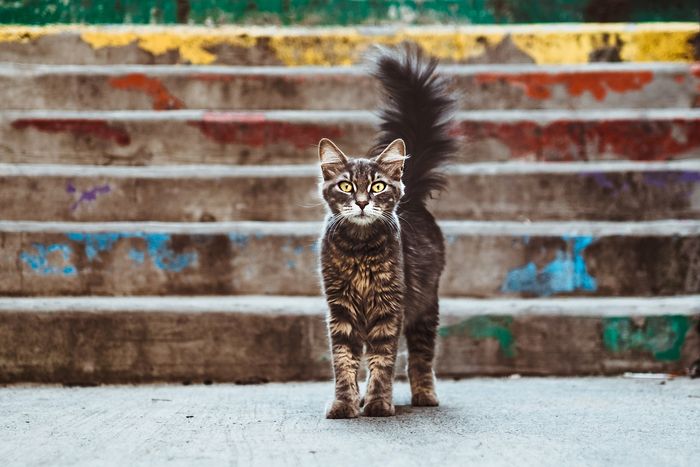
Photo of a cat in front of stairs

Telephoto (105-300mm, and Above)

Lenses in this range are often used for distant scenes such as buildings or mountains. They’re not really suitable for landscape photography because of the way they flatten the perspective of a scene. But they can provide interesting perspectives in that field, too.

Lenses in this range are often used for sports and animal photography. The most popular lenses for such applications are 70-200mm f/2.8 lenses on the shorter side, and 150-600mm lenses on the longer side.

Portraits are also a great genre to use them in. Shooting portraits with long lenses can provide exceptional subject separation and background compression. But it also expands working distance, so if you’re going for more intimate images, they might not be the ideal lens to choose.

There are hard-to-imagine extremes in this range. The longest modern DSLR lenses (800mm f/5.6) from both Canon and Nikon cost more than a small car. But there are longer ones not in mass productions. Canon’s groundbreaking 1200mm f/5.6 has only sold a few dozen copies before production ceased. They are owned by select companies in special fields.
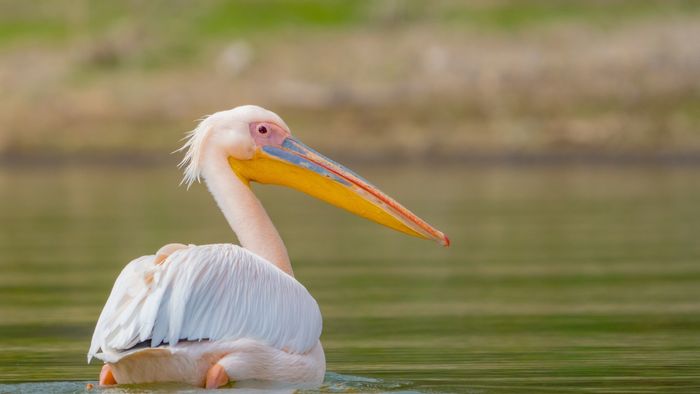
Photo of a pelican on a lake

How Does Focal Length Affect Perspective?

I tackled most of this in the previous section. Let me give you a better idea of how the focal length affects the perspective of a photo. I took four photos of the same subject at different focal lengths and compared them below.

The subjects (three soup cans) remained in the same position (about 10 inches apart from one another) in every photo. It’s worth noting that these photos are shot with a crop sensor. This means the effective focal length will be higher than listed.

To say it’s the focal length that changes the perspective is, however, quite misleading. You see, it’s the distance from the subject.

The focal length of a lens is an indicator of the distance from the subject: the images are all framed the same. Differences arise because the focal length is getting longer (zooming in) as the camera moves further away from the subject.

Remember, the distance from the subject is changing the perspective. The focal length is just used to compensate for this.
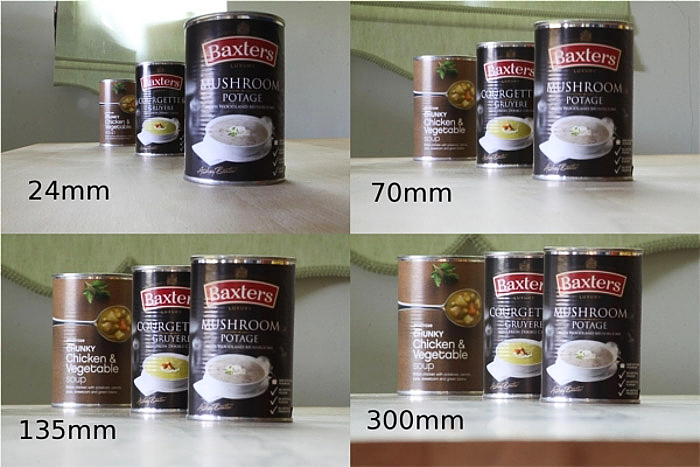
Four photos of three cans shot with different focal length lenses

What About My Crop Sensor?

Shooting on a crop sensor has what’s known as the ‘crop factor’. What you’re doing is zooming in on an image, and avoiding the widest parts of the scene. The diagrams below show the way this works.

Even lenses built for crop cameras such as the EF-S range (Canon) and DX range (Nikon) will still have this effect. This is because lenses are listed by their physical focal length rather than their effective (or equivalent) focal length.

However, these lenses will not work on a full-frame body without heavy vignetting. This is because the image will not project onto the whole of the sensor.

That’s it!
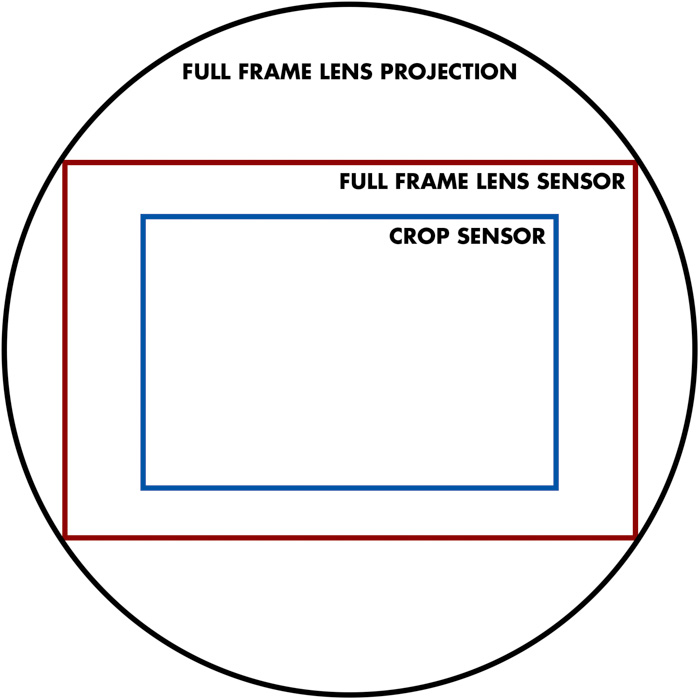
a diagram showing the crop factor for full frame lens projection, full frame lens sensor and crop sensor

Hopefully, this article cleared up any confusion you’ve had before about focal length. Once you understand it fully, the technical aspects of photography become a step easier.


PHOTOGRAPHY FREEBIE:

How to make money with your Photography even if you're not a Pro.

Copy & paste this link into your browser, click ENTER, and enjoy: 

https://mrdarrylt.blogspot.com/2020/01/how-to-make-500-month-from-your.html

                                                         or

https://www.photography-jobs.net/?hop=darryl54

 ----------------------------------------------------------------------------------------------------------------------

Visit me on Facebook and post your pictures.

https://www.facebook.com/Darryl-T-363867387724297/  
----------------------------------------------------------------------------------------------------------------------
Need a camera?  Try this link (Tri State Camera) for discounted prices:  https://ebay.to/2Smb1ho  


Monday, February 22, 2021

Which Lens Do I Need? From Fisheye to Super Telephoto

Tags:  Photography for Beginners, Lenses
 

Full-Frame Vs. Cropped Sensors

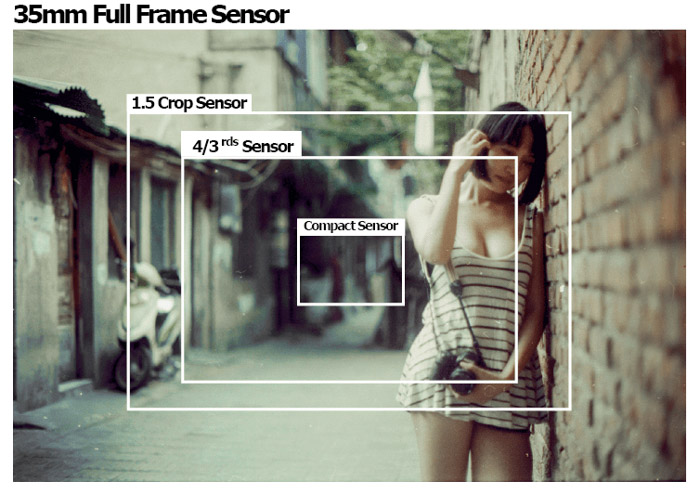
A full frame DSLR or mirrorless camera has a sensor the same size as the 35mm format (36mm x 24mm). 35mm was always considered small format, compared to medium and large format cameras.
These sensors will give you the highest resolution and image quality unless you move to a larger format camera.
Cropped sensors are smaller than the 35mm format. They include APS-C (Nikon, Sony), APS-H (Canon) and four thirds (Olympus, Panasonic).
The APS-C has a sensor size of 23.6mm x 15.7mm, APS-H has 28.7mm x 19mm and the four-thirds system has 17.3mm x 13mm. These are generally cheaper to manufacture and buy.
These affect your lens’ abilities. A full frame-lens working with a cropped sensor will multiply the focal length by x1.6 (APS-C),  x1.5 (APS-H) and x2.08 (four-thirds).
So, a 50mm full-frame lens will effectively become a 75mm lens on a Nikon DX camera, an 80mm on a Canon 7D and a 104mm on an Olympus camera.
This is great for getting closer to a subject without buying an extra lens. The 50mm turns into a telephoto lens on the Olympus, or a macro lens if you turn it around using adapters.
The only problem is that you are cropping into the image, so the resolution will never be the same as the full frame version.
A portrait of a girl leaning against a wall with sensor size diagrams over the image

Prime Vs Zoom

A prime or fixed focal length lens is one where you need to get closer or farther away from a subject to frame correctly. These lenses are typically lighter, faster and cheaper as they do not require motors or devices inside the lens.
Their quality is unsurpassed, yet they make that a trade-off for versatility.
There will be situations where you can’t move physically, yet still, need to get a tighter frame on a subject. The Canon EF 50mm f/1.8 II or Nikon AF Nikkor 50mm f/1.8D are the perfect examples.
A zoom or variable focal length lens is one where you can ‘zoom’ in and out of a scene.
This means that by standing in the same place, you can tighten or loosen the frame around the subject. Typically, they are more expensive and heavier due to the amount of machinery needed inside.
Remember, they need to move and focus at a whole range of focal lengths.
They also have a lower quality overall than prime lenses, and they don’t allow you to open your aperture as wide as a prime lens. The Canon EF 24-70mm f/2.8L II is a perfect example. 
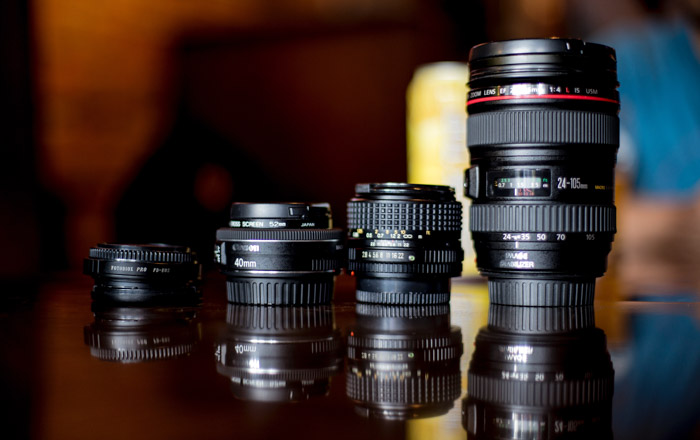
four different types of photography lenses on a table with reflections

Different Types of Lenses

Fisheye/Ultra Wide Angle

A fisheye or ultra wide angle lens is a lens that achieves extremely wide angles of view. The focal length of a fisheye lens is the smallest focal length you can find in photographic lenses.
These lengths can be anywhere between 4.5mm and 24mm, where the angle of view is anywhere between 100° and 180°.
When it comes to using these lenses, you will find that there are the different types; circular cropped circle and full-frame.
A circular lens will give you a circle image, a cropped circle will give you images with curved sides, and the full-frame will give you a rectangular image, cropped from the captured circular image.
In terms of positive uses, they will capture very wide panoramas and skyscapes very well. They have been used for cityscapes, as they give you an ultra-wide view.
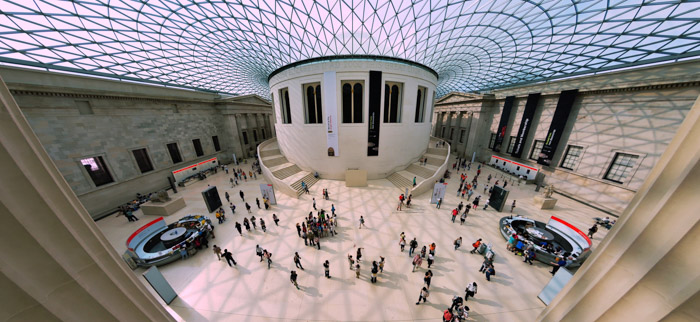
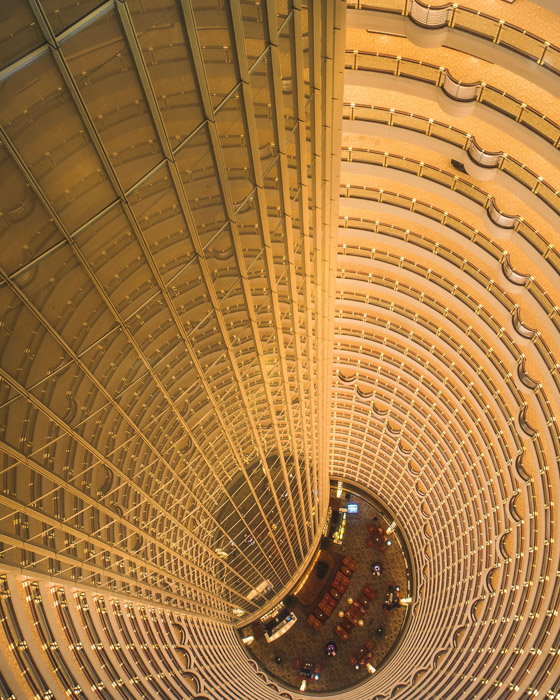
The interior of an impressive architecture building with a glass ceiling taken with a wide angle lens
On the flip side, they give you unparalleled levels of distortion. This is due to the lenses having to squeeze in all the information. You can use rectilinear remapping to correct the perspective, turning the curved lines into straight ones.
They give you an unusual perspective that you may want to use rarely, making this a very expensive lens if you don’t use it often.
They are great for capturing scenes where the photographer needs to fit in a lot of a scene into a photograph while operating from a small space. Their biggest use is more artistic, where you might use one to show an above and below water scene.
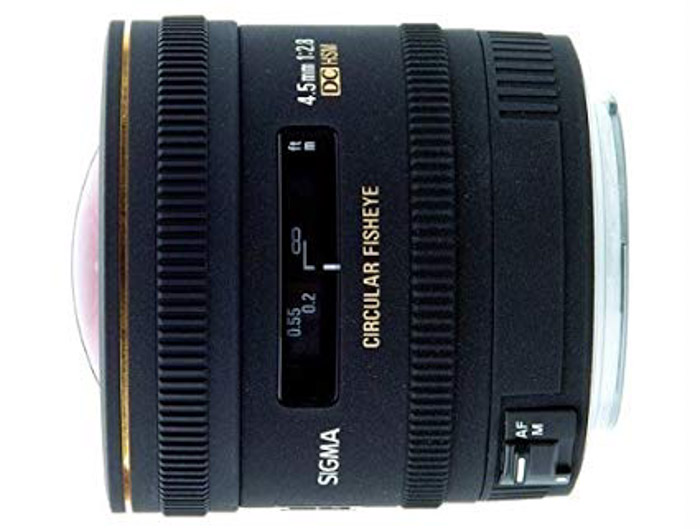
The smallest focal length fisheye lens is currently the Sigma 4.5/2.8 EX DC Circular Fisheye. This is extreme when it comes to fisheye lenses, where a more popular choice would be the Nikon AF DX NIKKOR 10.5mm f/2.8G ED.
Sigma 4.5/2.8 EX DC Circular Fisheye lens on white background

Wide Angle

A wide-angle lens refers to a lens where the focal length is substantially smaller than the focal length of a standard or ‘normal’ lens. This will translate to a lens with a focal length of 24mm to 35mm.
They typically have an angle of view of between 64° and 84°.
They have the capacity of fitting as much of a scene into the frame without being as overly distorted as the fisheye lens. The amount of distortion can be annoying but easily corrected using lens profiles in Adobe Lightroom.
Wide angle lenses will help in emphasising the difference in size between the background and the foreground.
With these, you have to get close to your subject, which could break the candid state of the scene. Also, Bokeh is out of the question as the depth of field is long.
They usually don’t have the widest apertures, and buying one will most certainly need a remortgage on your house.
Awesome downward shot from inside a glass walled architectural building
This lens allows the most amount of a scene to be included in a photograph. Perfect for use in architectural, interior and landscape photography. They are especially useful when the photographer is unable to move further away from a subject.
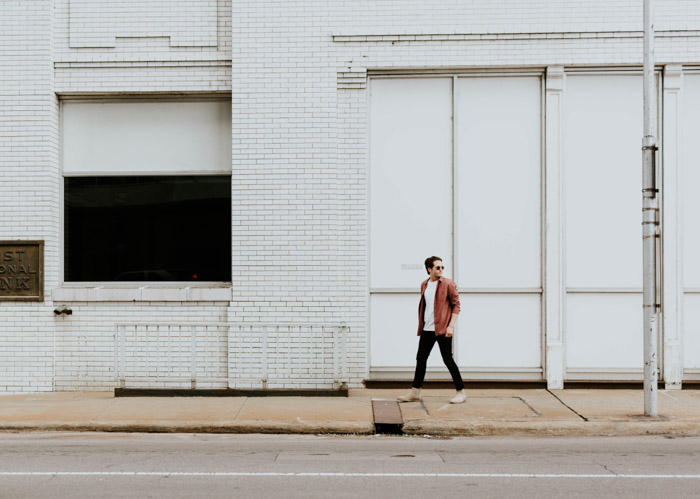
Great for street photography, where a background scene is important in storytelling.
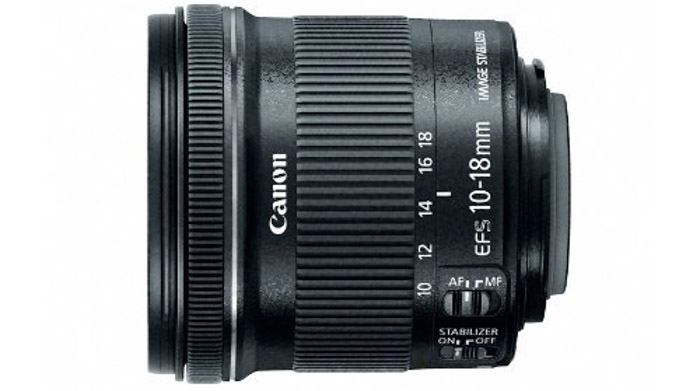
The Canon EF-S 10-18mm f/4.5-5.6 IS is a great lens to work with, and being a zoom lens, it gives you room to play. The Nikon 24mm f/1.4G is a great choice as a wide angle prime lens, yet expensive.
Canon EF-S 10-18mm f/4.5-5.6 IS lens on white background

Standard / Normal

A standard or ‘normal’ lens is usually what all other lenses are compared to. This lens is closest to the human eye in terms of focal length and angle of view. Typically a 50mm feels natural, without an overabundance of lens distortion.
They sit firmly at a focal length of 50mm and generally have an angle of view of 58°.
Positively, a 50mm lens is a prime lens, which is lighter, faster and creates a higher image resolution. A ‘nifty fifty’ has a very wide aperture (f/1.4 or f/1.8), making it faster and very good in low light conditions.
With any prime lenses, you need to move physically to get closer to a subject. On a negative note, these lenses are mostly plastic, where the 50mm metal lenses are very expensive.
street photo of a man in sunglasses walking down a path
As their name would suggest, normal or standard lenses are versatile lenses. They can be used for almost all sorts of photography. It will be street, portraiture, landscape, or event photography.
As this is a prime lens, it tends to have a wider aperture, which allows you to keep your ISO low and quality high.
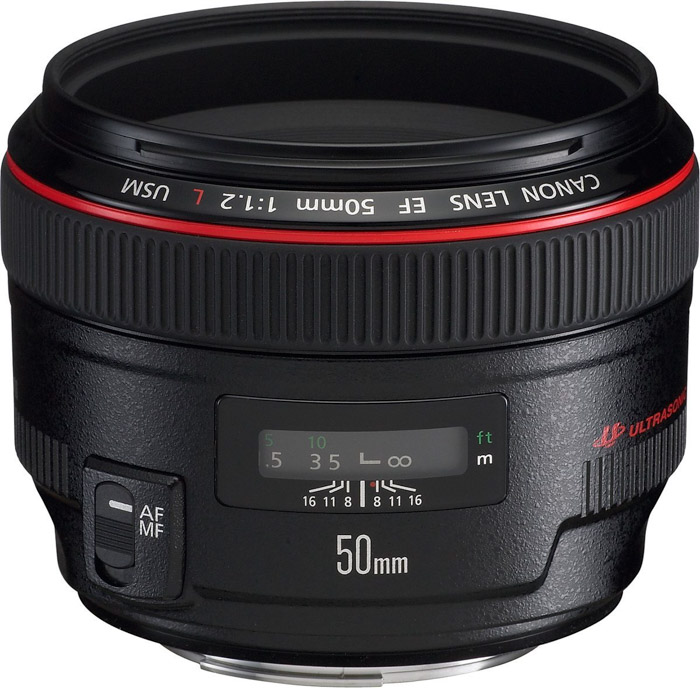
For a ‘nifty fifty’, look no further than the Canon EF 50 mm 1.8 STM. For the faster, heavier and pricier version, have a look at the Canon EF 50 mm f/1.2L USM.
the Canon EF 50 mm f/1.2L USM nifty fifty lens

Telephoto

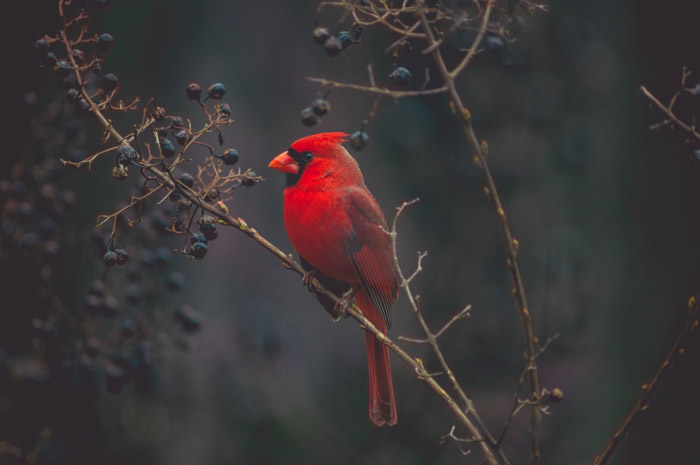
A telephoto lens is one with a longer focal length than the standard lens. It gives you a narrow field of view and a magnified image. These lenses range from 70mm – 200mm and have an angle of view of 10°-30°.
Positively, a telephoto lens will let you capture subjects that are too far away, or too dangerous to approach. With this lens, you capture better candid images. However, as they have such long focal lengths, their depth of field is very small.
This can drastically affect your foreground and background, pushing both out of focus.
A red bird perched on a tree taken with a telephoto lens
The perspective you get from this type of lens has the potential of bringing the subject and background closer together, almost squashing them together. This can be used to your advantage.
They are heavy, cumbersome and generally expensive, especially as zoom lenses.
Telephoto lenses are typically used in sport and wildlife photography, astrophotography and capturing specific details in landscapes. They can be used in street photography, allowing you to keep your distance or capturing details in architecture.
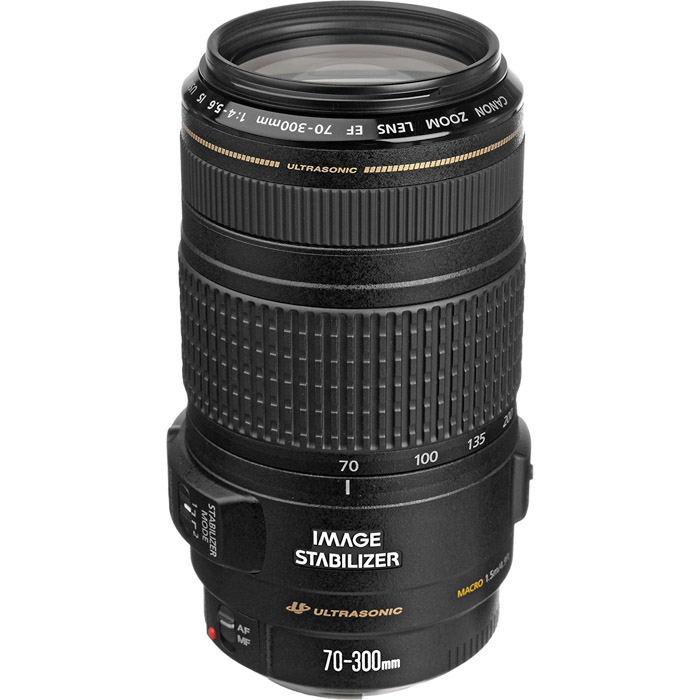
The Canon EF 70-300mm f/4-5.6 IS USM is a notable lens, which comes with image stabilisation to help eliminate camera shake, which itself is exemplified by the lens’ low depth of field.
The Canon EF 70-300mm f/4-5.6 IS USM lens on white background

Super Telephoto

A super telephoto lens goes above and beyond the capabilities of a telephoto lens. These start at 300mm and can go all the way to 600mm. Their field of view is a drastically small 1° to 8°.
Positively, if you can’t get close to a subject, this is the lens. For some areas of astrophotography, it is this lens or a telescope, which could end up being smaller than the focal length of a super telephoto.
If used with a cropped sensor, this lens is almost a 1000mm lens.
Negatively, this lens has a telephoto effect, as it will push the subject and foreground closer together. This is made more apparent than just a telephoto lens as the focal length here is longer.
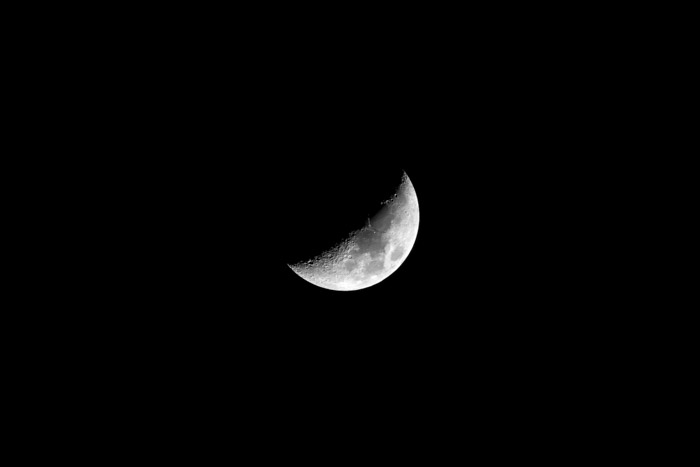
A close up photo of the moon taken with a super telephoto lens
The super telephoto lens is for really far away subjects. For sports, wildlife, nature and astronomy are all subjects for this lens.
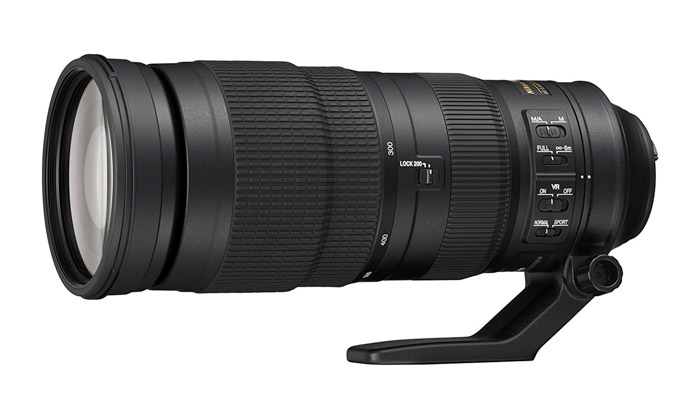
The Nikon AF-S 200-500mm f/5.6E ED VR is an affordable lens in the super telephoto category.
The Nikon AF-S 200-500mm f/5.6E ED VR, an affordable lens in the super telephoto category

Specialist Lenses

Macro

A macro lens is a specific lens created to photograph small objects at a very close range. They are able to focus from 1cm to infinity.
A macro lens can be replicated by either using extension tubes or by turning an already owned lens the wrong way round, mounting it with an adapter.
Macro lenses let you focus close, but they also work as a normal lens. This lets you get some versatility out of your lens, making this a cheap option. Extension tubes cut out light entering the lens as the film and focal planes are further apart.
A macro lens doesn’t cut down the light, allowing you to keep your ISO low.
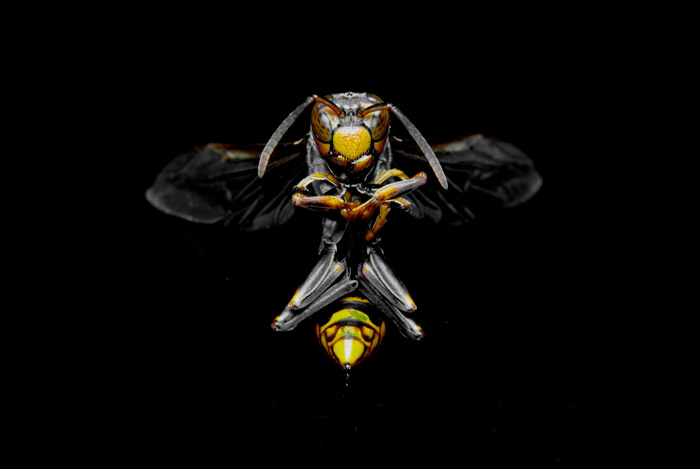
Close up of an insect on black ground taken with a macro lens
These lenses come at a higher cost, as the number of motors and mechanics involved on the inside of the lenses. they aren’t super light lenses either, so expect yet another weight added to your bag.
On top of this, macro photography does require special equipment, meaning more items and weight added to your trip.
You will use this lens for insects and small objects that you want to blow up larger than the 1:1 ratio.
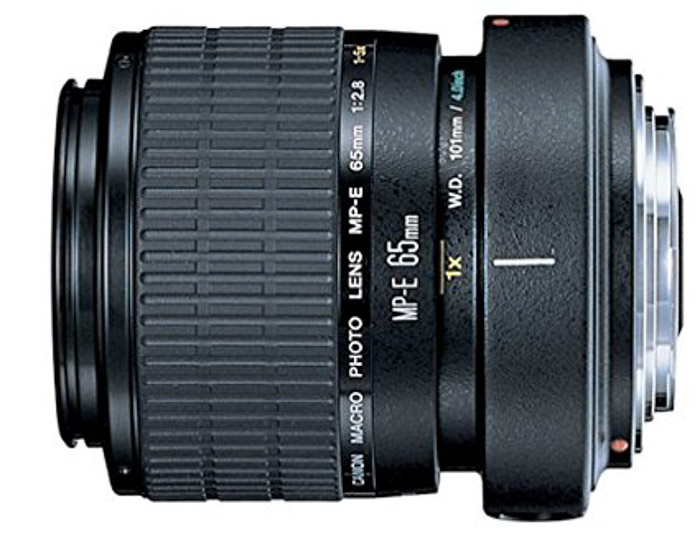
The Canon MP-E 65mm f/2.8 1-5X is a lens we all wish we could enjoy the benefits from. This lens will magnify your subject up to five times its actual size. 

 Canon MP-E 65mm f/2.8 1-5X lens on white background 


PHOTOGRAPHY FREEBIE:

How to make money with your Photography even if you're not a Pro.

Copy & paste this link into your browser, click ENTER, and enjoy: 

https://mrdarrylt.blogspot.com/2020/01/how-to-make-500-month-from-your.html

                                                         or

https://www.photography-jobs.net/?hop=darryl54

 ----------------------------------------------------------------------------------------------------------------------

Visit me on Facebook and post your pictures.

https://www.facebook.com/Darryl-T-363867387724297/  
----------------------------------------------------------------------------------------------------------------------
Need a camera?  Try this link (Tri State Camera) for discounted prices:  https://ebay.to/2Smb1ho  


Tuesday, February 16, 2021

11 Best Entry Level DSLR Cameras in 2021


Many new photographers don’t have the budget or need for the most professional camera systems. Especially since some of these can cost thousands of dollars.

Entry-level cameras provide photographers the chance to capture amazing scenes without breaking the bank. After all, it’s all about the person and not the camera.

Here’s our list of the best entry-level DSLR cameras in 2021.

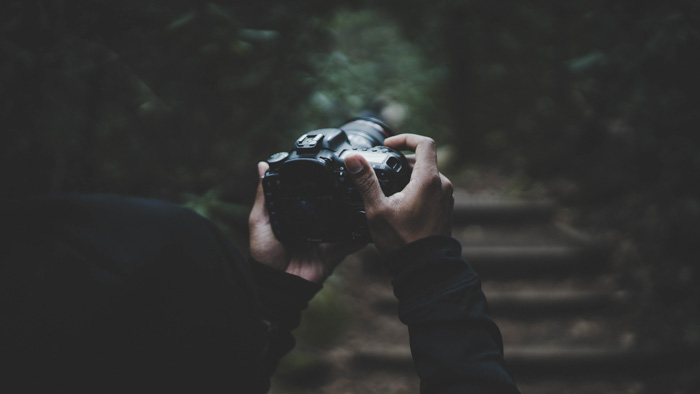
A close up of a photographer taking shots in a dark forest 

What Is an Entry Level DSLR?

A DSLR is a digital single reflex camera. This type of camera uses one lens to view the scene and capture it on the sensor. It does this by using a mirror that changes it from viewing to capturing.

DSLRs can range from $400 for the Canon Rebel T6 to $6,500 for the Canon EOS-1DX Mark III. The former is an entry-level camera, while the latter is a professional DSLR.

There is a world of difference between these systems, but they have the same basic functions. Both cameras have a digital sensor, the same exposure triangle settings and other basic functions, such as autofocus, burst shooting, and mirror lockup.

Where they differ is the extent of these functions.

There are smaller learning curves with entry-level DSLR cameras because their settings and features are limited. But as I said, the basics are the same across every digital camera.

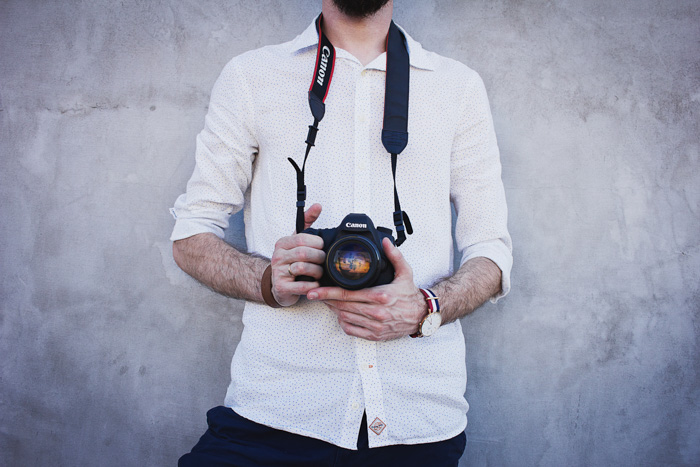
A closeup of a photographer holding a canon dslr camera

Warning – Don’t Buy the Bundle

When it comes to searching for an entry-level DSLR camera, we really want you to heed the following warning: Don’t go for the bundle package.

There’s a reason we link and show photos of the camera without any extra stuff, and particularly lenses. This is because the lenses that come with the camera are usually not great.

These lenses are what we call ‘kit-lenses’ and are of lower quality than other lenses, traditionally. Modern kit lenses are much better, but still often don’t give you the best experience. Of course, there are great kit lenses, but they usually come with more expensive camera bodies.

As for options one step above the ‘kit’ level, a few options come to mind. On the Canon side, the EF-S 15-85mm f/3.5-5.6 IS USM is a cost-effective option offering a great image. Nikon offers the excellent 16-80mm f/2.8-4 DX lens, although that’s quite a bit more expensive. There are fantastic third-party options, too, such as the Sigma 18-35mm f/1.8 (Canon version).

With a bundle, you get a lot of junk that you won’t need. Because of this, these bundles are actually overpriced. The items are of low quality, and perhaps items you don’t need or never use. If you need memory cards and bags, source them individually. You’ll save money and get what you actually want.

You might find discounted kits which are actually cheaper than the camera body alone; if this is the case, go for it, of course.

Now, let’s see our favourite entry-level DSLR options from the four manufacturers that still produce them.

Canon

1. Canon EOS Rebel T7i

  • 24.2 Megapixels
  • 1.18 lbs
  • APS-C sensor (Cropped Sensor)
  • Built-in WiFi & Bluetooth
  • High-Speed continuous shooting at up to 6 fps
  • 45 AF points
  • Vari-angle touch LCD
  • 25,600 ISO range

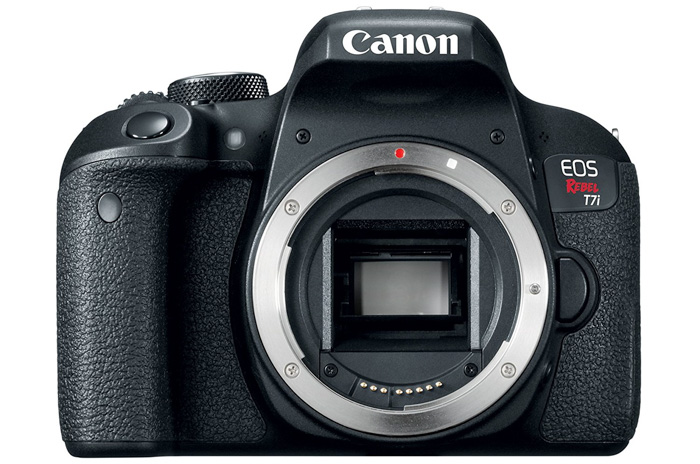
The Canon EOS Rebel T7i, otherwise known as the EOS 800D has all the bells and whistles you’d expect from a Canon DSLR. It comes with a 24-Megapixel sensor, dual-pixel AF and even a tilt-flip touchscreen.

The viewfinder shares the same 45-point autofocus system from the 77D, making it a pretty good contender for sports photography. This also matches with the possible 6 fps.

This camera shares most of the same specifications as the T6i. The resolution is the same, the weight is similar and they both have WiFi built-in, alongside a vari-angle LCD screen.

The advantages with the T7i is the advanced technology, the longer usage time and the slightly faster burst rate. These come at a higher cost of around $150.

This is one of the best DSLRs at entry-level available, and possibly the best that Canon digital cameras have to offer in this list.

Canon Rebel T7i

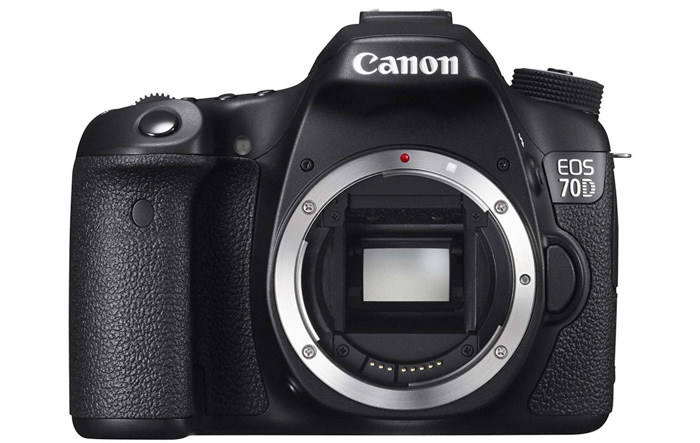
2. Canon EOS 70D

  • 20.2 Megapixels
  • 1.7 lbs
  • APS-C sensor (Cropped Sensor)
  • Built-in WiFi
  • High-Speed continuous shooting at up to 7 fps
  • 19-point Autofocus
  • Vari-angle touch LCD
  • 25,600 ISO range

The Canon EOS 70D is the most expensive option among their entry-level DSLR range. It’s actually an older midrange model, which slowly descended into more affordable territories. It’s almost 7 years old now, but we still consider it to be a great digital camera.

It has a resolution of 20.2 megapixels. Its autofocus system is one of the first implementations of the Dual Pixel technology. This means each pixel is split into two separate readable photodiodes, which face left and right.

This means that, in principle, it is capable of phase detection autofocus. This feature works across 80% of the frame, down to 0 Exposure Values and up to f/11. All these attributes make this a very capable autofocus system.

Other attributes are the 7 frames per second and the Digic 5+ processor that was first seen in the beast we know as 5D Mark III.

Video mode is accessible with the flick of a lever. The camera provides continuous autofocus tracking during live view and video recording.

The 70D bridges the gap between entry-level and professional cameras. There are many similarities between the 70D and Canon’s 6D and 7D lines.

It has the separate top LCD for showing exposure parameters even when the main LCD screen is turned off. It has two control dials, making manual operation a lot easier.

Its function buttons are laid out next to the top LCD, which makes it quicker to operate blindly. You can concentrate on getting the image and what happens in the viewfinder.

So, if you’re planning to upgrade but don’t yet have the budget, it might be the perfect option.Canon 70d dslr

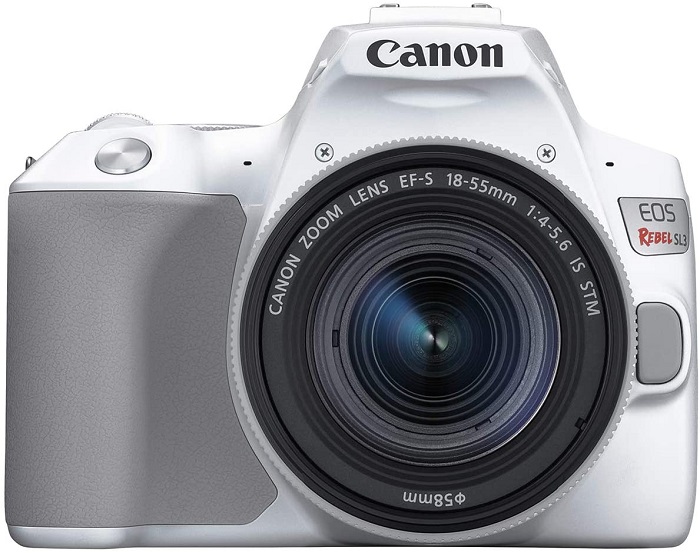
3. Canon EOS Rebel SL3

  • 24.2 Megapixels
  • 1 lb
  • APS-C sensor (Cropped Sensor)
  • Built-in WiFi & Bluetooth
  • High-Speed continuous shooting at up to 5 fps
  • 9 AF points
  • Vari-angle touch LCD
  • 4K video

The Canon EOS Rebel SL3 boasts a great deal. It has Dual Pixel autofocus, WiFi with NFC and Bluetooth. It even comes with a new interface, making it more accessible to beginners.

Its small size might be misleading, but as the Nikon D3500’s main competitor, it is just a tad smaller and lighter. The less weight is a welcome feature, perfect for long hikes and country hopping.

Compared to the SL1, it’s almost the same. Except here you get better focusing in live view. In terms of the Canon Rebel T7i, you do get more, but for a higher price.

If you don’t need the extra autofocus points, stick with this model. It will capture scenes excellently without breaking the bank.

In live view mode, you can use the excellent eye detection Canon has added to Dual Pixel systems. 4K video recording lets you capture memories in higher resolution than ever before in an SL camera.

Canon Rebel, one of the best entry level dslr cameras

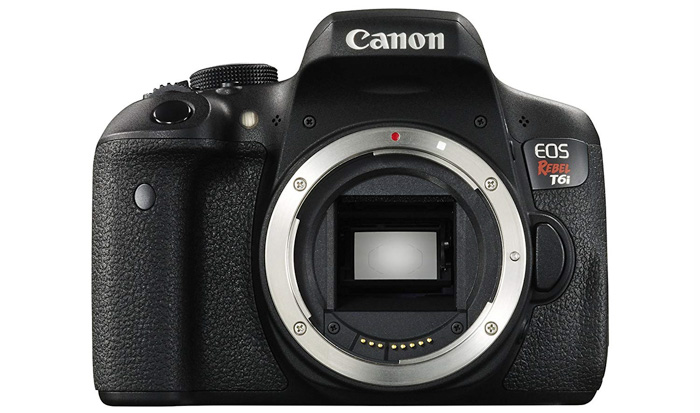
4. Canon EOS Rebel T6i

  • 24.2 Megapixels
  • 1.22 lbs
  • APS-C sensor (Cropped Sensor)
  • Built-in WiFi
  • High-Speed continuous shooting at up to 5 fps
  • 19 AF points
  • Vari-angle touch LCD
  • 25,600 ISO range

The Canon EOS Rebel T6i was the newer version of the Rebel T5i, adding more megapixels, a slightly faster burst capacity, and 10 more phase-detection points to its autofocus system.

Also coming with this system is the addition of WiFi and Near Field Communication (NFC).

Here, you’ll find the Hybrid CMOS AF III. Canon claims that the performance of the Hybrid CMOS III is close to that of the original Dual Pixel AF found in the 70D and 7D II.

It’s a great camera to use. The image quality is excellent, and it performs well in low light situations, making it one of the best entry-level DSLRs out there.

Canon Rebel T6i


Nikon

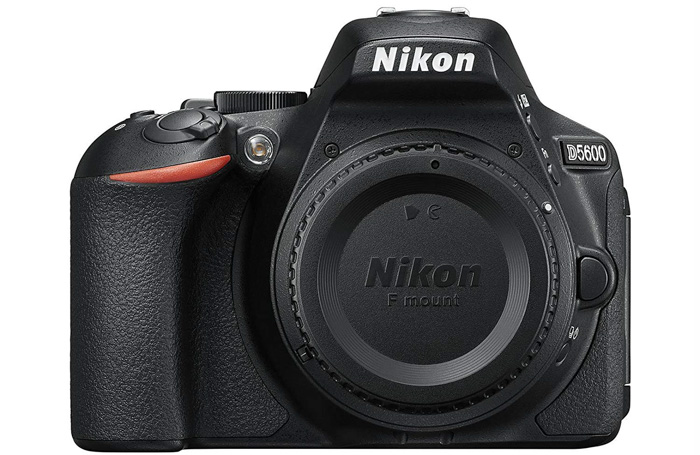
1. Nikon D5600

  • 24.2 Megapixels
  • 1.04 lbs
  • APS-C (Cropped Sensor)
  • Built-in WiFi & Bluetooth
  • High-Speed continuous shooting at up to 5 fps
  • 39-point Autofocus
  • Vari-angle touch LCD
  • 25,600 ISO range

The first thing you will notice about this miniature beast is its lightweight body. It is also very connected, having WiFi and Bluetooth built into the camera.

As we look across these entry-level cameras, we see they are very similar. The most important thing that really separates the Nikon D5600 from the Nikon D5300 is the addition of Snapbridge.

Otherwise, this is an incremental, but useful update.

Snapbridge, if this is a new term for you, is Nikon’s answer to syncing the images you capture with your DSLR to other devices, such as a smartphone or tablet.

The image quality is excellent, and in terms of the high ISO range, it is one of the best in our list. It keeps the quality high even in the lowest light situations.

Its dynamic range is outstandingly wide, market-leading in the entry-level segment.

For the Nikon range, this is one of the best cameras for excellent image quality.

Nikon D5600 camera

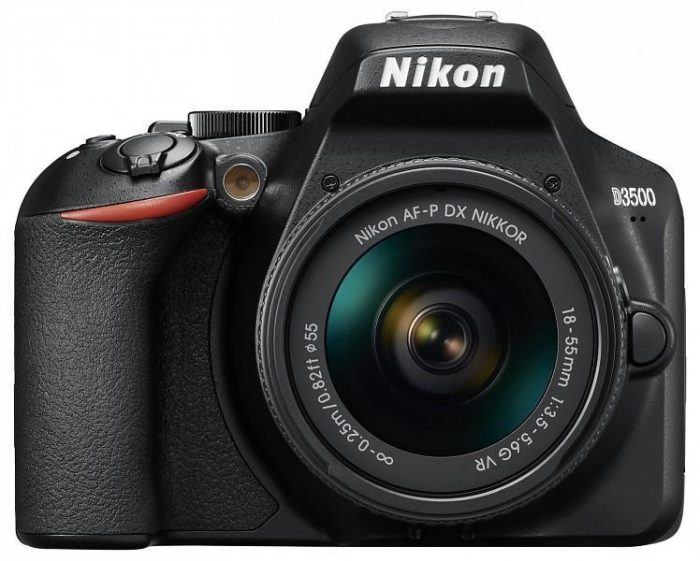
2. Nikon D3500

  • 24.2 Megapixels
  • 0.86 lbs (without battery)
  • APS-C sensor (Cropped Sensor)
  • Built-in WiFi & Bluetooth
  • High-Speed continuous shooting at up to 5 fps
  • 11-point Autofocus
  • Vari-angle LCD
  • 25,600 ISO range

The Nikon D3500 is the update on the Nikon D3400. It is specifically made for those first-time photographs with no experience of ILC (Interchangeable Lens Cameras).

The difference here is the Snapbridge connectivity across devices using built-in Bluetooth. The battery life increased, but they scrapped the Ultrasonic sensor cleaning.

In terms of competition, this is a very similar Nikon version of the Canon T6i. The one thing that does set them apart is the battery life. The Nikon can capture 3 times more images on a single charge on paper, although the difference is smaller in real life.

This camera is great for travel or any field of photography where you’ll need to hold your camera for extended periods of time. It doesn’t even weigh 1lb, so your arms and back will thank you for it.

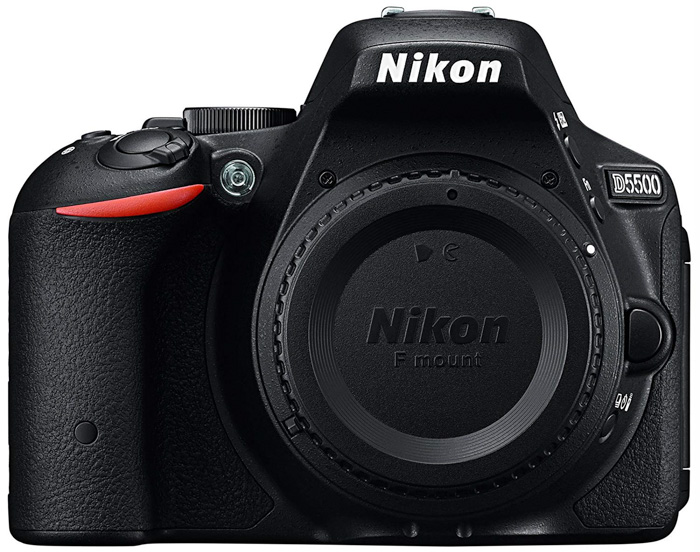
3. Nikon D5500

  • 24.2 Megapixels
  • 1.4 lbs (with lens)
  • APS-C (Cropped Sensor)
  • Built-in WiFi
  • High-Speed continuous shooting at up to 6 fps
  • 39-point Autofocus
  • Vari-angle touch LCD
  • 25,600 ISO range

The D5500 falls between the D5300 and the D5600 in terms of age and features, but also price. It also has the competitive WiFi feature built-in, and a usual 39 point autofocus and 25,600 ISO range.

These settings are usually in this area of entry-level cameras. It does have a solid noise reduction capability and is smaller and lighter than the Nikon D5300, also on this list.

How did they manage to make it lighter? Instead of polycarbonate, this camera uses a carbon fiber composite. It’s a great camera to use. One of the reasons for this is the curved grip, making it easier to hold.

Although it utilizes a pentamirror rather than the brighter and clearer pentaprism, you won’t notice any problems with this easy-going system.

Nikon D5500 dslr camera

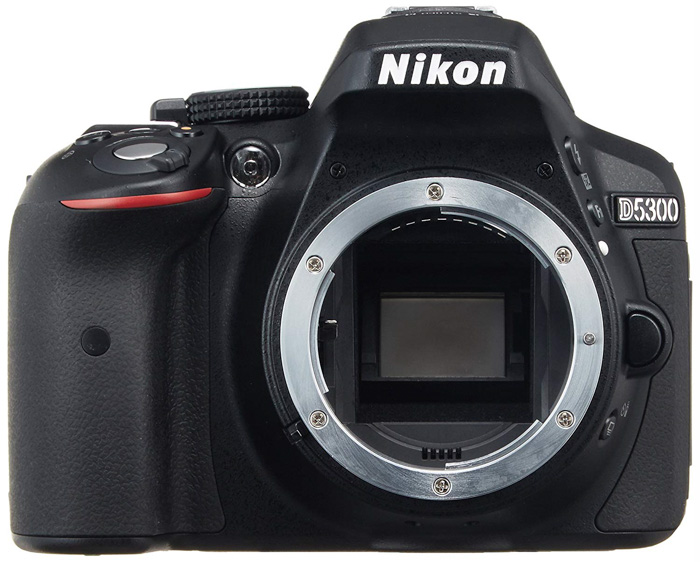
4. Nikon D5300

  • 24.1 Megapixels
  • 1.05 lbs
  • APS-C sensor (Cropped Sensor)
  • Built-in WiFi
  • High-Speed continuous shooting at up to 5 fps
  • 39-point Autofocus
  • Vari-angle LCD
  • 25,600 ISO range

The benefit of having an entry-level camera is its ease of use. There is no need to have all the bells and whistles if you aren’t going to use them. They’ll just hinder your learning curve as a hobbyist photographer.

With the Nikon D5300, you get a very competitive range of features and settings. These are the 39 autofocus points, the 25,600 ISO range, and the 24-megapixel resolution.

The difference with this system is the added GPS. This makes it easy to reference your images, especially with Lightroom’s map module.

While this is not the newest generation of the Nikon 5X00 series, it’s still a viable choice if you’re on a slightly lower budget.

Nikon D5300 camera


Pentax

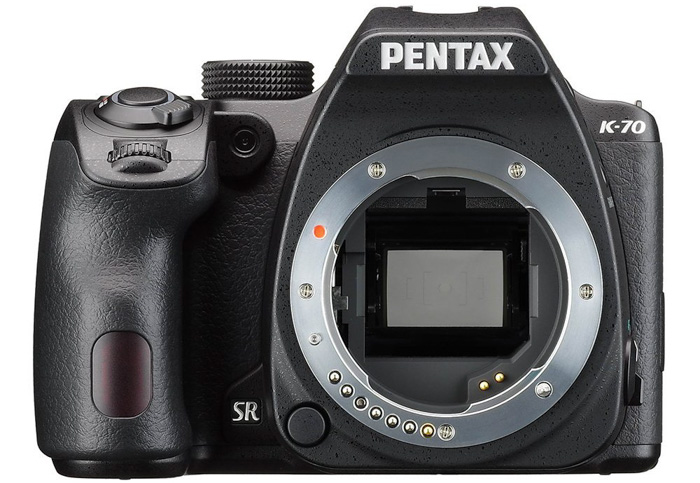
1. Pentax K-70

  • 24.2 Megapixels
  • 1.5 lbs
  • APS-C (Cropped Sensor)
  • Built-in WiFi
  • High-Speed continuous shooting at up to 6 fps
  • 11-point Autofocus
  • Vari-angle LCD
  • 102.400 ISO range

There is a lot to like about this camera. Its incredibly high ISO range, faster frames-per-second than other entry-level DSLR cameras and image stabilization are among them.

There is a function where the camera automatically detects a slanted horizon and corrects it. On top of this, there is a pixel shift function. Here, the camera takes four images to produce one huge photograph. This will give you a high-resolution image without having to invest thousands of dollars into top-notch specialised gear. You need a tripod to fully use this feature, though.

Image stabilization allows you to shoot sharp images in darker conditions than usual, by reducing the movement caused by your own hands.

The body is splash-proof and can be used in inclement weather conditions.

The K-70 has two unique buttons to Pentax cameras. On the top is a green button that switches functions back to their default settings.

On the left-hand side, the camera offers a button that allows the user to toggle between JPEG and Raw mode. The camera offers two Raw formats: Pentax’s own “PEF” format and Adobe’s “DNG” format.

Pentax K-70 entry level dslr camera

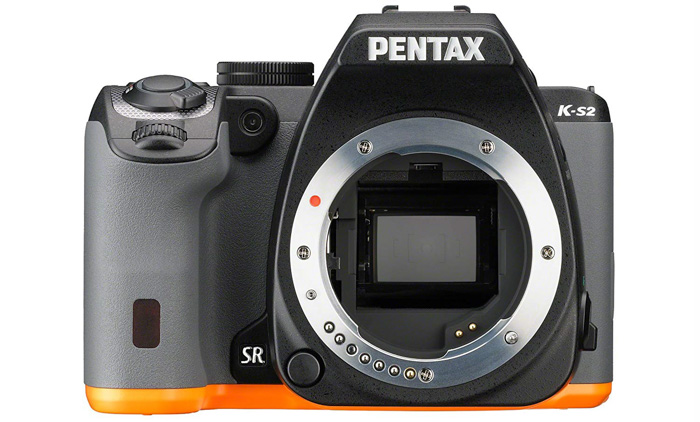
2. Pentax KS-2

  • 20 Megapixels
  • 1.49 lbs (with lens)
  • APS-C (Cropped Sensor)
  • Built-in WiFi
  • High-Speed continuous shooting at up to 5.4 fps
  • 45-point Autofocus
  • Vari-angle LCD
  • 51,200 ISO range

You might only be aware of Canon and Nikon DSLRs. Yet, Pentax makes a few really great entry-level DSLRs that might surprise you.

The Pentax KS-2 is an all-weather camera. This means you can embrace the elements with landscape and adventure photography, without worrying about your device.

Image stabilisation counteracts hand movement and ensures sharper images when shooting handheld.

It is compact, yet is slightly heavier than the other entry-level DSLRs. Some people prefer that, as the weight makes it easier to grip, hold and shoot with.

It offers excellent quality and decent performance for its class. The biggest area you will find that sets itself apart is its extended ISO range of a maximum 51,200. This is perfect for low light situations.

If you’re a fan of vintage manual lenses, a Pentax camera is a great option you. Pentax has kept the same lens mount for many decades now, allowing intercompatibility with old lenses.

Pentax K-S2 camera


Sony

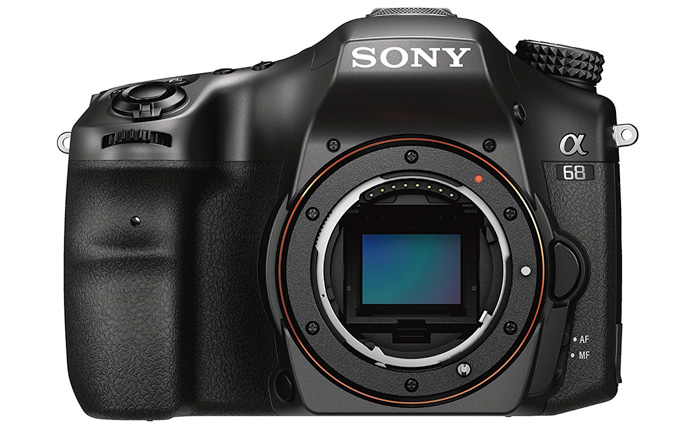
Sony Alpha a68

  • 24 Megapixels
  • 1.34 lbs
  • APS-C (Cropped Sensor)
  • No Built-in WiFi
  • High-Speed continuous shooting at up to 8 fps
  • 79-point Autofocus
  • Vari-angle LCD
  • 25,600 ISO range

The a68 is technically not a DSLR, but in many aspects, such as size and weight, it’s similar to one. However, it has an electronic viewfinder instead of an optical one.

What you’ll find with this system is a 24 megapixel cropped sensor. It gives you a 79-point autofocus selection, and a frame rate of 8 shots a second.

These two settings make this camera great for fast-moving subjects that vary in distances from the camera.

This camera has lots of dials and buttons, making it easy to flip between the settings you need. Everything is viewed from the display panel, which can illuminate when dark.

Most of these buttons are customizable, allowing you to make the most of your device.

You won’t find WiFi or a touch screen – but these are bonus points and not necessary for amazing photography.

At this price, you’d be hard pushed to find another camera system that has this many advantages. If you don’t mind the electronic viewfinder on this mirrorless camera, this camera is for you.

Sony A68 entry level dslr camera

Like anything else in photography, your camera needs to reflect your field and involvement.

There are many DSLRs on the market across 4 or 5 different manufacturers. they come in a range of prices, suited to attracting hobbyists and professionals alike.

Many of them are very similar across different specifications. They all create a 20-24 MP image, all have a cropped sensor, come with WiFi as standard and have different ISO range, but similar low-light capabilities.

Looking at this list, we see the specifications that are better and worse than the camera’s competitors. This is a good place to start, as it shows you the strengths and weaknesses of each system.

You will no doubt have an idea in mind of what you plan on doing with your camera. For me, being a live gig and musician photographer, a high ISO range is a must.

Due to this reason, I’m more likely to go for the Pentax cameras.

If you are looking to capture moving objects, then Sony is your best bet. This Alpha a68 system will capture 8 fps, 20% faster than its competitors.

For those who will spend long times outdoors, such as travel or street photographers, a weighty camera is a no-no. Here, you are more likely to go for the Nikon D3500 as it weighs less than 1 lb.

If budget is a big issue, then the cheapest entry-level DSLR camera will be your best bet. Many photographers will tell you that your money is better spent on lenses rather than camera bodies and sensors.

All of these cameras as identical in that they allow you to produce high-quality images for both print and web use.

Feeling lost and want to know more before buying? 

 Try this link: (Tri-State Camera Online Store) for discounted prices:  https://ebay.to/2Smb1ho   


PHOTOGRAPHY FREEBIE:

How to make money with your Photography even if you're not a Pro.

Copy & paste this link into your browser, click ENTER, and enjoy: 

https://mrdarrylt.blogspot.com/2020/01/how-to-make-500-month-from-your.html

                                                         or

https://www.photography-jobs.net/?hop=darryl54

 ----------------------------------------------------------------------------------------------------------------------

Visit me on Facebook and post your pictures.

https://www.facebook.com/Darryl-T-363867387724297/  
 ------------------------------------------------------------------------------------------------------------------------


Monday, February 15, 2021

Brave the Cold: Winter Landscape Photography Tricks

Tags:  Photography for Beginners, Landscape, Cabin Fever
 

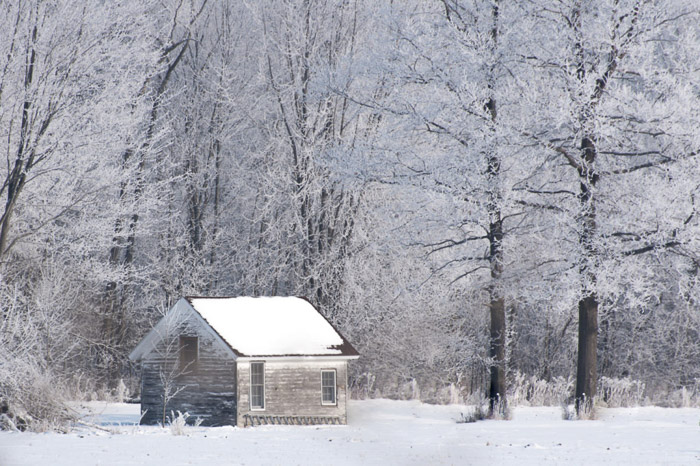
This post will show you how to capture amazing winter landscape shots and relieve that cabin fever.

Winter brings sub-zero temperatures, the threat of frostbite, and red noses. And amazing winter landscape photos. All you need are a few winter landscape photography tips.

Winter landscape shot of a wooden hut covered in snow in a forest. 

Photographing Winter Landscapes: The Gear

For winter landscapes, you’ll need the same gear that you would in the summer. Your camera, a wide-angle lens and, for long exposures, a tripod.

But there are a few specific winter gear tips. You’ll want to dress in warm layers and add a few more items to your bag:

  • Gloves – The best photography gloves for shooting winter landscapes must allow you easy access to all the buttons and dials. Working your camera with mittens is next to impossible. My favorite option is using a pair of fingerless gloves with a mitten cover.
  • An extra battery – Cold weather wreaks havoc on lithium-ion batteries. I always carry a spare battery. The only times I’ve ever needed it was when the temperatures dropped below 20°F (-7°C). Also, keep your spare in your pocket! It prevents the cold from draining your back-up too.
  • A small towel  If there’s snow falling, your camera is going to get wet. Bring a dry towel to wipe off the front of the lens.
  • Other accessories Filters like a polarizer or neutral density filter are also helpful. Polarizers will make the sky appear blue, while neutral density filters allow for long exposures.

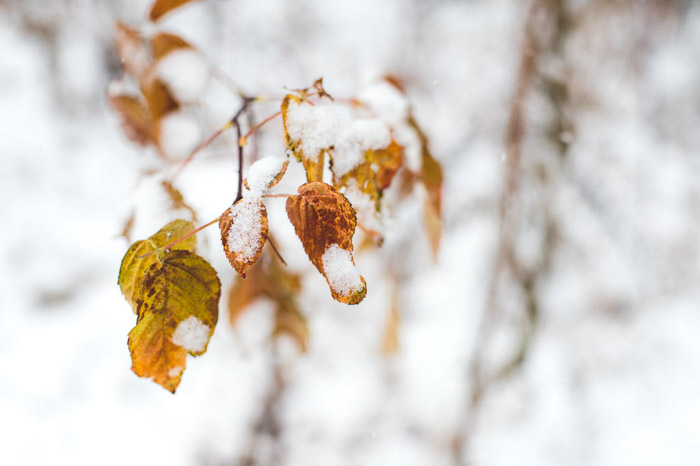
Macro close-up of brown leaves on a frozen tree in snowy forest - winter landscape photography

Photographing Winter Landscapes: The Steps

8. Plan Ahead

Planning ahead will help you avoid spending unnecessary time in the cold weather.

Watch the weather to find a fresh coat of snow rather than brown slush. Ice storms can make great winter landscapes as well.

The best time to shoot is often early. This is before the wind has knocked the snow off the trees and before the sun has a chance to melt the frost. Earlier shoots also mean a low sun. This creates a soft orange glow.

On the flip-side, if you shoot with the sun in the sky, you may risk losing the frost. But it tends to make the sky appear bluer than early morning.

Winter landscape photography needs a little planning for great images. You want to capture the snowy landscape any way you can, so a little work goes a long way.

7. Tread Carefully — and Keep Your Gear Protected

On the scene, avoid that over-eager need to traipse around the winter wonderland. You’ll mar the fresh snow with footprints. Do explore, but make sure to shoot as you explore. Choose your path carefully to keep unwanted footprints out.

As you trek out, remember to keep your batteries warm and your camera cold. Keeping the spare battery in your pocket gives you a backup. It’s likely your other one gets too cold from the winter weather.

Moving a camera from warm to cold temperatures will also create condensation. This may even freeze on the lens. Keep your camera in your bag until you are outside to avoid that initial condensation. And don’t breathe on the front of the lens.

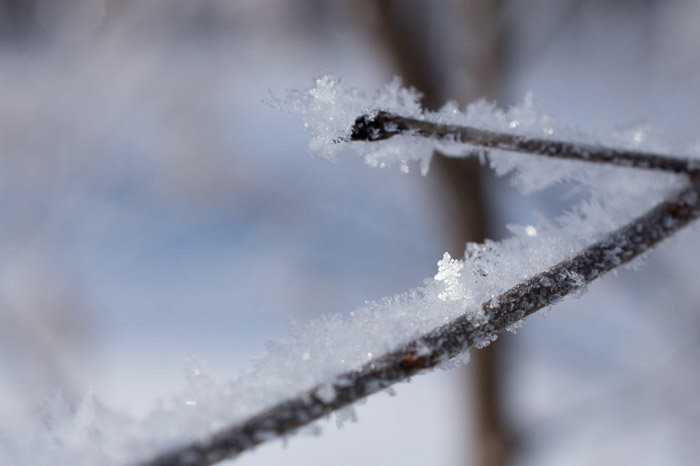
Macro zoom of ice crystals on a tree branch in a winter scene,

6. Set Your Exposure — but Don’t Rely on the Meter

A digital camera’s built-in meter uses color to estimate proper exposure. When everything is covered in white, your camera thinks the scene is brighter than it is. Left alone, a camera on auto mode or a manual shot set exactly to the meter is going to look a little dark.

If you’re comfortable in manual mode or a semi-manual mode like aperture priority, great. Let the meter guide you using the spot metering mode, then overexpose a bit.

Take a test shot to check the exposure and continue adjusting from there.

Another option is to use exposure bracketing. Allow your camera to take three different exposures in a row. This will increase your chances of getting the proper exposure.

Remember, use a larger f-number to keep more of the scene sharp. Or a smaller number to create more background blur.

Shutter speed only comes into play when shooting landscape photography if you’re trying out long exposure. But during the wintertime, you shouldn’t ignore shutter speed.

If snow is falling, a fast shutter speed will freeze those flakes. A slow shutter speed will create streaks of snow. Neither one is right or wrong. It’s important to recognize the final effect and determine what look is right for your shot.

Not a manual shooter yet? I encourage learning exposure settings. But if you haven’t crossed that bridge yet, use exposure compensation to brighten up the image.

This control is adjusted by pressing a +/- button and turning the control dial on a majority of DSLRs and mirrorless cameras.

5. Set Your White Balance

Exposure isn’t the only setting thrown off by all that white. White balance (ironically) is often affected as well. There are a couple of ways to ensure you can get a proper white balance.

You can choose the cloudy day preset or manually set the white balance using all that white already in the scene. Or you can use a white balance card.

To make any white balance errors easy to fix later (as well as small exposure errors), adjust the file setting to Raw. This will give you more control over the edits, including easy tweaks to the white balance.

The winter season brings snowfall. This can make it difficult to capture a correct exposure and white balance.

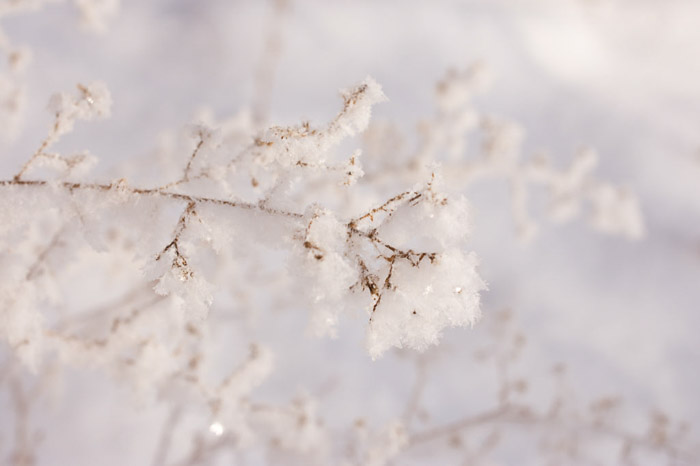
Ice crystals at macro zoom on a winter landscape.

4. Look for Light

With a coating of snow over every surface, nature is going to catch your eye. Armed with the right exposure and white balance settings, let the ambient or available light guide your composition.

Sunlight makes snowflakes sparkle. Let yourself be drawn in by that sparkle as you shoot. Try backlighting, or shooting with the sun behind the subject. This makes snowy foliage pop.

Shooting on a cloudy day means you have free reign of the scene. Look for patterns and lines to inspire your shots. With white on the ground and covering every surface, look for contrast or a pop of color. This is a great way to add interest to a winter landscape.

Shots that show seasons converging — like snow on a flower or a colorful leaf — also make great subjects. Wait for the winter snow, and capture it with anything from a DSLR camera to an iPhone.

Light shouldn’t be a problem for winter day scenes in terms of availability. You’ll get a lot of reflected light from the white reflective surface of the snowfall.

3. Focus

Just like the meter works on color, most camera’s autofocus systems rely on contrast. If you are shooting a snow owl in a snowstorm, the scene will have very little contrast. Same goes for a snowman in a snowfall.

To help get a sharp focus, use single-point autofocus mode. Place the point on your subject. Or for a more traditional landscape with a majority of the image in focus, place the focal point a third of the way into the scene.

Only use continuous autofocus if you are photographing a moving subject, like wildlife.

In the trickiest scenes, you may need to use manual focus. But most of the time, using single-point autofocus helps the camera find focus even with limited contrast.

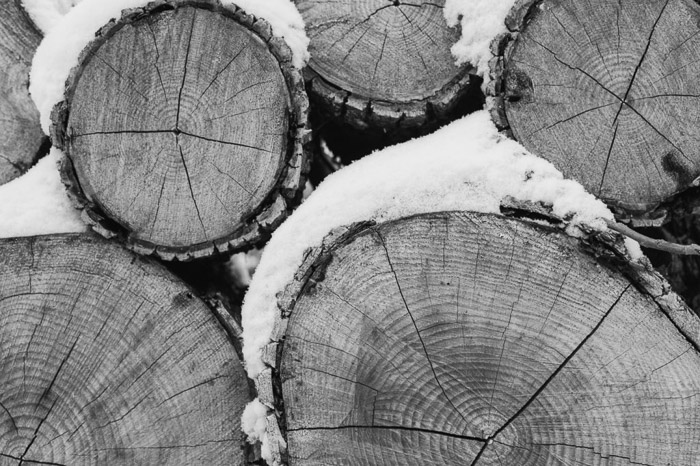
Stacked logs covered in snow taken in a black and white exposure - winter landscape photography

2. Shoot — and Adjust

Once you’ve settled on your composition, shoot — and then troubleshoot. Check the LCD for the most common winter landscape issues. These include exposure, white balance, and focus.

  • Too light? Decrease the exposure or exposure compensation.
  • Too dark? Increase exposure or exposure compensation.
  • Snow blue — or yellow? Adjust your white balance.
  • Image lacking contrast? Make sure your lens isn’t fogging or adjust your composition.
  • Is the subject too soft? Make sure you are using single-point autofocus, and if necessary, try manual focus.

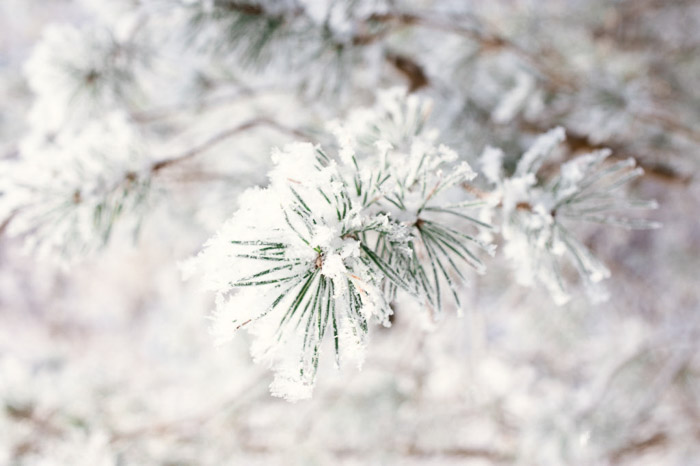
Pine needles dusted with snow at macro zoom in a winter setting - winter landscapes

1. Warm Up and Edit

After you’ve finished shooting, make sure you dry off your camera before putting it away. Tucking a camera or lens with condensation on it back into your bag can damage your gear.

Grab a hot chocolate or mug of tea to unfreeze your fingers. It’s time to use your favorite editing program to tweak your shots.

You can perfect that tricky exposure and white balance with software. This post has so far shown you how to take the proper steps while shooting to get the shot as close as possible.

Winter landscapes can often also use a contrast boost. Rather than boosting with the contrast option, lighten the highlights and whites. Then darken the shadows and darks. This will add more pop to your photo.

While white may be the most prominent color in a winter landscape, don’t ignore color edits. White balance can be further fine-tuned not for accuracy, but to create a mood. Adding a hint of blue makes the image feel colder, for example.

Adjusting the luminance values of a single color can also help give the image a specific feel. Particularly if you used color to guide your composition.

For example, in the photo of the evergreen, I lightened the greens for a softer, lighter look. I used the Hue Saturation Luminance or HSL panel in Lightroom.

Photographing winter landscapes is a great way to spend those cold months. You can capture stunning views of a white wonderland. And you’ll relieve cabin fever while keeping your photography skills fresh.

Cameras will act differently in the winter, so proper preparation is necessary. Understanding how the snow affects factors like metering, white balance and focus is essential to making that cold trek worth those numb fingers.

Grab a pair of good gloves, several layers, and your camera — and go create that winter landscape.


----------------------------------------------------------------------------------------------------------------------

PHOTOGRAPHY FREEBIE:

How to make money with your Photography even if you're not a Pro.

Copy & paste this link into your browser, click ENTER, and enjoy: 

https://mrdarrylt.blogspot.com/2020/01/how-to-make-500-month-from-your.html

                                                         or

https://www.photography-jobs.net/?hop=darryl54

 ----------------------------------------------------------------------------------------------------------------------

Visit me on Facebook and post your pictures.

https://www.facebook.com/Darryl-T-363867387724297/  
 ------------------------------------------------------------------------------------------------------------------------

Need a camera?  Try this link for discounted prices:  https://ebay.to/2Smb1ho  

Wednesday, February 10, 2021


What Is Blue Hour Photography and How to Take Advantage of It

Tags: Photography for Beginners, Blue Hour, Horizon Line, Photoshoot
 

When Is Blue Hour?

The sun has dipped a certain amount below the horizon. The sky picks up a cool, crisp blue colour before it gets too dark or what we refer to as night.

If it is a clear day, it wouldn’t be unusual to also see some pink/red colour near the horizon line as well. A night sky is darker and occurs after the blue hour and is very different.

But whilst it’s called the blue hour, it doesn’t actually last an hour. In fact, on average, it lasts around 20 to 40 minutes but can be even shorter.

Exactly how long the blue hour lasts on any given day will vary depending on the season and where you are in the world. The good news is that there are a ton of websites and apps that give you information on blue hour quickly and easily.

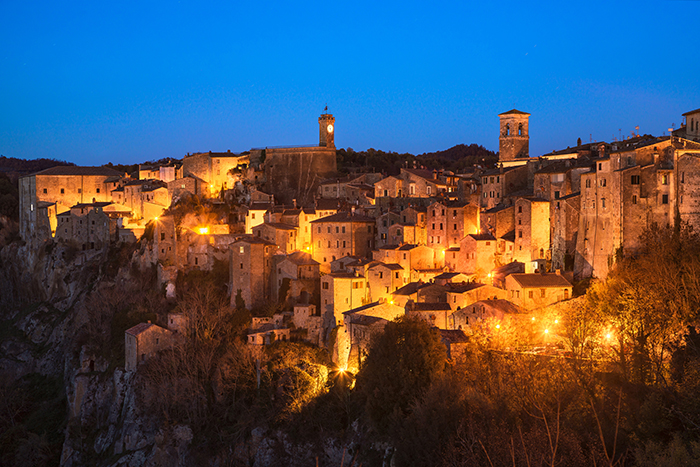
Cityscape photography of Tuscany, Sorano medieval village in blue hour.


Plan Your Blue Hour Photography Shoot

The downside of blue hour photography is that you only have a short window to capture your images. So unless you are prepared, you may end up missing the shot you wanted to take.

As with any photoshoot, planning is vital. Your starting point should be what you are actually going to photograph. Is it a cityscape? Is it a famous landmark?

Once you know what you are going to be photographing, you can begin to plot a few shot locations on a map. Using Google Maps street view, you can check your location to ensure that your view isn’t going to be obstructed.

You can also check that there is actually going to be somewhere for you to be able to take the photo from. It’s disappointing to go to a location only to find when you get there that it involves standing on train lines.

You are not going to have time to travel vast distances, so keep your shot locations to a few around the same place.

Don’t forget to also check and make a note of the time that blue hour will occur on that day. Apps like The Photographer’s Ephemeris give valuable information like the direction of light at different times of the day.

Work on computer desktop with camera.

Essential Gear for Blue Hour Photography

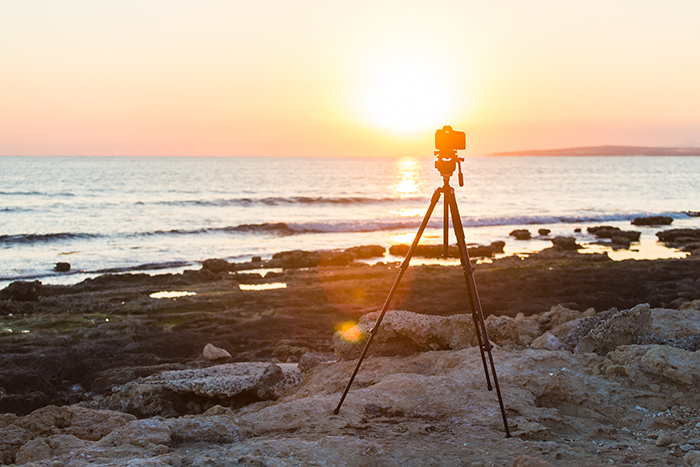
The one vital piece of equipment you will need for blue hour photography will be a tripod. You will not be able to hold the camera steady enough to capture sharp photos at slow shutter speeds.

For anything below 1/100 of a second shutter speed, I will use a tripod if possible. The slowest shutter speed I would try to handhold a camera would be 1/60 of a second At slow shutter speeds, even the smallest movement will cause camera shake. This will make your photo look blurred.

The only way around this will be to raise your ISO setting, which will, in turn, mean more noise in your photos. So if you want to capture the best possible blue hour photograph, make sure you pack your tripod.

Another item which you may find useful for blue hour photography is a remote shutter release. This means that you won’t have to touch the camera when taking a photo. This again reduces the chance of camera shake.

If you don’t have a remote shutter release, fear not as you can set your camera on a timer. When you press the shutter button, it will wait a couple of seconds before a photo is taken.

You can also use different types of filters when shooting during the blue hour. Neutral Density and Polarising filters are great ways to improve your long exposures or enhance the sky.

Other than a tripod and a remote shutter release you won’t need anything else. Remember that long exposure photography uses more battery power, so pack spares.

Camera with tripod over sunset near blue hour.

Arrive Early but Be Patient

As we have already discussed, you have a short window to capture photos during the blue hour. So make sure you arrive early at your location to give you time to scout the area.

You might have planned your shoot and looked at Google Maps, but things could have changed. For example, there might now be building works which show up in your shot. Or you may actually find a better spot for a photo than the one you had planned.

Once you have a final set of locations in your mind, run through the shots in your head and take some test photos. This will help you work out your composition before the time comes to take the actual photo.

Once you have done this, it is time to wait for the blue hour. You might be waiting a while as the blue hour doesn’t occur straight after sunset. Right now, the blue hour at my location will start approximately 45 minutes after sunset.

So don’t make the mistake of taking a few photos after the sun has gone down and going home. Hopefully, you remembered to check the blue hour times and you are already aware of when it will occur.

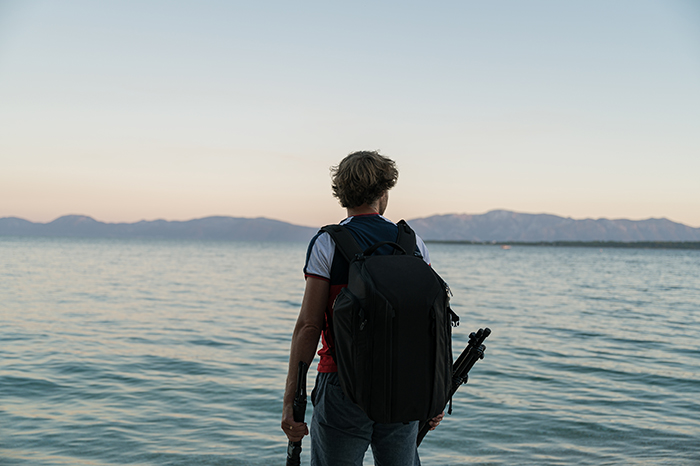
Male photographer with tripod in his hands during blue hour.

Choose Your Settings

Blue hour photography gives you some flexibility in what settings you choose. They will depend on what type of photo you are taking.

When photographing a city skyline, you’ll want both the foreground and background sharp. In other words, your depth of field (f-number) will determine your settings.

You should start at around f/8 and work your way up depending on what you need. The higher the f-number, the slower the shutter speed you will need. It’s at slow shutter speeds that you will also begin to see things like light trails from cars. However, don’t go crazy with a narrow aperture as you’ll encounter lens diffraction (over f/22 in most case).

If you want to freeze the action and make sure people and or cars are sharp, you will need a faster shutter speed. Depending on how fast the movement is, you may need to set your shutter speed as fast as 1/200 of a second or even faster.

The low light during the blue hour means you will have a lower f-number such as f/4 but even that might not be enough. Also, you might need to raise your ISO to be able to have a fast enough shutter speed to freeze the action.

As you can see there are many options for you for blue hour photography. It all depends on what your vision for the final blue hour photo is.

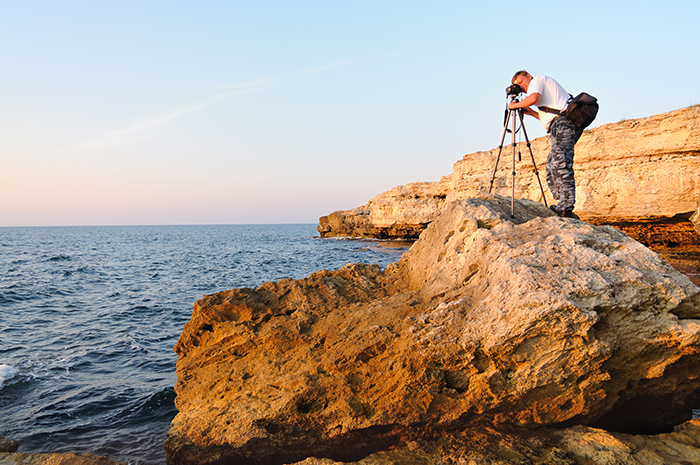
Man standing on rock and taking photo with tripod in blue hour.

Lock-up the Mirror to Reduce Blur

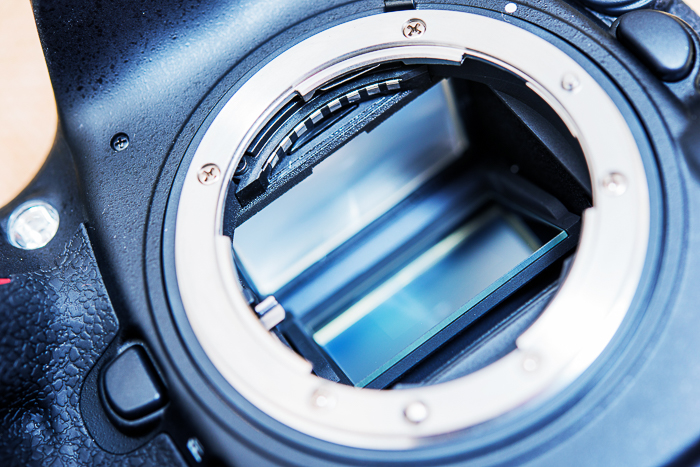
If you are using a DSLR camera, you’ll need to lock-up the mirror. If you are using a mirrorless camera, you can skip this step.

You may not know that when you press the shutter button on your camera, a mechanical process takes place. The shutter opens and a small mirror in the back of the camera flips over. This mechanical process is so fast that when you are photographing using a fast shutter speed it is not noticed by the camera.

But in low light photography, this process can cause a small vibration. This movement can make your image look blurred. This is a common rookie mistake when photographing in low light and blue hour conditions.

The good news is that you can avoid it with a simple solution.

In all DSLR cameras, there will be an option in the menu to “lock mirror”. This flips the mirror and holds it in place until you change it again in the settings. This eliminates the camera shake from the mirror and means your photos won’t be blurred.

Another option is to set your camera to “live view” mode which also flips and locks the mirror.

A close up of a camera body without lens
Inside of DSLR camera with mirror locked. Credit: Dreamstime

Experiment to Capture Unique Photos

It’s important to work quickly due to the limited time of the blue hour. But you should still try to experiment as well. Blue hour photography gives you the opportunity to capture some unique photos. But to do so, you have to be willing to look beyond the obvious scene in front of you.

Experiment with different angles, like setting your camera very low on the ground. Try different shutter speeds. See how that affects the composition by introducing light trails and movement. You could even try zooming in or out whilst the photo is being taken for a surreal effect.

If you work quickly and have planned well, you should have time to experiment.

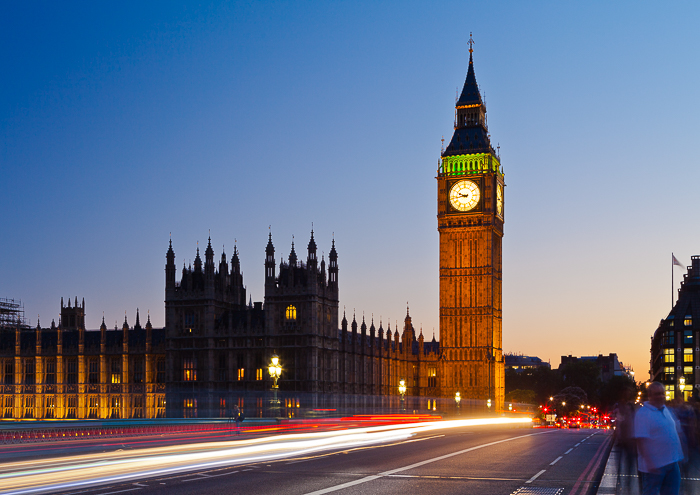
Atmospheric London street scene photographed during the blue hour
Atmospheric London street scene photographed during the blue hour. Photo by Kav Dadfar

Don’t Forget Post-Production

Blue hour photos benefit from at least some level of post-production.

It could be as little as just straightening and cropping. Or more extensive elements such as boosting contrast, saturation, vibrancy. Even retouching can help enhance the photo.

Ensure that your photos are straight, with correct white balance and blemish or dust-free. How much post-production you do depends on your preference and the photograph.

Always remember that the key to good post-production is subtlety. Too much, and it will look fake and negatively impact the photo.

To learn all about post-production in Lightroom, try our Effortless Editing course.

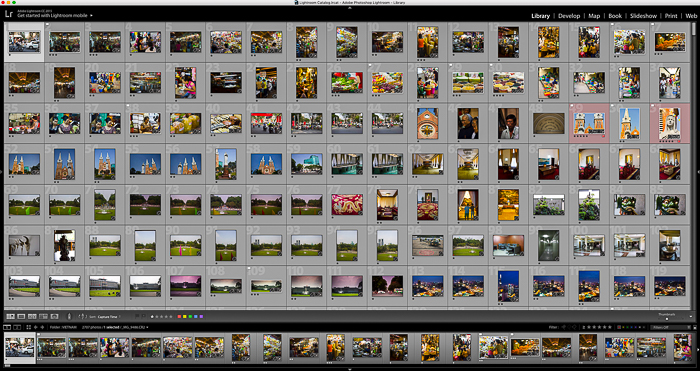
Screenshot of editing blue hour photography in Lightroom
Post-production on-screen interface. Editing blue hour photograph. Photo by Kav Dadfar

Beautiful blue hour photographs are captivating in colour and light.

A good blue hour photograph wouldn’t look amiss hanging on a living room wall or as a double-page spread in a magazine.

The great thing about blue hour photography is that it is also one of the easier scenarios to photograph. Composing and taking the photo is easier without harsh shadows or bright sunshine.

But as with all types of photography, you have to ensure you plan well and are willing to put the effort in. If you’re willing to get out there and capture this magical blue hour, you will no doubt be pleased with the results.

----------------------------------------------------------------------------------------------------------------------

PHOTOGRAPHY FREEBIE:

How to make money with your Photography even if you're not a Pro.

Copy & paste this link into your browser, click ENTER, and enjoy: 

https://mrdarrylt.blogspot.com/2020/01/how-to-make-500-month-from-your.html

                                                         or

https://www.photography-jobs.net/?hop=darryl54

 ----------------------------------------------------------------------------------------------------------------------

Visit me on Facebook and post your pictures.

https://www.facebook.com/Darryl-T-363867387724297/  
 ------------------------------------------------------------------------------------------------------------------------

Need a camera?  Try this link for discounted prices:  https://ebay.to/2Smb1ho