Brave the Cold: Winter Landscape Photography Tricks
This post will show you how to capture amazing winter landscape shots and relieve that cabin fever.
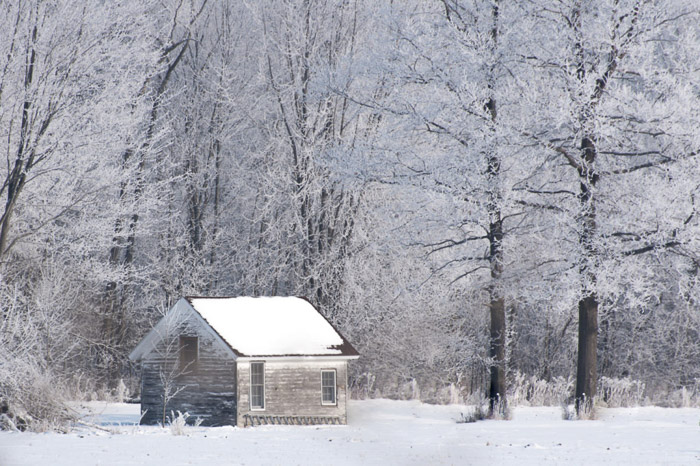
Winter brings sub-zero temperatures, the threat of frostbite, and red noses. And amazing winter landscape photos. All you need are a few winter landscape photography tips.
Photographing Winter Landscapes: The Gear
For winter landscapes, you’ll need the same gear that you would in the summer. Your camera, a wide-angle lens and, for long exposures, a tripod.
But there are a few specific winter gear tips. You’ll want to dress in warm layers and add a few more items to your bag:
- Gloves – The best photography gloves for shooting winter landscapes must allow you easy access to all the buttons and dials. Working your camera with mittens is next to impossible. My favorite option is using a pair of fingerless gloves with a mitten cover.
- An extra battery – Cold weather wreaks havoc on lithium-ion batteries. I always carry a spare battery. The only times I’ve ever needed it was when the temperatures dropped below 20°F (-7°C). Also, keep your spare in your pocket! It prevents the cold from draining your back-up too.
- A small towel – If there’s snow falling, your camera is going to get wet. Bring a dry towel to wipe off the front of the lens.
- Other accessories – Filters like a polarizer or neutral density filter are also helpful. Polarizers will make the sky appear blue, while neutral density filters allow for long exposures.
Photographing Winter Landscapes: The Steps
8. Plan Ahead
Planning ahead will help you avoid spending unnecessary time in the cold weather.
Watch the weather to find a fresh coat of snow rather than brown slush. Ice storms can make great winter landscapes as well.
The best time to shoot is often early. This is before the wind has knocked the snow off the trees and before the sun has a chance to melt the frost. Earlier shoots also mean a low sun. This creates a soft orange glow.
On the flip-side, if you shoot with the sun in the sky, you may risk losing the frost. But it tends to make the sky appear bluer than early morning.
Winter landscape photography needs a little planning for great images. You want to capture the snowy landscape any way you can, so a little work goes a long way.
7. Tread Carefully — and Keep Your Gear Protected
On the scene, avoid that over-eager need to traipse around the winter wonderland. You’ll mar the fresh snow with footprints. Do explore, but make sure to shoot as you explore. Choose your path carefully to keep unwanted footprints out.
As you trek out, remember to keep your batteries warm and your camera cold. Keeping the spare battery in your pocket gives you a backup. It’s likely your other one gets too cold from the winter weather.
Moving a camera from warm to cold temperatures will also create condensation. This may even freeze on the lens. Keep your camera in your bag until you are outside to avoid that initial condensation. And don’t breathe on the front of the lens.
6. Set Your Exposure — but Don’t Rely on the Meter
A digital camera’s built-in meter uses color to estimate proper exposure. When everything is covered in white, your camera thinks the scene is brighter than it is. Left alone, a camera on auto mode or a manual shot set exactly to the meter is going to look a little dark.
If you’re comfortable in manual mode or a semi-manual mode like aperture priority, great. Let the meter guide you using the spot metering mode, then overexpose a bit.
Take a test shot to check the exposure and continue adjusting from there.
Another option is to use exposure bracketing. Allow your camera to take three different exposures in a row. This will increase your chances of getting the proper exposure.
Remember, use a larger f-number to keep more of the scene sharp. Or a smaller number to create more background blur.
Shutter speed only comes into play when shooting landscape photography if you’re trying out long exposure. But during the wintertime, you shouldn’t ignore shutter speed.
If snow is falling, a fast shutter speed will freeze those flakes. A slow shutter speed will create streaks of snow. Neither one is right or wrong. It’s important to recognize the final effect and determine what look is right for your shot.
Not a manual shooter yet? I encourage learning exposure settings. But if you haven’t crossed that bridge yet, use exposure compensation to brighten up the image.
This control is adjusted by pressing a +/- button and turning the control dial on a majority of DSLRs and mirrorless cameras.
5. Set Your White Balance
Exposure isn’t the only setting thrown off by all that white. White balance (ironically) is often affected as well. There are a couple of ways to ensure you can get a proper white balance.
You can choose the cloudy day preset or manually set the white balance using all that white already in the scene. Or you can use a white balance card.
To make any white balance errors easy to fix later (as well as small exposure errors), adjust the file setting to Raw. This will give you more control over the edits, including easy tweaks to the white balance.
The winter season brings snowfall. This can make it difficult to capture a correct exposure and white balance.
4. Look for Light
With a coating of snow over every surface, nature is going to catch your eye. Armed with the right exposure and white balance settings, let the ambient or available light guide your composition.
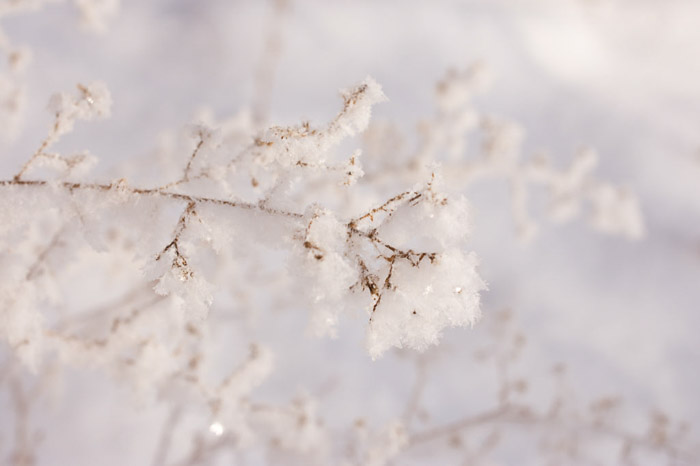
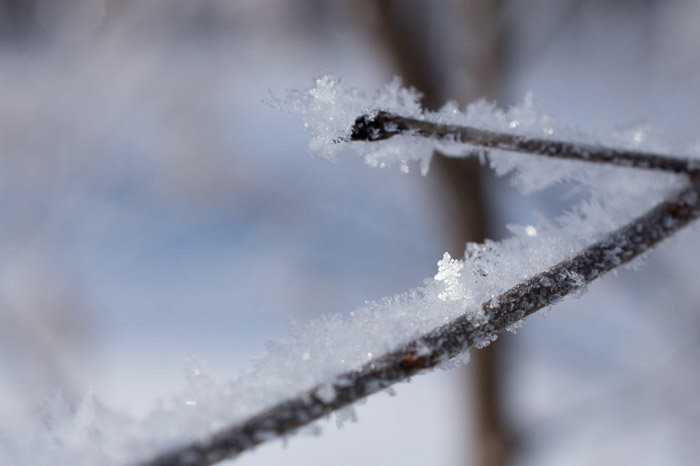
Sunlight makes snowflakes sparkle. Let yourself be drawn in by that sparkle as you shoot. Try backlighting, or shooting with the sun behind the subject. This makes snowy foliage pop.
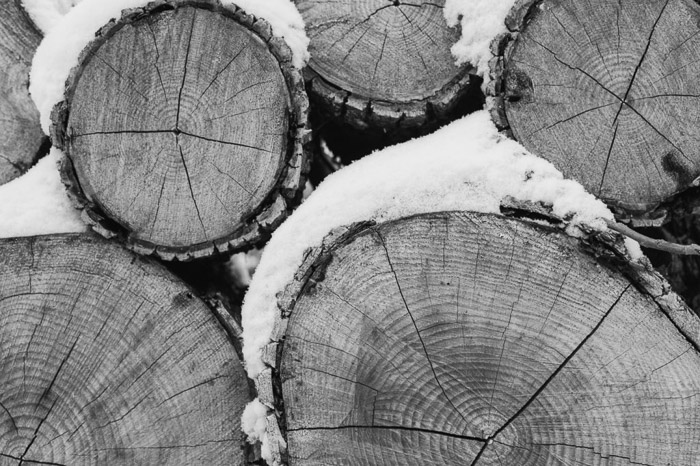
Shooting on a cloudy day means you have free reign of the scene. Look for patterns and lines to inspire your shots. With white on the ground and covering every surface, look for contrast or a pop of color. This is a great way to add interest to a winter landscape.
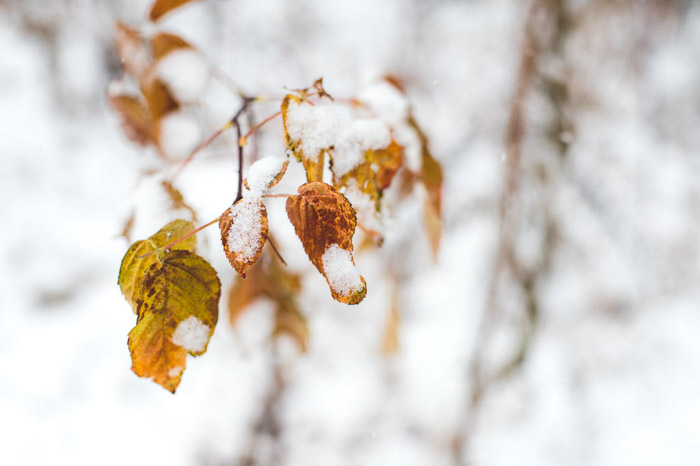
Shots that show seasons converging — like snow on a flower or a colorful leaf — also make great subjects. Wait for the winter snow, and capture it with anything from a DSLR camera to an iPhone.
Light shouldn’t be a problem for winter day scenes in terms of availability. You’ll get a lot of reflected light from the white reflective surface of the snowfall.
3. Focus
Just like the meter works on color, most camera’s autofocus systems rely on contrast. If you are shooting a snow owl in a snowstorm, the scene will have very little contrast. Same goes for a snowman in a snowfall.
To help get a sharp focus, use single-point autofocus mode. Place the point on your subject. Or for a more traditional landscape with a majority of the image in focus, place the focal point a third of the way into the scene.
Only use continuous autofocus if you are photographing a moving subject, like wildlife.
In the trickiest scenes, you may need to use manual focus. But most of the time, using single-point autofocus helps the camera find focus even with limited contrast.
2. Shoot — and Adjust
Once you’ve settled on your composition, shoot — and then troubleshoot. Check the LCD for the most common winter landscape issues. These include exposure, white balance, and focus.
- Too light? Decrease the exposure or exposure compensation.
- Too dark? Increase exposure or exposure compensation.
- Snow blue — or yellow? Adjust your white balance.
- Image lacking contrast? Make sure your lens isn’t fogging or adjust your composition.
- Is the subject too soft? Make sure you are using single-point autofocus, and if necessary, try manual focus.
1. Warm Up and Edit
After you’ve finished shooting, make sure you dry off your camera before putting it away. Tucking a camera or lens with condensation on it back into your bag can damage your gear.
Grab a hot chocolate or mug of tea to unfreeze your fingers. It’s time to use your favorite editing program to tweak your shots.
You can perfect that tricky exposure and white balance with software. This post has so far shown you how to take the proper steps while shooting to get the shot as close as possible.
Winter landscapes can often also use a contrast boost. Rather than boosting with the contrast option, lighten the highlights and whites. Then darken the shadows and darks. This will add more pop to your photo.
While white may be the most prominent color in a winter landscape, don’t ignore color edits. White balance can be further fine-tuned not for accuracy, but to create a mood. Adding a hint of blue makes the image feel colder, for example.
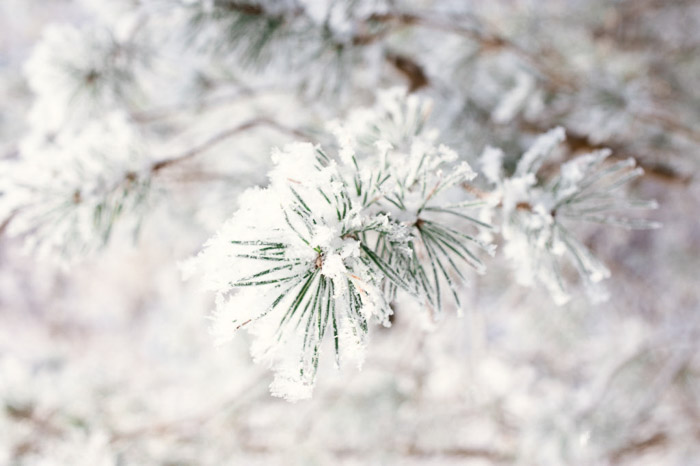
Adjusting the luminance values of a single color can also help give the image a specific feel. Particularly if you used color to guide your composition.
For example, in the photo of the evergreen, I lightened the greens for a softer, lighter look. I used the Hue Saturation Luminance or HSL panel in Lightroom.
Photographing winter landscapes is a great way to spend those cold months. You can capture stunning views of a white wonderland. And you’ll relieve cabin fever while keeping your photography skills fresh.
Cameras will act differently in the winter, so proper preparation is necessary. Understanding how the snow affects factors like metering, white balance and focus is essential to making that cold trek worth those numb fingers.
Grab a pair of good gloves, several layers, and your camera — and go create that winter landscape.
----------------------------------------------------------------------------------------------------------------------
PHOTOGRAPHY FREEBIE:
How to make money with your Photography even if you're not a Pro.
Copy & paste this link into your browser, click ENTER, and enjoy:
https://mrdarrylt.blogspot.com/2020/01/how-to-make-500-month-from-your.html
or
https://www.photography-jobs.net/?hop=darryl54
----------------------------------------------------------------------------------------------------------------------
Visit me on Facebook and post your pictures.
https://www.facebook.com/Darryl-T-363867387724297/------------------------------------------------------------------------------------------------------------------------
Need a camera? Try this link for discounted prices: https://ebay.to/2Smb1ho
No comments:
Post a Comment
Note: Only a member of this blog may post a comment.