Wednesday, October 31, 2018
7 Tips Your Camera Manual Never Told You About Portrait Photography
Picking up a camera for the first time and pointing it at a subject can be quite overwhelming. Further, shooting for years and never finding satisfaction with the portraits captured can be frustrating. If the majority of the following steps are mastered, the results are guaranteed to turn people’s heads. The ambition necessary to master these rules will allow for a photographer to go above and beyond the person who is “born with the eye.”
1. EXPRESSION
People tend to forget that a portrait without a REAL expression does not connect to the viewer. Humankind wants to see genuine emotion and not a posed, cheesy smile. This is more important than location, light and expensive gear. Clients will more often than not choose the blurry images with bad compositions if it means those images are honest portrayals of themselves.The first thing people look at is the connection the subject has with the camera. The only way to achieve that is to make the subject comfortable. A Vital Detail Often Ignored is an in depth guide on how to make a subject feel natural in front of the camera.
2. COMPOSITION
The purpose of properly composing images is to attract the viewer’s eye straight to the most important detail of the portrait—the subject’s face and more specifically, the eyes. This is where two important rules kick in: rule of thirds and depth.
It is scientifically proven that the eye is most attracted to four different points of an image. Sticking with these four points will help frame the subject in the most pleasing manner. Further, when taking photographs, it goes without say that the images produced will be 2-dimensional. To make it look 3-dimensional and to make the subject pop out of the frame, there must be depth in the composition. An image’s foreground, middle ground and background are essential in achieving the necessary depth. This article on bokeh discusses this concept in depth.
3. LIGHT
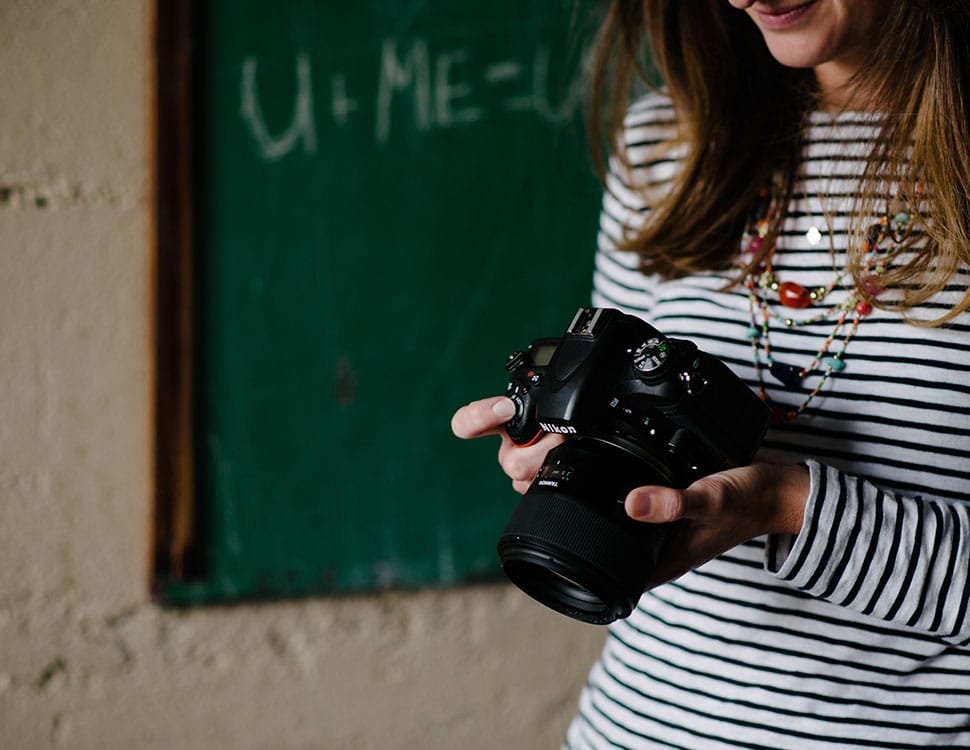
The topic of light deserves it’s own article but to be concise, there are two important things to keep in mind. Just like artificial light is very directional, natural light needs to be this way too. It is for this reason that using window light is so popular.
Further, when shooting outdoors, consciousness of the direction of light is intrinsic. To achieve the best lighting, have the subject face the light source. For example, using the beam of light coming from the ends of the street in narrow alleys or the light coming from the large opening in storefronts or garages. The above image was taken miday in the door way of a bar. In the case of open fields, the light oftentimes comes from above head. In instances like that, tilting the subjects face slightly upward towards the light has proven to be affective.
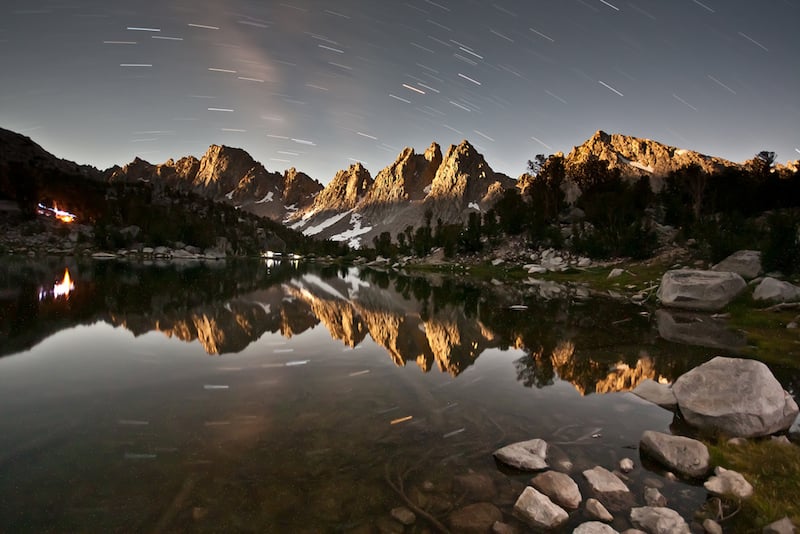
The second rule is time of day. Although cliché and contrite, the golden hour is a real thing. Most importantly, it’s free and possibly the best quality light any photographer will ever use if used appropriately. An hour before sunset, the entire sky is one huge soft box. Harsh light that results from direct sunlight is very difficult to work with.
4. SETTINGS
It is very easy to get carried away with settings and gear. Oftentimes, the best advice is to take one lens and on camera body on a shoot. The less gear, the easier it is to concentrate on every other aspect. People are not interested in seeing a technically perfect portrait. They want to see a creative portrait.
Moreover, every DSLR has an aperture priority mode. This setting allows the photographer to choose the f-stop and iso, while the camera chooses the right shutter speed to expose the image properly. Why not let the camera do the extra homework, while the photographer focuses on more important details? Sometimes the camera will not do a good job in choosing the shutter speed, which can be easily overrided with the exposure compensation setting. This is easier and less time consuming than re-adjusting all the manual settings every time the location is switched.

5. LENS
Choosing the proper focal length is very important. The focal length has the potential to distort the subject’s head in one way or another. The longer the focal lengths, the more flattering it is for the subject and the shallower the DOF will be. Personally, I find that the 85mm on a full frame camera and the 50mm on a cropped sensor to be the optimal portrait lengths. Both are wide enough to capture the surrounding scenery with the appropriate distance and also with a few steps forward, they can achieve tighter portraits. Fixed prime lenses such as the 50mm or 85mm are fast lenses with wide apertures that will help shoot at wide settings. This is important when you want to melt away distracting backgrounds. My latest article expounds in great length on this point.
6. Complimenting Colors
When it comes to choosing clothing, backgrounds and even toning in Photoshop following the complimenting colors makes a huge difference.
Notice the complementing colors in the color wheel. Chose clothing that compliments the skin or the background colors of the location. This is make the subjects stand out.

7. POSES
I’m not going to lie. Personally, when it comes to posing I have a very difficult time. Hand placement can make or break a photo. If it doesn’t look natural it stands out like a sore thumb. What I’ve found helpful is scrolling through images on 500px on my phone every night and taking screen shots of inspiring poses. On my shoots I whip out my phone and look through these screenshots for ideas. With time, your gun will be locked and loaded with hundreds of poses. Remember, it’s all about placing your subjects in the most flattering positions. Top 48 Photogaphers to Follow on 500pxTo conclude the above 7 steps are just topics to consider when taking portraits. Rules are meant to be broken. Consider these tips and you will walk away with solid portraits, but also let your own ideas and visions shine through.
Tuesday, October 30, 2018
Photography Basics
Courtesy of:
I'm so glad you found your way onto my Photography Basics series. I have taught the basics of photography to millions of photographers around the world through Improve Photography, so I know just exactly how difficult it can seem to learn the basics of photography.
My goal is to make this Photography Basics series the absolute simplest way to learn the basics of photography.
I hope you'll love this series because of what you learn here, and I hope you'll join the Improve Photography community after you get your feet wet with the photo basics. Let's get going.
Now that you have your camera, it is time to learn exposure.
 To help get the right exposure with your camera settings – you can download this Camera Settings Cheat Sheet guide.
If you're reading this Photo Basics series, it probably means that you currently shoot on the “Green mode” of your camera–or the automatic setting. That means the camera entirely controls the exposure of the picture. When you shoot on automatic mode, your camera selects an aperture setting, an ISO setting, a shutter speed, and a host of other settings for you.
Automatic can be handy, but it also seriously limits your creative ability to make a beautiful picture.
Want proof that automatic isn't the best way to shoot? Check out the picture below. On the left, the picture was taken entirely in automatic mode on a Canon Rebel DSLR. That might look okay to you… until you see the picture on the right. Same sunset. Same camera. The pictures were taken only seconds apart. The difference? The picture on the right was taken using manual exposure.
 Which
photo do you prefer? Probably the picture on the right! By choosing a
creatively dark exposure, the rich colors in the sunset were allowed to
shine through.
Which
photo do you prefer? Probably the picture on the right! By choosing a
creatively dark exposure, the rich colors in the sunset were allowed to
shine through.
However, technically, the photo on the left is “correct,” and the photo on the right is “incorrect.” The camera saw through the lens and tried to expose the bird so that it wouldn't become a shadow. To me, the photo was not about exposing the bird properly, but exposing the sunset properly. The bird was just a nice shape to include in the foreground. This is exactly why you must learn exposure–because sometimes the “scientifically correct” exposure is not the best exposure to make the photo look how you want it to.
Once you're ready to learn to shoot in manual mode, get tack sharp focus, and master lighting, please consider buying my Photography Start video series. It's a series of 22 video tutorials where I walk you step-by-step through the things that it normally takes my photography students two years to learn. I've priced it at a REALLY reasonable price so you can get a good solid start in photography.
Courtesy of:
I'm so glad you found your way onto my Photography Basics series. I have taught the basics of photography to millions of photographers around the world through Improve Photography, so I know just exactly how difficult it can seem to learn the basics of photography.
My goal is to make this Photography Basics series the absolute simplest way to learn the basics of photography.
I hope you'll love this series because of what you learn here, and I hope you'll join the Improve Photography community after you get your feet wet with the photo basics. Let's get going.
Basic Equipment You'll Need
You can do photography with even the simplest of cameras, but the principles that I'd like to teach are for people who want to learn to use a DSLR camera, a micro four-thirds camera, or at least a camera that allows the photographer to adjust the shutter speed, aperture, and ISO. Even some pocket cameras have this functionality.Now that you have your camera, it is time to learn exposure.
Exposure–the most basic element of photography
When photographers talk about “exposure,” we simply mean the brightness or darkness of a photo. It seems simple enough to take a photo that is correctly exposed (has the proper brightness or darkness), but in reality it can be quite the trick.To help get the right exposure with your camera settings – you can download this Camera Settings Cheat Sheet guide.If you're reading this Photo Basics series, it probably means that you currently shoot on the “Green mode” of your camera–or the automatic setting. That means the camera entirely controls the exposure of the picture. When you shoot on automatic mode, your camera selects an aperture setting, an ISO setting, a shutter speed, and a host of other settings for you.
Automatic can be handy, but it also seriously limits your creative ability to make a beautiful picture.
Want proof that automatic isn't the best way to shoot? Check out the picture below. On the left, the picture was taken entirely in automatic mode on a Canon Rebel DSLR. That might look okay to you… until you see the picture on the right. Same sunset. Same camera. The pictures were taken only seconds apart. The difference? The picture on the right was taken using manual exposure.
The
only difference between these two pictures is that one was shot with
automatic exposure, and the other was shot using creative exposure.
However, technically, the photo on the left is “correct,” and the photo on the right is “incorrect.” The camera saw through the lens and tried to expose the bird so that it wouldn't become a shadow. To me, the photo was not about exposing the bird properly, but exposing the sunset properly. The bird was just a nice shape to include in the foreground. This is exactly why you must learn exposure–because sometimes the “scientifically correct” exposure is not the best exposure to make the photo look how you want it to.
What's next?
Now that you understand why it is so important to take control over the exposure, let's move on to lesson #2 where we'll learn all about shutter, aperture and ISO–which are the tools you need to control the exposure. Keep reading for the next 10 or 15 minutes and you'll already understand the basics of how to shoot in manual mode on your camera. I promise shooting in manual mode isn't nearly as scary as you might think.Once you're ready to learn to shoot in manual mode, get tack sharp focus, and master lighting, please consider buying my Photography Start video series. It's a series of 22 video tutorials where I walk you step-by-step through the things that it normally takes my photography students two years to learn. I've priced it at a REALLY reasonable price so you can get a good solid start in photography.
Photography Basics Part 2
From the example of the sunset picture in installment #1 of this photography basics series, you have learned the importance of taking full control over the exposure on your camera. Now, it's time to dig into your camera and learn the three most basic tools available to you in controlling the exposure.
Those tools are shutter speed, aperture, and ISO. After I explain what each one does, I'll explain why we need three separate tools to control the brightness or darkness of the photo.
 The
aperture is a small set of blades in the lens that controls how much
light will enter the camera. The blades create a octagonal shape that
can be widened (we photogs call it shooting “wide open”), or closed down
to a small hole. Obviously, if you shoot with the aperture wide open,
then more light is allowed into the camera than if the aperture is
closed down to only allow a tiny hole of light to enter the camera.
The
aperture is a small set of blades in the lens that controls how much
light will enter the camera. The blades create a octagonal shape that
can be widened (we photogs call it shooting “wide open”), or closed down
to a small hole. Obviously, if you shoot with the aperture wide open,
then more light is allowed into the camera than if the aperture is
closed down to only allow a tiny hole of light to enter the camera.
So suppose you take a picture that is too bright. How do you fix it? Simply choose a smaller aperture. Simple! Aperture sizes are measured by f-stops. A high f-stop like f-22 means that the aperture hole is quite small, and a low f-stop like f/3.5 means that the aperture is wide open.
Let's test your knowledge to make sure you have it down. If you take a picture and it's too dark at f/5.6, would you choose a lower f-stop number or a higher one? Yep! You'd choose a lower f-stop number, which opens up the aperture to let in more light. The size of the aperture controls more than the brightness or darkness of the picture, though.
The aperture also controls the depth-of-field. Depth-of-field is how much of the picture is sharp, and how much is blurry. If you want to take a picture of a person and have the background be blurry, you'd use shallow depth of field. If you want to take a picture of a sweeping mountain vista, you'd want to use a small aperture size (high f-stop number) so that the entire scene is in sharp focus. If you, like me, are more of a visual learner, then I think this graphic will help solidify the information about aperture. Take a minute and make sure you understand this info before moving on.

 Just
as the aperture affects the exposure as well as the depth-of field, the
shutter affects more than just the exposure. The shutter speed is also
principally responsible for controlling the amount of blur in a
picture. If you think about it, it makes sense that the shutter speed
controls how much blur is in the picture.
Just
as the aperture affects the exposure as well as the depth-of field, the
shutter affects more than just the exposure. The shutter speed is also
principally responsible for controlling the amount of blur in a
picture. If you think about it, it makes sense that the shutter speed
controls how much blur is in the picture.
Imagine me sitting here at my computer desk waving to you (you don't have to imagine very hard if you just look at the picture on the right).If you take a picture of me with a shutter speed of 1/30th of a second, then my hand will have moved in the time that the camera is recording the picture. To get rid of the blur, you need to increase the shutter speed to around 1/320th of a second. At this speed, my hand is still moving, but the camera takes the picture so fast that my hand travels only such a small distance that it is not noticeable in the picture.
The next question that most people ask is, how slow of a shutter speed can you use and still get a sharp picture? Click here for a blog post that answers that exact question.

A high ISO such as ISO 1,600 will produce a brighter picture than a lower ISO such as ISO 100. The drawback to increasing the ISO is that it makes the picture noisier. Digital noise is apparent when a photo looks grainy. Have you ever taken a picture at night with your cell phone or your pocket camera, and noticed that it looks really grainy? That is because the camera tried to compensate for the dark scene by choosing a high ISO, which causes more grain.
What constitutes a “high” ISO is constantly changing. Camera companies are constantly improving the ability of cameras to use high ISOs without as much grain. A few years ago, only the highest-end pro DSLR cameras could achieve 2,000 ISO, and now even entry-level DSLR cameras can shoot at this level. Since each camera is different, you would do well to do a few tests with your camera to see how high of an ISO you can shoot at without making the image overly grainy.
Right now, you will commonly find new DSLRs that advertise expandable ISO ranges. To learn more about that, click here.

 I
know exactly what you're thinking: “Why do I need three tools to
control the exposure!?!? Wouldn't one suffice?” The answer is no, and
I'll explain why with an example. In January 2012, I took a trip to my
favorite place on the planet to take pictures–Yellowstone National Park.
My guide informed us that the bighorn sheep in the park were dying off
very quickly due to whooping cough, so I worked hard that week to
capture pictures of the last few sheep in that area of the park. Around
9AM on a cloudy day, I found a small group of bighorn sheep and started
photographing them with a long 600mm lens. The early hour and clouded
sky made the situation quite dark for shooting.
I
know exactly what you're thinking: “Why do I need three tools to
control the exposure!?!? Wouldn't one suffice?” The answer is no, and
I'll explain why with an example. In January 2012, I took a trip to my
favorite place on the planet to take pictures–Yellowstone National Park.
My guide informed us that the bighorn sheep in the park were dying off
very quickly due to whooping cough, so I worked hard that week to
capture pictures of the last few sheep in that area of the park. Around
9AM on a cloudy day, I found a small group of bighorn sheep and started
photographing them with a long 600mm lens. The early hour and clouded
sky made the situation quite dark for shooting.
The lens I was working with (which costs $11,000–don't they know I've gotta send my kids to college?)… Anyway, it had a maximum aperture size of f/4. So I set my aperture at f/4 to gather as much light as possible. This also impacted the depth-of field to blur out the rocks behind the bighorn sheep. Next, I set my shutter speed. I wanted to capture action in the photo, so I set my camera to 1/1000th of a second shutter speed. I knew that this fast of a shutter speed would prevent any motion blur from the sheep running on the mountain side. Then, I took a picture. WAAAY too dark! I couldn't compromise my shutter speed or aperture, so I knew I needed to use the third player in the exposure triangle–the ISO.
I played around with my ISO and found that if I increased it to ISO 640, it made the picture bright enough to take the picture without making it overly grainy. Yahtzee! This combination of shutter speed, aperture, and ISO worked out perfectly. Now can you see why you need to know how to shutter, aperture, AND ISO, and know how to set them independently on your camera?
Click the link below to continue reading this totally free photography basics series of articles, but if you're more of a visual person and want to see how to set the camera settings for various situations, you should really check out Photography Start.
If you're a visual learner and want to really learn your camera, then be sure to check out my beginner photography class, which I call Photography Start. It's a series of 22 short videos where I take you on location to shoot waterfalls, landscapes, people, kids, and macro photos. You can look over my shoulder and see exactly how I set up my camera to take professional photos. Best of all, the video series is priced REALLY reasonably at just $15. Check it out here.
In part 3 of the Photo Basics Series, I'm going to teach you how to set these on your camera.
From the example of the sunset picture in installment #1 of this photography basics series, you have learned the importance of taking full control over the exposure on your camera. Now, it's time to dig into your camera and learn the three most basic tools available to you in controlling the exposure.
Those tools are shutter speed, aperture, and ISO. After I explain what each one does, I'll explain why we need three separate tools to control the brightness or darkness of the photo.
Aperture
A small aperture in a camera lens.
So suppose you take a picture that is too bright. How do you fix it? Simply choose a smaller aperture. Simple! Aperture sizes are measured by f-stops. A high f-stop like f-22 means that the aperture hole is quite small, and a low f-stop like f/3.5 means that the aperture is wide open.
Let's test your knowledge to make sure you have it down. If you take a picture and it's too dark at f/5.6, would you choose a lower f-stop number or a higher one? Yep! You'd choose a lower f-stop number, which opens up the aperture to let in more light. The size of the aperture controls more than the brightness or darkness of the picture, though.
The aperture also controls the depth-of-field. Depth-of-field is how much of the picture is sharp, and how much is blurry. If you want to take a picture of a person and have the background be blurry, you'd use shallow depth of field. If you want to take a picture of a sweeping mountain vista, you'd want to use a small aperture size (high f-stop number) so that the entire scene is in sharp focus. If you, like me, are more of a visual learner, then I think this graphic will help solidify the information about aperture. Take a minute and make sure you understand this info before moving on.
.
Shutter Speed
The shutter is a small “curtain” in the camera that quickly rolls over the image sensor (the digital version of film) and allows light to shine onto the imaging sensor for a fraction of a second. The longer the shutter allows light to shine onto the image sensor, the brighter the picture since more light is gathered. A darker picture is produced when the shutter moves very quickly and only allows light to touch the imaging sensor for a tiny fraction of a second. The duration that the shutter allows light onto the image sensor is called the shutter speed, and is measured in fractions of a second. So a shutter speed of 1/2 of a second will allow more light to touch the image sensor and will produce a brighter picture than a shutter speed of 1/200 of a second. So if you're taking a picture and it is too dark, you could use a slower shutter speed to allow the camera to gather more light.
That's me! Typing away on this article from my studio in Meridian, Idaho.
Imagine me sitting here at my computer desk waving to you (you don't have to imagine very hard if you just look at the picture on the right).If you take a picture of me with a shutter speed of 1/30th of a second, then my hand will have moved in the time that the camera is recording the picture. To get rid of the blur, you need to increase the shutter speed to around 1/320th of a second. At this speed, my hand is still moving, but the camera takes the picture so fast that my hand travels only such a small distance that it is not noticeable in the picture.
The next question that most people ask is, how slow of a shutter speed can you use and still get a sharp picture? Click here for a blog post that answers that exact question.
.
ISO
The funny thing about ISO is that it is an acronym, but nobody really knows what it stands for. It is always just called ISO even though it really stands for International Organization for Standardization. Every once in a while, you'll hear an older photographer pronounce it “I-so”, but almost everyone pronounces it “I.S.O.” The ISO controls the exposure by using software in the camera to make it extra sensitive to light.A high ISO such as ISO 1,600 will produce a brighter picture than a lower ISO such as ISO 100. The drawback to increasing the ISO is that it makes the picture noisier. Digital noise is apparent when a photo looks grainy. Have you ever taken a picture at night with your cell phone or your pocket camera, and noticed that it looks really grainy? That is because the camera tried to compensate for the dark scene by choosing a high ISO, which causes more grain.
What constitutes a “high” ISO is constantly changing. Camera companies are constantly improving the ability of cameras to use high ISOs without as much grain. A few years ago, only the highest-end pro DSLR cameras could achieve 2,000 ISO, and now even entry-level DSLR cameras can shoot at this level. Since each camera is different, you would do well to do a few tests with your camera to see how high of an ISO you can shoot at without making the image overly grainy.
Right now, you will commonly find new DSLRs that advertise expandable ISO ranges. To learn more about that, click here.
.
Putting It All Together
Bighorn sheep in Yellowstone National Park. Photo by Jim Harmer (Founder of Improve Photography)
The lens I was working with (which costs $11,000–don't they know I've gotta send my kids to college?)… Anyway, it had a maximum aperture size of f/4. So I set my aperture at f/4 to gather as much light as possible. This also impacted the depth-of field to blur out the rocks behind the bighorn sheep. Next, I set my shutter speed. I wanted to capture action in the photo, so I set my camera to 1/1000th of a second shutter speed. I knew that this fast of a shutter speed would prevent any motion blur from the sheep running on the mountain side. Then, I took a picture. WAAAY too dark! I couldn't compromise my shutter speed or aperture, so I knew I needed to use the third player in the exposure triangle–the ISO.
I played around with my ISO and found that if I increased it to ISO 640, it made the picture bright enough to take the picture without making it overly grainy. Yahtzee! This combination of shutter speed, aperture, and ISO worked out perfectly. Now can you see why you need to know how to shutter, aperture, AND ISO, and know how to set them independently on your camera?
Click the link below to continue reading this totally free photography basics series of articles, but if you're more of a visual person and want to see how to set the camera settings for various situations, you should really check out Photography Start.
If you're a visual learner and want to really learn your camera, then be sure to check out my beginner photography class, which I call Photography Start. It's a series of 22 short videos where I take you on location to shoot waterfalls, landscapes, people, kids, and macro photos. You can look over my shoulder and see exactly how I set up my camera to take professional photos. Best of all, the video series is priced REALLY reasonably at just $15. Check it out here.
In part 3 of the Photo Basics Series, I'm going to teach you how to set these on your camera.
Photography Basics Part 3
In part 2 of this photography basics series, we learned about aperture, ISO, and shutter speed. Now, you need to learn how to apply these settings on your camera to take advantage of your new-found nuggets of knowledge. I'll try to struggle through writing this, but my wife has me on a vegetarian diet right now, and just the mention of nuggets makes me hungry. Anyway…
 Whenever
I teach shooting modes, I always get the same question from members of
my class, so I'm going to attempt to deal with that one right off the
bat. The question is: why do I need to learn how to set my camera's
settings manually when my camera already has built-in modes for sports,
portraits, landscapes, etc? (These are, by the way, referred to by
photographers as the icon modes because they have icons of the shooting
situation on the mode dial).
Whenever
I teach shooting modes, I always get the same question from members of
my class, so I'm going to attempt to deal with that one right off the
bat. The question is: why do I need to learn how to set my camera's
settings manually when my camera already has built-in modes for sports,
portraits, landscapes, etc? (These are, by the way, referred to by
photographers as the icon modes because they have icons of the shooting
situation on the mode dial).
Again, an example will help to explain why these icon modes won't work for those who want to become a “real” photographer.
With your new photography skills and your new fancy camera, your family members nominate you the official photographer at your family reunion. It comes time to take the giant group picture with over 60 people in it (including your Uncle Bob who really shouldn't have worn that ugly Hawaiian shirt). What mode do you set the camera to? The little portrait icon, because it's a portrait! But there is a problem… a really big problem. The portrait mode on your camera automatically makes the aperture go really low, because it thinks you want shallow depth-of-field in your portrait. But in this instance, it's such a large group of people that you need full depth-of-field so that the people in the back aren't out of focus. The camera doesn't know your intentions with this portrait, so half of the group looks blurry.
And thus we see why the little automatic icon modes (the landscape, portrait, sports modes, etc), simply will not work for photographers who want to learn to take professional-quality photos.
 The
Creative Modes on your camera are Program, Aperture Priority, Shutter
Priority, and Manual Mode. On most cameras, they are marked “P, A, S,
M.” These stand for “Program Mode, Aperture priority, Shutter Priority,
and Manual Mode.”
The
Creative Modes on your camera are Program, Aperture Priority, Shutter
Priority, and Manual Mode. On most cameras, they are marked “P, A, S,
M.” These stand for “Program Mode, Aperture priority, Shutter Priority,
and Manual Mode.”
If you use a Canon DSLR, then you'll see that your camera company likes to feel “special” by changing up those names. Canon cameras will show “P, Av, Tv, M” for the same exact modes. “Av” is Canon's version of Aperture Priority, and “Tv” is Canon's version of Shutter Priority.
It may feel a little bit intimidating to move to these creative modes on your camera, but I'll walk you step-by-step through each of the creative modes, how to use them, and what they do.
But just in case you're curious, program mode usually (it is slightly different on each camera model) sets the aperture and the shutter speed for you, and allows the photographer to set the white balance, ISO, and flash.
This mode is not a great choice for serious photographers because you can't set the shutter speed to make sure the picture isn't blurry, or the aperture to control the depth-of-field.
When you shoot aperture priority mode, you set the aperture (the f-stop) and also the ISO. The camera will then set a shutter speed for you so that the picture is properly exposed.
Aperture priority mode is powerful because it is amazingly simple to use, and still allows the photographer a lot of creative choice. In fact, most competent photographers use aperture priority mode every single day.
Suppose you're shooting friends and family at a party. The background is really busy with people and things around the house, so you decide you want a blurry background in the photo (shallow depth-of-field). To achieve this, you set the camera to f/3.5 which is a low aperture and which will blur out the background. The first picture you take is of a person sitting on the couch next to a lamp. The lamp is bright, so you want a fast shutter speed to get the correct exposure since your aperture is wide open. Using aperture priority mode, the camera would automatically set that shutter speed for you. Then, you want to take a picture of someone in a darker corner of the room. You wouldn't have to fiddle with camera settings at all, because the camera will automatically see that it is dark and choose a slower shutter speed. All the while, you're able to keep the aperture set to use creative depth-of-field.
If I could only teach you one thing in this photography basics series, it would be to set your camera in aperture priority for the next six months. When you want full depth-of-field, choose a high f-stop (aperture). When you want shallow depth of field, choose a lower f-stop. Your pictures will DRAMATICALLY improve when you learn to control the depth-of-field.
At first blush, it sounds convenient to have a mode where you could choose the shutter speed and ISO and let the camera choose the aperture for you. For example, when shooting a school basketball game, you might think you'd want shutter priority mode because you could set the shutter speed fast enough for the quick-moving sports situation.
However, you might be surprised to learn that nearly all professional sports photographers I've worked with shoot in aperture priority mode. Why? Because the depth-of-field is key. We want to control depth-of-field in our sports pictures and we just keep an eye on the shutter speed to make sure the camera isn't picking one that is too low. If it does, then we boost the ISO so that the camera will chose a faster shutter speed.
The first time any of my students use a camera in manual mode, I can see them terrified to try it out. However, shooting in manual mode really isn't as difficult as it may seem. To understand manual mode, the example below will be helpful.
 I
took the picture above while at a photography conference in San
Francisco. In a situation like this, the bridge isn't going anywhere,
the bay isn't going anywhere, the chain in front of me wasn't going
anywhere… I had a captive audience to say the least. In situations like
this, I always use manual mode. I then set my shutter speed to 1/100.
I set my ISO to 100 because I wanted no noise in the picture and I knew
if I needed more light, I could just slow down the shutter speed.
I
took the picture above while at a photography conference in San
Francisco. In a situation like this, the bridge isn't going anywhere,
the bay isn't going anywhere, the chain in front of me wasn't going
anywhere… I had a captive audience to say the least. In situations like
this, I always use manual mode. I then set my shutter speed to 1/100.
I set my ISO to 100 because I wanted no noise in the picture and I knew
if I needed more light, I could just slow down the shutter speed.
After taking the picture with the settings above, I realized that the picture was coming out a bit too dark with 1/100 shutter speed. So, I slowed it down to 1/60 and it looked just how I wanted.
The point is that, eventually, you'll find yourself wanting to shoot in manual mode for situations where you aren't rushed to get the shot. If you're shooting sports, outdoor portraits, or other things, then aperture priority is simpler and faster than shooting in manual mode.
But since you're still learning, the best option for the next few months is to get comfortable shooting in aperture priority mode 100% of the time.
In the next lesson in this series, you're going to learn how you can dramatically improve your pictures by using creative compositions. We're past most of the technical stuff for now.
In part 2 of this photography basics series, we learned about aperture, ISO, and shutter speed. Now, you need to learn how to apply these settings on your camera to take advantage of your new-found nuggets of knowledge. I'll try to struggle through writing this, but my wife has me on a vegetarian diet right now, and just the mention of nuggets makes me hungry. Anyway…
The Great Flaw of Shooting “Icon Modes” on Your Camera
Icon modes highlighted in red.
Again, an example will help to explain why these icon modes won't work for those who want to become a “real” photographer.
With your new photography skills and your new fancy camera, your family members nominate you the official photographer at your family reunion. It comes time to take the giant group picture with over 60 people in it (including your Uncle Bob who really shouldn't have worn that ugly Hawaiian shirt). What mode do you set the camera to? The little portrait icon, because it's a portrait! But there is a problem… a really big problem. The portrait mode on your camera automatically makes the aperture go really low, because it thinks you want shallow depth-of-field in your portrait. But in this instance, it's such a large group of people that you need full depth-of-field so that the people in the back aren't out of focus. The camera doesn't know your intentions with this portrait, so half of the group looks blurry.
And thus we see why the little automatic icon modes (the landscape, portrait, sports modes, etc), simply will not work for photographers who want to learn to take professional-quality photos.
What are Creative Modes?
Creative modes highlighted in yellow.
If you use a Canon DSLR, then you'll see that your camera company likes to feel “special” by changing up those names. Canon cameras will show “P, Av, Tv, M” for the same exact modes. “Av” is Canon's version of Aperture Priority, and “Tv” is Canon's version of Shutter Priority.
It may feel a little bit intimidating to move to these creative modes on your camera, but I'll walk you step-by-step through each of the creative modes, how to use them, and what they do.
Program Mode (P)
Just trust me on this one–you don't want to use it–ever.But just in case you're curious, program mode usually (it is slightly different on each camera model) sets the aperture and the shutter speed for you, and allows the photographer to set the white balance, ISO, and flash.
This mode is not a great choice for serious photographers because you can't set the shutter speed to make sure the picture isn't blurry, or the aperture to control the depth-of-field.
Aperture Priority Mode (“A” on most cameras, “Av” on Canon)
I'd love to see you use aperture priority for 95% of your shooting for the next several months. It is the mode that most hobbyist photographers and even many many pro photographers shoot in most of the time.When you shoot aperture priority mode, you set the aperture (the f-stop) and also the ISO. The camera will then set a shutter speed for you so that the picture is properly exposed.
Aperture priority mode is powerful because it is amazingly simple to use, and still allows the photographer a lot of creative choice. In fact, most competent photographers use aperture priority mode every single day.
Suppose you're shooting friends and family at a party. The background is really busy with people and things around the house, so you decide you want a blurry background in the photo (shallow depth-of-field). To achieve this, you set the camera to f/3.5 which is a low aperture and which will blur out the background. The first picture you take is of a person sitting on the couch next to a lamp. The lamp is bright, so you want a fast shutter speed to get the correct exposure since your aperture is wide open. Using aperture priority mode, the camera would automatically set that shutter speed for you. Then, you want to take a picture of someone in a darker corner of the room. You wouldn't have to fiddle with camera settings at all, because the camera will automatically see that it is dark and choose a slower shutter speed. All the while, you're able to keep the aperture set to use creative depth-of-field.
If I could only teach you one thing in this photography basics series, it would be to set your camera in aperture priority for the next six months. When you want full depth-of-field, choose a high f-stop (aperture). When you want shallow depth of field, choose a lower f-stop. Your pictures will DRAMATICALLY improve when you learn to control the depth-of-field.
Shutter Priority Mode (“S” on most cameras, or “Tv” on Canon cameras)
Shutter priority mode sounds very useful, but the truth is that I have never found a professional photographer who uses it. It is a bit difficult to explain why that is.At first blush, it sounds convenient to have a mode where you could choose the shutter speed and ISO and let the camera choose the aperture for you. For example, when shooting a school basketball game, you might think you'd want shutter priority mode because you could set the shutter speed fast enough for the quick-moving sports situation.
However, you might be surprised to learn that nearly all professional sports photographers I've worked with shoot in aperture priority mode. Why? Because the depth-of-field is key. We want to control depth-of-field in our sports pictures and we just keep an eye on the shutter speed to make sure the camera isn't picking one that is too low. If it does, then we boost the ISO so that the camera will chose a faster shutter speed.
Manual Mode (“M”)
When I was 16 and drove a car for the first time, my teacher took me to a large parking lot. He asked me to floor it as fast as I possibly could across the parking lot. This was my first time driving! So, I went for it. I felt like I was FLYING! Then, he told me half way across the parking lot to look at the speedometer. I was only going 10 miles per hour (16 kilometers)! The point is, the first time you try anything, it feels intimidating and like you're out of control.The first time any of my students use a camera in manual mode, I can see them terrified to try it out. However, shooting in manual mode really isn't as difficult as it may seem. To understand manual mode, the example below will be helpful.
Manual mode. Aperture: f/18. Shutter speed: 1/60. ISO 100. Nikon 10-24mm lens. Nikon D7000 camera.
After taking the picture with the settings above, I realized that the picture was coming out a bit too dark with 1/100 shutter speed. So, I slowed it down to 1/60 and it looked just how I wanted.
The point is that, eventually, you'll find yourself wanting to shoot in manual mode for situations where you aren't rushed to get the shot. If you're shooting sports, outdoor portraits, or other things, then aperture priority is simpler and faster than shooting in manual mode.
But since you're still learning, the best option for the next few months is to get comfortable shooting in aperture priority mode 100% of the time.
In the next lesson in this series, you're going to learn how you can dramatically improve your pictures by using creative compositions. We're past most of the technical stuff for now.
Photography Basics Part 4
In part 3 of this photography basics series, I taught you how to shoot in aperture priority and manual mode on your camera. In this installment, I'm going to teach you how to develop strong compositions in your photos.
Here's the thing about composition. There are a few basic rules of composition that you'll easily understand from this article, but you'll soon see as you get out and practice photography that finding a strong composition is a process of trial-and-error which you'll only learn with time and practice.
Simply put, composition means meticulously selecting what elements will appear in the picture, and then carefully placing those elements in the frame to create a creative, balanced, and interesting organization.
From the photo below, you can see a humorous example of how photographers often envision a picture, and what the camera actually captures. It's funny, but unless you start paying attention to your composition, your pictures will always look like mugshots.

If you're shooting a portrait, decide which eye of the model is the focal point of the image. Usually, it's the eye closest to the camera. Then, adjust the framing of the picture until the eye is on the intersection of the imaginary tic-tac-toe board. Bingo! You followed the rule of thirds.
The same is true when shooting a landscape. In many or most landscapes, we like to include some of the foreground up close to the camera so as to give the sweeping landscape a sense of depth. So if there is an interesting rock or plant in the foreground, I'll place it on the bottom-right or bottom-left intersection of the frame. The same is true without a foreground element. You can place the horizon on the top or bottom third-line so that the horizon doesn't cut the picture in half.
I wrote a much more complete article about the rule of thirds, which you can check out as well.
When I go out and shoot, I usually find that trial-and-error is the only way to get strong compositions. I loosely follow the rule of thirds and other compositional principles, but mostly it's about getting down low and shooting up, or finding something to stand on to shoot down, or moving my tripod an inch here an an inch there, and really playing around until everything in the picture looks balanced and solid. Don't over-analyze the rules.
In the next lesson of this Photography Basics series, I'm going to talk about proper focusing techniques.
In part 3 of this photography basics series, I taught you how to shoot in aperture priority and manual mode on your camera. In this installment, I'm going to teach you how to develop strong compositions in your photos.
Here's the thing about composition. There are a few basic rules of composition that you'll easily understand from this article, but you'll soon see as you get out and practice photography that finding a strong composition is a process of trial-and-error which you'll only learn with time and practice.
Simply put, composition means meticulously selecting what elements will appear in the picture, and then carefully placing those elements in the frame to create a creative, balanced, and interesting organization.
Composition Example
Ever had a driver's license photo taken? Or a mug shot? Hopefully not the mug shot, but we all know how horrendous those photos look. You can look your absolute best when you get to the driver's license place, but the photo always makes you look terrible. Why? Because they position you in the middle of the frame, and then make you square off your shoulders to the camera.From the photo below, you can see a humorous example of how photographers often envision a picture, and what the camera actually captures. It's funny, but unless you start paying attention to your composition, your pictures will always look like mugshots.
Driver's
license photos always look terrible because they pose you in the middle
of the photo and make you square off to the camera.
The Rule of Thirds
Imagine a tic-tac-toe board placed on your picture. The rule of thirds says that you should place whatever is most interesting or eye-catching in the photo on the intersection of the lines on the photo. That's really all there is to it!If you're shooting a portrait, decide which eye of the model is the focal point of the image. Usually, it's the eye closest to the camera. Then, adjust the framing of the picture until the eye is on the intersection of the imaginary tic-tac-toe board. Bingo! You followed the rule of thirds.
The same is true when shooting a landscape. In many or most landscapes, we like to include some of the foreground up close to the camera so as to give the sweeping landscape a sense of depth. So if there is an interesting rock or plant in the foreground, I'll place it on the bottom-right or bottom-left intersection of the frame. The same is true without a foreground element. You can place the horizon on the top or bottom third-line so that the horizon doesn't cut the picture in half.
I wrote a much more complete article about the rule of thirds, which you can check out as well.
The REAL Rule of Composition
Ask most amateur photographers in the world what composition is, and 90% of them would answer something like “The rule of thirds and leading lines.” Those are certainly important principles to follow, but I have found that these basic principles are far too simplistic.When I go out and shoot, I usually find that trial-and-error is the only way to get strong compositions. I loosely follow the rule of thirds and other compositional principles, but mostly it's about getting down low and shooting up, or finding something to stand on to shoot down, or moving my tripod an inch here an an inch there, and really playing around until everything in the picture looks balanced and solid. Don't over-analyze the rules.
In the next lesson of this Photography Basics series, I'm going to talk about proper focusing techniques.
Photography Basics
Part 5
In the previous installment of this photography basics series, I taught about composition. In this installment, I'll teach you all about focus and why your photos may not be as sharp as you'd like them to be.
This morning, I got an email from one of the students in my online beginner photography class who said she spent $2,000 on an expensive camera and another $1,500 on a high-end lens. Still, her pictures don't look as sharp as she would like them to, and wondered why that is. I have to admit that I get this type of question SOO OFTEN that I dedicated an entire WEEK of training in my beginner class to teaching about how to get crystal clear and sharp photos.
It is not uncommon for photographers to think that something must be wrong with their equipment if the photos don't come out sharp, but most of the time I find that the reason is simply a product of mistakes the photographer makes when shooting. You can avoid those issues by understanding how to properly focus your camera.
Suppose you're taking a portrait of someone. Now that you've learned how to use shallow depth-of-field from the second article in this series, you want to use it all the time in your portraits to get a creamy background behind the subject. This means you're usually shooting your portraits at f/2.8 or a similar low aperture. Suppose, also, that you're using a 100mm lens and standing 7 feet (2.1 meters) from the subject. Did you know that, with these settings, that only 1.4 inches (3.5 centimeters) of the photo sharp? That means that, if you focus on the person's cheek, their eyes and nose will be partially blurry.
So if you want your photos to come out crystal clear and sharp, you need to focus PRECISELY, and make sure you have enough depth-of-field to make the subject come out sharp. When shooting portraits, you will almost always focus on the person's eye, since that is where the viewer of the photo will look first. For landscape photographers, check out this article on where to focus in landscape photography.
Your camera ALWAYS focuses on one specific spot in the scene. It is physically impossible for a lens to focus on two spots at once. When you look through your viewfinder, you see a bunch of dots (Canon) or small boxes (Nikon). Those markings show you where in the frame the camera is focusing. This spot generally blinks red when the camera sets focus.
In the picture below, I chose to focus on the ant on the flower, since that is where I wanted people to look. To do this, I set the camera to spot focus and used the four-way selector on the back of my DSLR to move the focus point onto the ant.
 Sometimes,
the spot in the picture where you want to focus will not have a focus
point available. This is especially true on entry-level Canon Rebel or
Nikon D3200 DSLRs, which do not have many focus points. If you find
that this is the case, check out this article on focusing and recomposing.
Sometimes,
the spot in the picture where you want to focus will not have a focus
point available. This is especially true on entry-level Canon Rebel or
Nikon D3200 DSLRs, which do not have many focus points. If you find
that this is the case, check out this article on focusing and recomposing.
99% of the time when I'm out shooting I use spot focus, which allows me to move around the focus point in the viewfinder. My thumb has become adept at constantly moving around the focus point using the four-way selector on the back of the camera as I compose a shot through the viewfinder. Spot focus is great because you have exact control over where the focus is placed.
However, there are other focus selection options on most DSLR cameras. Other than spot focus, you have the ability to choose a small group of between 3 and 5 focus points and tell the camera to choose the best of those points, or you could set your camera to determine which focus point to use all on its own. I never let the camera take control of focus–it's a recipe for blurry pictures. When I'm shooting sports or fast-moving wildlife, I'll sometimes set the camera to use any of the center area focus points and choose the best one, because the action happens faster than I can move the focus point.
Although there are certainly situations to use other focus selections, I would encourage you to use spot focus and get used to constantly moving around the focus point around the frame as you shoot for the next few months.
The other main option is continuous focus (displayed on the camera as “AF-C” for Nikon cameras and “AI Servo” for Canon cameras). This mode is used when the subject is moving. Suppose you're shooting a soccer player running toward you. If you use one shot, then the camera focuses when you press half way down on the shutter, and by the time you finish pressing all the way down, the camera takes the picture. In that split second, the athlete will have moved, so the picture will not turn out sharp. Continuous focus (AF-C or AI SERVO) means that the camera continues to find focus all the way up to the instant that you snap the picture.
So why wouldn't you want to use continuous focus all the time? Because it's slightly less precise than one shot. So here's the rule… use one shot (“AF-S” on Nikon, and “One Shot” on Canon) for all shots where the subject is reasonably still like landscapes or most portraits. Use continuous focus (“AF-C” on Nikon, and “AI Servo” on Canon) for all fast-moving shots.
Note: Canon users will also see the option for “AI Focus” when choosing a focus mode. There is a specific use for this, but honestly it's just outdated technology. I have tried it extensively even in the best case scenarios for this focus mode and have always achieved better results with AI Servo.
You have just learned a LOT of the basics of how your camera works, but there is much more to learn. If you want more information like this in video format that you can watch at your own pace, you should really check out my beginner online photography class. It's only $15 for 22 videos (many filmed on-location) with all the camera settings for each picture, videos of exactly how to put a composition together, and training on getting tack sharp photos.
Sign Up for My Online Photo Class
Part 5
In the previous installment of this photography basics series, I taught about composition. In this installment, I'll teach you all about focus and why your photos may not be as sharp as you'd like them to be.
This morning, I got an email from one of the students in my online beginner photography class who said she spent $2,000 on an expensive camera and another $1,500 on a high-end lens. Still, her pictures don't look as sharp as she would like them to, and wondered why that is. I have to admit that I get this type of question SOO OFTEN that I dedicated an entire WEEK of training in my beginner class to teaching about how to get crystal clear and sharp photos.
It is not uncommon for photographers to think that something must be wrong with their equipment if the photos don't come out sharp, but most of the time I find that the reason is simply a product of mistakes the photographer makes when shooting. You can avoid those issues by understanding how to properly focus your camera.
The #1 focusing mistake of beginning photographers
The #1 mistake I see from beginning photographers in terms of getting clear pictures, is that they aren't being precise with their focus. I often ask students where they are focusing, and I get answers like, “On the model's face.” The fact of the matter is that “the face” is far too large of an area to focus on for intimate portraits. Allow me to explain why…Suppose you're taking a portrait of someone. Now that you've learned how to use shallow depth-of-field from the second article in this series, you want to use it all the time in your portraits to get a creamy background behind the subject. This means you're usually shooting your portraits at f/2.8 or a similar low aperture. Suppose, also, that you're using a 100mm lens and standing 7 feet (2.1 meters) from the subject. Did you know that, with these settings, that only 1.4 inches (3.5 centimeters) of the photo sharp? That means that, if you focus on the person's cheek, their eyes and nose will be partially blurry.
So if you want your photos to come out crystal clear and sharp, you need to focus PRECISELY, and make sure you have enough depth-of-field to make the subject come out sharp. When shooting portraits, you will almost always focus on the person's eye, since that is where the viewer of the photo will look first. For landscape photographers, check out this article on where to focus in landscape photography.
How to focus on one spot
When you were shooting in automatic mode on your camera, the camera would automatically find the subject and focus for you. Now that you're shooting manually, it's time to take control of your focus as well.Your camera ALWAYS focuses on one specific spot in the scene. It is physically impossible for a lens to focus on two spots at once. When you look through your viewfinder, you see a bunch of dots (Canon) or small boxes (Nikon). Those markings show you where in the frame the camera is focusing. This spot generally blinks red when the camera sets focus.
In the picture below, I chose to focus on the ant on the flower, since that is where I wanted people to look. To do this, I set the camera to spot focus and used the four-way selector on the back of my DSLR to move the focus point onto the ant.
Notice the red illuminated focus point right on the ant? That's where I'm setting the focus for this shot.
Focus Selections
I hope I didn't confuse you earlier when I said that the camera can ONLY focus on one specific spot in the photo. There are ways that you can activate multiple focus points at once, but in doing so, the camera is just choosing the best of both worlds and compromising between the focus selections to set the focus in the middle somewhere.99% of the time when I'm out shooting I use spot focus, which allows me to move around the focus point in the viewfinder. My thumb has become adept at constantly moving around the focus point using the four-way selector on the back of the camera as I compose a shot through the viewfinder. Spot focus is great because you have exact control over where the focus is placed.
However, there are other focus selection options on most DSLR cameras. Other than spot focus, you have the ability to choose a small group of between 3 and 5 focus points and tell the camera to choose the best of those points, or you could set your camera to determine which focus point to use all on its own. I never let the camera take control of focus–it's a recipe for blurry pictures. When I'm shooting sports or fast-moving wildlife, I'll sometimes set the camera to use any of the center area focus points and choose the best one, because the action happens faster than I can move the focus point.
Although there are certainly situations to use other focus selections, I would encourage you to use spot focus and get used to constantly moving around the focus point around the frame as you shoot for the next few months.
Focus Modes
Aside from selecting which focus point(s) the camera is using, you also need to set which type of autofocus the camera will use. For most uses, you'll want to leave your camera on “AF-S” (Nikon) or “One Shot” (Canon). This means that the camera will acquire focus when you press half-way down on the shutter button, and then take the picture when you finish pressing all the way down on the shutter button.The other main option is continuous focus (displayed on the camera as “AF-C” for Nikon cameras and “AI Servo” for Canon cameras). This mode is used when the subject is moving. Suppose you're shooting a soccer player running toward you. If you use one shot, then the camera focuses when you press half way down on the shutter, and by the time you finish pressing all the way down, the camera takes the picture. In that split second, the athlete will have moved, so the picture will not turn out sharp. Continuous focus (AF-C or AI SERVO) means that the camera continues to find focus all the way up to the instant that you snap the picture.
So why wouldn't you want to use continuous focus all the time? Because it's slightly less precise than one shot. So here's the rule… use one shot (“AF-S” on Nikon, and “One Shot” on Canon) for all shots where the subject is reasonably still like landscapes or most portraits. Use continuous focus (“AF-C” on Nikon, and “AI Servo” on Canon) for all fast-moving shots.
Note: Canon users will also see the option for “AI Focus” when choosing a focus mode. There is a specific use for this, but honestly it's just outdated technology. I have tried it extensively even in the best case scenarios for this focus mode and have always achieved better results with AI Servo.
You have just learned a LOT of the basics of how your camera works, but there is much more to learn. If you want more information like this in video format that you can watch at your own pace, you should really check out my beginner online photography class. It's only $15 for 22 videos (many filmed on-location) with all the camera settings for each picture, videos of exactly how to put a composition together, and training on getting tack sharp photos.
Monday, October 29, 2018
Must-Have Photography Equipment for Beginners
Finding the best photography equipment for beginners can be overwhelming. But it doesn’t have to be.
Yes, we know that it is not the gear that makes a photographer great. A talented photographer can rock any type of camera because they know how to use light, composition and the situation to create a dynamic image.
That being said, it helps to have the right gear to learn on which is why we created this photography equipment for beginners list. It can be a challenge to learn manual mode on a point and shoot or try to get those blurry backgrounds with a kit lens.
Read more: What to Pack for a Photo Shoot
This post contains Amazon affiliate links. This means if you make a purchase through one of the links I will earn a commission at not additional cost to you.
- No.01DSLR cameraIf you are serious about photography you will want to get a DSLR camera. However, mirrorless cameras are becoming more popular so if you have a mirrorless camera that works as well.
According to Wikipedia, a DSLR is a “digital single-lens reflex camera is a digital camera that combines the optics and the mechanisms of a single-lens reflex camera with a digital imaging sensor, as opposed to photographic film”.
Basically, that means you are looking for a camera that has interchangeable lenses.
You may be wondering what camera should you get. The quick answer is any DSLR camera will work great and help you learn manual mode.
However, I suggest purchasing the best camera your budget allows while still leaving money left over to purchase a lens.
You want to avoid purchasing a kit lens. The kit lens is the lens that comes with the camera. Often times camera companies will create a whole package with the camera body and a couple of lenses to try and sweeten the deal. However, these lenses aren’t the highest quality so I suggest skipping them altogether.
Read more about the lenses I recommend starting with below.
Now you may be wondering, should I get a Canon or Nikon. Basically, they are both amazing camera brands and it really depends on which camera body & look you prefer. I talk more about that in the video below.
Best Nikon DSLR Cameras for Beginners
Nikon 3400 – Great entry level camera. You may outgrow it quickly once you learn manual mode but if you aren’t 100% you want to learn manual mode this is a great camera to start with.
Nikon 5600 – Middle of the road entry level camera. The ISO is higher than the 3400 series but still an affordable camera.
Best Canon DSLR Cameras for Beginners
Canon EOS Rebel T7i – Honestly, any camera in the Rebel series is a great one. I started with a Rebel myself. This is a great entry level camera.
Canon EOS Rebel T6i – This is an older version as the T7i has replaced this one but is still an amazing camera for a less expensive price tag.
- No.02Prime lensAs I mentioned above when you purchase your DSLR you want to skip the kit lens. However, if you already purchased your camera and kit lens, don’t worry. I did the same thing.
But when I got serious about photography and started asking a friend how I could get those blurry background and amazing photos she was taking, she not only told me about manual mode but how I needed a better lens.
She suggested I purchase a prime lens, the 50mm 1.8. I couldn’t believe she wanted me to purchase a lens after I just spent all this money on a new camera. But I instantly saw a difference in my photos as soon as I put that lens on my camera. What a difference!
You don’t have to start with one of these prime lenses but having a lens with a fixed aperture (meaning the aperture doesn’t move if you zoom in and out) will help you as you get your settings where you want them for the exposure triangle.
A prime lens will not zoom lens. Some people don’t like that it doesn’t zoom back and forth but all you need to do is move your feet to get closer or further away. Pretend it’s like a workout combined with photography.
Best lenses for Beginners
Either one of these lenses is what I recommend you start with. They are both affordable when it comes to photography gear. If you aren’t sure, a lot of people prefer the 35mm 1.8 as it allows you to include more in the frame since it’s focal length is 35mm vs 50mm so if you do a lot of indoor shooting you may prefer this lens.
Nikon 50mm 1.8G
Nikon 35mm 1.8
Canon 50mm 1.8
Unfortunately, Canon does not make a 35mm 1.8 version for Canon.
Read more: What lens should I buy first? - No.03Gray Card/Expodisc for White balancePersonally, I use Kelvin for white balance but when I first started I didn’t have a lens that had that option and relied on my gray card to help me set my white balance.
If you aren’t familiar with white balance it is the temperature of your photo. Have you ever taken a photo indoors at night and noticed it looked really yellow? That is because the white balance was off from the artificial light. This is a common problem.
You can rely on your camera for auto white balance but expect to need to adjust it when shooting indoors without natural light.
You can use a gray card or an Expodisc to set your custom white balance. Basically, you are telling your camera exactly how to read the colors of the scene so you don’t get a too yellow or too blue image.
It will save you hours in post processing from trying to fix your white balance which can be a massive headache. - No.04Lens PenIf you are photographing children they will inevitably touch your lens. It happens. But instead of feeling frustrated, you can use your lens pen to clean it up.
This is also great if you are like me and lose your lens caps often. My lenses get dust and smudges on them all the time but I can easily use my lens pen to clean them up. - No.05Editing softwareThe two most popular options for editing software for photographers are Lightroom & Photoshop.
Personally, I prefer Lightroom as I feel it is a lot more user friendly than Photoshop.
Lightroom not only allows you to edit your photos but also offers a great system for organizing your images from key words, stars, and color coding.
It has everything you need to get started with photo editing. I’ve been editing my photos for eight years and use Lightroom exclusively to edit my images.
- No.06Camera bagLet’s face it, you spent all this money on a nice camera and lens, you need to make sure you are putting in it a safe place when you take it out of the house. And yes, you need to take it out of the house with you.
In fact, when just starting out, I challenge you to take it everywhere. I remember practicing in the grocery store among other places.
I have been using ShutterBags for the past six years and they are by far my favorite camera bags. They are high quality leather camera bags that don’t look like camera bags.
I have used these to double as a diaper bag when we were in that stage of life. There are a variety of sizes, styles and colors. I promise there is one there you will love.
There
are so many more things you can purchase when getting started like a
fun camera strap, tripod, external flashes and more. However, I think
it’s important to start simple. Learn to use this gear before moving on.
Don’t get distracted by the thought of if I only had (blank) my photos would be so much better.
If your photos aren’t where you want them it isn’t more gear you need, it’s more education. I have a free webclass, I would love to have you join. Click here to find out more.
– What to Pack for a Photo Shoot
– Go-To Camera Lenses
Don’t get distracted by the thought of if I only had (blank) my photos would be so much better.
If your photos aren’t where you want them it isn’t more gear you need, it’s more education. I have a free webclass, I would love to have you join. Click here to find out more.
Find out more about best photography equipment for beginners:
– 5 Must Have Tips for Traveling with Photography Gear– What to Pack for a Photo Shoot
– Go-To Camera Lenses
Learn
the EXACT techniques that I use everyday to photograph my kids. Stop
feeling frustrated with your DSLR. Let me help you with this FREE
webclass.
Yes, I want this!National Photography Program
The National Photography Program enables youth to develop
their creativity and cultural awareness through the appreciation of
photography.

The National Photography Program enables youth to develop their creativity and cultural awareness through the appreciation of photography.
The National Photography Program is designed to help youth ages 6 to 18 go beyond taking snapshots and develop the necessary skills to take photographs that can really impact the viewer. The current popularity and accessibility of photography makes it a powerful means to engage youth of all ages in creative programming, while simultaneously teaching them skills they will use for the rest of their lives. For some youth, photography opens a door to creative self-expression that no other art form allows. Others may discover a career path.
Sunday, October 28, 2018
 Lisa Clarke
40 Tips to Take Better Photos
“How do I take better photos?”I was extremely lucky to have many talented and generous photographers take me under their wing to show me the ropes. Without their valuable advice there is no way I would have become the photographer I am today.
Ironically, the number one question I now get asked as an Open producer is “How do I take better photos?”
So along with some tips that I’ve picked up over the years, I’ve recruited some outstanding snappers across Australia to share their own secret techniques about how they take their photos to the next level.
1. Get in close
It was the famous photojournalist Robert Capa who once said “If your photographs aren’t good enough, you’re not close enough.” He was talking about getting in amongst the action. If you feel like your images aren’t ‘popping’, take a step or two closer to your subject. Fill the frame with your subject and see how much better your photo will look without so much wasted space. The closer you are to the subject, the better you can see their facial expressions too.2. Shoot every day
The best way to hone your skills is to practice. A lot. Shoot as much as you can – it doesn’t really matter what. Spend hours and hours behind your camera. As your technical skills improve over time, your ability to harness them to tell stories and should too. Don’t worry too much about shooting a certain way to begin with. Experiment. Your style – your ‘voice’ – will emerge in time. And it will be more authentic when it does. — Leah RobertsonLeah Robertson is a super talented Melbourne based photographer and videographer, specialising in music and documentary photography.You can see her work here.
3. See the light
Before you raise your camera, see where the light is coming from, and use it to your advantage. Whether it is natural light coming from the sun, or an artificial source like a lamp; how can you use it to make your photos better? How is the light interacting with the scene and the subject? Is it highlighting an area or casting interesting shadows? These are all things you can utilise to make an ordinary photo extraordinary.4. Ask permission
When photographing people, especially while in countries with different cultures and languages, it can be hard to communicate. In certain countries if you photograph someone you are not ‘supposed’ to photograph, it can get ugly and rough very quickly if you are not careful. So out of respect you should always ask permission. I have started shooting a series of school children in Pakistan. These are all posed portraits and they are looking down the lens. My guide helps me with the language and I limit myself to smiling, shaking hands, giving ‘hi-five’ and showing them the image on the back of my camera once it is done. You would be amazed how quickly people open up. — Andrea FrancoliniAndrea Francolini is a well known Italian born, Sydney based sports photographer. He is also the founder of My First School, as trust which has the aim to facilitate educations in Northern Pakistan. You can see his work here.
5. Use flash during the day
You might think that you should only use flash at night time or indoors, but that’s not the case at all. If it is an extremely bright day outside and the sun is creating harsh shadows on your subject, switch on your flash. By forcing extra light onto your subject, you will be able to fill in those ugly shadows and create an even exposure.6. ISO
There are questions to ask yourself when deciding what ISO to use:What time of day are you shooting? If you are shooting outside during the middle of the day you will need to use a lower ISO such as 100 or 200. If you are shooting at night time without a tripod you will have to increase the ISO to a higher number to be able to record the light on the camera’s sensor.
Will the subject be well lit? If your subject or scene is too dark you will need to use a higher ISO such as 800 or 1600.
Do you want a sharp image or an image with more movement in it? Using a high shutter speed to capture fast movement might mean that you need to use a high ISO to compensate. Likewise, if you’re using a slow shutter speed to capture blur you will need a low ISO to compensate.
Don’t forget, increasing your ISO increases the grain or pixel size in your photo. So don’t use an ISO of 3200 or 6400 if you don’t want a photo with a lot of ‘digital noise’.
7. f/4
f/4 is my ‘go to’ aperture. If you use a wide aperture with a long lens (200mm-400mm) you’re able to separate the subject from the background. This helps them stand out. Works every time. — Peter WallisPeter Wallis is a sports photographer extraordinaire, working for The Courier Mail in Brisbane. You can see his work here.
8. You’ve got to be joking
A well timed joke will always yield a more natural smile, than simply saying “smile” — Dean BottrellDean Bottrell is a Emerald based photographer who specializes in portraiture. You can see his work here.
9. Buy books, not gear
Having expensive camera equipment doesn’t always mean that you’ll take good photos. I’ve seen some absolutely amazing images shot with nothing more than a smart phone. Instead of having ten different lenses, invest in some fantastic photography books. By looking at the work of the masters, not only do you get inspired, you come away with ideas to improve your own photos.10. Read your camera’s manual
The best way to know what to do with your camera is to actually read the manual. So many people miss this really important step on their photographic journey. Every camera is different, so by reading the manual you’ll get to know all the funky things it’s capable of.11. Slow down
Take time to think about what is going on in the viewfinder before pressing the shutter. How are you going to compose the shot? How are you going to light it? Don’t jump straight in without giving it some thought first. — Brad MarsellosBrad Marsellos is the Wide Bay über Open producer. You can see his photos, videos and musings on life here.
12. Stop chimping (checking the photo on the back screen)
It’s a bad habit digital photographers can develop. Time and time again I see photographers take a photograph and then look at the back of the screen straight away. By doing that you could miss all the special moments. You can look at your photos later. You can miss ‘the shot’ and it affects the flow of your work, so just keep shooting! – Marina Dot PerkinsThe lovely Marina Dot Perkins is a news, travel and wedding photographer who worked for The Canberra Times and is now based in Newcastle.
13. Framing
This is a technique to use when you want to draw attention to something in your photograph. By framing a scene or a subject, say with a window or an archway, you lead the viewer’s eye to the primary focal point.14. Shape with light
Never shoot with the sun directly behind you. It creates boring, flat light on the subject. If you shoot with the light source to the side or behind the subject, you are able to shape with the light, creating a more interesting photo. — Patria JannidesPatria is not only a talented news photographer, she is also my long term friend, mentor, and personal cheer squad. She even helped me to land my first job as a paid photographer. Thanks for everything P xxx
15. Watermarks
This tip isn’t in direct relation to TAKING photos, but it does affect the look of photos. When it comes to watermarks, the smaller the better. And if you can avoid using them, do.Chances are, unless you are a paid professional, there’s not much of a chance of your photos getting nicked. But in reality, they won’t prevent your images from getting stolen. They only distract from the fabulous image that you’ve created, because once you’ve slapped a watermark all over it, that’s all the viewer will be looking at. The only way you can prevent your images from being stolen is to not publish them on the internet.
Read Open producer Luke Wong’s blog post on watermarks here.
16. Be present
This means make eye-contact, engage and listen to your subject. With the eyes – lower that camera and be human. Bring the camera up for a decisive shot. But remember to lower it, like you’re coming up for air, to check in with your subject. Don’t treat them like a science experiment under a microscope. Being there with your subject shows them respect, levels the playing field in terms of power dynamics, and calms them down. You’ll get much more natural images this way. — Heather FaulknerHeather Faulkner is a photographer who convenes the ePhotojournalism major at QCA, Griffith University. She is also the executive director of The Argus, a student-run, visual journalism online magazine. See her personal work here.
17. Shutter speed
Being aware of your shutter speed means the difference between taking a blurry photo and a sharp photo. It all depends on what you are after. If you are shooting a sporting event or children running around in the backyard, you probably want your subjects to be in focus. To capture fast action you will have to use a shutter speed over 1/500th of a second, if not 1/1000th to 1/2000th. On the opposite end of the scale, you might want to capture the long streaks of a car’s tail lights running through your shot. Therefore you would change your camera’s shutter speed to a long exposure. This could be one second, ten seconds, or even longer.18. Charge your batteries
This seems like a simple one, but pretty much every photographer on the face of the planet has been caught out before. Including myself. The trick is to put the battery onto the charger as soon as you get home from your photo shoot. The only thing then is to make sure you remember to put it back into the camera after it has been recharged…19. Focal length
Keep it simple. I shoot with two prime lenses and one camera; A 28mm and a 35mm. For everything. I use the 35mm lens 70% and the 28mm lens 30% of time. It takes some time to get used to it, but once you work it out, shooting primes is the only way to go. It means you have to work with what you have and you can’t be lazy. Basically, this means more pictures and less fiddling around with zooming and maybe missing moments. It also helps for consistency. If you’re working on a project or a series, keeping the same focal lengths is a great way to maintain a powerful sense of consistency. — Justin WilkesJustin Wilkes quit his job in Sydney this year to cover the political and social change in post revolution Egypt. He has since had his photographs published in The New York Times, TIME magazine, and The Jakata Globe to name but a few. You can see his amazing documentary work here.
20. Be part of a photographic community
Like ABC Open! Not only will you be able to publish your photos for the rest of the country to see, you’ll be part of an active group that offers feedback on how great you are going. You can learn new things to help you improve your technique, and you might even make some new photography buddies.21. Shoot with your mind
Even when you’re not shooting, shoot with your mind. Practice noticing expressions and light conditions. Work out how you’d compose a picture of that scene over there that interests you, and what sort of exposure you might use to capture it best. — Leah Robertson22. Return the favor
Always remember that if you are shooting people in a different country, they are probably doing you a favor by posing. So the least you can do is return this favor some way or another.I often return to the same places year after year, so I bring along prints and look for the people I photographed previously. In some areas people do not have a picture of themselves. Imagine not having a picture of you and your family? Strange don’t you think? Yet many people don’t. So a $0.50 print can really make someone happy. It also opens doors for more photography further down the track. — Andrea Francolini
23. Have a camera on you at all times
You can’t take great photos if you don’t have a camera on you, can you? DSLR, point-and-shoot or smart phone, it doesn’t really matter. As long as you have access to a camera, you’re able to capture those spontaneous and unique moments in life that you might have otherwise missed.24. The golden hour
Shoot portraits and landscapes in the golden hours — the light is softer and the colours are more vibrant. — Dean Bottrell25. Keep it simple
Don’t try to pack too many elements into your image; it will just end up looking messy. If you just include one or two points of interest, your audience won’t be confused at where they should be looking or what they should be looking at.26. Don’t get bogged down by equipment
We’ve all seen these types of photographers out and about. They usually have three or four different cameras strapped around their necks with lenses long enough for an African safari. In reality, there’s probably no need for all that equipment. One body with one or two lenses means that you’ll be freer in your movements to capture interesting angles or subjects on the move.27. Perspective
Minimize the belly-button photograph. This is a reference to Moholy Nagy of the Bauhaus movement in photography (which was all about lines of perspective). In other words, perspectives are more engaging when we crouch down, or lie down, or elevate our position in reference to the subject. Look at how changing your perspective can change the visual language and implied power dynamics of the image. Crouching low can make your subject more dynamic, whereas gaining height on your subject can often minimize their presence in the image. One of my favorite exercises is to make my students lie down and take pictures, often in the dirt. I am a little cheeky. — Heather Faulkner28. Be aware of backgrounds
What’s in your frame? So often I see great photos and think “didn’t they see that garbage bin, ugly wall, sign, etc?” It’s not just the person or object in your frame, it’s everything else in the background that can make or break a great photograph. So don’t be afraid to ask the person to move (or move yourself) to avoid something ugly in the background. — Marina Dot Perkins29. Shade
Shade can be your best friend. If there is no way you can make the available light work for your photo, shoot in the shade. You’ll get a nice even exposure with no patchy highlights throughout your shot.30. Rule of Thirds
This is one of the most common tips that pop up when it comes to improving your photos.To break it down, you cut your frame into thirds by using both horizontal and vertical lines. You then place your point of interest over the cross sections of the grid.
Check out this article for further details about using the rule of thirds.
31. Exposure
I’ve been shooting a lot of protests lately. Basically, they’re just a lot of people really close to one another; often moving. After having made many mistakes with getting my exposures right, I worked out that if the sun is behind me and in the face of protestors I will set exposure compensation to underexpose by a stop to bring out even tonal range. When the sun is behind the protestors I like to over expose just slightly to bring out the shadow details on their faces. This could apply to street photography when the light is in front or behind your subject. — Justin Wilkes32. Don’t spend too much time post-processing
The key is to get it right in the camera first, so you don’t HAVE to spend time editing. Over working a photo in editing software very rarely looks good, unless you are trying to achieve a super-artsy effect. If it takes you longer than ten minutes to alter your photo, maybe think about going back out into the field to re-shoot it.33. Variation
Variation is key. I often use a recipe from Life Magazine picture editors for building a story narrative. I look for: over-all shots or scene-setters, interaction, action, portraits, details, medium shots and of course the signature image. Having this list in my head helps me start photographing a story that sometimes isn’t visually apparent until you get into it. This is great when you’re in a crowded or busy place. — Heather Faulkner34. Become one with the camera
Push the button regardless of the outcome so the camera becomes part of your hand. — Dean SaffronDean Saffron is a photojournalist and an ABC Open superstar. His video The Spokesman, has had over 170,000 views. Woah!
35. Hold your camera properly
You might not know it, but there is a right way and a wrong way to hold a DSLR camera. The correct way is to support the lens by cupping your hand underneath it. This is usually done with the left hand, with your right hand gripping the body of the camera. This helps to prevent camera shake. If you are gripping your camera with your hands on either side of the camera body, there is nothing supporting the lens, and you might end up with blurry photos. To get an even stabler stance, tuck your elbows into the side of your body.36. Limit your palette
When photos have too many colours spewing out from them, they’re often hard to look at. Unless it’s a photo of a rainbow or the Mardi Gras. Try to focus on having one or two colours predominately featuring in your photograph. It will be more pleasing to the eye and will help set the tone of the image.37. Get your subject to relax
This applies mostly to portrait style photography. As a press photographer, I spend most of my time doing one on one portrait shoots. I think it’s really beneficial to take the time (if you have it) talking to your subject, asking questions, showing an interest in whatever it is they do. I find it really helpful in relaxing the person and often they’ll say something and that can lead to a better photo opportunity. — Marina Dot Perkins38. Inspiration from all forms
Take in as much photography as you can – online, and in books and magazines. But not passively. Look at different styles. Work out what you like or don’t like about them. Look at the technical elements of pictures and think about how they were made, and what the photographer is trying to say. The more you take in, the more arsenal you’ll have when creating your own work. — Leah Robertson39. Be patient and persevere
With time, patience, and perseverance, you will get better; with each and every photo you take.40. Break the rules
Now that you know some of the rules, go ahead and break them! Experiment. Have fun. Learn from your mistakes. Make up your own tips and techniques for taking fantastic photographs. I’d love to hear them.Go forth and shoot!
Saturday, October 27, 2018
Friday, October 26, 2018
Photography: a beginners tale

It’s the twenty first century and just about everyone takes photographs; on phones, on computers, on games consoles and of course on cameras. Photography is easy?
Well yes – on lots of levels it is – but what if you want to take more artistic or technically accomplished photographs? How easy is that?
Here are a few thoughts on my own experience of learning to be a photographer; an experience that made me feel that photography was a very hard skill to learn. That might just been me of course, however I suspect not. Hopefully this article will re-assure those going through the same learning process, i.e that they are not alone – and that there is light at the end of the tunnel (or the end of the lens).
Getting started with a new camera
I started taking photographs seriously (so to speak) when my wife Pat started a website about Glasgow West End; our local area. Being a typical puffed up male – it wasn’t going to be good enough for me to buy a cheap camera and take snaps – I felt a ‘need’ to take good photographs. The year was 1999 and taking decent photos was my goal.So, aiming high, I bought a good second-hand SLR camera, a Canon T90 (built in 1986 and top of the range for the time). A fancy camera with all the required knobs. I thought a ‘real’ camera was what I needed to take real photos. Not something I think now I have to say; it turned out that the camera is not as important as I first thought, i.e. it’s more about how you use it, and more importantly, about having an eye for a good photo.
I very quickly realized that professional cameras are not just cameras built with better quality plastic than the ‘automatics’ I had been using – they are completely different machines. I was daunted by the camera – it felt like I would need the equivalent training to someone learning to fly the the Space Shuttle in order to understand it.
Trying to figure out how to use it
So my next task was to track down the Manual and buy a few photography books. A jargon and acronym fest ensued as I plowed my way through the manual; SLR, TTL, exposure, f-stops, exposure compensation, spot metering, Program AE…… and on and on – and all completely baffling. (As a side note – the T90 turned out to be a fantastic camera which had features that I came to rely on – and which no other camera I’ve had since has been able to match; i’m feeling nostalgic about that manual focus camera – and it used real film; just like in the olden days.)Ok – got the camera – got the manual and read a few books, so what were the things that I found most difficult to understand?
Underexposed to the techniques of photography

Undoubtedly I have to say that ‘exposure’ was one of the main things that first gave me a feeling of insecurity (yes there is a joke in there – but not from me); I struggled to understand just what it was; it felt like trying to harvest smoke, as I couldn’t get a handle on it at all.
In very simple terms, exposure turned out to be about how to actively control how light or dark I wanted my photos to be. That’s my short and stupidly simplified definition – you can read an article I’ve since written about it, which expands that idea in marginally more detail. To understand exposure I had to understand those two totems of photography, shutter speed and aperture; i.e how long should my film be exposed to light and how big should the hole that the light passes through be? In essence it’s no more complicated than that (I lie obviously).
(Rather than try to explain these topics at any length in this article, i.e. shutter speed and aperture – check out the two beginners articles I’ve written about these topics at, which you will find by clicking the other two links on this page related to beginners photography).
What did I learn of a practical nature?
To cut a short story short, in terms of exposure spot metering became my friend. Spot metering is metering from a very small area of the scene you are photographing , i.e. you calculate your exposure from an area that you can roughly guess the reflectivity of (i.e a person’s face which tends to be equivalent to approximately +1 stops). This turned out to be the most dependable way for me to control the exposure of my photos.In our ‘face’ example – what you do is set the exposure compensation to plus one – set the camera to spot meter – and then point at the person face and use whatever button is on your camera to set the exposure from an area on the person’s face. The rest of the image will be darker or light in relation to the metering taken from the person’s face. (the traditional way to spot meter is to use a gray card and point your camera, or a light meter, at that with no exposure compensation – but I’m too embarrassed to carry a gray card around).
Once you having been doing this for a while you will learn to adjust the exposure a bit one way or another depending on the results you are getting. While out and about taking photographs I would take my exposure from a blonde sandstone building or a patch of grass; even though those weren’t the things I was photographing; however, because I knew what settings these related to I got fairly consistently exposed images.
I also use spot metering to take different exposures of the same scene; by spot metering from different areas of the image. An example would be taking photographs of a sunset and metering from different parts of the sky to get darker or lighter images; this way you can take lots of different images to find the one that works best.
If you are unaware of what spot-metering is and therefore the above explanation makes no sense, I recommend you spend some time researching it and then using it. I’m confident it will give you much more of a feeling that you are in control of your photography. Google ‘spot metering tutorial’ to find some useful articles.
 Getting control of depth of field
Up next on the confusion stakes was the ‘depth of field’ thingy and the
associated ‘in and out of focus’ thingy. In other words controlling the
blurry and sharp bits on a photograph.
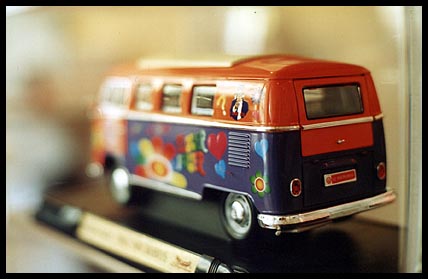
Though I instinctively grasped what that was about; controlling it was another matter. I was keen to really understand this as I could see that many photographs in magazines used the ‘get the background out of focus’ trick to make the subject stand out. I was very pleased with myself when I could accomplish this. In fact in my early photographic attempts I was a bit obsessed with it and took hundreds of photos of flower with nice soft out of focus backgrounds; I still like this effect more than I should.
Although I could understand what depth of field was – it wasn’t the simplest thing to control – as the particular part of a photograph that can be completely in focus is reliant on the size of the ‘aperture’ used. This is made even more complicated as the control you have over these things is dependent on the available light, i.e., in very dull light I might want a very sharp photograph but because there isn’t much light I have to have a very short lens and a big aperture which translates to a very narrow depth of field. The large aperture makes it much harder to have a photo that is sharp in all areas. (Note: These remarks assume you are not using a tripod; as that would help you take a photo with a smaller aperture in low light situations.)
What did I learn of a practical nature?
Big apertures produce a very narrow depth of field (i.e the depth of the part that is in focus). For example, you you could use a large aperture for portraits, as you get the person nicely in focus and the background out of focus (and therefore soft). This is handy as it makes the person stand out against the background.As a side note: portraiture isn’t of course just about depth of field; very short lenses for example can give a photograph a bit of a convex look that isn’t desirable (hey my nose looks awfully big in that picture) so a slightly longer lens can give a more pleasing result.
On the other hand a very long lens flattens the image (don’t call me flat face) so you want something in between; 60mm up to 100mm would be in the right ball-park. Portraiture isn’t just about the size of your lens either, it’s about artistic considerations among a million other things; too many things to discuss in this particular article.
Small apertures produce much sharper images; for example you might want to use a small aperture for taking landscapes; were you want the entire photograph to be sharp.
The wonder of being a beginner
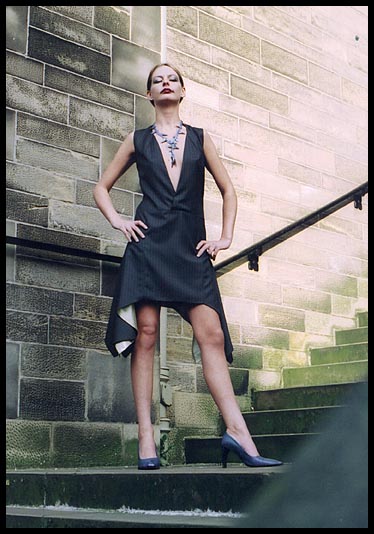
You might not think it at the time but the when you are new to photography and learning about it, this is the best times you will have with your camera. I remember having the feeling that I was seeing the world afresh as I stared at it through a camera lens. I had never really been aware (to the same extent) of the shadows, the abstract shapes and the sheer beauty of the world around me as I was when I started taking photographs.
Strangely, shadows took on a new importance; one because the light and shade was what made the shapes in the photograph and two, because with a scene where the difference between the dark and light regions was large, it may be impossible to capture a decent image.
Film (or digital sensors) are not capable of capturing the range of light and shade that our eyes can. This is one reason why photographs at the beginning or the end of the day tend to be nicer; the shadows are both softer and more visible, i.e. they define the elements of the image more as they are longer.
The other thing that makes photographs taken in the morning or evening more attractive is the ‘colour of the light’. Again this isn’t something I had noticed to any great extent before; light has colour (although I know we are all taught that in physics class at school). Take a photograph indoors with only a lamp as a light source and you’ll notice a colour cast on your photograph; that is the colour of the light in the room – which you hadn’t noticed before; because your brain had adjusted your perception of the light.
Morning and evening light tends to be ‘warmer’ (i.e more red/orange) than that during the height of the day; and that nice warm colour makes photographs very attractive – particularly when combined with long soft shadows. The colour of the light is warmer because it has traveled through a greater amount of the earths atmosphere on its way from the sun. Handy for photographers.
The most important thing I learned
One of the most important thing I have learned is that ‘it’s all about the light’. Good light makes a photograph – bad light can mean there is no photograph worth taking. However, good and bad light cannot be simply defined; high contrast photography can make a career – as it did with the crime photographer Weegee (Arthur Fellig), whose photographs were to a large extent defined by the bright light from his flash.Nothing excites a photographer more than looking out of the window and noticing that the light is fabulous. Time to grab the camera. Sheer bliss
Happy snapping.
Written by : Jim Byrne
Subscribe to:
Posts (Atom)