Coastal adventures are a spectacular way to explore with your camera and to soak in the sea views and fresh sea air. There are so many amazing beaches and miles upon miles of coastline around the world or closer to home to entice photographers to the sea. Beautiful seascapes can vary from wide open clifftop vistas to picturesque harbors, tranquil ocean views, secluded coves, and even fishing villages. Here are 6 scenarios to try for more interesting beach photography:
1. Monumental views
Sailing boat at sea
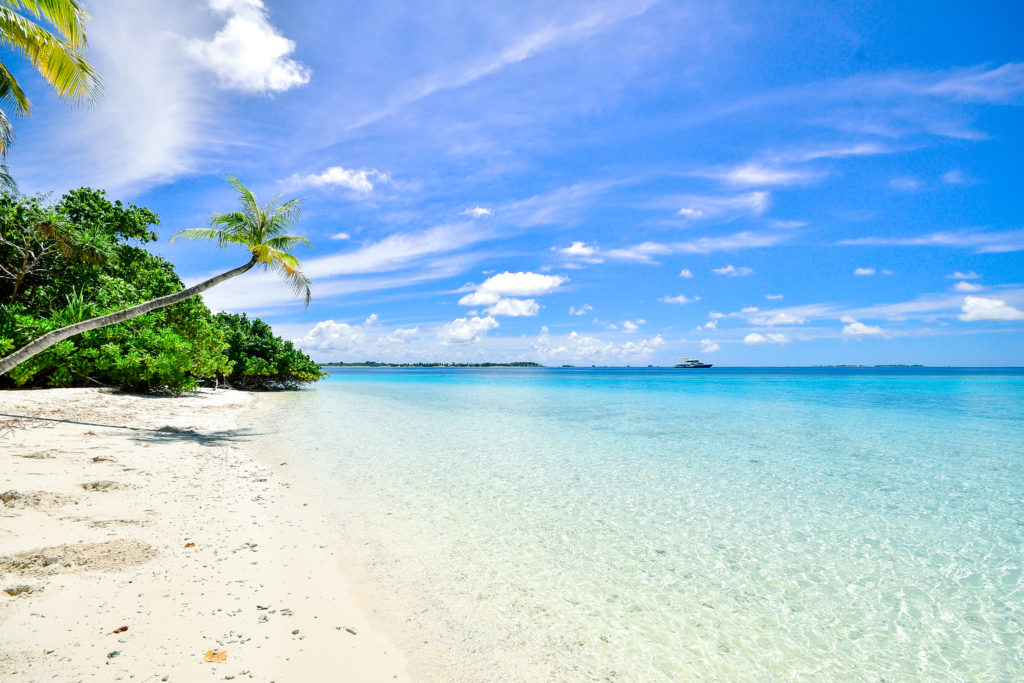
Firstly, take in the bigger picture when capturing your seascapes.
Seek out and find those great sweeping ocean views that cover a wide expanse of sea. Be sure to use a wide-angle lens to photograph the scene too. By photographing the sea and sky, you can add another element to the scene to improve your photos.
An interesting sky also adds texture and atmosphere to the sea view and creates interesting beach photography.
2. Interesting patterns
Cornwall, England
During your adventures at the coast, look for interesting patterns and textures to photograph. You will find many details such as shells, patterns in the sand, and interesting rocks. Rockpools can be great subjects to focus your camera on to make dramatic beach photos.
Consider how your image may be affected by the tide and decide what you most want to achieve with the look of your photos. Shooting at high tide or low tide can alter the appearance of your image. At high tide, for example, some attractive rocks may look even better with the swell of the ocean circling them as opposed to when the tide is out, and the rocks separate from the sea. Try to time your visit to coincide with your photo objective. Alternatively, visit a location and plan a return visit when the tide levels are suitable.
3. Secluded coves
Cornwall, England
Finding and photographing a secluded cove is a great way to spend your adventures capturing coastal scenes.
When photographing these wonderful locations, find a suitable vantage point from higher up, such as on a ledge or from beach level. Take care when photographing the sea and be careful when standing near cliff edges or moving over slippery rocks – they can be treacherous.
Another thing to be aware of is the tide times, which are very important for your own safety. If you can coincide your visit when the tides are receding this is usually a favorable time to prevent being trapped by the incoming seas or being caught out by a rogue wave.
4. Find hidden gems
Cornwall, England
Think beyond the familiar landmarks when photographing the coast. There are endless opportunities and locations for you to discover.
One of the best ways to find new places is to explore the coast on foot. Instead of heading for the nearest beach, venture out for a long walk along the coastal paths. You never know what you might see. Behind every turn and headland, there are often hidden gems to discover. These may include secret beaches that have seen few visitors. Perhaps you will find sea caves lying beneath the clifftops which have been formed by the sea eroding the land over time.
5. Coastal shores
Cornwall, England
Coastal shores can offer some of the most dramatic and best photo opportunities for seascapes. Crashing waves and moody skies after a storm can be great for your coastal photos.
How you capture your coastal adventures depends on the type of image and mood you want to evoke.
The coast can look very different throughout the day. You could either go there in the late afternoon to capture the suns rays striking the cliffs or visit during the day when the beach is busier and more active with people.
Visiting at different times of the day will give you the chance to capture a wide variety of shots to include in your collection.
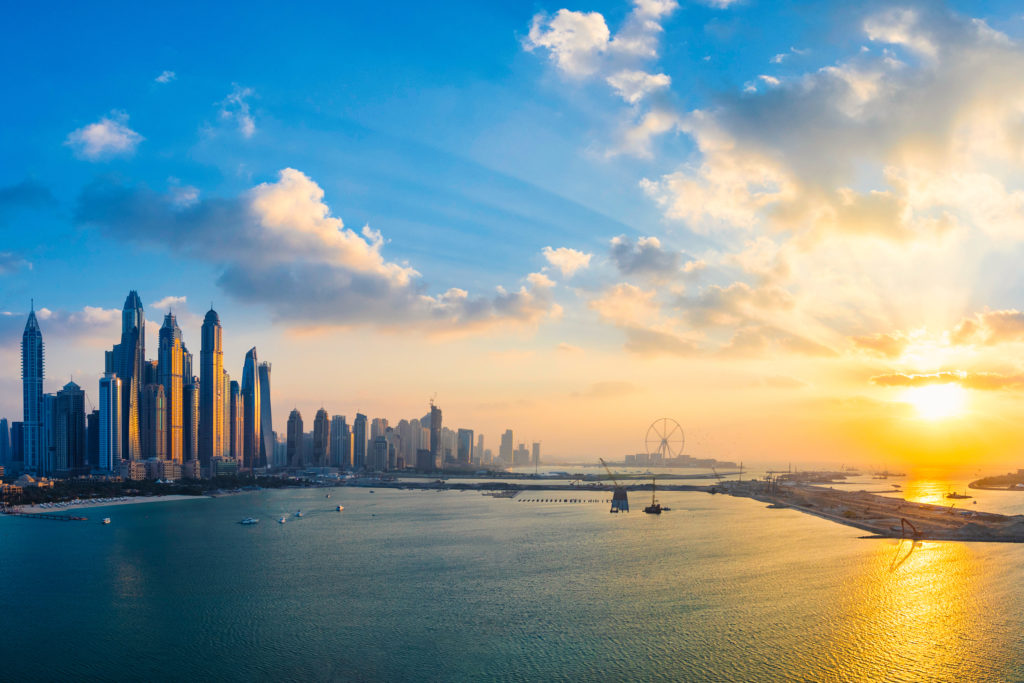
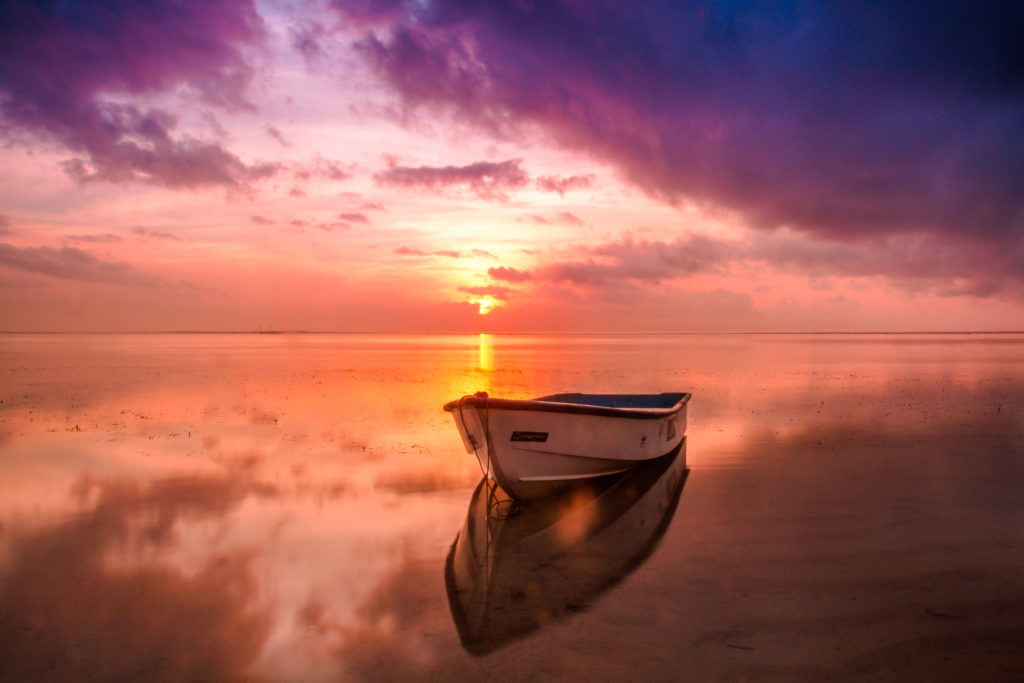
6. Sunsets
Land’s End, Cornwall, England
Photographing Sunsets by the sea are one of the most popular things to capture – and for a good reason. The coastline often looks its best at this time of day when the colorful glow is spectacular. Views of the sea get transformed into wonderful vistas with great light. Sand dunes and rock ledges can look great with the sunset light shining on them.
Shooting into the sun is another great way to capture the sunset during your coastal adventures.
Use these tips to capture more interesting beach photography and seascape images. Next time you are visiting the coast remember to look out for great ocean views, interesting details, secluded coves, hidden beaches, coastal vistas, and dramatic sunsets and share your images with us below.
What do you enjoy about beach photography?
Ten Things You Will Want to Practice Shooting in Summer
By Mike Panic
#photographyeveryday #photographyislife #photographylover
Whether your summer is ending or just beginning, it is always a great time for photography. Summer means good times with friends and family, outdoor activities and vacations. It's also a great time to practice shooting different and new subject matters.
Here are ten things you will want to practice shooting in the summertime that will make you a better, more well-rounded photographer.
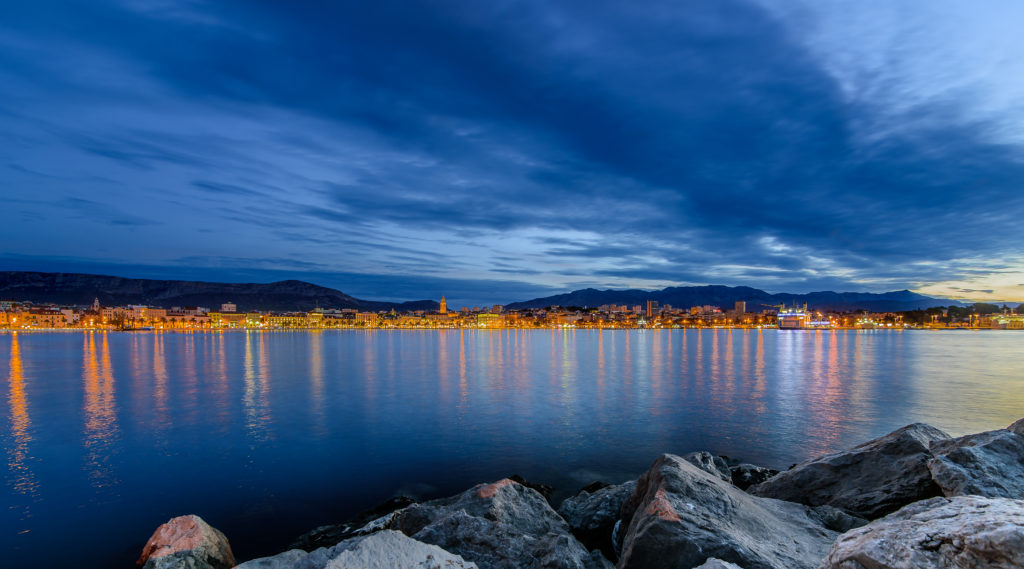
The blue hour refers to the small window of time that occurs just before sunrise each day and just after sunset. It can provide some of the most stunning landscape photos you've ever taken, but some careful planning is required. Check out this blue hour website to see what time the window is open in your part of the world, get your tripod and go shooting!
Capturing the blue hour can be difficult – not to mention that if you elect to shoot in the predawn then you'll be getting up at “stupid o'clock”.
Here are the basics for shooting the blue hour and what you'll need:
A sturdy tripod
Shutter release
Shoot RAW
Shutter speeds of 1 to 2 seconds
An aperture of f/8 or f/11
Of course, this is a guide – experiment with your settings to get the image you want
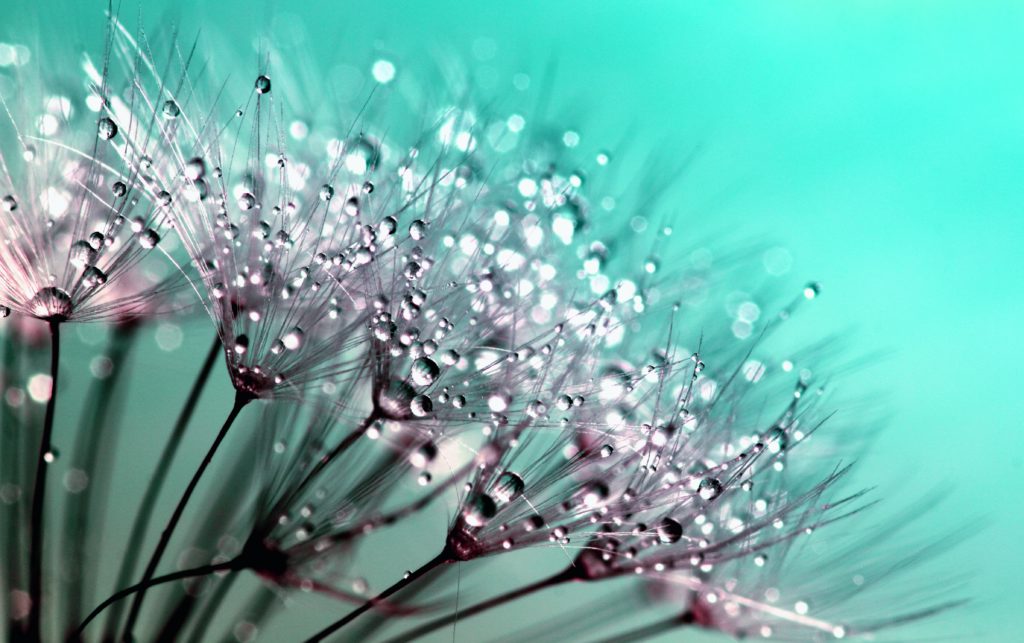
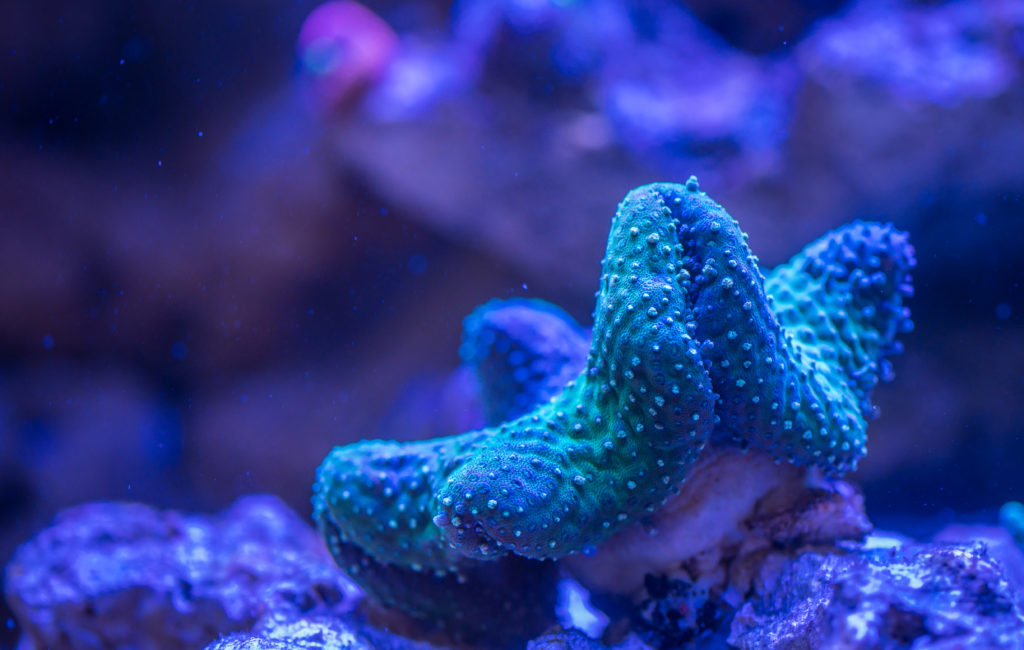
Blooming flowers make for some of the best subject matter for macro photography, so take advantage of the vibrant and fun colours as different varieties change through the summer season.
Егор КамелевMacro photography isn't easy but it is rewarding. Ritesh Saini wrote a piece for us that highlighted five fantastic and free ebooks that cover everything you need to start with macro photography
Here they are, but also read the piece in full:
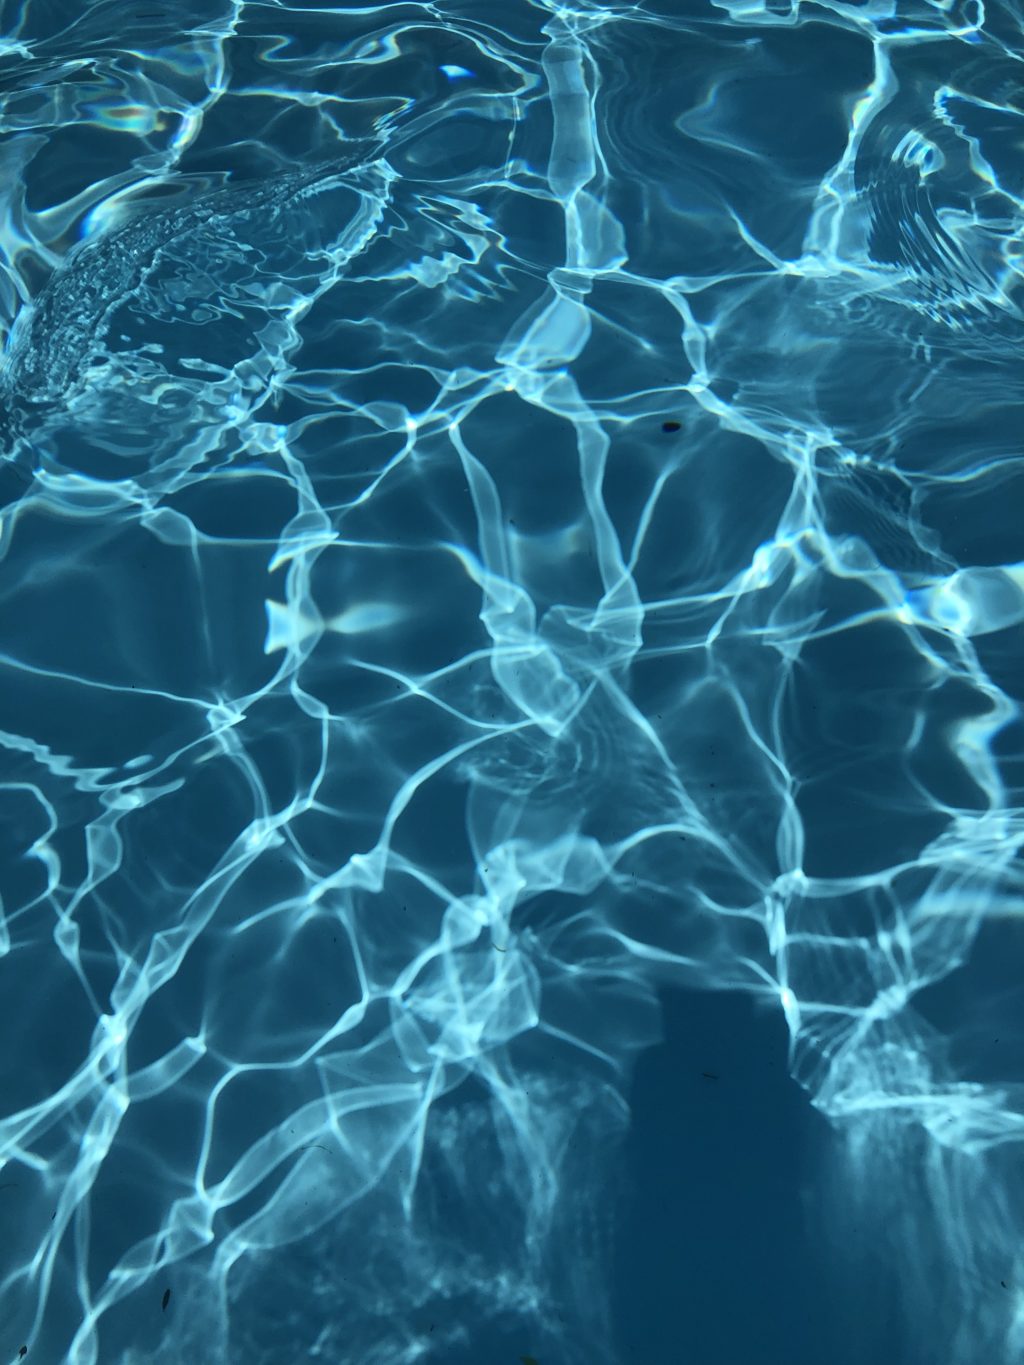
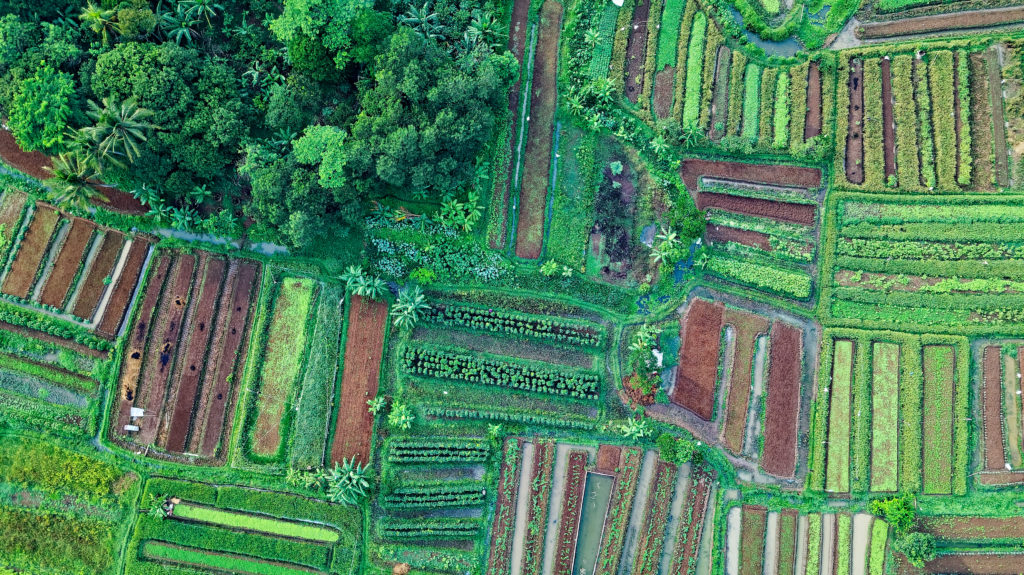
Shots like the one of this pool show how important texture is to photography. Look for subtle details like how light reflects and refracts off and through the water for impressive photos like this one.
Understanding textures is one of those advanced composition techniques that will take your photography further. If you would like to start making advanced composition choices, then take a look at Kent Dufault's excellent guide to Advanced Composition. In this guide, you'll discover concepts such as:
Why the human eye is attracted to light objects over dark objects
How to train your mind to simplify composition for professional results
Why the use of repetition is so important
How to tell a story through graphic elements
Why your choice of aspect ratio can vastly affect a viewer’s reaction to your photograph
Advanced Composition is definitely a guide that you will want if you are ready for the next level
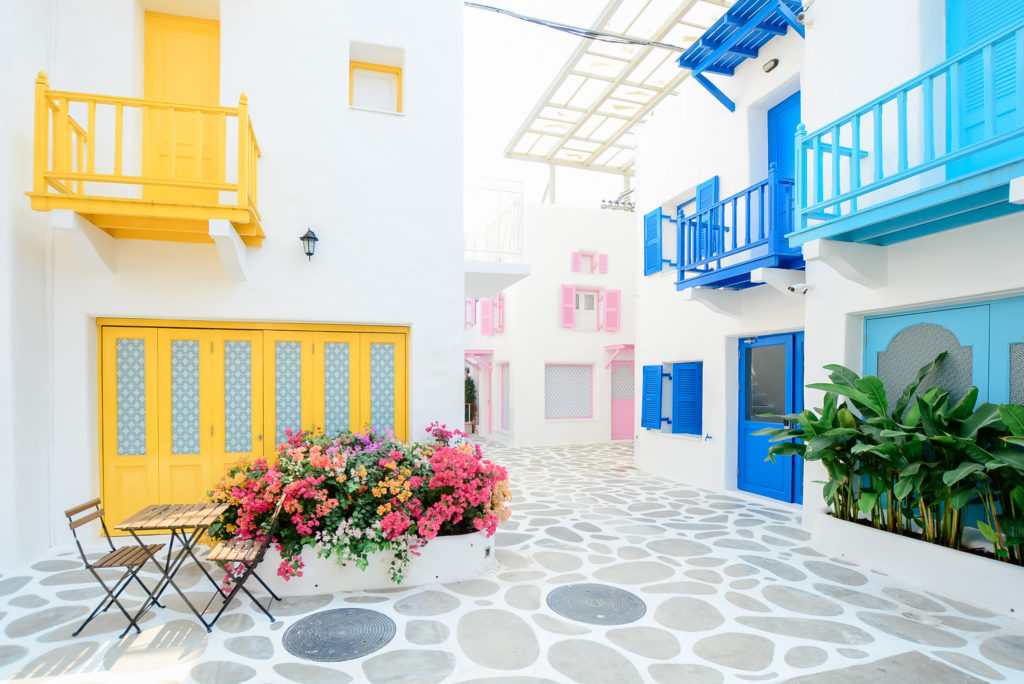
So many of us travel during the summer, often to different countries where commonplace things like a bright blue door are new and inspiring to us, like in this photo. Stark white building with a bright blue door or yellow shutters is probably something different from what you see at home daily, so take a minute and frame out the shot capture that moment. Beautiful colours make for amazing photographs
When opposing colours meet in a single composition, contrast is achieved in the most magnificent ways. When adjacent colours – like an array of warm or cold tones are together without an opposing hue – low levels of contrast are achieved.
Creatively selecting colour when composing your images will take them to the next level. It is definitely a composition technique that you should work with.
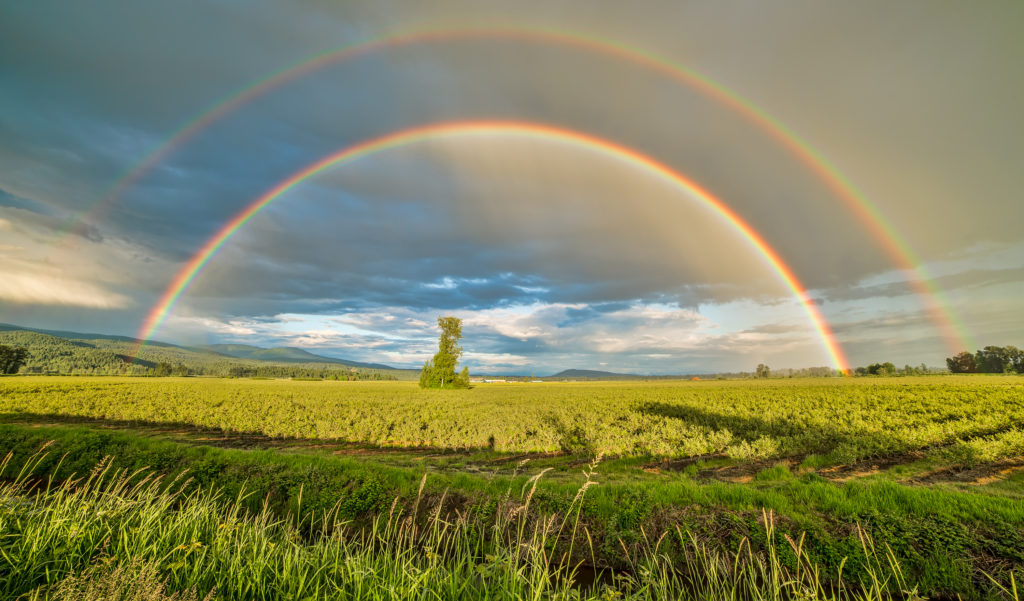
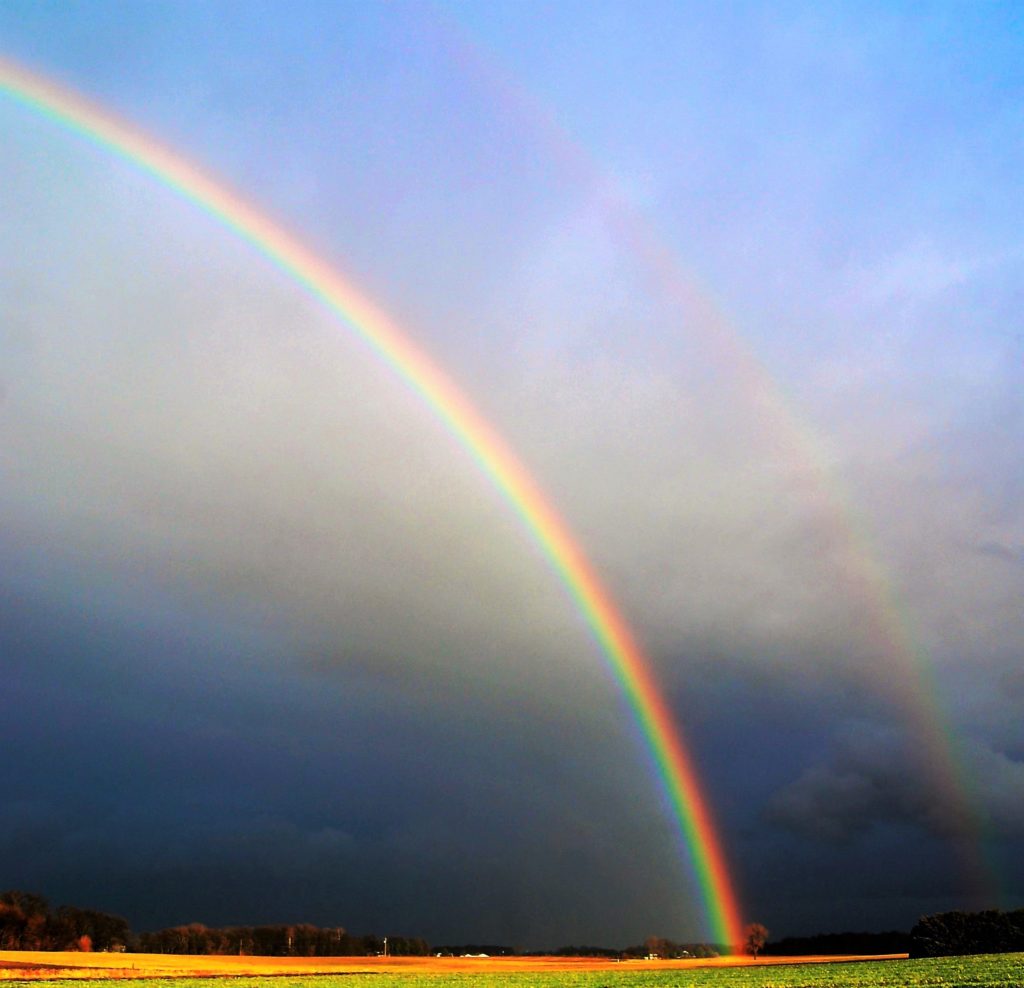
A perfect case for always taking a camera with you wherever you go, rainbows can often come at the most unplanned times. You might even get lucky and find a pot of gold while you're out shooting (that'll pay for the next lens)!
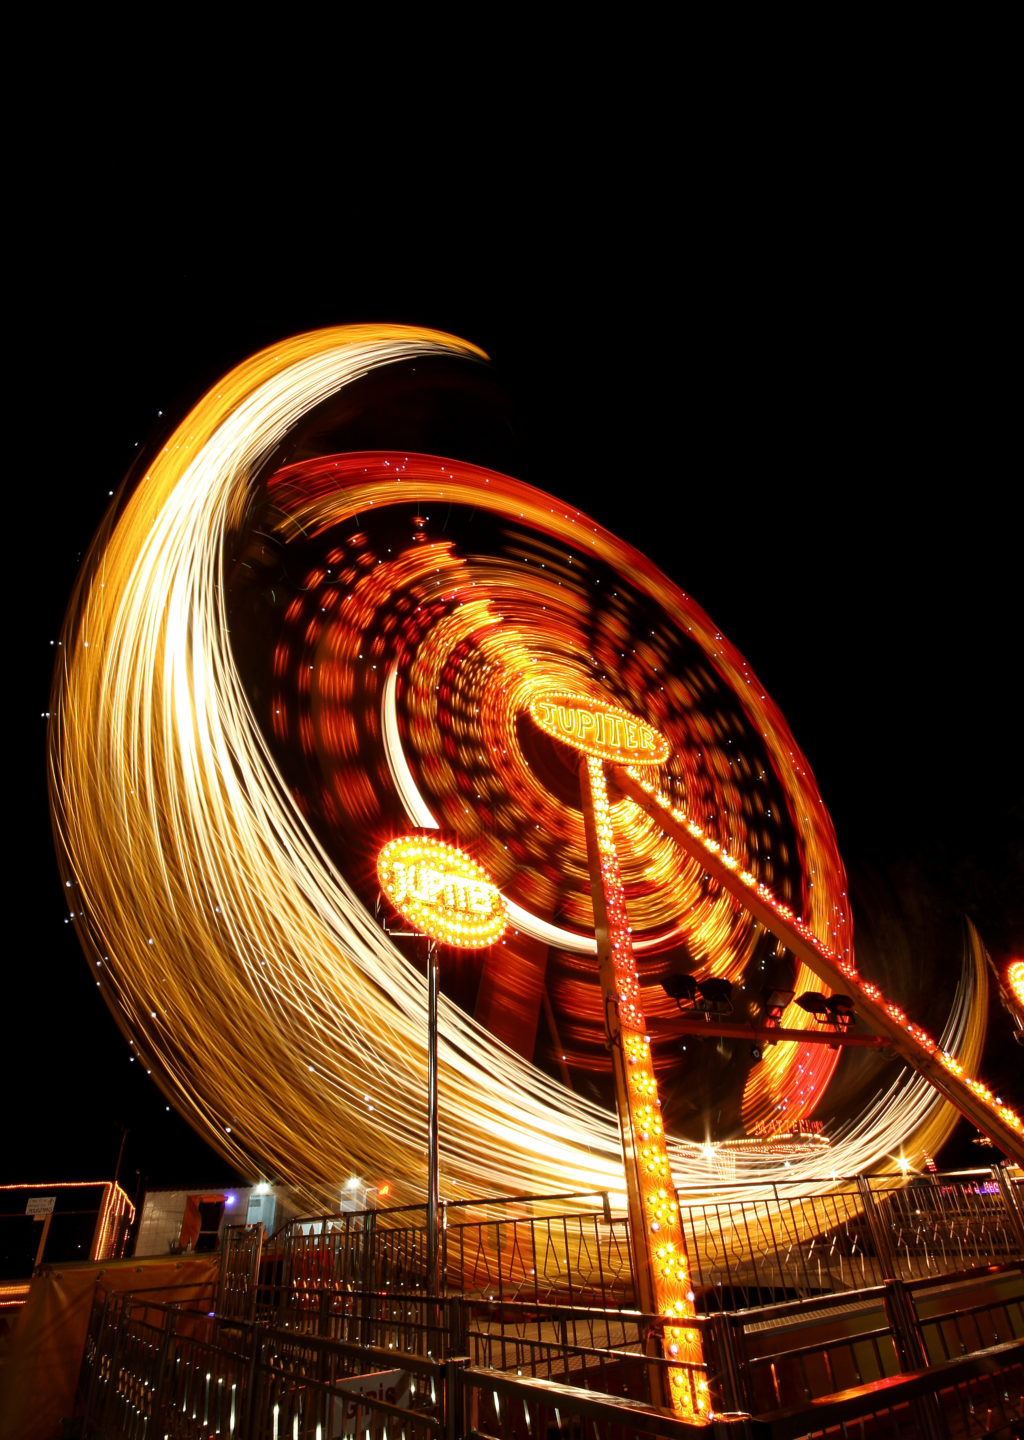
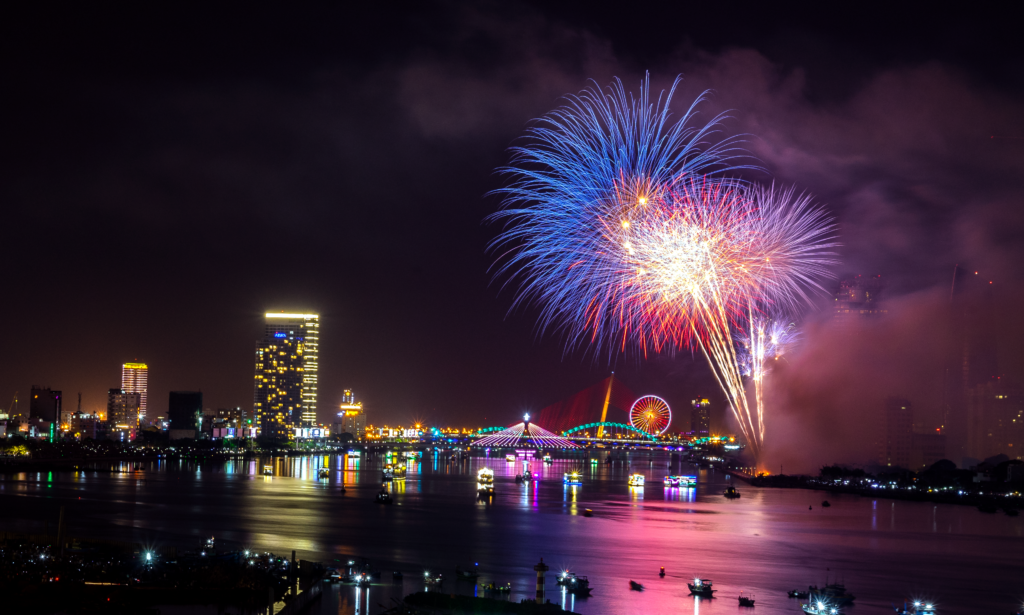
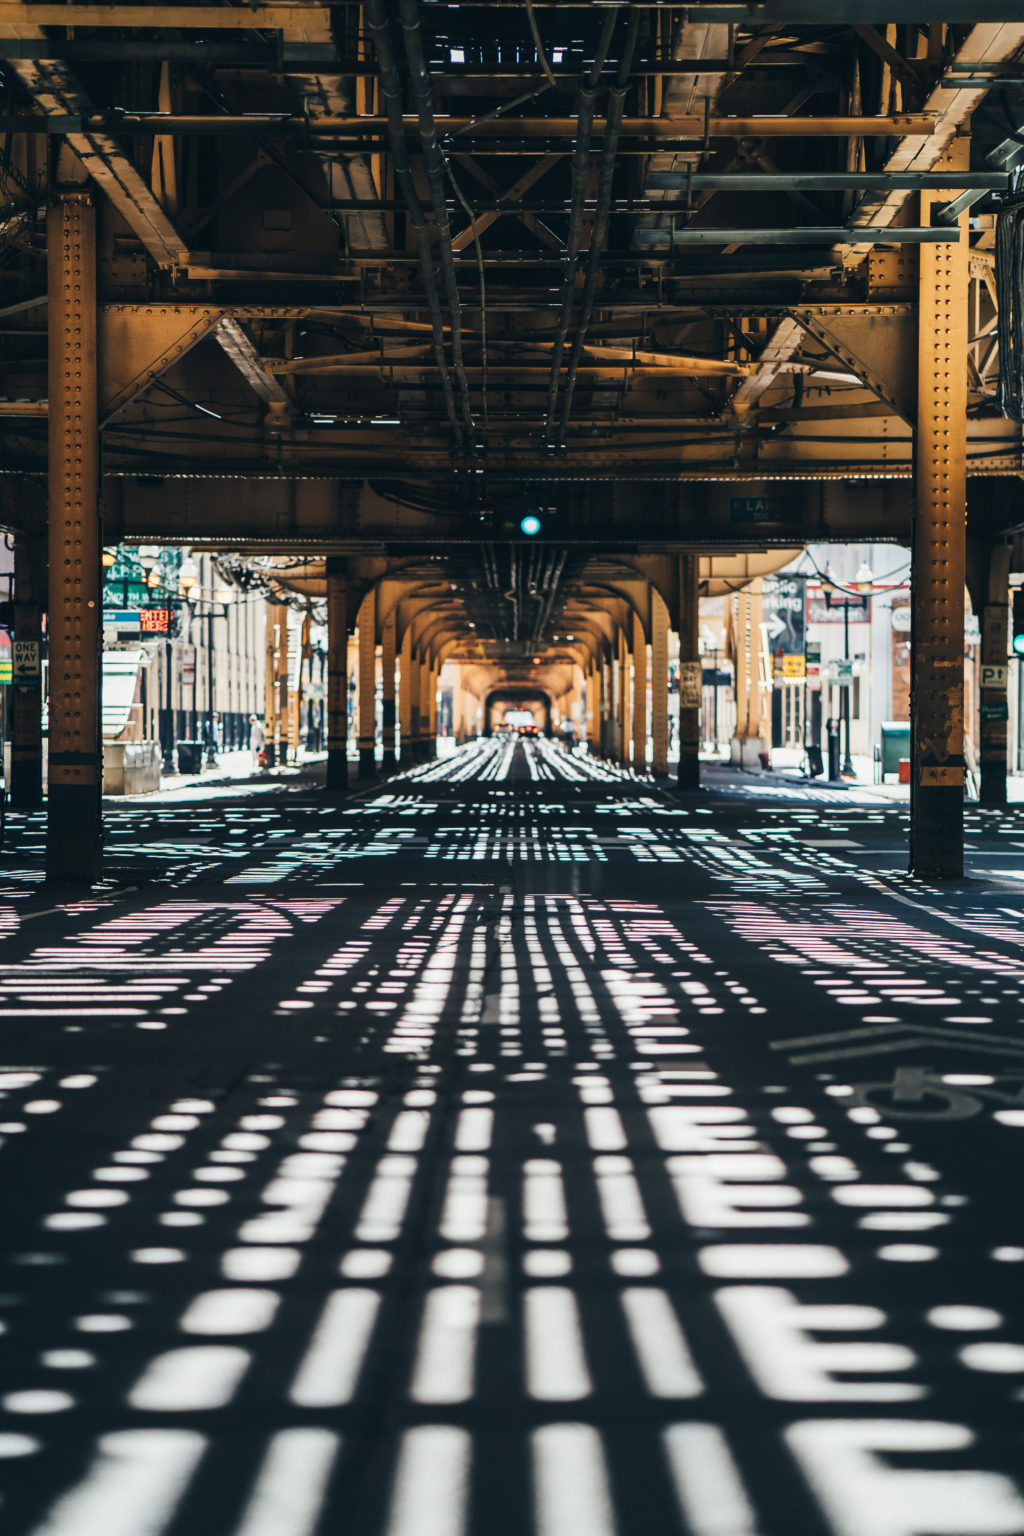
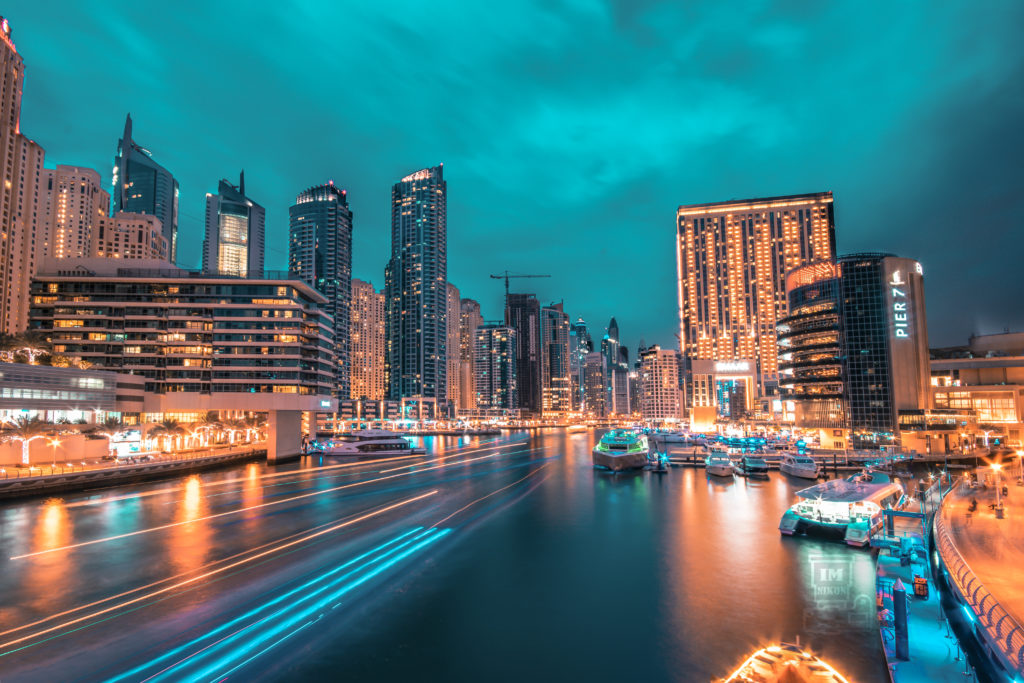
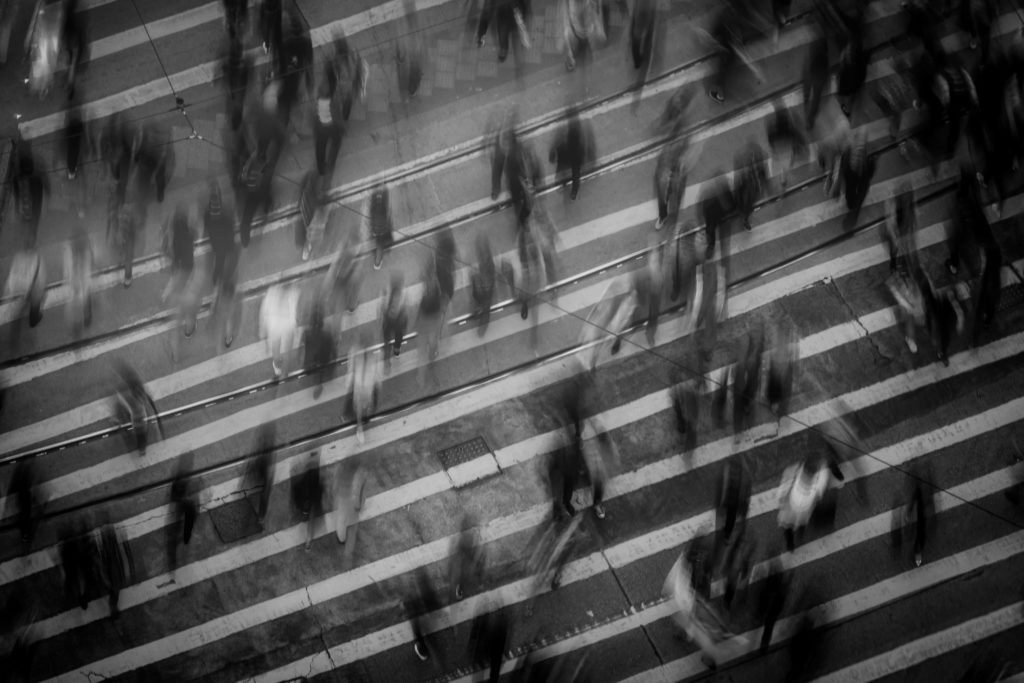
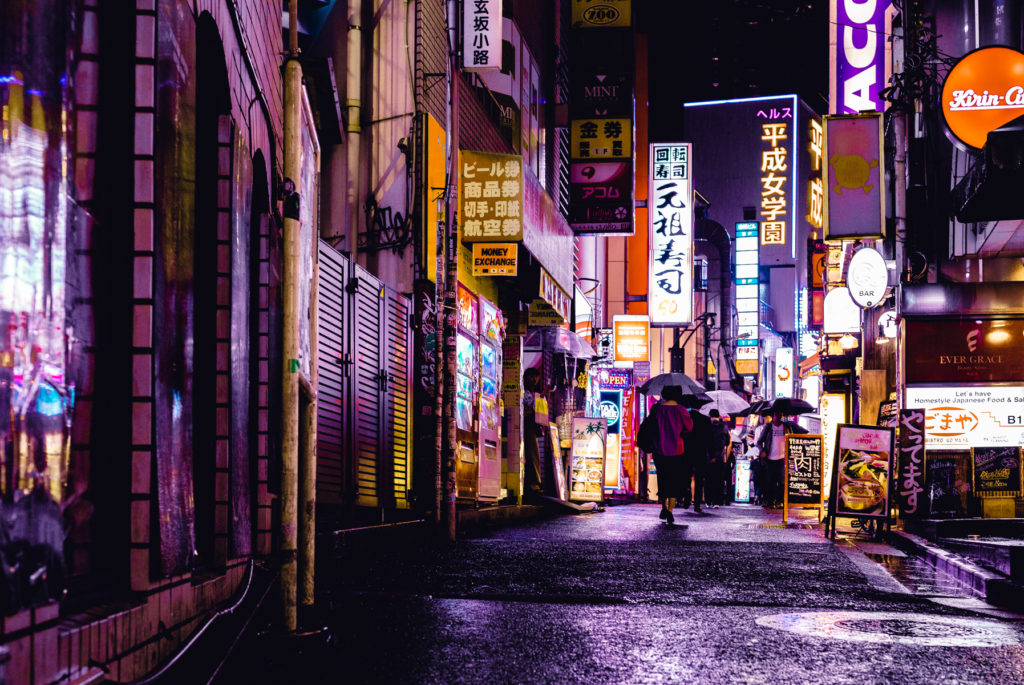
Carnivals and festivals tend to travel throughout different countries during the summer months and with them come great fun and good eats. They are also a great source for photography buffs, as is the case of this great long exposure shot of a whirling people machine. Bright lights, fast action and lots of fun are great subjects and will help further your memories of the trip.
Fireworks are also usually a summer staple. So have a look at these tips to get you started:
Use a Tripod
Always use a Cable Release
Aperture = F11 – Work wider from this point
ISO = 100
Shutter Speed = 4.0 Seconds (use Bulb mode)
Focal Length 35mm (Crop Sensor) as a starting point
Do some homework and planning. Enjoy the show!
If you want to dive really deep into the art of fireworks photography, then you might want to get a more in-depth guide. The best around is Richard Schneider's ebook on the topic so take a look at it here.
Hiking in the summer is how many people enjoy the outdoors. Often along the hikes are beautiful waterfalls, as shown here. Another case to bring the tripod along, a few ND filters and work on some beautiful waterfall or moving water shots.
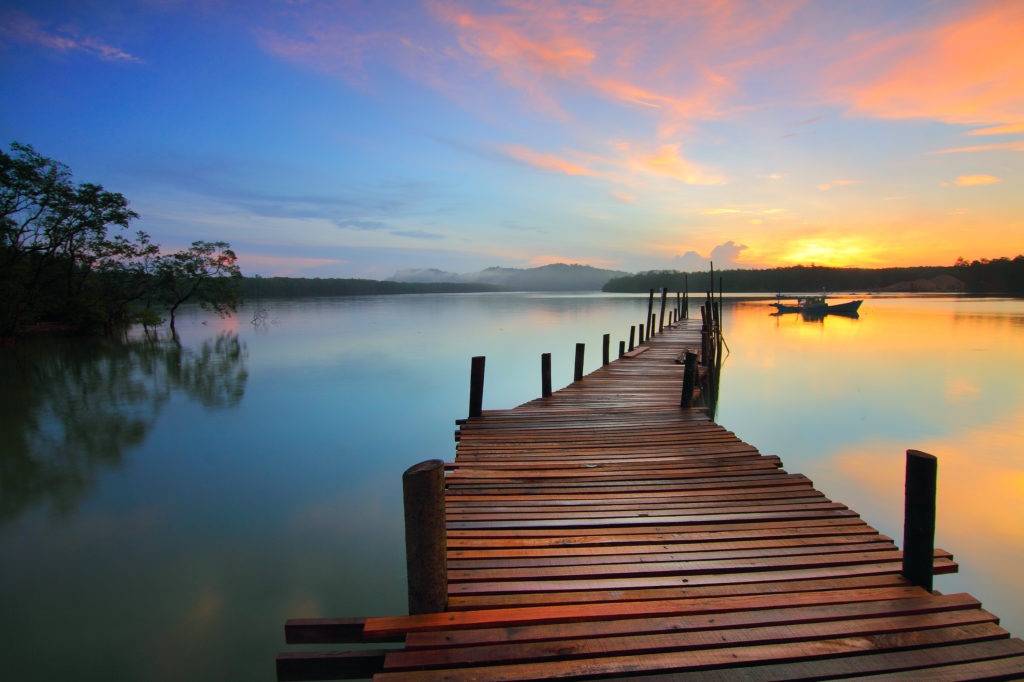
Sean O.Ok, so this is an obvious photographic opportunity in summer. If you are going to enjoy your photography at the beach, then it is worth noting that you should try to time your picture-taking to say early morning or evening when you can take advantage of golden hour!
If you can't make golden hour, you can still capture the beach in all its glory, but a pro-tip is you need to expose for the very brightest part of the scene and ensure that you get those areas covered. You can generally recover the shadows in post-processing whereas if an area of the highlight is burnt out in the exposure; you’ll never see it again.
We focus so much attention on subjects that sometimes using them as filler for the photograph is overlooked. Here's a great photo of how silhouetting creates a very dramatic photograph. Perfect to do on those long summer nights.
If you are into creative silhouettes, then you definitely need to check out these three free guides from Photzy as these guides will help you to achieve beautiful silhouette images in no time!
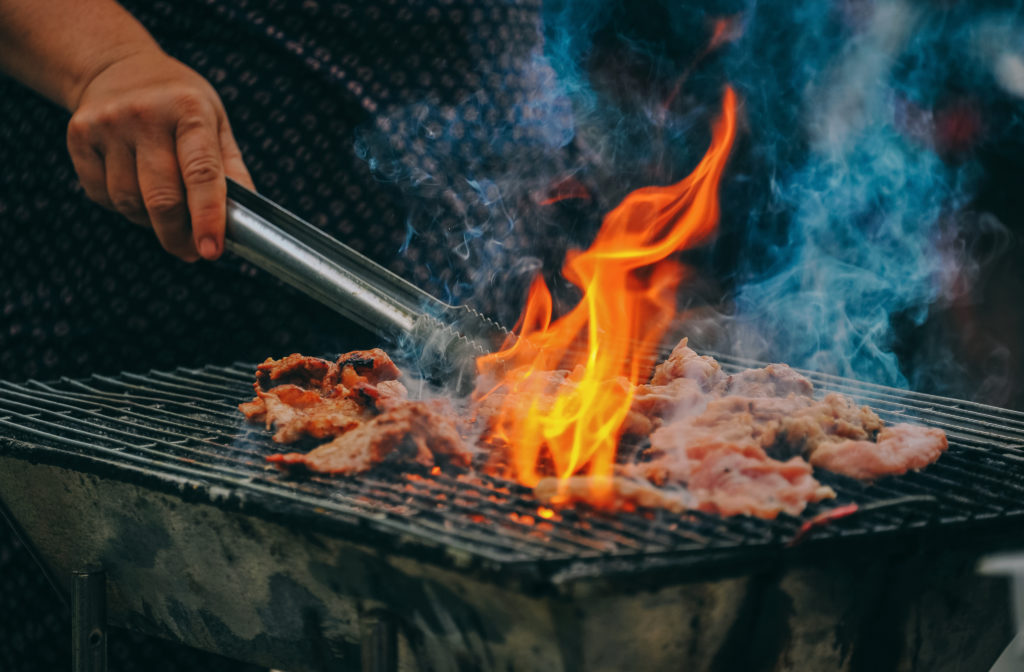
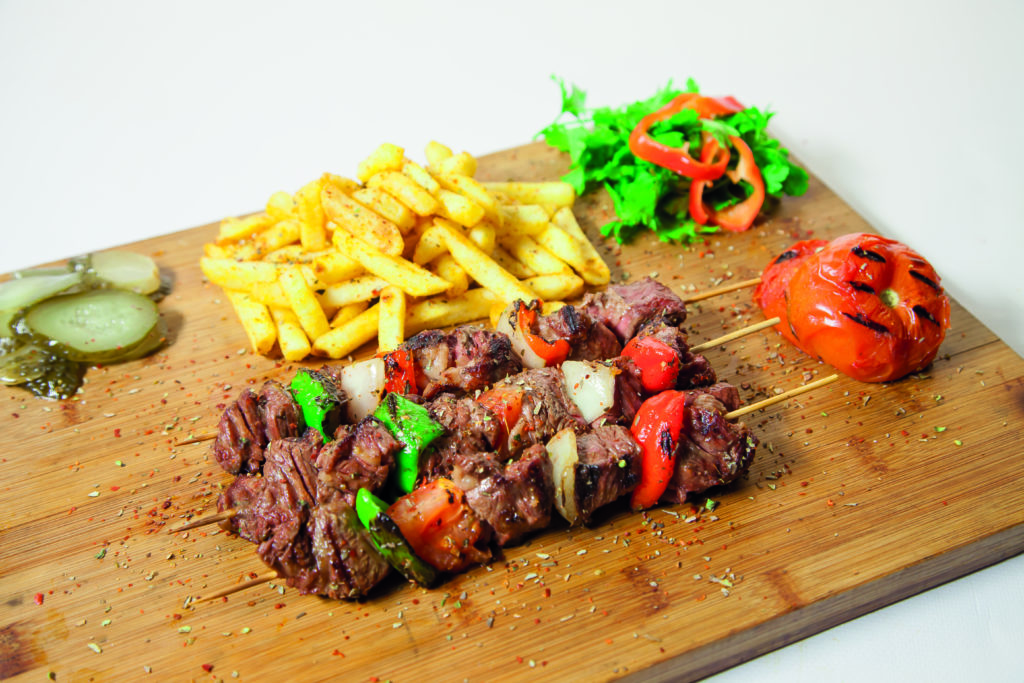
Grilling is something most everyone enjoys doing, or the by-product of grilling, the food. Beautiful colours and great memories can be had photographing food, while it's cooking or during plating. Think of how great these vibrant photos would look framed in your kitchen.
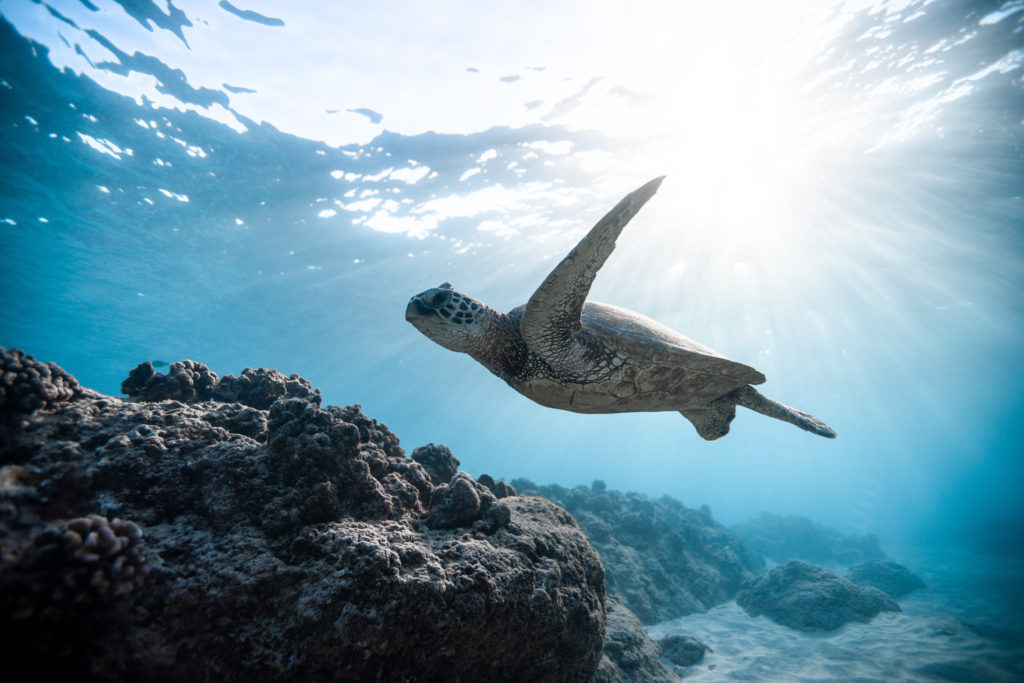
Underwater cases for DSLR cameras, watertight bags and a new breed of waterproof point and shoot cameras now enable us to capture stunning photos where we never would have before, at a fraction of the price. Long gone are the days of horrible waterproof disposable film cameras with mediocre photographs. Get out there, get wet and go capture some great photos in the water!
Summer is one of the most beautiful times of the year, anywhere you live or travel to, and hopefully these 10 things will help you further your photography and keep shooting. Share in the comments what you've captured this summer already or what you are preparing to shoot this coming summer!
Share this article.
Friday, August 30, 2019
Another free Photograpy Ebook. Enjoy!
Here's the link to this weeks Photography Freebie. Just copy and paste it into your browser, click enter and it's yours.
How to Choose the Correct ISO Setting for Your Shot
By Mike Panic
#photographyeveryday #photographyislife #photographylover
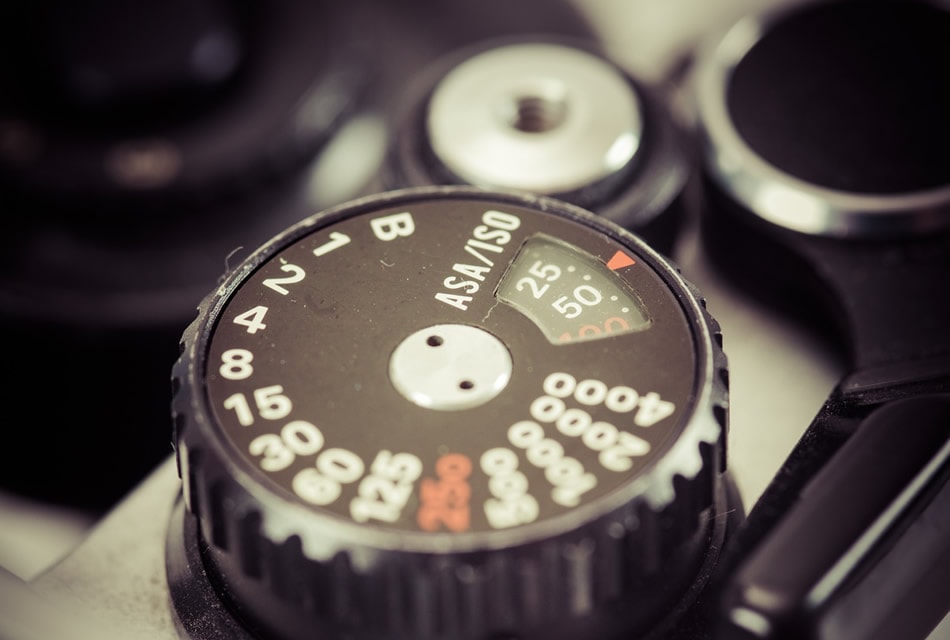
ISO can be confusing, especially to everyone just starting out in photography. To put it simply, the ISO setting in your camera affects how sensitive the sensor is to light. If you love mathematics, you can immerse yourself in the technical information on Wikipedia – it is quite good. But, we won't be delving into the maths here. In this article, we will focus more on choosing the right ISO setting for your specific shot.
The correct ISO can make your photo; the wrong ISO can ruin it. ISO on most cameras starts at 100, some cameras begin at 50, but the lower the number, the less sensitive to light, the higher the number, the more sensitive. While that seems pretty straight forward, there is a price to pay as you go higher in the ISO settings, digital noise. Something to remember is that High ISO film has visible grain, and this may be somewhat desirable for photographers. On the whole, digital noise, the equivalent to grain for digital photographers is not a welcome addition to photographs.
Unlike most settings in your camera, like shutter speed and aperture, changing the ISO probably won't be noticeable when you review images on the LCD. The digital noise will show up when you view and edit your photos on a computer. Ideally, you want the lowest ISO setting possible for the least amount of noise, but in any given lighting situation that's not always an option.
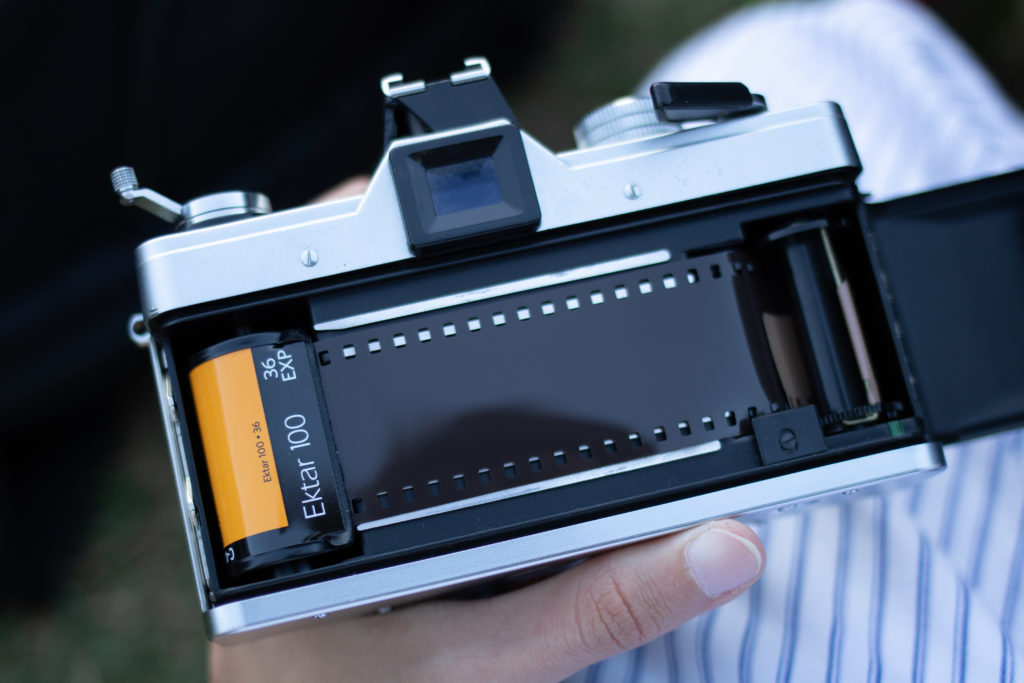
ISO denotes film or an image sensor's ability to capture light and is a factor that helps with taking well-exposed images. It is a measure of the camera's ability to capture light, whether darker or brighter depending on the value you choose. For example, you can check this on your camera – increasing or decreasing the ISO value, keeping other factors constant can make the image brighter or darker. It is one of the factors that affect exposure (besides aperture and shutter speed) in an image if you know and understand the exposure triangle. When it comes to film, ISO is an indication of the light sensitivity of the film. Film is coated in light-sensitive layers of silver halide crystals. The larger the crystals, the more light-sensitive and therefore quicker the film – but this, in turn, means more grain. Finer crystals mean lower sensitivity to light and, as such, less grain. A lower ISO film will have virtually unnoticeable grain.
ISO is somewhat different in digital cameras; here, the light that falls on the sensor is converted into electrical signals for processing. So increasing the ISO value will amplify the signal. The lower the ISO, the less digital amplification which means, less boosting of the light leading to minimal digital noise. With an increase in ISO, the amplification increases and, as a result, this causes more noise that can, at higher values, degrade image quality. So you should only increase the ISO in situations where you cannot increase the exposure via aperture and/or shutter speed.
ISO is helpful when you are shooting at different lighting conditions more importantly in low light. Increasing the ISO will also introduce noise in your images – the higher the ISO, the higher the noise with a corresponding decrease in image quality. Digital cameras perform well at low ISO values, produce accurate colours, smooth images and sharp details. Shooting at low ISO values is only possible if there is enough light to compensate or when you are taking long-exposure photographs. But, when you want to shoot wildlife, sports and other fast-moving subjects, or if you have low light conditions, you will need a faster shutter speed. This is when you will want to increase your ISO to have a faster shutter speed for correct exposure so you can eliminate blur due to movements.
So how should you choose ISO values? Here are some suggestions for handheld shooting without a flash. Each camera performs differently at higher ISO values, so test your camera before using high ISO values.
When you are shooting in bright light, you have a lot of light available so choose lower or the lowest ISO value. Stay between 100 to a maximum of 200
When shooting landscapes or long exposures during the day, shoot at ISO 100 or below depending on the native ISO values available. You can choose a low ISO because you will have your camera on a tripod. The low ISO value will ensure that when you print your images, they will look great at any size.
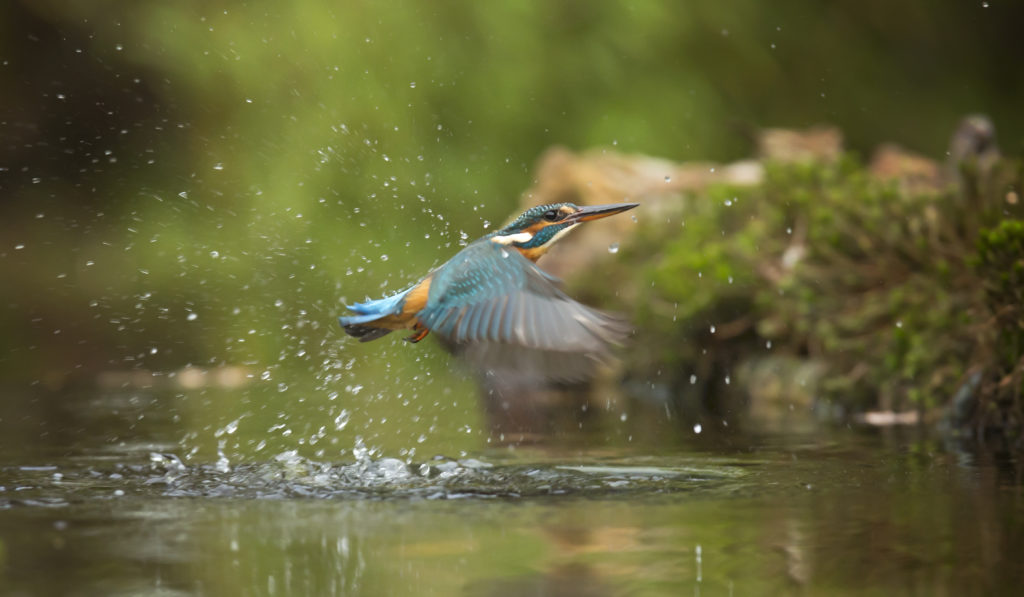
Even on a bright day, you may need to increase the ISO to about 200 to 400 sometimes to shoot with the correct shutter speed for sharp images. Scenarios would include shooting in the shade or shooting wildlife, especially birds and animals in shady areas of the trees
On cloudy or overcast days, you will have less light compared to bright sunny days. So choose a slightly higher ISO value. A maximum value of 400 should be more than enough, but then it also depends on the aperture value and shutter speed you will require.
When shooting indoors in natural light, you are again dealing with the available light. So depending on the intensity of the light source, you will need to think about your ISO value. If you are shooting in direct bright light, you can use between 100 to 400, but if it is indirect, diffused light, you may want to go up to 800.
Low light conditions are a different beast. Lighting conditions such as indoors at night, events, outdoors at night, etc., will need a higher ISO. If you are using aperture values like f/1.8, you can start with ISO 800. Depending on light conditions, you may want to use about 1600, or even above, to get the exposure right.
Setting higher ISO values should be considered as a last resort in situations where you want to capture the photo and need a higher ISO for that situation.
The above suggestions can vary with the focal length and aperture used. Note that, each time you double the ISO, the camera only needs half the amount of light to make the same exposure. So for example, if you got a shot at ISO 100 and shutter speed 1/250s, then at ISO 200 you can shoot the same image at 1/500s provided that you do not change the aperture value. When using a tripod, if your shooting scenario is good for long exposure, then go for the lowest ISO possible. When it comes to night sky photography, you may not be able to work with very low ISO values like 100 or 200 as you want to eliminate star trails. So based on your shutter speed, you will have to do test shots and choose the lowest ISO that will help you get correctly exposed images. Remember different cameras with different sensors, respond differently to ISO values.
So how high can you go with ISO values? Setting the correct ISO value is trial and error. Test which ISO values get you the shot you are after. Use higher ISO values when you want to freeze actions or avoid camera shake due to slow shutter speed when hand-holding the camera. But as much as possible, always use the lowest ISO for any situation. Wherever possible, keep your ISO lower or, if possible, use base ISO and shoot using a tripod.
What is Expandable ISO?
In recent years, digital cameras are being manufactured with a specification called expandable ISO. So, what is expandable ISO? A camera's sensor has a range of ISO values within which it will produce good to acceptable quality images – this is called the native ISO. But, there are times when photographers may want to go beyond the native range or extend/expand it – for example, requiring more light in very dimly lit situations. Some cameras come with an option to expand the native ISO by a stop or two, so the amount of light recorded by the sensor increases. For example, if the maximum native ISO value on a camera is 6400, the expanded ISO will be 12800 aiding with doubling the amount of light reaching the sensor.
Note: Similar to extending beyond the highest native value, there are also options to go below the native ISO value of 100 or 200 in most cameras. This does not degrade the image quality by affecting the colours, or dynamic range like the higher ISO values do.
How Does Expandable ISO Work?
The camera digitally expands the native ISO value by metering the light for the highest native ISO value and then it amplifies that data for the expandable ISO value. This is done digitally via software and not hardware. There is a considerable trade-off to this feature, which is poor image quality with a lot of noise, inferior colours, and loss of dynamic range. So as much as possible, try to stay within the native range. But in case you need that important photo and need to expand the ISO, then make use of this feature – a noisy photo is better than no photo. To understand the above concept even better – think of the native ISO and expandable ISO like optical zoom and digital zoom on a camera.
Sunny days, outside, ISO 100 will be wonderful. If you are noticing a lot of detail in the shadow area of your photos with your naked eye that you aren't seeing when you review files on the LCD on the back of the camera, bump the ISO up to 200 or even 400. Indoor photography can be tricky, artificial light combined with natural light coming through the windows can result in constant monitoring and adjusting the ISO level. What looks excellent at ISO 400 in one room might require ISO 800 in the next place. If you're using a tripod, use the lowest ISO setting possible. You can get away with a longer shutter speed because the tripod will stop all motion blur of the camera. Using a flash can help keep the ISO low and your photos noise-free in a lot of situations. Likewise, if the depth of field isn't a concern for you, opening up the aperture will allow more light in, giving a lower ISO option. When shooting at particularly high ISO settings be mindful of proper exposure. Post-production of high ISO shots that weren't properly exposed to the best of your ability start to fall apart. Particularly when adjusting the exposure or contrast levels, digital noise is enhanced, often resulting in an unpleasing image. Noise isn't always bad, though! One of the most brilliant aspects of film noir styled photographs is the grain in them. Low key black and white images with lots of grain can be a good thing if they are exposed well, and the subject matter holds up to it.
The key to choosing the correct ISO is determining what factors need to be appropriately emphasized. Most people strive for little to no digital noise. So shooting at the lowest ISO is usually the best bet – unless a film noir style is more for your liking. Since no guide can give you exacting settings, I suggest you bracket shoot ISO in a number of scenarios. Then you can compare the photos in post-production so you can best see what happens with your particular camera. ISO is one of the few things you can't correct in post-production because you shoot in RAW mode too. If you accidentally take photos on a sunny day at ISO 3200, you are going to have lots of digital noise. Share this article.
ISO is a term that every photographer, from amateur to pro, has heard of. Surprisingly, though, some photographers are still unfamiliar with all of the different ways that ISO affects their pictures.
One of the three factors that affect your exposure (together with shutter speed and aperture), ISO is something that has to be mastered if you want to take great photos each time. ISO relates to the sensitivity of your camera’s sensor. It usually begins at 100 and will double to your camera’s limits: 200, 400, 800, 1600, 3200 and so on. There are 1/3 stops in between. Some photographers even have fears about increasing their ISO too much. Instead of living with this fear, learn how ISO really affects your pictures.
Lower ISO = Better Images… in Some Cases
It’s a widespread belief that a lower ISO will result in better pictures that are more appealing to your viewers because they’re sharper and clearer. This is true for the most part, but there are very significant exceptions that apply, which you have to understand to get the best shots in all photographic conditions.
In general, a lower ISO will always produce better images in these situations:
However, consider other situations when these four elements aren’t in play. Then, a lower ISO won’t give you better photographs. That’s a fact. Actually, when you pump up your ISO in other situations, you’re going to get much better results than with a lower ISO.
When to Use a Higher ISO
The key here is knowing when to use a lower or higher ISO. It’s a mistake to assume that a higher ISO should be avoided. It can be instrumental in getting a great shot in the right conditions. That’s because increasing your ISO means you can raise your shutter speed and use a smaller aperture (actually increasing your aperture number). Together, these two settings done right are more instrumental to a technically awesome photograph that looks impressive than a low ISO.
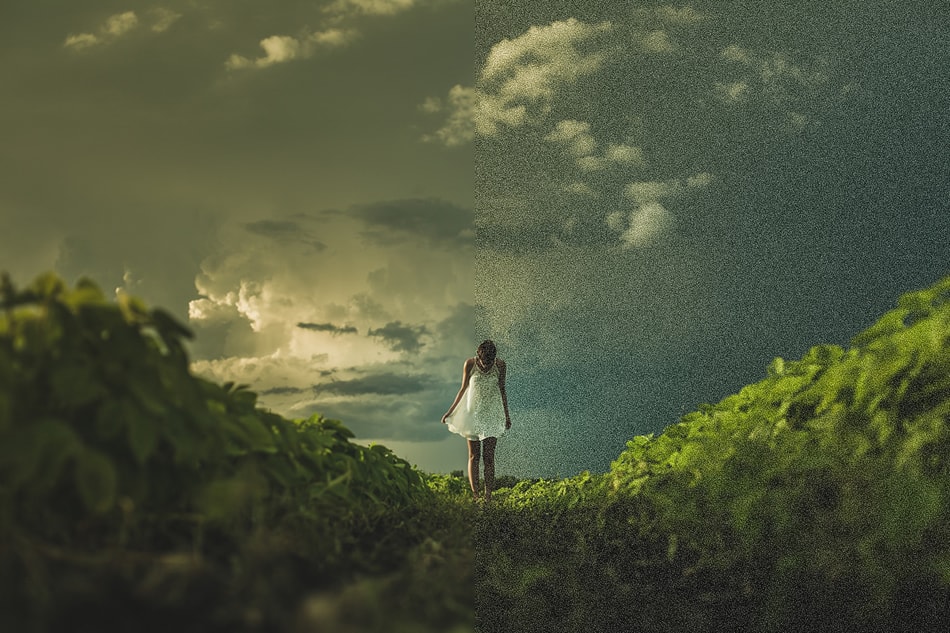
For instance, have you ever looked at event photographs—concerts, award shows, banquets, receptions, anything indoor, etc… and admired how bright and attractive those images turn out to be? It’s more than just having top-notch equipment like lenses and flashes. It’s because they’re really turning up the ISO to high levels in order to capture all of the natural light in the scene. Noise exaggerated to illustrate ISO noise.Consider also the advancement of camera technology in the last, few years. The increased graininess of pictures that feature a higher ISO is not as stark and intense as it used to be with older cameras. Newer cameras have turned down the intensity of the graininess of images at a higher ISO, and they’ve also made that graininess less displeasing to the eye. A great example is the Sony A7s – its low-light and high ISO performance is astonishing!
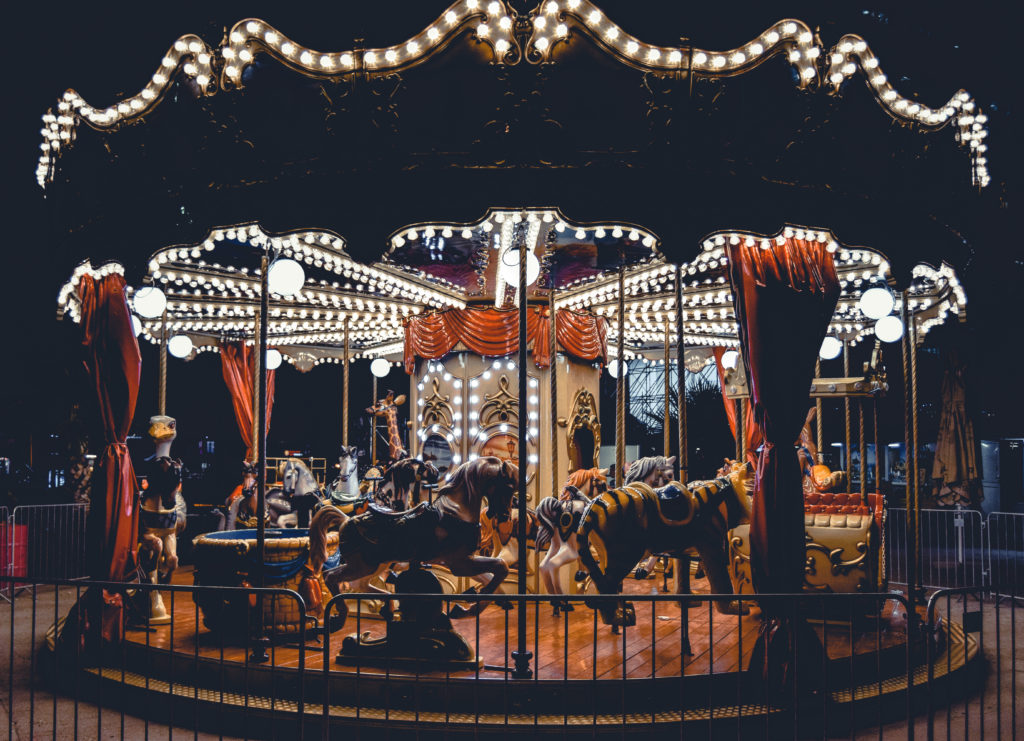
That’s why event photography and low-light conditions – such as night photography for outdoor concerts and nighttime carnivals – are excellent opportunities to now harness the effectiveness of a higher ISO to produce amazing images.
Exposure and ISO
Since exposure is another of the key players in how a picture turns out, it only stands to reason that you’ll have to harmonize your exposure with your ISO. One of the biggest dilemmas that photographers can face is what they do in postproduction. You’ll destroy the look of the grain in your images when you – and you’ll have to – increase the exposure in postproduction. The key is taking care not to raise the exposure too excessively.
Therefore, raise the exposure only a moderate amount in postproduction, but the higher you’ve increased the ISO, the more important it is to be very watchful during postproduction.
Different ISO Ranges for Different Scenes
It’s necessary to ensure you’re working within the correct range of ISO for the specific scene you’re shooting. As we’ve explained, ISO can work well if it’s lower or higher, all depending on the specific situation and context of your photography.
100 to 200
ISO at these settings is perfect for daytime shooting because the abundance of natural light ensures you don’t need to mess with the ISO at all. If you up the ISO any higher, keep in mind that very noticeable grain will begin appearing in your shots, which is very avoidable when you have this much natural light to work with in the first place.
200 to 400
Slightly raise your ISO if you want to get stellar pictures in conditions that are a bit darker. These will include instances like indoor shooting in brightly lit rooms and outdoor shots in the shade.
400 to 800
This range is ideal when you have to shoot indoors with a flash. This helps to create a more balanced exposure that also features a more detailed background.
800 to 1600
Event photographers already know that they have to work within this range because of the nature of their job. Live events like concerts, sports games and shows routinely take place in low-light conditions where a flash isn’t permitted.
1600 to 3200
This more extreme range is also good for event photographers shooting live shows. It’s also ideal for very low-light situations where having a tripod isn’t an option. Essentially, this range is the highest you can go before the grain or noise becomes too unpleasant.
More than 3200
If you have to set your ISO to this extreme level, then it’s likely because you have exceptionally low-light conditions, or you’re just going for a really artistic look in your shots. In either case, you’re going to have a grainy result (which is not necessarily a bad thing!)
Using ISO Wisely
Knowing how to set your ISO and for what conditions is the difference between a picture that’s great-looking and one that has exposure problems. Depending on how you use your ISO, you can give yourself a whole lot of freedom in photography since you have the ability to put yourself into so many different shoots. There are situations when a low ISO is called for and other instances when a high ISO is the way to go. The trick is being able to identify them and set your ISO accordingly. When you do, you’ll turn out splendid shots each time.
Share this article.
Thursday, August 29, 2019
How to Set Your White Balance Manually
By Mike Panic
#photographyeveryday #photographyislife #photographylover
Most recent cameras, whether DSLRs or mirrorless, come with a feature called white balance that can be set manually depending on the light conditions that one is shooting. Some compact cameras may have that feature too if they have a manual mode for shooting photographs. White balance is important because we don't want a warm, cheerful scene to look cold and bleak. Nor do we want a cold scene to look artificially tinted with warm colours.
In this article, we'll cover how to properly set a custom white balance manually in your digital camera. Before we begin, let's look at what white balance is in photography and why you need it set it up correctly.
Here Is A Brief, Easy To Digest Explanation.
White balance is how warm or how cool the colours look in your photographs. Usually, the camera reproduces colours the same way they look in real life. For example, even on a bright day, the light is a bit blue when your subject is in the shade. Our eyes don't register this because our brain is very good at dealing with colour casts, processing the information and making it look white to us. But our camera will pick up on this colour cast.
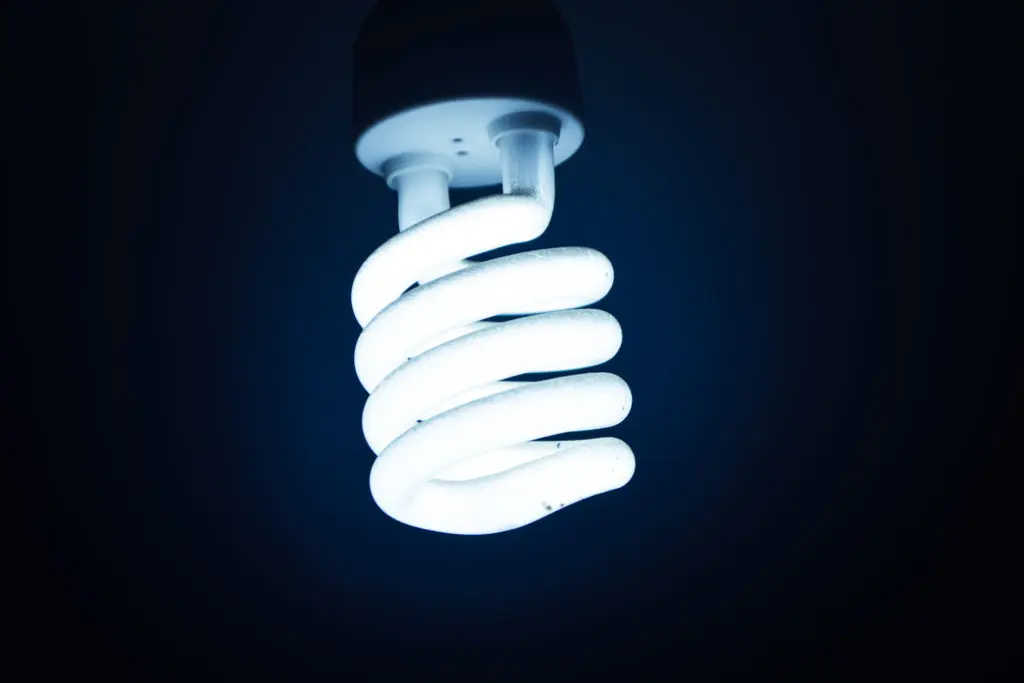
Similarly, indoors under fluorescent or incandescent lights, we don't see much difference in white colour, but the camera sees it. This is what is called the colour temperature and balancing these colours to make the white look natural is adjusting white balance. Note: Balancing the white colour means, adding warmer tones to cooler light and adding cooler tones to warmer light to make the white look natural.
Light sources emit colour in different temperature ranges, and it is measured in units of Kelvin. For example, the direct light from the sun has a different temperature than light in the shade. Similarly, light from a fluorescent lamp will have a different temperature compared to tungsten or incandescent lights, and so on. So, natural light is cooler, while tungsten and candlelight are warmer. Fluorescent light can give a green colour cast. Note: Warmer lights have low Kelvin values, whereas cooler lights have higher Kelvin values.
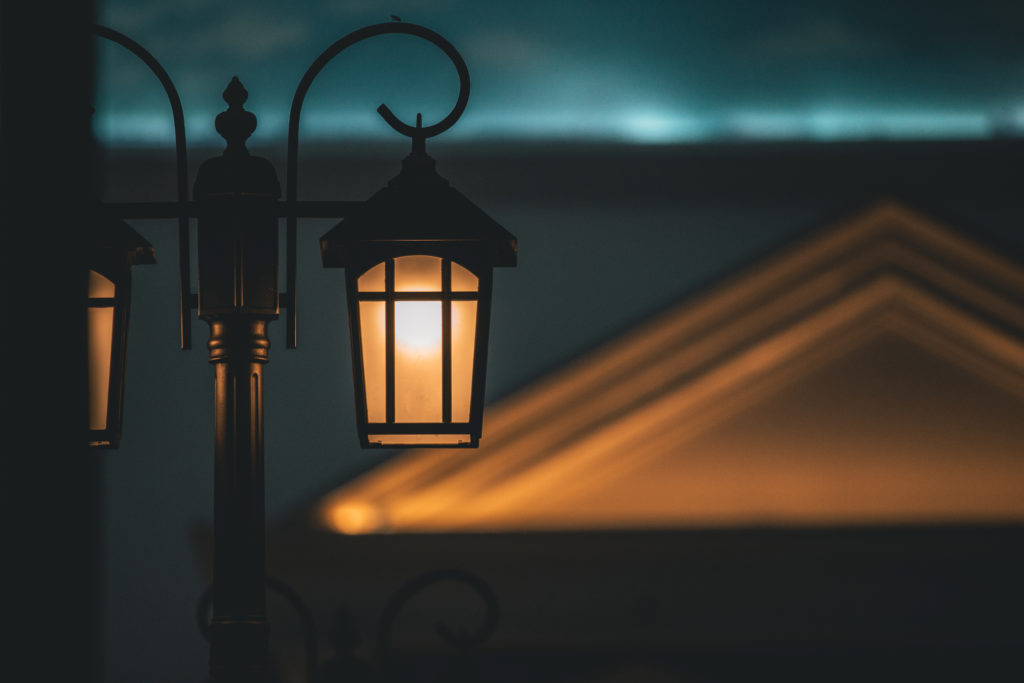
Street lights typically emit an orange colour to them, when you take photographs with your digital camera in auto mode, the orange gets exaggerated, and the result isn't so pleasing. This is typically considered warm lighting.
On the other end of the spectrum is cool lighting and favours the blue/white Kelvin spectrum. The new Lexus, BMW, Mercedes headlights all have this white/blue light to them.
In both examples, light is the final result, but the colour is different. Similar to the above examples, indoor incandescent bulbs cast an orange colour while candles cast an orangish-red glow. Likewise, when the sun is not up in the sky, the blue sky looks very blue and photographs taken in the shade look blue too. The reason for this is, different light sources emit different amounts of red, blue, green colours and the scattering of different wavelengths of light is the reason for the colours – for example, the reason why the sky is blue is due to the diffusion of blue light off air molecules more than any other wavelengths of light. In days gone past when film ruled, it was much more lenient towards these particular colour shifts, and two main types of colour film existed, regular and tungsten. While you could use gels in extreme cases, these two film types satisfied the needs of most everyone; digital sensors, however completely changed the game.
So, What Does Setting White Balance Do, And Why Should You Do It?
Setting white balance helps the camera to establish what is white in the scene and then set the colours more accurately for the photos taken in that scene, under that lighting situation. Setting white balance is very important when shooting in tricky light conditions, such as a mixed lighting scenario. Your shot might have artificial light indoors combined with natural light from a door or windows. Setting your white balance in this scenario will ensure you get accurate colours in your images. Cameras come with inbuilt white balance presets that are good to go most of the time, for a single type of light in a scene, but in situations where there are multiple light sources, the camera gets confused, and that is when you need to set the custom white balance. Moreover, if you are shooting jpegs for some reason, custom white balance is the way to go as fixing white balance when post-processing is not always possible with jpegs. Even if you are shooting RAW, it is best practice to get the white balance correct in camera. Almost all digital cameras come with a handful of presets for white balance, each usually has an indicator to get you in the round-about territory of where you should be, plus auto which isn't great all the time. Here are the most common camera presets for white balance:
AWB – Auto White Balance, where the camera sets the white balance based on the light in the scene. Most of the time, it is accurate, but there are times when the camera gets confused. So using auto white balance should be limited to situations when you do not have enough time to set the auto white balance for specific shots or lighting conditions. Examples include event and wedding photography where you cannot spend time adjusting the white balance for all the different lighting conditions as it will lead to the photographer missing the most critical moments of the event or wedding.
Daylight – the camera usually adds warm tones when this preset is selected. So it is best to use this preset when the sun is bright enough as otherwise, it can cast a blue colour in your photographs.
Cloudy – the camera adds slight warm tones to the images when the sky is completely covered with clouds because the light on overcast days is a bit cooler. There are times when shooting sunset or sunrise may not reproduce the vibrant colours in your pictures, similar to what you see at the location. You can use this preset, so it adds warm reddish tones to your photographs.
Shade – the camera adds warm tones to the images as otherwise, photographs shot in the shade using auto white balance may end up having blue tones. Also, if you are looking for warmer colours in daylight, you can use this white balance preset.
Tungsten – the camera adds cool tones to the images as the tungsten light usually adds warm tones. So using this preset adds cool tones to bring down the bright yellow or orange colour casts these lights create in a scene.
Fluorescent – the camera adds warm reddish tones to the photographs since these lights emit cool light.
Flash – the camera adds warm tones to the image as the light from a flash is cool. Use this preset only if the flash is your only source of light. If not, you will need to use custom white balance settings.
White Balance Preset Menu for NikonWhite Balance Preset Menu for CanonHere are some sample images shot under various white balance settings to get an understanding of how different white balance values affect colours in the image:
Thomas SteinerVassia AtanassovaBefore going on to custom white balance, you could always try the different presets to see if these work for the light conditions that you are shooting in. If one preset does not work for a particular light condition, depending on whether you are looking for warmer or cooler tones, you can use the white balance preset above or below to adjust the colours. The preset modes are great when you are 100% sure of your lighting, but how often can that be? Setting your preset to Sun mode or daylight, for example, doesn't account for the light change from the early morning, high noon and late afternoon. Likewise, most homes have multiple different temperature bulbs, that makes it near impossible to use a preset to get an accurate white balance. Especially with portraits and when shooting people under other light conditions, we want the skin tones to appear natural unless you are going for a creative look or feel in the image.
The goal for white balance is to achieve a neutral and accurate portrayal of what the naked eye sees and to represent that in your photography. Most of the time, auto white balance or one of the presets works fine, but there will be times when the camera gets confused by the light conditions, and you will need to instruct it to see what is white in the scene. Setting a manual white balance, often called a custom white balance is way easier than most people could ever hope it to be. You'll want to shoot using custom white balance in any situation that you cannot control the light sources you are using. This will also be helpful in scenarios where there is more than one light source, and you have to use them both while photographing.
Custom White Balance – the photographer sets the white balance depending on the light in the scene. You tell the camera what is white in the scene so the camera can adjust all the colours in the scene and reproduce the correct colours.
How Do You Set Custom White Balance?
Setting up custom white balance involves taking a photo of something white or mid-grey in the same light where you will be shooting your subject. You then select the camera's custom white balance mode and set it to use the photo of the white or mid-grey thing as reference. Follow the steps below on how to set this up, and this applies for any image. Note: Refer to the camera's manual if you need help with getting into the white balance menu for your specific camera. Also, most cameras will have a WB button at the top or back of the camera, if not there, then at least white balance menu in the shooting menu.
This is what you see when you press the WB button on a Nikon. Rotate the front or back wheel for custom white balance presets or inbuilt camera's white balance presets.
Take a photograph of something white in the same location under the same light you intend to shoot. Make sure it is shot at the right exposure, and it covers a large area of the frame or completely. This could be a wall or ceiling, fabric, paper, card or anything white or grey, and it will be used as the reference photo to set white balance manually.
Then go to your camera's shooting menu, choose white balance settings and select custom white balance or, press the WB button on your camera and turn the dial until the custom white balance icon is displayed.
Select the image you just photographed (something white or grey under the shooting light) by pressing the set button. The “Set” button is usually the “OK” button; if not, you will be guided on the screen.
Set your camera's White Balance setting to Custom.
Now the white balance for the light you will be shooting under is set for your camera and you should get good results for that lighting situation. All the images shot in this lighting scenario in this location should turn out neutral with natural colours and should not have a colour cast. If anything in the scene changes, for example, a background, more light sources or colour of light, you will then need to set the white balance again following the steps above.
If you move to a different lighting scenario, repeat the same steps above.
Set Custom White Balance – Nikon
Go to the shooting menu
Choose “Preset Manual” to set custom white balance
Select one of these
Select the image shot with grey to set for custom white balance
Set Custom White Balance – Canon
Choose custom white balance
2. Select the image with the white or grey area
3. Choose OK to use white balance data from this image
4. Click set again
There's no magic; it's that easy! There is one secret, though. You want your white or grey area to be where your focal point is. That is to say, the model above is holding it directly over their face; that's what is important. If you, the photographer, are standing 15 yards away and hold the grey card in one hand, camera in the other and shoot it, the light falling on the grey card for which you make your custom white balance setting could differ from what falls on your subject. You must get the grey card into the frame with the subject! Note: The bonus to doing a custom white balance, resulting in more neutral and natural colours is the total decrease in post-production work you'll have adjusting for improper white balance settings.
What If I Don't Have A Neutral Scene?
If you do not have a grey card or anything white or neutral in the scene, you can go the trial and error route. Use the Kelvin scale and depending on the light used, use manual values to increase or decrease the values in the Kelvin scale to set the white balance manually. Take test shots to get the most accurate white balance values. You can also use this as a way to creatively use white balance to add mood to your images. Choosing Kelvin values for setting white balance: For Nikon: In the Shooting Menu -> Choose White Balance -> Choose colour temp.
Adjust the temperature according to your lighting situation
For Canon: In the shooting menu, choose Kelvin scale adjustment
Here is a rough idea of the values to look out for:


 Some photographers even have fears about increasing their ISO too much. Instead of living with this fear, learn how ISO really affects your pictures.