How to Start Shooting in Manual Mode (Photography Basics)
Shooting in manual mode is like driving a car. If you only use an automatic shift, you cannot drive a manual car. However, if you learn how to drive manual, then you can do both. Photography newbies and professionals are the same. They use the same camera, yet their final photos look very different.
By using manual mode, a whole new level of possibilities will open up for you.
Now, set your camera to ‘M’ and follow the points below.
Why and How to Shoot in Manual Mode?
Manual mode gives you total control. It is tempting to let the camera control all of the settings. However, when you photograph in automatic mode, the camera will use settings that you might want to change. Moreover, you are not learning anything about photography.
When we talk about settings, we are looking at the exposure triangle. The triangle consists of three camera settings. These are aperture, ISO, and shutter speed. These directly influence how much light comes from your scene. They also add special techniques, such as differential focus and subject freezing.
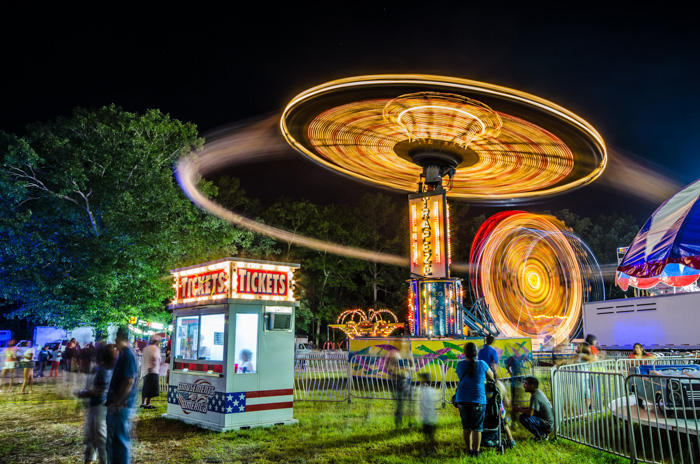
If you wanted to capture bokeh, you need to know about differential focus and a wide aperture. To capture motion blur, you need to know how to use long or slow shutter speed.
Manual mode lets you harness the camera’s power, allowing you to change the settings as the scenes and subjects change.
1. Light Meter
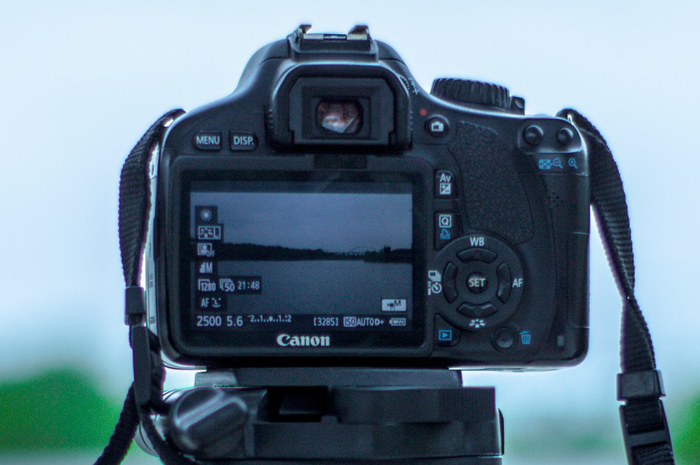
When you look through the viewfinder, you will see a line of numbers at the bottom. They will look something like this: 2…1…0…1…2+ (Canon) or +2…1…0…1…2- (Nikon).
This is the light meter, and when aligned with ‘0’, you know that your photo will come out properly exposed.
This is only if you are going for that specific effect. For example, let’s say that you are correctly exposing one part of a building where the sun hits. The shaded part has some detail, but you want none.
The sunny part of the building is still well lit if you bring the exposure down. So this is what you do to make the shadows (and the entire image) darker.
The light metre is a great guide, but you can use it as you wish. Do not be too dependent on it. Sometimes you do not have to rely on the in-camera light meter as it meters an average or a centre.
When you are shooting RAW and low ISO and highlight and shadow inequalities, it is always worth going against the rules and underexposes the scene with 1 or 2 stops. You can correct it in Lightroom afterward.
2. Exposure Triangle
The exposure triangle helps us understand more about light.
Apertures rise from f/1.4 to f/2.8 and go all the way to f/22. So shutter speeds could be 1/125 s or 1/250 s and all the way to 1/4000 s. The same goes for the ISO, which jumps from 100 to 200 and keeps going to 3,200.
3. ISO
ISO is your camera’s sensitivity to light, with a typical range of 100-1,600. Some cameras can go as low as 50 or 64 and reach as high as 12,600, but these are found in costly and full-frame camera bodies.
The lower the ISO number, the less light is hitting your sensor.
More light is needed at the lower ranges to get a good exposure, meaning more light for the higher ranges—the lower the number, the better the resolution and quality of your resulting images.
Higher ISO numbers allow you to photograph in low light conditions, yet these settings bring more grain.
DSLR cameras can cope well with high ISO numbers as their sensors, processors, and large pixel sizes can cope with the digital noise. However, as a rule, use an ISO with a value as low as possible.
4. Aperture
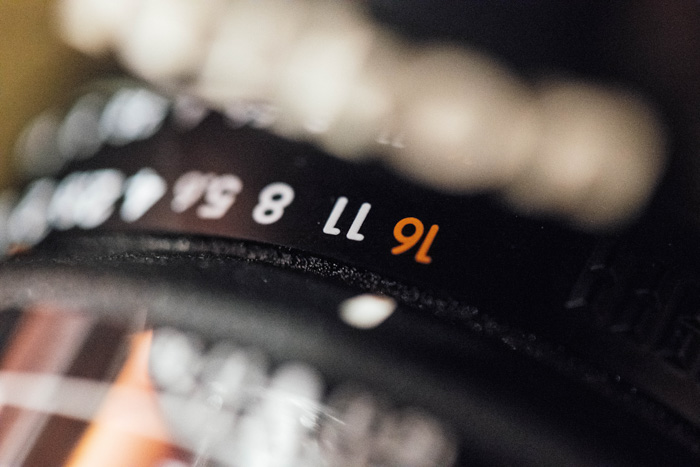
The aperture is the hole inside your lens, which acts as the ‘iris’ similar to your eyes. A wide or low-number aperture, such as f 2/8, will have a very small focal length. This means that only a small part of the subject will appear clear wherever you place your focus.
A narrow aperture, such as f/16, will place the entire scene in focus, as it has a large focal area. Landscape photographers use a narrow aperture to show the foreground and background as clear and sharp.
With a large f-number (narrow aperture), you have to consider the diffraction effect. When this happens, the finest details of your photograph will not be sharp anymore. This is the reason why small details of your photographs blur when using a large f-number.
The lower the f-stop, the more light is allowed to enter your lens, and therefore, hitting your sensor. To keep my ISO value down, to retain quality, I shoot live musicians with a wide aperture. This gives me more usable light.
A high f-stop number gives me less light to play with, which means that longer exposure is needed. To create images with a bokeh background, you would use a wide aperture.
5. Shutter Speed
Your shutter speed refers to the amount of time your camera’s shutter stays open. The longer it stays open, the more light enters your scene and, therefore, your image.
These numbers are shown in fractions of a second, where 1/250 s is a typical value.
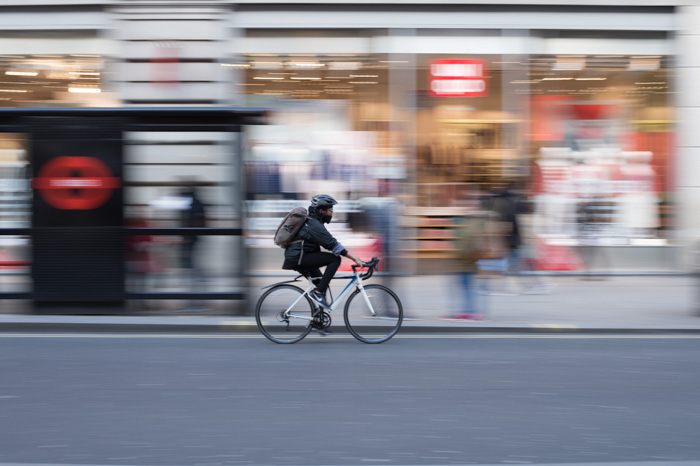
Your shutter speed affects the sharpness of your subject. Slower shutter speeds allow more light and allow more blur from your subjects, especially when you capture motion.
A faster shutter speed lets in less light but gives you a sharper image as the subject is ‘frozen’.
6. Combining All the Settings
Well, the numbers do have a pattern, and they are chosen so. Look at the aperture, for example, and see if you can spot it. A typical range would be f/1.4, f/2.8, f/4, f/5.6, f/8, f/16, and f/22. So the numbers almost double every time.
The ones that don’t (f/4 and f/22) are often the previous two numbers added together (or thereabout).
The same goes for ISO, where the numbers double each time. 100 goes to 200, then 400, 800, 1,600 and finally 3,200. Shutter speed follows suit with 1/125, 1/250, 1/500, 1/1000.
Each of these numbers is one stop. They either add or subtract one stop’s worth of light from your image. The reason we show them in a triangle is that they all work together.
For example, you have a correct lighting scene at ISO 100, shutter speed at 1/125 s, and an aperture of f/16. But what happens when the sun disappears behind a cloud? The scene got two stops darker. This means you need to add two more stops of light into your settings for correct exposure.
This is everything you need to know about how to shoot in manual mode and how to take your first photographs with it.
Your aim is to get correct exposure from your scene, and your camera gives you three settings to do so.
These three manual camera settings also let you capture the scene in several different ways. It takes a little time to get confident, but you will be shooting in manual mode in no time.
-------------------------------------------------------------------------------------------------------------
PHOTOGRAPHY FREEBIE:
How to make money with your Photography even if you're not a Pro.
Copy & paste this link into your browser, click ENTER, and enjoy:
https://mrdarrylt.blogspot.com/2020/01/how-to-make-500-month-from-your.html
_____________________________________________________________________
Play Station $50 code. Just copy & paste this link into your browser,
click "ENTER" and follow the easy steps: bit.ly/3g2Ghhi
No comments:
Post a Comment
Note: Only a member of this blog may post a comment.