How to Use a Light Meter for Better Photography
What is a Light Meter?
Simply put, a light meter is a photography tool used to measure light. Without a light meter, we would not be able to judge how light or dark a subject is with our eyes alone.
There are two types of light meter: reflective and incident.
Reflective meters are often built into camera bodies. This type of light meter will first measure the amount of light reflected by the subject. It will then calculate which camera settings to use to create a balanced exposure. This calculation is based on the number of mid-tones in your scene.
Incident meters are external devices that measure the light falling on a subject. This type of reading is far more accurate, as it evaluates a more discrete area and considers only the intensity of light falling on the subject.
Should I Use a Light Meter When Shooting Digital?
There are two main reasons why you should use a handheld meter when shooting on a DSLR camera.
1. Greater Accuracy
The reflective readings in digital cameras can sometimes cause inaccurate exposure calculations. This is because the meter inside your camera measures light in relation to middle grey. This means that the calculation intends to achieve a tonal range of 18% grey across the image. But in certain conditions, such readings can result in over or underexposed images.
A common example is when photographing a scene that includes snow. The reflective meter inside your camera is calibrated to middle grey, and so you will often end up with an underexposed image. In this case, the snow is rendered as grey instead of white. To compensate, we must over-expose the image in our camera settings.
Incident metering doesn’t suffer from this same problem. When using an incident reading, you always get an accurate exposure calculation. For portrait photographers, capturing skin tones is crucial. And for this reason, they often favour using incident light meters for accuracy.

2. Flash Metering
The built-in meter in your camera cannot measure the intensity of the flash. To measure the light of an external flash source, you must use a handheld light meter.
How Do I Use a Light Meter?
We already know that an incident meter reading will give us the most precise reading. Yet, there may be situations when measuring the reflective light is beneficial. One example is landscape photography. Here, you should take three readings, from the brightest to darkest areas in your viewfinder. Then calculate the average.
This type of reading is called Spot Metering. A Spot Meter measures the reflected light in one specific area (or spot) within the scene. Matrix Metering measures the light from across different grid areas in the viewfinder. Many readings are then used in an algorithm to generate a balanced exposure value. Centre Weighted metering gives priority to the light in the centre of the viewfinder.

1. Get to Know Your Light Meter
Understanding how your handheld light meter works is essential.
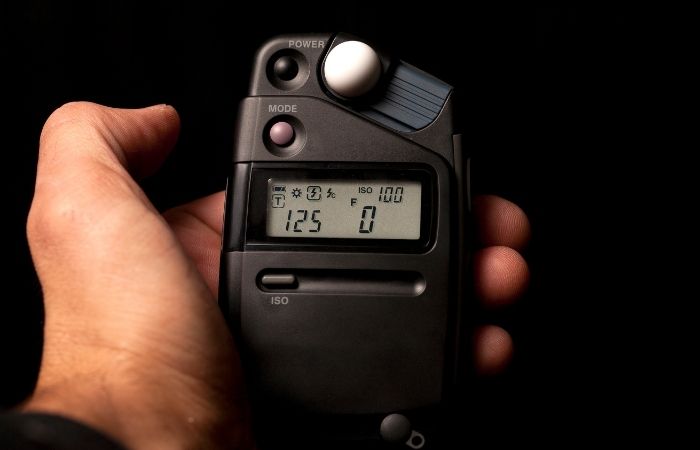
Start by powering on the light meter and, if necessary, select photo mode.
For taking an incident meter reading, it’s important we set up our device accordingly. For most devices, this is achieved by sliding the Lumisphere so that it covers the light-receiving sensor.
Now that your device is set to take an incident light meter reading, we must also set our metering mode. This mode relates to the light source you are using in your scene. You can choose between ambient light (for any non-flash, continuous light), cordless flash, and flash with sync cord (for strobe lighting).
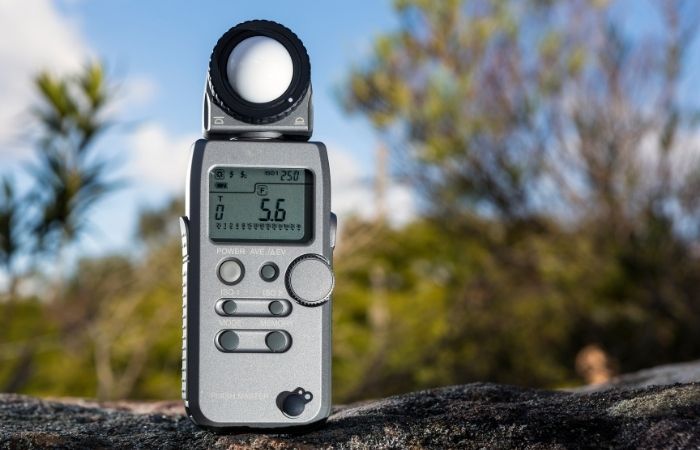
2. Set Your ISO
We must calibrate the ISO in our hand-held light meter to that of the camera settings. If you are shooting analog, calibrate to the ISO of your film.
This is an important step and will ensure that our devices are in sync.
3. Set Your Shutter Speed or Aperture Priority
If your priority is to maintain a desired aperture, for example, an f stop of f/2.8 to create depth of field in your image, you can set your light meter to aperture priority mode (F). Then, select f/2.8 by pressing the up and down buttons.
If shutter speed has priority, for example, a shutter speed of 1/500th of a second or faster because you need to capture movement, set your light meter to shutter priority mode (T) and then select your desired shutter speed.
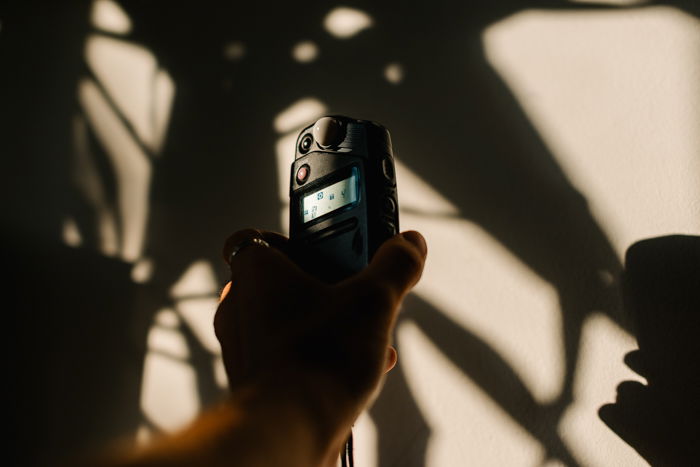
4. Take a Reading
Next, we want to measure how much light is falling onto our subject. Hold up the light meter in front of the area you want to measure. Make sure the Lumisphere is facing the lens of the camera, and then press the measure button. Your device will then measure the light hitting the Lumisphere and produce an exposure value.
For some subjects, you may need to take many readings to calculate a balanced exposure. For example, in portrait photography, we must measure the light falling on the subject from different angles to not underexpose (by only measuring a highlight area) or overexpose (by only measuring a shadow area).
When using strobe lighting, make sure to trigger your flash unit after pressing the measure button on your meter.

5. Adjust Your Camera Settings
Check to see what the meter reads. Now that you have an exposure calculation from your device, you can adjust your camera settings accordingly.

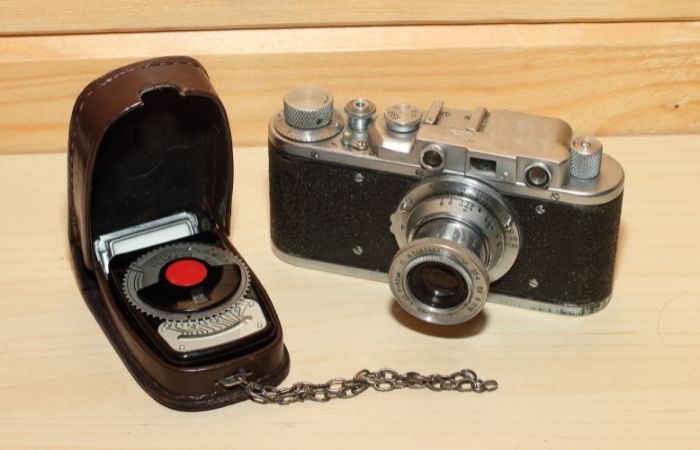
How do I use an Analogue Light Meter?
Analogue meters offer precise readings and are more practical than you might think.
When using an analogue light meter, you exchange a digital display for a needle. This needle indicates exposure values within an old-school, circular index.
First, calibrate set the ISO on your analogue meter. This should be the same as the settings in your digital camera or roll of film. You can set the ISO on most analogue meters by rotating the appropriate dial until it indicates the ISO you’re using.
Next, take a reading by holding the metering button until the needle stops moving.
In most models, the needle will remain fixed in position for around 15 seconds after the metering button is released. Lastly, rotate the dial ring indicator to align with the needle. You can then read the full range of aperture and shutter speed combinations.
Having a handheld light meter is an absolute essential. We recommend getting to know your light meter by practicing with different subjects. Try using it in a variety of modes and scenes.
For a reliable digital light meter, I recommend the Sekonic L-308X Flashmate.
For a small and easy-to-use light meter, check out the Gossen Digisix 2.
For a trustworthy analog light meter, look no further than the Sekonic L-208 Twin Mate.
---------------------------------------------------------------------------------------------------------
FREE Photography Ebook
No comments:
Post a Comment
Note: Only a member of this blog may post a comment.