8 Techniques for Capturing the Best Cloud Photography
Many people think clouds are only important for landscape photos but this is not true. Clouds can be very effective at shaping the mood of your photo.
Whatever type of photography you’re into, here are eight techniques to shoot amazing cloud photography.
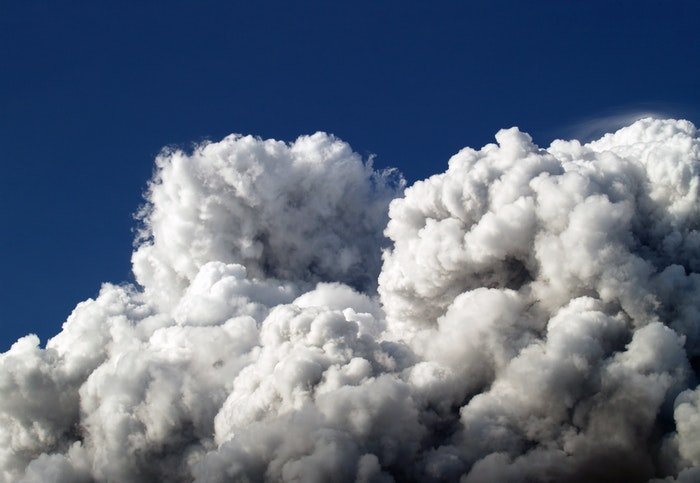
8. Look for Different Clouds for Different Moods
There are many types of clouds out there. Each has its own way of influencing how your photo appears.
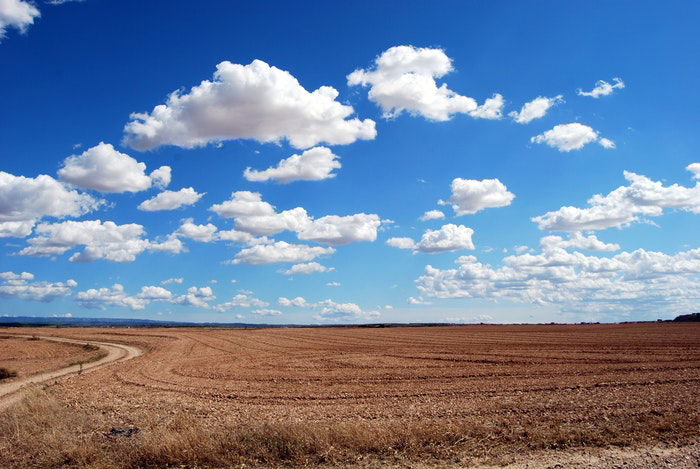
If you want your photo to look vibrant, shoot Cumulus clouds. They appear when the weather is good.
For a more serious vibe, consider the flat and grey Stratus clouds on overcast days.
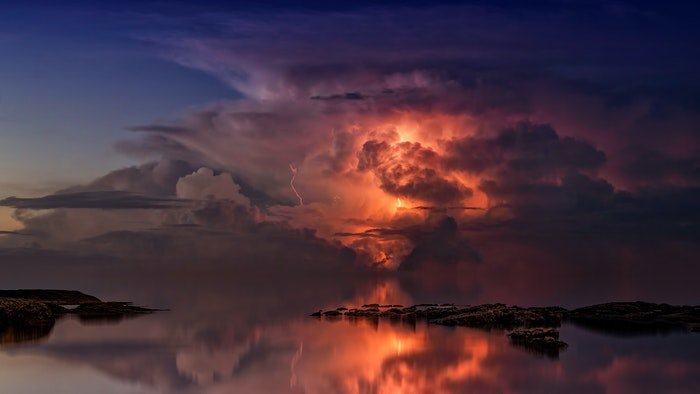
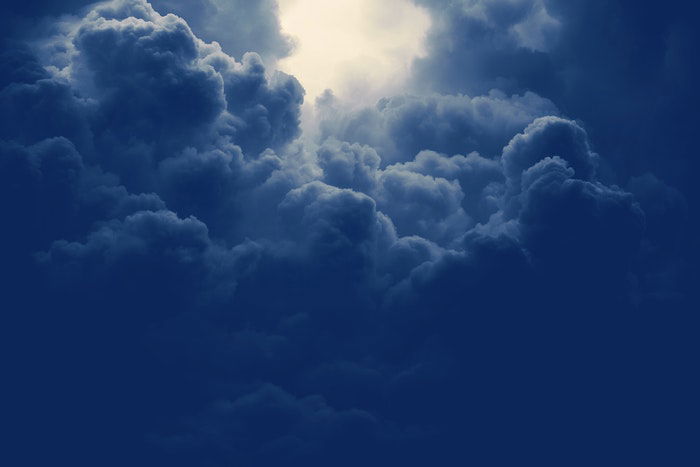
If you’re after a more dramatic effect, then try the big and scary Cumulonimbus and Altostratus. They appear when a big storm is on the way.
7. Pay Attention to the Weather Forecast
Forecasts provide you with a lot of information if you’re interested in taking cloud photos. They’re very useful if you want to capture a location in a specific type of weather.
So if you were waiting for storm clouds to approach an area you have in mind, then you’ll know when to prepare.
If your location has a weather radar you can access online, take advantage of it. This shows real-time results in a more concentrated area. And it’s more accurate than the ones you see on national TV.
The radar map shows you where the clouds are and where they may be headed. In most cases, it has a scale that indicates the severity of the weather.
Green spots in the clouds mean there could be light rain. Purple spots represent severe storms.
But you shouldn’t worry even if you don’t have access to radar. You can still use the regular news forecast to help you guess what types of clouds to expect on the day of your shoot. Or just check The Weather Channel for accurate predictions.
If your local weatherman says there will be a thunderstorm, prepare for Cumulonimbus clouds.
6. Choose the Right Camera Settings
You don’t need deep technical knowledge when it comes to taking pictures of clouds. In fact, you can even get away with using auto settings on your camera in most cases.
But these tips will help you make the most out of those dramatic clouds.
First, set your ISO between 100 to 800. If it’s bright outside, then use 100. As it gets dark, you can use higher values until you reach 800. If you go any higher than that, you might end up with pictures that look noisy and grainy.
Next, set your aperture between f/11 to f/16. The deep focus produced by these f-numbers ensures that everything in your frame is sharp.
When it comes to shutter speed, you get to choose from a few options depending on what you want to achieve. In most cases, you can set your camera to Aperture Priority. Then let your device decide the shutter speed for you.
If you want to try long exposure photography, then you’ll need to use Manual Mode.
5. Get Creative with Long Exposure Cloud Photography
Long exposure photography is useful for capturing clouds at night. Using normal shutter speeds would result in underexposed images.
It works by opening the shutter for a long time so the sensor could gather more light to create a proper exposure.
As a consequence, anything in the frame that moves while the aperture is open will end up blurry. That sounds like bad news in most cases but it creates surreal effects when shooting clouds.
In fact, the longer you keep your shutter open, the fuzzier the clouds are going to look.
You’ll need to switch your camera to manual mode to create a long exposure. Once you’re on that mode, set your aperture somewhere between f/11 to f/16 depending on the lighting condition.
If it’s dark enough, f/11 will suffice. But if it’s still too bright out, then try f/16. Although most lenses have a minimum aperture size of f/22, we don’t recommend you using it due to diffraction.
When the aperture is too narrow, light struggles to go through, and that results in blurry photos.
Once you set your aperture, you can adjust your shutter speed up to 30 seconds. Take a test shot. If it’s over or underexposed, bump it up until you get the proper exposure.
If you want to create an exposure longer than 30 seconds, you can use Bulb mode instead. This function allows you to keep the shutter open as long as you have your finger on the button.
When shooting long exposures, don’t forget to bring a sturdy tripod and a remote trigger in your camera bag.
This process involves a lot of trial and error. But in general, all you have to do is to shorten the exposure if it’s overexposed and lengthen it if it’s underexposed.
Keep taking test shots until you end up with a properly exposed photo.
How to Stabilise Your Camera
It’s okay to handhold your camera while taking pictures of clouds. But there are situations when you’ll need a tripod.
The tripod is essential when you’re doing long exposure photography. It keeps the camera stable while the shutter stays open and is vulnerable to motion blur.
When shooting cloud photos at night, you should consider using a remote shutter. This will ensure stability. Touching your camera, even when it’s on a tripod, can introduce movement. This will make your photo look fuzzy.
You can fix this if your trigger your device without any wires.

4. Use an ND Filter for Unique Results
You can’t use long exposure photography when it’s not dark enough. When you leave the shutter open too long, and there’s too much light, your photo will be overexposed.
One way to enable you to shoot long exposure even in daylight is by using Neutral Density (ND) filters. Think of them as sunglasses for your lens. They limit the light that goes through the glass so you can use slower shutter speeds.
Each ND filter has an ND number representing the amount of light it limits. The higher the ND number, the more the f-stop reduction you get. For instance, if you use ND2, you get 1 f-stop reduction, with ND4 you get 2, with ND8 you get 3 and so on.
F-stop reduction is the number of stops that the filter trims off the regular exposure.
Say your shutter speed is at 1/4000 and can’t go any higher. Putting on an ND2 filter which has an f-stop reduction of 1 lowers it down to 1/3200 (1 stop).
Using different ND filters create different effects for creative cloud photography.
If you want blurry clouds, you can use ND16. This prevents a lot of light from coming through.
If you’d like the effect to be subtler, use ND2 or ND4. Their f-stop reduction is smaller.
You can always try out some CPL filters in case you don’t want any significant reduction in shutter speed.
Experiment with different options until you get the photo you like.
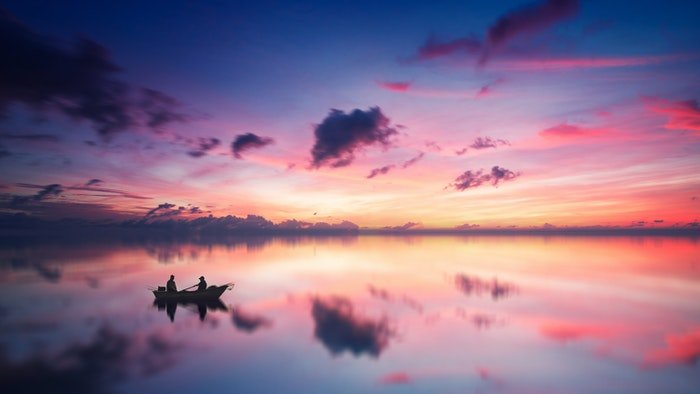
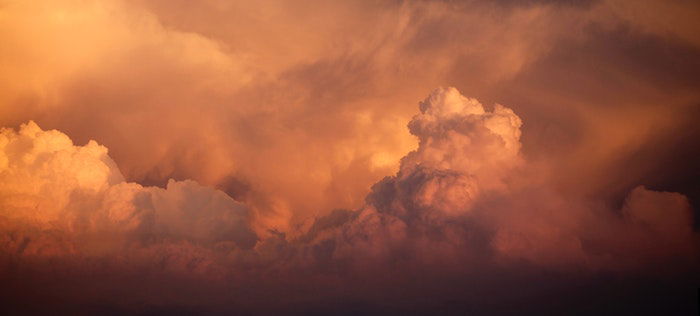
3. Try Cloud Photography During the Golden Hour
If you want to add dimension and colour to your photos, shoot during the golden hour. It’s the time after sunrise and before sunset when the sun casts a bright orange glow onto the clouds.
The sun is low on the horizon. This means that the golden hour produces shadows that highlight the shape of the clouds.
This way, they end up looking fuller and more realistic.

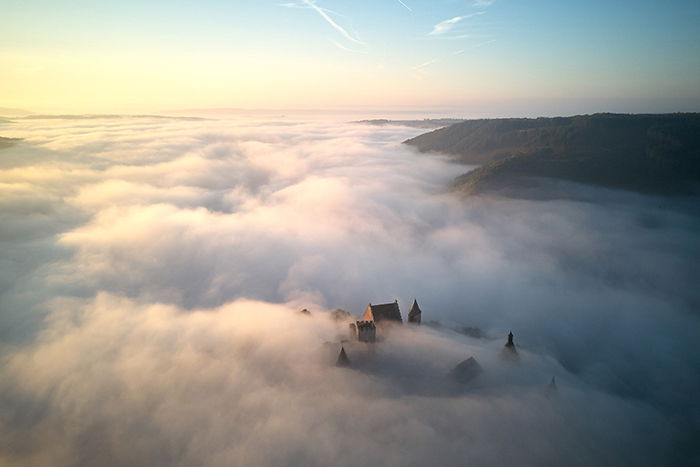
2. Include Landscapes in Your Images
Try photographing clouds over an impressive landscape. It will give your images some context and make them more relatable to people.
You can incorporate anything from trees to mountains. Even buildings work!
Capture bigger portions of the sky, even if you are not sure if you want to incorporate all of it. You can always crop it in post-processing.
1. Zoom in to Show More Detail
You’d be surprised how you can create different cloud images when you zoom in and out of the sky. If you’re doing nature photography, snap on a zoom lens. Use its wide range of focal ranges to your advantage.
By shooting tight shots and wide shots of the same cloud, you have two to six photos at your disposal.
And, if you move your frame a little bit and recompose your shot, you can achieve even more unique pictures.
You don’t have to be a master photographer to shoot cloud photos. What’s important is how you use cloud photography to create different moods in your pictures.
All you have to do is look up, and you’ll find something you can take photos of.
Keep your camera in hand because clouds move fast. If you encounter a beautiful cluster in the sky, better snap some cloud pictures before they’re gone.
Next time your landscape or cityscape image needs more impact, try adding clouds!
------------------------------------------------------------------------------------------------------------
Free eBook:
Before the Shutter

Prepare for an award-winning image:

No comments:
Post a Comment
Note: Only a member of this blog may post a comment.