Intro to Studio Photography — By a Beginner for Beginners
Recently
I purchased an off-camera flash and started experimenting with studio
lighting. I have shot natural light for a couple of years and like many
others I was quite intimidated to try off-camera flash photography but I
decided to take the leap. It’s so much fun, and I couldn't not believe
how easy it was! I wish I had tried it sooner. It might be cliché but
the concept of going from “taking a photo” to “making a photo”
is really something different. Working with studio lights where you are
able to fully control the light and therefore the image, is truly
incredible — I almost feel like I’m falling in love with photography all
over again.
This
is the first post in a series where I’ll document my learning process
to not only accelerate my own learning, but to invite others to follow
along and hopefully learn something as well. I got started by learning
from so many other photographers* openly sharing their knowledge online,
so I’m thinking this as a way to give back to the community. These
posts will contain behind the scenes kind of stuff like the lighting
setups, post-processing before and after, camera settings, my learnings,
etc. My goal is to be as transparent as possible with all my mistakes
as I learn. Since you are reading an article about studio photography,
I’m going to assume you already have some experience with photography
and know your way around your camera and concepts like shutter speed,
aperture and so on.
Again, this is a learning process so bare with me. If you have any feedback or tips, please do share in the comments or on Twitter.
A note about style — My photography is very much inspired by master cinematographers like Jeff Cronenweth, Darius Khondji et al. whose styles are very dark and moody. So don’t expect to see many of the trendy California-sun-drenched-happiness photos in this series!
Ok, enough introduction.
Getting started: the gear you’ll need for starting with studio photography
In
short, all you need is a flash speedlight and an umbrella. After doing
some (too much) research online I bought a cheap but decent umbrella and
a Godox speedlight with a flash transmitter to go with my Sony a7rII
camera. (If you are shooting with Canon/Nikon/Fuji etc you need to find a
flash that works with your camera).
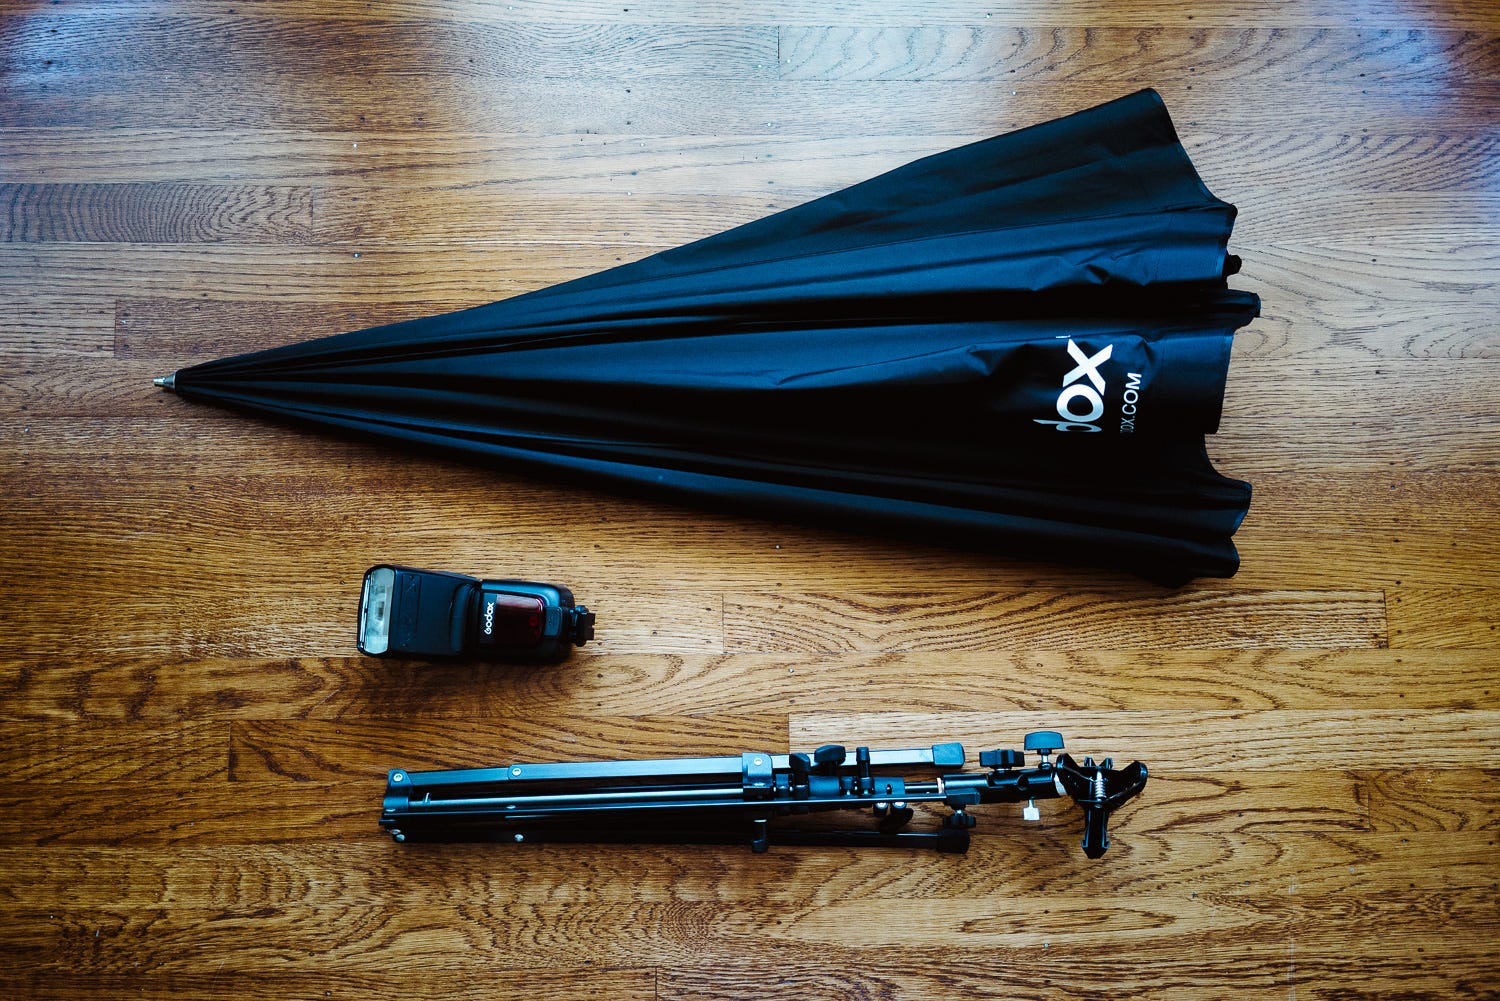
- Umbrella: Godox 47"/120cm ($30)
- Flash: Godox TTL Flash Speedlite with Wireless Flash Trigger ($165)
- Lightstand: Manfrotto 5001B 74-Inch Nano Stand ($57)
The
total for this, not including the actual camera, is $250 (even cheaper
if you buy second hand), and it’s more than capable for a getting
started kit. In fact an umbrella like this—being the cheapest light
modifier you can get—it’s actually super versatile once you learn how to
control it.
A study of light: the first hundreds of crappy shots
I
had read up enough already to know that I needed to set my camera and
flash to (M) manual so I could learn how this all worked in practice.
For me it doesn’t matter how much theory I read until I actually try it
myself.
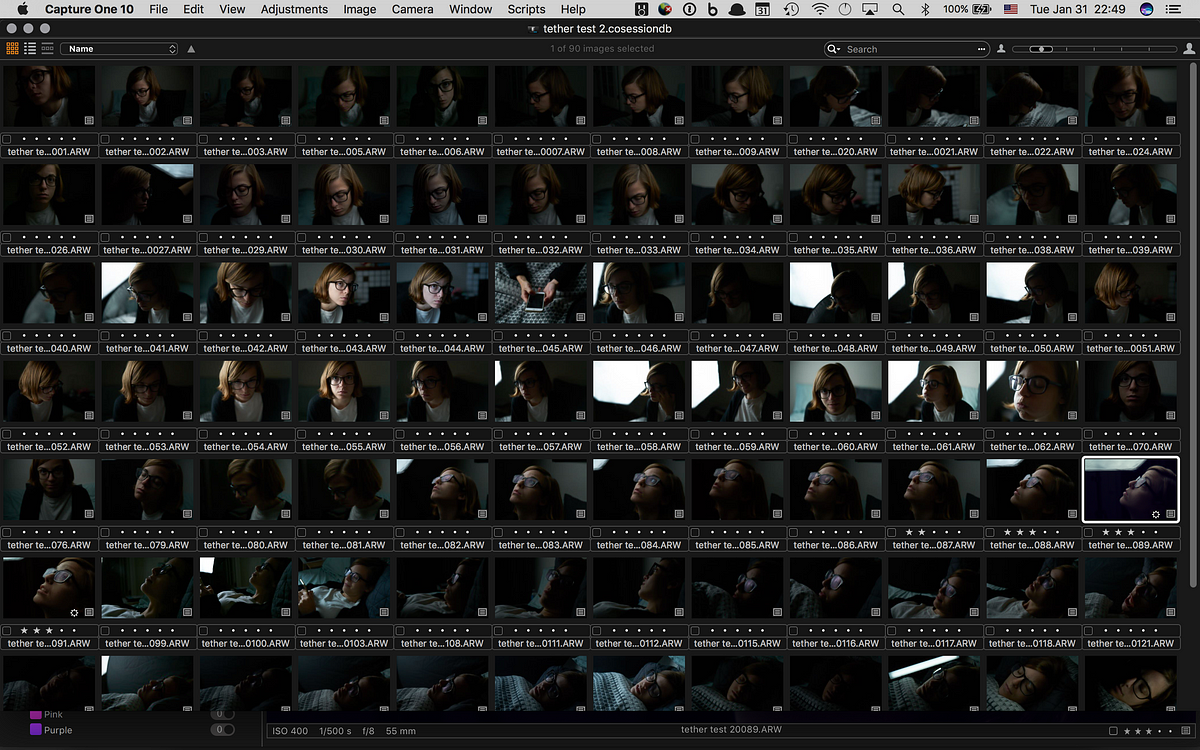
I
asked my girlfriend Megan if she could take a seat on a chair, and then
I just started shooting. Changing the camera settings, the flash power,
moving the light around her, tweaking the angles and so on. I took
hundreds of images — I wasn’t trying to take a great picture but rather
just study how the light behaved. Having said that, I was lucky to get a
few good shots, one which I’ll now go into how it came to be.
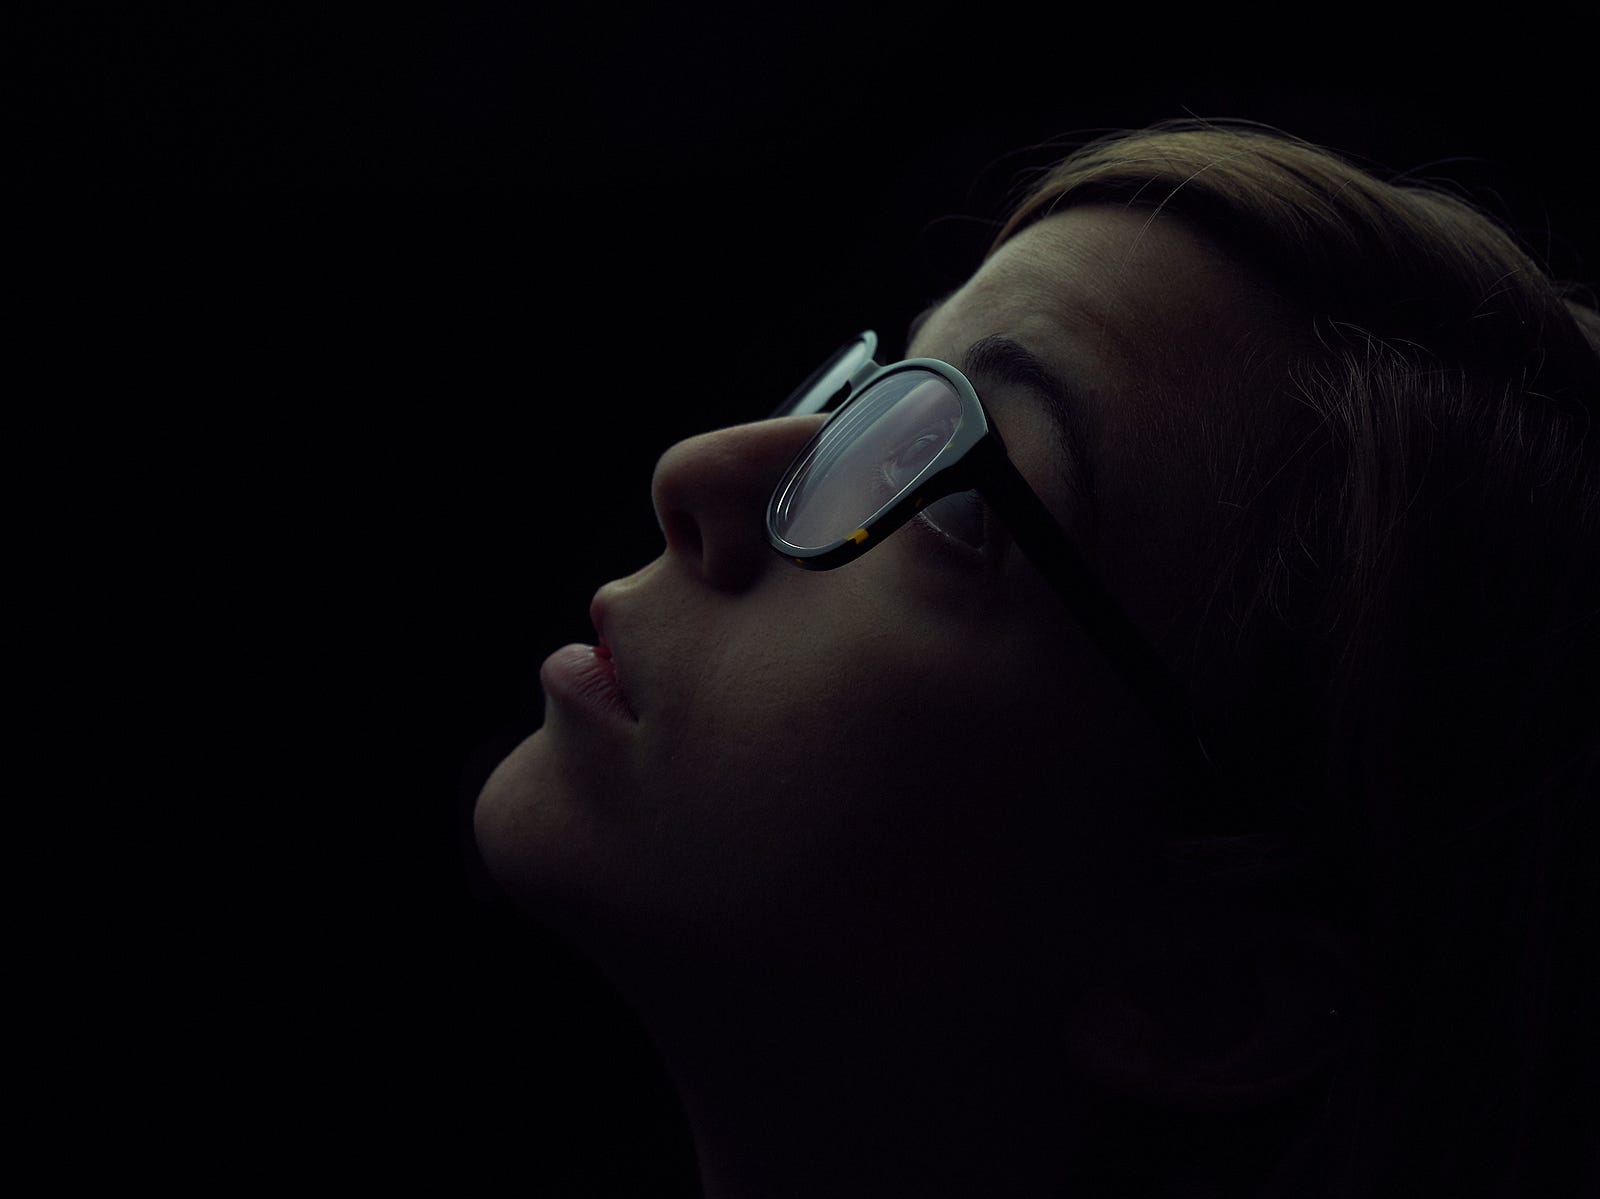
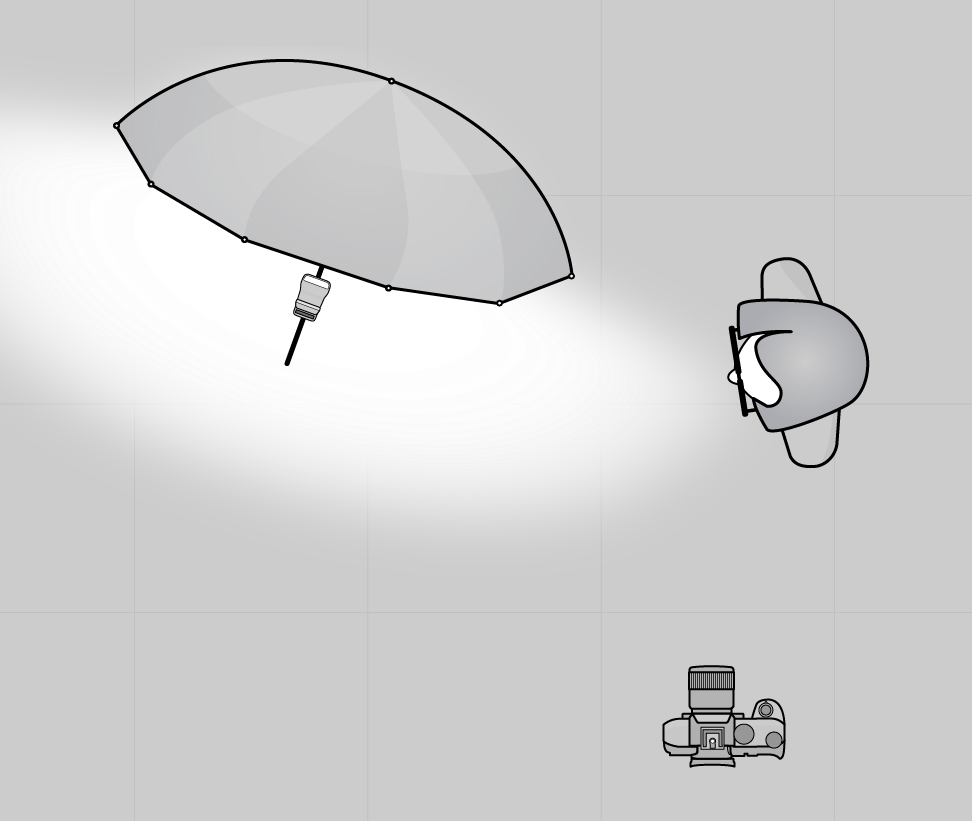
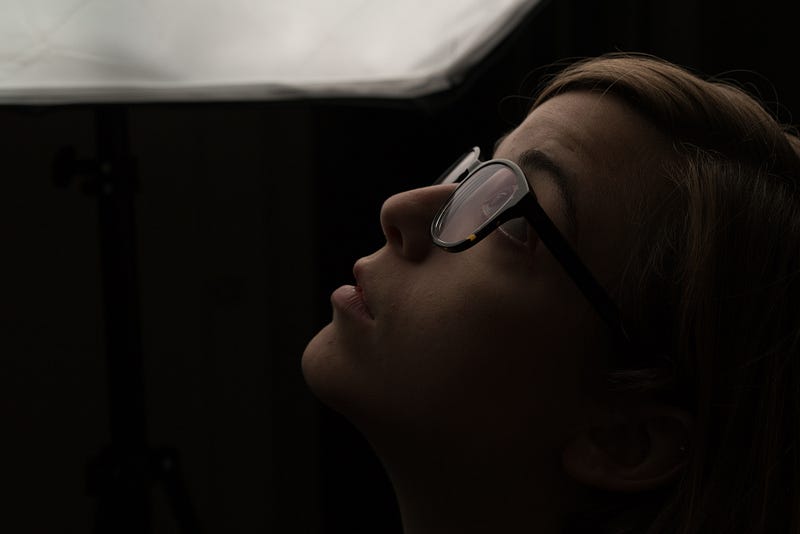
The light and camera setup
The setup was rather simple. The flash was mounted onto the light stand pointing into
the umbrella, causing the light to bounce and become diffused (making
it softer). I had the umbrella on a stand with the flash positioned
slightly above her head and slightly behind her to get this sort of
“appearing from the darkness” effect. The flash was not pointed directly
at her, but angled just in front of her. This is called feathering and
it is a powerful and fundamental technique to control how light lands on
your subject. (Read more about feathering in this article by Brian McNamara).
My camera settings
Shooting with my Sony a7rii and a 55mm prime lens, the shutter speed was 1/500s at f/8, ISO 400 (yep, someone already told me I made a mistake —I should have shot at ISO 100 to reduce noise and save flash power. Such a newbie mistake!). Note however, these settings will completely vary depending on your lightning situation, so don’t try to copy these. Instead, just play around and experiment with various settings and see how the picture changes.
Shooting with my Sony a7rii and a 55mm prime lens, the shutter speed was 1/500s at f/8, ISO 400 (yep, someone already told me I made a mistake —I should have shot at ISO 100 to reduce noise and save flash power. Such a newbie mistake!). Note however, these settings will completely vary depending on your lightning situation, so don’t try to copy these. Instead, just play around and experiment with various settings and see how the picture changes.
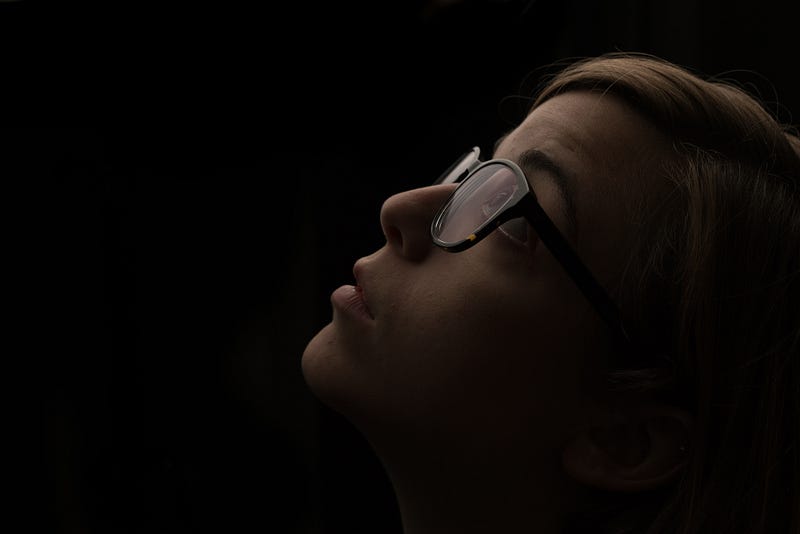
And to finish it off with some very light post-processing
I
can sit for hours to tweak colours and what not, but here I kept it
super simple. The umbrella was visible in the top left, so I just
painted it out with the mask brush in Capture One
which I just picked up (It’s a raw-photo editor similar to Lightroom,
but faster and better suited for studio shoots— more on that in an
upcoming post). Then I tweaked the exposure a bit and added some colour
grading to make it look more cinematic and in the style of the
cinematographers I mentioned in the intro. Later in this series I’ll get
more into post-processing. Stay tuned.

Takeaways
My
biggest takeaway from this initial stab at studio lightning was that
it’s not at all as scary or hard to get started as it seemed, in fact
it’s quite the opposite — I only regret not trying it sooner. One thing I
would do differently (besides using the right ISO setting) would be to
try to reduce some of the light reflections in the glasses using a few
tips I got from by Joe Edelman.
I encourage you to buy a speedlight and an umbrella
and try out studio lighting for yourself. I hope I this article has
shown it’s not hard to get started, especially if you go about it with a
more trail and error approach rather than trying to figure out the
exact settings. Let me know if you have any questions or feedback in the
comments.
No comments:
Post a Comment
Note: Only a member of this blog may post a comment.