A Beginners Guide to Baby Photography, 10 Baby Portrait tips.

Baby Photography made easy
There are 10 tips that will make baby photography easy and fun. If you follow these 10 baby portraits tips, you should be able to achieve some great shots of your own little ones! And it’s such a great feeling to see the final product. I’ve never had baby portraits of my little ones before little Rose. So this has been such a fun experience for me. And I am really treasuring these photos.
The trick to those amazing newborn portraits is that you can take these photos of baby up to 4 weeks old. Much older than that and baby is too wiggly and alert for the cozy sleepy photos. You can still get some great shots, but like I said, they won’t have that adorable sleepy photo look.

But here are the top 10 tips to great baby portraits.
1. The Photography Gear – For great baby photography your gear matters. Don’t get me wrong, you will still be able to get some fun shots with a regular camera, But if you want photos that could come close to rival the professional, you need quality gear. I have 2 great DSLR cameras. My starter DSLR was a Canon T3i. And I absolutely loved this camera. It was perfect for starting out learning how to use a DSLR. I still am known for pulling out the T3i now and then for a quick shot since it is slightly lighter. And it has the flip out viewfinder screen that makes taking some types of photos a lot easier, AKA my self portrait fashion shoots.Now the type of camera is only half the story. The Lens that you use is just as important if not slightly more important when taking photos. For single portraits or single/small subjects to capture I prefer using my Canon EF 100mm f/2.8 Macro lens.
For a larger subject group like if I am taking photos of multiple people (more than 3) or I need to include a larger area of subject into the photo then I shoot with a Canon EF 50mm f 1.4 lens. It produces amazing clarity and lets me include a larger area in the frame. If you can’t bare the price of the the f1.4 model the Canon EF 50mm f1.8 lens is still a very good alternative.
First the Canon Speedlite 430EX II Flash has been my best friend lately. I get a lot of shadows in our house. Or the color of the walls cast odd lighting onto the subject that I’m shooting. So this lets me use a flash to get more lighting. But you don’t want to point it directly at your subject. I aim it to bounce the light off of a reflector or the ceiling to help eliminate the shadows.
Next, I also use a reflector for baby photography. I use the LimoStudio 43″ 5 in one photography Disc. It has 5 different reflector options in one. And it folds down for small storage. It has been so great at reflecting light and filtering out sunlight that is too harsh, that I am planning on getting another one so I can use 2 at multiple angles for even better lighting.
2 Warm Shooting Location– Babies don’t like it cold. No one likes it cold really. But babies are extra sensitive. And if you want the beautiful sleeping shots, you need to have a warm location. This means if it is cooler, then turn on the heat. Or use little portable heaters to simply warm the room where you are shooting to a cozy temperature.

Also for the backdrop you want great colors. Since we aren’t going to big expensive photographer setting, then simple things can really set up the scene. Use blankets with great colors and textures. This is where baby will lay. Great ideas include sheepskin rug, minky blanket, or a hand crocheted blanket.
I used a gorgeous blanket that my cousin crocheted for Rose made from Bernat blanket yarn. This yarn is super thick, and gives a plush feel. It is super soft and cozy and warm. And it gives a gorgeous texture for photos.

I also used a nice white ruffled blanket I bought from Etsy.

Also you will need something to prop up baby. This is where a boppy pillow is your best friend yet again! I used a boppy pillow to prop up Miss Rose for her 4 week photos. Simply place it under the blanket and you can set up baby to the position you want to shoot.
Also you can use a beanbag chair, or my favorite a fuf chair. A Fuf chair is like a beanbag chair, but the filling is different so it holds it’s shape better than a beanbag chair. And personally I think they are far more comfortable. I love our small fuf chair! I just move it right in front of the window and then I can mold it to prop up baby just right for her photos.

4 Test shoot -Once you have the scene set up you always want to take a few test shots. This is to ensure you have the proper settings before adding baby. Make sure your ISO and aperature are set right for good exposure. Check your white balance. Also check the K setting to see if your warm/cool setting needs to be adjusted. Depending on how much light is reflecting off of our colored walls, sometimes I have to change these settings on my camera to make sure the WHITE in the photo stays white and doesn’t turn yellow or blue after a photo is captured. This will save you a lot of time in photo editing later if you get your white balance and K settings set up properly before you even begin shooting.

6. Loose clothing, – Be sure to dress baby in loose clothing. If you are going for the traditional newborn photos where baby is not wearing clothes, make sure the clothing is loose so that it is easy to remove without disturbing baby after they fall asleep. Make sure to loosen the diaper so it’s easy to remove after baby is drowsy. But always make sure to remove the diaper last. And only when you are immediately ready to begin shooting. The last thing you want is to have an accident and have to clean up any potty mess before you begin shooting.
If you aren’t going for the traditional newborn look, simply make sure the clothing baby is wearing is comfortable and easy to adjust for photos.
7. Swaddle– most babies love to be swaddled. It comforts them. And also keeps them warm. I swaddled Rose in nothing but her loose diaper while I fed her. Then she was full and mellow. I positioned her then quickly but gently removed the swaddle and diaper and started shooting.
8. Binky for happy baby – if baby gets worn out or starts to fuss, a Binky can be a life saver! Give them the binky while you position the baby. Let it soothe the baby. Get set to take the shot then quickly remove binky and snap the shot. You will be able to capture the photo before baby realizes the binky is gone and starts fussing again.

Yes, I used this trick frequently when I take baby portraits of Miss Rose. And don’t worry about baby being hooked on her binky. We have a great collection of ways you can say bye bye binky when baby is older and you want to get rid of the binky habit the easy way.
9- Props– many people love the props. And yes they are adorable. Just don’t overwhelm the scene with them- the baby should be the star.
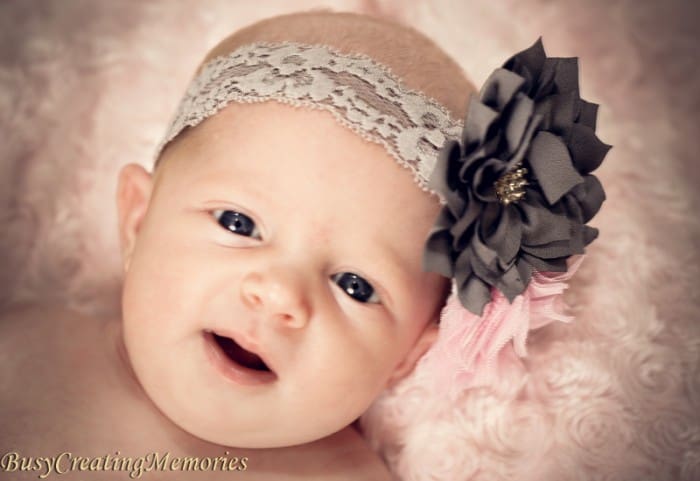
You can find amazing baby photography props on Amazon and Etsy. For boys, handmade crochet items are a hit. Or a simple tie and diaper cover. Girls you can always find amazing headbands that are just adorable for these baby portraits. You can also get adorable crochet booties for babies as well.

If you find that the headgear is too big for baby a simple tip is to fold the headband to fit and then secure with a small bobby pin in the back. I had to do this with Miss Rose because even though I ordered a newborn sized headband, her head is still too small. So this helps get the headband to sit right for the pictures.
Also you don’t have to buy a lot of items for a baby portrait session. Use what you have on hand. Make sure you have an outfit for the baby if you are going to use one, have the blanket for under the baby, then just use what is on hand. Like this shot. I used Miss Jade’s petticoat to get the white texture. I simply positioned a few ruffles on top of Rose’s feet and this is the result.

10. Stay calm – Babies don’t like to be stressed. If you’re talking and laughing loudly, they’ll be easily upset. Consider a sound machine to see if that will soothe baby. Along with that, be efficient, but don’t rush.
Take your time with each shot and that will help everyone be calm. Follow your photo position plan. Allow yourself time to position baby gently and calmly. Make sure you aren’t rushed to have another appointment, or need to pick up kids at the bus stop. Or that you don’t have a family waiting on dinner. Make sure you have plenty of time for the photography session so you can take your time.
But be deliberate in each photo. Plan ahead what type of photos you want to take before the session even begins. So you can be deliberate in each moment. Search Pinterest for great newborn portraits for ideas of how you want to position baby. Have a list of ideas. If baby is not cooperating for a position, let it go. Move onto the next position you have planned.

Now you have everything you need to know to go out and be a beginner in baby photography! The last thing you need is simply practice! You may be discouraged after your first try. That is OK. No one is perfect the first time. Don’t let that stop you. You can only get better with practice. As you do it more you will begin to develop an eye for capturing the shots. You will learn your own style and can be even more efficient the next time.
%2080%20by%2080.jpg)
Amber
Owner/Influencer at Busy Creating Memories
Besides
my quirky obsession with BBC classics, Sci-Fy, Dystopian novels,
Fantasy, DR Pepper, Chocolate, and Popcorn; I also have a passion for
photography, baking and creating recipes, crafts & crochet, tabletop
board games, and camping. My Husband and I have 4 children, 2 girls
ages 2 and 8 years. And 2 boys ages 12 and 14.I am the owner &
editor of Busy Creating Memories located just north of the greater Salt
Lake City, Utah area.
No comments:
Post a Comment
Note: Only a member of this blog may post a comment.