How to Photograph Food For Professional-Standard Shots
By Rob Wood
A great food photograph can do a lot of things – it can make a viewer hungry, it can convince a diner to order a dish and it can sell a hell of a lot of food and recipe books. But knowing how to photograph food to get great results requires a specific knowledge of what works best and what looks terrible. We have put together a few things you will need to think about when you photograph food if you want results like you see in glossy magazines and books.
Peach Salad by ralph and jenny, on Flickr
How to Prepare Food for Look, Not Taste – A Short Guide to Food Styling
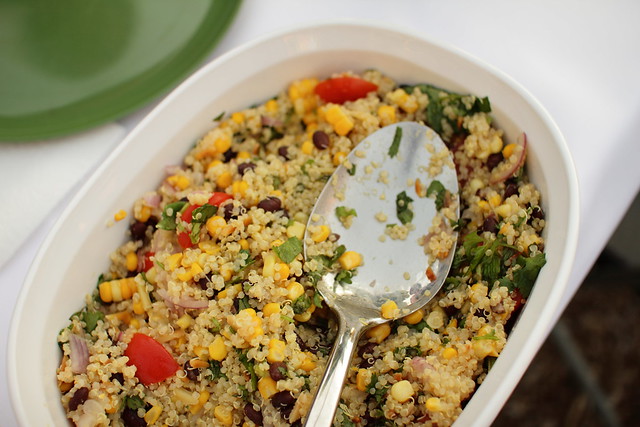
There are entire books (and careers) devoted to the topic of how to style food for a photography shoot (I don't mean photography, I mean STYLE it for a photographer). The food industry is huge and they understand the importance of great photography in selling their wares. Now, if you're serious about getting great shots (and not so much about just eating the food after the shot) then you need to prepare the food to look its best, not taste its best. So how do you do that?Are You Shooting Full-Bodied Food? In photographs, food usually looks best when it is full-bodied (as opposed to “big”). The problem is that often when you take something out of the oven, it usually loses its body in the cool air to a degree. Several photography tricks exist to account for this, but the simple ones are probably the best!
- Shoot the food while it's still very hot and fresh from being cooked.
- Build the dish so it looks full-bodied (sometimes this requires putting things on the plate but under the food to make it look fuller. Sometimes it requires piling the food on other food.)

massive attack:live with me by visualpanic, on Flickr

Chai-Kwon-Do by Kris Krug, on Flickr
Styling food also often relies on what is surrounding the dish as what is in the dish itself. Setting up the table and props can be a massive help (or hinderance) to getting a fantastic photograph of the food you are shooting in its own context. Here are a few things to think about.
Your Table Setting Can Make or Break Your Food Photographs – The surroundings that your food appears in are almost as important as the food itself. A well designed setting can give context and mood to your shot so think about it a little. What is in the background and foreground of the food? Do you want to exclude setting altogether and get an extreme close-up of only the food? Are your dishes matched to the colour of the food? Are the surroundings set up to give a balanced composition?
Elements that you would usually find in the context of a meal (condiment holders, cutlery, napkins etc) can be arranged by a stylist to help the composition. Usually you will want these elements to compliment rather than dominate the main subject – the food.
Think About Colours Outside of Your Dish – This goes back to the styling of the scene, but it's very important to consider the colours of the dishes, cutlery, table, table-cloth etc that surround your main subject as they have such an important impact on the end result.
Colours are usually very deliberately set as either contrasting or complimentary. Both can work very effectively.
On the other hand, some colours just don't work with food (light green is very tough to use if you're trying to make the food dish look appetising).
What You Need to Know About Lighting in Food Photography
Perhaps one of the biggest factors that affects the end result of a food photograph is the quality of light. The good news is that because your scene is usually portable you have a fair amount of control over the lighting situation.- Natural window lighting usually rules the roost in professional food photography. (If you can get natural window lighting on an overcast day, then you're even luckier). The soft, dispersed lighting usually given by natural window lighting that casts very soft shadows works beautifully with a lot of food photographs. Generally the best lighting is from the front side (ie coming over the shoulder of the photographer), but all angles of natural light can be made to work. Depending on how much light is available, you may need to consider a tripod.
- Reflectors – If you want to disperse the light even more or tone down some of the shadows, then reflecting natural lighting is also high on the scale of desirability. This can be done with a purpose-built reflector or you can improvise with light coloured material (white sheets/cloths) or reflective material (foil).
- Artificial Lighting – Sometimes, you're just not going to be able to get in a position to take advantage of natural lighting. Using strobes on food is a huge topic, but suffice to say that you will often need to soften and disperse the light as much as possible with the use of soft-boxes and reflectors.
- Dark Food Photography – a growing trend in some food photography is to go the low light style and a dark setting. This is more about using the dark colours of the food and its background and surroundings in combination with natural window lighting such as in the example below. It is very effective in creating mood. You can see some more amazing examples on Pinterest here.

Other Elements of Good Food Photography
Use Depth of Field Deliberately – Another key to effective food photography is knowing how to control your depth of field and doing so deliberately. As you can see with most of the examples in this article, photographers tends to use a shallow depth of field to draw the eye to a specific part of the photo (usually the main piece of food or part of it). Occasionally however, you might wish to close the aperture of your camera to capture a deeper depth of field. Both can work, but be aware of the trend towards narrow depth of field and make your decision on this to suit your own style.If you are not sure about how to do that, download our free guide to depth of field here.

banana bread by sajia.hall, on Flickr
Pick an Angle – In food photography, there are two common ways of composing basic shots. The first way involves photographing them from directly above the food – either getting a closeup of the food (like the example below) or showing the aerial map of the placement setting.
The second common angle is to shoot at an angle from the side so you can include either a foreground or background or both or the entire surrounds of the dish such as the example below. Obviously there are a thousand ways to skin that cat, but the examples on this article should give you a few ideas of the common compositions of food photography.

These little things that make our days by rennes.i, on Flickr
A Few Quick and Easy Tips for Better Food Photography
The following tips are for when you're in a bit of a rush and you just want to bash out a quick, but good food photograph. They are not set in stone by any means and there are plenty of times when you should in fact ignore them. But if you don't have too much time, following these few ideas will usually get you a better food photograph than you would have had otherwise.- Move the scene to take advantage of natural window lighting
- Limit the depth of field with a wide aperture setting (f/1.8 – f/5.6) and focus near the front edge of the food
- Either zoom right in on the food or arrange your background to give context
- Look for contrasting coloured garnish and put it on the food (bright colours like green (chives), red (chilli) and white (parmesan) tend to work well
- Keep the portions smallish so you have a definite center of interest in the photograph
- Photograph the food while it is as fresh as possible
- Print your images! It's the ultimate test for photographers. See our article on the best photo printer to see how.
Secret Food Styling Tricks
While there are a few photography tricks to getting great shots, there are also a few quick and easy food styling tricks to make sure the food looks as good as possible before you shoot it. Here are some to keep in mind.- Anything green (like lettuce leaves) will look greener and fresher by soaking it in ice-water for a few minutes before the shot. Shake them dry before you photograph them.
- Brush some oil on hot food to make it look fresher for the photograph, especially if it has been sitting around for a while
- Don't put too much dressing on salad for photographs – it makes the salad look limp.
- Fresh is best – for both taste and looks.
- Undercook the food – it looks fresher and brighter for the photograph.
- Make sure the plates and settings are really clean – spots of errant food on the tablecloth or where it shouldn't be can ruin a photo.
No comments:
Post a Comment
Note: Only a member of this blog may post a comment.