#ACX, Photography Tips, Basic Photography
The Best Lens for Wedding Photography in 2023 (Updated)
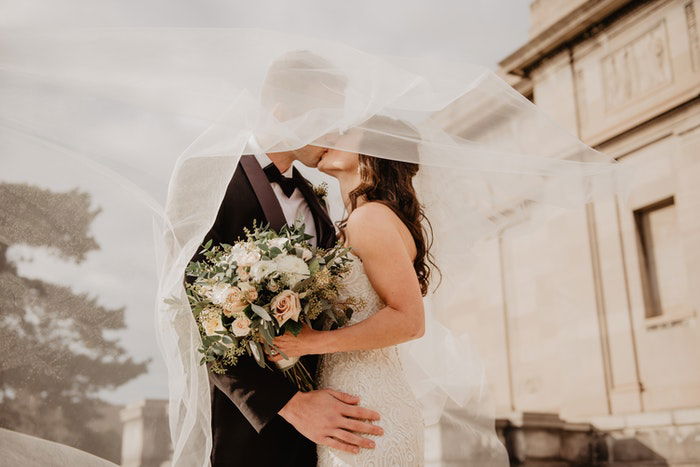
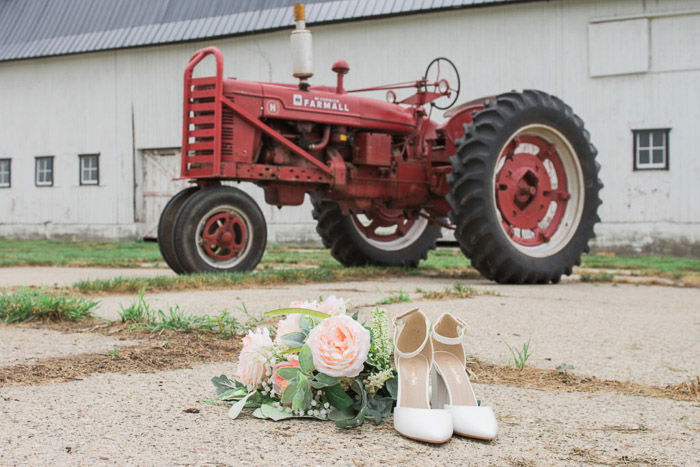
Having the best lens for wedding photography will help you capture those special moments, no matter where they occur.
Lenses come in all shapes and sizes. They also vary in cost. In this article, we have collected some of the most recommended lenses for wedding photography.
If you can only choose one lens, then a fast 70-200mm zoom would be ideal. For Canon users, that would be this fantastic Canon EF 70-200mm f/2.8L lens.
Navigate to the wedding photography lens of your choice here:
- 24-70mm f/2.8
- 70-200mm f/2.8
- 85mm and 50mm prime lenses
- 35mm prime lenses
- Macro lenses
- The Impact of Choosing the Right Lens for Wedding Photography
Camera lenses come in dozens of different focal lengths. They have different apertures and features.
The best lens differs from photographer to photographer. It’s based on shooting style and the brand of the camera body. Some wedding photographers favor bright primes with two bodies for fast access. Others prefer the ease and range of a zoom lens.
Owning more than one wedding lens allows you to capture the moment in a cramped, dim reception venue, as well as in a wide-open, brightly lit park. But there are a few features and focal lengths that are standard for the pro wedding photographer.
The following list includes everything. From lenses for multiple camera bodies (such as Nikon, Canon, Sony, and Fujifilm) to third-party lenses that are available for multiple mounts.
Before we look at the details of our chosen lenses, here’s a table of all the lenses for wedding photography in this review.
Best 24-70mm f/2.8 Wedding Photography Lenses
This wide to medium zoom lens covers a solid range of focal lengths and still packs in a bright aperture.
The lens is wide enough to capture the entire ceremony in one shot. You can adjust the telephoto end for closer shots and even portraits, so it also comes in handy for those family formals.
As a popular wedding photography lens, some manufacturers have multiple versions of it. The difference is often optical image stabilization (IS).
That stabilization helps shoot those dimly lit spaces, especially at slower shutter speeds. This allows you to drop the ISO down. But stabilization isn’t as essential in a wide-angle lens as it is for telephoto and macro.
Due to its popularity, third-party manufacturers got in on the action too. This could help you save some cash when choosing gear for wedding photography.
- Fast f/2.8 maximum aperture
- Up to 4 stops of IS
- Strong construction
- Always-avaliable manual focus
- Fast and silent USM AF motor
- Sharp across all apertures
- Weather-sealed construction
- Great contrast
- Smooth bokeh
- Focus hold button
- ED and Super ED lens elements
- TIPA Award winner
- Great value lens
- Available for several mounts
- In-lens IS
- Quiet HSM AF motor
- Weather and dust-sealed
- 24-84mm full frame equivalent
- ED and aspherical lens elements
- Nano-coating to reduce flare
| Brand | Nikon |
| Lens Mount | F-Mount |
| Focal Range | 24-70 mm |
| Maximum Aperture | f/ 2.8 |
| Image Stabilization |
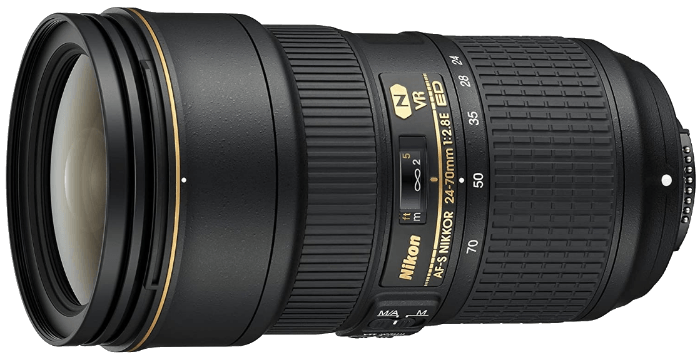
This Nikon AF-S 24-70mm f/2.8 is fast, sharp, and performs well in low light. You’ll appreciate the fast constant f/2.8 maximum aperture in low-light interior wedding shots. Especially in combination with Vibration Reduction (Nikon’s version of IS).
Both ends of the zoom range are useful at a wedding. The 70mm length is ideal for couples portraits, and you can count on beautiful bokeh. At 24mm, the wide end will help you fit everyone in without distortion.
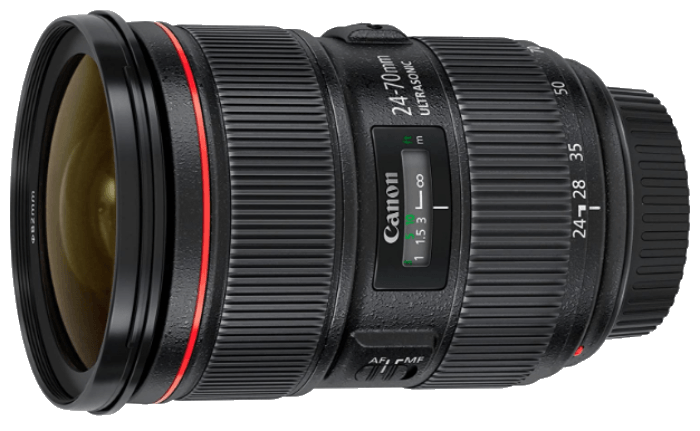
2. Canon EF 24-70mm f/2.8L II USM
| Brand | Canon |
| Lens Mount | EF-Mount |
| Focal Range | 24-70 mm |
| Maximum Aperture | f/ 2.8 |
| Image Stabilization |
The Canon EF 24-70mm f/2.8L II is a versatile telephoto that is sharp with solid bokeh. Some people think this lens is the ultimate wedding photographer’s glass. Like the Nikon before, it has two of the most useful focal lengths. And the f/2.8 maximum aperture produces bright images in demanding settings.
Autofocus with this lens and a matching Canon EOS full frame camera will rarely disappoint. It has pro-level construction and weather sealing. So you’ll find that the bride and groom will run for cover before you do.
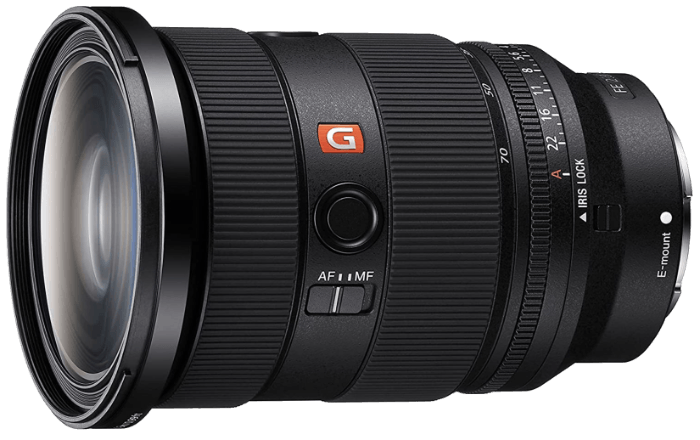
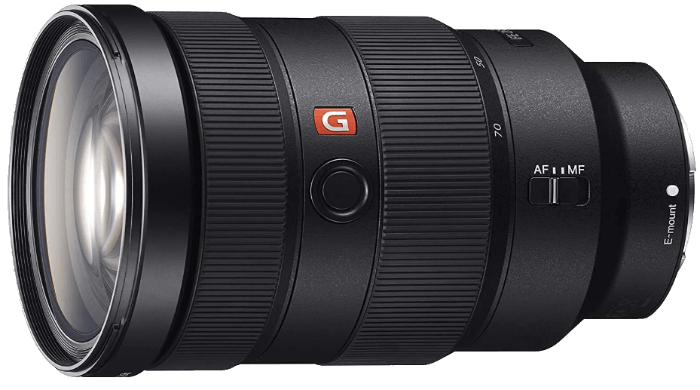
3. Sony FE 24-70mm f/2.8 GM
| Brand | Sony |
| Lens Mount | E-Mount |
| Focal Range | 24-70 mm |
| Maximum Aperture | f/ 2.8 |
| Image Stabilization |
Owners of this Sony FE 24-70mm f/2.8 praise the bokeh and sharpness and even the video performance. A combination of Extra-Low Dispersion (ED) and Super ED glass helps to make the images sharp and glare-free. The extreme aspherical lens element reduces aberration.
The result of all this tech is a super-sharp lens that is ideal for the wedding photographer. Extensive weather sealing and a useful zoom lock will be appreciated by the busy pro.
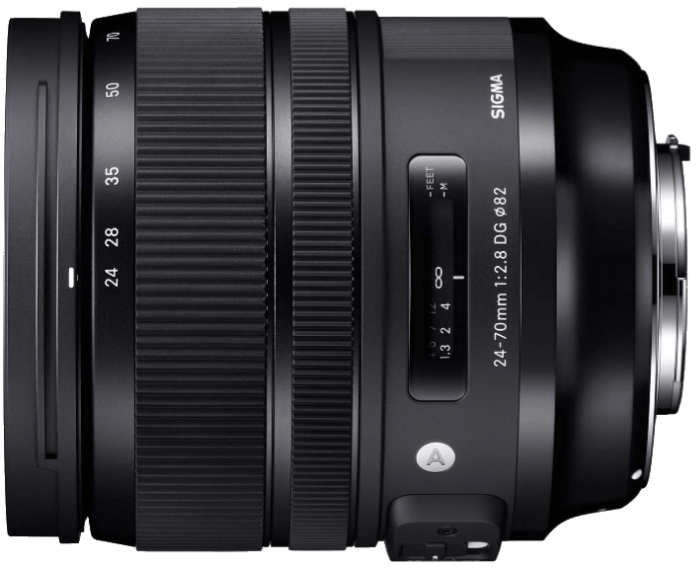
4. Sigma 24-70mm f/2.8 DG OS HSM Art
| Brand | Canon |
| Lens Mount | EF-Mount |
| Focal Range | 24-70 mm |
| Maximum Aperture | f/ 2.8 |
| Image Stabilization |
This Sigma 24-70mm f/2.8 offers a similar range and bright aperture for a significantly lower price. Sigma Art lenses have a loyal following. A wedding photographer friend of mine uses them exclusively on her Canon. And her photos are luminous and beautiful.
Which makes the price of this lens all the more remarkable. It has all the qualities you would want in a pro lens. Quick and reliable autofocus, weather sealing, and aspherical lens elements make this a top-notch lens. Sigma makes this Art lens to fit Canon EF, and Nikon F mount cameras.
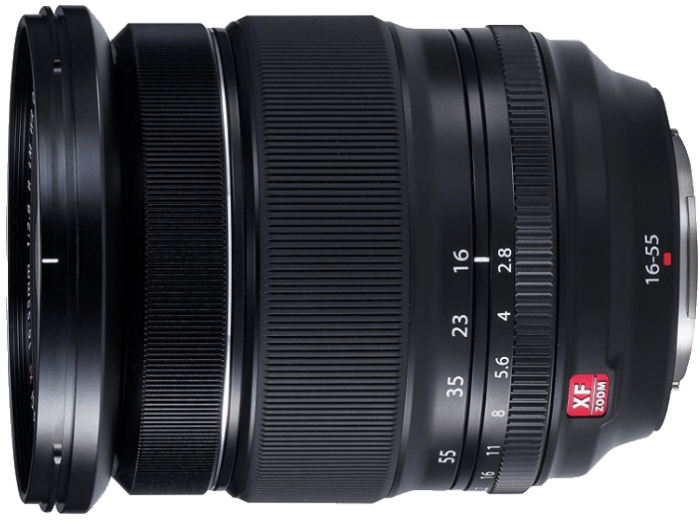
5. Fujifilm XF 16-55mm f/2.8 R LM WR
| Brand | Fujifilm |
| Lens Mount | X-Mount |
| Focal Range | 16-55 mm |
| Maximum Aperture | f/ 2.8 |
| Image Stabilization |
This Fujifilm XF 16-55mm f/2.8 is equivalent to a 24-84mm on a full frame camera. So it offers a more typical portrait length and still has the useful 24mm wide angle. It maintains the essential wide aperture for many low-light scenarios. And it offers the sharpness that a wedding photographer needs.
It combines aspherical elements with ED elements to control aberration and flare. It is also weather sealed for constant professional use, whatever the climate. If you are a Fujifilm camera user, this should definitely be on your list of wedding photography lenses!
Best 70-200mm Lenses for Wedding Photography
The 70-200mm offers a versatile zoom range and enough focal length to help the subject pop from the background.
The 70-200mm is great for capturing details and close-ups. The long zoom range also makes the lens an option for the portrait section of the day. Its length will help create softer backgrounds. All this while having the aperture a bit wider to keep both the bride and groom in focus.
There’s a downside though. The long focal length and bright aperture mix make this lens a heavy piece of glass. It’s also an expensive addition to your wedding photography kit.
The general rule is to keep your shutter speed above the focal length. While it’s easy to shoot a 50mm at 1/50 s in limited light but the 1/200 s suggested for a 200mm is harder to do. This is where that lens stabilization comes in.
The longer the lens, the more important image stabilization is. If you can only afford to get stabilization on one lens, get it on the longest one in your bag.
Many wedding photographers use both a 24-70mm and a 70-200mm to capture the wedding day. These work particularly well during parts of the day when the pace of events isn’t ideal for lens swaps.
As far as wedding lenses go, this is the most necessary addition.
- Weather-sealed rugged construction
- Up to 4 stops IS, including panning mode
- Fast f/2.8 maximum aperture
- Super-quiet AF motor
- Adjustable focus and IS modes
- Beautiful bokeh
- Fast and accurate AF
- Bright and sharp at all apertures
- Lightweight but robust
- Excellent bokeh
- Fast lockable autofocus
- Corner-to-corner sharpness
- Up to 5 stops IS
- Fluorine-coated front element
- Smooth bokeh
- Focuses as close as 37.4" (95 cm)
- Good value lens
- Five different low dispersion glass elements
- Super-quiet AF motor
- Impressive edge-to-edge sharpness
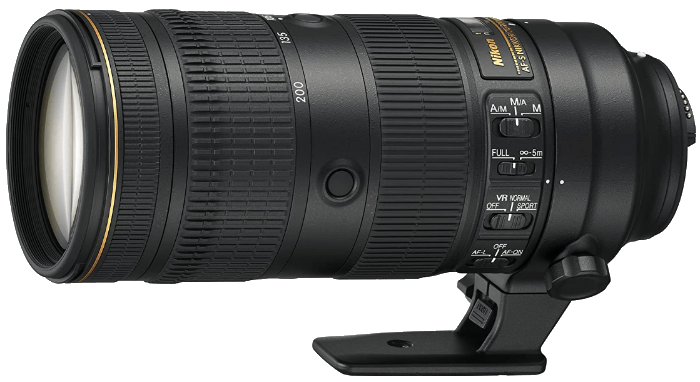
| Brand | Nikon |
| Lens Mount | F-Mount |
| Focal Range | 70-200 mm |
| Maximum Aperture | f/ 2.8 |
| Image Stabilization |
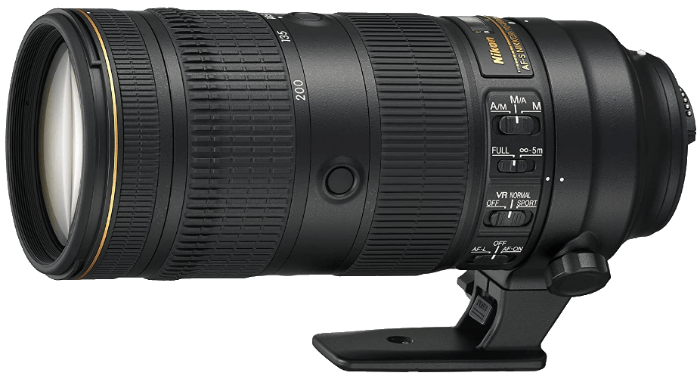
The Nikon AF-S f/2.8 is a top-quality professional lens with a price to match. But it has features that a working pro appreciates. These include a solid build, weather sealing, and a fast constant f/2.8 aperture. These are things that make the difference. Other great features are the focus lock and quick AF with a silent wave motor.
This Nikon delivers beautiful bokeh, edge-to-edge sharpness, and bright and clear images. And it’s why it’s a favorite among working professional Nikon users.
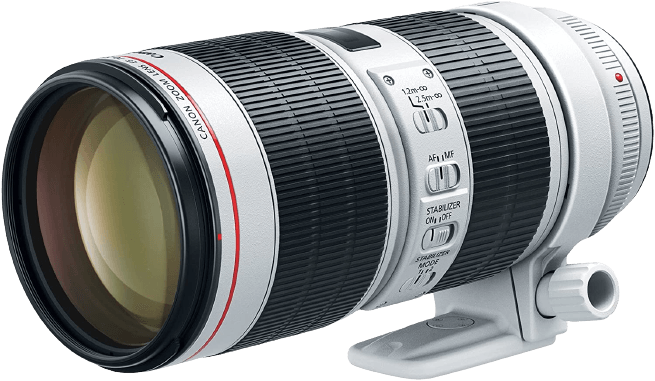
2. Canon EF 70-200mm f/2.8L IS III
| Brand | Canon |
| Lens Mount | EF-Mount |
| Focal Range | 70-200 mm |
| Maximum Aperture | f/ 2.8 |
| Image Stabilization |
Canon photographers rave about the Canon EF 70-200mm f/2.8L‘s mix of sharpness and bokeh with the telephoto zoom range. And they are right. I’ve used one quite a lot, and it is a joy. For portraits and shots from the back of the church, it shines. The bokeh defines the word “creamy.”
When you look at the results, you will think you were mistaken at how dark the church was. In the images, the interiors will glow. It’s solid and well made. The EF 70-200mm f/2.8L will endure everything that a wedding photographer’s life will throw at it.
3. Sony FE 70-200mm f/2.8AF GM OSS
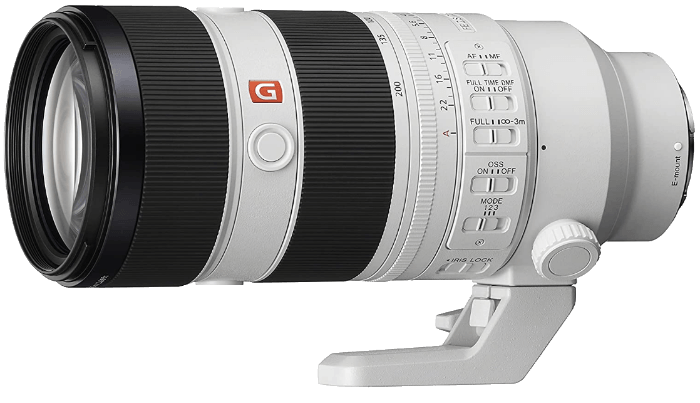
| Brand | Sony |
| Lens Mount | E-Mount |
| Focal Range | 70-200 mm |
| Maximum Aperture | f/ 2.8 |
| Image Stabilization |
This Sony FE 70-200mm f/2.8AF brings a pro-level 70-200mm lens to the Sony E-mount. The gray color sets it apart as a serious lens. And its specifications fit with this designation. It boasts a constant f/2.8 maximum aperture and twin linear motors for the AF.
Magnesium alloy construction brings lightness and strength. And weather sealing means that the rain won’t bring anxiety for your kit. Sony has the video community in mind, so you’ll find little focus breathing and very fast AF. All in all, the FE 70-200mm f/2.8 is a very competent lens for the busy professional.
4. Tamron SP 70-200mm f/2.8 Di VC G2
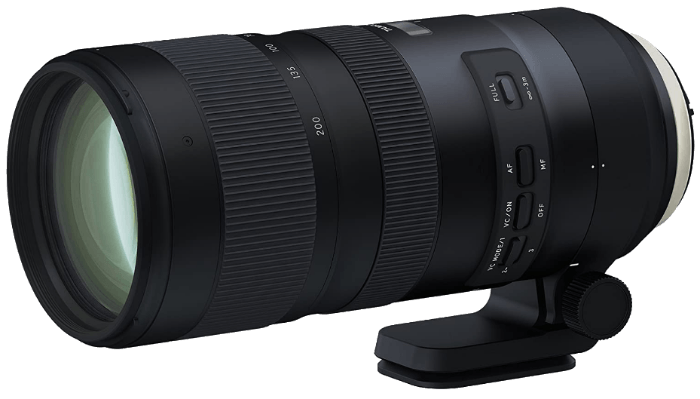
| Brand | Tamron |
| Lens Mount | F-Mount |
| Focal Range | 70-200 mm |
| Maximum Aperture | f/ 2.8 |
| Image Stabilization |
Third-party lenses are generally cheaper than the OEM equivalent. This Tamron SP 70-200mm f/2.8 is no exception. You will generally save 30% or more over the OEM. And in this case, without much penalty.
The Tamron is optically superb. It has the same constant f/2.8 maximum aperture and excellent sharpness. The bokeh is as fantastic as its more expensive rivals. AF is fast and quiet, and the 3-mode IS is very effective.
If you use automatic lens corrections in-camera, then this isn’t the lens for you. Unlike own-brand lenses, Nikon and Canon do not supply profiles for this lens. So this would have to be done in post.
But for day-to-day performance, this is an excellent choice. It is available for Nikon and Canon.
5. Sigma 70-200mm f/2.8 EX DG APO OS HSM
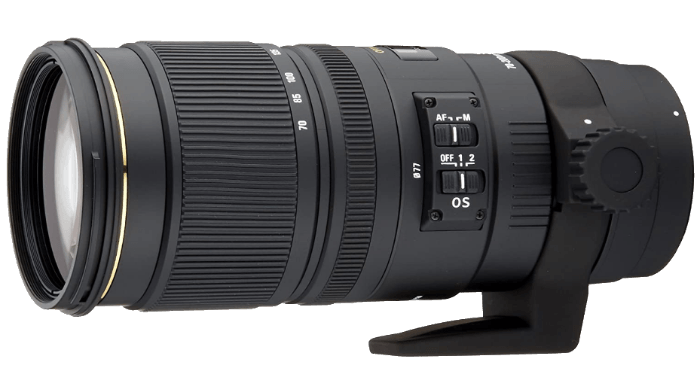
| Brand | Sigma |
| Lens Mount | EF-Mount |
| Focal Range | 70-200 mm |
| Maximum Aperture | f/ 2.8 |
| Image Stabilization |
Sigma doesn’t make an Art 70-200mm zoom. But this Sigma 70-200mm f/2.8 DG OS HSM lens is still superb. It’s generally more expensive than the Tamron, it’s still cheaper than an OEM lens.
But it doesn’t skimp on features or quality. Image sharpness is excellent and bokeh is nearly on a par with the Canon. Autofocus is quick and nearly silent. AF can be limited to reduce hunting, and there are two IS modes to account for panning as well as general shake.
And the Sigma has one extra trick up its sleeve (or magnesium barrel). It comes in the form of a programmable function button on the lens. It’s a pro-level lens with a considerable cost saving over its OEM rivals. It is available for Nikon and Canon mounts.
Best 85mm and 50mm Prime Lenses for Wedding Photography
Prime lenses offer a brighter aperture than the 70-200mm ones. Some brands even offer more efficient autofocus and higher-quality shots. Without all those zoom components, most prime lenses are also lighter and cheaper.
The 85mm is an excellent focal length for portraits, particularly on full frame cameras. The focal length is more flattering than a wider angle. But it still allows you to take portraits in venues with limited space.
Although the background separation isn’t quite as nice as an 85mm, the 50mm is also a popular choice for portraits. For wedding photographers who need to make the budget, a 50mm lens is an excellent option. It offers that bright aperture without the big price tag.
The brighter aperture of an f/1.8 prime will allow for even smoother backgrounds in portraits. Some brands go even wider, down to f/1.4 or f/1.2.
The wider aperture is also excellent for limited light when that f/2.8 isn’t enough to get a nicely lit shot. This lens is helpful during ceremonies and other low-light portions of the day.
- Excellent optical quality
- Great value at the price
- Solid build quality
- Smooth, attractive bokeh
- Fast maximum aperture
- Good bokeh at wider apertures
- Sharp images at all apertures
- Quite compact for an 85mm full frame lens
- Small and lightweight
- Great value
- Fast silent focus with the USM motor
- Fast sharp f/1.8 maximum aperture
- Fast f/1.8 maximum aperture
- ED element for reduced chromatic aberration
- Edge-to-edge sharpness
- Exceptional bokeh
- Very sharp at all apertures
- Distortion-free
- Superb smooth bokeh
- All-metal construction
- Fast f/1.4 maximum aperture
- Always-available manual focus
- Compact and lightweight
- Silent USM AF motor
- Inexpensive prime lens
- Fast and accurate AF
- Good bokeh
- Compact and lightweight
- Exceptionally light and compact
- Great value
- Great bokeh
- Distortion-free
| Brand | Sigma |
| Lens Mount | EF-Mount |
| Focal Range | 85 mm |
| Maximum Aperture | f/ 1.4 |
| Image Stabilization |
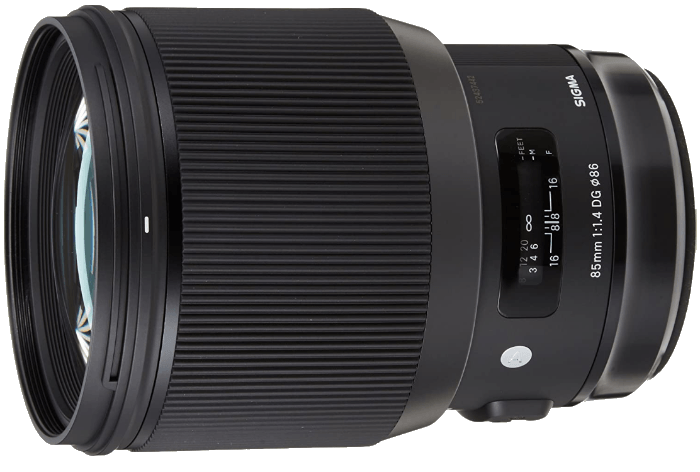
This Sigma 85mm f/1.4 is another high-quality offering in the Sigma Art range of lenses. Built with the professional in mind, it has a weather-sealed body and full-time manual focus.
Bright, sharp images show minimal aberration, and the f/1.4 maximum aperture is perfect for low-light situations. And importantly for a portrait lens, you get smooth bokeh.
Low dispersion glass, a hypersonic motor, and multicoating complete the specs for this impressive lens. The Sigma 85mm f/1.4 is not cheap. But it is a quality lens.
2. Nikon AF-S 85mm f/1.8G
| Brand | Nikon |
| Lens Mount | F-Mount |
| Focal Range | 85 mm |
| Maximum Aperture | f/ 1.8 |
| Image Stabilization |
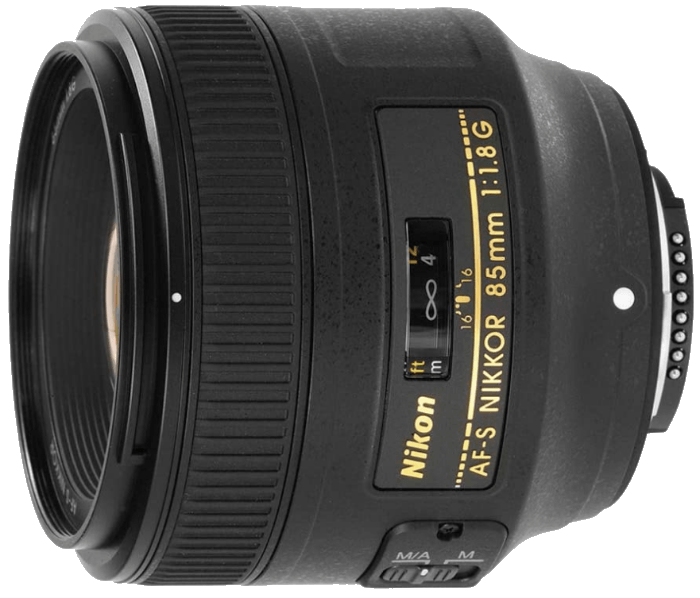
Bright and affordable, the Nikon AF-S 85mm f/1.8G is Nikon’s best portrait lens for a wedding photographer with a smaller budget. It is exceptionally sharp, with little-to-no distortion or aberration.
It has a gasket to seal the lens-to-camera connection that protects your camera’s internals. And it has constant manual focus available.
If your budget is tight, the Nikon AF-S 85mm f/1.8G will deliver sharp, bright images at a very reasonable cost.
3. Canon EF 85mm f/1.8 USM
| Brand | Canon |
| Lens Mount | EF-Mount |
| Focal Range | 85 mm |
| Maximum Aperture | f/ 1.8 |
| Image Stabilization |
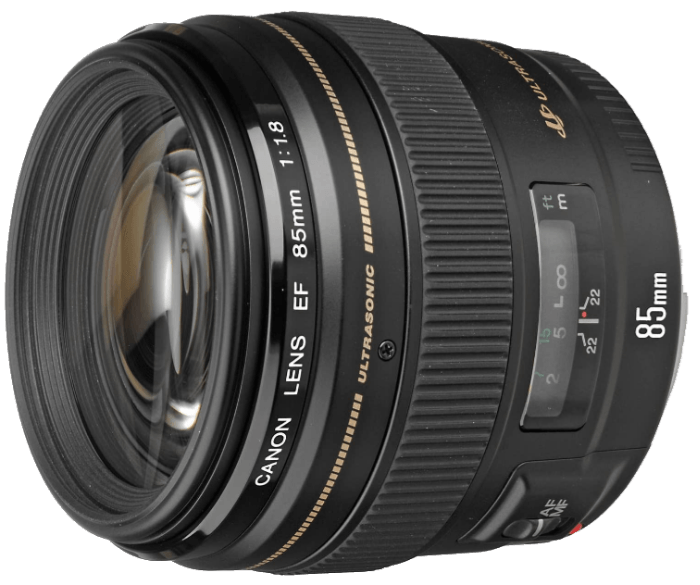
As a portrait favorite, this Canon EF 85mm f/1.8 lens delivers exceptionally sharp images. The almost-silent USM focus motor is fast and accurate. And the bokeh is as good as you can get. This is important for your wedding photography.
It’s not an L series lens, so the price is very reasonable. It is small and lightweight, so it’s easy to carry in your camera bag. And it won’t disappoint with image quality.
This Canon EF 85mm f/1.8 is a great choice for Canon users of all kinds, not just wedding photographers.
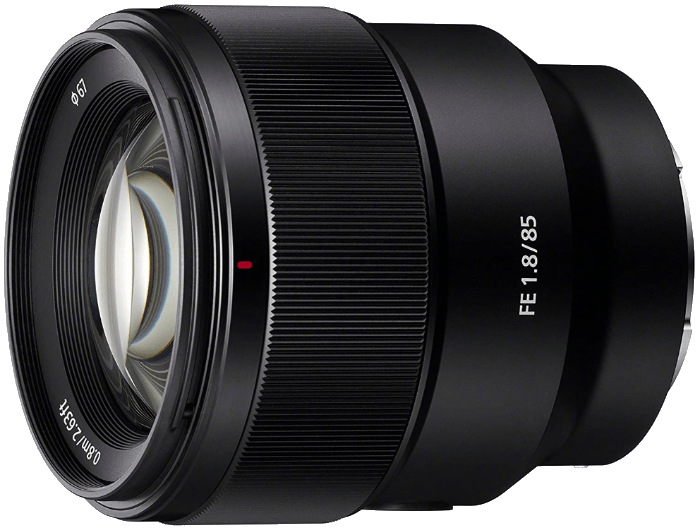
4. Sony FE 85mm f/1.8
| Brand | Sony |
| Lens Mount | E-Mount |
| Focal Range | 85 mm |
| Maximum Aperture | f/ 1.8 |
| Image Stabilization |
This Sony FE 85mm f/1.8 is a popular option for Sony shooters, it is noted for its sharpness and compact size. It is another example of a less expensive lens performing almost as well as its more expensive counterpart.
This lens has superb optics. And its compact size works well with mirrorless cameras. The autofocus is super fast and silent. And the bokeh is breathtaking.
If you’re looking for a portrait lens for your Sony camera, then this Sony FE 85mm f/1.8 is likely to impress.
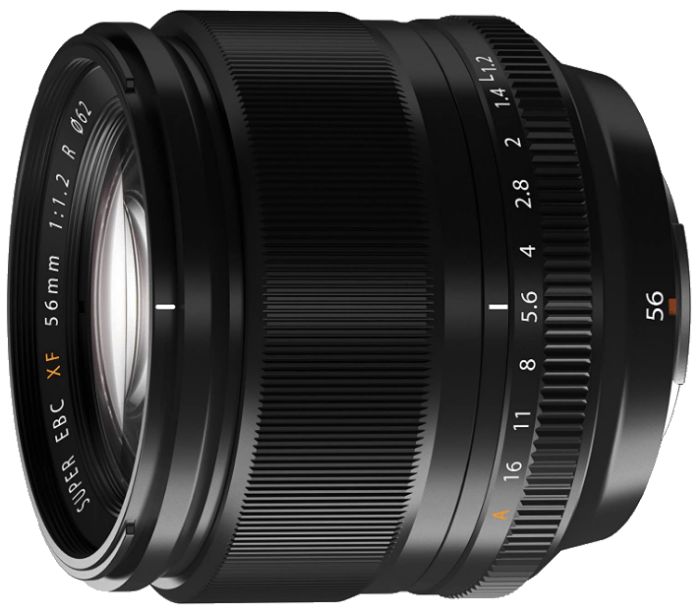
5. Fujifilm XF 56mm f/1.2
| Brand | Fujifilm |
| Lens Mount | X-Mount |
| Focal Range | 56 mm |
| Maximum Aperture | f/ 1.2 |
| Image Stabilization |
This Fujifilm XF 56mm f/1.2 is equivalent to an 85mm lens on a full frame camera. It produces pleasingly sharp images and has excellent bokeh. The f/1.2 maximum aperture makes this very fast for the price.
Some reviews report that the autofocus is not as fast or reliable as the user might hope. This might, of course, depends on the camera model being used as well. But there are no complaints about the quality of the images the Fujifilm XF 56mm f/1.2 produces. It’s a good choice for a Fujifilm camera user.
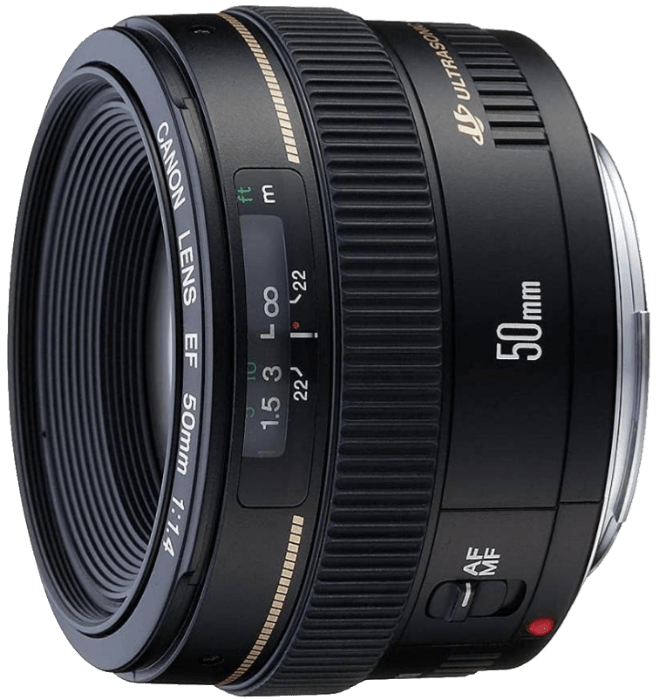
1. Canon EF 50mm f/1.4 USM
| Brand | Canon |
| Lens Mount | EF-Mount |
| Focal Range | 50 mm |
| Maximum Aperture | f/ 1.4 |
| Image Stabilization |
With a super bright f/1.4, this Canon EF 50mm f/1.4 has a lot to love about it. It hits the sweet spot between speed and affordability. The Canon EF 50mm f/1.8 STM is much much cheaper. And the Canon EF 50mm f/1.2L much more expensive.
But this f/1.4 lens produces clear and sharp images in very poor light. If you’ve only experienced zoom lenses at f/4 or above, you will be amazed at what you can achieve with an f/1.4!
The 50mm lens is perfect at a wedding for capturing groups of people without distorting the image. This Canon EF 50mm f/1.4 is the sort of lens that you might rarely take off your camera.
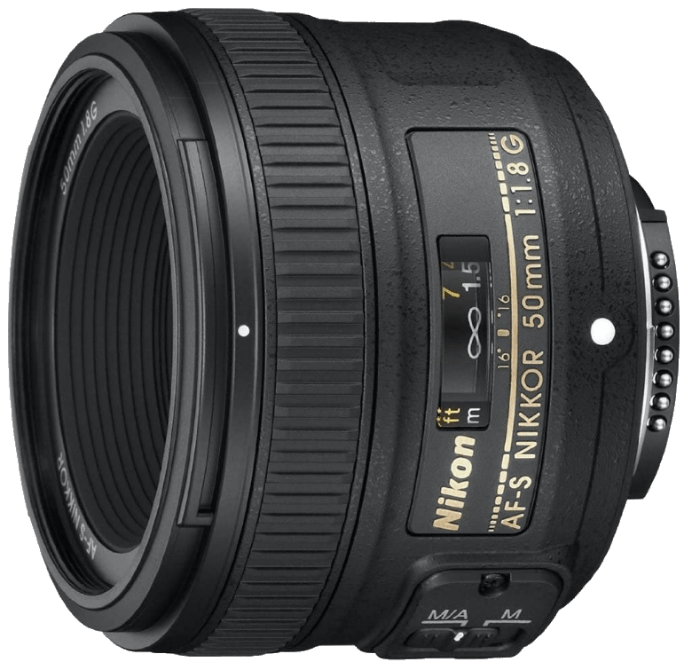
2. Nikon AF-S 50mm f/1.8
| Brand | Nikon |
| Lens Mount | F-Mount |
| Focal Range | 50 mm |
| Maximum Aperture | f/ 1.8 |
| Image Stabilization |
The Nikon AF-S 50mm f/1.8 is a nice portrait lens that performs well in low light without breaking the bank. The Nikon AF-S 50mm f/1.4G is also excellent. But it sits at about twice the price in exchange for that lower aperture.
This lens is super sharp and has a fast autofocus that’s nearly silently. You can override the AF at any time with the manual focus ring.
Bokeh is pleasingly good, and will give your wedding photos a pleasant backdrop. This Nikon AF-S 50mm f/1.8 is a great choice for Nikon users.
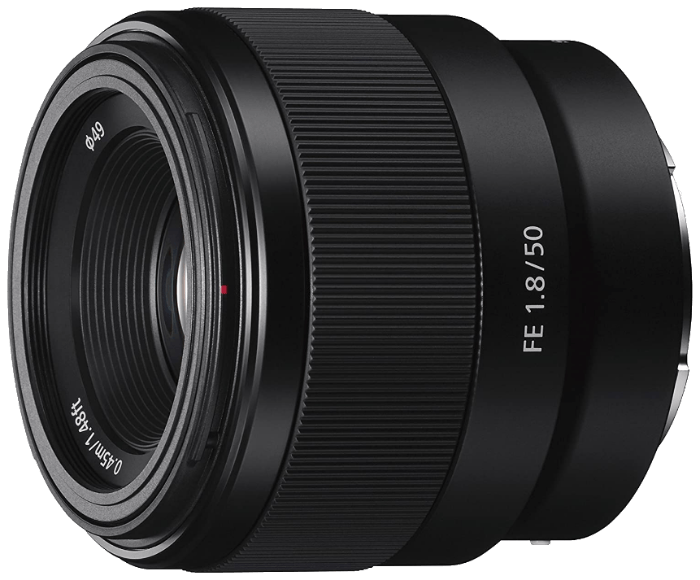
3. Sony - FE 50mm f/1.8
| Brand | Sony |
| Lens Mount | E-Mount |
| Focal Range | 50 mm |
| Maximum Aperture | f/ 1.8 |
| Image Stabilization |
Affordable and bright, this Sony FE 50mm f/1.8 is a good portrait option. The optics are super sharp. Bokeh is outstanding and among the best you will find.
This isn’t an expensive lens, although it is when compared to, say, the Canon f/1.8. This makes the slightly slow and noisy AF more of a disappointment.
Any distortion of aberration is capably dealt with by the camera’s built-in compensation settings. The camera also handles the programming of the electronic manual focus ring. You will have to choose the correct settings to make that available.
A fast 50mm lens is as close as you get to a “must-have” lens. For Sony users, the Sony FE 50mm f/1.8 should be high on the list. Best 35mm Lenses for Wedding Photography
Wedding photography involves storytelling. And sometimes you need a wider lens to capture the shots that tell the story. A prime 35mm is brighter and lighter than a wide telephoto lens.
35mm prime lenses are often bright and affordable. These are excellent for everything. From capturing the entire ceremony setup in one shot to photographing the entire dance floor.
- Compact and lightweight
- Fast f/1.8 maximum aperture
- Fast AF, with always-available manual
- Almost completely flare-free
- Exceptionally sharp at all apertures
- Silent AF with the USM motor
- Always-available manual focus
- Beautifully-balanced and easy to use
- Fast f/1.4 maximum aperture
- Updatable firmware via optional dock system
- Bright clear images
- Great value lens
- All-metal, weather-sealed construction
- Light and compact
- Aperture ring
- No focus breathing
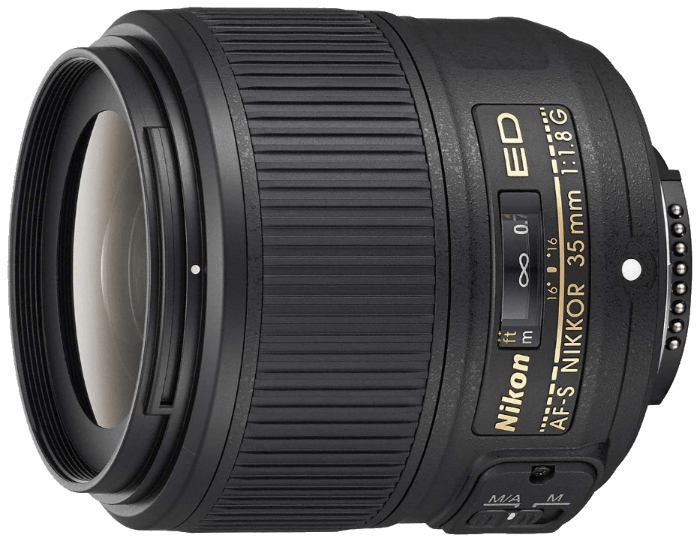
| Brand | Nikon |
| Lens Mount | F-Mount |
| Focal Range | 35 mm |
| Maximum Aperture | f/ 1.8 |
| Image Stabilization |
Wide, bright, and lightweight, this Nikon AF-S 35mm f/1.8G is a popular option for getting wide shots of the wedding day. It has top-notch optical quality and a fast, accurate autofocus. Manual focus override is available at all times via the focus ring.
It’s a neat and compact lens, with little noticeable distortion or aberration. Flare and ghosts are almost nonexistent.
The Nikon AF-S 35mm f/1.8G is a solid choice of medium wide-angle lens for the Nikon camera user.
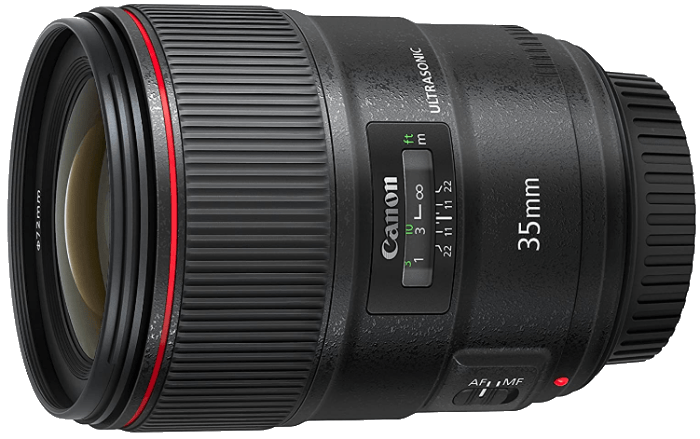
2. Canon EF 35mm f/1.4 L II USM
| Brand | Canon |
| Lens Mount | EF-Mount |
| Focal Range | 35 mm |
| Maximum Aperture | f/ 1.4 |
| Image Stabilization |
This Canon EF 35mm f/1.4L lens is pricey for a prime. But photographers who have shot with it praise its sharpness as well as that extra-wide aperture. Image quality is superb. This is a combination of pin-sharp optics, negligible distortion, and almost nonexistent flare and ghosting.
Although you pay a lot of money for this lens, you feel its quality in its build quality. It feels sturdy and is weather sealed for demanding pro use. Everything works smoothly. Autofocus is fast and quiet, like we’ve come to expect from a Canon.
Anyone looking for a top-quality medium-wide lens for their Canon will be delighted with the Canon EF 35mm f/1.4L.
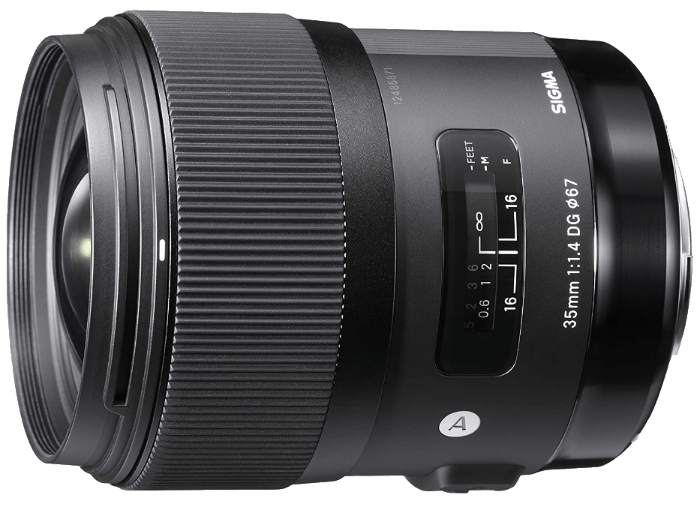
3. Sigma 35mm f/1.4 Art DG HSM
| Brand | Sigma |
| Lens Mount | EF-Mount |
| Focal Range | 35 mm |
| Maximum Aperture | f/ 1.4 |
| Image Stabilization |
It’s a familiar pattern by now. A Sigma Art lens that delivers superb performance at a less terrifying price than an OEM lens. The Sigma 35mm f/1.4 Art delivers superb images, and is built like a proper pro lens.
Weather sealing, a hypersonic focus motor, and various low- or super-low dispersion elements contribute to its performance. It’s a top-quality lens that will survive heavy daily use. The Sigma 35mm f/1.4 Art is available for Canon and Nikon cameras.
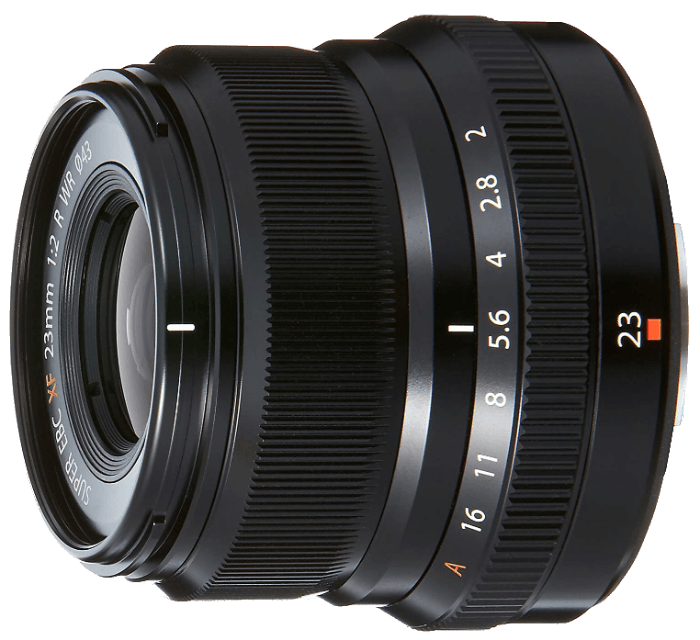
4. Fujifilm XF 23mm f/2 R WR
| Brand | Fujifilm |
| Lens Mount | X-Mount |
| Focal Range | 23 mm |
| Maximum Aperture | f/ 2.0 |
| Image Stabilization |
This Fujifilm XF 23mm f/2 R compact lens is the equivalent of a 35mm on a full frame camera. It is particularly attractive in its silver version. It’s perfect if you have the beautifully-stylish Fujifilm X-T4 to pair it with.
Looks aren’t everything, of course. But here the looks reflect the quality. It’s mainly metal construction with etched numbers and includes an aperture ring. The optics won’t disappoint, either. Images are sharp and clear and it delivers beautiful bokeh as well.
If video is important to you, then you’ll like the absence of focus breathing with the XF 35mm f/2 lens.
Best Macro Lenses for Wedding Photography
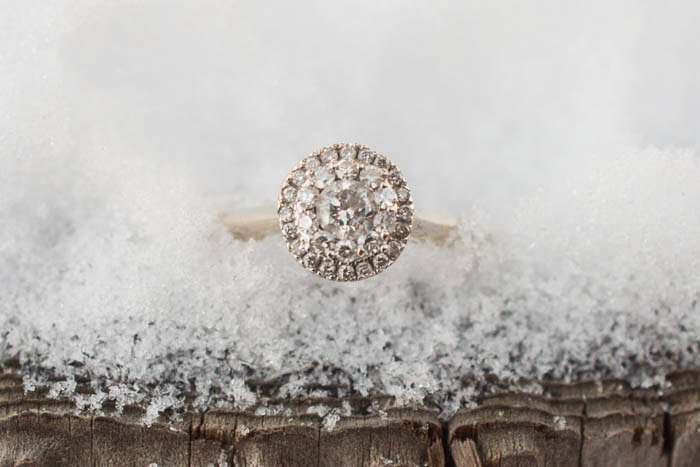
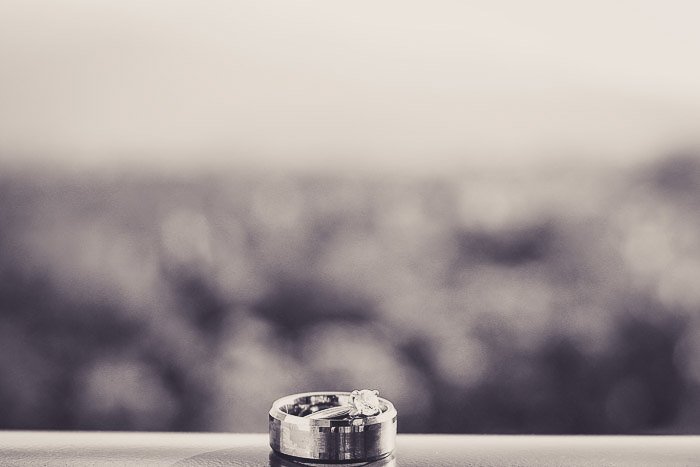
Ring shots and detail photos may only make up some of the wedding albums, but they are important.
Along with ring shots, a macro lens captures other details like flowers or architecture. You can even use them for portraits, like a shot of the bride’s eyelashes and makeup.
Macro lenses come in all different focal lengths and apertures. A longer focal length will offer more separation for the background. But getting close-up shots on a macro level already provides significant softness. That means an f/1.2 isn’t necessary for a wedding photographer.
If you do pick up a brighter macro lens, you don’t have to use it for just macro. Many lenses allow you to switch off the close-up mode, which results in shooting like a normal lens. Buying a bright macro that doubles as a portrait prime can help stretch the budget.
Like with a telephoto, stabilization is more important on a macro than a wide-angle. The close magnification will exaggerate any camera shake.
- Fast autofocus
- Always-available manual focus
- Genuine macro 1:1 reproduction
- Pleasing bokeh
- Superb image quality
- Lightening-fast, silent autofocus
- Beautiful bokeh
- Fully weatherproof
- Great price for the lens quality
- Amazing optical stabilizer
- Floating Inner Focus
- Fast auto focus abilities
- Simple push-pull A/M focus switch
- Fast, silent AF
- Excellent bokeh
- Superbly sharp images
- Superb optics
- Up to 5 stops of IS
- Weather-sealed
- Fast and accurate AF
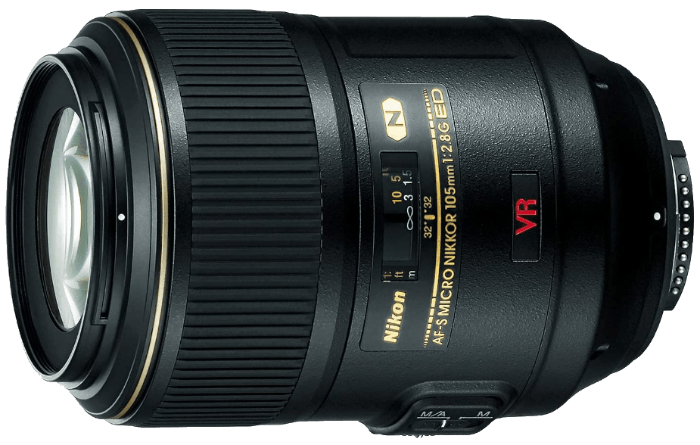
| Brand | Nikon |
| Lens Mount | F-Mount |
| Focal Range | 105 mm |
| Maximum Aperture | f/ 2.8 |
| Image Stabilization |
This Nikon AF-S FX 105mm f/2.8 has a life-sized 1:1 magnification and stabilization. It is very good value. With sophisticated multi-coatings and aspherical elements, the image quality is excellent.
Bokeh is good and smooth. Of course, macro is the main reason you might buy this lens. True 1:1 reproduction comes with this lens, and the performance is great. The biggest drawback is the focus breathing. Normally it’s only a consideration for video, but it can be an issue for macro work. You might frame your subject, then focus, then find the framing is now all wrong. It takes some practice.
But for the money you get a reasonably fast f/2.8 105mm lens with an added macro bonus. This makes the AF-S FX 105mm f/2.8 an attractive proposition.
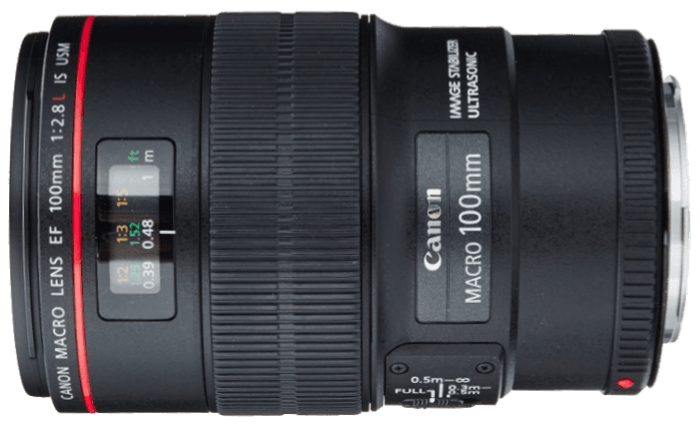
2. Canon EF 100mm f/2.8L Macro IS USM
| Brand | Canon |
| Lens Mount | EF-Mount |
| Focal Range | 100 mm |
| Maximum Aperture | f/ 2.8 |
| Image Stabilization |
This Canon EF 100mm f/2.8L Macro has an excellent reputation. It is perhaps best thought of as a medium telephoto lens with the added bonus of macro. This makes it perfect for weddings.
You might want a close-up of the flowers, rings, or details of the dress. But most of all you want a lovely portrait-length lens with smooth bokeh, image stabilization, and a fast maximum aperture.
In every other way, the Canon EF 100mm f/2.8L Macro delivers the quality you expect from an L-Series lens.
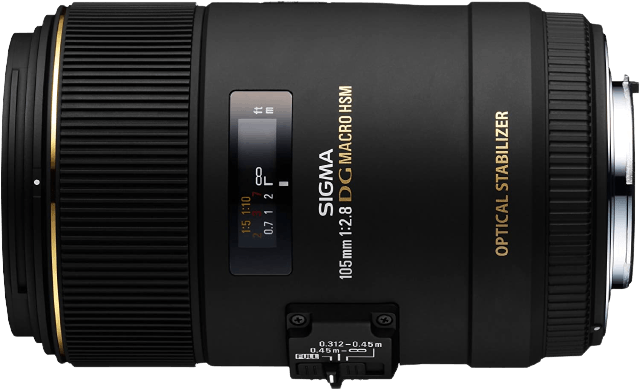
3. Sigma 105mm f/2.8 EX DG OS HSM Macro
| Brand | Sigma |
| Lens Mount | EF-Mount |
| Focal Range | 105 mm |
| Maximum Aperture | f/ 2.8 |
| Image Stabilization |
This Sigma 105mm f/2.8 EX DG OS HSM Macro lens offers stabilization and a 1:1 ratio. Some wedding photographers suggest that the autofocus is a bit slower than the equivalent from big brands.
105mm is a surprisingly useful focal length for wedding photography. And with Sigma’s IS and the quality of the lens elements and multicoating, this is a solid choice.
The Sigma 105mm f/2.8 Macro is available for Nikon and Canon mounts.
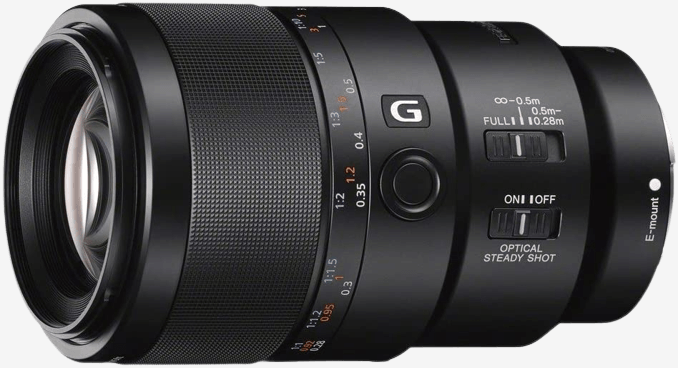
4. Sony FE 90mm f/2.8 SSM ED G OSS Prime Lens
| Brand | Sony |
| Lens Mount | E-Mount |
| Focal Range | 90 mm |
| Maximum Aperture | f/ 2.8 |
| Image Stabilization |
The Sony FE 90mm f/2.8 is a highly regarded lens. One interesting feature is the push/pull focus ring. This switches instantly between manual and autofocus. It’s one of the ways Sony has rethought the process for their mirrorless cameras.
As well as pin-sharp images, this lens delivers beautiful, rich bokeh. Autofocus is super fast and silent. It’s perfect for video.
With the FE 90mm f/2.8 Sony has produced an excellent value, very competent lens with genuine 1:1 magnification.
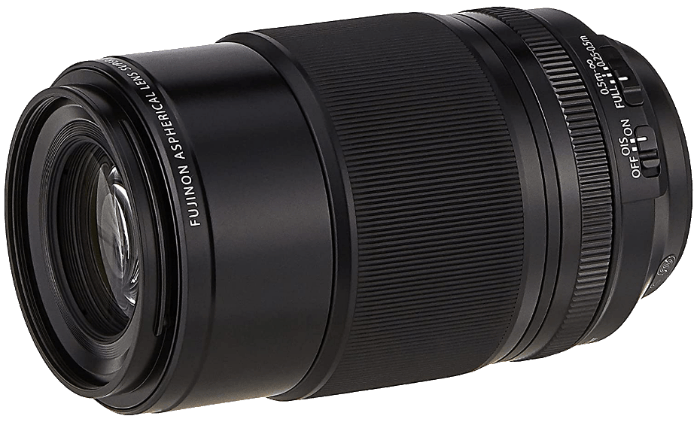
5. Fujifilm XF 80mm f/2.8 R LM OIS WR Macro
| Brand | Fujifilm |
| Lens Mount | X-Mount |
| Focal Range | 80 mm |
| Maximum Aperture | f/ 2.8 |
| Image Stabilization |
This Fujifilm XF 80mm f/2.8 offers a 120mm equivalent and shoots close enough to get a 1:1 ratio. 120mm is perhaps more useful for macro photography. It allows you to shoot a little further from your subject. This makes lighting it easier.
The focusing system in this lens is designed to produce the clearest focus possible whatever the distance to the subject. This is more of a challenge with a macro lens. But Fujifilm has done it well.
Other highlights are special fluorine coating on the front element, IS, and weather sealing. It’s not the cheapest lens, but the XF 80mm f/2.8 is a sound choice for the Fujifilm camera user.
How Many Wedding Lenses Do You Need?
A wedding photographer needs enough focal lengths to cover the wedding from start to finish. How many lenses that means is different for every photographer.
Photographers with enough clients to support a big budget may have one lens in each category. They might even have a few duplicates as backups. Others may shoot with only two or three lenses.
The choice of a focal length also varies based on style. Some favor the separating power of a big lens. Others enjoy the storytelling feel of a wide-angle that captures the full scene.
Lenses are difficult to judge based on tech specs alone. If you’re still not sure if you should get that pricey brand name or a third-party lens, try renting one.
Renting is an affordable way to rest easy in your choice. Some rental companies will allow you to buy the rental lens if you end up liking it. If you don’t, it’s a much cheaper loss than finding you don’t use that focal length after purchasing it.
Prioritize what focal lengths you need most to capture the entire event in your own style.
Choosing the best lens for wedding photography is important. You need it to capture the entirety of the day.
The most popular lenses for this niche are the 24-70mm and 70-200mm bright zooms. For primes, think of 85mm, 50mm 35mm, and a macro.
The overall winner is this superb Canon EF 70-200mm f/2.8L zoom lens.
 Here's another Photography Freebie