Monday, April 3, 2023

 #Tripod for Camera

The Best Wedding Photography Gear (+5 Best Tripods) in 2023


Wedding Photography Gear: What Should Photographers Look for in a Tripod?

Humorous wedding photography still life of wedding accessories on the ground in front of a red tractor
First, do you really even need a tripod for wedding photography? Most wedding photographers prefer the ability to easily move around during the ceremony rather than being tied down with a tripod.
But, there are a number of different times during the wedding day when a 
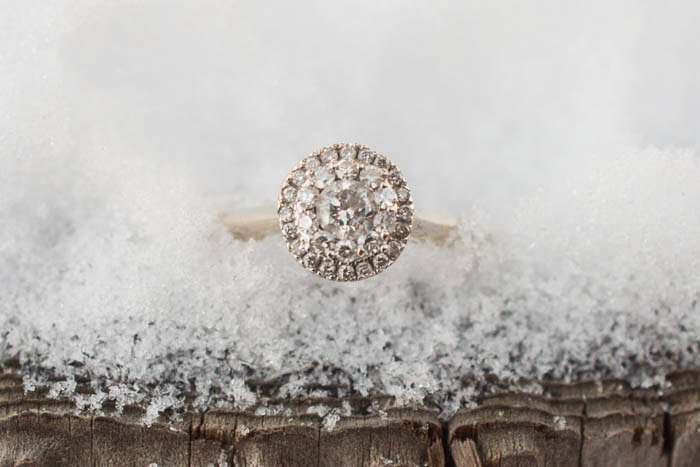
tripod is more help than a hindrance. For macro shots, a tripod can help get sharper images while also allowing techniques like focus stacking.
Techniques like panning to blur the background while following the bride and groom around the dance floor are also best with a tripod.
Tripods can do more than stabilize your camera, however. My favourite purpose for my tripod during a wedding? As a light stand for my off-camera flash.
Adding a flash bracket at the top turns a tripod into a dual purpose accessory. Tripods aren’t always as tall as a light stand, but they can be more portable and flexible.
So if you want to get sharper macro and support an off-camera flash, what do you look for in a tripod?
In short, the best tripod for wedding photography is a mix of a travel tripod and professional tripod. And these are the most important characteristics.
Portrait of a groom buttoning his shirt sleeves -best tripod for wedding photography gear 

Capacity

First, a tripod needs to be able to handle whatever gear you place on top of it. Wedding lenses and cameras can be on the heavier side.
Wedding photographers with a full frame camera with a battery grip and bright zoom lens will need a tripod with a higher capacity than a photographer using a mirrorless system or crop sensor.
Add up the weight of your camera body, largest lens, and flash and make sure that number is less than the tripod’s maximum capacity.

Quick Set Up

Wedding shoots are quick-paced. There’s not much time to fiddle with gear in between shots. When considering a tripod for wedding photography, the speed of setting up that tripod is a big factor.
A quick release plate is a must. Picking up an extra is helpful when using the tripod both as a camera and a light stand. Factor in the leg set-up too. More leg sections will take longer to set up.

Weight

Wedding photographers carry a lot of gear. Lighter tripods are easier to lug around during the wedding day and helps the accessory feel more like a tool than a burden.
Materials like carbon fiber can make tripods lighter to carry around, but look at the overall weight in the specifications when comparing models.

Flexibility

Lightweight tripods mean less gear to carry — but so does flexibility. Look for a tripod that can handle any shot that you may need it for.
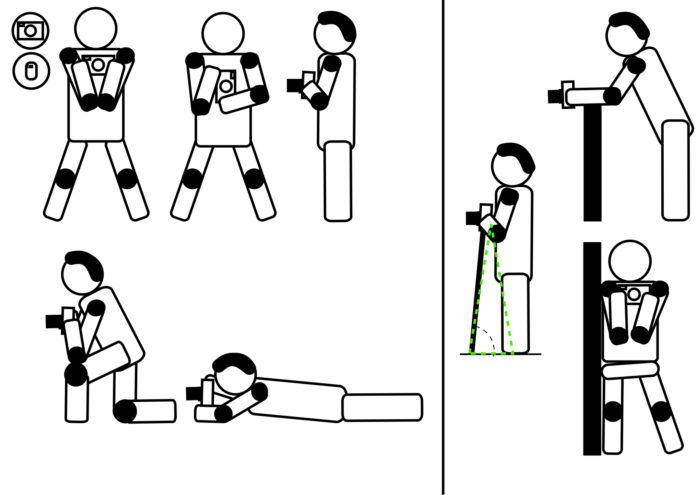
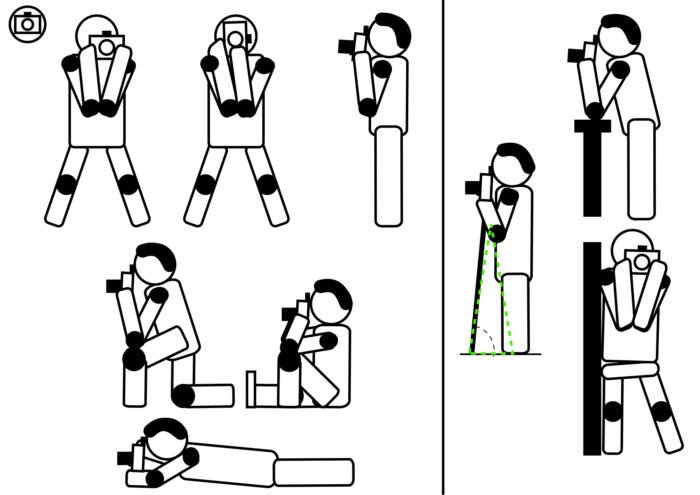
That means a tripod that can shoot close to the ground for a macro shot, then extend to eye level for some creative panning around the dance floor. Some tripods will also double as monopods.

What Are the Best Tripods for Wedding Photography?

Close up of diamond earring on turquoise background -best tripod for wedding photography gear
With those factors in mind, what’s the best tripod for wedding photography? We’ve rounded up a handful of options, but be sure to check the capacity with your current gear.
In no particular order, here are some of the best tripods for wedding photography.

Vanguard Alta Pro 263AB 100 Aluminum Kit

Pros

  • The Vanguard Alta Pro offers the best mix of features and price. The aluminum option retails for about $170, yet the tripod still has versatile features and a sturdy build.
  • Legs that adjust to three different angles allow you to shoot from a low angle for macro shots as well as from an excellent 68 inches. That taller than average height is great when using the tripod as a light stand.
  • Flip-style leg locks and a quick release plate help make setting up the tripod fast and simple. Spikes also retract from the feet to switch between indoor and outdoor surfaces.
  • The tripod’s versatility also extends with a center column and can rotate up to 180 degrees.
  • A counter weight hook adds stability, but if you don’t care for the hook, it’s also easily removed.

Cons

  • While the Alta Pro is sturdy enough to hold over 15 pounds of gear, the tripod weighs more than some travel tripods at more than five pounds.
  • Some reviewers suggest that the parts loosen over time, so this tripod may not have the same durability as higher priced options.
  • The Alta Pro is a versatile tripod for a not so bad price, but it is heavier than other options. You can find it here.

A row of chairs decorated for a wedding ceremony. Wedding photography gear

Manfrotto BeFree Compact Tripod

Pros

  • Designed for travel, the Manfrotto BeFree won’t add much weight to your gear. It weighs only about three pounds. The legs also flip up to easily tuck it into a suitcase for traveling wedding photographers. 
  • With three different leg angles, the tripod can reach a maximum 56.7 inches or shoot low to the ground.
  • A counter weight hook helps add stability. Placing your camera bag on the hook will make it even more stable, similar to heavier studio-style tripods.
  • A quick release plate and flip type locks allow for easy set up.

Cons

  • With only an 8.8 pound capacity, it’s not a tripod for hefty camera gear. This option will still accommodate a DSLR and a 24-70mm f/2.8 lens as well as most mirrorless cameras, but sits on the low end for the amount of weight it can hold.The BeFree can’t carry as much weight or sit as sturdy in wind, but a counterweight hook helps add more stability in a pinch while keeping the profile small.

The BeFree also uses flip leg locks, which are harder to find in travel tripods. You can find it here.
close up photo of engagement ring in ice. Wedding photography gear

Benro Travel Angel 1 Carbon Fiber Tripod

Pros

  • Weighing less than 3.5 pounds but carrying up to 17.6 pounds of gear, the Benro Angel is a travel tripod with the capacity of a studio tripod.
  • This option has a similar weight compared to the BeFree, but can handle twice as much gear.
  • One leg comes off and screws into the head to make a monopod, for photographers who want a mix between that added stability but with more portability. The legs also reverse fold for a more compact profile when tucked away.
  • A maximum height of 60.8 inches is helpful for doubling as a light stand or for tall photographers.
  • Constructed with nine layers of carbon fiber, this Benro is a lightweight with some serious durability. 
  • The ball head is easy to use and includes a quick release plate for faster swaps between tripod shooting and handheld.
  • Interchangeable feet are included, which helps give the tripod more grip for different surfaces. This is helpful for photographers shooting beach weddings one week and church weddings the next.                  

Cons

  • The sturdier build and monopod flexibility make it pricer than some of the other options on the list.

The Benro Angel is an excellent tripod for wedding photographers that need the portability of a travel tripod, but have heavier gear. Those features push the tripod in a higher price range than other options, however.
You can find it here.
A black and white close up photo of a wedding ring on a window sill. Wedding photography gear 

Induro Stealth Carbon Fiber Tripod

Pros

  • Don’t want the bright colors or flashy branding distracting during a wedding? The Induro Stealth series has an all black design, with a lighter gray name on the side, making it a more inconspicuous tripod. 
  • With a carbon fiber design, the Induro Stealth is a sturdy option that doesn’t get crazy heavy, weighing just over four pounds. 
  • Adjustable angles for those carbon fiber legs allow the tripod to shoot from low heights around a foot for those macro shots or low angles.
  • The series includes three different leg styles, which means you can choose a maximum height of about 58 inches to about 63 inches, with the price increasing as the length increases.
  • A tripod’s capacity is a good sign of it’s durability — and this tripod can hold around 44 pounds. That leaves a lot of room for big gear and suggests a sturdier build than some of the other lightweight options.

Cons

  • That sturdier build will cost you though, with the shortest option starting at around $300.
  • The Stealth Series can come with a head or without, which allows you to get picky about the exact head — but it does drive the price up more than that original $300.

The Induro Stealth is an ideal wedding photography tripod for photographers that want a durable support without flashy colors that can carry a good amount of gear. That carbon fiber build that gives the tripod the durability, however, isn’t ideal for photographers on a limited budget.
You can find it here.
A still life photo of wedding presents on a table. Wedding photography gear 

3 Legged Thing Punks Travis

Pros

  • Three Legged Thing is known for its quirky style and versatility, and the Travis model is no exception. The smallest height is just 4.25 inches, making it great for those ring shots, while it can reach heights of 65 inches. That’s a lot of flexibility, which is great for the different types of shots wedding photographers may need to shoot during the day.
  • The center column of this tripod can be inverted, which allows for that low angle and more flexibility.
  • With a 40 pound capacity at the 23 degree leg spread, this tripod can handle most gear with ease, including heavy lenses. Despite that larger capacity, the tripod itself weighs 4.5lbs.
  • The Travis legs reverse fold, which allows the tripod to fit inside smaller bags, ideal for traveling wedding photographers.
  • One leg of this tripod unscrews to be used as a tripod, giving the camera support system even more flexibility.
  • Like most travel tripods, the legs use twist locks. While some prefer these types of locks over levers, others find them harder to set up and keep in place.
  • A quick release plate is included for fast setups and tear downs.

Cons

  • Aluminum build isn’t as lightweight or durable as other options.
  • The tripod set includes a ball head that allows for easy adjustments for angle, though the ball head type isn’t ideal for videographers.

Retailing for less than $200, the Three Legged Thing Travis offers a lot of flexibility for not a lot of cash. It’s ideal for wedding photographers who need a lot of versatility from a single, compact tripod because of the wide height range and monopod option.
Some photographers may not like the twist type leg locks, while the aluminum build isn’t as ideal as carbon fiber.
You can find it here.
A close up black and white wedding photo of a groom buttoning his jacket. Wedding photography gear

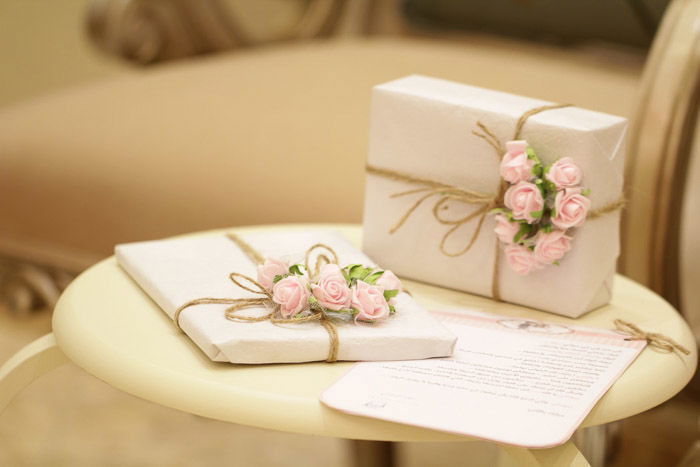
Wedding days bring a wide range of different types of shots to capture, from action on the dance floor to the still life shots of the wedding day details.
The best wedding tripods can shoot at both ends of that range — they can shoot low for macro and tall for doubling as a light stand.  But because wedding photographers already tend to carry quite a bit of gear, size is also a big consideration, along with a quick setup.
Before you buy, make sure that maximum capacity will accommodate your camera and heaviest lens and accessories, then look for a tripod with the right mix of versatility, portability and price.

----------------------------------------------------------------------

  Here's another Photography Freebie

The Multiple Functions of Tripods Explained – Free Quick Guide


All tripods have one thing in common: three legs and a place to secure the camera. After that, they can be as different as the day is long.

In this eBook, Kevin Landwer-Johan gives you the scoop on different tripod features and functions and why they may impact your choice in selecting this critical piece of gear.

To quote Kevin, “Tripods are a bit like camera bags. I’ve never found one that suits all my needs.”

Every photographer should have at least one and probably two or more tripods in their kit.

Why? Click below and read on!

Photo Credit: Kevin Landwer-Johan


Monday, February 27, 2023

#ACX, Photography Life, Autofocus

Why Use Manual Focus? (How to Manually Focus Your Camera)

width=

It’s hard to imagine a time before our trusty autofocus (AF) systems when we used manual focus. We now have cameras that boast a whopping total of 850 AF points. And the manual focus ring barely seems to be touched anymore.

Today, I’ll show you how to manually focus and tell you why this function is still available on every lens produced.

Close-up man in hat looking through camera and using manual focus

What is Manual Focus?

Manual focus is the process of adjusting the depth of field by hand—manually selecting the clarity of the image in the various distances you set your lens. When you turn the manual focusing ring, you adjust elements inside the lens. You change the distance between a selection of lenses, moving one or more lenses either closer or further from the imaging sensor. It is how a telescope or pair of binoculars work.

Most analog film cameras require manual adjustments because they don’t have digital features. It means they only use manual focus lenses. It wasn’t until 1978 that Sony released the first-ever SLR with auto focusing. Every camera that came out before this time (and many film cameras after) would strictly involve manual focus.

How to Use Manual Focus

Manually focusing your image is as easy as turning the focus ring on your lens. But this can be trickier than it seems. I don’t recommend using this function when taking quick shots is a crucial factor in your photography, like wedding photography, when missing important moments can cost you the job.

But if your camera’s AF starts to fail you, there are some ways to work around that by manually focusing. Various kinds of cameras will have different techniques. You can even manually focus on your iPhone! Simply by tapping the element on the screen that you want in focus. But I will mainly focus on DSLRs.

Viewfinder on top of mirrorless camera for manual focus

3 Manual Focus Techniques

1. Depth of Field Preview

Pretty much all modern DSLRs feature a depth of field (DoF) button. Pressing this button will give you an idea of your image with your selected aperture. It will show how far your depth of field focus range will span through the viewfinder.

The button is usually found next to your lens mount but can vary from camera to camera. If you have an issue finding it, you can always check the manual for your camera.

The DoF button will show the exact aperture you have set on your camera. The presented image will look a bit darker. So don’t worry about the image turning out like this. If you set a higher numerical aperture like f/22, the aperture is smaller. Therefore, it lets less light into the camera.

The feature is helpful, giving you an idea of how the image will look. It shows how much of your surroundings will be in sharp focus or soft focus.

2. Live View

Modern cameras, especially DSLRs with video capabilities, can have a ‘Live View’ feature. It is beneficial when it comes to manual focusing. Using this feature will bring up a real-time view through your lens on your LCD screen.

It provides a wider screen to view your image. That makes it easier to judge the sharpness of the subject you are focusing on. You can also zoom into this screen. It allows you to take time and care with this process, giving you confidence in the sharpness of the image.

Some cameras will have a focus-magnifier setting. It will automatically zoom in to give you a part of the image for you to focus on. Some new cameras, especially mirrorless ones, have this function applied whenever you move the focus ring.

2. Focus Distance Windows

The oldest way of manually focusing is still readily presented to us, of measuring the distance from your lens to the subject. These distance windows can be helpful when all else fails, giving you a chance to judge or even measure the length. The distance the camera provides should be in both metric and imperial measurements.

Most lenses should have a focus distance window (or even numbers engraved on older lenses). But they are getting less common, especially in mirrorless ranges of cameras. This window is an active lens element that moves according to how much you alter the focus ring.

This method is not the most accurate way of focusing an image. But it can be a lifesaver when emergency occasions arise!

3. Rangefinder

Some cameras use alternate ways of focusing because the viewfinder doesn’t look through the lens. These are found on ‘rangefinder’ cameras and digital rangefinders—for example, many of Fuji’s X Series.

The rangefinder presents a section showing two images of the same scene. To get the desired focus point, you have to overlay the two images to match them up perfectly.

When to Use Manual Focus

Now I’ll look at seven situations that benefit from using manual focusing. These may be due to personal preferences or from the automatic features of your camera not allowing you to be fully in control.

1. Choosing Your Subject of Focus

A pretty obvious one, but regardless, manual focusing allows you to pick the exact subject you want to focus on. It is handy when there are many layers throughout your scene. For instance, if you’re going to shoot through flowers or windows.

Sometimes in these situations, the auto focus system will snap to elements that you don’t want in focus. When this happens, that’s when I recommend hitting the manual focus switch and adjusting it yourself.

It can be helpful when photographing crowded or busy situations.

A small bird in focus in a tree.

2. Low Light

If it hasn’t happened to you already, it will do at one point. In a dark environment, you will hold down the auto focus button, and all you will hear is the lens adjusting and readjusting itself. With no sign of that comforting beep, it is time to focus manually.

Cameras have a hard time reading distance in low light, which isn’t surprising. Hopefully, you should be able to make out some forms through your viewfinder. Turn your focus ring manually to make an accurate selection of the subject.

Multiple lit tea candles at night with center manual focus

2. Macro Photography

Macro photography fans out there will already know the importance that manual focus brings. Macro photography involves taking images very close to the lens. It requires wide apertures. And wide apertures give hardly any forgiveness when it comes to sharp focus.

You don’t need manual focus for this process. But it is where a majority of the creative aspects come from. Mastering manual focusing is a must for macro photography because it allows for a much greater range of experimentation.

Close-up macro photo of four white flower petals in focus with a blurred green background

3. Focus Stacking

Focus stacking is a method to ensure that every element is in focus to its fullest. It is often used in landscape photography, mainly by photographers who like the HDR process.

This process is very similar to HDR. You have your camera on a tripod, take many images, and then stitch them together through post-production. Instead of taking the best exposure for each section of the image, you’ll be gathering the sharpest focus. You use manual focus to target each different aspect.

This method is helpful because you will be able to take images on a wide aperture. Using a wide aperture will allow you to drop your ISO down, in turn producing sharper images. It also allows you to take many photos to pick the best ones later when looking on a bigger screen.

Macro image of a dragonfly using manual focus stacking

4. Low Contrast

If you have been a photographer for a while, you will have identified situations where the autofocus system can fall short. Certain cases are when there isn’t much definition in the subject or no contrast in particular areas.

The autofocus function looks for lines of contrast to find depth to base its measurements. Environments with a lack of different tones can force you to use manual focus. Use the techniques I wrote above to work through this issue.

Low contrast landscape image of a coastline with cliffs, a beach, and water

5. Fast-Moving Objects

Relying on auto focus for fast-moving objects isn’t the best idea. Especially if you only have a small window to get the perfect shot.

Hopefully, you know your subject well or can quickly assess how the subject will act. Preparation will allow you to measure out and take some test images beforehand. By using manual focus, you can get the sharpest image. Adjust the camera in manual focus and then wait for the subject to move by and snap.

Two blurred fast moving trains about to pass each other at night

6. Panoramas

A panorama is an image where a whole landscape or skyline is presented seamlessly in one picture. Some cameras, as well as iPhones, have this feature embedded in their software already. The manual way of doing this is to take a series of images and stitch them together in the post-photography process.

If you were to take these images with an autofocus system, you would risk the focus adjusting. If this happens, the viewer will notice it in the final result. The image will look disjointed, and the believability of the image being one seamless photograph will be lost entirely. I suggest focusing beforehand and then taking each image accordingly.

Panorama landscape image of clouds a setting sun and vast land of grassland and ridges

Technology has come so far with its constant advancements in autofocusing capabilities. Still, there is no denying the importance of being able to use manual focus with confidence.

The more you photograph, the more this will become clear. I’m not saying you need to be the quickest manual focus photographer to be a confident photographer. But there will be times when you will be glad you studied this article. So turn that switch to manual focus, put your hand on the focusing ring, and get practicing!

Are you looking for an amazing way to improve your Photography Skills?  Click the link below.

 
or
 

The Big Three: Focal Points, Leading Lines, and Frames – Free Quick Guide


Photo composition is a complicated subject. No matter their level of expertise, any photographer can spend years, if not a lifetime, working on their composition skills.

Most photographers can benefit by limiting their efforts to a group of concepts and mastering them before moving on to more advanced ideas.

This guide teaches you about the Big Three.

The big three are three tools of composition that you should master first. They include focal points, leading lines, and frames.

In this guide, you will learn…

  • What is a focal point?
  • What creates a focal point?
  • How does a focal point work in a photo composition?
  • What creates a poorly executed focal point?
  • What is a leading line?
  • How do leading lines work in a photo composition?
  • What not to do with leading lines
  • What is a frame?
  • How is a frame effective in composition?
  • Recognizing a good frame in a scene versus a not-so-good one

Click Below and Grab Your Free Copy

Photo Credit: Simon Launay

 
----------------------------------------------------------------

Want more best of "Photography for beginners" digital "gold mine" of photography tips.  It's called "The Open Library".

https://mrdarrylt.blogspot.com/2023/05/photography-photography-tutorial-by.html


Wednesday, February 1, 2023

#Photography Tutorial


12 Tips for Long Exposure Landscape Photography


Landscape photography can be so much more creative with long exposures. They add that extra wow-factor to your landscape image.

Here are 12 tips to help you take better long exposure photography. 

1. Long Exposure Landscape Photography: Looking for Overcast Weather to Add More Interest to Your Photos

When I scout for a new location, or I search the internet, I always have long exposure photography in mind.

You can do long exposure landscape photography almost anywhere on the globe. You need to know where and when to find an element that moves at an adequate speed.

The two main subjects are water (including waterfallsseas, streams) and clouds in the sky.

But there may also be other possibilities. For example, a car’s lights moving on a winding mountain or hill road. Or the movement of stars in the sky.

One of the less considered aspects of this kind of photography is the weather.

A sunset or sunrise with a cloudless sky can be beautiful to see live. A unique experience. But it can turn into a boring image because there’s no movement in the sky.

Even worse is leaving home with a beautiful sky overhead and then arriving at the shooting location only to find bad weather.

So get familiar with weather websites! Check out The Weather Channel or AccuWeather. These will show you the movement of clouds and precipitation levels.

Then you can have a better idea of ​​what you will find once in the field.

A coastal seascape in Porto Venere, Italy
Two-minute long exposure photography in Porto Venere, Italy. Without an incoming storm, 
I would not have been able to take this long exposure.

2. Track the Sun’s Position To Avoid Overexposed Areas

The position of the sun and the path it will follow are also important when planning long exposures. It is a good rule to exclude the sun from the composition as much as possible.

The first reason is that with long exposures, the sun will no longer be circular. But you will start to see its movement during the exposure.

Plus, it will create an overexposed area which is close impossible to correct in post-production.

To preview the sun path you can use a lot of mobile apps. I use Photopills to plan my shots and you can find it on the Apple Store and Google Play Store.

The sun path as seen in the Augmented Reality section of the mobile app PhotoPills.
The sun path as seen in the Augmented Reality section of the mobile app PhotoPills. Amazing feature.

3. Scout the Location Beforehand To Get a Preview of Your Composition

As I said before, long exposure photography looks very different from the reality perceived by our eye. This is why it’s necessary to have a clear idea of what you will find on the field. You can double-check the sites in Google Maps if you can’t do it in-person.

Location scouting also means getting a preview of your composition. You’ll have a better idea of the possible direction of the clouds and sunlight, the power of the sea and tide, or how the light will reach the mountains.

Long-exposure photography of a coastal town and seascape in Italy.
I took this long exposure photography after waiting two hours for the sun to set.

4. Focus a Third of the Way Into the Scene To Avoid Blurry Results

After deciding about your long exposures composition, you should set your focus point. For a landscape shot your lens will be set to an aperture value of f/10 or f/11. You should try not to go over f/16 to not stumble on diffraction problems. It will cause unsharp images.

Don’t use aperture to make a shot last longer. But what if you think that your shutter speed is not slow enough? This is where ND filters help a lot.

You can even try this simple trick to be sure of your focus point. You can try to focus on one of the two lower intersection points of the rule of thirds.

At this point, set the manual focus, so you do not have to change it anymore.

When it comes to long exposure photography composition, focusing is the most important part of your final photo. Better spend a lot of time to be sure of your point of focus than regret it later.

There’s nothing worse than going home and having an exposed photo for 1 or 2 minutes that’s totally out of focus.

Photoshop interface using rule of thirds composition for long exposure landscapes
The focus point for this image is in the red circle, the left lower point of the rule of thirds grid.

5. Use a Tripod To Adverse Weather Conditions

A sturdy tripod is essential for successful long exposures. It will prevent camera shake and blurry pictures.

If you don’t want to buy a heavy or expensive tripod, you can get away with an average one. In that case, weigh the tripod down with your backpack if the weather conditions are not in your favour.

A bridge over a coastal scene

6. Lower Your ISO to Avoid Digital Noise

Now that you decided the composition and you set the focus point, it’s time to move on to the technical aspects of photography.

We start from the ISO. You are taking landscape pictures with a tripod and the camera fixed on it. So set the ISO as low as your camera allows.

Forget the so-called “extended” downwards and upwards values. These are only an electronic change to the sensor’s native sensitivity values.

Beautiful long exposure landscape with mountain and waterfall

7. Learn to Read The Histogram for Better Exposure

Once you’ve set your focus point and ISO, it’s time to move on to exposure.

Start making some test shots, see the exposure you like best. Keep in mind the mood you want to give to the image.

The idea is to have a good and balanced histogram. Make sure it’s not too shifted to the highlights and not too far to the left, where there are blacks.

At this stage, do not check the exposure only with the image on the camera screen. Learn to read your histogram.

There is no perfect histogram or one that is always correct. But there are clear signs for the wrong one. If it is too much shifted to the left (blacks) or too far to the right (the highlights).

Beautiful long exposure seascape

8. Use an ND Filter to Enhance Your Long-Exposure Photography

It is now time to add your ND filter. Be careful though. If you use a very dark filter (for example a 10 stop), you will not see anything through the viewfinder or the live view.

That’s why it’s important that you set the focus and exposure before using an ND filter.

At this point, recalculate the correct exposure for the ND filter you added to match the one without it.

For example, if a correctly exposed photo without a filter was f/8, 1/50 and ISO 100, and then you added a 6 stop filter, you need to remove 6 stops of light from that exposure. The new photo could be shot at f/11, 0.6 seconds, ISO 100.

You can do this work with smartphone apps, or with a table that you can find on the website of your ND filter manufacturer.

Long-exposure photography setup with CPL, a 3 stop Medium GND filter and a 6 stop ND filter.
A classic setup with CPL, a 3 stop Medium GND filter and a 6 stop ND filter.

9. Experiment With Bulb Mode for Exciting Results

Take a test shot and check the histogram for the last time.

If you have calculated the new exposure time in the right way, you are ready to switch to Bulb mode (if necessary). And then shoot your final image.

Long-exposure photo of a coastal town and seascape in Manarola at sunset.
A 2-minute exposure for this Manarola sunset

10. Act Fast Before the Scene Changes

Be aware that the perfect conditions to take the shot could last only a few moments. The sunrise pastel colors, the fire sunset on the tops of the mountains, the wind that speeds up clouds. They can be gone in a second.

If your exposure time is one or two minutes, you only have one shot available to set them in your photo.

You must also be able to change all the settings in seconds if the weather conditions change. And be able to change the intensity of filters to accommodate for new light conditions.

A long exposure seascape

11. Set Aside Enough Time To Make Sure You Get Your Shot

Landscape photography is a continuous game to test your patience.

You have to find the chosen location and arrive there with plenty of time to spare. Then you have to find the right composition. And then you have to wait for the ideal conditions.

It might happen that that one chance to shot won’t materialise. Then you have to go home empty-handed, waiting and planning the next trip.

A mountainous landscape surrounding a lake.
It took almost an hour for the cloud to pass quickly enough to give some movement to the image.

12. Use Post-Processing to Stack Your Images

Now that you know how to make a long exposure landscape photograph, you can learn how to create it without filters.

Yes, you can simulate a long exposure without using ND filters. But you’re still going to need a tripod.

Then all you need is a scene with an element that moves fast enough. For example, the clouds in the sky.

Put the camera on the tripod and follow the same “rules” for the composition of your image.

When you are ready to shoot you can create a series of shots which show the movement of your element. You will need at least 20-30 images.

And now, go to Lightroom. Once you have imported the images into the catalog, work your edits on one shot. Then synchronise all the edits of this shot with the others of the series.

Once done, select all the images in the series, right-click, and open in Photoshop as layers. This process will take some time, so relax a little and let your computer work.

Once finished you will have a Photoshop document with all the images in a stack of layers. Next step is to select all the levels and then right-click “Create smart object”.

This is a single layer object that contains the information of all the previous layers. Once finished go to Image -> Smart Object -> Stack Mode -> Mean.

And watch the magic and your long exposure combine together.

The Matterhorn mountain on a cloudy day
The Matterhorn, 60 single frames combined for a 3-minute long exposure

As Ansel Adams said: “Landscape photography is the supreme test of the photographer, and often the supreme disappointment.”

For me, the best thing is to be out there in nature, thinking about creating something that will always remind me of that moment.

Get out there with the above photography tips you’ve read, have fun, experiment, make mistakes and try again.

----------------------------------------------------------------------------

5 Camera Controls for Landscape Photography – Free Quick Guide


When we talk about camera controls, there are three that always come to mind: aperture, shutter, and ISO.

That’s not what we are going to discuss today.

Today, you are going to learn about 5 camera controls (that are lesser known) that can vastly improve your landscape photography.

Learn how to create dreamy landscape images without the need for neutral density filters!

Discover how you can pre-check DOF image sharpness – right on the spot!

Learn the camera meter settings that will make or break a winter wonderland shot just like this!

 
------------------------------------------------------------------------------------
 

Turn Your Passion into Profits!

  • Make an extra income from your Photography!
  • Turn your hobby into a profitable passive income
  • Upload and instantly sell to millions of potential buyers
  • Instant Access, Start Today no matter where you are in the world!
  •  Click Here


Sunday, January 8, 2023

#Photography Tutorial


How to Avoid Camera Shake for Sharper Photos (Photography Tips)

Camera shake is one of the major curses of handheld photography. It’s one of the most common reasons why you will have to throw away a photo.
Camera shake occurs when your shutter speed is slow enough that it will not freeze your natural body shaking (breathing, muscular tension, etc.).
This article will look at the many ways you can bypass this when shooting handheld in low light.
But first, let’s talk about intentional camera shake.

Camera Shake and ICM

You might think you should never allow camera movement for a successful photo. That’s not true.
Intentional camera movement, such as panning, is a useful technique. Car race photographers often use this to convey a feeling of speed.
The photographer follows the subject’s movement against the background. This leaves the subject sharp against a blurry background.

a red sports car racing at the 82nd Italian GP Monza - avoid camera shake
Panning at the 82th Italian GP in Monza (Photo credit: Alessandro Torri Canon EOS 350D 
with Canon 70-300 f/4-5.6 IS USM).

You can achieve other creative results by moving the camera during a long exposure.

blurry photo with red, purple, pink light trails from intentional camera shake
Image Credit: Marc Wavreil.

Camera Settings to Avoid Camera Shake

But what if you find yourself photographing handheld in low light conditions with a low shutter speed? And you don’t want creative motion blur in your photos?
Here are the settings that will help you.
You’re likely to shoot handheld in low light are concerts and stage photography.

Turn On Image Stabilization

Many cameras offer some sort of image stabilization. You can find this on the lens (IS system on Canon lenses, for instance).
Or in the camera sensor, such as the Olympus PEN and OM-D camera bodies.

camera screen showing image stabilization settings
Image stabilization is often turned on/off on the lens or in the settings menu.

The job of the image stabilization is to sense camera movement and try to null them in real time. This allows you to shoot handheld at a shutter speed of 1/10 or lower.
The performance of the image stabilization is often expressed in the number of stops.
When handheld, if we consider 1/60th a safe shutter speed for camera shake free images, a 3-stops image stabilization will allow you to produce sharp images all the way down to 1/8s.
Image stabilization can freeze the photographer shaking. But it’s ineffective on your subject’s movement.
Your camera may allow camera shake free images down to 1/8, thanks to image stabilization. But at that shutter speed you will not be able to freeze your subject’s movement.
You’ll still have a blurry image.

photo of white text on blue background, comparison side by side showing camera shake on the right
The effect of image stabilization On (left) and OFF (right). Sony RX10 focal length 200mm, 
aperture f/2.8. shutter speed 1/10th second.

Some lenses will feature mode 1 and 2 stabilization.
Mode 1 will correct all movements, while mode 2 will correct for the up/down movement only. Mode 2 is typical in panning photography.

Go Wide Open

One obvious way to increase your shutter speed to avoid camera shaking is to use fast lenses. These are lenses with wide apertures of f/2.8 or less.
These are also expensive lenses. But if you regularly work in low light conditions, it is worth investing in a good set of fast lenses.
Say the widest aperture for your lens is f/5.6 and the resulting shutter speed is 1/10s. An f/2.8 (2-stops brighter) lens will, in the same light conditions, allow you to use a shutter speed of 1/40s.

Raise Your ISO

There is a lot of misconception around about ISO. ISO, in digital cameras, does not affect your sensor’s sensitivity to light.. It electronically amplifies the signal recorded by the sensor.
This has many effects, one of which is ISO noise. In general, the higher the ISO, the brighter the image, but more noisy.
I prefer noisy images over blurry ones. I would suggest to raising your ISO until you can get a reasonably fast shutter speed.
Keep in mind that it is usually worse to brighten up an underexposed image in post. Just use a higher ISO to get the correct exposure.
Post-processing will introduce more noise, especially in the shadows.

Stay Wide, Don’t Zoom In

While the focal length does not affect the camera shaking, it affects how much of it you will see in your image.
Short focal lengths are, usually, more forgiving than longer ones when it comes to motion blur. The amount of blur is “diluted” in the wide field of view.
By zooming in, you are reducing the field of view, thus making everything big: the details and the motion blur.

photo of white text on blue background, side by side comparison, right side zoomed in crop showing camera shake
100% crop from two images taken at 24 mm and 200 mm focal length. Sony RX10 with 
image stabilization OFF, aperture f/2.8 and shutter speed 1/10th second.

The shutter speed should be the inverse of the focal length used. That way you’ll get sharp images handheld and without image stabilization. At least in theory.
If you are at 200mm, your ideal shutter speed be should  1/200s.
In reality, how slow your shutter speed can be will depend on how much you shake. And how well you are holding the camera (more on this later).

Single Shot Vs Burst Mode

In the film era the number of exposures we could take was quite limited (max 36 exposures per roll of film). In the digital world we can take hundreds of photos.
We can adopt the so-called, and usually bad, “spray and pray” method in an attempt to get sharper images.
Pressing the shutter for a single photo at a time can introduce or amplify camera shaking. When using the burst mode, you press the shutter only to start and to stop taking photos.
Try taking three/four images in rapid sequence. This will usually allow you to capture one image that is noticeably sharper than the others.
In the test sequence below, the second image is the sharpest.

three photos comparison, burst photos of white text on blue background showing image stabilisation
A burst of three photos. Sony RX10 handheld, image stabilization ON, 200mm, f/2.8, 1/10s.

I did this test with the Sony RX10 handheld. Image stabilization was on, focal length of 200 mm, aperture f/2.8 and shutter speed 1/10s.
This is below the 1/200s speed suggested by the empirical rule I mentioned earlier.

How to Hold the Camera to Avoid Camera Shake

When it comes to camera shake, technology can help. But the way you operate and hold your camera is crucial to get steady shots.

Camera Size And Weight

Light and small cameras are good for portability, but not great for avoiding camera shake.
Small camera bodies, such as in pocketable compact cameras, make it difficult to get a good grasp on them.
And light cameras will not have enough inertia to hold them as steady as possible.

General Good Posture

A good posture for steady shots is a relaxed one. Don’t assume postures that stress your muscles or keep them in tension. This will increase body shake.
If you cannot lean on something, to best stabilize your posture, spread your legs. Do this either laterally or one leg in front and the other behind your torso.
This will allow you to form a triangle with your feet and pelvis, which will stabilize your body.
diagrams showing best and worst ways to hold a camera phone to avoid shake
Keep the elbows one against the other and pushed into your torso. You will form another triangle that will help stabilizing the camera.
Another trick is to be as light as possible when firing the shutter. Ideally, it is said that you should almost be surprised to hear the sound of the shutter.
Also, mind your breathing. Don’t hold your breath but begin to exhale and fire the shutter when you have finished exhaling.

The Role of the Viewfinder In Camera Stabilization

Compact cameras and camera phones don’t have a viewfinder, so you have to look into the camera screen. This makes it natural to move the camera far from the body, at arm’s length.
A viewfinder makes you put your camera against your forehead. This means your arms against your torso and close to each other. This forms two closed triangles that stabilize your posture and the camera.

diagrams showing best and worst ways to hold a camera phone to avoid shake
On the left, the typical bad way to hold a compact camera or a camera phone. 
With a viewfinder (right), the posture improves and the camera is steady.

The Bad Habits

Particularly with cameras that do not have a viewfinder. You may have acquired some very bad habits when holding your camera.
Think of the human body as a series of sticks and joints, as in the scheme below.
Bad habits are all those postures where the sticks and joints used to hold the camera are kind of floating in the air. And only muscular tension keeps them in position.
This tension increases body shaking. And you cannot hold your camera steady enough to shoot in low light.

diagrams showing where the joints move when holding camera phone
The arms are floating in the air and the red arrows indicated unsupported joints and 
resulting camera shake.

Good Postures for Camera Phones and Compact Cameras

As we said, the use of a viewfinder does help you to hold your camera steady, but what if you do not have one?
The principle of a good posture does not change. Tuck your arms into your body and keep your camera close to your torso.
If you can, sit on the ground or kneel and place your elbows on a knee, in a very stable position. You can also lay down on the ground and put one hand under the camera.
If you want more distance from the ground, make a fist with the hand you have under the camera.
Finally, leaning on walls and lamp posts will help to stabilize your posture.
A monopod can also be useful to keep your camera stable. Make it lean toward your body, rather than pushing it away from the body.
The image below summarises all these postures.

diagram of Good postures to hold a compact camera or camera phone steady.
Good postures to hold a compact camera or camera phone steady.

These postures, while good to hold the camera steady, can make it difficult to see your camera screen. Do not hesitate to use the articulating screen, if you have one.

Good Postures for DSLRs and Cameras With a Viewfinder

This chart summarises the best postures for when you can use a viewfinder.
The camera will be further stabilised by touching your forehead.

diagram showing Good postures for when using a camera with viewfinder.
Good postures for when using a camera with viewfinder.

The String Tripod

A trick to help you stabilize more is to use a string tripod.
Tension a string attached to the camera tripod socket to one side and to your belt (or under you feet) on the other side.
Tensioning the string will engage your muscles and reduce shaking.

diagram showing how you can use string tripods (red lines).
Possible string tripods (red lines).

I prefer to attach bungee cords to my belt. Tensioning the elastic cords gives me more control. Some commercial solutions are also available.

Other Postures

What if you are left eye dominant? Use the hold photographer Joe McNally has made famous and illustrated in his blog.

In this article we saw how to adopt good postures for steady shots without camera shake.
This includes camera phones, compact cameras and cameras with viewfinders, such as all DSLRs and some mirrorless cameras.
Next time you are shooting handheld in low light conditions, remember to use these postures. And pay attention to the way your hands wrap around the camera to support it. 

---------------------------------------------------------------------------------

Are All Tripods the Same? – Free Quick Guide


When it’s time to buy a tripod, you will soon realize that there is a dizzying array of brands and types.

What style of tripod do you need?

How great of a factor should the cost be?

What materials last the longest and perform the best?

In this eBook, author Jo Plumridge addresses the questions about tripods that everyone needs answers for.

Don’t make an expensive mistake.

Here’s what’s covered:

  • What are the advantages and disadvantages of using a tripod?
  • What factors make tripods different?
  • Which tripod should you buy, depending on your budget?

Get your free copy now.

Photo Credit: Jonatan Pie