Don't just hope for a great shot. Leave less to chance by preparing for an award-winning image.
Creating
a timeless image has as much to do with the work that went in to the
photograph long before the shutter was pressed as it has to do with what
happened on the scene.
DSLR cameras aren’t hitting the headlines as much as they used to.
They’re a traditional type of camera, and digital technology is moving
so fast these days. New camera types appear to be leaving DSLRs in the
dust.
In the last few years, mirrorless cameras
have stolen the spotlight. The online photography community is abuzz
with discussion about the wonders of mirrorless camera technology.
There’s so much noise about mirrorless cameras one might start to think
DSLRs are a thing of the past.
Are DSLRs still worth buying in 2021? Yes, absolutely. They are still
great cameras. DSLRs are usable, reliable, and produce fantastic
results. Their day is far from done, and there are some excellent
options on the market.
But which is the best DSLR camera for you? That will depend on your
level and what you need. Whether you’re a beginner, enthusiast, or
professional, there will be a camera option for you.
We’ll take you through some important information and provide our list of the best DSLR Camera options available.
First, let’s look a bit more into what DSLRs are and how they differ from mirrorless cameras.
What is a DSLR Camera?
The initials stand for Digital Single Lens Reflex. That might make it sound complicated, but it’s pretty simple.
The digital part is fairly obvious. It refers to the fact that it is a
digital camera rather than a film camera. You’re using a memory card
instead of a roll of film.
Single-lens means that the camera only uses one lens to reflect light
entering the camera onto the sensor. Older cameras would use several
lenses and mirrors to reflect the light onto the film. This was less
efficient, so single-lens cameras were a revelation at the time.
Reflex refers to the movement of the shutter and mirror. It only
needs to make one mechanical movement to reflect the light onto the
sensor. You change the speed of this motion by changing the shutter
speed on the camera.
In the realm of modern digital cameras, you now have crop frame and full-frame
DSLRs. This refers to the size of the sensor. Most crop frame DSLRs
will use an APS-C sensor, which is smaller than the full-frame sensors.
Mirrorless cameras are grabbing the headlines in the photography world. And it’s not without reason.
Many mirrorless cameras are smaller than their DSLRs counterparts. No
space is needed for a mirror or prism, which allows for a smaller body.
And, the lack of a mirror makes an electronic viewfinder possible as
the light can travel straight to the sensor.
The lack of a mechanical shutter also means there is a reduction in
noise. Some photographers like the sound of the shutter. But a silent
camera can be an advantage for sports and wildlife photographers.
Burst mode
speed is another area of competition. No mechanical parts mean that
some mirrorless cameras have a much faster continuous shooting speed.
This isn’t a general rule, but electronic shutters generally achieve a
higher rate for continuous shooting.
But DSLRs have their benefits too. Many photographers still prefer
the mechanical nature of DSLRs. Some find that the optical viewfinder
helps with concentration and composition. Others like their ergonomic
body designs.
It’s also easier to keep the sensor clean in a DSLR as the shutter
protects it. If you need to change lenses with a mirrorless camera,
there is a higher risk of dust reaching the sensor.
In terms of image quality, it’s a fairly even race. The camera having
a shutter or not doesn’t affect the quality of the image. That tends to
be determined by the sensor size.
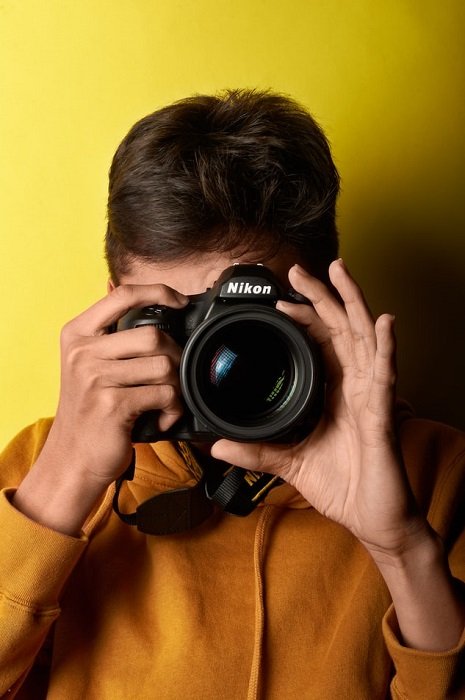
Many manufacturers are now making new lenses specifically for
mirrorless machines. But the quantity and variety don’t come close to
that for DSLRs. There are hundreds of lenses available, especially for
Nikon and Canon.
It appears that Sony and Fujifilm are now committed to the mirrorless
camera market. But in our opinion, Nikon and Canon are still producing
world-beating DSLRs in 2021.
Now, here are our picks for the best DSLR cameras available to buy in
2021. Check out our options for beginners, enthusiasts, and
professionals.
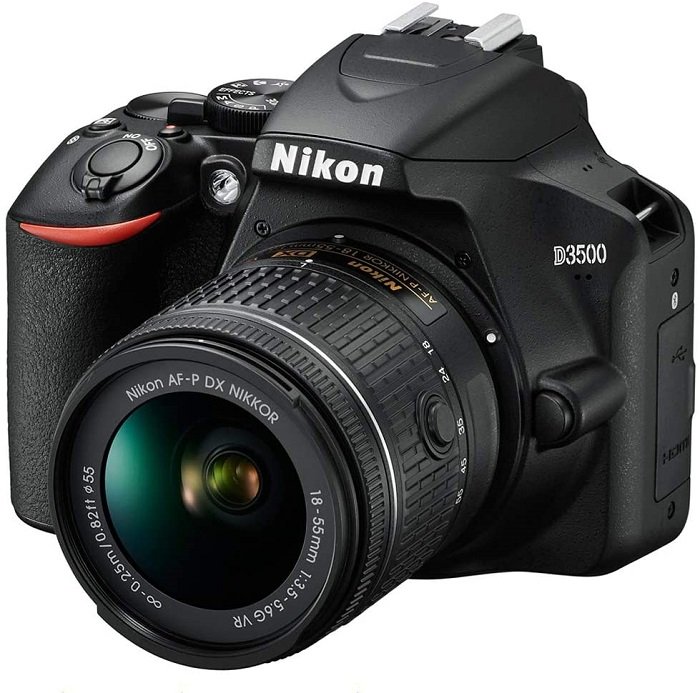
If you’re new to photography, DSLRs are a great place to start. They
are usable, have great features, and produce excellent images. The Nikon
D3500 is the perfect example.
The D3500 is easy to use. The fantastic autofocus features make it
easy to pick it up and start shooting straight away. And the 24.2MP
sensor produces high-quality images that will feed you enthusiasm.
One beneficial feature is connecting the camera to your smartphone
using the Nikon Smartbridge, which uses Bluetooth. It allows you to
move photos from one to the other, freeing up space on the memory card
as you go.
It is limited in some respects. It lacks a burst function, and there
is no movable screen for multi-angle shots. But with the Nikon D3500,
simplicity is part of the appeal. You can have fun taking pictures
without getting lost in the function menu.
The Nikon D3500 is fun to use and affordable. It doesn’t have every
function you can think of, but it’s the best DSLR camera for beginners.
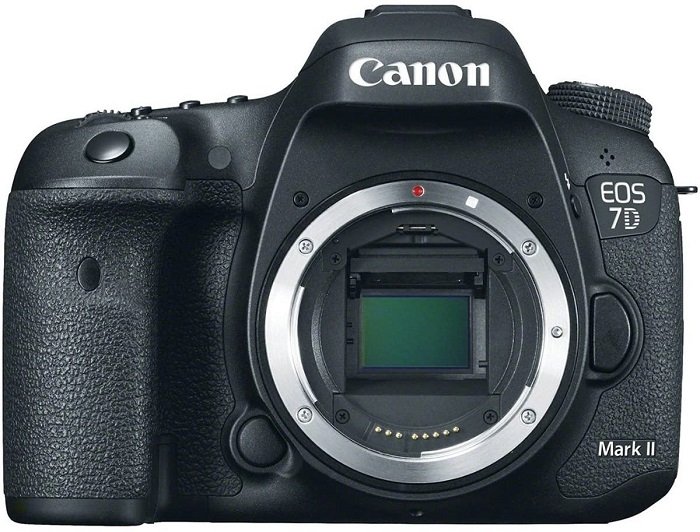
The Canon EOS 7D Mark II is an excellent DSLR camera for beginners.
It has fantastic build quality and all the functions you’d expect from
an entry-level digital camera.
The 20MP sensor may not sound too powerful, but it still packs a punch. And, with the expanded ISO range, it works well in low-light conditions.
The Canon EOS 7D has a 65-point autofocus system. The camera will track your subject as it moves across your frame, making it great for action or sports photography.
There’s a continuous shooting speed of 10fps, which is quick by any
standard. And the generous buffer performance allows for continuous
shooting without losing any quality.
The extra functions do come with an extra cost. But, the Canon EOS 7D Mark II is a great DSLR camera for beginners.
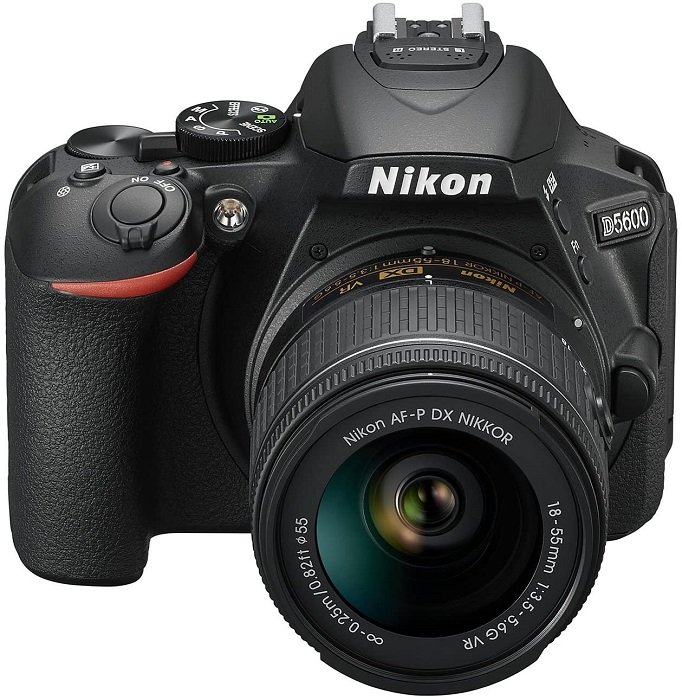
Compared to the D3500, the Nikon D5600 has more features and functions. But with that expansion comes a bigger price tag.
The sensor resolution
remains the same, at 24.2MP, so you’ll get excellent images with both
cameras. But the D5600 has an expanded ISO range, from 100-25600. It’s
versatile and can cope with different environments.
Sports and action photographers will enjoy the 39-point autofocus system. It’s quick and reliable, so you won’t miss your shot.
You can use the SnapBridge to move your images to other devices.
Perfect for sharing your photos on social media. The vari-angle
touch-screen is also a welcome upgrade.
With expanded functionality, the Nikon D5600 is on the edge of the
beginners’ category. Enthusiasts would find this camera more than
acceptable. But it’s a great DSLR camera for beginners too.
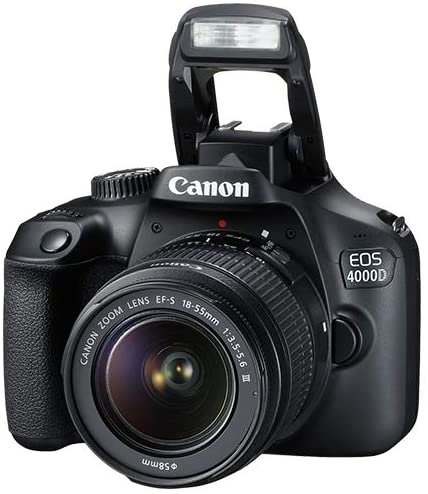
With the EOS 4000D, Canon has taken a back-to-basics approach. It has been stripped back and simplified.
18MP is about as low a resolution you will find on a modern DSLR
camera. But the image quality is still very good. It’s not professional
but more than adequate for beginners.
The burst rate is sluggish at 3fps. But this will allow you to learn
about burst functions and continuous shooting. And, the Canon EOS 4000D
does have full HD video capabilities, something other entry-level
cameras lack.
They’ve stripped it back to create a cheap DSLR option for beginners.
But have Canon taken this too far? Not quite. The functionality is
still good, and you can get some bundle packs at reasonable prices. The
Canon EOS 4000D is still one of the best DSLR cameras for beginners.
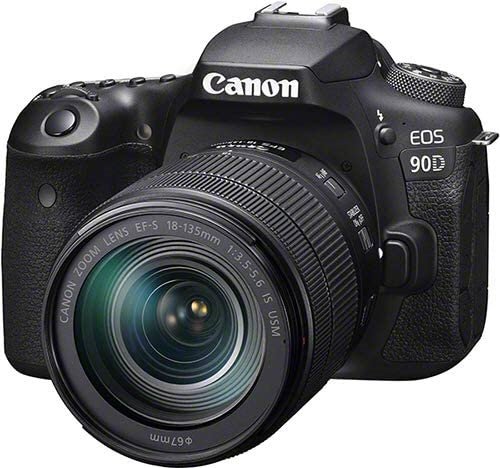
When it comes to mid-range DSLR cameras, Canon has stolen the show.
The Canon EOS 90D is the best DSLR camera for enthusiasts in 2021.
The sensor has a resolution of 32.5MP. Impressive for an APS-C
sensor. The images from this camera will knock your socks off, and you
won’t lose quality when shooting at 10fps. Its only weakness is the
limited ISO range.
The Canon EOS 90D is not only photographers that love this camera.
Thanks to the 4K uncropped video capabilities, videographers and
vloggers are raving about it too.
For quality and functions, you can’t do better than the Canon EOS
90D. And the price isn’t bad either. It is the best DSLR camera for
enthusiasts.
The Nikon D7500 is a versatile and reliable camera. It’s one of the best DSLR cameras for intermediate-level photographers.
This camera is a great all-rounder. The resolution of 20.9MP might
seems low for this level, but the image quality is superb. And with an
ISO range of 100-51200, extendable up to ISO 1640000, the D7500 performs
brilliantly in dark conditions.
The 51-point autofocus and 8fps burst mode make it great for
capturing the action. And, if that’s not quick enough, you can try the
4K video capture.
The image resolution doesn’t quite match the Canon EOS 90D. But in
every other respect, it’s a close race between the two. The Nikon D7500
is one of the best DSLR cameras for enthusiasts.
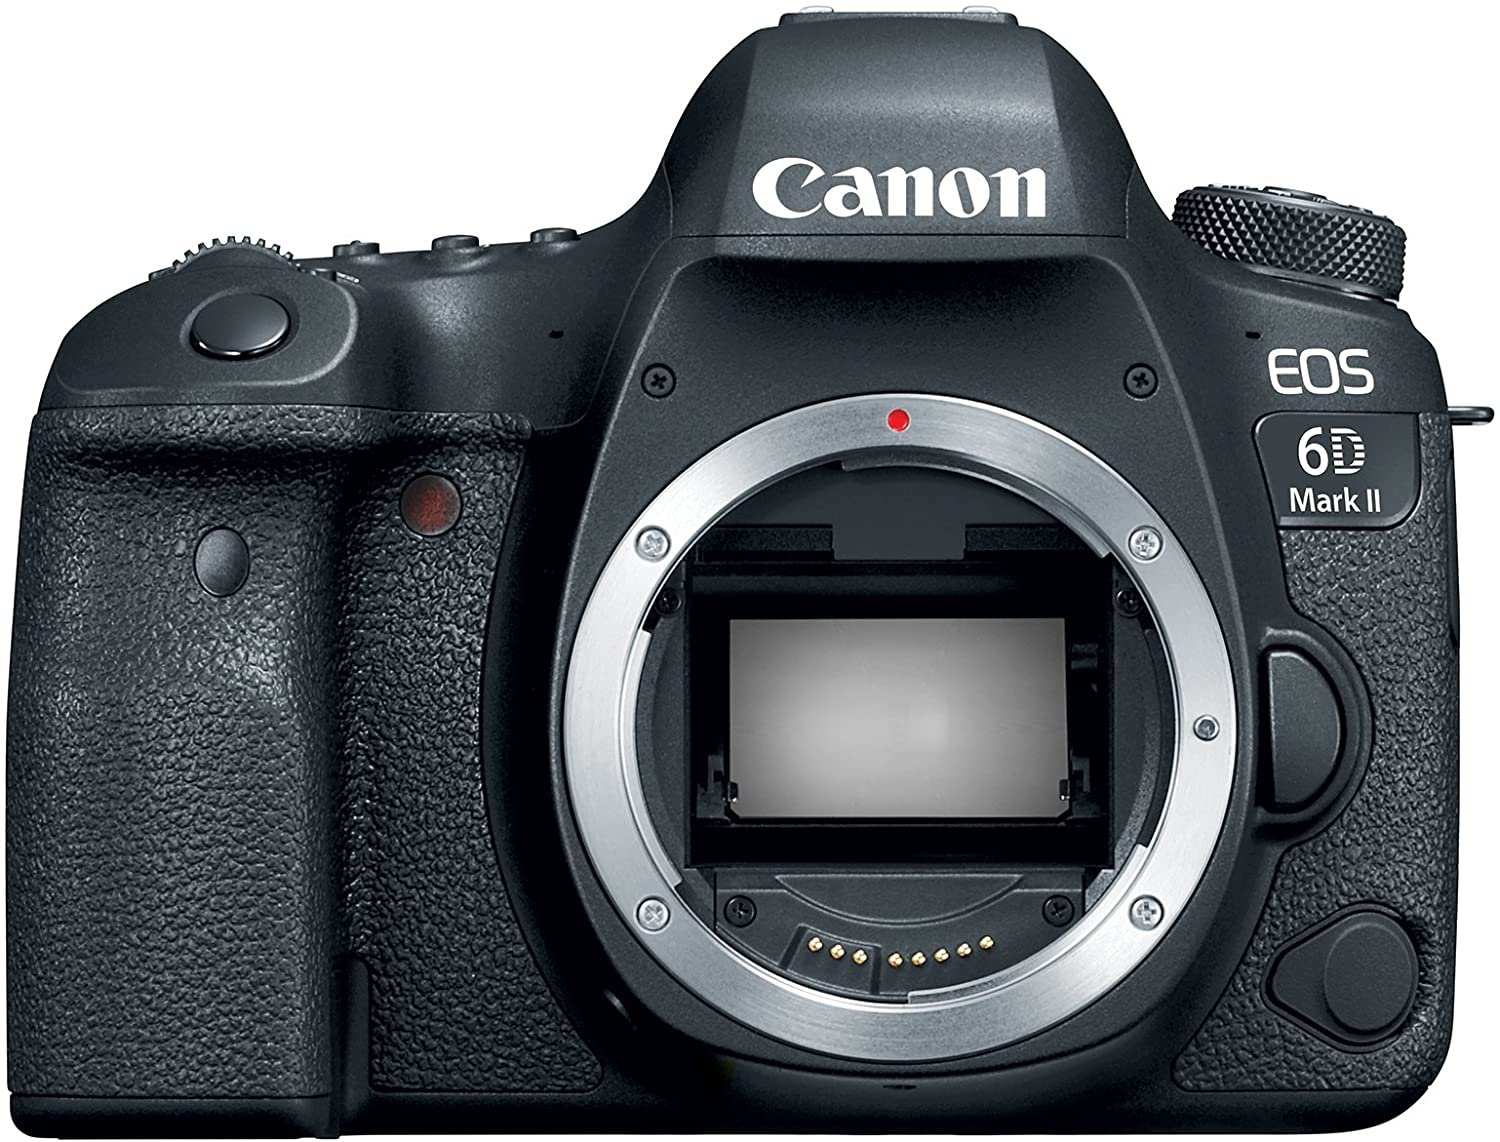
The Canon EOS 6D Mark II is for serious enthusiasts. It’s for the
photographers that want to capture the best images they can. It isn’t
the most versatile, but it plays to its strengths.
It’s hard to beat the Canon EOS 6D Mark II on image quality. The
26.2MP sensor packs a wallop, and the expandable ISO range means it
won’t let you down if the conditions change.
The burst of 6.5fps is slow compared to some competitors. But the 45-point autofocus system is quick and reliable.
It’s a rugged camera with impressive build quality. If you want a
DSLR that gives you quality images, the Canon EOS 6D Mark II won’t let
you down. One of the very best DSLR cameras available.
The Nikon D500 is geared towards sports and wildlife photography. But
the excellent functions and performance make this a great DSLR camera
for any enthusiast.
Other cameras on this list have surpassed the 20.9MP sensor. But, it
has a rapid 10fps burst mode. And, the buffer system can capture up to
200 RAW when shooting at full speed.
The 153-point autofocus system has wide coverage over the frame, so
you won’t lose your subject. It’s perfect for shooting fast action or at
night. The Nikon D500 also has excellent 4K video capabilities.
The Nikon D500 might not be for everyone. But if you’re interested in
sport or wildlife photography, the D500 is one of the best DSLR cameras
on the market today.
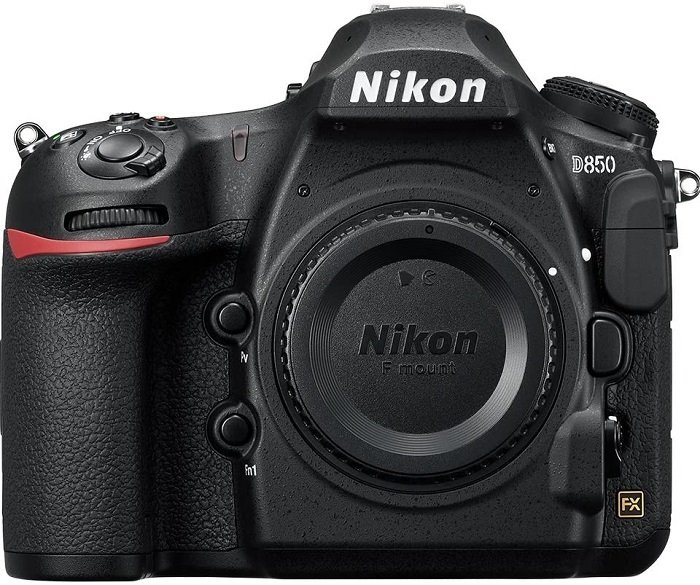
The Nikon D850 is a robust and versatile full-frame camera. It was made to work and won’t let you down.
The full-frame sensor has a resolution of 45.7MP, which is pretty
mind-blowing. For image quality, you won’t find anything better in the
world of DSLRs. The 4K video capture is also excellent quality, making
it an ideal camera for videographers too.
The continuous shooting speed is quick, and the autofocus system will
function even at full speed. And the battery life is great too. You can
get up to 1840 shots on one charge, which is impressive for a camera of
this standard.
A stand-out feature is the focus shooting
mode. This mode allows you to change the focal area after taking the
picture and also makes image stacking possible in post-production.
The intervalometer also provides a lot of creative scope for time-lapse photography. You can program specific intervals and shooting rates for different effects.
The Nikon D850 isn’t cheap. But you are paying for quality in every
respect with this camera. It is the best DSLR camera for professionals
in 2021.
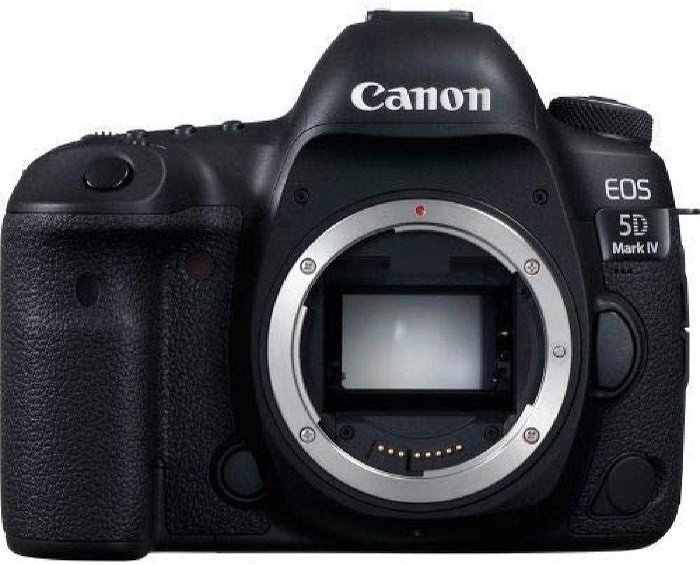
The Canon EOS 5D Mark IV is a tough and reliable DSLR camera. It’s
well-rounded and is very popular among professional photographers.
The specs may not match those of the Nikon D850. But the race is
closer than you might think. The 30.4MP CMOS sensor produces stunning
images that are of professional quality.
The continuous shooting speed is a reasonable 7fps. But the autofocus
system is fast and reliable with stills and video. And despite the
cropped footage, the Canon EOS 5D Mark IV is ranked highly by video
makers.
The Dual Pixel Raw innovation allows you to shift the focus after
you’ve taken the picture. You can correct errors or change the subject.
It’s a fantastic feature for professionals when money is on the line.
The Canon EOS 5D Mark IV is robust and reliable. It’s a professional
DSLR camera that produces excellent results with photos and videos. It
is one of the best DSLR cameras for professionals on the market.
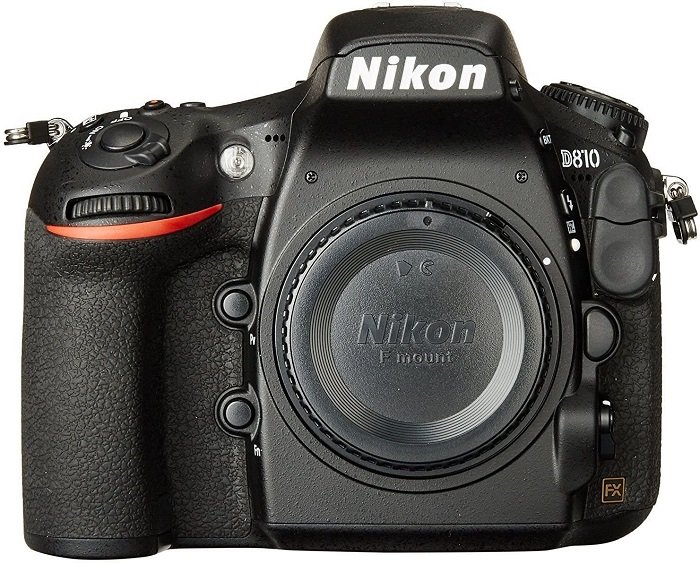
The Nikon D810 is an earlier incarnation of the D850. But, despite
its age, the D810 is still has everything a professional needs from a
DSLR.
Some specs may not match up to the D850. But for many, the 45MP
sensor on the D850 is overkill. A resolution of 36.3MP on the D810 is
more than enough to capture stunning images. It will more than meet the
standard of any publication or editorial.
The autofocus system is sharp and reliable, and the burst is decent
for continuous shooting. The 4K video is cropped but still of excellent
quality. And, it has a brilliant ISO change for shooting in low-light
conditions.
The D850 is at the top of the professional league. But the Nikon D810
is still a great option for professional photographers in 2021. It may
not have the very top specs, but you’ll find very little to complain
about. It’s still one of the best DSLR cameras available.
Max Burst Speed: 4.4fps (6.4fps in APS-C crop mode)
Max Video Resolution: 1080p
User Level: Enthusiast/professional
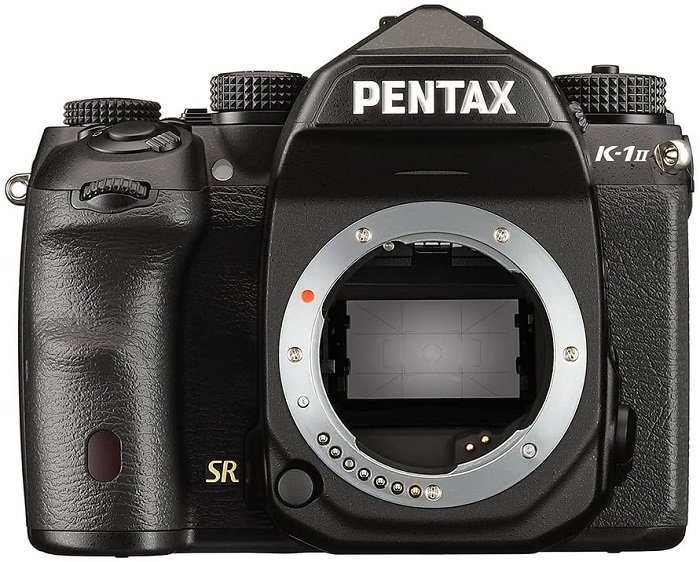
Canon and Nikon are dominating the DSLR market. But the Pentax K1
Mark II can definitely compete with the DSLR top dogs. It’s a superb
full-frame camera.
The 36.4MP image resolution meets the brief of a professional camera.
It won’t disappoint on image quality. And the built-in 5-axis image
stabilization system will ensure a sharp focus on all your images.
The autofocus system doesn’t live up to its competitors. But, the
Pentax gives you more options with the burst function. You have 4fps
with the full-frame sensor, or 6fps if you use crop mode. But one
downside is the lack of 4K video capture, which isn’t ideal for
videographers.
The Pentax K1 Mark II is a DSLR for traditionalists. It loses points
on features, but it is tough and reliable. It’s weather-sealed and made
for tough work. If you want a back-to-basics camera that you can rely
on, the Pentax is one of the best DSLR cameras for professionals.
DSLR cameras may not be in vogue right now, but don’t let that put
you off. The battle between DSLR and mirrorless cameras is not over. And
Nikon, Canon, and Pentax are proving DSLRs still have a place in the
world of photography.
The best DSLR cameras offer everything you’ll need, from
stripped-back to feature-packed. There are top-market cameras and
affordable alternatives.
Should I use/purchase a DSLR camera, or a mirrorless camera? This is a
decision that has been on just about every photographer’s mind for the
past couple of years.
Every camera we purchase is a major investment- so we don’t want to make a mistake.
You will hear a lot of hype pushing for both types of cameras. Clearly, each has its own benefits and drawbacks.
We asked photographer and author Jason Little to look into this question for us and give us the straight scoop.
What does the lens situation look like for a mirrorless versus a DSLR camera?
Does a DSLR camera body provide better quality?
Is a mirrorless camera body and lens truly less weight?
What is the comparison of accessories?
Is the industry giving up on the DSLR and moving toward all mirrorless cameras?
Sorry I missed posting since last Monday. I've been feeling a little "under the weather" and had to take some time off. I'm now feeling fine, and back in the saddle. I think you'll like this post as much as I enjoyed researching it.
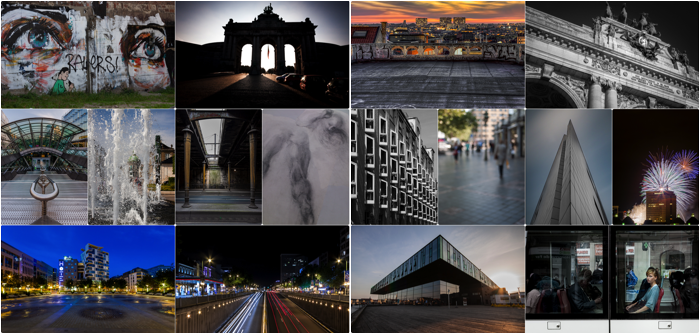
Cities are the most beautiful, vibrant and ever-changing playgrounds
for photographers. City photography is not only about breathtaking skylines and cityscapes, though.
It is easy to play it safe and limit yourself to the classic tourist
snapshots. Or to be overwhelmed and try to shoot everything that moves
or stands tall.
In this article, I will share 18 tips to help you to take breathtaking city pictures.
Golden Rules for the Urban Photographer
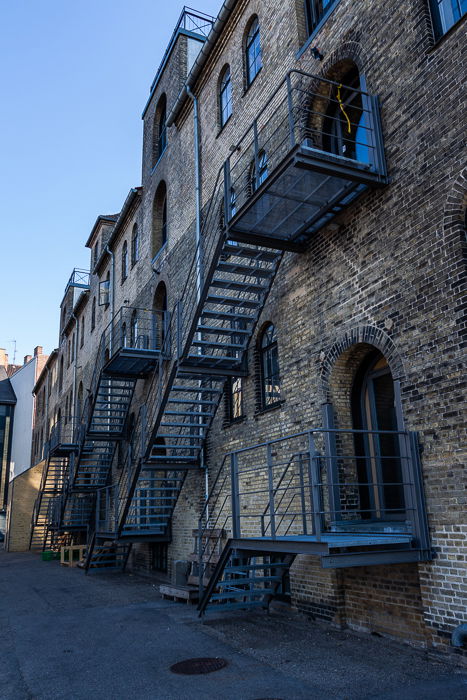
Be Safe
Every city has its fair share of crimes. Ask the locals and tourist
offices for places a tourist should avoid. Keep in mind that what seems
like a nice, common street by day can be a risky area by night.
A small alley in Copenhagen. It looks nice by day, but I have no idea if it is the safest place at night.
Be aware of what is going on around you. Try not to attract too much attention by walking around with lots of equipment. If you are not on a professional assignment, you may ditch your expensive pro gear. Take more modest-looking bridge or compact camera instead.
You won’t compromise much image quality, and you’ll be safer. It’s
always a good idea not to go out on your own but bring a friend or two
when it gets dark.
Be Respectful of Others
The city is not your home studio, and the people you see are not there posing for you. Be respectful and not imposing or threatening.
Some street photographers like to jump at people’s face with a flash to get candid reactions. Like Magnum photographer Bruce Gilden. Not everybody is comfortable enough to do this with strangers in the street. And it’s not legal everywhere either.
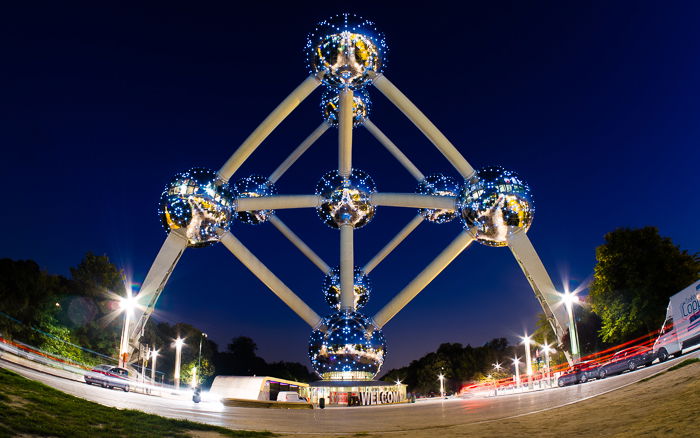
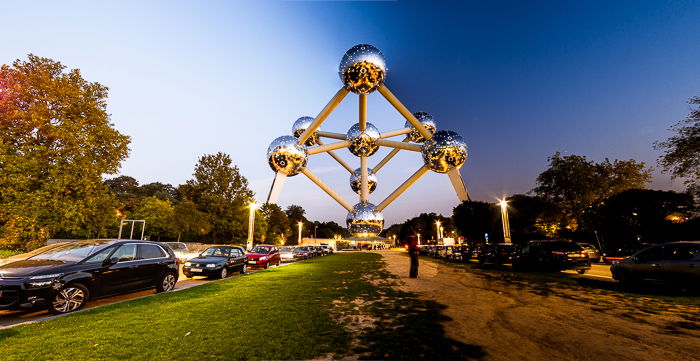
Be aware that some places do not allow
cameras. Some buildings (or parts of them, like the light display on the
Eiffel Tower) are copyrighted. You can photograph them for your
personal use. But cannot sell your images without paying royalties to
the copyright owner.
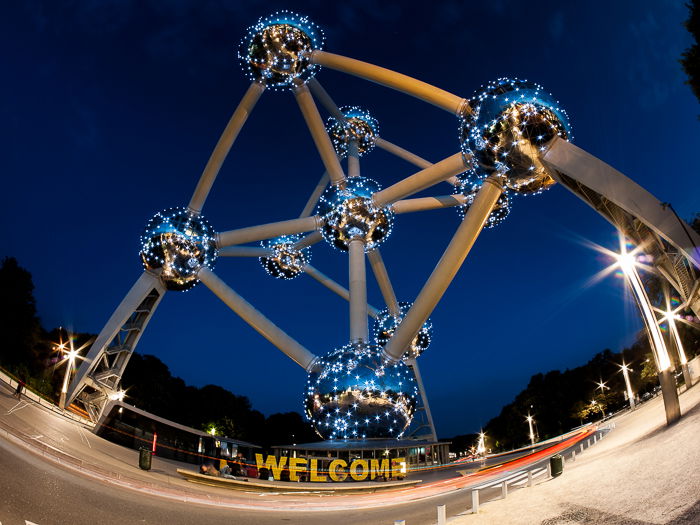
The Atomium is a famous landmark in Brussels (Belgium) and it is copyrighted.
Stay Comfy
Urban photographers hit the streets for many hours at a time in all
weather conditions. Dress comfortably, stay warm in the winter. Make
sure to dress in layers and have good shoes.
If you are carrying heavy equipment, a backpack is more comfortable than a shoulder bag.
Keep Looking and Experimenting
Look up, look in front, now to the left, to the right and also give a
good look behind you. Scan the city for small details, hidden patterns,
interesting people and situations.
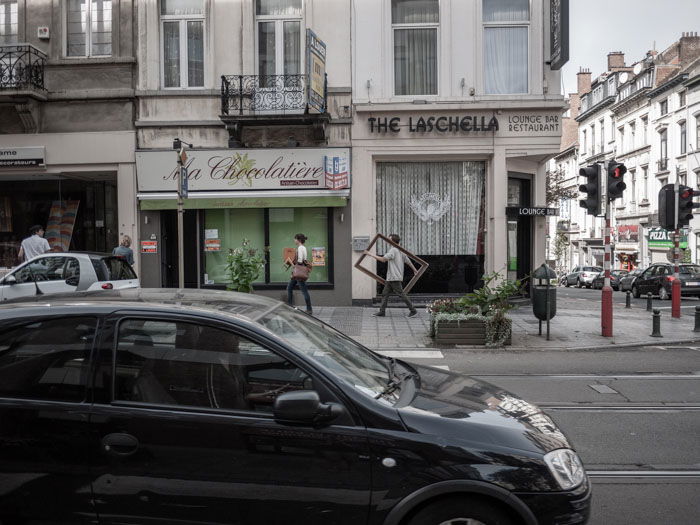
The best thing about city photography is that you cannot plan your
pictures. There is always something new, even if you try to photograph
the same location every day.
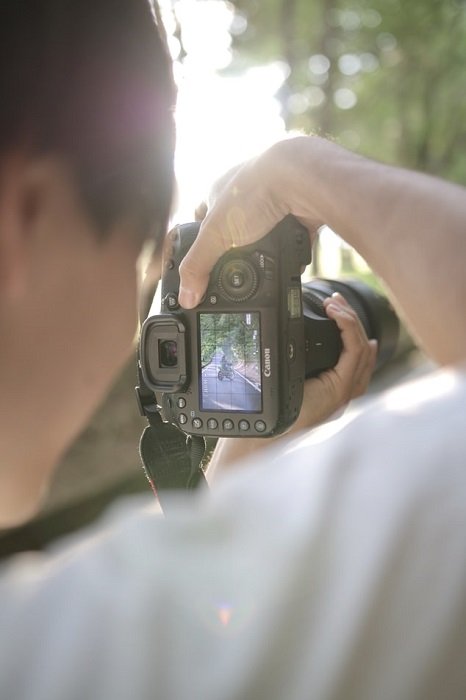
Did you notice the man with the frame?
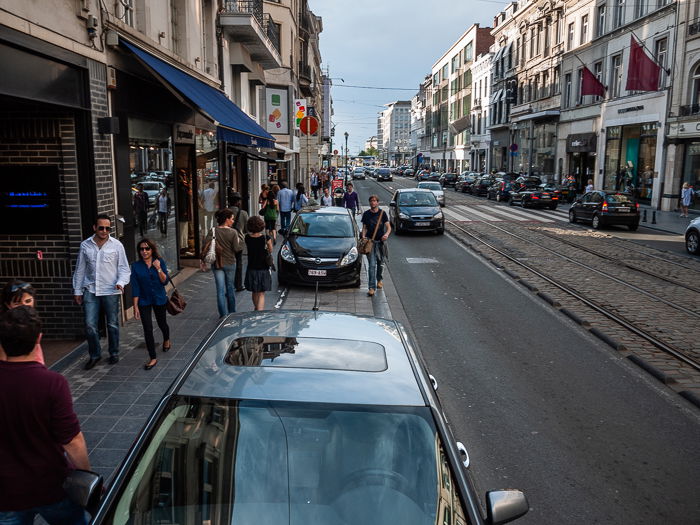
Photographing from ground level or from above the crowd can help to shoot better street photography.
In
this shot, I mounted my old Panasonic GF-2 mirrorless camera on a
monopod to lift it well above eye level for a different view of the city
street.
City Photography Gear
If you are visiting a city for tourism, a good zoom lens is far more important than the kind of camera you are using. A travel zoom lens for DSLR and mirrorless cameras is often all you need. They will allow you to shoot both cityscapes and candid portraits.
Bridge cameras with power zoom, such as Sony RX10 with its 24-200 f/2.8 lens, are great all-around cameras for the city. The fast aperture is also great for indoor use.
Pocketable compact cameras, such the Sony RX100 sporting a great 24-70mm f/2.8 zoom lens, are portable and can often be used where DSLR cameras are forbidden. Like at concerts and some events. Small cameras are also less intimidating when you shoot street photography.
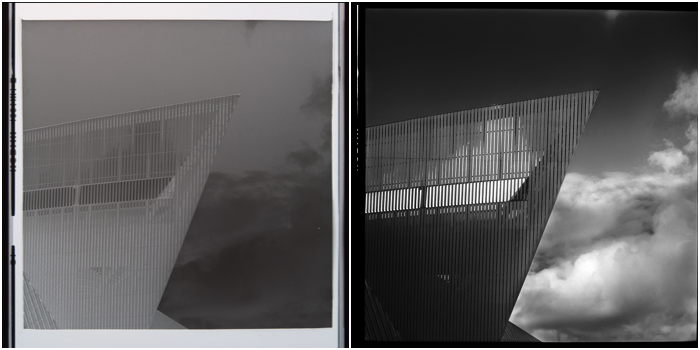
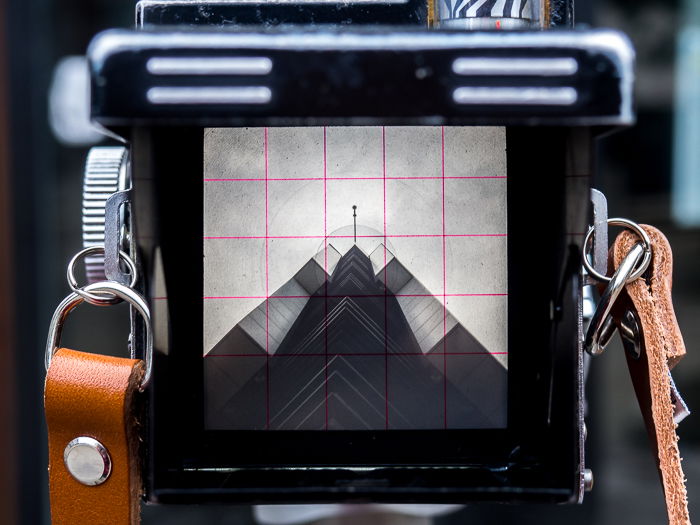
Old TLR cameras (6×6 medium format
film) are still great cameras to work with. Particularly if you like to
create and work on projects.
But a TLR camera is also a great prop to show the city in a different
way. I love to photograph the city through my Yashica Mat TLR camera
and create more unique images.
Looking up at a modern building through my old Yashica Mat LM TLR camera.
Smartphone cameras
are best used for the casual shot and for some work in street
photography, as they are small and do not attract too much attention.
A travel tripod, such as the MeFoto RoadTrip S and the Gorillapod, is also a nice thing to have. Especially if you are after some night shots. Unfortunately, some cities have laws against the use of large tripods in the urban environment.
If you are unsure but you really want to bring the shot home, set up
the tripod. But if you are asked to leave, don’t make a fuss. Sometimes a
monopod is more accepted.
Some filters can be handy too. Graduated filters are great for getting those magical sunsets over the city. Neutral density filters can be used to shoot long exposures in daylight. They let you capture clouds or remove passersby and traffic from your images.
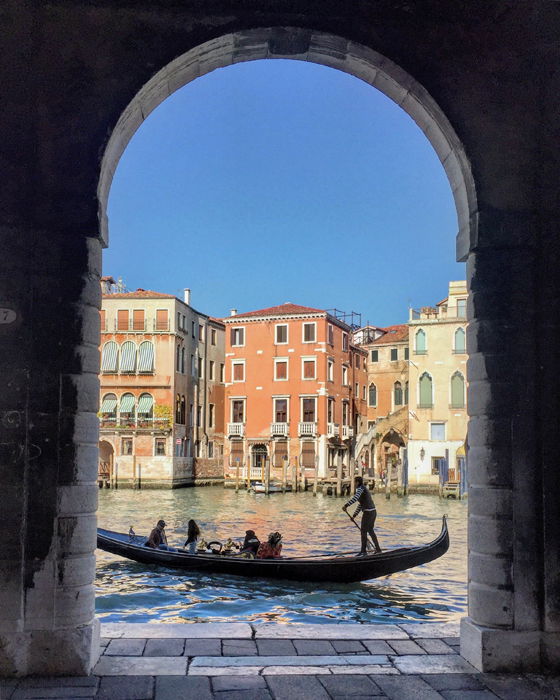
Shoot your image through archways so that it has a nice frame
around it. In general, there are archways in older parts of the city.
Sometimes you have to wait for the right time to get the perfect shots.
You can also look for interesting shadows that the sunshine generates through the arches.
Photo by Dora Jokkel
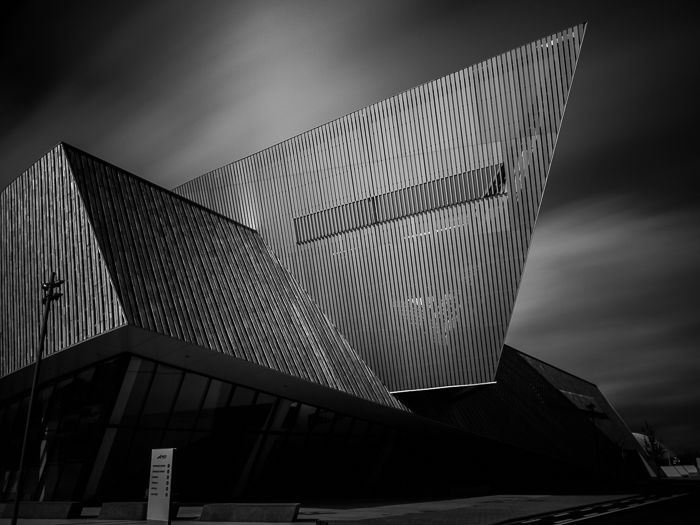
17. Focus on Architecture Photography
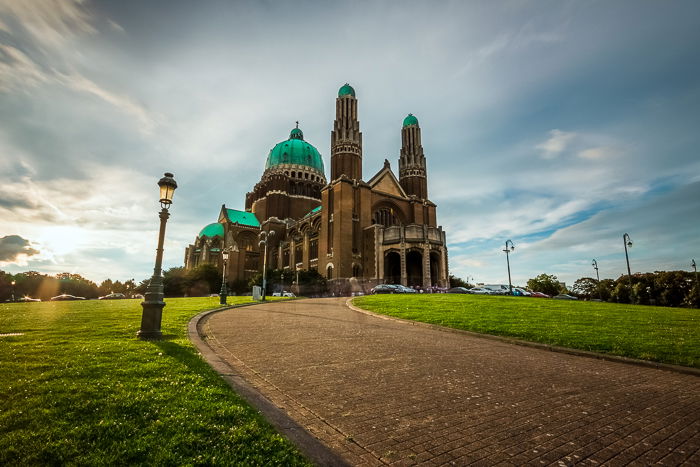
The most obvious kind of photography you can do in the city is architecture photography. Every city has famous landmarks such as monuments, buildings, churches and so on.
Basilica
of the Sacred Heart, Brussels (Belgium). Also known as Koekelberg
Basilica. Note the wide-angle lens distortions and how it affects the
lamp post in the foreground.
A wide-angle lens is a must for capturing an entire building. But you will get some distortions in the image. If you can, try to put some distance between you and your target to reduce perspective distortions.
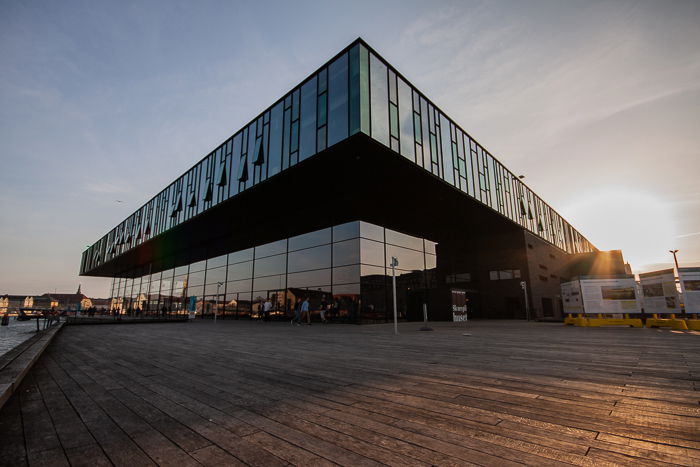
A careful composition can help to make the building more imposing. I did this by increasing lens and perspective distortions in the image below.
The Skuespilhuset (Copenhagen, Denmark) at sunset.
Famous landmarks are not the only kind of interesting architecture you can find. Look around for shops, train stations, modern corporate buildings and so on.
Focus on the typical architectural style of the city you are in. New
York and Rome have very different buildings. But they are both iconic,
and everyone would recognise them in city photography.
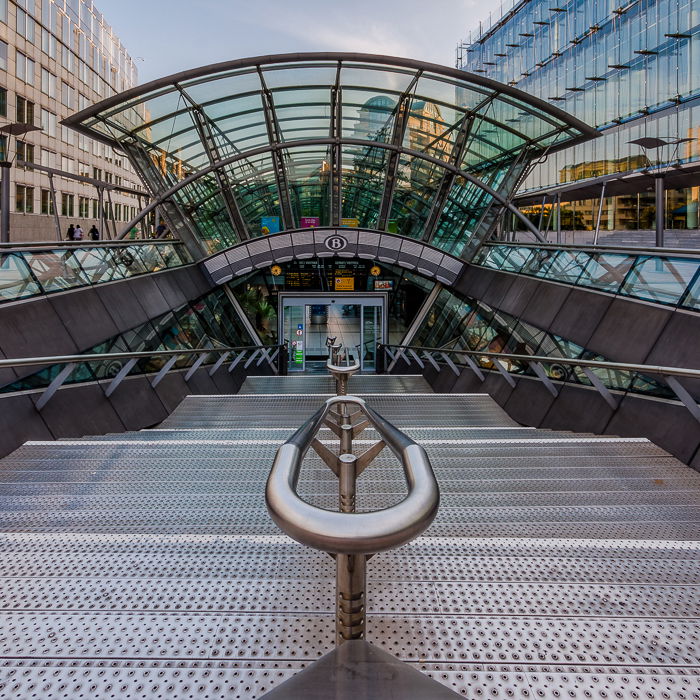
The entrance of the Luxembourg Metro Station in Brussels is quite interesting.
16. Shoot Cityscapes
There are two kinds of cityscapes: the skyline, where you see part of the city from a distance. And bird’s-eye views over the city.
Skylines require to put some distance between you and the city. A
famous example is New York’s Manhattan skyline seen from across the
Hudson River. Or the City from across the Tames in London.
Bird’s-eye views are taken from rooftops and high vantage points.
Some monuments, hotels and buildings also give access to a panoramic
terrace.
Keep in mind that no every city has a nice skyline. It is always
worth to climb up to a higher spot and get a new perspective about the
city.
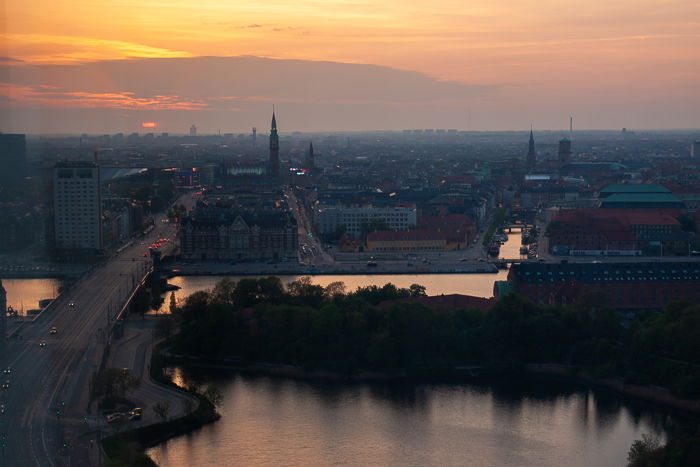
Copenhagen at sunset from my hotel room on the last floor.
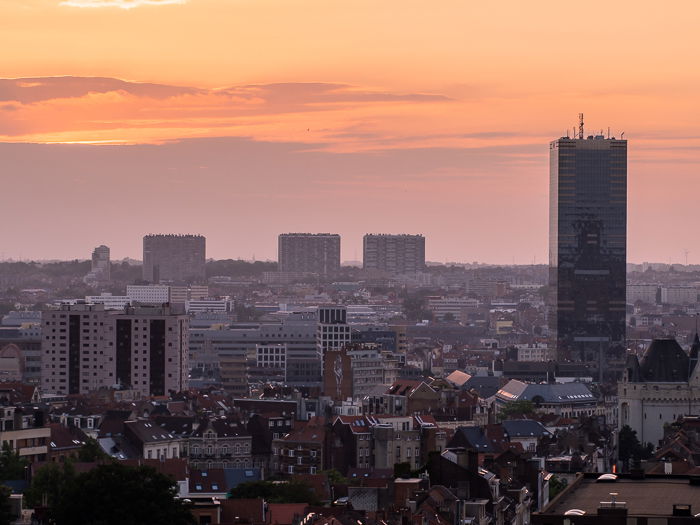
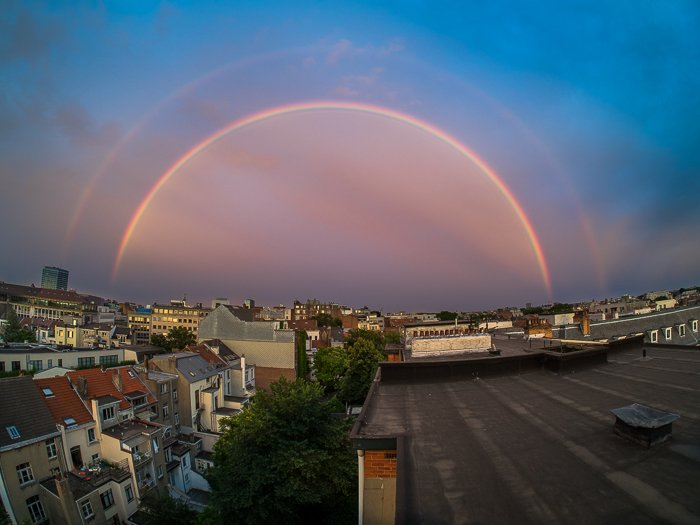
I’m lucky enough to live in a tall building on top of a hill in
Brussels, and I like to sneak on the roof to take breathtaking images of
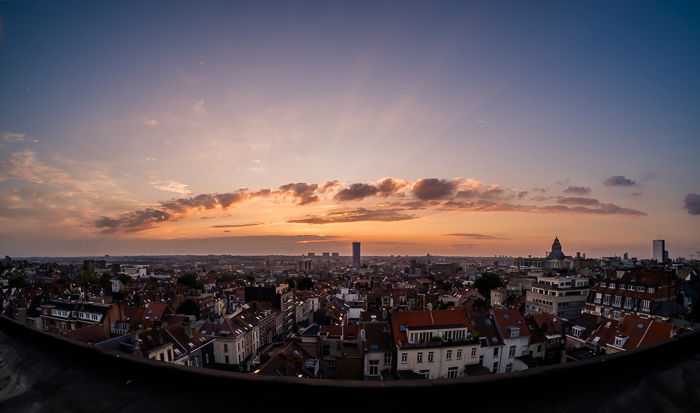
the south part of Brussels.
The view from the roof of my building at sunset.
Sometimes, though, it is nice to zoom in a little to isolate some interesting buildings.
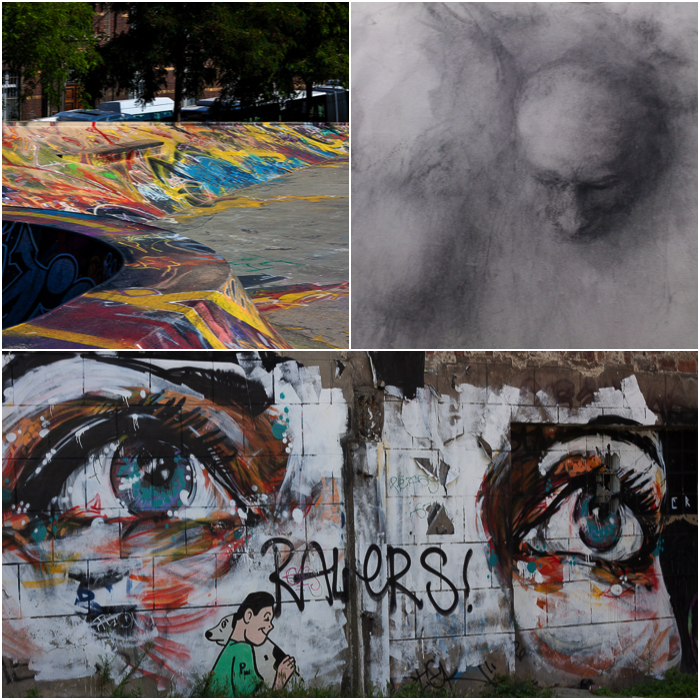
Note the different style mix and the huge graffiti taking up a full facade at the center of the frame.
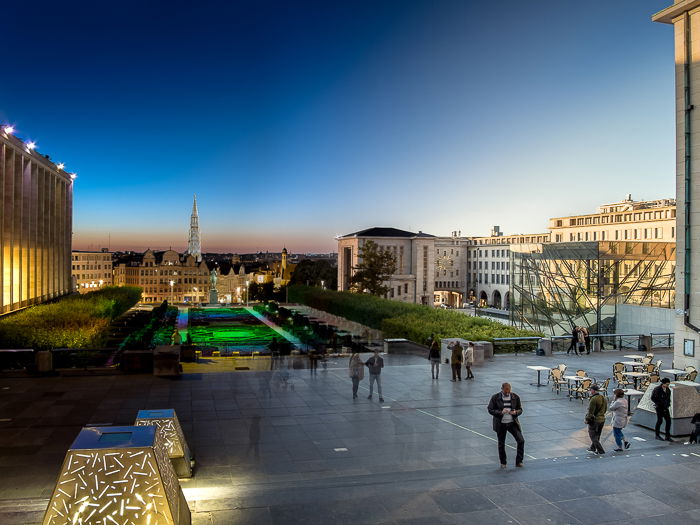
15. Take Day to Night Shots
This technique is very particular. It consists of photographing the
same place for many hours at a regular interval. All the images are then
combined together to display the passing of the day, from morning to
night. Photographer Stephen Wikes is a specialist of this technique.
Mons des Arts, Brussels (Belgium).
Day-to-night
works best on large cityscapes, where you can create a smooth
transition. Less time consuming alternative is what I call Golden2Blue
(from the golden to the blue hour).
You can still observe how the city transforms with the hours. But you will have done so with only about an hour’s shooting.
You need a tripod,
and you will occupy that spot for quite some time. Be respectful of
others and
don’t block a passage or the only view spot available.
Graduated filters can help to balance the exposition across the scene at sunset or during the day. Panorama stitching is a great way to create large cityscapes. And works very well with this technique.
A panorama stitch from the Atomium (Brussels, Belgium)
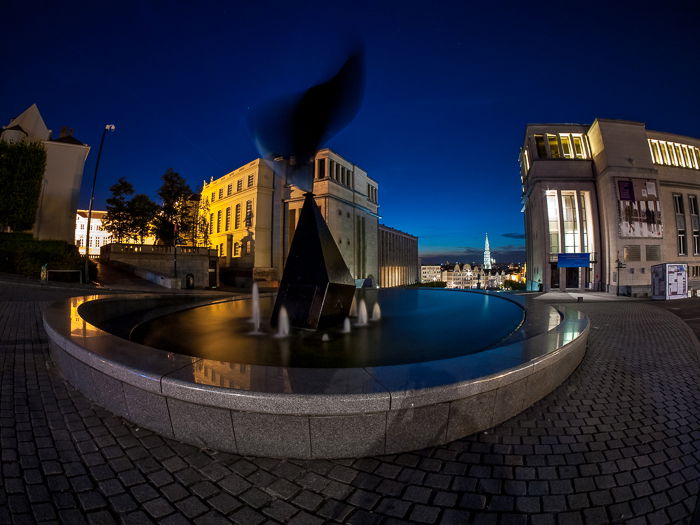
14. Shoot Fisheye Photography in Cities
Fisheye lenses are often considered toy lenses because of their
distortions. But you can use them for serious photography to create
interesting city images.
A few years ago, I did a project called Fisheye & The City. I found that the lens works very well in the urban environment.
Mons des Arts by night (Brussels, Belgium).
Fisheyes are compact and light lenses. They have very wide fields of
view, are quite fast and have very large depths of field. Focus is not
something to worry about. Even with manual lenses such as the Samyang 7.5mm f/3.5 MFT fish-eye lens I own.
We have written in detail about fisheye photography before. To summarise, it is all about understanding lens distortions and working with those to create more dynamic images.
The
fisheye allowed me to capture the entire Atomium (102mt tall) from just
across the street. The distortions and the light trails create a
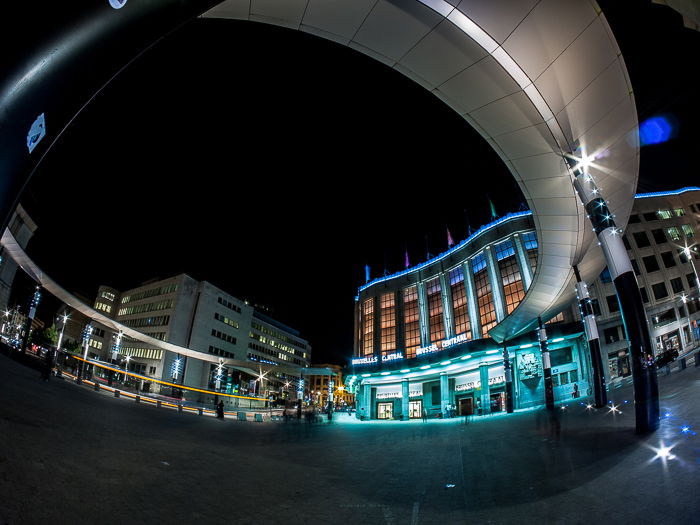
powerful, dynamic and uncommon view of this famous landmark.The
combined effect of lens distortion and architecture creates some
powerful leading lines to the main entrance of Brussels Central Station.
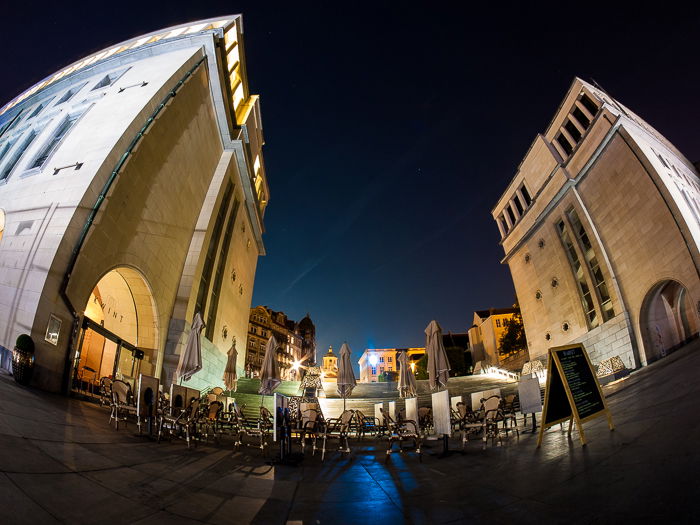
The increased distortions make the leaning building effect less
disturbing. It’s handy when photographing a building from close range.
Tall
buildings from a low angle give the idea of waves about to break on the
shore. Again, for a powerful image where perspective distortions are
not disturbing.
13. Focus on Colors
Colors
are everywhere. Try to look for matching colours in your scene. Some
cities such as Rome, Venice or Nice have amazing pastel colours
everywhere.
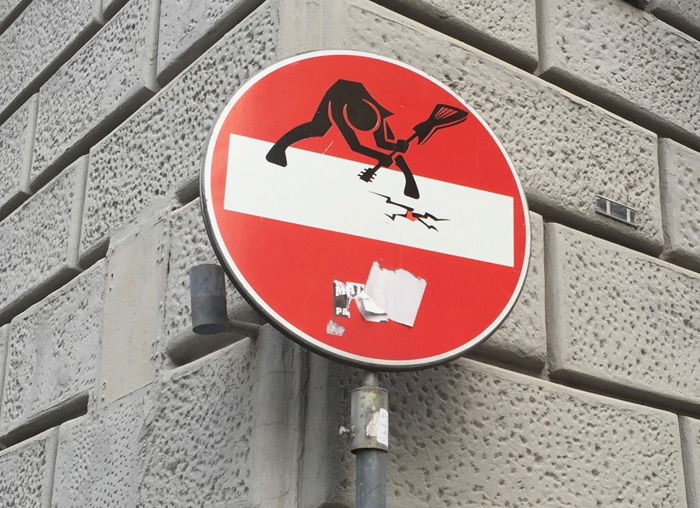
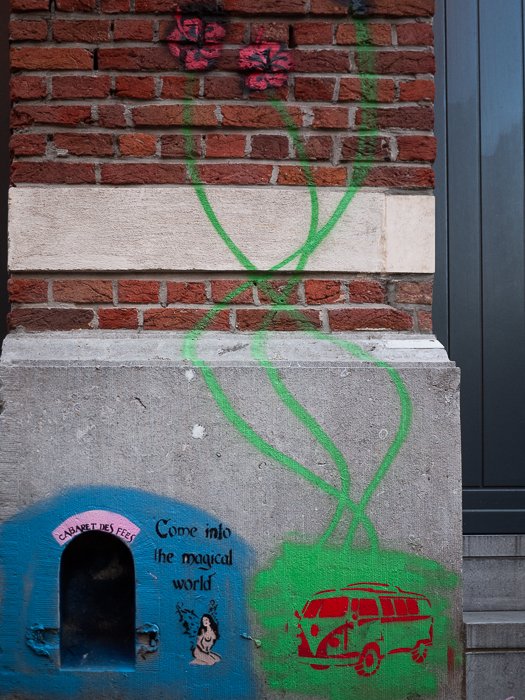
12. Focus on Details
Buildings are nice and easy to spot. But look around for those
interesting details that are everywhere to be found. This can be
anything new from an ivy coated building to funny street art.
When I stroll around a city, I always look into empty courtyards or abandoned streets. You never know what hidden gem you may find in there.
Florence has lots of similar funny street signs
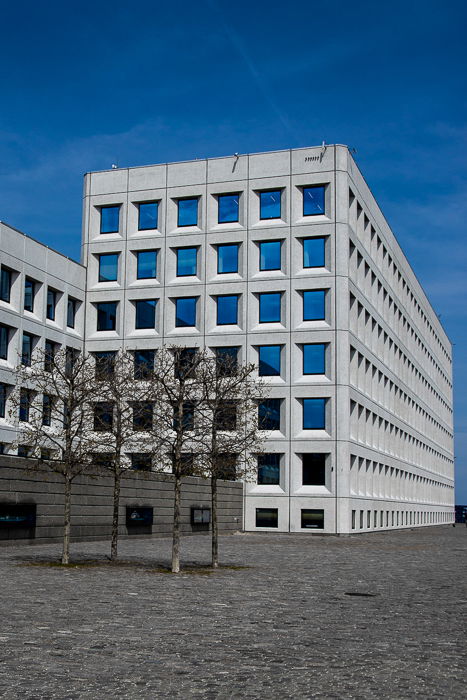
11. Focus on Patterns
Patterns
are another exciting.subject in city photography. In harsh daylight,
it’s better to focus on patterns rather than cityscapes. Take advantage
of the strong contrasts due to the hard light.
Windows can reflect the sky. In the cloudless and sunny afternoon, I
managed to get both a pattern and matching colours in this image.
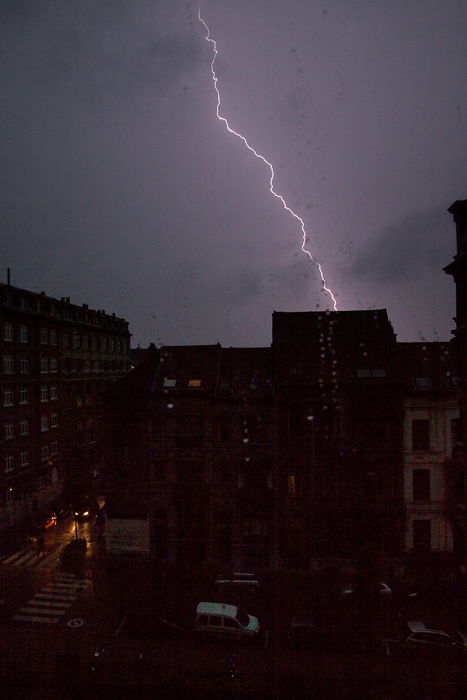
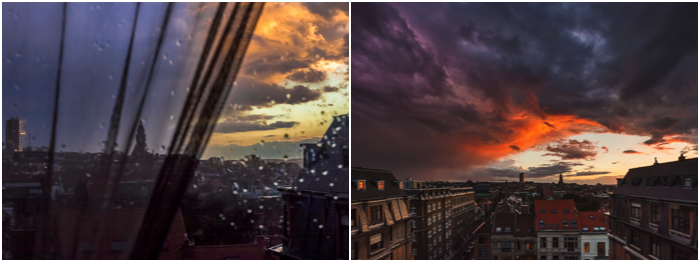
10. Focus on the Weather
Weather can have a huge impact on your city photography. Brussels is
not known for its thunderstorms. But I was lucky enough to catch a bolt
of lightning striking somewhere across the street.
Bad weather at sunset creates spectacular skies. It will make your cityscapes stand out.
To photograph the city with plenty of details during these times of
the day, you need a tripod. But the results are well worth dragging your
tripod around.
Golden hour over Brussels from the belvedere of Place Poelaert (Justice Palace).
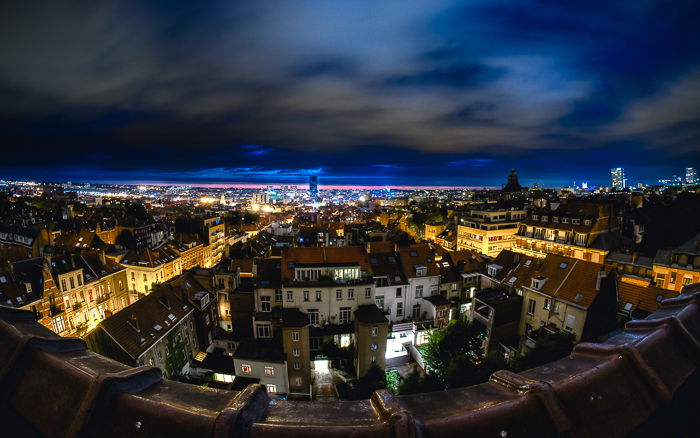
At night the city transforms thanks to all the different lights.
Yellows from the older parts of the city and bluish from the modern
areas.
Brussels at night from the roof of my building.
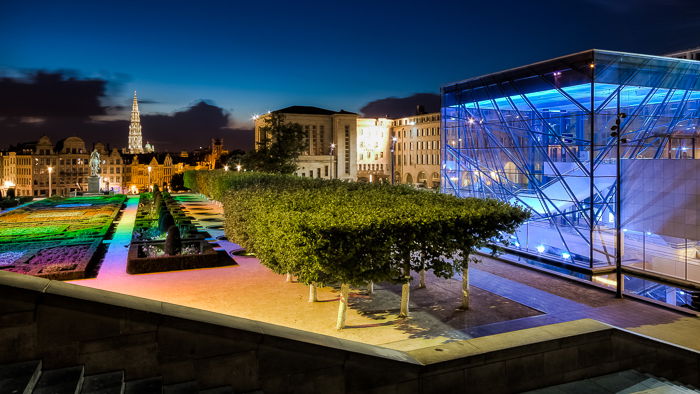
Sometimes you will find some light displays at monuments, buildings and squares.
Mons des Arts by night, with the changing lights making the small park very picturesque.
And the night is the realm of the light trail
from the traffic. Photograph at night down a road to get the classic
car trails. Or you can be more creative and use a fish-eye to capture an
entire roundabout and its carousel of light trails.
8. Look for Interesting Graffiti in the City
There is no city without graffiti. Most of them are quite pointless and not interesting, but some are very nice and artistic.
The best ones, though, are often quite small and unexpected, so keep
an eye out while you wander the streets. Many cities are now very
liberal about street art.
Vienna has a canal where graffiti is legal, and the artists repaint
the walls every now and then. Brussels has a comic strip walk with walls
depicting comic book characters. Florence has street signs decorated
with funny figures.
And not to mention Banksy! The famous British street artist who left his signature work in cities all around the world.
Look for street art and interesting graffiti in every city you visit.
Who knows, your hometown might have a few interesting pieces that you
didn’t know about.
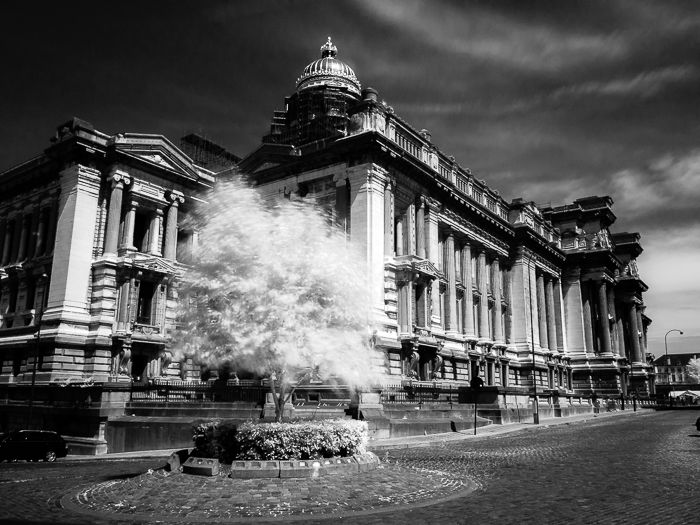
7. Use Infrared Photography in Cities
You can use infrared photography
to add a wow factor to your city pictures. You may create fresh images
of touristic spots. Also, it is interesting to see how materials look
like in infrared light.
Infrared
photography of the famous Justice Palace in Brussels. Because of the
long exposure, passing cars were not a problem for this image.
To start, all you need is an infrared filter such as the Hoya R72
and a sunny day. With unmodified cameras, infrared photography means
doing a long exposure photograph. So you will need a tripod.
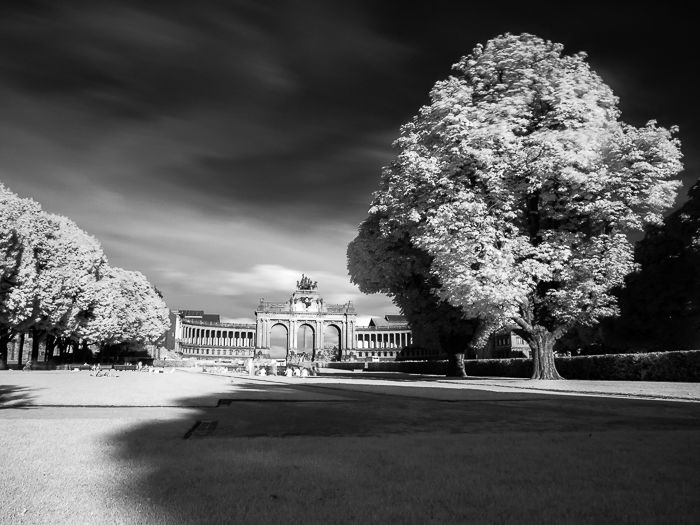
Parks are great locations for infrared photography. The most surprising effects are on tree leaves and grass.
Parc du Cinquantenaire (Brussels, Belgium).
If you are curious about this technique, read our detailed article about infrared photography.
6. Shoot Long Exposures in Your City Photography
Long exposures
are great in the city because all passers-by and moving traffic will be
invisible in your image. You can do long exposure in daylight by using
strong neutral density (ND) filters and a tripod.
The classic image is a black and white building with interesting
architecture. It is standing against a dynamic sky with fast-moving
clouds that will introduce movement to your image.
The Congress Centre in Mons (Belgium).
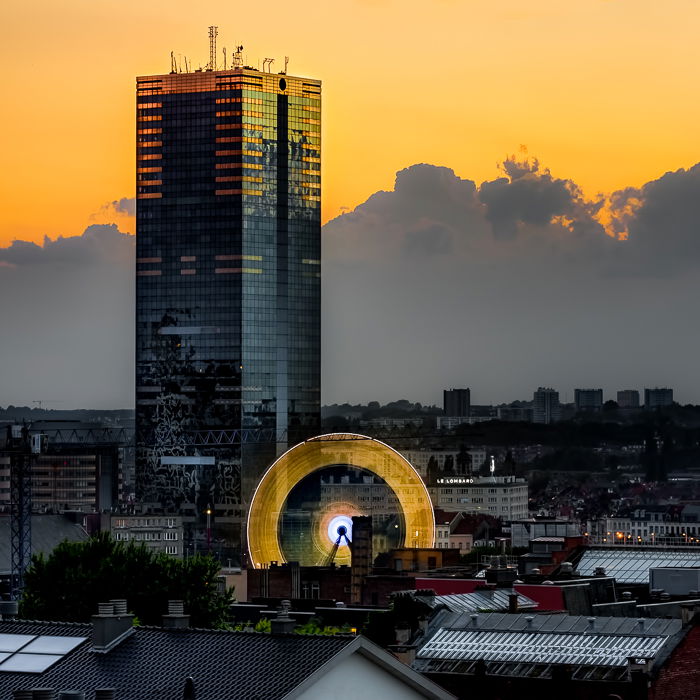
You can also combine a standard exposure with one taken with an ND
filter. In the image below, I wanted to get the movement from the slow
turning ferry wheel. I combined exposure for the city and the sky with a
long exposure taken with a 10-stops ND filter.
The reason to combine the exposure was that the clouds were nicer in the short exposure.
A turning Wheel in Brussels.
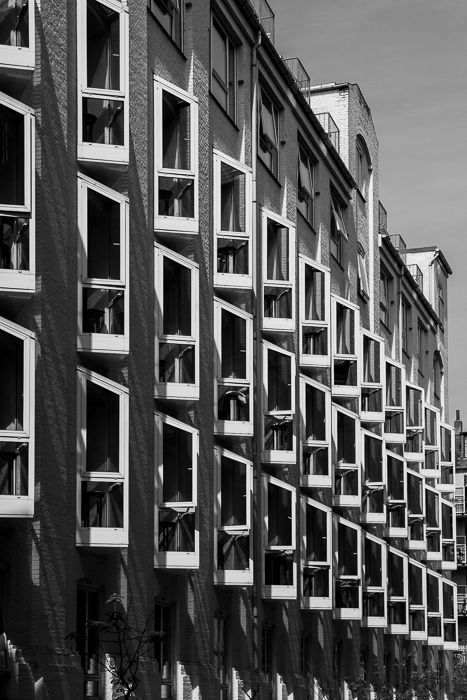
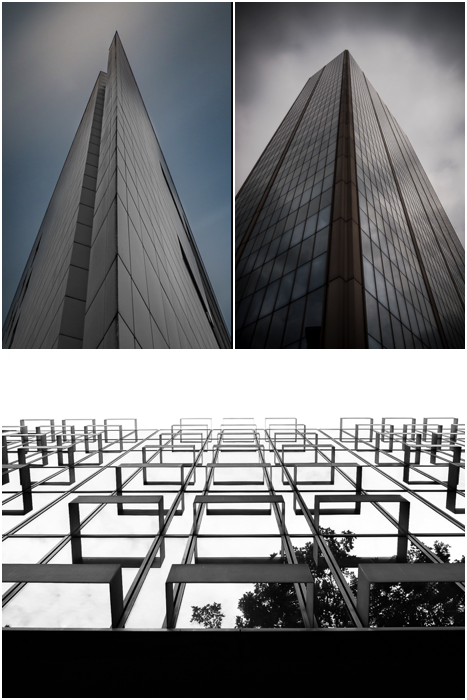
5. Look Up
As I said, you should always look out for interesting subjects and angles. But don’t forget to look straight up at building facades for interesting shapes and patterns.
Look straight up at buildings and facades for interesting shapes and patterns.
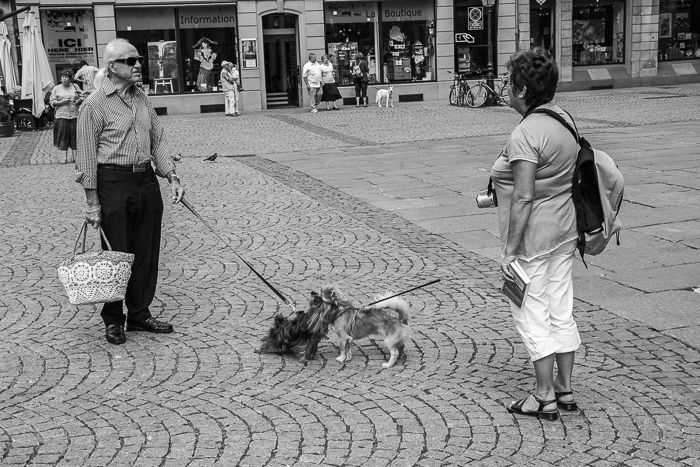
4. Include People in Your City Photography
People are a big part of the city. They are everywhere and are
interesting subjects. But remember: they are not buildings, nor are they
there to pose for us, so be respectful.
Avoid photographing children or jumping in people’s face even if you
are after candid portraits. Don’t photograph them just because they look
weird or to ridicule them. Instead, try to build a story or convey a
message.
It is easy to photograph people in touristic places as they are used
to seeing other people photographing around and tend to ignore you.
Also, smaller cameras can help you go unnoticed when you shoot street
photography.
Strangers converge together in the main square in Strasbourg (France).
Photographing people can be intimidating. If you are shy, try
practising with street artists (leave them a tip afterwards). Or
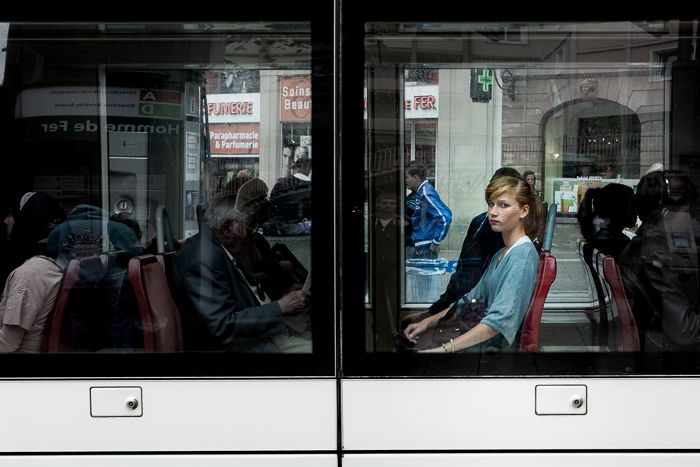
photograph people that are on buses, trams, cars or trains.
Split
Frame. This young lady spotted me and looked straight at the camera,
while the tram provided a nice frame for the picture (Strasbourg,
France).
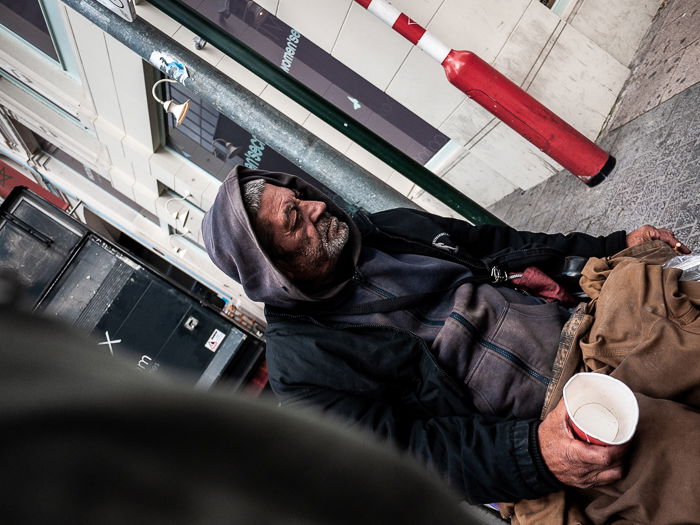
You can also shoot from the hip. This means that the camera is at your hip and you aim and shoot blindly to go unnoticed. This requires a bit of practice, but autofocus can make things easier.
I
was drawn in this photo by the empty cup of the man on the wheel chair.
By shooting from the hip I was able to get a candid shot.
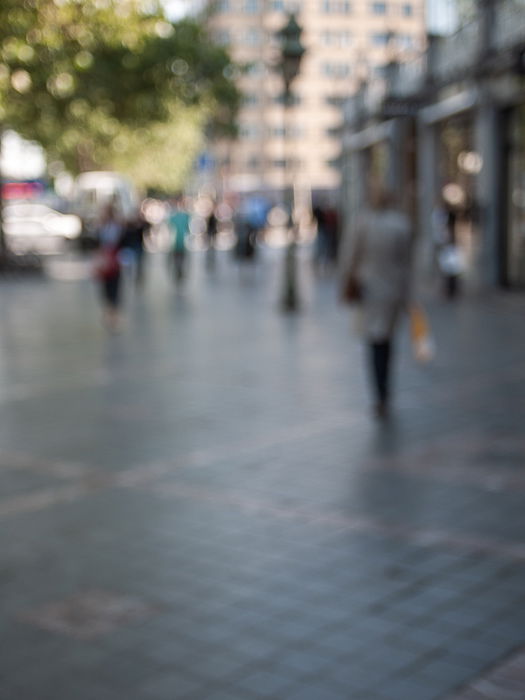
You can get more creative and photograph people in silhouette or out of focus.
A blurry street view where shapes, shadows and colours are playing a key role.
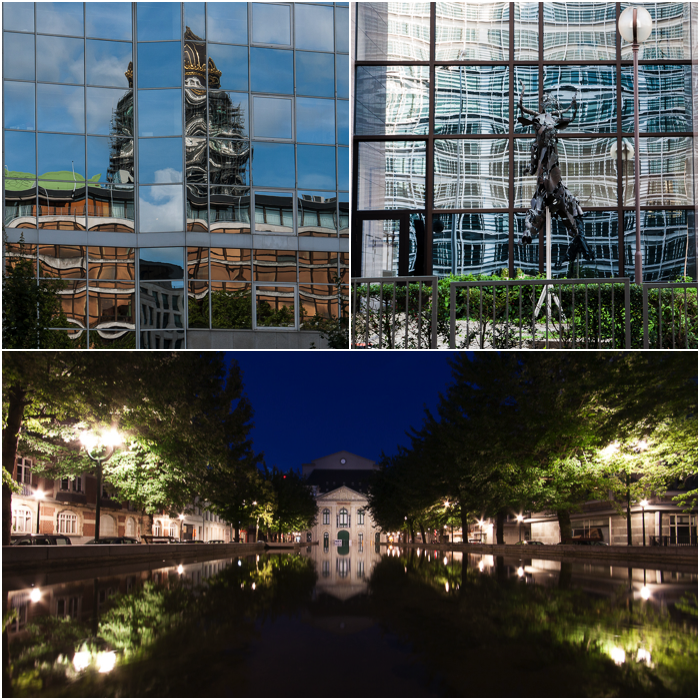
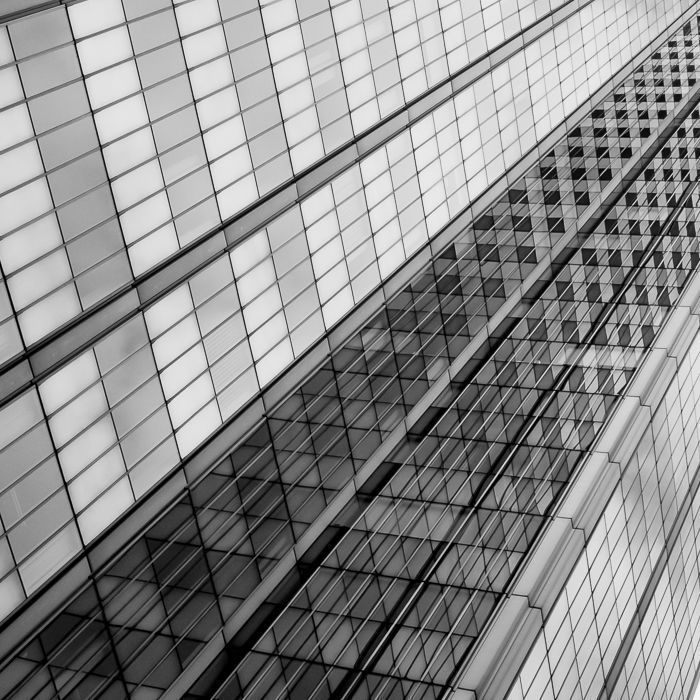
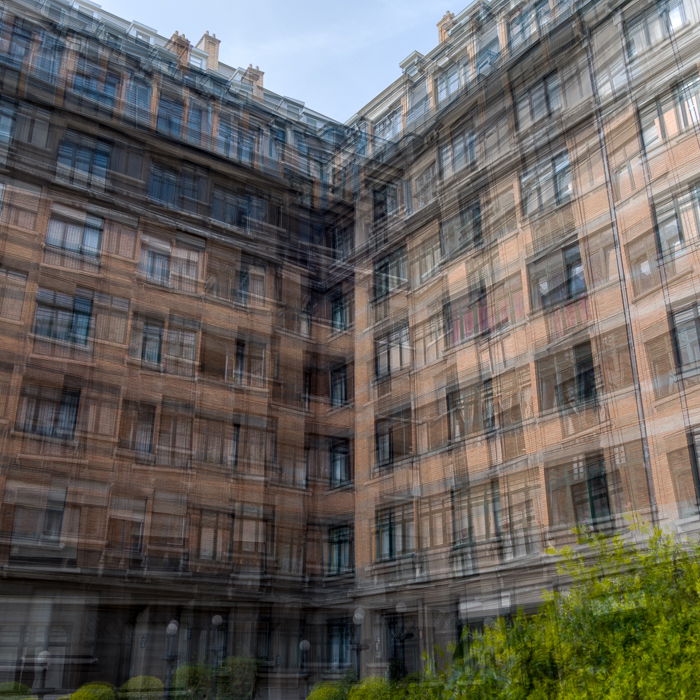
3. Look For Reflections in the City
Cities are full of reflective surfaces: puddles, fountains, windows, glass, steel. Reflections are everywhere. You just need to find them.
It is not rare to have multiple reflections interacting together,
creating interesting patterns. This is often the case with modern
buildings and skyscrapers with plenty of windows.
I love shooting after a rainy day and try to find puddles with
interesting reflections. Water surfaces such as small ponds can also get
you exciting shots.
The multiple reflections playing together create a checked pattern on this building’s facade.
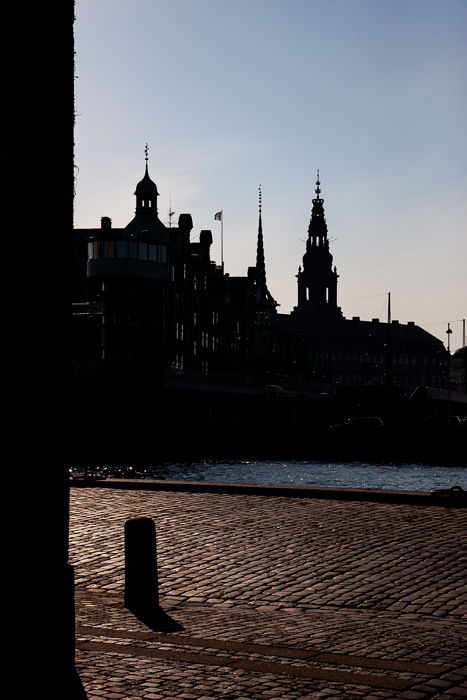
2. Capture City’s Silhouettes
I like to capture the city’s silhouette against the bright sky. This
way, I can focus more on the shape of the skyline, rather than on the
building details.
Cityscape during a late afternoon walk in Copenhagen.
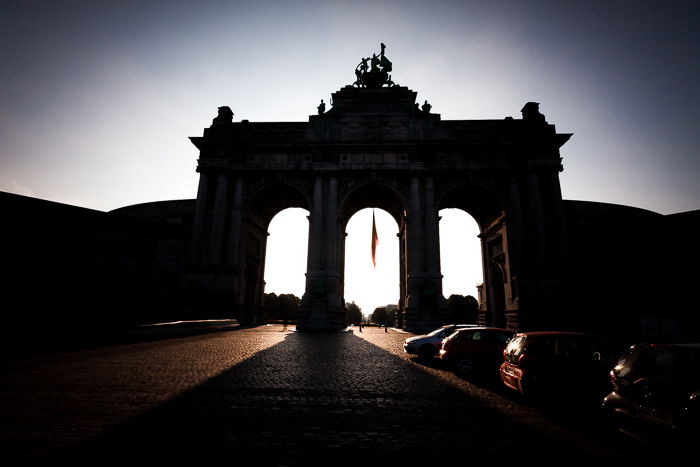
Sometimes the interplay between light and shadows is what makes an image interesting.
The Arc du Cinquantenaire in Brussels. The light filtering from behind the monuments adds interest to the photo.
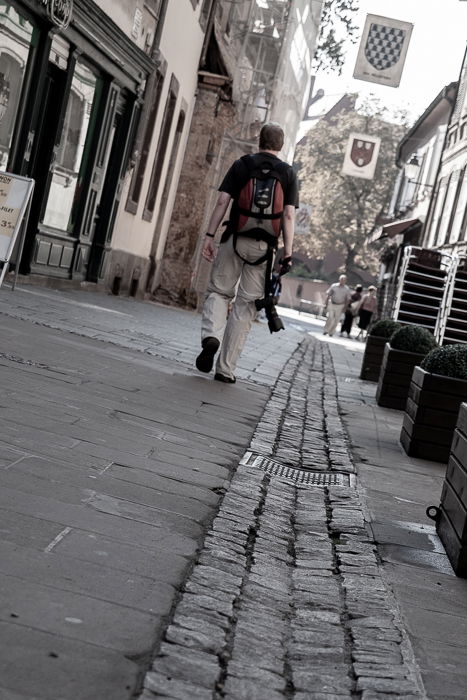
1. Work the Angle
Don’t photograph only at eye level! This is the prime cause of boring images, particularly in touristic spots. Low angles can make for an unusual composition.
Strassbourg is not a game: this photographer means business.
The low angle in the image above, the tilt and the line in the pavement add interest to an otherwise common image.
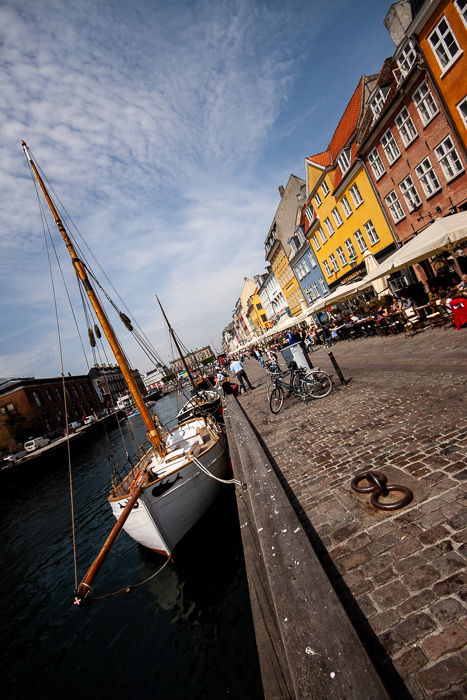
Below is the most iconic place in Copenhagen: the Nyhavn canal. This
is the tourist spot of that city, because of the colourful houses, the
channel and the restaurants.
By tilting the camera, I was able to get a more dynamic and interesting composition.
Whether you are photographing in your city or you are visiting a new one, keep experimenting. Try to find new compositions even at touristy spots.
There are plenty of things you can try that I haven’t mentioned here.
If you are not feeling confident enough, just take one classic shot of
your subject before moving on with more creative ideas.
Keep an eye on shadows and patterns! Look straight down at the street
from a high point of view rather than into the distance. Experiment
with panning, intentional camera movements, and more.
Practicing with intentional camera movement and image stacking.