Monday, March 14, 2022


Location Scouting for Landscapes: 10 Lesser-Known Locations

Are you drawn towards travelling, remote areas, and landscape photographs but are struggling to find great locations to shoot? Well, you may need some help with location scouting.
Not to worry. Below, I’ve curated for you a list of ten gorgeous landscape photography locations that most don’t know about, to help satisfy your wanderlust and give you an amazing shooting environment.
Everyone wants to shoot famous natural landmarks like the Grand Canyon, the Alps, or the Amalfi Coast, but there are other destinations worth going out of your way for that you don’t hear about every day.
Bring a wide-angle lens and a knowledge of panoramic stitching, and you’ll be prepared for all of these landscape photography locations and all the other ones your travels throw at you! 

10 Awesome Landscape Photography Locations

Wanaka, New Zealand

I’m definitely biased towards New Zealand, and it shows in this list. But there’s simply nowhere else I’ve found which offers the sheer diversity of climates and geography that New Zealand does.
Wanaka is a little lake town in the Southern Alps of New Zealand. In the winter it serves as a ski base, and in the summer it serves as everything else. It’s one of the more quaint and relaxing areas I’ve ever been to, and there are photos everywhere you turn.
wanaka - breathtaking landscape locations

Monteverde, Costa Rica

After an assignment for a nonprofit in Guanacaste, a province on the Pacific Coast, I spent a week riding the bus through rural Costa Rica.
While the beaches and coast are beautiful, you can find a lot of off-the-beaten-path areas like the Cloud Forest area near Monteverde, a town high up in the mountains.
It takes hours of winding up steep, gravely roads that snake up the side of the mountain, but it’s worth it once you’re at the top. It’s cooler than most of the area, due to altitude, and though it’s almost perpetually foggy, this can make for some beautiful photography.
Be sure to catch the Arenal volcano just a few hours away.

Cape Town, South Africa

South Africa is beautiful, but Cape Town transcends beautiful. Imagine craggy mountains on the edge of a tropical sea, with vineyards in between: that’s what Cape Town is.
As landscape photography locations go, it may not be as obscure as some of the other locations mentioned here, but the fact that the city is still not yet well known for the diverse landscapes in its surrounding terrain that has earned it a spot on this list.
For example, the famous Table Rock towers over the city, and is perfect for early morning fog shots.
And if urban/humanitarian photography is one of your interests, Khayelitsha Township is one of the largest slums in Africa: it spreads for miles, just outside of Cape Town.
Go a few miles east, and you’ll be in the Stellenbosch winemaking region, which runs along the coast. Strand, about an hour east, is a popular beach destination.
capetown - landscape photo

Thermopolis, Wyoming

It’s not your typical Western American destination, and due to the active thermal springs it smells like sulphur. Just east of the Grand Tetons is a little area called the Gateway to Yellowstone.
Thermopolis is an old hot spring resort town with a population of 3,000 and is nestled in between massive canyons and rolling plains.
Driving through the town recalls a heyday of long ago, but it’s still worth visiting. Directly west are the Tetons, and directly south is Colorado and the Rockies.
beautiful landscape in thermopolis, wyoming

Buller Gorge, New Zealand

This mountainous area is one of the lesser-known areas of New Zealand’s South Island. It’s a long, remote road through the mountains, in between the Marlborough wine country and the rocky upper west coast.
Take the drive during a time in which you can catch either the foggy dawn or the sunset, and fill up with gas before you start driving. There’s only a couple of gas stations along the way.
evening shot of buller gorge, new zealand - cool landscape locations

Fish Hoek, South Africa

Just south of Cape Town, there’s a small fishing village called Fish Hoek on False Bay, with a picturesque harbour well-shielded from the elements.
Keep on travelling down the highway for a few hours and you’ll eventually come to the Cape of Good Hope, the traditional southernmost point of the African continent, where the Atlantic Ocean becomes the Indian Ocean.
the harbour at fishhoek

Rajasthan, India

India provides plenty of options for exotic photography, the most interesting of which can be found by heading north, past the typical Taj Mahal shots.
I hired a driver for three days for 10,000 rupees (around $150). He drove me from New Delhi up to the Pakistani border, to the province of Rajasthan. It’s straight Middle East: camels, sand, elephants, street markets, and rolling red mountains.
lovely view of a mountain top building at rajasthan - awesome locations for landscape photography

Ireland-to-France Ferry

There’s a $60 overnight ferry that runs from Ireland to France. It begins in a tiny fishing village in the south of Ireland called Rosslare, and ends in a small city in the north of France called Cherbourg.
It takes a little less than a day, but it’s worth the experience and view. If you take it outside of vacation season, you might be one of the only passengers on board. It’s the cheapest way to get a legitimate ship ride experience that I’ve ever found.

Nile River, Uganda

The Nile River starts at Jinja, Uganda, where Lake Victoria becomes the source of the Nile. It’s quite rapid and swift throughout Uganda, and makes for some great photography as it winds through the bush.
An hour or two north of Jinja, a few locals have created an overlook in the corner of a horseshoe bend where people come to look at the rapids. In between it all, there are a thousand villages perfect for exploration and photography.

Franz Josef Glacier, New Zealand

Blessed as it is with its abundance of landscape photography locations, New Zealand might deserve to be in this list ten times, but that’s hardly fair, so we’ll have to settle for three.
If you’ve always wanted to shoot in Iceland, but haven’t yet had the chance to pop over to Reykjavik, then an alternative might be the west coast of New Zealand’s South Island.
It’s remarkably Nordic: it’s almost the southern hemisphere’s mirror reflection of the North Sea.
Franz Josef is a massive glacier tumbling from the Southern Alps down into the Tasman Sea. It’s huge, the water is icy and blue, and at the base of the glacier is a rainforest: one of only two places on earth where a glacier is within walking distance of a jungle.
You can hike the glacier with a strenuous all-day trek, or take a helicopter ride up to the top.
beautiful view of the mountains at franzjosef
Discovering breathtaking landscape photography locations is one of the most exhilarating things in the world for travel and photo junkies. And the world is a big place — there are plenty more photo-worthy places to find almost everywhere. The key is to keep an eye open for the unusual and rarely seen.

--------------------------------------------------------------------------------------

Creating Stunning Landscape Photography During the Blue Hour – Free Quick Guide


The Blue Hour occurs twice a day, just after sunset and just before sunrise. The light progression of the evening is the inverse of dawn.

The light during the Blue Hour provides a sense of tranquility that resonates with us as silhouettes and shapes drift from light to dark, or vice versa. A beginning and an end.

There is something extraordinary about experiencing the light during the Blue Hour.

Capturing Blue Hour landscape photos requires a little knowledge of light, weather, and gear.

Tomas Alvarez walks you through the necessary steps to achieving mind blowing Blue Hour landscape images in this free guide.

Here is what he covers:

  • The types of light available during the Blue Hour
  • How to use Blue Hour color
  • Camera setup and optional equipment
  • Processing Blue Hour images
  • Experiments in Processing

Are you ready?

Click here.

Photo Credit: Tomas Alvarez

--------------------------------------------------------------------------------------- 

Saturday, March 12, 2022

How to Prepare For Your First Client Photo Shoot

Tags: Landscape Photography, Photographers near me, Lightroom

The key to a successful first client photoshoot is preparation.

Whether you’re shooting on location or in the studio, pulling off a photoshoot involves a lot more than bringing a big camera.

Here are my essential tips to help your first shoot with a client go as smoothly as possible.

A close up of a professional photographer holding a DSLR at a photo shoot


Create a Mood Board to Share Ideas With Your Client

This is to make sure that you and your client are speaking the same language. It’s crucial to have visual information that communicates the required end result.

A mood board is one of the best ways to do so. You can ask your client for one or come up with one yourself.

Simply put, a mood board is a collection of images gathered together in collage form. They are used extensively in design and photography to communicate the direction of a project.

Asking your clients for a mood board or images that represent the desired aesthetic will ensure that everyone involved in the photoshoot is on the same page.

Miscommunication occurs when people have different ideas about what different terms mean. You may have one idea about what constitutes a “dark and moody” shot while your client may have another. Your perception of the color teal maybe someone else’s green.

Having a mood board can help you and your client define the lighting style, color treatment, composition, or any other important elements that are desired for the final images.

Note that 4-6 images are all that you really need. Too many images may dilute what is meant to be conveyed.

Ultimately, a mood board can go a long way in preventing any client dissatisfaction and the need for a costly re-shoot. 

Do a Tech Scout of the Location

A tech scout (or technical scout) is when you visit your shooting location ahead of time to get “the lay of the land”. It’s a term used widely in the film industry but it’s important to photography as well.

Location can make or break a photograph. It’s important to know exactly what you’ll be dealing with before you do a professional shoot.

As a commercial photographer, I try to do a tech scout for every shoot I do for a client.

If I’m shooting in a new studio, I make sure I have enough space to work in and that the studio has a kitchen. This is necessary for me as a food photographer working with stylists.
If I’m shooting at a restaurant, I visit beforehand to see if there are enough windows for me to shoot in natural light. Or if I will need to bring in lighting equipment.

When shooting outdoors, there can be a variety of factors that can influence your shoot. These include the light you’ll be photographing in, how public the space is, and what the actual terrain looks like.

There is always some thinking on your feet involved in photography. But anticipating any problems before the actual shoot will ease your stress and help you make sure that you have everything you need to be successful.

Are there enough large trees in that park that you can move your subjects too if the sun is too harsh? Is the area where you want to take family portraits actually too crowded?

Or maybe the tide will not be out far enough at the time you intend to take engagement photographs at the beach.

A portrait of a newlywed couple embracing in long grass - professional photo shoot
Timing your shoot with the position of the sun can be crucial for most outdoor shoots.  You can use an app like Sun Seeker to help you determine where the sun will be for your shoot.

Make sure that you bring your camera to the tech scout and the lenses that you plan on using. Not only can some test shots be used to determine possible camera settings for your shoot day, you may need to send them to a client.

Professional photographers often scout 2-3 locations for a potential shoot. Then they let the client choose where the shoot will ultimately take place.

Keep in mind that putting a tripod down in some public places can require a permit.

If you’re shooting a portrait, you might be able to move along if you encounter this scenario. But with a commercial production, it can potentially be disastrous.

A bright and airy forest location for a professional photo shoot

Rent or Borrow Extra Gear You Might Need

A big part of photography is problem-solving. Unfortunately, this often means gear issues or technical difficulties.

First of all, make sure that you have all the gear you need to pull off the photo shoot.

This may mean renting items that are not part of your regular setup or purchasing extra SD cards, etc.

You should also bring at least two of everything.

Camera lenses, tripod and other photography equipment of a black table

This doesn’t mean just two batteries and SD cards. It also means two cameras, a variety of lenses, and extra extension or tethering cables.

A backup camera may be the last thing you can afford financially. But you also cannot afford to have your equipment die on you on an important photo shoot.

Digital cameras get error messages and stop functioning for a host of seemingly inexplicable reasons. You need to be prepared for this.

It might mean borrowing a camera from a photographer friend. Or buying a used one that might not be top-level but will help you get the job done in the event your camera craps out.

The same goes for lighting equipment if you use it. Not only do I bring an extra strobe light to my commercial shoots, I also bring a couple of extra speedlights and remote triggers in case something goes wrong with my strobes.

Make a list of every single item you will need to complete the shoot. Then make sure that you have it or can buy it or rent it.

A flat lay of nine old film cameras on a white background - professional photo shoot

Hire an Assistant to Speed Up Your Workflow

There are certain types of shoots that require assistance. Wedding shooters often have backup photographers that shoot alongside them. This ensure they get images that they may have missed.

Other photographers have assistants to hold reflectors, help with small things like changing batteries and lenses as well as transporting gear.

The role your assistant should take is up to you, as is figuring out when you actually need one.

I have an assistant on almost every shoot that I do, even if the job is seemingly small.

In fact, I worked with an assistant on my very first food photography job. That was a two-day restaurant shoot where I was required to photograph fifty dishes!

My assistant helped me swap out background, change my lenses and adjust my tripod. He also acted as the liaison between me and the kitchen.

His assistance helped my workflow go much faster and ensured that I would be done on time.

On shoots where I have needed to use artificial lighting in studio, my assistant has managed my lighting and gear in addition to making sure everything I need is at my fingertips.

There is only so much you can do with one pair of hands. Having an assistant is not necessarily expensive and the cost is worth tacking onto a quote or even paying out of pocket for if need be.

A bright and airy photo of a photographer holding a DSLR camera on a tripod

What to Do the Day Before the Shoot

Here are the things you need to do the day before your photo shoot.

  • Finalize what equipment you’ll need to bring. My suggestion is to have a checklist of the gear and accessories you need to bring to shoots and refer to it whenever you are packing your photo shoots. If you are working on a commercial shoot, you will need to determine any gear rentals ahead of time. Pack any reflectors, extension cords and your laptop if you use it for tethering.
  • Clean your equipment. Wipe your camera and lenses and laptop keyboard and screen.
  • Charge your batteries. Have several on hand to change out before you run out.
  • Look up directions to the venue. Don’t rely on your GPS on the day of. I have been taken to the wrong address by relying on apps more than once.
  • Check your camera settings. Make sure they are at a neutral starting point or that any settings that you don’t want are switched off and vice versa, such as back button focusing or exposure compensation.

Camera lenses, tripod and other photography equipment of a black table

What to Do the Day of the Shoot

Always be early for your shoots. How early you need to be will be determined by the type of shoot you are doing.

If you are shooting in a studio, you may need at least an hour to set up and test your lighting.

On the other hand, if you’re doing family portraits, fifteen minutes should be sufficient to set up your gear depending on the light source at the location.

Hopefully, you have done a tech scout and are familiar with the location. But give yourself extra time if you need to find parking or if you need to walk a stretch.

Any model releases and contracts should be signed up front. Bring a copy of these with you in case you need to refer to them.

There is that old saying that an ounce of prevention is worth a pound of cure. That is definitely true when it comes to pulling off your first professional photo shoot.

The last thing you want is to discover a dead battery with no backups, or that you have forgotten to pack your favorite lens.

Knowing you have everything under control will help you focus on your photo shoot and allow your creativity to flow.

 ---------------------------------------------------------------------------------

My First Product Shoot and How It Went – Free Quick Guide


Everyone stresses about approaching new photography challenges.

If you’re approached by someone to do a product shoot, what would be your answer?

Ludmila Borošová will guide you through the whole process, so you will handle your first “product” inquiry as a master!

When approaching a new problem, it’s best to look at it from the end: why do businesses hire photographers in the first place?

You need to realize there are different reasons behind the photoshoot of a product, as well as the audience who will be viewing the results.

In this guide, photographer and author Ludmila Borošová will share with you the details of setting up a successful product photoshoot, including…

  • Getting to know the client
  • Asking for advice
  • Organizing your assets
  • Finding a location
  • Prioritizing by the light source
  • Providing the client with a variety
  • Editing for accurate color

Photo Credit: Ludmila Borošová

 ------------------------------------------------------------------------------------------------------

                                                             Advertisement:

I blame BIDEN!

Women's Comfort Tee Shirt   undefined

State YOUR beliefs about the economy without saying a word! 

Click Here 

----------------------------------------------------------------------------------------


Monday, March 7, 2022

8 Tips for Planning Better Landscape Photo Shoots

Some people think that landscape photography is about luck but in reality, it’s about planning. Good landscape pictures come out of many factors, and planning the photo shoot is one of the most important. The luck part takes no more than 5-10%.
The recipe is being in the right place at the right time. Otherwise, it doesn’t make any sense to go out at all.
In this article, I’ll cover the most efficient planning tips and tricks to get the best landscape images. 

Planning a Landscape Photo Shoot

The planning stage includes several aspects, and each of them should align perfectly to make the whole structure work. There are basically two approaches – happy snapping and proper planning.
The former is good when you want to have fun and unwind with no serious expectations. Sometimes the stars align and you get a great shot, but chances are slim.
The latter approach is about planning, improving chances and using your mind and skills efficiently. I strongly recommend planning every single shoot to get the best possible landscape pictures.

1. Weather in Landscape Photography

The weather has the most significant impact on the final landscape pictures. The cloud cover, the wind, tide, humidity – everything plays a role. There are no set rules because it differs for each scenery type.

Cloud Cover

I use http://accuweather.com/ to fetch this info as it provides hourly data. The other site to check for detailed cloud cover is Skippy Sky, which looks confusing but the data is unique.
High clouds typically produce better colours and start to lighten up much earlier than the low clouds.
Rocky seascape photo shoot with dramatic pink clouds reflected on the water below.
For the general landscape photo shoot, I wouldn’t go out if the cloud cover is less than 30%. For a morning forest walk, I could easily go out when the sky is clear. The same clear sky works fine to shoot some of the seaside lifestyle photography.
The general idea is to think in advance what kind of cloud cover works for your area and go from there.

Wind

The force and direction of the wind can also play a role in the decision making. For instance, a strong wind blowing from the sea will surely cover your lenses with a salty spray so it could be wise to go to the cliffs, for instance.
On the other hand, the same strong wind blowing towards the sea is dangerous when you climb those cliffs, so it’s better to stay at ground level.
If the plan is to shoot reflections in a calm lake, look for weak winds up to 10 km/h. The same thing applies to fog; strong winds won’t let it form.
Also, wind is very important for long exposures. The faster the clouds move, the more prominent cloud trails they produce. So, if the plan is to create some movement in the sky, strong winds work better.
Long exposure landscape photo shoot showing fast moving clouds over mountains and water.

Humidity

Photographers adore fog and haze. Weather websites have general predictions and sometimes we could miss perfect fog if we skipped physics in school. For fog to form, we need a temperature lower than the Dew Point (shown on Accuweather).
The dew point calculation includes humidity, of course. But the weather sites don’t take into account that certain areas have higher humidity than average. Like, near the lake or the river.
So, if the forecast isn’t showing fog, but the temperature is just 1-2C higher than the Dew Point, and the general humidity is high enough (>85%), there’s a good chance of witnessing morning fog.
A group of trees in foggy weather

2. Pick the Right Time of Day and Year

Some areas work best during the sunrise, some work only for sunsets. It’s up to the photographer to figure out when to arrive. Have a look at the objects you want to photograph and envision the light coming from the East or the West and see which highlights the features better.
Walk around, try several frames and then you’ll know which side you need the light coming from.
The hard part here is that the Sun position changes throughout the year and you need to include it in planning. The easy way to determine the exact Sun position is to use SunCalc right in your browser. The other way is to use apps like “PlanIt! For Photographers”, TPE or PhotoPills.
They also show this data for any day/time/year and also have a virtual reality mode where the app shows Sun position overlaid on the camera picture of your phone.
Make notes, don’t rely fully on your memory. Too many places and conditions to remember.
A rocky seascape at sunset

3. Research on the Spot

The best way to prepare is to research on the spot. Come over well before the best light, walk around, take notes of the best spots and points of view. Envision where the Sun is going to be at certain times and see what’s the best position to stand.
This research is also good for safety – you get familiar with the area. This is when you determine if the area works for sunsets or sunrises, how a long exposure shapes the terrain, etc.
Icy mountain peak photo shoot with pink light reflected on the snow
Another aspect of this research is to discard certain locations. You could see some fantastic photo on the internet, and in reality, it is completely different.
It could work only for a certain season or tide level or only in a certain light. Or some landmark has been destroyed. Or it’s so full of photographers that it is no longer possible to do any serious photography.

4. Research Online

Online research is my favourite way to find locations. The number of approaches you can take is unlimited. This is what I do to find the best spots:

  1. Images on Google maps. People upload tons of photos right to the maps. Of course, they are mainly touristy, not artsy. But that’s good for us as we could find some not-so-famous spots.
  2. Google maps. This approach is different. You turn on satellite view and scan the area to find something interesting just by looking from the top. Once you have several candidates, you’ll need to research them further using other methods.
  3. 500px search. Photographers often set a location on their photos. They could also include it in tags or description, and the search reveals all of it. I guess you could do the same on Flickr, but you’ll have way more data to dig through. I have found a good number of nice undiscovered spots using this method.
  4. Local photo tour guides. Some tour guides publish their tour itineraries, and you could stalk best locations if you are planning a trip. Once you have a list of locations, you’ll need to research them individually to find exact spots. Google something like “Photography workshop Sydney” or “Photography tour Australia” and then go through the sites. Not all of them will have a list of locations but some will.
  5. TripAdvisor. Not so much photographer-oriented but it could also provide valuable textual data when you already have a list of locations. People here also upload photos, and it’s easy to understand if the place holds any photographic potential.
  6. Use apps. I have already mentioned a few Android/IOS apps and SunCalc website. You don’t need to be there physically to determine if the Sun/Moon/Milky Way is in the right spot.

serene mountainous landscape photography

5.Look Out For Special Conditions

It not wise to visit a location just once. Many areas look ordinary but have a huge potential during certain weather conditions. You need to take notes and envision what the area could turn into when something special happens.
A great example is a Centennial Park here in Sydney. On a regular day, it looks nice but ordinary. But I figured it used to be a swamp. It means it holds water for a long time.
I went there right after the rain, and I was rewarded with the completely new landscape. Could you guess I made this shot right in the middle of the city?

A forest of trees overlooking vast pools of rainwater in Centennial Park, Randwick, NSW, Australia

Other special conditions include – Sun position, Milky Way position, tide, rain, fog, storm, tornado, etc.. Use your imagination.
Pro tip: Do not run away immediately if the weathers bad. Remember an old saying about the rainbow after the rain? Give nature a chance; maybe it shows some magic.
Patience leads to some unbelievable results.

6. Plan Enough Time

We all know (I suppose) that the best time to shoot landscape images is approximately 1 hour before sunrise to 1 hour after sunrise and 1 hour before sunset to 1 hour after sunset. But it doesn’t mean we have to arrive exactly 1 minute before the best light.
These timeframes can be easily extended depending on weather conditions. For instance, the sun can produce crepuscular rays 2 hours before sunset. Or the clouds can lighten up 75 minutes before the sunrise in extreme cases.
Dramatic clouds over the silhouette of a tree covered landscape
Also, for me, I need some extra time to get myself to the right mood. I can’t jump out of the car and start shooting right away. I suppose it could be the same for others – walk around, breath in the air, have a look at various elements, calm down, clear your mind, etc.
And when the light comes in, you’ll be ready.

7. Research Less Famous Places

Some places have been photographed for decades. It’s a little presumptuous to believe that you can shoot this particular landmark better than thousands of photographers before by visiting it only once. Or at least that you can make a unique shot.
I mean, you surely can, but what are the odds? You get yourself stuck in an unnecessary competition and comparison. And finally, you’ll be biased with the composition choice because you’ve seen it all.
Wrapping up, shoot famous places but focus on less crowded and photographed areas. Find new gems, discover places, build your own secret spots.
One day you could blast off a photography tour, and you need those unique places. No one will attend a tour based on a spot they can Google in 2 minutes.
I have described some ways to discover new places earlier in this article. But nothing beats you with a backpack roaming around, taking notes and looking for wonders. It doesn’t have to be a place in the absolute wilderness where no one has ever been before. It could easily be a good underrated location.
A good example is Wanaka Tree. I went there and was baffled by the number of photographers standing in the same spot doing the same shot. So I walked around and found this frame just 200 meters away.
A serene landscape image of mountains and water

8. Pack the Right Gear: From Clothes to Tripods

Packing right is often overlooked. But I must assure you, it is very important. Proper equipment in your bag could save a trip. It’s also nice to have a checklist to go through before going out. Create one for yourself using some of the tips below.

Warm clothes

If the days are hot, it is easy to forget that the nights can be much colder, especially if it isn’t summer. Staying in a spot with minimal movement is not the same as trudging through the forest with a backpack.
Take warm clothes. I also have spare socks for the way back in case my feet get wet during the shoot.

Rain/Wind Protection

If there is a chance for the rain, take an umbrella. An umbrella is too old-school you say? Well, it’s not for yourself, it’s for the camera!
An umbrella is very useful to protect your camera from the rain, obviously, but also it can resist wind, which could easily ruin your long exposure shot. Get a raincoat for yourself.

Tripod

Believe me, it’s very sad to forget a tripod or a tripod plate. Just check them before going out to avoid the disappointment.
A photographer in red jacket shooting landscape photography

Battery

Check the battery before going out. Take a spare one if you have it.

Memory cards

The same applies to memory cards. Verify that one is inside you camera and bring another one just in case.

Extra Lenses

This advice is my favorite one. Do not set limits for yourself! If the plan is to shoot wide-angle seascapes, take a telephoto too. There could be a dolphin or a shark in the distance.
Do not take everything you have because you still need to move somehow but guess the possibilities and cover as much focal range as you can.

There is a place for luck in the photographer’s life but it plays a much smaller role than some would think. The most significant role is reserved for proper planning. Of course, you can’t plan everything and weather forecasts fail too.
It’s more about being prepared for several scenarios. We need to be in the right place at the right spot and that’s exactly what planning is all about. 

------------------------------------------------------------------------------------

Free Landscape Photography Ebook

Free eBook – Camera Settings for Landscape Photography

Photo Shutterbug Black T-Shirt Front 

Photo Shutterbug Shirt


Saturday, March 5, 2022

How to Make Money with Photography (14 Tips for 2022)

You’ve discovered the art of photography and honed your skills. But now you are wondering, “how can I earn money through photography?”.

Here are a few lesser-known ways a photographer can find work. Doesn’t matter if you’re setting up a portfolio, or struggling to find the work you’re ready for. This post will help you figure out how to make money with photography.

A close up of a person counting money 

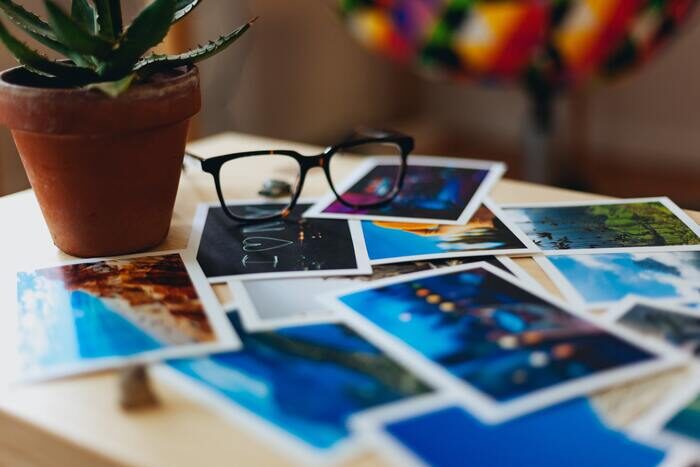
14. Sell Prints Online

If you practice enough, there’s a good chance you’ve taken some amazing shots by now. So good in fact that people are going to want to buy them. So why not start selling prints? There are different ways to make money by selling prints. Both options can be very easy to do and inexpensive.

The easiest way is selling photos online through a third-party seller. They will do all the legwork, process the order, print and send out the prints. In return, they provide you with a commission. There’s no reason why you can’t go through all your best photos right now, and upload them to a site. Start making money from the prints you sell today!

A great platform on which you can sell your prints is Etsy. This is a website that offers a platform to sell all kinds of handmade products. Each listing is only $0.25 so it is a cost-effective way to sell. All you need to do is print your image, put it on the website, and then send the print to the buyer. If there are any complaints or refunds, you will have to manage them.

Another way of selling prints is a little bit harder. You have to print them yourself and sell them through shops and restaurants.

Say, for example, you’ve taken plenty of nice photos from your area. You could approach a cafe or a restaurant, and come to an arrangement where they display and sell your photographs. All you have to do is print them and give them a commission. They get artwork, you get money. At the very least, you will have your photos displayed to thousands of people.

Photo prints on a table

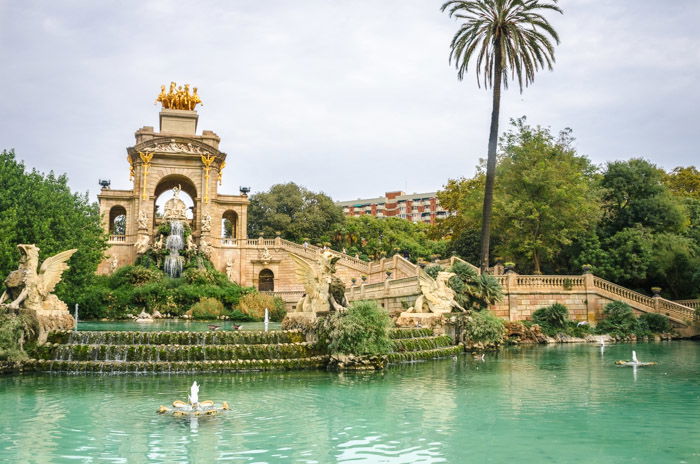
13. Sell Your Travel Photography Stories

Do you love travelling and photography? You could make money doing both!

There is an increase in demand for original content. Clients such as magazines and newspapers are constantly looking for new content. This means you can try to make money by creating and selling travel content. This could be photos or videos highlighting destinations.

If you are also a talented writer, you can provide a complete package of an article with photographs. To be able to sell these, the article and photos need to create a story. So, it is important to take photos that don’t only look good. They need to tell a story.

Newspapers and magazines aren’t the only organizations that need travel photos. You can also sell them to tour operators, travel companies, airlines, or even your local magazine.

Often you’ll find that the more you work with a client, the more other opportunities will present themselves.

photo of a beautiful park in Barcelona with a lake and fountains

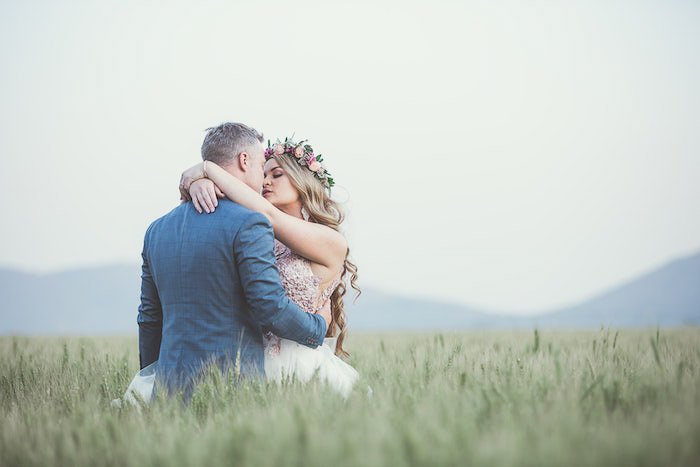
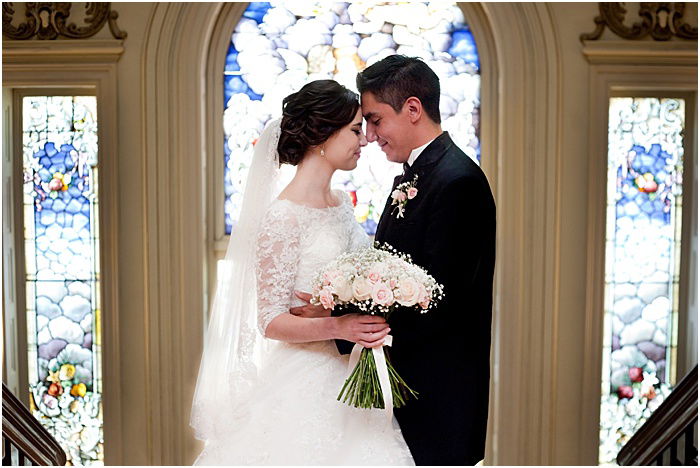
12. Pursue Wedding Photography

Many photographers prefer to go down the wedding photography route. This niche has the potential to make you a lot of money as a photographer. And for a good reason. The stress, planning, and amount of work you need to do are immense.

Not only are the financial benefits high, but it is also a very rewarding job. You get to be a part of one of the happiest days of some people’s lives.

But, the pressure is quite high. You are responsible for capturing one of the most important moments of the happy couple. Hence, it is important to make sure you have enough practice. If you already shoot events or portraits, you are on your way to being a wedding photographer.

If you aren’t sure you are ready to shoot weddings, you can try the following to get a similar idea:

  • Work as a second shooter.
  • Photograph engagement sessions.
  • Create a stylized shoot (a fake wedding).
  • Photograph the rehearsal.

Here, you’ll learn how to start a wedding photography business and how to make the most of it.

Photo of a couple on their wedding day

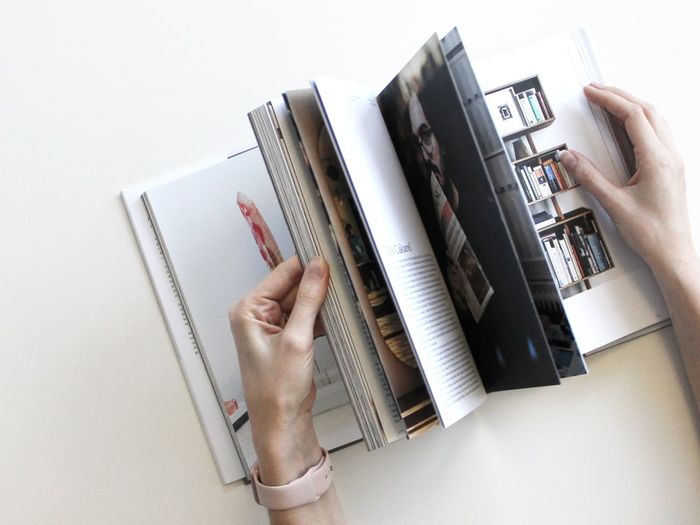
11. Make Your Own Photo Book

One of the less common ways to make money through photography is to make your own photo book. There are many galleries available online. However, photo books are superior to virtual galleries in many ways.

Photo books offer a lot of customization. Unlike a photo album, you can customize your photo book any way you like. You can add textcreate frames around your photographs, and organize your collection of images. If you’re efficient, you can create a photo book within an hour or two. You can also try to buy a photo book online such as the Self Adhesive Photo Album and customise it to your taste.

Photo books are cost-effective. Printing hundreds of photos and buying a good album is costly. Many photo book services offer books that cost as little as $10.

They are also great gifts for friends and family members who want to keep their memories in a single reliable place.

They’re ideal for sharing with clients. Some photographers prefer to share their portfolios in books. This helps prevent a variety of internet-related issues. It also makes you look more professional.

There are many ways to create a photobook. You don’t necessarily have to spend hours editing and compiling one on your laptop. Some websites, like Shutterfly, have designers who will create your photo book within 3 business days. Blurb is also a great platform to create your own professional portfolio. All you have to do is upload your photos.

It is important that you choose a specific theme for your photo book. This will make it look more appealing and interesting. You can create one theme for your entire book or pick different themes for every 10 pages.

Once you have a theme in mind, it’s time to start choosing your favourite photos.

Try to avoid having too many photos of the same kind. Use images with different angleslighting, and poses. This will make your photo book as diverse as possible.

Prioritize bright images over dark ones. It is also a good idea to avoid very grainy photos as they look unappealing when printed on a page. Likewise, too much contrast or sharpness may ruin your image.

When choosing the resolution of your photos, try to keep them as large as possible. Most photography sites have a maximum and minimum size limit. The closer your pictures are to the maximum, the better they will look when printed.

Photo of someone flipping through a photo book

10. License Through Flickr & Getty Images

Flickr helps thousands of people to start making money from their photos. If you have a Flickr account, you can now license your photos through Getty Images. So, when people see them, they can pay to use them, and earn you money.

Flickr members can turn on a “Request to License” link on their photo pages. The link will show right next to the licensing information. When a member makes a request, Getty Images reviews the photographer’s work. They will contact the Flickr member and help handle details like permissions, releases, and pricing. I would recommend only showing your best photos on Flickr, though.

Screenshot of Flickr homepage

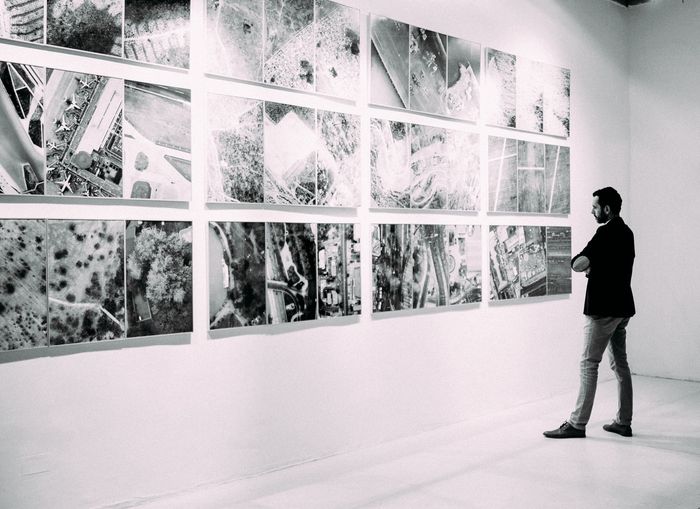
9. Sell Your Photos in Galleries

Selling your photos in local galleries is a great way to make some money. But, it is important to figure out what sells. Photos that remind people of the local areas, such as nice views or local landmarks will sell. International landmarks, famous landscapes, and portraits of famous people may sell well to a large audience. But they’re going to be less popular in a local market.

As a general rule, if you have people in your photos, they won’t sell. Photographs of cliched subjects work well. For example, a photo of the Eiffel Tower in Paris, or a boat in a sea town. Although these are overdone for locals, they appeal to tourists.

Ask in person to get wall space. The best way to actually get your photos featured in a gallery is to go and visit the gallery. Show them your work in person, and only take around 10 of your best photos.

If the local gallery decides they want to feature your photos, you will have to discuss pricing. Pricing differs in each situation. Some will allow you so rent wall space. Some will ask for a small monthly fee and a percentage of your profits. Others might handle all the printing and pricing but take a larger commission.

Photo of a guy looking at photos at a gallery

8. Sell on Stock Photography Sites

We’ve all heard of stock photography before, and it’s like what Getty is doing with Flickr. How do you make money from stock photography?

You can sit around and wait for clients to find your photographs. Or, you can sell photos online by submitting them to a variety of stock photography sites. You can add keywords, making it easier for people to find them.

Companies and businesses are always looking for stock photos. If your images fit what they are looking for, they will buy them. When I say buy, I really mean license. You can continue to sell photos time and time again, and make a good living if you have a large portfolio.

Commissions vary depending on which of the many stock photography sites you use. Here are a few to consider: iStock, BigStock, and Shutterstock.

Photo of a laptop on a desk

7. Pursue Club Photography

This is a very specific type of photography, that’s listed here for a reason. Proper nightclubs have with well-established promoters. These promoters all want photos from their club at night, and you can be the one to provide them. It’s worth the promoter paying for a photographer to come along and take photos. These photos end up on Facebook and are used to promote the club.

You’ll probably notice that the majority of club photographers are in their early 20’s. So you don’t have to have the greatest experience in the world to get work. If you want to expand your photography, go down to a nightclub with your camera anyway. I have NEVER been stopped from going into a club with my camera.

And, as a little added bonus, if you enjoy this sort of thing, you start going to a lot of gigs for free. Go out tonight and take some photos at a local club/gig/event.

Photo of people dancing at a party

6. Try Real Estate Photography

Another great way to make money is to offer your services to an interior designer or real estate agent. Determine who you would want to work with. Figure out local photography job rates, and take a look at some sample images for real estate photography.

You’ll then need to create your own package. It should include a rate sheet, a contract, and other details to make sure the whole process goes smoothly.

Then, all you have to do is networking and identifying potential clients! Meetup.com, Meero or Facebook groups are great platforms to find local real estate events. You can also try to find connections at design-related conferences or events.

Regardless of how you are networking, do not overlook the power of word of mouth! Be sure to let your family, friends, and colleagues know that you’re looking to connect with new clients. In addition, create a social media page targeted just for real estate photography.

Real estate photography depicting the front porch of a house and the road leading up to it

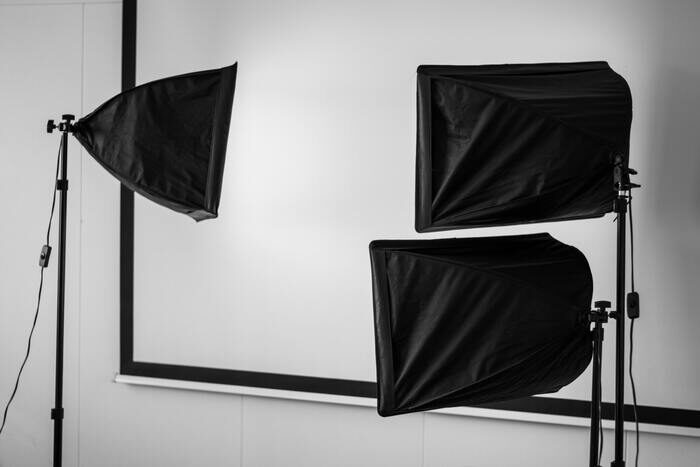
5. Assist Other Photographers

You want to make money with photography, but aren’t yet ready to get your own projects? Try assisting other photographers.

Assisting a photographer is one of the best ways to gain experience and start making money fast. You will need a strong portfolio if you’re expecting to work at weddings and such, though. There is also high-end work, such as fashion. Here, you won’t get behind the camera but still gain experience and money.

Photographers often need assistants on jobs, and you should expect to be compensated for your time. The biggest advantage of all is that you don’t have to look for the work, it comes to you.

The hardest part is finding people who are willing to pay you the money you want, for the work you’re good at. Take some time now and find local working photographers in your area. Contact them, ask if they need an assistant. Offer to do the first time for free if you like. If you’re any good, they will want you back.
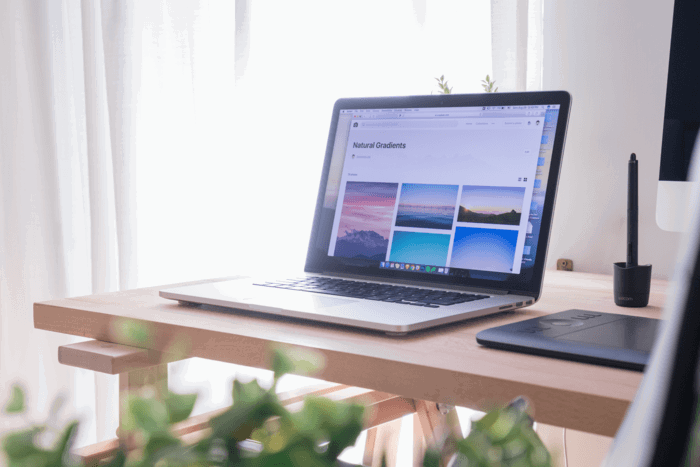
Photo of a photography studio

4. Build a Blog

Starting a photography blog is a great way to get your photographs seen. Creating a strong photography blog to complement your photography portfolio is one of the most powerful tools at your disposal.

To create your own website, you first have to buy your own domain name and hosting for your website. Then, install WordPress, a theme, and some plugins. Write your first post, and ta-da, your website is ready!

Photo of a person typing on a laptop

3. Start Teaching

Getting into a rather competitive market takes a lot of hard work and dedication. If you are you don’t want to be constantly fighting for clients and jobs, I would suggest teaching.

Not everyone can learn from the internet. If you have the ability to teach, reach out to those people, and show them how it’s done, one on one. A good teacher can make a good living, whether it’s from group classes or one on one sessions.

Photo of a guy in a hoodie with a camera

2. Enter Photography Competitions

I think photo contests is one way to make money that most people seem to forget about. I went round one of my model’s house and up on the wall was a pretty terrible picture of her when she was younger. It looked like a friend had taken it in a playground. It turns out that some photographer won $2500 for it in Canada. My jaw dropped. I couldn’t take my eyes off the thing, it was just so… average.

It doesn’t take long to enter photo contests. Even if you do not end up winning, it will get your work out there. If you’re lucky, your work might even get critiqued.

Photo of photographers on railroad tracks

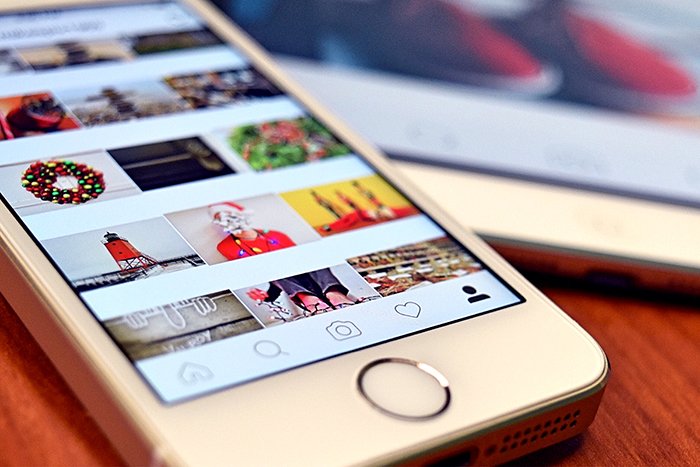
1. Share All of It on Social Media

Instagram is a great source of inspiration for good photography. But, you can also use Instagram to make money by selling your images.

You can supply photos to businesses and blogs that constantly need images. Many photographers sell the images that they post on their page. All they do is add a link that allows you to buy their photos from a third-party site.

Close-up photo of an iPhone

Common Questions on How to Make Money as a Photographer

How Much Money Can You Make as a Photographer?

According to the New York Institute of Photography, here are some general figures about how much photographers should earn based on their expertise.

  • Hobbyist: Free (or under $100). These are mainly people who love photography and simply like to practice their passion for fun. They offer to do shoots for relatives and friends for free or way below market price.
  • Amateur: $25 – $75 per hour. This is someone who is just beginning in the photography world.
  • Student: $50-100 per hour or $25-100 per image. Students’ rates depend on their skill and the amount of experience they have. But, if they are advanced, they can charge as much as professionals.
  • Semi-Pro: $50–$150 per hour or $50-125 per image. These are photography school graduates who have completed formal training and have some professional experience. Although they might not yet own their own studio, they are not beginners and therefore charge a slightly higher rate.
  • Professional: $75-$250 per hour or $75-$250 per image. This photographer has a lot of experience and has earned respect for his or her work.
  • Top Professional: $200-$500+ per hour or $250-$1,500 per image. These are the cream of the crop, the elite, highly in-demand photographers.

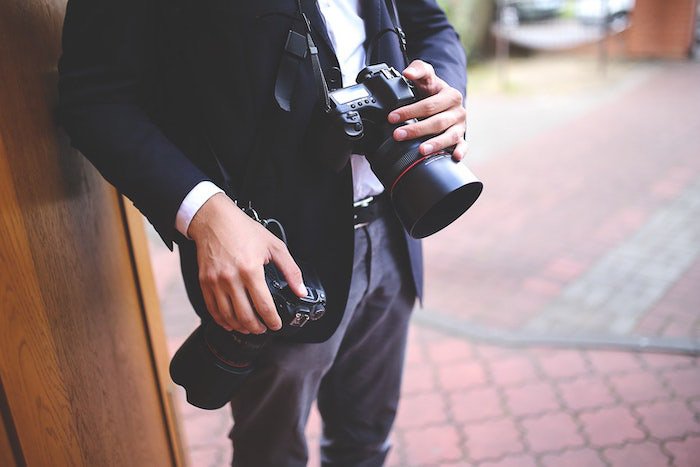
How Do Freelance Photographers Make Money?

Freelance photographers are self-employed photographers. They take projects from various organizations and people as and when they like.

Freelancers have the flexibility to choose what project they take. For example, it could be for a media company, a newspaper, an event, or a commercial shoot. They get paid by project/hour/day. To make money, freelance photographers have to market their work. It is important to have a strong portfolio and network to find new projects.

What Type of Photos Sell Best?

There is no one kind of photograph that sells the most universally. It depends on where you are selling your images, which niche you are targeting, and who your customer is. More specifically, if you are selling on stock photography sites, there are a few categories that sell better than others.

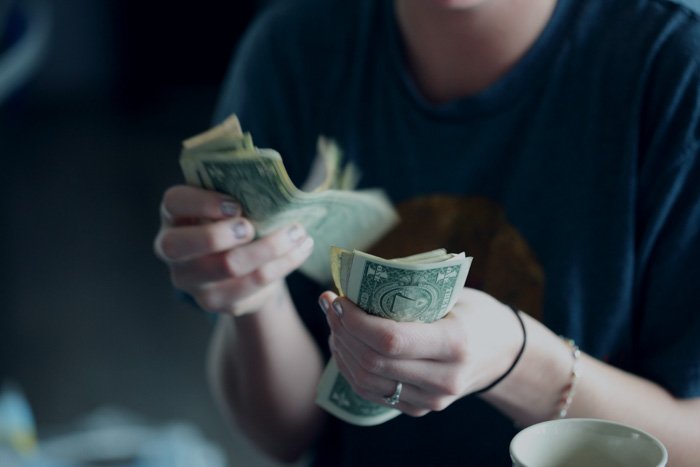
For example, pictures of people doing everyday things, nature, animals, transport are especially popular. In addition, images of businessmen and women, electronics, and money are hugely in demand for businesses.

There are many ways to make money through photography. You can sell prints, offer your photography or retouching services, or teach. Depending on your personality and what you are interested in, you can monetize your skills in photography. 

--------------------------------------------------------------------------------

Free Photography Ebook 

Stock Photography: The Nitty Gritty of Image Licensing – Free Quick Guide


Most of us have dreamed about, or at least thought about, the potential of earning some money with our photography.

That dream could span from becoming a full-time pro to simply paying for that next lens we’ve been lusting after.

If you’re like me… You can’t just quit your day job to go take pictures.

So, what options are there?

One possibility for earning money is image licensing, also known as stock photography.

Anyone with a camera, and a desire to do so, can enter this money-making venture.

However, there are some things that you need to know.

Author, photographer, and educator Robin Nichols has been selling his stock photography for over 25 years. He’s going to give you a primer on how to get started.

Here is what Robin covers:

  • Is image licensing worth your time and effort?
  • Why a non-specific image can be beneficial.
  • What makes a good stock photograph?
  • Tips to get you started
  • Some stock agencies that you should know
  • How to set your expectations

This is a very interesting read!

Don’t miss out.

Photo Credit: Robin Nichols

 
-----------------------------------------------------------------------------------------
 Lady Shutterbug White  T-Shirt Front