Thursday, January 20, 2022

What Is a Wide Angle Lens (And When to Use One!)

Tags: Shutterbug, Photography for Beginners, Newbie Photography

As a photographer, you have a vast selection of lens options to choose from. Those that show a vast portion of the scene are called wide angle lenses. But do you need one? And which wide angle is the best lens choice for you?

To tackle this question, let’s look at the different types of wide angle lenses available, and when to use them.

A Nikon dslr camera and two different wide angle lenses resting on a map 

What Is a Wide Angle Lens?

First, we must clarify the meaning of wide angle.

The most common description is that a wide angle lens displays a wider field of view than our vision. However, this doesn’t translate directly to millimetres (mm) and degrees.

So, what focal lengths (in mm) can be considered wide angle? The popular definition is that a lens below, or equivalent to 35mm is considered a wide angle lens. This is roughly 65 degrees of diagonal field of view.

Does a Wide Angle Lens Zoom?

All lenses, including wide angle lenses, come in either a prime or a zoom version. A prime lens has a fixed focal length, meaning you can change your field of view by moving physically closer or further away.

Primes are generally lighter, faster, cheaper and produce better image quality. The Canon 24mm f/2.8 STM is a great example of a cheap and small prime. 

A zoom lens has a variable focal length (zoom range). Some all-around “travel” zoom lens options cover wide, standard and telephoto focal lengths alike. Most zoom lenses are more specific, giving you one or two of these.

Zoom lenses very versatile, allowing to keep your gear to a minimum. But, generally, a zoom lens is heavier and more expensive, due to extra mechanisms and glass inside the lens. Kit lenses are exceptions, they are often quite small, but they come with serious compromises.

Zooms’ image quality is usually surpassed by prime lenses in the same price range. They are a jack of all trades, master of none in particular. The Canon EF 16-35mm f/4 lens is an excellent example for a professional wide angle zoom lens.

How Wide Is a Wide Angle Lens?

We have to make a disclaimer here. The camera that you use influences how your lens will ‘look’. Smaller sensors crop out the centre portion of any lens, resulting in a tighter field of view.

For simplification, all focal lengths mentioned here are full-frame equivalent. If you want to know how these translate to your camera, divide them by 1.5 (APS-C) or 2 (M4/3).

As I mentioned, by popular definition, wide angle means anything below 35mm. But there’s still a lot of room for further specification.

Focal lengths between 35mm and 24mm are considered standard wide angle. Between 24mm to 16mm is what we usually refer to when saying wide angle. Focal lengths below 16mm are considered ultra wide angles.

The most popular wide angle zoom range is 16-35mm. Most kit or standard zoom lenses go down to 24mm or 28mm. The widest lenses on the market are 10mm (rectilinear) and 8mm (fisheye).

What Are the Three Main Types of Wide Angle Lenses?

In terms of distortion, we differentiate between three main sorts of wide angle lenses.

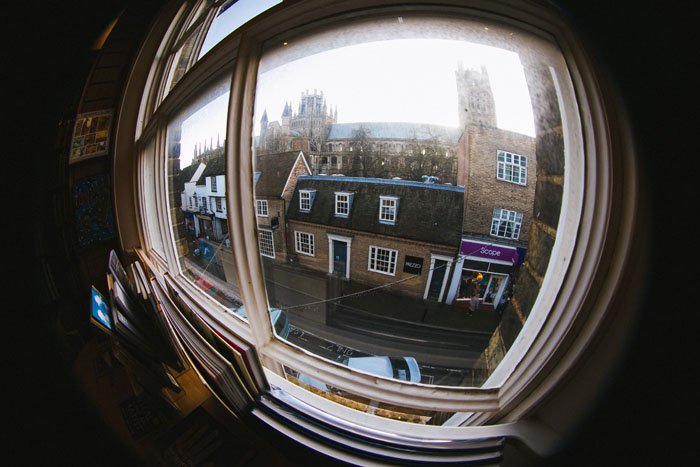
Fisheye Wide Angle Lens

Fish-eye lenses are special ultra-wide angle lenses. Their angle of view is usually 180°, allowing you to see half of a full rotation.

They have a distinctive, hemispherical type of lens distortion. They cram in as much information as possible. Thus, they don’t produce straight lines.

In terms of focal length, they are at the bottom of the scale.

The Rokinon HD8M-C 8mm f/3.5 HD is a great example. There are also fish-eye zoom lenses (though only a few), such as the Canon EF 8-15mm. There’s an ultra-rare 6mm f/2.8 fish-eye made by Nikon. 

Most action cameras, like the GoPros, also feature built-in wide fish-eye lenses.

A street view through a window showing fish-eye distortion
Fish-eye distortion. Image by Phil Hearing on Unsplash

Rectilinear Wide Angle Lens

Rectilinear wide angle lenses are the other type. These are not free from distortion either, but they keep lines (close to) straight.

You might still notice moderate barrel distortion on some. It is more obvious in architectural images, where the lines bow outward, away from the centre. But, it’s also easy to correct during post-processing.

Basically, any lens that’s not explicitly marked as fisheye is rectilinear.

They won’t give you a full 180° field of view, although some are close. The widest currently available are the Samyang XP 10mm f/3.5, the Laowa 10-18mm, and the Voigtlander 10mm f/5.6.

You can get lenses with shorter focal lengths, but they are solely for cropped-sensor cameras (like the Sigma 8-16mm).

Keep in mind that you cannot compare a 16mm fisheye with a 16mm rectilinear wide angle lens. Because of the distortion, the fisheye lens will give a different, slightly wider image.

The Canon EF 28mm f/1.8 USM is a good example of an all-around, rectilinear wide angle lens for Canon. If you have the budget for it, I strongly recommend the Canon 24mm f/1.4L II lens. It’s one of my all-time favourites.

Photo of a couple sitting on the coast of a waterscape at sunset shot with a wide angle lens
The lines here are straight. Photo by the Author

Tilt-Shift Wide Angle Lens

Although tilt-shift lenses don’t have to be wide angle lenses necessarily, most are. Neither of the previously mentioned two lens types allows you to correct for perspective distortion.

This type of distortion is especially prevalent in wide angle lenses. It happens you’re not viewing two parallel lines directly from the middle. With a standard rectilinear lens, they would converge.

Tilt-shift lenses take rectilinear a step further.

They project much larger images than the full-frame sensor. You can move the lens on the plane parallel to the sensor both horizontally and vertically. Thus, they can make converging lines parallel, or parallel lines converge.

You also have the option to independently control (tilt) the plane of focus.

These lenses are extremely sophisticated and very expensive. They are the most popular lenses among professional architecture and fine-art photographers.

My favourite is the Canon TS-E 24mm f/3.5L. It’s a very versatile lens. You can even attach a teleconverter to make it a longer tilt-shift lens.

Photo of the patio of an older building shot with a Canon EF  TS-E 17mm wide angle lens
I corrected the perspective by shifting the lens

When to Use A Wide Angle Lens (with Recommendations!)

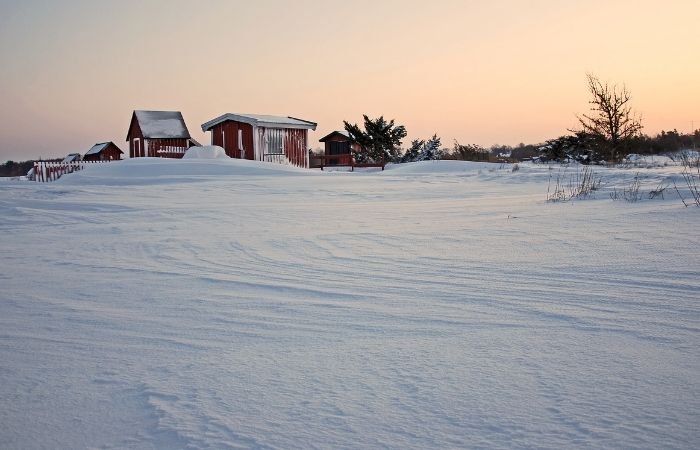
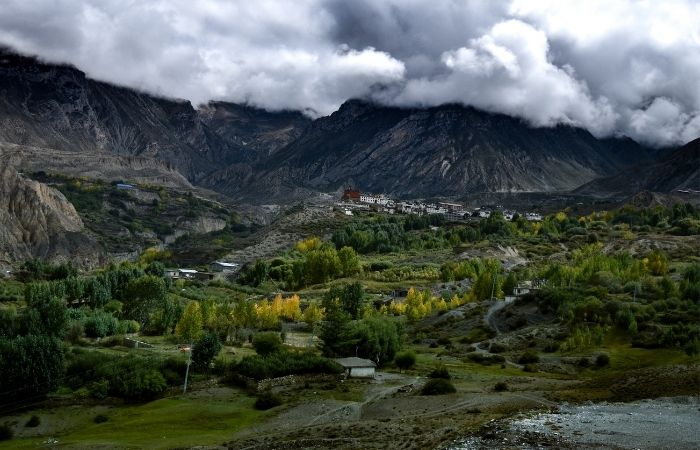
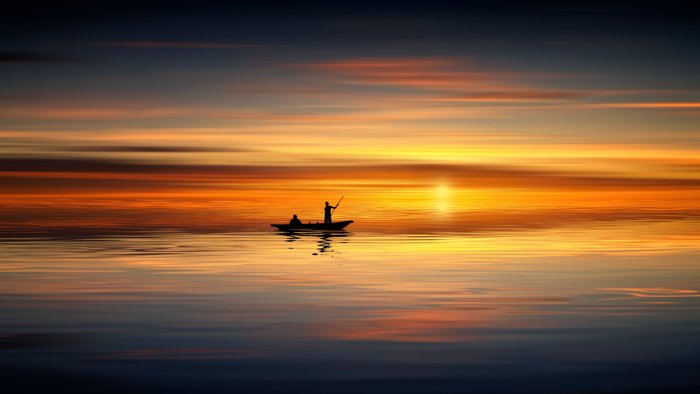
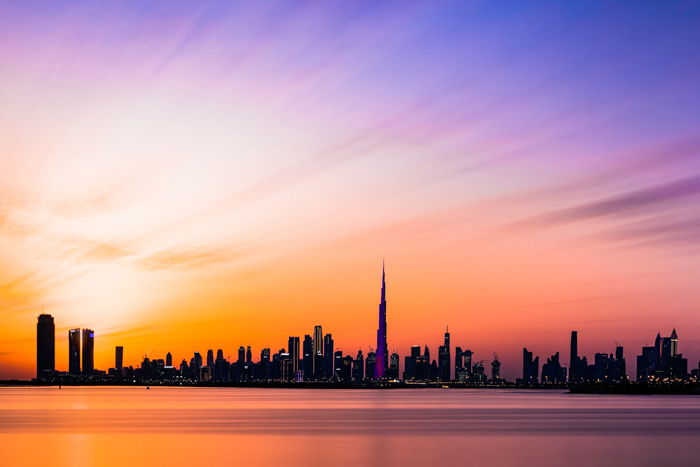
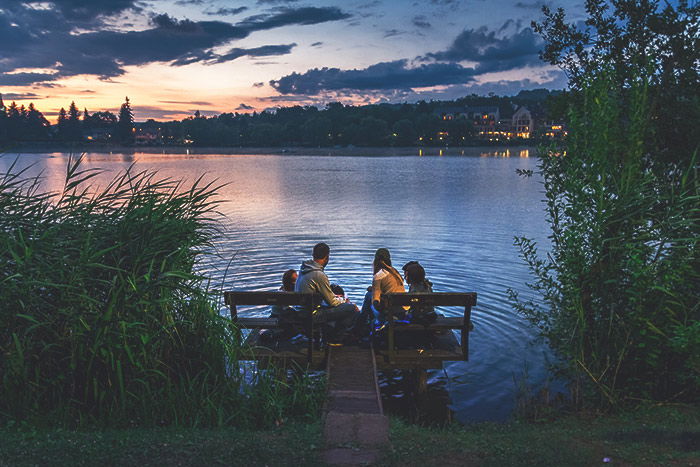
So, what is a wide angle lens used for? Wide angle lenses are generally used for scenes where you want to capture as much as possible. Landscapes, cityscapes, and architecture are the main categories that use a wide angle lens.

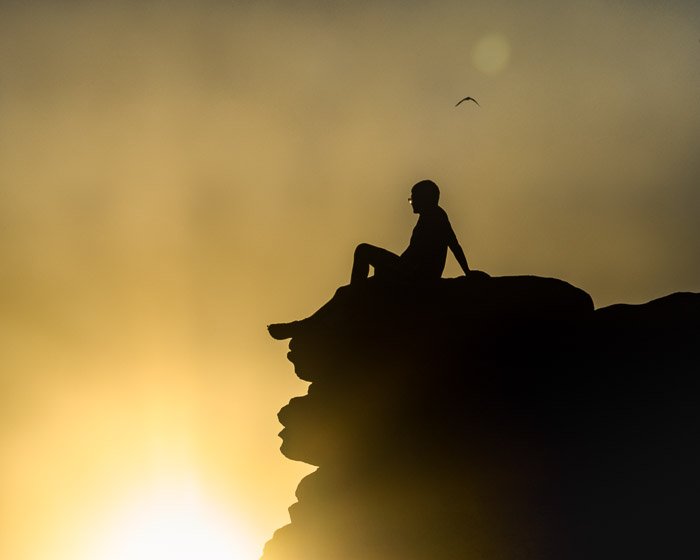
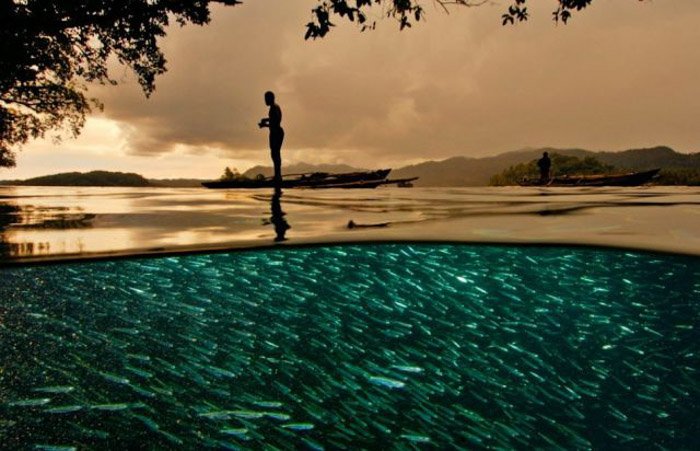
A fish-eye lens captures even more of the scene but is mainly used for artistic and creative purposes. They are wide enough to nicely capture the two-worlds scene that I am sure we have all seen and admired.

Be aware that you have to be very conscious of your composition to work well with a wide angle lens. It is easy to fall into the trap of showing too much.
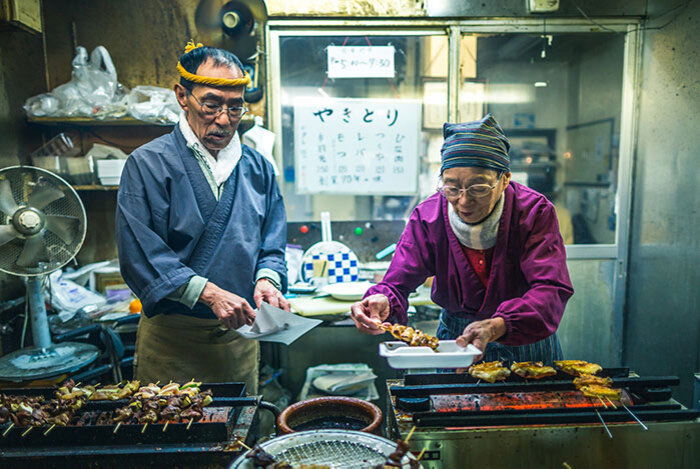
A person standing beside a turquoise pool full of fish in golden evening light, shot with a wide angle lens.
Image by David Doubilet, National Geographic

Street Photography

I often use my wide angle lens for street photography. If I need to get closer to a subject, I move there myself.

As Robert Capa taught us, “If your images aren’t good enough, you’re not close enough”. This can be a pain with wide angle lenses, as you need to get in really close.

In turn, it can give a dramatic perspective and a sense of presence.

I recommend a fast 35mm or 24mm prime lens for street photography, especially in challenging lighting conditions.

Photo of people at an Asian market food stall shot with a wide angle lens

Travel Photography

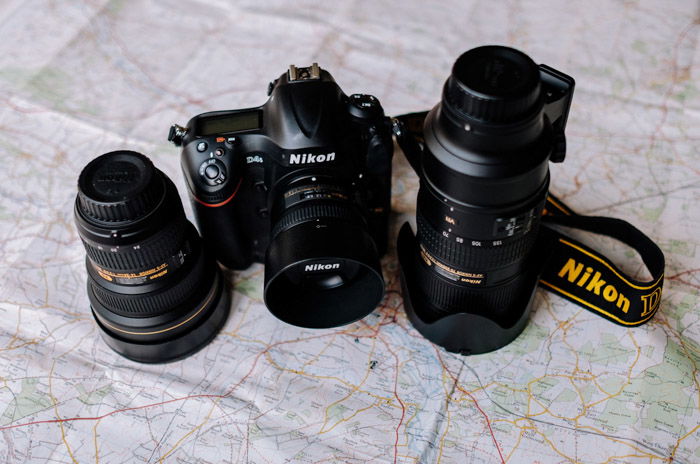
When you’re travelling, you don’t usually want to bring a lot of lenses. Lighter gear means more room to pack other stuff or more convenient travel. So, most photographers opt to choose a standard zoom lens, maybe an extra telephoto lens.

If you’re going to a place with a lot of landmarks, or vast landscapes, I suggest you include at least a moderately wide lens. If your kit lens goes as low as 24mm, it might be enough. (Keep in mind that the 18mm kit lenses are equivalent to 28-30mm.)

I actually seldom bring a standard zoom lens when travelling. Instead, I tend to rely on a wide angle prime lens and a short telephoto prime.

My two favourite lenses for travel are the 24mm f/1.4 and the 85mm f/1.8. Sometimes I throw in the 40mm f/2.8 pancake lens because of its tiny size.

Photo of a bridge at night
A 24mm view is usually enough for travel. Image by the Author

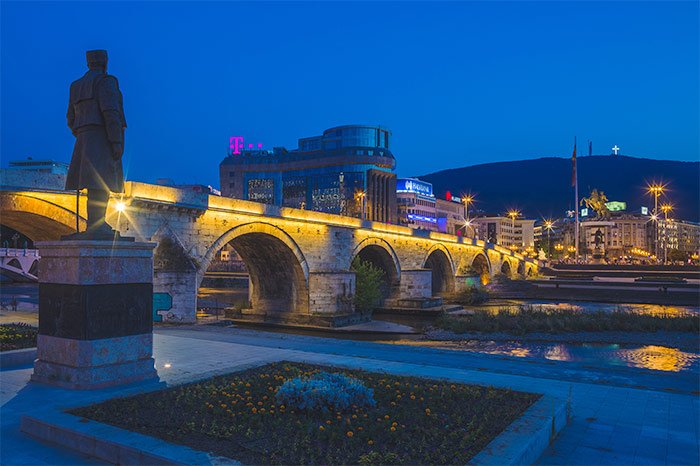
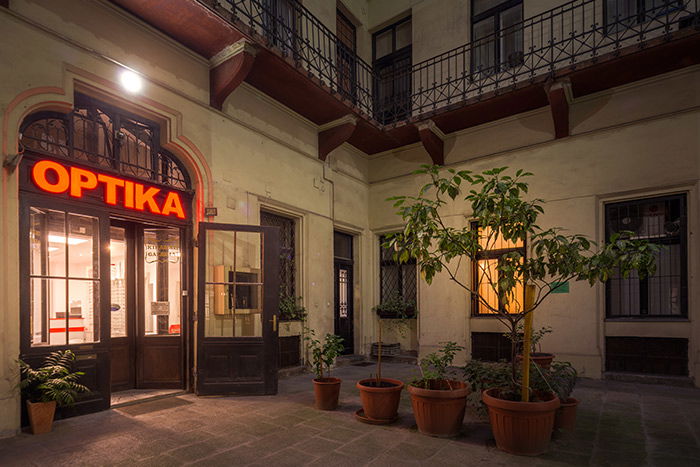
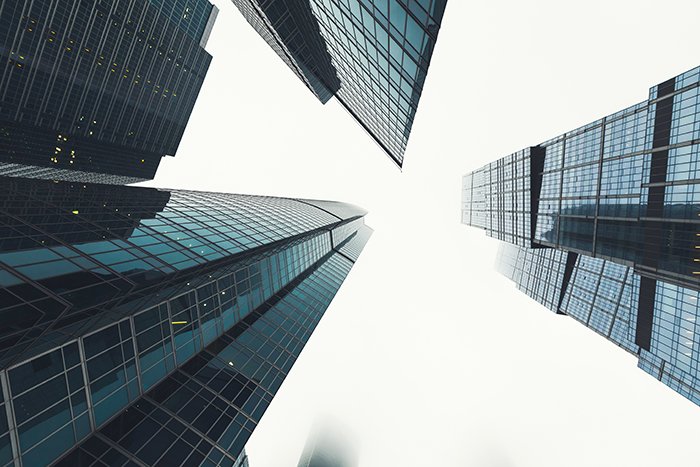
Architecture and Real Estate Photography

For these specific purposes, you’ll need to have a wide lens. An ultra-wide lens is recommended for interiors.

Aperture and build quality are not really of consideration here. What you need is a versatile, sharp and wide lens.

You might opt for a tilt-shift. They give you excellent image quality, advanced controls, and distortion-free results – for a high price.

Canon and Nikon both make fantastic tilt-shifts, often for astronomic prices. Samyang, a third party manufacturer, offers less expensive options which still give you a lot of value.

Photo of skyscrapers with glass windows shot with a wide angle lens

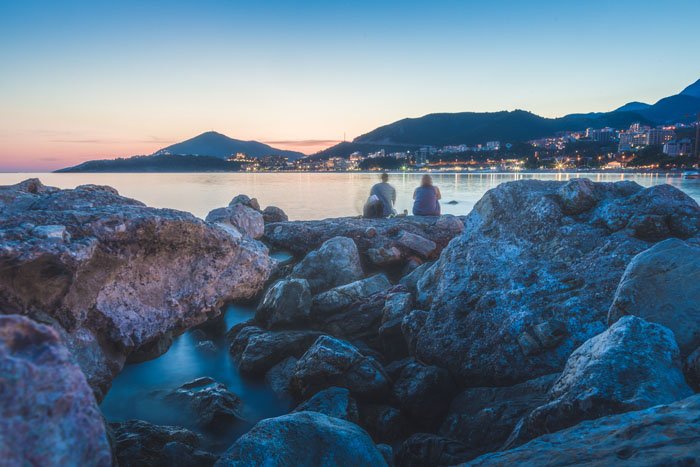
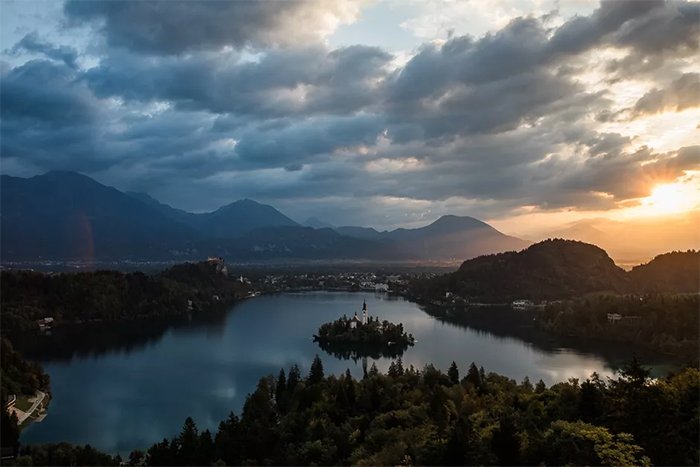
Landscape Photography

For landscapes, you inevitably need a wide angle lens. As you’ll probably do it from a tripod, the aperture is not a very important factor. Instead, size, weight, image quality and weather sealing are.

The lens we love for landscapes is the Canon EF 16-35mm f/4. Learn the ins and outs of landscape photography in our Simply Stunning Landscapes course.

Photo of a landscape with mountains in the background at sunset
Photo by Josh Dunlop

Event Photography and Photojournalism

These fields (among other gear) require fast and wide lenses. You have to be ready for numerous possible lighting and action situations.

Use wide angle lenses when you need to capture the all-encompassing shot. Or, use it to get really close-up for dramatic angles – remember Capa’s words.

You have several options.

You can choose a wide zoom lens. On the Canon and Sony sides, there are several 16-35mm f/2.8 lenses, which are very popular. Nikon makes a 14-24mm f/2.8, along with Sigma.

These are all versatile, well-built and provide adequate image quality, but are all serious investments.

Sadly, with zooms, you very rarely get below f/2.8. To capture moving subjects in low light, you still have to raise the ISO quite a bit – resulting in more noise.

The way I prefer is going with wide aperture primes. As mentioned, I’m a big fan of the 24mm f/1.4 lens but there are other options. Most brands make 35mm f/1.4 lenses. Tamron recently brought out their own, which I like a lot.

If you need wider, Sigma makes a 20mm f/1.4 lens. If you need even wider (rarely), there’s the 14mm f/1.8 – a unique lens, not challenged by anything else on the market, but not particularly suited for photojournalistic applications.

Photo of a family sitting beside a lake at sunset
Photo by the Author

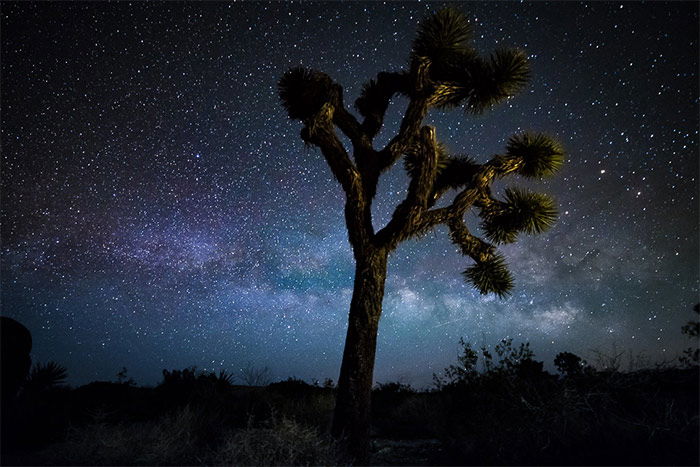
Night Sky Photography

If you want to photograph the night sky (maybe the Milky Way), fast prime lens are the way to go, too, especially the aforementioned 14mm f/1.8 lens.

Follow our guide in the Milky Way Mastery course to know all about this field, and the use of wide angle lenses in it.

Photo of a tree with the starry sky above
Photo by Josh Dunlop

Why Not Use Your Normal Lens?

You could use a multitude of lenses to try to replicate the view from wide angle lenses.

If you were to use a standard 50mm lens, for example, you would have to shoot a few dozen images and stitch them together for a 16mm view. Six to eight images may be enough to cover 28mm.

Here, you’ll need an editing program such as Adobe Photoshop or Lightroom. If you have the time, the non-moving subject, and the effort required, you can be quite successful with this. Your combined image will also have a much higher resolution than a single shot.A photo montage comprising of many images creating a large landscape image

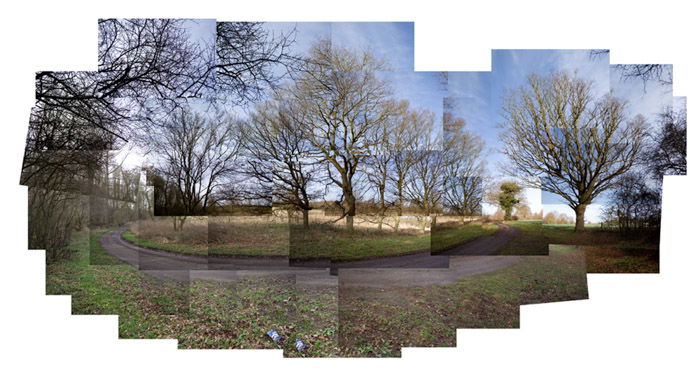
There’s also a different consideration to stitching. You can use it to replicate the shallow depth-of-field look of large formats. There’s nothing to stop you from doing it with portraits or product shots.

The pioneer of this technique is Ryan Brenizer, a wedding photographer from New York. He achieves impressive background separation and wide angles simultaneously with it.

Of course, other photographers also borrow his trick. It takes time to perfect (particularly with portraits), but the results are rewarding.

A guitar resting on an outdoor table shot with wide angle lens
Photo by Kevin Landwer-Johan

Beginner photographers often neglect wide angle lenses. But they are powerful tools of expression, providing options that no other lens type is capable of.

Wide angle lenses can also pose challenges. Applying composition and exposure skills to wide angle shots can be harder than expected.

It’s important that you feel comfortable using your wide angle glass, without overthinking it. Going with your flow almost always yields great results. This way, your shots will be genuinely great and unique.

You’ve Purchased a Wide-Angle Lens – Now What? – Free Quick Guide


Most lenses are bought with a specific problem or need in mind. 

Need to photograph the eye of a fly? Buy a macro lens. Need a versatile studio lens? Buy a 24-70 f/2.8. Need to photograph wildlife? Buy a 70-200 f/2.8. Bird photography? Buy a lens reaching up to 600mm.

The wide-angle lens is different.

It is often purchased because its owner feels that they have reached a plateau in their photography.

It’s time to grow in a different direction, they think. To try something new.

A wide-angle lens is perfect for that. It is unique in its capabilities and in the type of problems it solves.

Whatever the reason that you bought yours, I guess you are now thinking to yourself, “Well, this is it. I have it. Now what?”

That is what this guide is all about.

You can learn about using a wide-angle lens right here.


Tuesday, January 18, 2022

8 Best Tips for Framing Photography Shots

Tags: Shutterbug, Photography for Beginners, Newbie Photography

Why Framing Is Important in Photography

In photography, composition and lighting are everything. Without the right perspective

your subject will look unflattering or not stand out.

This is where framing comes in.

In essence, framing photos is surrounding a subject with different elements. This makes 

it stand out and grab the viewer’s attention. You can think of this as a frame within a frame.

There are many ways you can use framing. Some depend on luck. Others rely on the 

photographer’s creative eye. The right photo framing will make your photos look original 

and stand out. Here are a few ways you can achieve this.

Photo of a man walking with a suitcase reflecting in a mirror
The man’s surroundings in this photograph are unknown. It makes this image the epitome 
of great framing. There are no unnecessary distractions. The window frame emphasises 
only one subject. It helps that this image is black & white. Colors can be very distracting 
in certain compositions. Especially in genres like street photography.

8. Create Frames Using Light and Shadows

Photography is the art of capturing light. Light is one of the best ways of highlighting elements 

in your image, whereas darkness hides elements.

So it is understood that one way of creating a frame in your image is to use light and shadows.

Portrait of a woman in artistic light as a frame.

Shadows don’t always have to be harsh to frame the subject. Take a look at the image below. 

You may not even realize the soft shadows at first glance the soft shadows that subtly frame the woman. Portrait of a woman from the side - framing photography

7. Experiment with Bokeh

Bokeh is a creative way of using light to frame your subject.

There are many ways to create a bokeh effect. You can use fairy lights, capture light shining 

through leaves, or use a crystal or glass. This creates a soft, artistic frame.

You can incorporate bokeh in the background, in the foreground, or in both.

Cat with a bokeh frame.

6. Ask the Subject to Frame Themselves

If you are shooting a person, you can also use them to frame themselves. Many models and 

professional portrait photographers use this technique.

The model can place her hands, for example, in a way that it created a frame around her face. 

This is a natural and flattering way of putting emphasis on a certain body part.

Young woman holding paint covered hands up to frame her face.

5. Use Doors and Windows to Make Your Subject Stand Out

One of the best ways to frame around your subjects is to use doors, windows, or actual 

frames. These can be in the foreground through which you shoot. Or they can be in the 

background with the subject in front.

Doors and windows are perfect for framing simple photos of people, places, and objects.

There’s a lot you can do with a single framing tool. For example, you can use a window as a 

background or a blurred foreground. Or you can use a frame that you shoot through to 

emphasize an indoor or outdoor landscape.

If you’re shooting at a wedding, you can use simple photo booth frames. You’ll get 

funny photos without compromising the quality of your photography composition.

Portrait photo of a woman shot through a window
When shooting through windows or doors, you don’t need to focus on your subject 
all the time. Experiment with different angles, lighting, and focal point. Try to create 
conceptual or abstract photos like this one.

4. Shoot Through Objects to Bring out Details

Using elements in the foreground to fill negative space can make your image look more 

interesting.

If you want to create a soft atmosphere, use a large aperture. Make sure the object is close 

to your lens without completely covering it. Your goal is to put the spotlight on your focal 

point by covering its surroundings with a pleasant blur.

For something more detailed, use a smaller aperture. Take a few steps away from the 

foreground. This will still create a blur, but it will make the foreground more visible. This 

technique is often used in wide-angle photography. It helps capture as much of the 

atmosphere as possible.

Depending on your theme, you can use a combination of simple and vibrant objects.

You can use foregrounds to make a minimalist portrait stand out. Flowers work especially 

well here.

For a moody landscape shot, you can take photos through a branch or a bush.

Photo of a house with bushes in the foreground
Natural foregrounds, such as bushes and trees, are perfect for visually aesthetic outdoor photos.

3. Cover Your Subject in Simple Fabric for Minimalistic 

Effect

Outfits and decorations are very helpful when enhancing a composition. Your subject might 

look awkward or dull compared to their surroundings. Try framing them using cloth or fabric. 

This is most useful for framing portrait and still life photography.

Ensure the cloth you use complements your subject’s appearance and shape. Neutral and 

pastel colors tend to work well in most shots.

Make sure the clothing you use complements your subject’s appearance and shape. Neutral 

and pastel colors tend to work well with almost everything.

Portrait photo of a woman covered in a blanket
For this technique, you don’t need expensive props. Towels, curtains, and even sheets 
of paper can make a big difference. The original background was distracting and 
unflattering in this shot. I used a simple towel to cover it up and make the model’s face 
stand out.

Another way to use this framing technique is to cover parts of your subject. This puts the 

spotlight on a specific area.

For example, if you’re photographing a person, you can cover half of their face. This will 

lead the viewer’s eye to the part of their face that’s visible. And it’ll make your composition 

more intriguing to look at.

Portrait photo of a woman shot through white curtains as a frame
When taking photos with blurred foregrounds, make sure you use manual focus. Your camera’s autofocus might get confused and focus on the wrong detail. If you’re taking self-portraits, use autofocus to focus on your face first. Lock the focus, and then cover the lens with an object.

2. Use Natural Symmetry to Put Emphasis on Your Model

Compositions and symmetry go very well together, especially in atmospheric photos.

You can take a few steps back from your model without making your composition look busy. 

You can do so using basic symmetry knowledge.

This doesn’t mean you have to set up a studio with symmetrical props or backgrounds. Look 

for symmetrical elements in cities or out in nature. Some of the many examples could be 

countryside roads, skyscrapers, bridges, or water reflections.

Place your subject in the middle (or somewhere close to the middle) of these environments. 

This will help create appealing compositions.

Of course, too much symmetry can also be distracting. Don’t be afraid of creating imperfect compositions.

Girl jumps on a symmetrical bridge.


1. Use Reflections for Framing Photography

Window reflections are perfect for framing minimalist photoshoots. You can use them in 

almost any genre.

For portraits, make sure your model is standing behind a window. Take photos from different 

angles to find the best reflections. (Don’t shoot right in front of a window or else your camera 

will end up in the reflection.)

Reflections tend to be abstract and neutral in colour. This is perfect for hiding or emphasising 

certain features. This is like what you’d do with blurred foregrounds.

Portrait photo of a woman shot through a window

If you’re a landscape photographer, photograph different views reflected in a window. This 

creates a somewhat distorted and atmospheric effect.

You can also combine reflections and symmetry. Try creating surreal photos like the one below.

Photo of a square and buildings reflecting on the glass walls of an office building

There are many photographic framing techniques you can use to improve your compositions. 

Frames help you create balance and highlight specific elements for the viewer.

Knowing how to frame a photo will help you turn even the simplest subjects into 

eye-catching works of art


-----------------------------------------------------------------------------------------------------

Free Photography Ebook 

Six Tips for Getting the Camera Focus in the Right Place at the Right Time – Free Quick Guide


There are numerous articles on the topic of producing sharp pictures.

You’ll often see advice on how to hold the camera or what your shutter speed should be for a given lens.

However, we noticed that there is one aspect of image sharpness and focusing that is rarely discussed, and that is the theme of this free guide.


Tuesday, January 11, 2022

 More Great Camera Deals on Ebay


My photo by Darryl Turner

In addition to blogging about photography I'm also a 35mm film camera collector.  While I'm glad to get a good deal on a camera from just about anywhere, I usually buy my film cameras on Ebay.  The prices are great! The selection is huge, and they have nearly every brand ever made.  My personal preference is for either Nikon or Minolta cameras. But I have purchased Pentax and Vivitar brand cameras as well. Here are some of my recent purchases on Ebay. 


ORDER DATE
Jan 05, 2022
ORDER NUMBER
01-08097-88300
ORDER TOTAL
US $20.10

(185243229022)

Delivered on Mon, Jan 10

Tracking number: 9405508205499015831309 This item has been delivered.

Paid on Jan 5, 2022
Shipped on 01/06/22
Feedback needed
No Feedback received
ITEM PRICE:
US $10.00
--------------------------------------------------------------------------------------------
ORDER DATE
Nov 21, 2021
ORDER NUMBER
25-07896-80165
ORDER TOTAL
US $25.00

(324777585365) 
 
Delivered on Fri, Nov 26

Tracking number: 9405508205498387765809 This item has been delivered.

Paid on Nov 21, 2021
Shipped on 11/22/21
Feedback left
Feedback received
ITEM PRICE:
US $25.00
---------------------------------------------------------------------------------------------
ORDER DATE
Nov 21, 2021
ORDER NUMBER
06-07900-80090
ORDER TOTAL
US $36.74

(313762941973)

Delivered on Fri, Nov 26

Tracking number: 9405508205497788873465 This item has been delivered.

Paid on Nov 21, 2021
Shipped on 11/22/21
Feedback left
No Feedback received
ITEM PRICE:
US $24.99
If you're wondering why there are differences in the camera price and the order total, the difference is the additional cost for shipping.  But, as you can see, even with the additional charge for shipping, the prices are still a bargain.  All of the cameras above are FILM cameras.  Ebay also has digital cameras for sale. To check them out, or just window shop, click on the link below. 

Ebay Camera Deals!


Sunday, January 9, 2022


How to Use a Light Meter for Better Photography

Tags: Shutterbug, Photography for Beginners, Newbie Photography

What is a Light Meter?

Simply put, a light meter is a photography tool used to measure light. Without a light meter, we would not be able to judge how light or dark a subject is with our eyes alone.

There are two types of light meter: reflective and incident.

Reflective meters are often built into camera bodies. This type of light meter will first measure the amount of light reflected by the subject. It will then calculate which camera settings to use to create a balanced exposure. This calculation is based on the number of mid-tones in your scene.

Incident meters are external devices that measure the light falling on a subject. This type of reading is far more accurate, as it evaluates a more discrete area and considers only the intensity of light falling on the subject.

an upward shot image of a person holding a light meter in his left hand
© Jeremy Knowles

Should I Use a Light Meter When Shooting Digital?

There are two main reasons why you should use a handheld meter when shooting on a DSLR camera.

1. Greater Accuracy

The reflective readings in digital cameras can sometimes cause inaccurate exposure calculations. This is because the meter inside your camera measures light in relation to middle grey. This means that the calculation intends to achieve a tonal range of 18% grey across the image. But in certain conditions, such readings can result in over or underexposed images.

A common example is when photographing a scene that includes snow. The reflective meter inside your camera is calibrated to middle grey, and so you will often end up with an underexposed image. In this case, the snow is rendered as grey instead of white. To compensate, we must over-expose the image in our camera settings.

Incident metering doesn’t suffer from this same problem. When using an incident reading, you always get an accurate exposure calculation. For portrait photographers, capturing skin tones is crucial. And for this reason, they often favour using incident light meters for accuracy.

a lanscape image of snow with a bran in the background

2. Flash Metering

The built-in meter in your camera cannot measure the intensity of the flash. To measure the light of an external flash source, you must use a handheld light meter.

© Jeremy Knowles

How Do I Use a Light Meter?

We already know that an incident meter reading will give us the most precise reading. Yet, there may be situations when measuring the reflective light is beneficial. One example is landscape photography. Here, you should take three readings, from the brightest to darkest areas in your viewfinder. Then calculate the average.

This type of reading is called Spot Metering. A Spot Meter measures the reflected light in one specific area (or spot) within the scene. Matrix Metering measures the light from across different grid areas in the viewfinder. Many readings are then used in an algorithm to generate a balanced exposure value. Centre Weighted metering gives priority to the light in the centre of the viewfinder.

https://expertphotography.com/landscape-photography-guide-and-tips/

1. Get to Know Your Light Meter

Understanding how your handheld light meter works is essential.

Start by powering on the light meter and, if necessary, select photo mode.

For taking an incident meter reading, it’s important we set up our device accordingly. For most devices, this is achieved by sliding the Lumisphere so that it covers the light-receiving sensor.

Now that your device is set to take an incident light meter reading, we must also set our metering mode. This mode relates to the light source you are using in your scene. You can choose between ambient light (for any non-flash, continuous light), cordless flash, and flash with sync cord (for strobe lighting).

an image of a light meter set on a stump

2. Set Your ISO

We must calibrate the ISO in our hand-held light meter to that of the camera settings. If you are shooting analog, calibrate to the ISO of your film.

This is an important step and will ensure that our devices are in sync.

vintage film camera with light meter

3. Set Your Shutter Speed or Aperture Priority

If your priority is to maintain a desired aperture, for example, an f stop of f/2.8 to create depth of field in your image, you can set your light meter to aperture priority mode (F). Then, select f/2.8 by pressing the up and down buttons.

If shutter speed has priority, for example, a shutter speed of 1/500th of a second or faster because you need to capture movement, set your light meter to shutter priority mode (T) and then select your desired shutter speed.

a mans hand holding a light meter

4. Take a Reading

Next, we want to measure how much light is falling onto our subject. Hold up the light meter in front of the area you want to measure. Make sure the Lumisphere is facing the lens of the camera, and then press the measure button. Your device will then measure the light hitting the Lumisphere and produce an exposure value.

For some subjects, you may need to take many readings to calculate a balanced exposure. For example, in portrait photography, we must measure the light falling on the subject from different angles to not underexpose (by only measuring a highlight area) or overexpose (by only measuring a shadow area).

When using strobe lighting, make sure to trigger your flash unit after pressing the measure button on your meter.

light metering a female model in a read dress

5. Adjust Your Camera Settings

Check to see what the meter reads. Now that you have an exposure calculation from your device, you can adjust your camera settings accordingly.

an image of a Mamiya rb67 camera on a desk
© Jeremy Knowles

How do I use an Analogue Light Meter?

Analogue meters offer precise readings and are more practical than you might think.

When using an analogue light meter, you exchange a digital display for a needle. This needle indicates exposure values within an old-school, circular index.

First, calibrate set the ISO on your analogue meter. This should be the same as the settings in your digital camera or roll of film. You can set the ISO on most analogue meters by rotating the appropriate dial until it indicates the ISO you’re using.

Next, take a reading by holding the metering button until the needle stops moving.

In most models, the needle will remain fixed in position for around 15 seconds after the metering button is released. Lastly, rotate the dial ring indicator to align with the needle. You can then read the full range of aperture and shutter speed combinations.

© Jeremy Knowles

Having a handheld light meter is an absolute essential. We recommend getting to know your light meter by practicing with different subjects. Try using it in a variety of modes and scenes.

For a reliable digital light meter, I recommend the Sekonic L-308X Flashmate.

For a small and easy-to-use light meter, check out the Gossen Digisix 2.

For a trustworthy analog light meter, look no further than the Sekonic L-208 Twin Mate. 


---------------------------------------------------------------------------------------------------------

FREE Photography Ebook 

10 Camera Controls Every Photographer Should Know


There are 10 basic camera functions that every photographer should learn first.

I know how it goes, though.

We get that new camera. We get it out of the box. We start shooting, and then we forget to really go back and figure out- What’s what on this camera?

That entire scenario can lead to a lot of lousy photos.

Author and Photographer, David Veldman has written us a Quick Guide titled, “10 Camera Controls Every Photographer Should Know”.

This guide is not going to replace your camera manual.

It is going to give you some direction as to the key features of your camera- that you should be studying first!

Once you’ve learned these 10 key camera functions inside and out, your photography is guaranteed to improve!


Monday, January 3, 2022

Best Techniques for Shooting Silhouette Photography

Tags: Shutterbug, Photography for Beginners, Newbie Photography

Silhouette photography has a dramatic and mysterious atmosphere. You might have wondered, how other photographers take breathtaking silhouette photos.

In this article, I’ll let you in on the secret tips to creating spectacular silhouette photography. Once you understand the basic techniques, challenging lighting conditions become photographic opportunities.

The silhouette of two girls jumping over the sea at sunset 

What Is Silhouette Photography?

A silhouette is created by a subject photographed against a bright background. The hard backlighting makes the subject dark, concealing the details. The subject may be a person or an object, but we only see its shape.

Usually, we want to balance the exposure during photography. We want to reach an evenly lit scene in our photographs.

But in silhouette pictures, we want a bright background to be properly exposed, while the subject goes dark and loses all or most of its details. (mention dynamic range here)

Silhouettes photography benefits from the cases when the background is much brighter than the subject. It takes advantage of what might otherwise be a challenging lighting condition.

Such photos take a more minimalistic approach, compared to the usual detailed images. They reduce the visible information, concentrating solely on outlines, contrast, patterns, and shapes.The silhouette of men in a boat at sunset

How to Photograph a Silhouette

Shooting silhouette photography is easy once you know the basics. It’s mostly about where you stand in reference to a light source.

You’ll need a subject with a strong and identifiable shape. This subject will create your silhouette once you take the picture.

You also need a strong light source that is behind your subject, which creates a hard light. The sun as your light source is the easiest way to create silhouette photography.

To reach the desired results, make sure you are mindful of your position and camera settings when taking the photo. We will explain everything later in this article.

Cool silhouette photography of a girl beside a giant cross on a mountain at sunset

Use Spot Metering To Enhance Silhouettes

Cameras read light in the scene and try to figure out how to reach the best exposure. But the camera is only a machine, so it cannot always figure out the right values. This is where light metering comes in.

It gives you a chance to tell the camera how you want it to evaluate the scene. There are three main modes, which different camera brands use different terminology for.

  • Meters the whole scene: Averages light across the entire scene. It is found under the name of Multi (Sony), Evaluative (Canon), or Matrix (Nikon).
  • Meters the centre: Averages light across the entire scene but gives the centre exposure more importance. It is called either Center (Sony), or Center-Weighted (Canon, Nikon) mode.
  • Meters one spot: Exposes for a specific spot that you select, which is usually the focal point. It is called spot metering mode by the leading camera brands (Sony, Canon, and Nikon).

Cool silhouette photography of a girl and a dog on a beach at evening

In a silhouette photo, I want certain parts of my image to be well-exposed and other parts to be under-exposed. If my camera exposes for the whole scene, it will try to even out exposure differences.

In spot metering mode, I’m telling my camera precisely what part of the scene I want well-exposed. In the case of silhouettes, I want the background to be well-exposed, making my subject dark.

Therefore, spot metering is the best for making silhouettes.

Choose The Right Settings

Choose a relatively narrow aperture (around f/11). Press the shutter button halfway down, focusing on the background. You might have to move your camera a bit with the shutter button still halfway pressed to recompose the picture. This way, you can place your subject where you want it in the frame.

At f/11, the entire scene will be sharp. Most of the details in the subject are lost in the silhouette, so focus doesn’t matter too much. It’s just the edges of your subject that need to be in focus.

Cool silhouette photo of a tree by the full moon

If your subject isn’t dark enough, adjust your exposure compensation dial to -0.3 or -0.7 to darken the entire image a bit.

Finally, don’t use flash when creating silhouettes. Flash is all about bringing out the detail of your subject. For a silhouette, we want the subject to be under-exposed.

Find the Right Backlights

Because the light is behind the subject, the lighting method you need is called backlighting. When choosing the light conditions for a silhouette photo, you need to pick a light source that provides hard light.Cool silhouette photo of a girl kissing a dog

The sun works perfectly for this purpose, but you have to make sure it is behind the subject. This makes sunset and sunrise prime times for silhouette photography.

To determine whether the light and the weather conditions will be sufficient, use an application to check out the forecast. The Photographer’s Ephemeris app and website are made for specifically this purpose. They give you information about how the light will look at your chosen location, at any time of the day.

You can also use artificial light to capture silhouettes. Street light or a car’s headlights behind your subject can make for some pretty amazing results. If you are bringing your own lighting equipment, you even have the chance to reposition the light according to how you want to create a silhouette.

The silhouette of a girl

Choose The Right Subject

Silhouette pictures focus on the form of the subject. Colour and details of the subject will be dark, so the form must be strong and have a clear outline.

Silhouette photos of people are particular favourites because the human shape is easily recognisable.

Silhouette of a couple at sunset
I captured this couple watching a sunset at the Garden of the Gods in the Shawnee National Forest. The sun behind them creates a silhouette. My camera settings were 1/200th of a second at f/11, ISO 100.

When shooting silhouettes of people, try to photograph them in profile. This way we can see the shape of the face and body, even if we can’t see details.

When there’s more than one person, create negative space between the subjects. If you’re not careful enough, the silhouettes will start to merge and look like one person with an extra head or arm.

If you are creating silhouette photography of buildings or objects, look for clearly defined shapes and outlines. Anything that has a distinct shape and stands out from the horizon can work.

Whether it is a statue, a church tower, or a tree, look for subjects that are clearly separated from the background. Otherwise, the silhouette will lose its recognisable shape.

A good background for a silhouette photo is one which is simple, with minimal distractions. This allows the silhouette to be the sole focus of the picture. The bright, clear sky works as the best background, especially if it is a sunset scene.

The silhouette of a city skyline
The buildings in the city’s skyline merge together and lose their distinctive shapes.

Position Yourself For Better Silhouette Photography

If you have a distinct subject and a strong light source, but you’re not getting a silhouette, change your position. The trick is in the relationship between elements.

Stand in front of your subject, so that it is placed between you a strong light source. 

You can choose to include the light source in your image or block it completely with your subject. It’s all about the angle. A slight step to the side will change your relationship to the subject and the light source.

You can also create a sunburst in your images by choosing a narrow aperture, such as f/22. Please take note that on such aperture values, you might experience lens diffraction.

If you want to get a bit more creative, include rim light in your silhouette photography. Rim light highlights at least one edge of the silhouette. The strong backlight wraps around the subject and allows some detail to appear.

Silhouette of a boy sitting on the edge of a cliff
A boy watches the sunset at Garden of the Gods in Shawnee National Forest. My camera 
settings were 1/320th of a second at f/32, ISO 100.

Creating stunning silhouette photography is all about where you stand in relation to your subject and the light. Place your subject between you and the light source. Use Spot metering mode and a small aperture.

Look for an uncluttered background. It’s all about the shape of the silhouette, keep everything else simple.

Now that you’re equipped with all the info you need, go and take some silhouette photos of your own!

 --------------------------------------------------------------------------------------------

Another Free Photography Ebook 

Lightroom: Setting Tone – Free Quick Guide