10 Easy and Fun Still Life Photography Ideas
1. Play with Shapes
A metaphor
is a powerful tool in a photographer’s hands. Even if you’re not
looking too closely, you can still find unusual connections between
inanimate objects and make a beautiful picture out of it.
All you have to do is to compare dissimilar subjects that have one thing
in common. That could be their color, shape, or any other formal
resemblance.
For example, a globe is round. So is a CD. So you can shoot a CD in the
wooden frame taken from the globe and say that the world is full of
music. This is a very cool tool when you’re thinking of minimalist still life photography.
Find a mundane object that reminds you of something more interesting. Make this visible in your still life setup.
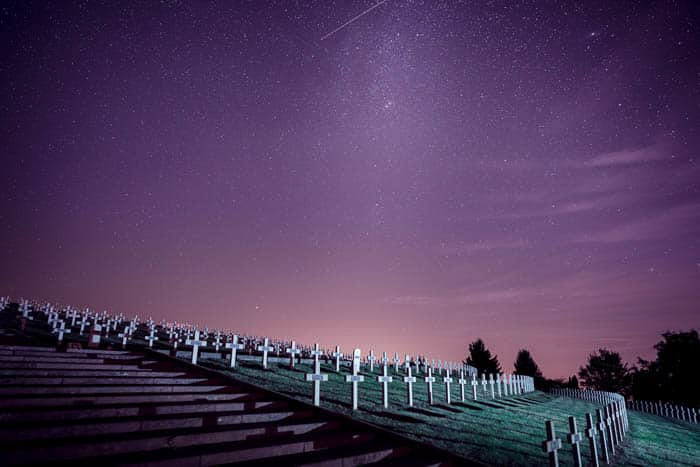
Let’s get back to round objects. Oranges are round. What else is round?
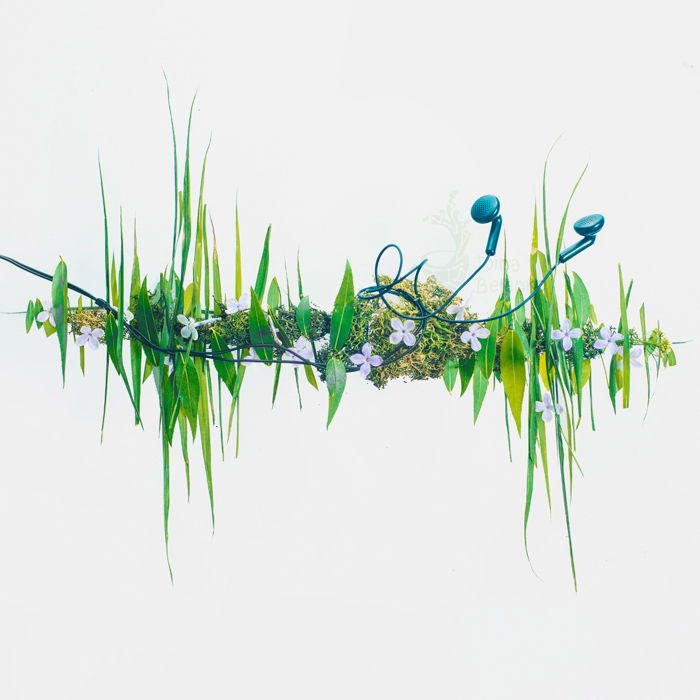
Bicycle wheels, the Moon, headphones, cups, vinyl records, tennis balls,
darts targets, and camera lenses. Also, balloons.
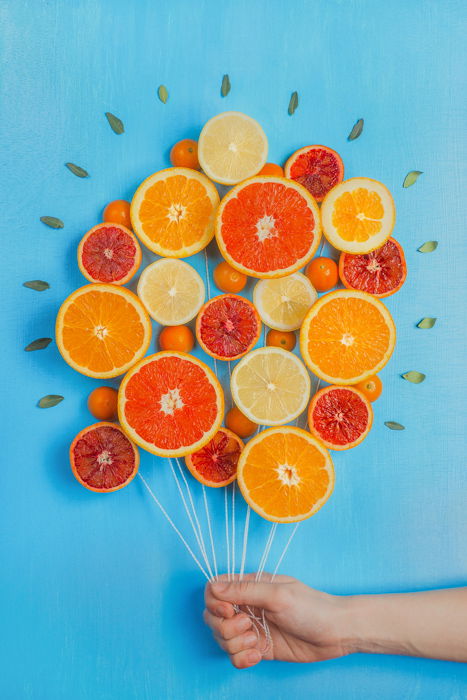
Why not turn some oranges and lemons into a bunch of balloons? For this
transformation, you will need only a few strings. For others, you can
draw the key details with a marker right on the backdrop, cut them out from paper or bend from a string of wire.
2. Try Adding Words
Photos always have to say something. And, sometimes they can do it literally!
Here dimensional typography comes into play! Beautiful texts made from flowers, confetti, chocolate, wire, stationery clips, and spices!
The easiest way to get started is to find objects similar to letters and
united by one theme. Pick a theme: sweets, flowers, outer space, toys,
autumn, you name it.
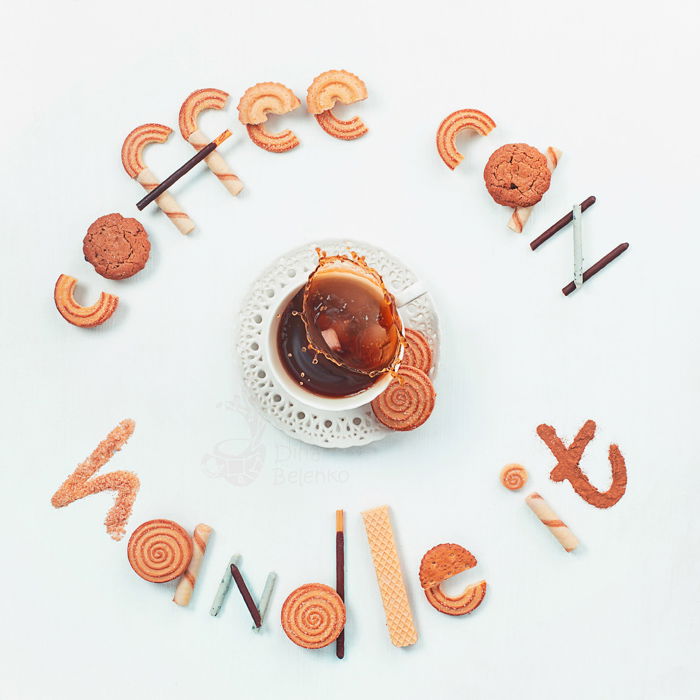
That’s your new alphabet now! Cookie with a bite is for C, a spiral of a
peeled orange zest is for S. Write Y with carefully poured mustard. Use
two crossed flower stems to form X. Create W from a broken slinky and
make a specific button stitch is for Z.
Make a list of possible objects and find corresponding letters. Now you’re ready to write something witty and funny.
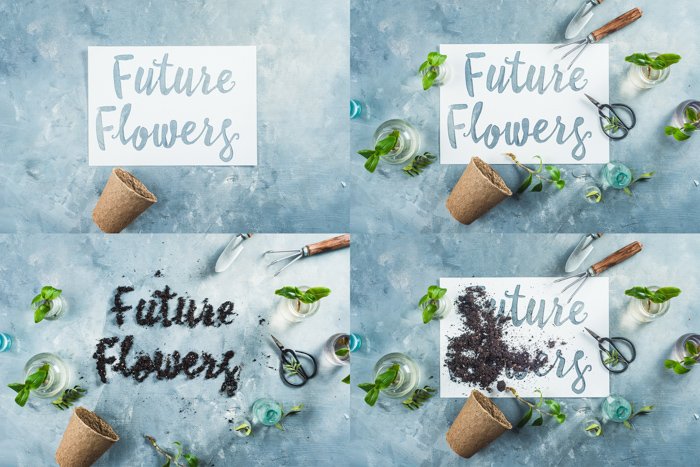
Another way to play with words is to work with a template. Print the
text you want to use and cut it from a sheet of paper with a layout
knife. Fill the template with something free-flowing like sugar,
sprinkles or confetti.
Carefully remove the template with tweezers and photograph the letters.
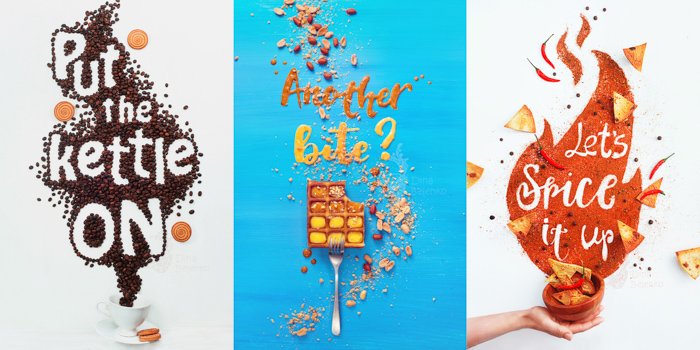
Wish someone good morning, spelling it with bacon and eggs. Offer
another waffle with letters made from syrup. Add some spice to your
nachos with letters made from chilli paper.
3. Have Fun with Patterns
Patterns
always look good. There’s something soothing in rows of alternating
objects. Even more, it’s the best way to make an impressive photo with limited props.
Pick a theme: sweets, fruits, leaves, embroidery tools, ceramics,
accessories, anything you like. Collect your objects, set your camera on
a tripod. Arrange a composition, starting with bigger items and moving
to smaller details.
Take a shot from above, and voila!

The most important thing here is to keep your items similar, organized,
but not boring. I have a sweet tooth, so naturally, I’m going to use my
patterns of sweets, coffee cups, and cookies.
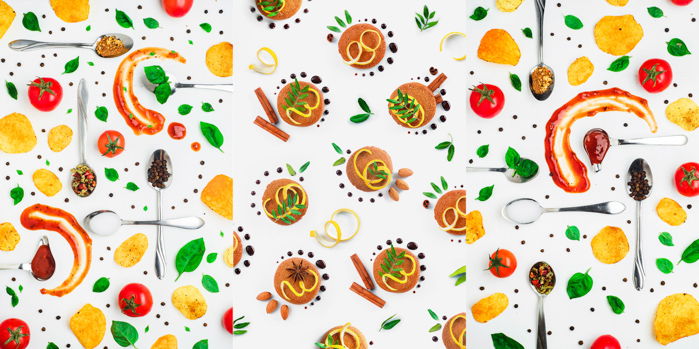
Сookies
in a checkerboard pattern make a boring picture. But add some lemon
zest here, a chocolate swoosh there, and a couple of star anise to fill
empty spaces. Now your pattern is pleasant to look at.

Avoid monotone! Don’t be afraid to break the rhythm and to experiment
with different colors. That’s what keeps the music interesting.
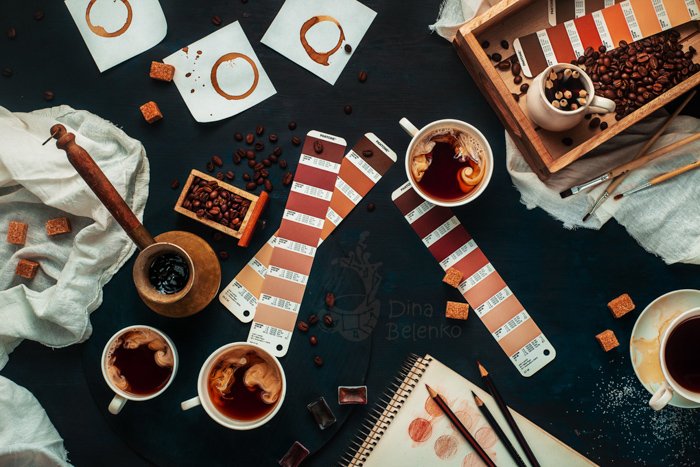
4. Coffee Is Your Friend
One of my favourite creative exercises is choosing one object and
trying to come up with at least 15 sketches with it as the main hero.
Yeah, I know it may seem hard and even tedious, but in fact, it’s pretty
fun. The key is finding an object with wide narrative opportunities.
For me, this object is always a cup of coffee.

You may think of an artist who got oblivious and put brushes and pencils
in their espresso. Or you can imagine blimps and zeppelins flying in
steam rising above hot coffee. Or you can have coffee cups competing
with cinnamon sticks in a game of tic-tac-toe.
Take your time, and spend 5 minutes (have a countdown!) on each thought.
Write every idea down without criticizing it. And don’t be afraid to
sketch something stupid.
Look at a coffee cup and try to brainstorm at least 15 stories about it.
You’ll be surprised at how swiftly your imagination can work once you
give it some fuel.
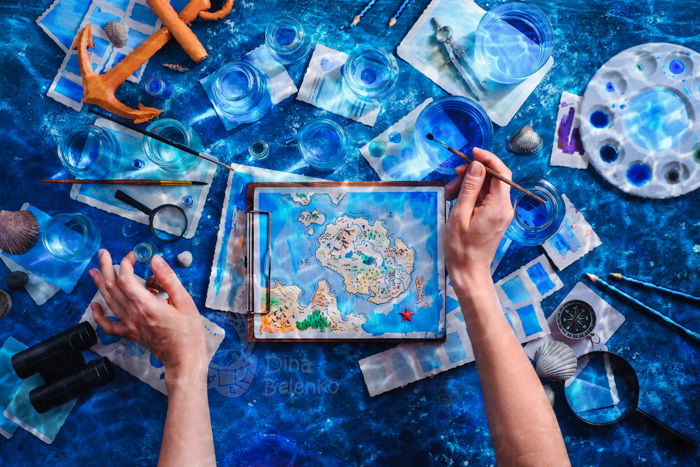
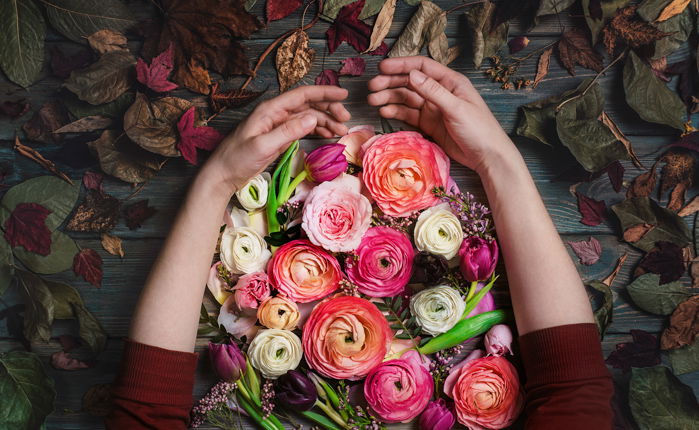
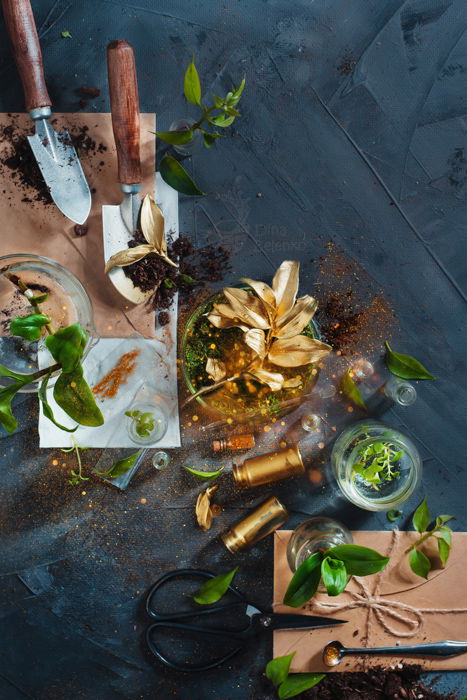
5. Tell a Story
Things can tell a lot about their owners. Especially if you don’t
look for random objects, but for tools of their trade. For me, desktops
look not only intriguing but magnificent. All these interesting objects
that belong to an artist, a ceramist, a silversmith, an embroiderer, or a
writer!
All the details make these tabletops alive.

You can ask your friend with an interesting profession or hobby for
permission to photograph their workplace (don’t miss the chance to
include their hands in the frame!). Or you can try to recreate something
more unusual by yourself.
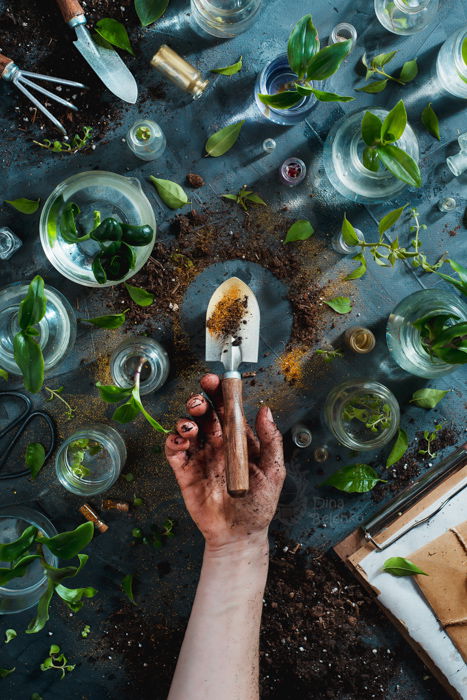
What would a workplace of a botanist look like? A cartographer? A
retired pirate, a witch, your favourite writer or, say, Hermione
Granger?
Which items would they keep? Would their tables look neat or be a
complete mess? Which objects are essential to their profession and which
are just cute little details?
Answer these questions, pick an appropriate and good background and
tell your story. You can include a busy backdrop, a blurry background, a
neutral background, or whatever background you fancy.
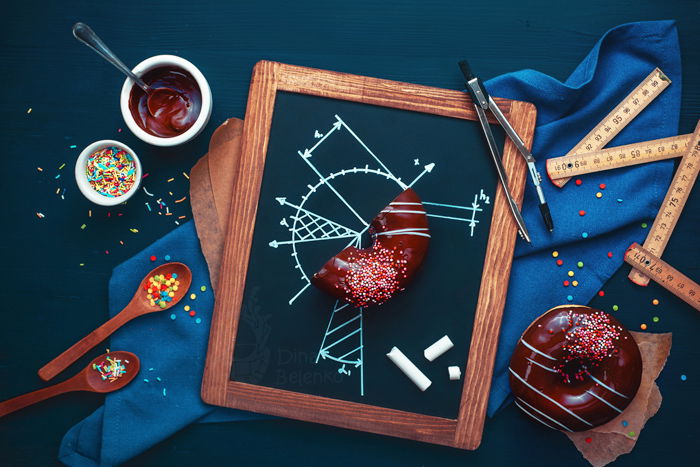
6. Include Chalk Drawings in Your Photographs
Combining a flat drawing with real objects is always a great trick.
You can create a new reality for ordinary objects transforming them with
a couple of chalk lines. Turn one thing into another or even create a
whole new space!
All you need is chalk, drawing surface and sketch. I’m absolutely
helpless at drawing, so I always find extremely simple subjects. I can’t
make a cupcake or part of an elaborate castle, but I can draw a fiery
tale and let it be a comet.
If you’re not drawing with a marker, but with regular chalk, keep it
wet. Don’t use dry chalk. Dip it in water before drawing. At first, the
lines will look a bit faded, but let them dry.
The drawing will dry bright white and the lines will look the same. But
drawing with wet chalk is much easier. You can also draw on a wet board
if you prefer.
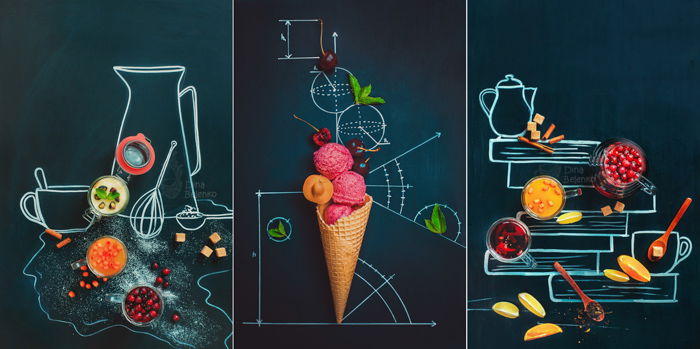
Spend 20 minutes on sketches. You’ll see that drawing a jam jar around
fresh berries or adding a chalk teapot to sugar cubes, mint leaves,
lemon slices and cinnamon is just a start.
7. Try Flower Photography
Flowers
are a perfect subject for still life photography. It’s practically
impossible to have flowers in the frame and get a dull image.
Especially if it includes a story you want to tell.
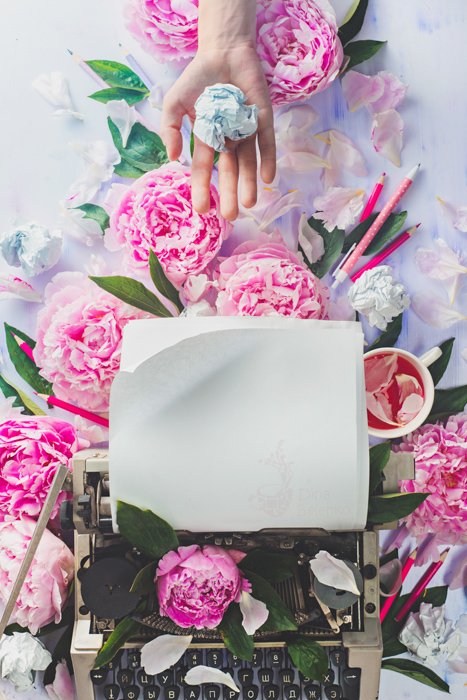
Say, your character is a writer, who’s working on a sweet and romantic
novel. Let’s get a bunch of pink flowers and arrange them around a
typewriter adding some pencils and crumpled paper balls.
Or your hero may be a young botanist who’s collecting field flowers for
his first herbarium. Then photograph a neat and accurate flat lay with papers and gardening scissors.
Or your character is a daydreamer who’s drying fern leaves between the
pages of a fantasy book. In that case, shoot something light and airy in
a high key.
You can even get a little destructive and paint flowers with metallic
spray paint (choose golden ones for a Midas reference!). Why not drown
them in water (wait for bubbles to form on the surface) or dip them in acrylic paint of matching color (and shoot falling drops of liquid).
You can even encase them in ice cubes (perfect for hot summers!).
Let your imagination run wild! With such a beautiful subject as flowers, there’s practically no chance for error.
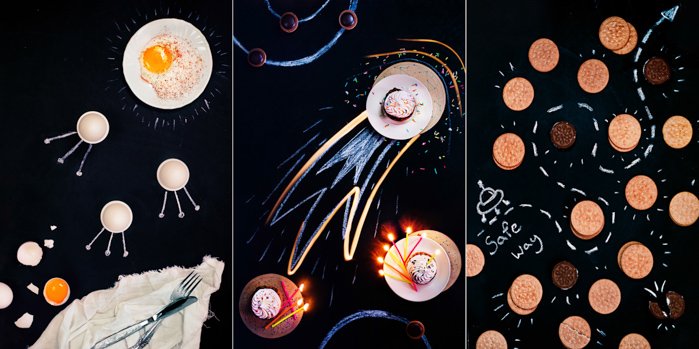
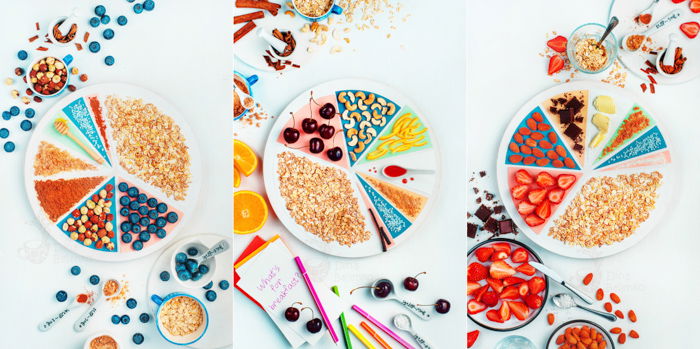
8. Play with Your Food
Food photography is wide and versatile enough to talk about for days
without stopping to draw a breath. Often, in order to take a shot, you
need to be a good cook or a food stylist. Or at least to work with one. But there’s no need for that if you’re shooting raw ingredients.
Disintegrate your favourite meal, and show how it’s made. Make a pie
chart from your breakfast cereal: this sector is for oatmeal, that one
for berries, and that tiny one is for a pinch of vanilla.
Or take it a step further and photograph a comprehensive recipe. Arrange
a flat lay composition with ingredients, paper arrows, and stickers
with written instructions.
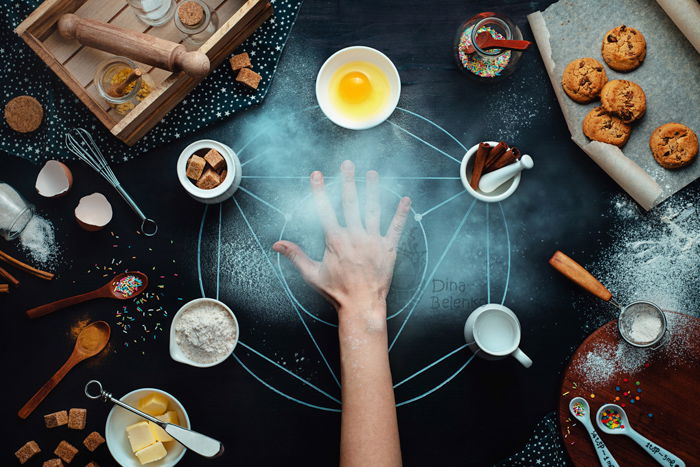
Another way is to fantasize how easy cooking could be with magic! How
with one spell or one pentagram you can avoid all that fuss with
cutting, roasting, sauteing, and blanching.
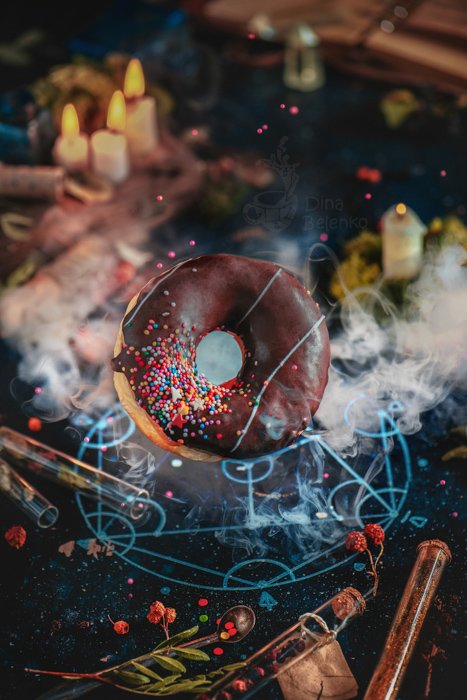
I can’t bake a proper doughnut to save my life. But I can imagine how I
summon a tasty chocolate doughnut with help of transfiguration seals
from Full Metal Alchemist.
Food is one of the most promising themes to work with. So, if you’re struggling for ideas, just look at your plate.
9. Catch Retro Vibes
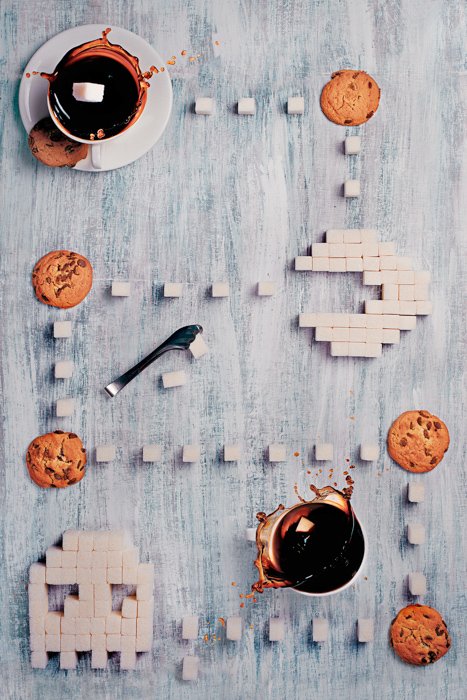
Remember old 8-bit video games? I’m very fond of them, so an idea of
making them real seems fascinating! Take something resembling a pixel (a
simple sugar cube would work perfectly) and recreate a scene from Space
Invaders or Pack-Man.
Make it a fight not for completing the level, but for your breakfast or after lunch cookies.
You don’t need to build an entire screen pixel by pixel. But note the
key elements and make sure you have them in your scene. Sometimes just
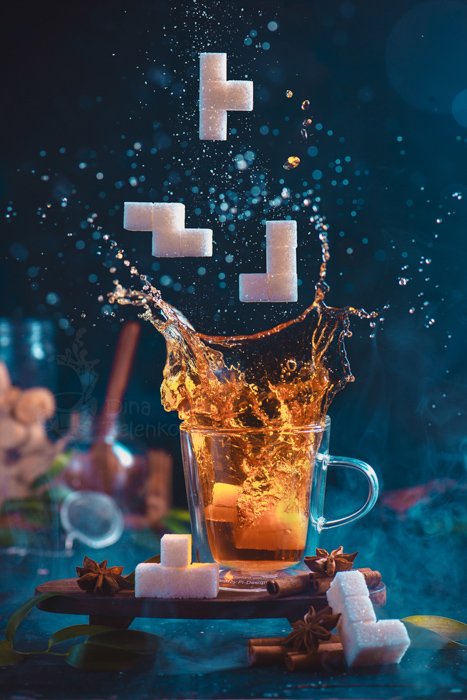
one element like one tetromino figure will do the trick.
My friend told me that the traditional name for the Tetris playing field
is called the “well” or “matrix”, or the “glass”. My mind immediately
produced an image of Tetris tiles filling a real-world glass.
Later, I transformed this image into a smalls series where Tetris figures fall into teacups and create beautiful splashes.
Now I’m really interested to see your take on this! Remember your
favourite 8-bit game and bring it to life. Even if it’s going to destroy
your breakfast.
10. Build Your Own Tiny World
What’s the absolute best thing about still life photography and still
life images? It’s all about world-building and reality-warping. There’s
a tiny world, full of petite adventures, hiding in plain sight.
Picture a conventional still life scene and populate it with tiny
people. They could build a treehouse on your cacti, steal your cookies
with a UFO or sail the length of your soup plate.
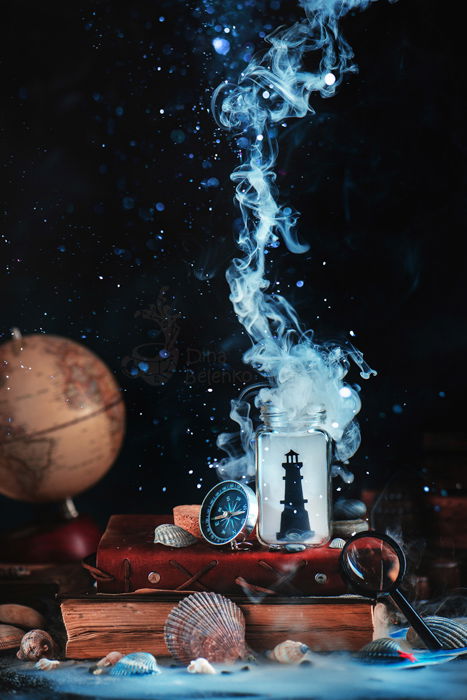
Ideas for beautiful images are endless! Place a paper silhouette of a sailboat on a bookshelf, add some stones and seashells and you’re ready for a story full of storms and pirates!
Spill some ink, borrow a couple of police cars from your child or little
brother, and add an obligatory yellow tape with POLICE LINE DO NOT
CROSS. Here, you have a crime scene.
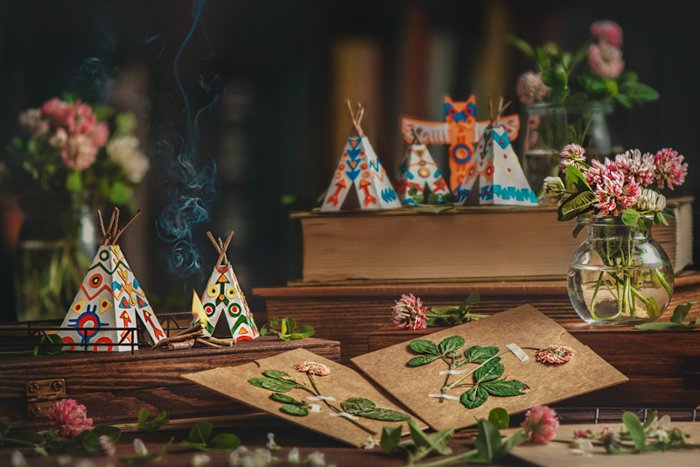
Put a teepee you made from paper and twigs on your table with glass jars
full of clover and books about Indian Tribes. Light a bonfire with a
match, look at smoke rising to the dark skies and take a picture.
Imagine your own tiny world, live in it, tell its stories. Check out our macro photography article for tips and advice!
This list of still life photography ideas, as any list of ideas, is
useful only if you really try to do something with your photography
work. Just making a mental note of ‘oh that’s really cool, I should try
it sometime’ won’t work.
Actually drawing a sketch, arranging a composition and taking great
photos, however, will work. So, choose one idea you like best, transform
it to match your vision, style, skills, and props. Plan the shooting
and then actually do it.
Photography Books