Thursday, July 22, 2021


What is Focal Length? (And Why it Matters in Photography!)

Tags: Beginner Photography

Why Focal Length Is Important?

Knowing what focal length means in relation to your camera is very important when it comes to buying lenses. Read this post to find out what different lenses are used for. You’ll see which ones are right for you, how to use them creatively, and all the technicalities.

Lenses are divided into two categories based on whether they can zoom. There are the ones that have a fixed focal length (prime lenses). And there are those that have a variable focal length (zoom lenses). In general, prime lenses are sharper and often have a wider aperture. These are great for low light conditions.

Zoom lenses allow you to use one lens to cover a range of different photography fields. One lens means less time spent searching for and changing lenses. There are advantages and drawbacks to both types of lenses. So, having a mixture of them gives you versatility and power.

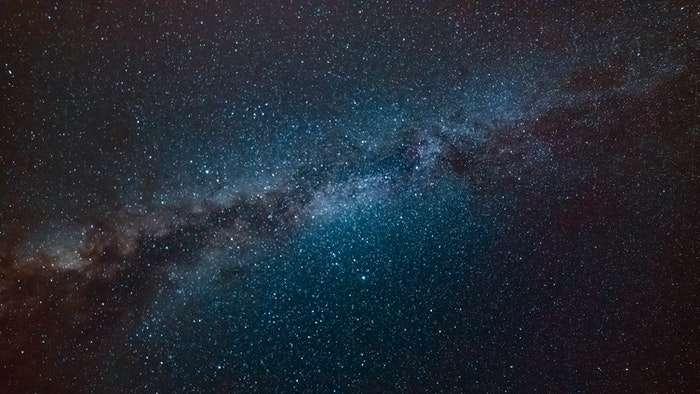
We can use the human eye as an example. Its focal length varies between 17mm and 25mm, depending on who you ask and who you examine.

We have an approximate field of view of over 180°. This is different from the 90° angle of view from a lens, which is down to the fact that we have two eyes.

The area that we actively perceive is smaller, similar to a 40-50mm lens. That’s why the 50mm is called the ‘standard’ focal length.

Photo of a subway station in low light

What Does Focal Length Mean?

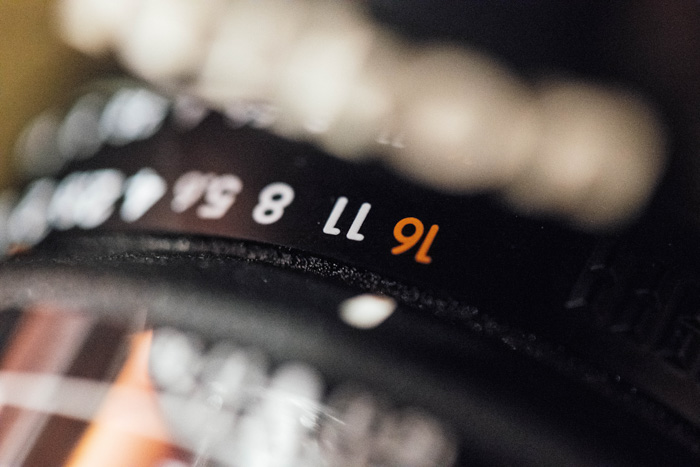
The focal length of the lens determines how ‘zoomed in’ your photos are. The higher the number, the more zoomed your lens will be.

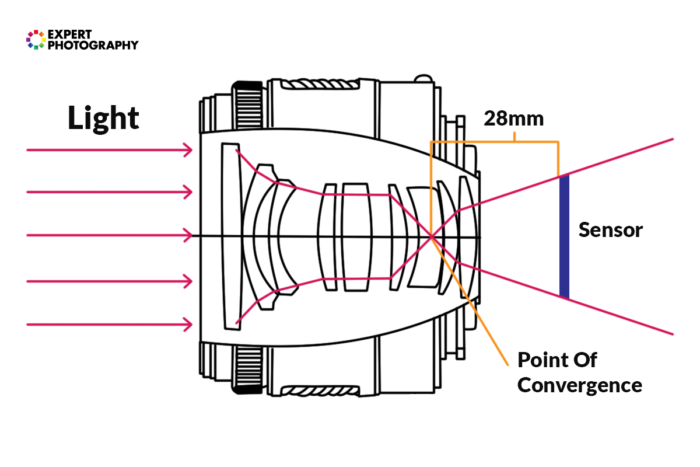
It is often misunderstood that the focal length is measured from the front or rear of the lens.

In reality, it’s the distance between the point of convergence in your lens and the camera sensor. This is the case of simple lens designs (like Double-Gauss). There are also plenty of complex optical designs that work differently. In many cases, that distance is not equal to the focal length.

The key takeaway is that the focal length of a lens is identical to the focal length of a single lens that would provide the same field of view.

Take a look at the diagram below that explains this.

A diagram showing the point of convergence in a lens

You might ask: why do we use complex, multi-element designs and large lens housings if a single lens will also provide an image for much cheaper?

There are many reasons for this. First, to use a lens for photography, you need to make that lens focus somehow. This, on its own, doesn’t require multiple elements. But it does require a mechanism that allows the user to move the lens closer to or further away from the sensor. If designers want to seal off the moving element, it means two more elements on the front and on the back.

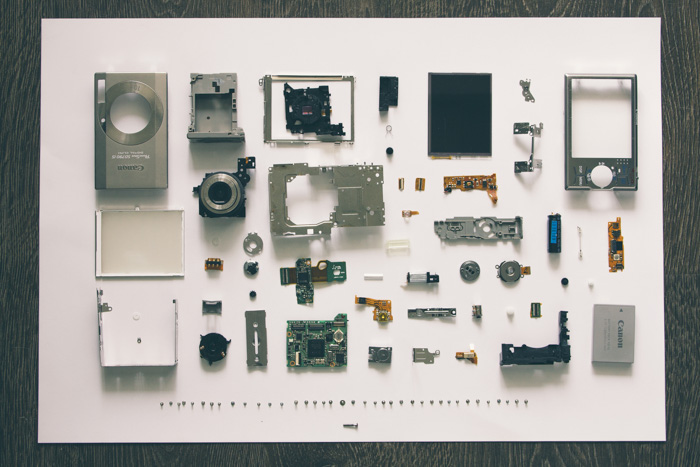
Second, an image coming from a single lens is not nearly as clear as you’d expect. Because of different wavelengths being present at the same time, colours shift very noticeably, causing a distracting effect. Special elements and coatings are necessary to counter this. And even in complex designs, the issue doesn’t disappear.

These elements, however, might introduce additional geometric distortions to the image. So, even more lens elements are needed potentially. In some expensive lenses, you’ll find aspherical elements. They, too, are there to provide a cleaner image with more detail and less distortion.

Zoom designs are a whole new world. They often use more than a dozen lens elements, sometimes even 20.

Ultimately though, their angle of view and focal length can be compared to single lenses. Hence, we’re able to use focal length as a measurement of “zoom”, and angle of view.

Different Focal Ranges and What They’re Used For

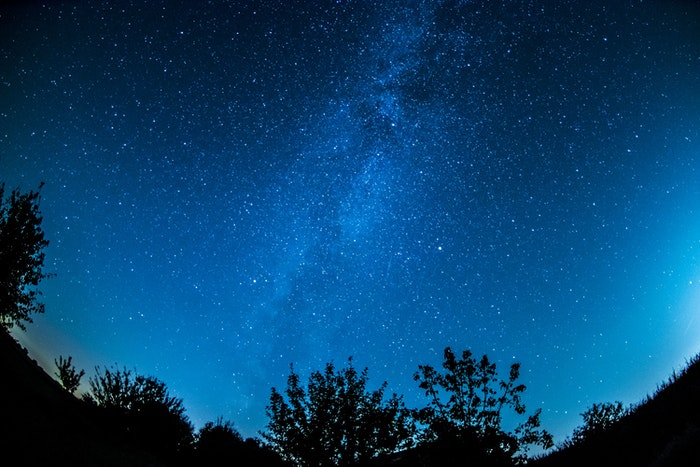
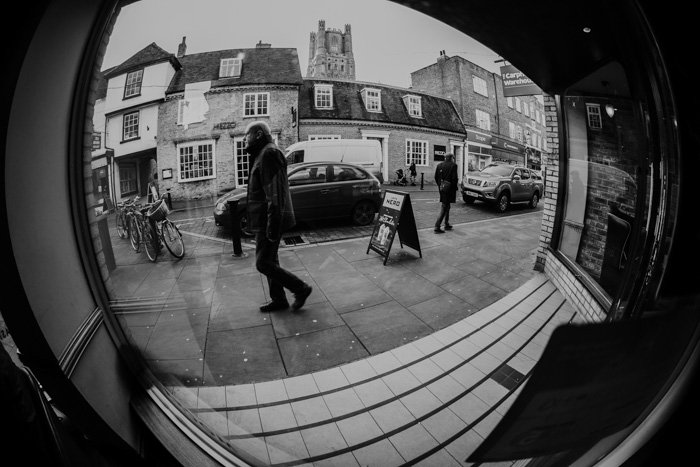
Ultra Wide Angle and Fisheye (14-24 mm)

These lenses are often considered speciality items. Usually, they are not included as part of a starter kit. They create such a wide angle of view that can feel unnatural to work with at the beginning. This is down to the lens having to fit more of the scene into the image than what your eyes can see at once.

Ultra wide-angle lenses are often used in event and architectural photography. They help to get a lot into a photo when shooting in a confined space.

These lenses are not suitable for portraits. They enhance the perspective so much that facial features can look unnatural.

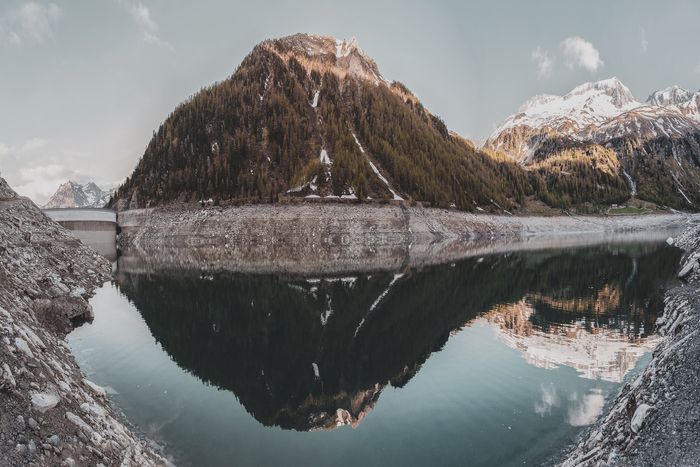
Landscape photographers and adventurers, however, love them. An ultra-wide lens is able to distort perspective in ways that these genres value. In a landscape scenario, it’s possible to have a flower in the foreground be larger than the mountain in the background, while still fully including both in the frame.

When used for journalistic scenes, ultra-wide-angle lenses can provide a dramatic, interesting angle. Especially if you’re close enough to the subject. A 16-35mm or 14-24mm zoom, for example, is a crucial tool in the bag of a press photographer. These focal lengths can be found in the lineup of most manufacturers.

You might recognise the work ‘rectilinear’. Rectilinear wide angles project an image in which the straight lines remain straight. Fisheye lenses distort the scene into a spherical shape.

If a lens is not designated as fisheye, it’s more likely rectilinear, as that’s the standard. Fisheyes are rather special tools. Apart from fisheye DSLR lenses, they’re most commonly included in action cameras, such as GoPros.

Their angle of view is the largest among all lenses, often reaching 180 degrees diagonally.

A black and white image of a street scene, shot using ultra Wide Angle focal length

Wide Angle (24-35 mm)

This is where you’ll find most kit lenses for full-frame cameras start. 24mm is the point at which the distortion that appears to stretch the side of an image stops appearing unnatural.

Wide-angle lenses are used by photojournalists for documenting situations. This is because they are wide enough to include a lot of the context, whilst still looking realistic.

Nature and landscape photographers love them for the same reason.

The widest lenses commonly used in movie production also fall into this range of focal lengths. Their field of view is ideal for showing plenty of the environment. But thanks to the wide aspect ratio, subjects can be far enough away to not appear distorted.

Photo of a mountain reflecting on a waterscape

Standard (35mm-70 mm)

It’s in this range (at about 45-50 mm) that the lens will best reproduce what our eyes see (excluding peripheral vision). I like to use this range when shooting on the street or with friends in a closed setting. Examples would be at the dinner table or the pub.

Standard lenses as called standard for a reason – these are the most common lenses, in both prime and zoom format.

Their focal lengths can be used for virtually anything, from nature to action.

A standard lens such as a 50mm f/1.8 is an excellent, inexpensive addition for a camera. It will provide excellent results. A prime lens will always provide better results than your kit zoom lens, as it is built with a single purpose. It does one job well.

Kit zooms also fall into this category. They usually cover a zoom range of 18-55mm (on crop cameras) or 28-70mm (on full-frame and film cameras). Both of these zooms cover the entire standard range, as well as some wider angles.

Photo of a ship with colorful houses in the background

Short Telephoto (70-105mm)

This range is often where kit lenses stop. Here, you’ll start to get into the range of telephoto lenses and portrait primes (around 85mm). This is a good range for portraits as the perspective of the lens will make human faces look natural.

Most short telephoto lenses separate the face from the background, without completely isolating it.

A large proportion of dedicated macro lenses also falls into this category. This is because short telephotos are long enough to provide enough working distance. But they are short enough to not make huge macro lenses. Their fairly natural perspective also plays a big role in this.

Photo of a cat in front of stairs

Telephoto (105-300mm, and Above)

Lenses in this range are often used for distant scenes such as buildings or mountains. They’re not really suitable for landscape photography because of the way they flatten the perspective of a scene. But they can provide interesting perspectives in that field, too.

Lenses in this range are often used for sports and animal photography. The most popular lenses for such applications are 70-200mm f/2.8 lenses on the shorter side, and 150-600mm lenses on the longer side.

Portraits are also a great genre to use them in. Shooting portraits with long lenses can provide exceptional subject separation and background compression. But it also expands working distance, so if you’re going for more intimate images, they might not be the ideal lens to choose.

There are hard-to-imagine extremes in this range. The longest modern DSLR lenses (800mm f/5.6) from both Canon and Nikon cost more than a small car. But there are longer ones not in mass productions. Canon’s groundbreaking 1200mm f/5.6 has only sold a few dozen copies before production ceased. They are owned by select companies in special fields.

Photo of a pelican on a lake

How Does Focal Length Affect Perspective?

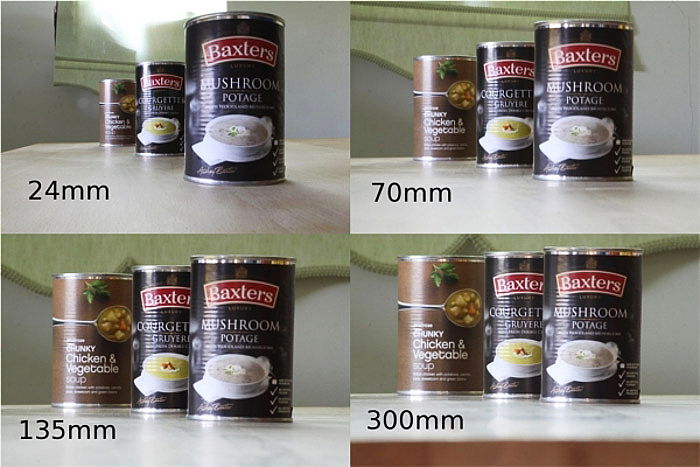
I tackled most of this in the previous section. Let me give you a better idea of how the focal length affects the perspective of a photo. I took four photos of the same subject at different focal lengths and compared them below.

The subjects (three soup cans) remained in the same position (about 10 inches apart from one another) in every photo. It’s worth noting that these photos are shot with a crop sensor. This means the effective focal length will be higher than listed.

To say it’s the focal length that changes the perspective is, however, quite misleading. You see, it’s the distance from the subject.

The focal length of a lens is an indicator of the distance from the subject: the images are all framed the same. Differences arise because the focal length is getting longer (zooming in) as the camera moves further away from the subject.

Remember, the distance from the subject is changing the perspective. The focal length is just used to compensate for this.

Four photos of three cans shot with different focal length lenses

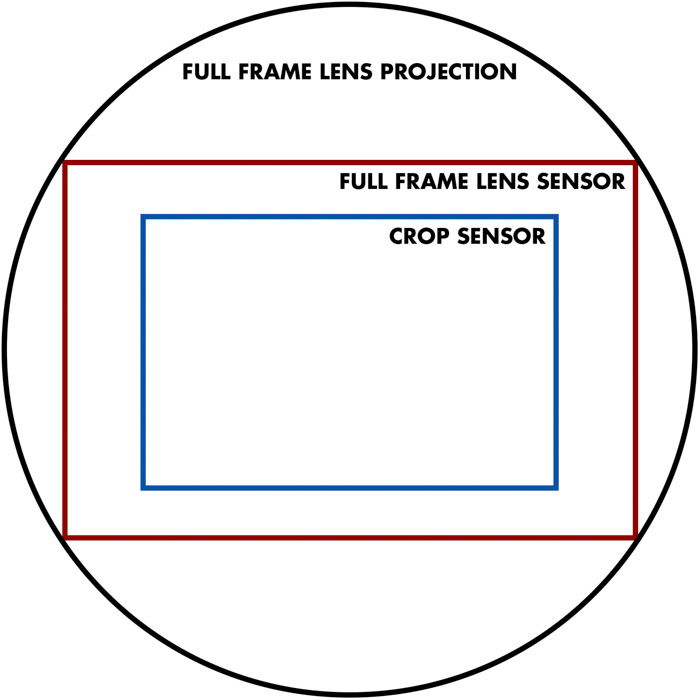
What About My Crop Sensor?

Shooting on a crop sensor has what’s known as the ‘crop factor’. What you’re doing is zooming in on an image, and avoiding the widest parts of the scene. The diagrams below show the way this works.

Even lenses built for crop cameras such as the EF-S range (Canon) and DX range (Nikon) will still have this effect. This is because lenses are listed by their physical focal length rather than their effective (or equivalent) focal length.

However, these lenses will not work on a full-frame body without heavy vignetting. This is because the image will not project onto the whole of the sensor.

That’s it!

a diagram showing the crop factor for full frame lens projection, full frame lens sensor and crop sensor


                             Kick Covid 19s' butt Tee shirt

                                                                   Advertisementundefined         

                                         Kick Covid 19's butt!   Classic Tee Shirt   $21.99

Encourage your friends, neighbors, and family members to get the vaccine...without saying a word. 


Wednesday, July 21, 2021

The No Control Photography Challenge


The No Control Photography Challenge 

I found this cool video on Pinterest.  mangostreetlab.com is the author of this work.  If you'd like some great ideas for your next photo shoot, watch the video and then check them out at their page on Pinterest.com

Monday, July 19, 2021

 # Photo, Time

Post Exposure Advanced Techniques

post exposure ebook 
Thanks for stopping by.  We appreciate each and every one of you for taking the time to visit our blog.  Here's another FREE Ebook we think you'll enjoy.  One hundred and seventy three pages of FREE Photography "how to" information.  Yours to download and read at your convenience.  Just copy and paste the link below into your browser, click enter and enjoy.  
https://ctein.com /PostExposure2ndIllustrated.pdf  

If you like the posts and freebies here, (See the post directly below this one for more free stuff) can we ask a small favor of you?  Please "share" this (or any of our other) blog page(s) on your social media sites.  Facebook, Twitter, Pinterest, My Space etc.  We want to get the word out about our blog.  And we hope you'll consider helping us to spread the word.  Thanks in advance.


-----------------------------------------------------------------------------------------------

PHOTOGRAPHY FREEBIE:

How to make money with your Photography even if you're not a Pro.

Copy & paste this link into your browser, click ENTER, and enjoy: 

https://mrdarrylt.blogspot.com/2020/01/how-to-make-500-month-from-your.html

_______________________________________________________


Wednesday, July 14, 2021

Free Photography Ebooks 

 Photo book to download

Based on the growing number of visitors to this blog each month, we're re-posting some FREE Photography E-books we gave away last year.  Many of you may not have been active visitors then so we're giving you access to those freebies now. Just
click on the title of each book and you'll be taken to
the free download page to receive your FREE copy.


This one’s been around for a while but the information is just as relevant today as ever. Photographers are often introverted characters, and this free photography ebook gives advice on how to gain the confidence to interact with your subject and become a better photographer.


An interesting read on a topic that’s not very often discussed – the planning that goes behind a photography trip. You’ll learn essential tips and techniques to get the most from your next trip, to be well prepared before you even pick up your camera.
 
Free photo book
Starting a Photo Business – by Photo Shelter
These guys know what they’re talking about when it comes to building a successful photography business. If you need a hand with where to start, check out this free ebook.
 
Stunning landscape photography and an entertaining read about  a journey to discover the art, craft and passion that lies behind landscape photography.


For more Photography Books, click on the 3 words below. (sorry, these aren't free), but they are awesome! 
 
P.S.  We're not done yet.  Check out the post directly above this one for another FREE Ebook.  And, the posted article below for even more photography insights.
 

-----------------------------------------------------------------------------------------------

PHOTOGRAPHY FREEBIE:

How to make money with your Photography even if you're not a Pro.

Copy & paste this link into your browser, click ENTER, and enjoy: 

https://mrdarrylt.blogspot.com/2020/01/how-to-make-500-month-from-your.html

_______________________________________________________


Monday, July 12, 2021

What Is the 500 Rule in Photography? (And How to Use It!)

Tags:  Photography for Beginners, 500 rule, Photography

The 500 Rule Explained

The idea behind the 500 rule is to provide you with an easy-to-remember formula to freeze the movement of the stars. This way, you will get images without any star trails.

Of course, if your goal is to make star trails, you should ignore this rule. Otherwise, you need to use it so that you can capture clear pictures of the Milky Way and the starry sky in general.

Other worldly night sky photography of a tree in the centre of a grassy landscape, starry sky and star trails above
If you have a fisheye, it is worth spending a few hours under the starry sky, to capture the Milky Way. I took this on a fixed tripod by using the 500 rule to prevent blurry stars.

But why are you getting trailing stars in the first place? That’s because the Earth is rotating on itself once every day. This rotation creates the rather fast 15º/hour apparent motion of stars.

The gif below shows how stars move around the North celestial pole, roughly indicated by Polaris, the North Star.

The night sky gif shows how stars move around the North celestial pole, roughly indicated by Polaris, the North Star shot using the 500 rule.

In astrophotography, we make a big deal out of freezing the stars. To be rigorous, the length (in mm) of a star trail on your image will depend on the field of view, sensor size, image resolution, exposure time and the star angular speed and declination.

While this is not rocket science, the formula that links all those variables together is not the simplest one to remember and to use in the field.

If you are an occasional star shooter, knowing how to use the much simpler 500 rule will let you capture trail free starry skies.

The rule reads like this: SS = 500 / (FL * CF)

SS is the shutter speed in seconds. FL is the focal length expressed in mm and CF is your sensor’s crop factor, i.e., the ratio between the size of a full-frame sensor and yours.

Here you can find the crop factor for different types of cameras:

  • 1 for full-frame cameras;
  • 1.6 (1.5) for Canon (Nikon) APS-C cameras;
  • 2 for micro four-thirds cameras;
  • 2.7 or higher for compact cameras with a 1″-type sensor or smaller.

As far as I know, while it can be related to image resolution and field of view at a specified focal length, the number “500” doesn’t have an actual meaning. It is an arbitrary constant chosen so that the guideline will work in most cases.

Impressive starry sky at night

Example of the 500 Rule in Action

Let’s consider my Olympus OM-D EM-5 Mk II micro four-thirds camera. It has a crop factor equal to 2. Now let’s see how this rule works.

With a 50mm lens, for example, the guideline will tell me the exposure time for which the stars will not trail.

See the calculation below:

SS= 500/(50*2)= 5 seconds.

With a full-frame camera with the same lens, the result will be:

SS=500/(50*1)= 10 seconds.

The image below shows how much stars are trailing when I use a shutter speed of 3 minutes with my 50mm lens on my Olympus. This exposure time is much longer than the rule suggests.

Night sky photo of star trails from a 3-minute long exposure with 50mm lens on Olympus OM-D 10.
Star trails from a 3-minute long exposure with 50mm lens on Olympus OM-D 10.

With this guideline, you can even get decent results when photographing bright deep sky objects such as M42 (The Great Orion Nebula) using a telephoto lens.

While the level of details will not be impressive, it will be a very satisfying experience. I would recommend you give it a try.

a night sky photography shot of M42 on fix tripod. Olympus OM-D EM-10, 150mm, f/4, 3.2 seconds, stack of 50 images.
M42 on fix tripod. Olympus OM-D EM-10, 150mm, f/4, 3.2 seconds, stack of 50 images.

The 400-, 600- and NPF Rules

There are two common variants of the 500 rule; the 400- and 600-Rule.

In the 400-Rule, the number 500 in the formula above is replaced by 400. This results in even shorter exposure time. With the 600-rule, the number 600 is used instead, resulting in slightly slower shutter speeds, i.e., longer exposure times.

If you want better results, you should switch to other rules, such as the NPF rule. These are more accurate and rigorous than the 500 rule.

You can find many star trail calculators online, as well as smartphone apps such as PhotoPills. You can also calculate the values online.

For Android, there is also PinPoint Starts available. These can help you choose the best exposure time for your camera-lens combination.

Image Stacking and 500 Rule Combined

The first thing to do to improve your night star pictures is to shoot in RAW instead of JPEG. This will ensure you have the maximum flexibility when you need to edit your images.

If you are not tracking the sky movement with a tracking head, the stars will always move across the sensor. The light you can collect for each pixel depends only on how long the star will stay over the same pixel.

You may be tempted to bump up your ISO. But this will only increase image noise, with no extra benefits.

Allowing stars to trail a bit more by using longer exposures will not help either. The time a star will excite the same pixel will not change. You will only record a trail.

The solution is called image stacking. So how do you do that?

You take many photos at a quite low ISO. You expose each according to the 500 rule. Then you can combine (stack) them later on in Adobe Photoshop. This technique will improve the number of details in the final image a lot.

The process involves masking and aligning the sky among all the exposures. But softwares like Deep Sky Stacker, Sequator (windows, free) and Starry Landscape Stacker (Mac OS X, commercial) will make the whole procedure faster.

Below you can see the comparison between a single raw from my Sony RX100 Mk II pocketable compact camera (1″ sensor type) …

Image of a red camper van parked under an impressive starry sky
Sony RX100 Mk ii on a tripod and set to ISO 6400, 15″, 28mm EFL (equivalent focal length), f/1.8. Single RAW.

… and the final image, obtained by staking 8 different exposures. You can see how stacking has boosted details and enriched the sky.

Image of a red camper van parked under an impressive starry sky after using focus stacking to help remove star trails
Stack of 8 different exposures.

You can read more about image stacking in this article about editing techniques for astrophotography.

The Science Behind the 500 Rule

The idea behind the 500 rule is to provide an easy way to guesstimate the longest exposure time for which the stars’ movement is not noticeable.

The sky rotates 360 degrees in 24 hours or 0.0042 arc degrees per second. A full-frame camera with a 24mm lens will have a horizontal view of about a 73.7 degree.

Let’s assume we have a 24 Mpx sensor (6000px X 4000px). Those 73.7 degrees are projected onto 6000 horizontal pixels, giving 81.4 pixels per degree.

Assuming a 24mm lens, the “rule of 500” gives you an exposure time of about 21 seconds (500/24).

In 21 seconds the sky will move about 0.09 degrees (0.0042*21).

For our 24 Mpx full-frame camera with a 24mm lens, 0.1 degrees translates to 7.3 pixels (81.4*0.1).

Those 7.3 pixels represent the maximum acceptable movement blur before point-like stars will turn into trailing stars. But is this movement really acceptable?

We are used to looking at our images on a computer screen. If you blow up your full resolution image to 100%, you will see that the star is not a dot.

But what about prints?

It turns out that if you print your image in 30x45cm format, those 7 pixels will make up a trail on your print only 0.5mm long!

Impressive starry sky over silhouettes of trees

Experimenting With Camera Settings

You might already understand that the shutter speed is only dependent on your camera’s crop sensor and the lens’ focal length.

But what about the other camera settings, you might ask. How should I set my ISO and my aperture? Not all combinations of ISO and aperture will result in successful Milky Way photos.

As I said before, cranking up your ISO may result in digital noise. But you still need to have a high ISO to get enough light.

Your aperture should be wide open. So try to work with the lowest possible F-stop. Remember, your shutter speed is fixed. You can only play around with the two other elements to get enough light.

Impressive starry sky over a rocky landscape
Photo by Ashan Rai on Pexels


If you find yourself struggling to capture that starry night sky photography, using the 500 rule will improve your results a lot. If you combine it with image stacking, the difference will be dramatic.

This rule is something you should remember when you find yourself under the Milky Way Galaxy shining through the night. 


-------------------------------------------------------------------------------------------------------------

PHOTOGRAPHY FREEBIE:

How to make money with your Photography even if you're not a Pro.

Copy & paste this link into your browser, click ENTER, and enjoy: 

https://mrdarrylt.blogspot.com/2020/01/how-to-make-500-month-from-your.html

_____________________________________________________________________

Play Station $50 code.  Just copy & paste this link into your browser, 

click "ENTER" and follow the easy steps:  bit.ly/3g2Ghhi


Wednesday, July 7, 2021

 Blog Pictures from the Video Below

  
These pictures come from the video below.  I spent part of my July 4th weekend
enjoying the nice weather and the atmosphere of Forest Park in St. Louis, Missouri.
 
Occasionally I post some of my photos in an effort to encourage you to post some of yours.
I checked my statistics for the number of visits this blog had during the month of June.  Over 
400,000 of you visited.  Thank you for stopping by.  If you're an amateur photographer like me,
please feel free to post some of your photos here.  In May we had over 200,000 visits.  Last month 
that number more than doubled.  So, if you post your pics here, they will be seen. (keep it clean. NO nudes or porn)   If you'd like to
learn how to get paid for your pictures, be sure to scroll down past the video directly below this
post, and  check out the Photography Freebie that describes how a fellow amateur shutterbug 
is averaging $500 per month as a hobby photographer.  Thanks for stopping by. 'til next time,
Happy Shutter bugging!


Monday, July 5, 2021

More Photos from my Blog


-------------------------------------------------------------------------------------------------------------

PHOTOGRAPHY FREEBIE:

How to make money with your Photography even if you're not a Pro.

Copy & paste this link into your browser, click ENTER, and enjoy: 

https://mrdarrylt.blogspot.com/2020/01/how-to-make-500-month-from-your.html

_____________________________________________________________________

Play Station $50 code.  Just copy & paste this link into your browser, 

click "ENTER" and follow the easy steps:  bit.ly/3g2Ghhi


Monday, June 28, 2021

How to Photograph Shy Children

Tags: Photography for beginners

When you’re photographing children, you’ll sometimes encounter ones who reveal their shining personality off the bat, show lots of expressions, and overall, just love the camera.  Then there are times you’ll get a young subject who is weary of strangers or even hides from clicking black boxes that are pointed at them!

So what can you do?

Aside from rescheduling until the child grows out of his shyness (that’d be funny), there are a few things that I do during my lifestyle photography sessions that you can try out.

Introduce yourself

If this is your first time meeting your little subject, show them the courtesy that you’d show an adult.  Tell them who you are and what you will be doing.  My suggestion is:  don’t put too much focus on the photography.  Instead, focus on all the fun you’ll be having and what activities you’ll be doing together.

Annie Tao Photography Photographing Shy Kids shooting from a distance

Give some space

When there are shy children, I start my sessions with a long lens (usually my 70-200mm f/2.8) so I can have some distance from them.  That will allow me to get some shots from a distance while giving kids time to warm up.

Annie Tao Photography Photographing Shy Kids toddler hiding behind moms legs

Show interest

No matter what the age of your subjects, treat them with respect.  Talk to them.  Ask them questions. Engage.  Interact.  Kids are incredibly in-tune to genuine interest.  If they see you having a good time, they will more likely join in.

Annie Tao Photography Photographing Shy Children comfort

Let them be themselves 

As opposed to children who are temporarily shy around strangers, some children are naturally quiet and introverted.  There is nothing wrong with capturing who they are!  If they are hiding behind mommy’s legs or quietly sitting by a tree, why not capture that?  Not every photo of a child needs to be of them smiling or laughing.  For more tips on this, read “Don’t Wait For a Smile”. Sometimes kids will open up after they feel the pressure is off of them to perform in front of the camera.

Annie Tao Photography Photographing Shy Children being themselves

Let them have a comfort object

If you find out your young subject is shy, allow the parents to bring a comfort object to their session, like a lovey, blanket or favorite toy.  Sometimes just having that well-loved object can put the child at ease.

Annie Tao Photography Photographing Shy Kids holding lovey

And lastly…

Smile

Simply put, if you don’t look friendly and approachable, children won’t warm up to you very easily.

In my photography career, I’ve had several clients contact me to warn me how their child is shy, hates the camera and will literally run from me when they see my camera!  I am happy to say that I’ve never had a shoot where a shy child didn’t warm up and do wonderfully during the shoot.  (Knock on wood!)

My love of children is transparent, so making kids feel comfortable comes naturally.  Now I am sharing my tried-and-true formula that has worked for me for many years.  I hope this will work for you too! 


-------------------------------------------------------------------------------------------------------------

PHOTOGRAPHY FREEBIE:

How to make money with your Photography even if you're not a Pro.

Copy & paste this link into your browser, click ENTER, and enjoy: 

https://mrdarrylt.blogspot.com/2020/01/how-to-make-500-month-from-your.html

_____________________________________________________________________

Play Station $50 code.  Just copy & paste this link into your browser, 

click "ENTER" and follow the easy steps:  bit.ly/3g2Ghhi


Friday, June 25, 2021

How to Start Shooting in Manual Mode (Photography Basics)

Tags: Photography for Beginners 

Shooting in manual mode is like driving a car. If you only use an automatic shift, you cannot drive a manual car. However, if you learn how to drive manual, then you can do both. Photography newbies and professionals are the same. They use the same camera, yet their final photos look very different.

By using manual mode, a whole new level of possibilities will open up for you.

Now, set your camera to ‘M’ and follow the points below.

an image of a stunning coastal cityscape 


Why and How to Shoot in Manual Mode?

Manual mode gives you total control. It is tempting to let the camera control all of the settings. However, when you photograph in automatic mode, the camera will use settings that you might want to change. Moreover, you are not learning anything about photography.

When we talk about settings, we are looking at the exposure triangle. The triangle consists of three camera settings. These are aperture, ISO, and shutter speed. These directly influence how much light comes from your scene. They also add special techniques, such as differential focus and subject freezing.

If you wanted to capture bokeh, you need to know about differential focus and a wide aperture. To capture motion blur, you need to know how to use long or slow shutter speed.

Manual mode lets you harness the camera’s power, allowing you to change the settings as the scenes and subjects change.

A flat lay of different camera parts

1. Light Meter

When you look through the viewfinder, you will see a line of numbers at the bottom. They will look something like this: 2…1…0…1…2+ (Canon) or +2…1…0…1…2- (Nikon).

This is the light meter, and when aligned with ‘0’, you know that your photo will come out properly exposed.

This is only if you are going for that specific effect. For example, let’s say that you are correctly exposing one part of a building where the sun hits. The shaded part has some detail, but you want none.

The sunny part of the building is still well lit if you bring the exposure down. So this is what you do to make the shadows (and the entire image) darker.

The light metre is a great guide, but you can use it as you wish. Do not be too dependent on it. Sometimes you do not have to rely on the in-camera light meter as it meters an average or a centre.

When you are shooting RAW and low ISO and highlight and shadow inequalities, it is always worth going against the rules and underexposes the scene with 1 or 2 stops. You can correct it in Lightroom afterward.

an image of a dslr camera in manual mode

2. Exposure Triangle

The exposure triangle helps us understand more about light.

Apertures rise from f/1.4 to f/2.8 and go all the way to f/22. So shutter speeds could be 1/125 s or 1/250 s and all the way to 1/4000 s. The same goes for the ISO, which jumps from 100 to 200 and keeps going to 3,200.

3. ISO

ISO is your camera’s sensitivity to light, with a typical range of 100-1,600. Some cameras can go as low as 50 or 64 and reach as high as 12,600, but these are found in costly and full-frame camera bodies.

The lower the ISO number, the less light is hitting your sensor.

More light is needed at the lower ranges to get a good exposure, meaning more light for the higher ranges—the lower the number, the better the resolution and quality of your resulting images.

Higher ISO numbers allow you to photograph in low light conditions, yet these settings bring more grain.

DSLR cameras can cope well with high ISO numbers as their sensors, processors, and large pixel sizes can cope with the digital noise. However, as a rule, use an ISO with a value as low as possible.

an image of a man walking towards a lake at sunset

4. Aperture

The aperture is the hole inside your lens, which acts as the ‘iris’ similar to your eyes. A wide or low-number aperture, such as f 2/8, will have a very small focal length. This means that only a small part of the subject will appear clear wherever you place your focus.

A narrow aperture, such as f/16, will place the entire scene in focus, as it has a large focal area. Landscape photographers use a narrow aperture to show the foreground and background as clear and sharp.

With a large f-number (narrow aperture), you have to consider the diffraction effect. When this happens, the finest details of your photograph will not be sharp anymore. This is the reason why small details of your photographs blur when using a large f-number.

The lower the f-stop, the more light is allowed to enter your lens, and therefore, hitting your sensor. To keep my ISO value down, to retain quality, I shoot live musicians with a wide aperture. This gives me more usable light.

A high f-stop number gives me less light to play with, which means that longer exposure is needed. To create images with a bokeh background, you would use a wide aperture.

A close up of the manual mode settings on a camera

5. Shutter Speed

Your shutter speed refers to the amount of time your camera’s shutter stays open. The longer it stays open, the more light enters your scene and, therefore, your image.

These numbers are shown in fractions of a second, where 1/250 s is a typical value.

Your shutter speed affects the sharpness of your subject. Slower shutter speeds allow more light and allow more blur from your subjects, especially when you capture motion.

A faster shutter speed lets in less light but gives you a sharper image as the subject is ‘frozen’.

A cyclist riding down a roadway with blurry background behind

6. Combining All the Settings

Well, the numbers do have a pattern, and they are chosen so. Look at the aperture, for example, and see if you can spot it. A typical range would be f/1.4, f/2.8, f/4, f/5.6, f/8, f/16, and f/22. So the numbers almost double every time.

The ones that don’t (f/4 and f/22) are often the previous two numbers added together (or thereabout).

The same goes for ISO, where the numbers double each time. 100 goes to 200, then 400, 800, 1,600 and finally 3,200. Shutter speed follows suit with 1/125, 1/250, 1/500, 1/1000.

Each of these numbers is one stop. They either add or subtract one stop’s worth of light from your image. The reason we show them in a triangle is that they all work together.

For example, you have a correct lighting scene at ISO 100, shutter speed at 1/125 s, and an aperture of f/16. But what happens when the sun disappears behind a cloud? The scene got two stops darker. This means you need to add two more stops of light into your settings for correct exposure.

Atmospheric shot of a fairground ride at night


This is everything you need to know about how to shoot in manual mode and how to take your first photographs with it.

Your aim is to get correct exposure from your scene, and your camera gives you three settings to do so.

These three manual camera settings also let you capture the scene in several different ways. It takes a little time to get confident, but you will be shooting in manual mode in no time.


-------------------------------------------------------------------------------------------------------------

PHOTOGRAPHY FREEBIE:

How to make money with your Photography even if you're not a Pro.

Copy & paste this link into your browser, click ENTER, and enjoy: 

https://mrdarrylt.blogspot.com/2020/01/how-to-make-500-month-from-your.html

_____________________________________________________________________

Play Station $50 code.  Just copy & paste this link into your browser, 

click "ENTER" and follow the easy steps:  bit.ly/3g2Ghhi


Monday, June 21, 2021


Here are a few more of my Pictures.  Yes, these are re-posts, but I like them 
and enjoy sharing them with you.  
 
 
 Got photos you'd like to share?  In the month of  May (last month) we had 190,811 visitors.  So far this month we've already had 305,224 visitors (as of the date of this post).  So don't be shy.  Go ahead and strut your photographic 
stuff for all the world (or at least those visiting this blog) to see.  Keep it "family friendly" please. NO nudes or porn!  Click on the pictures above to enlarge them.  This will give you an idea of how good your photos will look here. And before you go, be sure to take advantage of the "FREEBIE" below. Thanks for stopping by.

-------------------------------------------------------------------------------------------------------------

PHOTOGRAPHY FREEBIE:

How to make money with your Photography even if you're not a Pro.

Copy & paste this link into your browser, click ENTER, and enjoy: 

https://mrdarrylt.blogspot.com/2020/01/how-to-make-500-month-from-your.html

_____________________________________________________________________

Play Station $50 code.  Just copy & paste this link into your browser, 

click "ENTER" and follow the easy steps:  bit.ly/3g2Ghhi