Now
more than ever, pictures have become essential to our daily lives.
Never have people had so many memories recorded using photographs or had
as many places to share those memories with family, friends, and former
acquaintances.But while there is a strong temptation to use
the high quality camera that comes with your phone, there are just some
moments that need to be recorded with the higher quality of a digital
camera. And while some of these high-quality cameras can be expensive,
there are still plenty of affordable models that give you far superior
zoom and picture quality than a phone camera will.
Here are the top 12 best digital cameras on the market today that fall under the $200 mark.
 Nikon CoolPix A10
With
the Nikon COOLPIX A10, you can take pictures whenever the mood strikes
and get high-quality photos without having to lug around a lot of bulk
to do so. The Nikon COOLPIX A10 is a slim and lightweight camera that
allows you to simply point and shoot to get the pictures you want, while
the Easy Auto Mode automatically chooses the ideal settings for each
shot so that they turn out perfectly. You are able to zoom in while
using the five times optical zoom to capture the finest details of every
single moment. There is a NIKKOR glass lens that offers incredible 16.1
megapixel close-up pictures. You can also record videos using the
720-pixel HD video feature, and there is an electronic VR that will
steady any camera movement to reduce shake and blurriness. The Nikon
COOLPIX A10 runs effortlessly using double AA batteries, ensuring that
you will always have enough limitless power ready and on hand.
Purchase
 Samsung WB350F-16.3MP 21X Optical Zoom
With
the Samsung WB350F-16.3MP 21X Optical Zoom Digital Camera, you can take
the pefect photographs and share them with ease thanks to the tag and
go technology. It is able to connect to any smartphone just by tapping
the two units together. This phone comes with a 16.3 megapixel backslide
illuminated CMOS sensor that requires less light for the right amount
of exposure. It offers quick focusing power so that you won’t have to
wait a second longer than you need to in order to line up the shot. You
can take perfectly exposed images this way even in a low-light
environment. The back of the camera houses a bright, three-inch LCD
display that will let you edit and look at your pictures right away.
There is a 21 times zoom on the Samsung WB350F-16.3MP 21X Optical Zoom
Digital Camera that will allow you to get up close and personal. It even
has a wide-angle lens.
Purchase
 Fujifilm Instax Mini 90 Neo Classic Instant Film Camera
Take
a picture to cherish any moment and enjoy the ability to print those
photographs right away with the Fujifilm Instax Mini 90 Neo Classic
Instant Film Camera. This Fujifilm Instax Mini 90 Neo Classic Instant
Film Camera offers high performance flash that is able to provide the
perfect amount of light in any given situation; it is able to
automatically adjust to the lighting needs of a room and shine the
appropriate amount of light on a subject because of it. This helps to
optimize the exposure to provide you with the perfect photo every time.
With the party mode feature, you can capture not only the subject in
question, but also the background of the subject just as brightly so
that no memory of the night goes forgotten. There is a kid’s mode that
makes it easy to take pictures of fast moving objects like kids and pets
with the Fujifilm Instax Mini 90 Neo Classic Instant Film Camera.
Purchase
 Canon Powershot SX410 IS
One
of the most advanced Canon models yet, the Canon PowerShot SX410 IS is
full of exciting features that will get you excited about photography
all over again. The Canon PowerShot SX410 IS comes with an ultra
powerful 40 times optical zoom as well as its 24-millimeter wide-angle
lens offers you total versatility of shots. You can capture huge
landscapes at one time or zoom in for close-ups on certain subjects in
ways you never dreamed possible. The Optical Image
Stabilizer
allows all of these photos, no matter what zoom they were taken at, to
be incredibly clear and bright. There is a 20.0 Megapixel Sensor and
Canon DIGIC 4+ Image Processor that allows for crisp, unmatched
resolution to be present in all of your images. The videos that can be
taken on the Canon PowerShot SX410 IS are just as impressive, thanks to
its lifelike 720 pixel-recording feature. There are fun modes to
experiment with such as a toy camera effect, fisheye effect and more.
Purchase
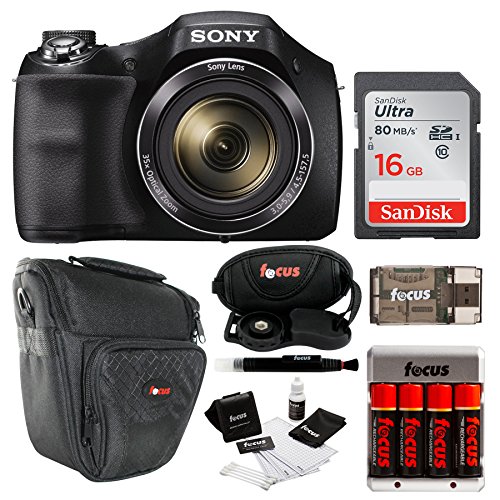
 Nikon CoolPix L340 20MP
With
the Nikon CoolPix L340 20MP, you can start taking photographs like a
pro in no time at all. This Nikon CoolPix L340 20MP is a durable camera
that can take pictures that are just as clear from way far away as they
are close up. There is an impressive 28 times optical zoom telephoto
lens on the Nikon CoolPix L340 20MP that makes it easy for you to
capture photographs as clear as day from quite the distance. A vibration
reduction feature allows you to snap steady photographs regardless of
if your hands have a bit of shake when you snap them as it will steady
out the image for you. The Nikon CoolPix L340 20MP comes with ultra
sharp 20.2 megapixel photo capabilities so that no detail gets missed
when you snap a picture. If you want to create videos on this camera,
you can use the 720 pixel video setting. Choose your own settings for
photos or let the scene auto selector do the work for you.
Purchase
 DP Power N6 4K Touchscreen Camera
The
DP Power N6 4K Touchscreen Camera is an action camera that is designed
to be able to take pictures of all of your adventures, no matter what
that may entail. Whether you want to capture shots during your favorite
activities such as surfing, gliding, skiing, diving, climbing, driving,
snorkeling or biking, the DP Power N6 4K Touchscreen Camera is there to
help. One of the easiest cameras to use, the DP Power N6 4K Touchscreen
Camera comes with a 2.31 inch touchscreen that makes it simple to look
at your shots or change the settings in a flash. This camera offers an
ultra sleek appearance that makes it not only attractive but simple to
mount and carry around with you as well. It has been designed using
heavy-duty gorilla glass that can resist any scratches or other issues
from minimal impact. It comes with image stabilization to make the DP
Power N6 4K Touchscreen Camera easy to use, even for those with shaky
hands.
Purchase
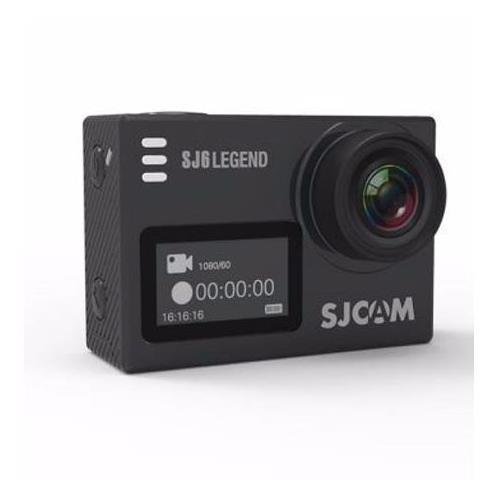
 SJCam’s Legend SJ6 Action Camera
The
SJCam’s Legend SJ6 Action Camera is a durable camera that is designed
to help you capture all of your fondest memories during your adventures
with ease. This SJCam’s Legend SJ6 Action Camera is a heavy-duty, ultra
HD 4K resolution video camera. It offers a dual screen so that you are
able to clearly see the image that you are shooting right as you take
the picture. The front of the screen will also show you the working
state of the SJCam’s Legend SJ6 Action Camera, helping to make it
simpler to operate. It comes with both a wireless connection and a
remote control that makes it easy for you to control this camera using
the included app. There is support for an external microphone to be used
as well, helping the SJCam’s Legend SJ6 Action Camera keep the original
sound of your video footage, even when the atmosphere you are in is
noisy. This also makes it ideal for recording videos on your motorcycle,
for instance.
Purchase
 Sony Cybershot DSC-WX220
The
Sony DSCWX220/B 18.2 MP Digital Camera with 2.7-Inch LCD is a durable
camera that will allow you to get up close and personal with the
subjects of your photographs, even from far away. The Sony DSCWX220/B
18.2 MP Digital Camera with 2.7-Inch LCD offers a 10 times optical zoom
as well as a 20 times clear image digital zoom. The image processor
inside of the Sony DSCWX220/B 18.2 MP Digital Camera with 2.7-Inch LCD
creates pixels to match the patterning of the pixels surrounding the
subject to make a sharper and more realistic image. It comes with an
18.2 megapixel Exmo R CMOS image sensor that offers high resolution,
fast-speed shots even in the lowest of light settings. You can shoot
smooth video and photographs using the Sony DSCWX220/B 18.2 MP Digital
Camera with 2.7-Inch LCD as well thanks, to the Optical SteadyShot
technology, and you can record those steady videos in stunning 1080
pixel resolution.
Purchase
 Polaroid Snap Touch Instant Print
The
Polaroid Snap Touch Instant Print Digital Camera allows you to take
pictures and immediately print them thanks to the built-in printer on
the camera. You can print high quality, full color pictures right on the
spot using paper that comes with an adhesive backing. There are no
toner or ink cartridges that you have to mess with as you would on other
instant print cameras. Alongside printing the images on adhesive
backing, you can choose to print them with digital stickers, filters,
borders and more. There is BlueTooth connectivity on the Polaroid Snap
Touch Instant Print Digital Camera that will let you connect your camera
to the included app in order to play around with the image some more.
The Polaroid Snap Touch Instant Print Digital Camera has a touchscreen
display that makes it easy for you to navigate the camera. The 3.5-inch
viewfinder makes it easy for you to take high def video, incredibly
sharp photos and even great selfies, thanks to the included mirror.
Purchase
 Sony DSCW800/B
The
Sony DSCW800/B 20.1 MP Digital Camera is an ultra powerful camera that
comes with a 20.1 megapixel image senor to help you take the most
beautiful photographs you can imagine. It comes with a five times
optical zoom that will allow you to get closer to your subjects, and the
10 times digital zoom helps provide you with even greater zooming
ability. You can shoot smooth and gentle video with the Sony DSCW800/B
20.1 MP Digital Camera thanks to its SteadyShot image stabilization that
begins to work when you are in active mode. With this technology, you
can get high definition image quality with minimal noise and blur, even
if you are walking while you take the picture. It is simple to charge
wherever you want to go thanks to the USB port that lets you charge it
with any universal USB charger. There is a sweep panorama mode on the
Sony DSCW800/B 20.1 MP Digital Camera that allows you to take huge
landscape portraits as well.
Purchase
 Canon 0111C001 PowerShot SX610
Slim
and easy to carry, the Canon 0111C001 PowerShot SX610 is a camera that
is prepared to go with you wherever you want to take it. The Canon
0111C001 PowerShot SX610 allows you to close in on the subject of your
shots no matter where they might be in relation to you, thanks to the 18
times optical zoom that the camera features. There is a 20.2 megapixel
high sensitivity CMOS sensor that combines with the DIGIC 4+ Image
Processor to provide you with stunning, high quality photographs. The
Canon 0111C001 PowerShot SX610 allows you to take smooth, still shots
and video thanks to the image stabilization properties of the
Intelligent IS system. It comes with both Wifi and NFC, making it simple
for you to transfer your pictures onto your smartphone or similar
device. The image quality of the Canon 0111C001 PowerShot SX610 is
outstanding, even in low light, making this camera the perfect choice
for any opportunity, anywhere at all.
Purchase
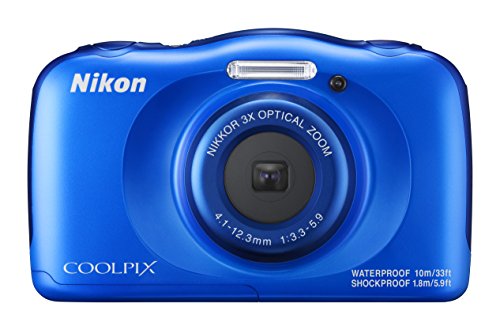
 Nikon’s CoolPix W100
Waterproof
up to 33 feet underwater, the Nikon COOLPIX W100 is an outdoor camera
that will be ready and waiting at your side to capture the memories of
all of your outdoor adventures. This Nikon COOLPIX W100 can be taken to
the beach, the pool, to the ski slopes and more without fear of it
getting dropped into moisture and ruined. This Nikon COOLPIX W100 is
able to resist shock from drops as high up as 5.9 feet and is able to
resist the cold as low as 14 degrees Fahrenheit. It is resistant to any
dust, making it perfect for taking on any rugged adventures with you.
The Nikon COOLPIX W100 allows you to take high-quality shots and videos
complete with stereo sound and then transfer them over to your
smartphone or other device, thanks to the SnapBridge technology. It has
one-touch buttons as well as a generally easy-to-use interface that
makes using the Nikon COOLPIX W100 a dream.
Purchase
http://www.photography-jobs.net/?hop=darryl54
:max_bytes(150000):strip_icc()/Nikon-CoolPix-A10-58bd753f3df78c353c2e9339.jpg)
:max_bytes(150000):strip_icc()/Canon-PowerShot-ELPH-190-IS-58bd75965f9b58af5ca064af.jpg)
:max_bytes(150000):strip_icc()/Sony-DSCW800-B-58bd75b55f9b58af5ca0af0f.jpg)
:max_bytes(150000):strip_icc()/Fujifilm-Instax-Mini-90-Neo-Classic-Instant-Film-Camera--575835305f9b5892e8f91a02.jpg)