Tuesday, January 18, 2022

8 Best Tips for Framing Photography Shots

Tags: Shutterbug, Photography for Beginners, Newbie Photography

Why Framing Is Important in Photography

In photography, composition and lighting are everything. Without the right perspective

your subject will look unflattering or not stand out.

This is where framing comes in.

In essence, framing photos is surrounding a subject with different elements. This makes 

it stand out and grab the viewer’s attention. You can think of this as a frame within a frame.

There are many ways you can use framing. Some depend on luck. Others rely on the 

photographer’s creative eye. The right photo framing will make your photos look original 

and stand out. Here are a few ways you can achieve this.
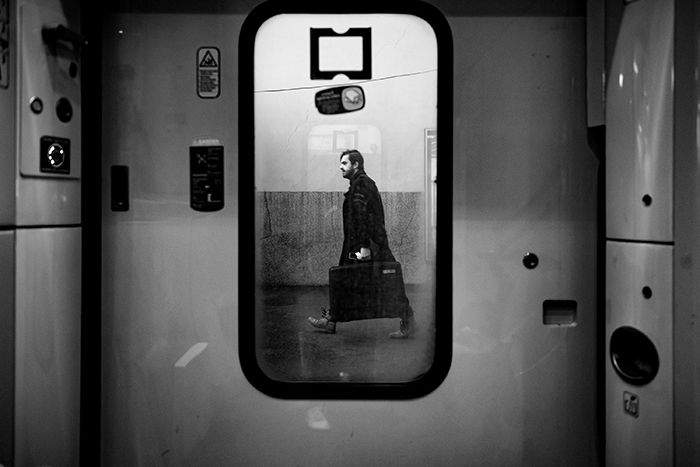
Photo of a man walking with a suitcase reflecting in a mirror
The man’s surroundings in this photograph are unknown. It makes this image the epitome 
of great framing. There are no unnecessary distractions. The window frame emphasises 
only one subject. It helps that this image is black & white. Colors can be very distracting 
in certain compositions. Especially in genres like street photography.

8. Create Frames Using Light and Shadows

Photography is the art of capturing light. Light is one of the best ways of highlighting elements 

in your image, whereas darkness hides elements.

So it is understood that one way of creating a frame in your image is to use light and shadows.

Portrait of a woman in artistic light as a frame.

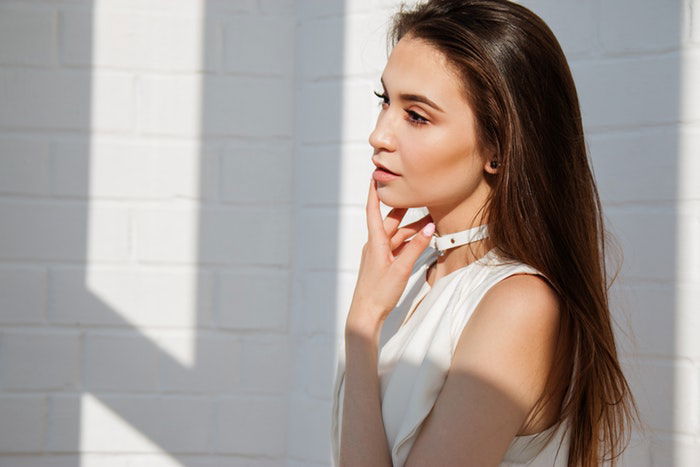
Shadows don’t always have to be harsh to frame the subject. Take a look at the image below. 

You may not even realize the soft shadows at first glance the soft shadows that subtly frame the woman. Portrait of a woman from the side - framing photography
7. Experiment with Bokeh

Bokeh is a creative way of using light to frame your subject.

There are many ways to create a bokeh effect. You can use fairy lights, capture light shining 

through leaves, or use a crystal or glass. This creates a soft, artistic frame.

You can incorporate bokeh in the background, in the foreground, or in both.

Cat with a bokeh frame.

6. Ask the Subject to Frame Themselves

If you are shooting a person, you can also use them to frame themselves. Many models and 

professional portrait photographers use this technique.

The model can place her hands, for example, in a way that it created a frame around her face. 

This is a natural and flattering way of putting emphasis on a certain body part.
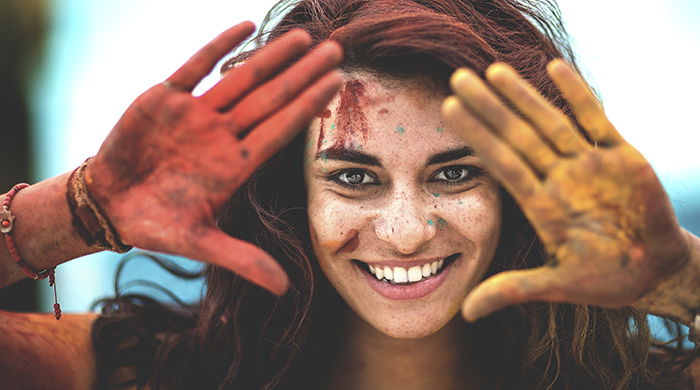
Young woman holding paint covered hands up to frame her face.

5. Use Doors and Windows to Make Your Subject Stand Out

One of the best ways to frame around your subjects is to use doors, windows, or actual 

frames. These can be in the foreground through which you shoot. Or they can be in the 

background with the subject in front.

Doors and windows are perfect for framing simple photos of people, places, and objects.

There’s a lot you can do with a single framing tool. For example, you can use a window as a 

background or a blurred foreground. Or you can use a frame that you shoot through to 

emphasize an indoor or outdoor landscape.

If you’re shooting at a wedding, you can use simple photo booth frames. You’ll get 

funny photos without compromising the quality of your photography composition.
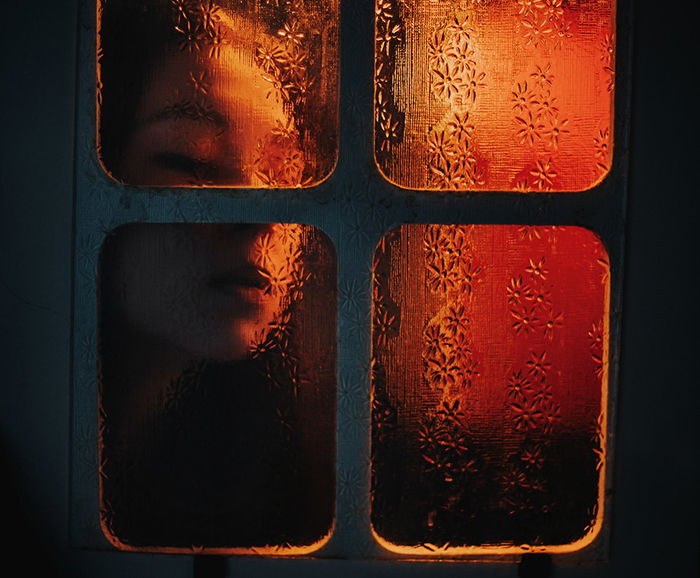
Portrait photo of a woman shot through a window
When shooting through windows or doors, you don’t need to focus on your subject 
all the time. Experiment with different angles, lighting, and focal point. Try to create 
conceptual or abstract photos like this one.

4. Shoot Through Objects to Bring out Details

Using elements in the foreground to fill negative space can make your image look more 

interesting.

If you want to create a soft atmosphere, use a large aperture. Make sure the object is close 

to your lens without completely covering it. Your goal is to put the spotlight on your focal 

point by covering its surroundings with a pleasant blur.

For something more detailed, use a smaller aperture. Take a few steps away from the 

foreground. This will still create a blur, but it will make the foreground more visible. This 

technique is often used in wide-angle photography. It helps capture as much of the 

atmosphere as possible.

Depending on your theme, you can use a combination of simple and vibrant objects.

You can use foregrounds to make a minimalist portrait stand out. Flowers work especially 

well here.

For a moody landscape shot, you can take photos through a branch or a bush.
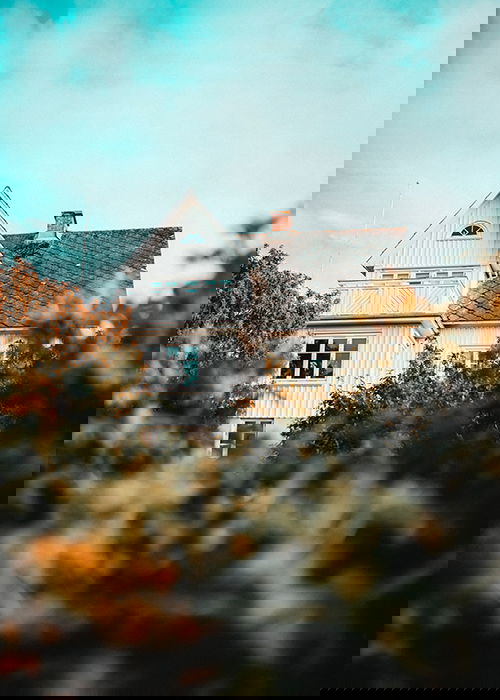
Photo of a house with bushes in the foreground
Natural foregrounds, such as bushes and trees, are perfect for visually aesthetic outdoor photos.

3. Cover Your Subject in Simple Fabric for Minimalistic 

Effect

Outfits and decorations are very helpful when enhancing a composition. Your subject might 

look awkward or dull compared to their surroundings. Try framing them using cloth or fabric. 

This is most useful for framing portrait and still life photography.

Ensure the cloth you use complements your subject’s appearance and shape. Neutral and 

pastel colors tend to work well in most shots.

Make sure the clothing you use complements your subject’s appearance and shape. Neutral 

and pastel colors tend to work well with almost everything.
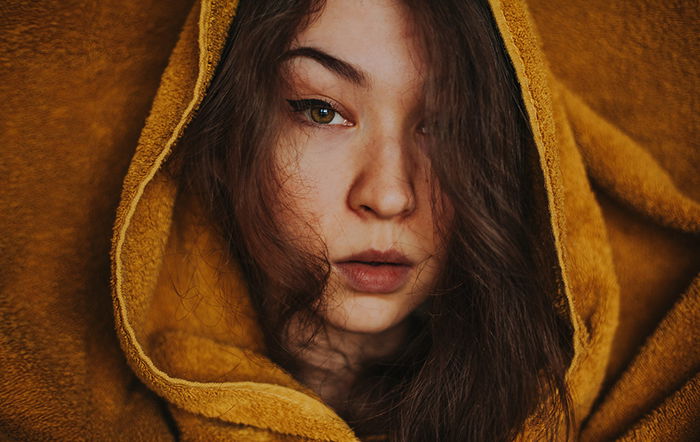
Portrait photo of a woman covered in a blanket
For this technique, you don’t need expensive props. Towels, curtains, and even sheets 
of paper can make a big difference. The original background was distracting and 
unflattering in this shot. I used a simple towel to cover it up and make the model’s face 
stand out.

Another way to use this framing technique is to cover parts of your subject. This puts the 

spotlight on a specific area.

For example, if you’re photographing a person, you can cover half of their face. This will 

lead the viewer’s eye to the part of their face that’s visible. And it’ll make your composition 

more intriguing to look at.
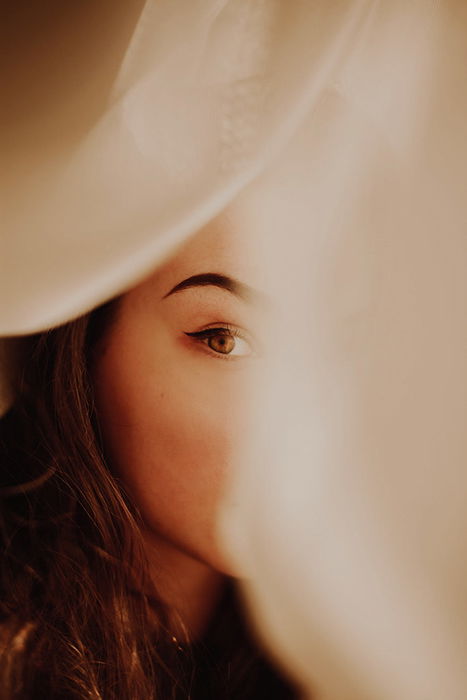
Portrait photo of a woman shot through white curtains as a frame
When taking photos with blurred foregrounds, make sure you use manual focus. Your camera’s autofocus might get confused and focus on the wrong detail. If you’re taking self-portraits, use autofocus to focus on your face first. Lock the focus, and then cover the lens with an object.

2. Use Natural Symmetry to Put Emphasis on Your Model

Compositions and symmetry go very well together, especially in atmospheric photos.

You can take a few steps back from your model without making your composition look busy. 

You can do so using basic symmetry knowledge.

This doesn’t mean you have to set up a studio with symmetrical props or backgrounds. Look 

for symmetrical elements in cities or out in nature. Some of the many examples could be 

countryside roads, skyscrapers, bridges, or water reflections.

Place your subject in the middle (or somewhere close to the middle) of these environments. 

This will help create appealing compositions.

Of course, too much symmetry can also be distracting. Don’t be afraid of creating imperfect compositions.
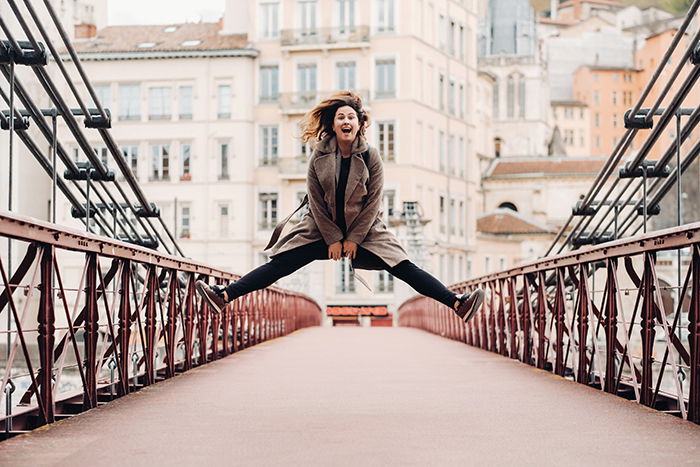
Girl jumps on a symmetrical bridge.


1. Use Reflections for Framing Photography

Window reflections are perfect for framing minimalist photoshoots. You can use them in 

almost any genre.

For portraits, make sure your model is standing behind a window. Take photos from different 

angles to find the best reflections. (Don’t shoot right in front of a window or else your camera 

will end up in the reflection.)

Reflections tend to be abstract and neutral in colour. This is perfect for hiding or emphasising 

certain features. This is like what you’d do with blurred foregrounds.
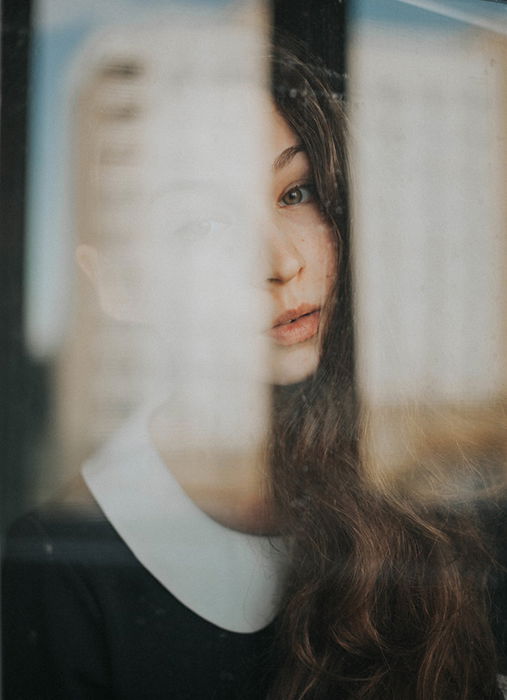
Portrait photo of a woman shot through a window

If you’re a landscape photographer, photograph different views reflected in a window. This 

creates a somewhat distorted and atmospheric effect.

You can also combine reflections and symmetry. Try creating surreal photos like the one below.
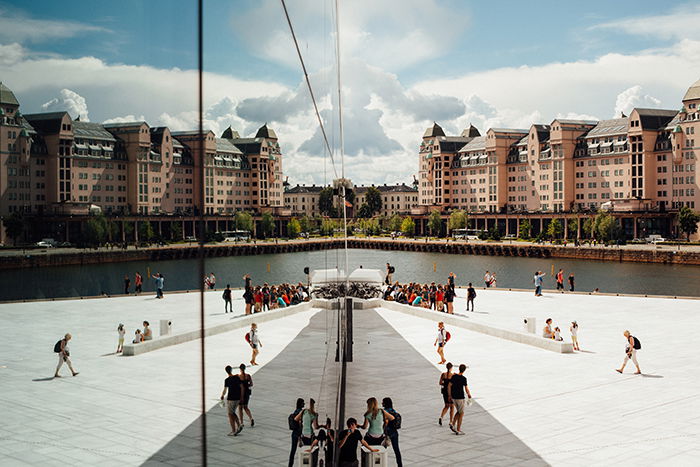
Photo of a square and buildings reflecting on the glass walls of an office building

There are many photographic framing techniques you can use to improve your compositions. 

Frames help you create balance and highlight specific elements for the viewer.

Knowing how to frame a photo will help you turn even the simplest subjects into 

eye-catching works of art


-----------------------------------------------------------------------------------------------------

Free Photography Ebook 

Six Tips for Getting the Camera Focus in the Right Place at the Right Time – Free Quick Guide


There are numerous articles on the topic of producing sharp pictures.

You’ll often see advice on how to hold the camera or what your shutter speed should be for a given lens.

However, we noticed that there is one aspect of image sharpness and focusing that is rarely discussed, and that is the theme of this free guide.
 

Tuesday, January 11, 2022

 More Great Camera Deals on Ebay


My photo by Darryl Turner
In addition to blogging about photography I'm also a 35mm film camera collector.  While I'm glad to get a good deal on a camera from just about anywhere, I usually buy my film cameras on Ebay.  The prices are great! The selection is huge, and they have nearly every brand ever made.  My personal preference is for either Nikon or Minolta cameras. But I have purchased Pentax and Vivitar brand cameras as well. Here are some of my recent purchases on Ebay. 


ORDER DATE
Jan 05, 2022
ORDER NUMBER
01-08097-88300
ORDER TOTAL
US $20.10

(185243229022)

Delivered on Mon, Jan 10

Tracking number: 9405508205499015831309 This item has been delivered.

Paid on Jan 5, 2022
Shipped on 01/06/22
Feedback needed
No Feedback received
ITEM PRICE:
US $10.00
--------------------------------------------------------------------------------------------
ORDER DATE
Nov 21, 2021
ORDER NUMBER
25-07896-80165
ORDER TOTAL
US $25.00

(324777585365) 
 
Delivered on Fri, Nov 26

Tracking number: 9405508205498387765809 This item has been delivered.

Paid on Nov 21, 2021
Shipped on 11/22/21
Feedback left
Feedback received
ITEM PRICE:
US $25.00
---------------------------------------------------------------------------------------------
ORDER DATE
Nov 21, 2021
ORDER NUMBER
06-07900-80090
ORDER TOTAL
US $36.74

(313762941973)

Delivered on Fri, Nov 26

Tracking number: 9405508205497788873465 This item has been delivered.

Paid on Nov 21, 2021
Shipped on 11/22/21
Feedback left
No Feedback received
ITEM PRICE:
US $24.99
If you're wondering why there are differences in the camera price and the order total, the difference is the additional cost for shipping.  But, as you can see, even with the additional charge for shipping, the prices are still a bargain.  All of the cameras above are FILM cameras.  Ebay also has digital cameras for sale. To check them out, or just window shop, click on the link below. 

Ebay Camera Deals!


Sunday, January 9, 2022


How to Use a Light Meter for Better Photography

Tags: Shutterbug, Photography for Beginners, Newbie Photography

What is a Light Meter?

Simply put, a light meter is a photography tool used to measure light. Without a light meter, we would not be able to judge how light or dark a subject is with our eyes alone.

There are two types of light meter: reflective and incident.

Reflective meters are often built into camera bodies. This type of light meter will first measure the amount of light reflected by the subject. It will then calculate which camera settings to use to create a balanced exposure. This calculation is based on the number of mid-tones in your scene.

Incident meters are external devices that measure the light falling on a subject. This type of reading is far more accurate, as it evaluates a more discrete area and considers only the intensity of light falling on the subject.

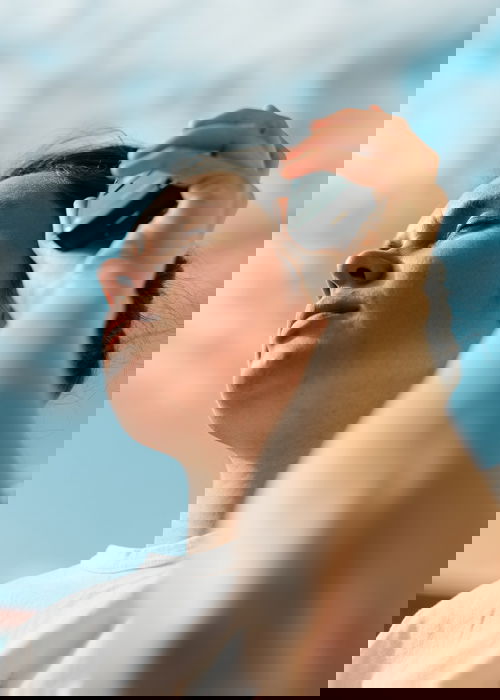
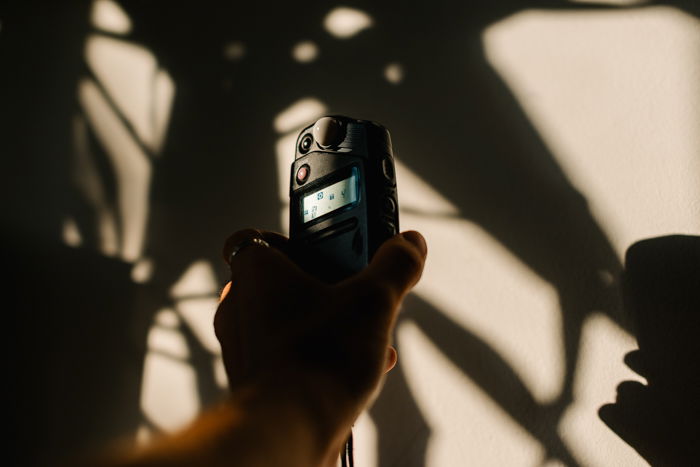
an upward shot image of a person holding a light meter in his left hand
© Jeremy Knowles

Should I Use a Light Meter When Shooting Digital?

There are two main reasons why you should use a handheld meter when shooting on a DSLR camera.

1. Greater Accuracy

The reflective readings in digital cameras can sometimes cause inaccurate exposure calculations. This is because the meter inside your camera measures light in relation to middle grey. This means that the calculation intends to achieve a tonal range of 18% grey across the image. But in certain conditions, such readings can result in over or underexposed images.

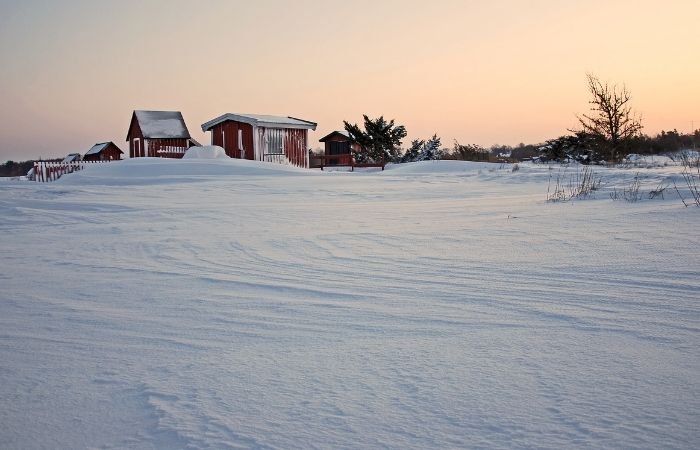
A common example is when photographing a scene that includes snow. The reflective meter inside your camera is calibrated to middle grey, and so you will often end up with an underexposed image. In this case, the snow is rendered as grey instead of white. To compensate, we must over-expose the image in our camera settings.

Incident metering doesn’t suffer from this same problem. When using an incident reading, you always get an accurate exposure calculation. For portrait photographers, capturing skin tones is crucial. And for this reason, they often favour using incident light meters for accuracy.

a lanscape image of snow with a bran in the background

2. Flash Metering

The built-in meter in your camera cannot measure the intensity of the flash. To measure the light of an external flash source, you must use a handheld light meter.

© Jeremy Knowles

How Do I Use a Light Meter?

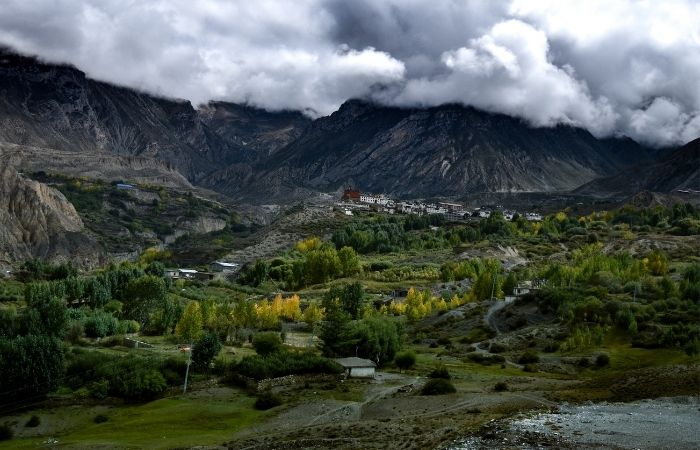
We already know that an incident meter reading will give us the most precise reading. Yet, there may be situations when measuring the reflective light is beneficial. One example is landscape photography. Here, you should take three readings, from the brightest to darkest areas in your viewfinder. Then calculate the average.

This type of reading is called Spot Metering. A Spot Meter measures the reflected light in one specific area (or spot) within the scene. Matrix Metering measures the light from across different grid areas in the viewfinder. Many readings are then used in an algorithm to generate a balanced exposure value. Centre Weighted metering gives priority to the light in the centre of the viewfinder.

https://expertphotography.com/landscape-photography-guide-and-tips/

1. Get to Know Your Light Meter

Understanding how your handheld light meter works is essential.

Start by powering on the light meter and, if necessary, select photo mode.

For taking an incident meter reading, it’s important we set up our device accordingly. For most devices, this is achieved by sliding the Lumisphere so that it covers the light-receiving sensor.

Now that your device is set to take an incident light meter reading, we must also set our metering mode. This mode relates to the light source you are using in your scene. You can choose between ambient light (for any non-flash, continuous light), cordless flash, and flash with sync cord (for strobe lighting).

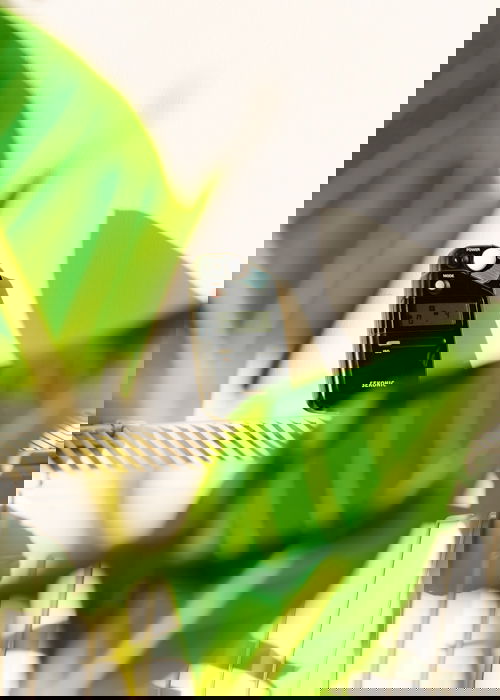
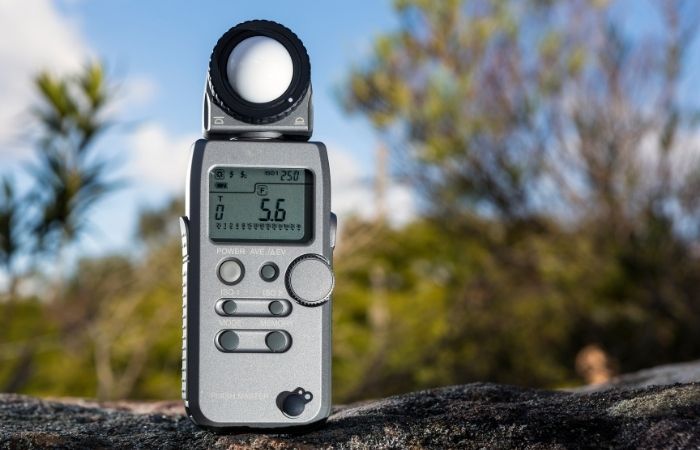
an image of a light meter set on a stump

2. Set Your ISO

We must calibrate the ISO in our hand-held light meter to that of the camera settings. If you are shooting analog, calibrate to the ISO of your film.

This is an important step and will ensure that our devices are in sync.

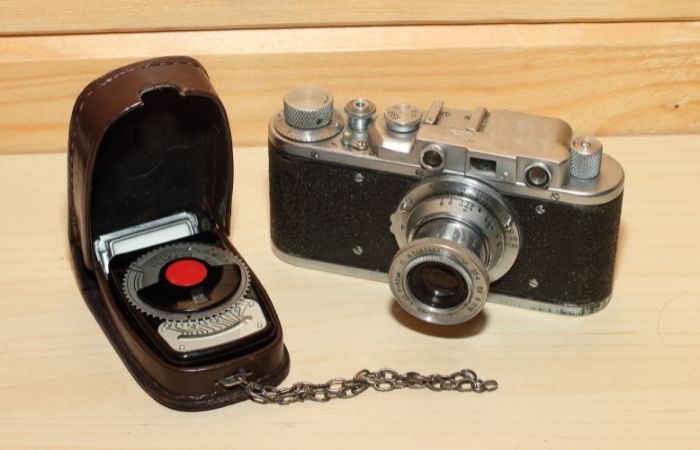
vintage film camera with light meter

3. Set Your Shutter Speed or Aperture Priority

If your priority is to maintain a desired aperture, for example, an f stop of f/2.8 to create depth of field in your image, you can set your light meter to aperture priority mode (F). Then, select f/2.8 by pressing the up and down buttons.

If shutter speed has priority, for example, a shutter speed of 1/500th of a second or faster because you need to capture movement, set your light meter to shutter priority mode (T) and then select your desired shutter speed.

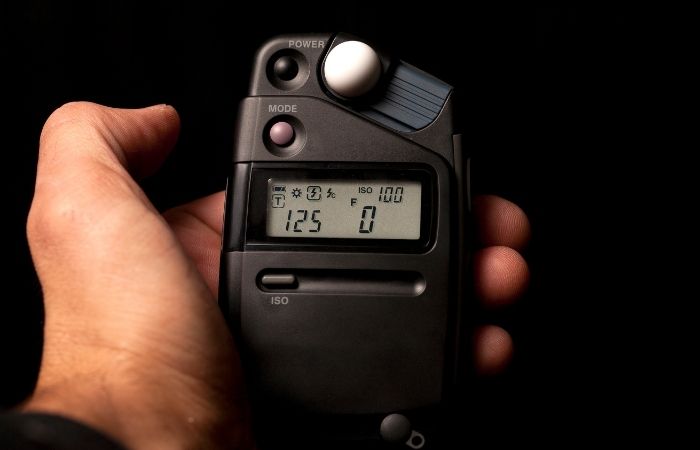
a mans hand holding a light meter

4. Take a Reading

Next, we want to measure how much light is falling onto our subject. Hold up the light meter in front of the area you want to measure. Make sure the Lumisphere is facing the lens of the camera, and then press the measure button. Your device will then measure the light hitting the Lumisphere and produce an exposure value.

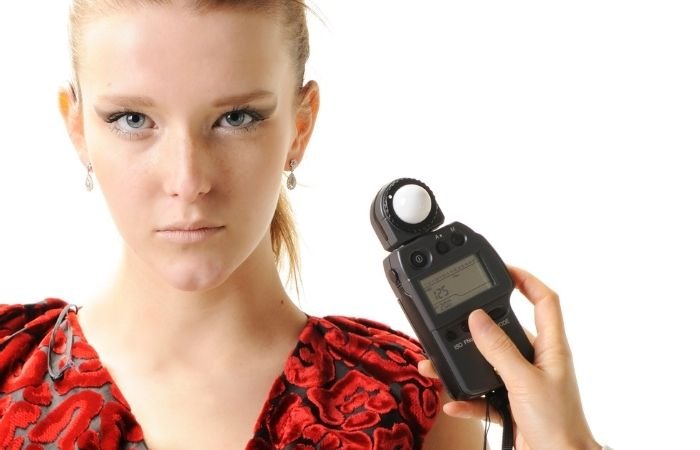
For some subjects, you may need to take many readings to calculate a balanced exposure. For example, in portrait photography, we must measure the light falling on the subject from different angles to not underexpose (by only measuring a highlight area) or overexpose (by only measuring a shadow area).

When using strobe lighting, make sure to trigger your flash unit after pressing the measure button on your meter.

light metering a female model in a read dress

5. Adjust Your Camera Settings

Check to see what the meter reads. Now that you have an exposure calculation from your device, you can adjust your camera settings accordingly.

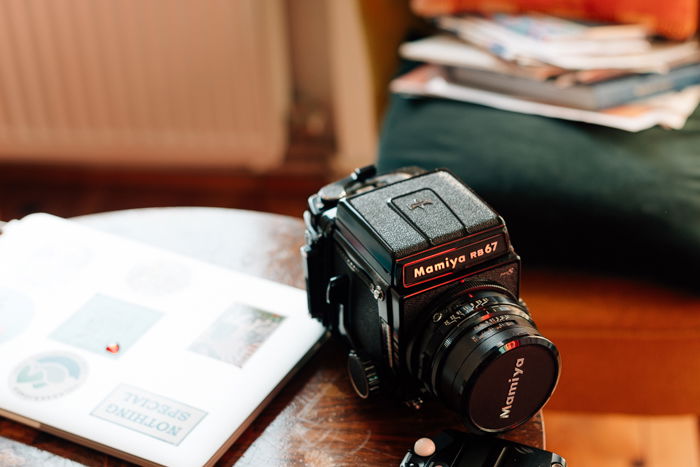
an image of a Mamiya rb67 camera on a desk
© Jeremy Knowles

How do I use an Analogue Light Meter?

Analogue meters offer precise readings and are more practical than you might think.

When using an analogue light meter, you exchange a digital display for a needle. This needle indicates exposure values within an old-school, circular index.

First, calibrate set the ISO on your analogue meter. This should be the same as the settings in your digital camera or roll of film. You can set the ISO on most analogue meters by rotating the appropriate dial until it indicates the ISO you’re using.

Next, take a reading by holding the metering button until the needle stops moving.

In most models, the needle will remain fixed in position for around 15 seconds after the metering button is released. Lastly, rotate the dial ring indicator to align with the needle. You can then read the full range of aperture and shutter speed combinations.

© Jeremy Knowles

Having a handheld light meter is an absolute essential. We recommend getting to know your light meter by practicing with different subjects. Try using it in a variety of modes and scenes.

For a reliable digital light meter, I recommend the Sekonic L-308X Flashmate.

For a small and easy-to-use light meter, check out the Gossen Digisix 2.

For a trustworthy analog light meter, look no further than the Sekonic L-208 Twin Mate. 


---------------------------------------------------------------------------------------------------------

FREE Photography Ebook 

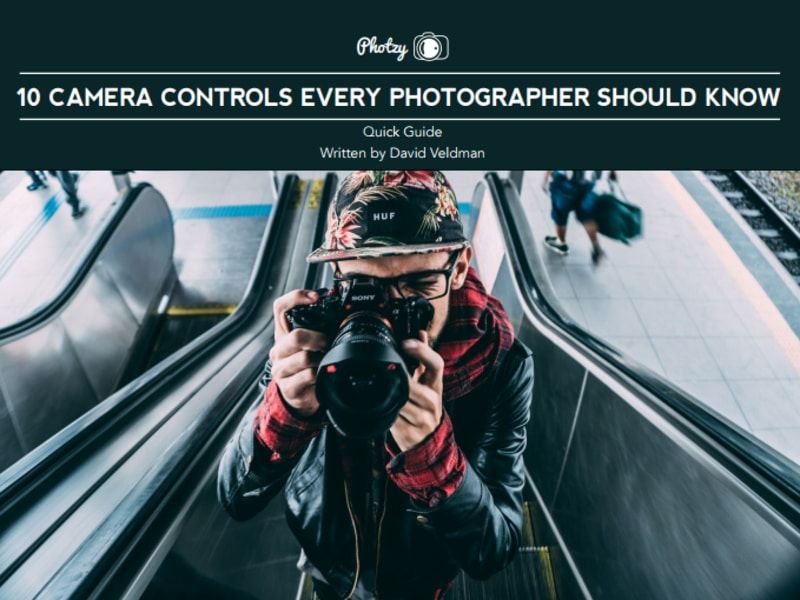
10 Camera Controls Every Photographer Should Know


There are 10 basic camera functions that every photographer should learn first.

I know how it goes, though.

We get that new camera. We get it out of the box. We start shooting, and then we forget to really go back and figure out- What’s what on this camera?

That entire scenario can lead to a lot of lousy photos.

Author and Photographer, David Veldman has written us a Quick Guide titled, “10 Camera Controls Every Photographer Should Know”.

This guide is not going to replace your camera manual.

It is going to give you some direction as to the key features of your camera- that you should be studying first!

Once you’ve learned these 10 key camera functions inside and out, your photography is guaranteed to improve!


Monday, January 3, 2022

Best Techniques for Shooting Silhouette Photography

Tags: Shutterbug, Photography for Beginners, Newbie Photography

Silhouette photography has a dramatic and mysterious atmosphere. You might have wondered, how other photographers take breathtaking silhouette photos.

In this article, I’ll let you in on the secret tips to creating spectacular silhouette photography. Once you understand the basic techniques, challenging lighting conditions become photographic opportunities.

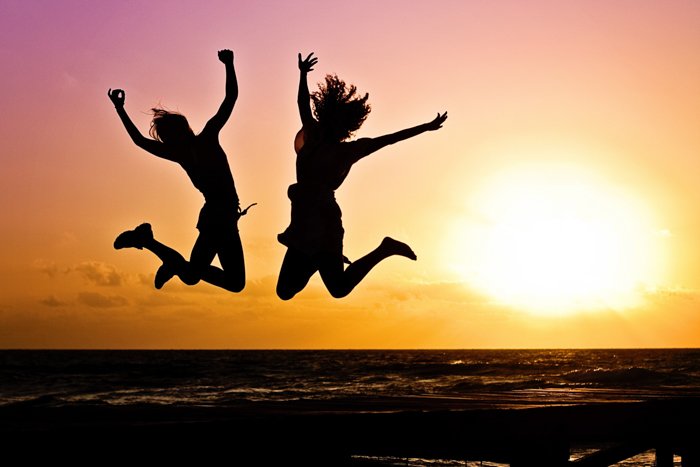
The silhouette of two girls jumping over the sea at sunset 

What Is Silhouette Photography?

A silhouette is created by a subject photographed against a bright background. The hard backlighting makes the subject dark, concealing the details. The subject may be a person or an object, but we only see its shape.

Usually, we want to balance the exposure during photography. We want to reach an evenly lit scene in our photographs.

But in silhouette pictures, we want a bright background to be properly exposed, while the subject goes dark and loses all or most of its details. (mention dynamic range here)

Silhouettes photography benefits from the cases when the background is much brighter than the subject. It takes advantage of what might otherwise be a challenging lighting condition.

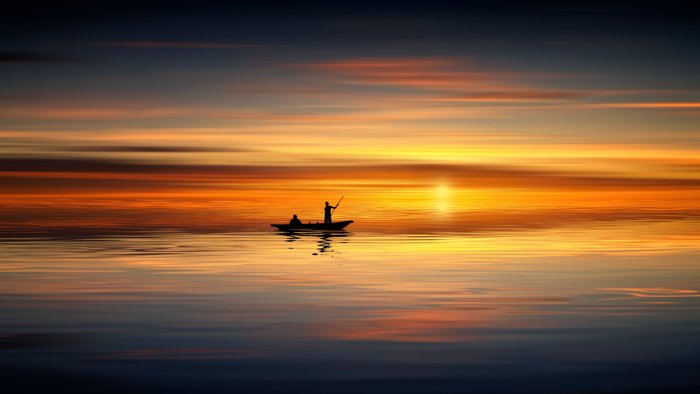
Such photos take a more minimalistic approach, compared to the usual detailed images. They reduce the visible information, concentrating solely on outlines, contrast, patterns, and shapes.The silhouette of men in a boat at sunset

How to Photograph a Silhouette

Shooting silhouette photography is easy once you know the basics. It’s mostly about where you stand in reference to a light source.

You’ll need a subject with a strong and identifiable shape. This subject will create your silhouette once you take the picture.

You also need a strong light source that is behind your subject, which creates a hard light. The sun as your light source is the easiest way to create silhouette photography.

To reach the desired results, make sure you are mindful of your position and camera settings when taking the photo. We will explain everything later in this article.

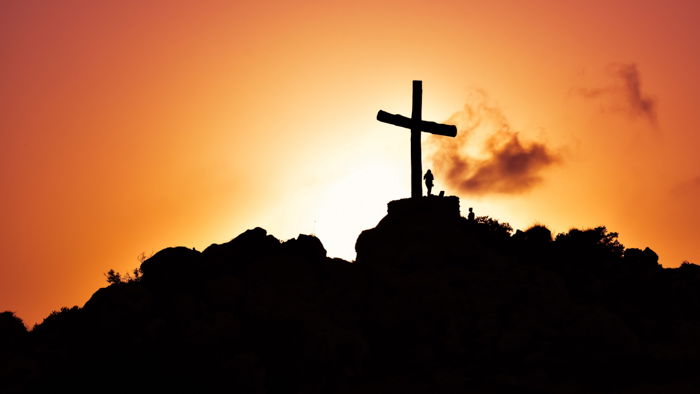
Cool silhouette photography of a girl beside a giant cross on a mountain at sunset

Use Spot Metering To Enhance Silhouettes

Cameras read light in the scene and try to figure out how to reach the best exposure. But the camera is only a machine, so it cannot always figure out the right values. This is where light metering comes in.

It gives you a chance to tell the camera how you want it to evaluate the scene. There are three main modes, which different camera brands use different terminology for.

  • Meters the whole scene: Averages light across the entire scene. It is found under the name of Multi (Sony), Evaluative (Canon), or Matrix (Nikon).
  • Meters the centre: Averages light across the entire scene but gives the centre exposure more importance. It is called either Center (Sony), or Center-Weighted (Canon, Nikon) mode.
  • Meters one spot: Exposes for a specific spot that you select, which is usually the focal point. It is called spot metering mode by the leading camera brands (Sony, Canon, and Nikon).

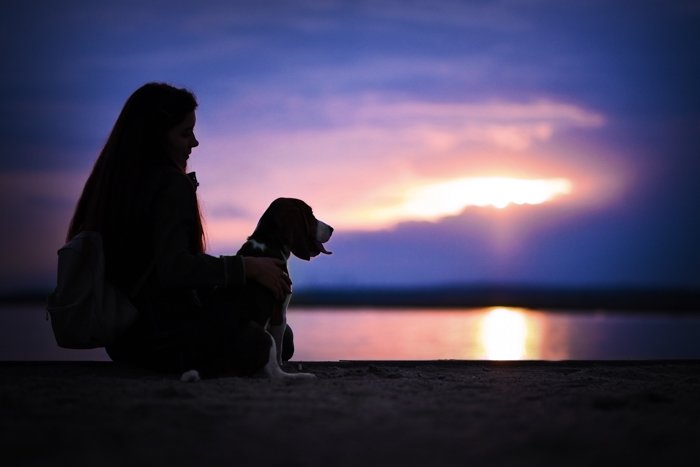
Cool silhouette photography of a girl and a dog on a beach at evening

In a silhouette photo, I want certain parts of my image to be well-exposed and other parts to be under-exposed. If my camera exposes for the whole scene, it will try to even out exposure differences.

In spot metering mode, I’m telling my camera precisely what part of the scene I want well-exposed. In the case of silhouettes, I want the background to be well-exposed, making my subject dark.

Therefore, spot metering is the best for making silhouettes.

Choose The Right Settings

Choose a relatively narrow aperture (around f/11). Press the shutter button halfway down, focusing on the background. You might have to move your camera a bit with the shutter button still halfway pressed to recompose the picture. This way, you can place your subject where you want it in the frame.

At f/11, the entire scene will be sharp. Most of the details in the subject are lost in the silhouette, so focus doesn’t matter too much. It’s just the edges of your subject that need to be in focus.

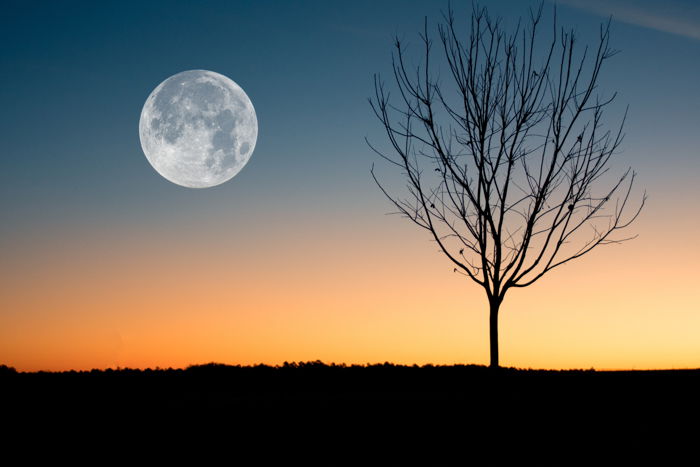
Cool silhouette photo of a tree by the full moon

If your subject isn’t dark enough, adjust your exposure compensation dial to -0.3 or -0.7 to darken the entire image a bit.

Finally, don’t use flash when creating silhouettes. Flash is all about bringing out the detail of your subject. For a silhouette, we want the subject to be under-exposed.

Find the Right Backlights

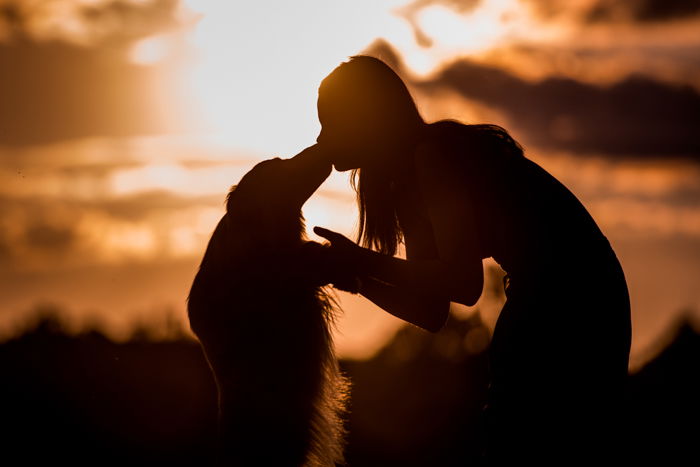
Because the light is behind the subject, the lighting method you need is called backlighting. When choosing the light conditions for a silhouette photo, you need to pick a light source that provides hard light.Cool silhouette photo of a girl kissing a dog

The sun works perfectly for this purpose, but you have to make sure it is behind the subject. This makes sunset and sunrise prime times for silhouette photography.

To determine whether the light and the weather conditions will be sufficient, use an application to check out the forecast. The Photographer’s Ephemeris app and website are made for specifically this purpose. They give you information about how the light will look at your chosen location, at any time of the day.

You can also use artificial light to capture silhouettes. Street light or a car’s headlights behind your subject can make for some pretty amazing results. If you are bringing your own lighting equipment, you even have the chance to reposition the light according to how you want to create a silhouette.

The silhouette of a girl

Choose The Right Subject

Silhouette pictures focus on the form of the subject. Colour and details of the subject will be dark, so the form must be strong and have a clear outline.

Silhouette photos of people are particular favourites because the human shape is easily recognisable.

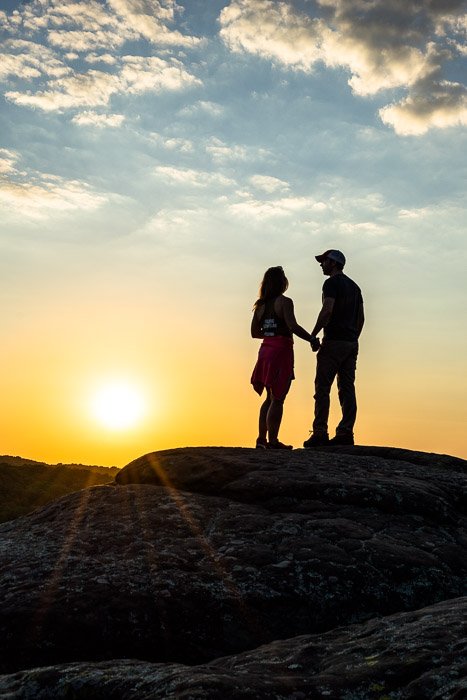
Silhouette of a couple at sunset
I captured this couple watching a sunset at the Garden of the Gods in the Shawnee National Forest. The sun behind them creates a silhouette. My camera settings were 1/200th of a second at f/11, ISO 100.

When shooting silhouettes of people, try to photograph them in profile. This way we can see the shape of the face and body, even if we can’t see details.

When there’s more than one person, create negative space between the subjects. If you’re not careful enough, the silhouettes will start to merge and look like one person with an extra head or arm.

If you are creating silhouette photography of buildings or objects, look for clearly defined shapes and outlines. Anything that has a distinct shape and stands out from the horizon can work.

Whether it is a statue, a church tower, or a tree, look for subjects that are clearly separated from the background. Otherwise, the silhouette will lose its recognisable shape.

A good background for a silhouette photo is one which is simple, with minimal distractions. This allows the silhouette to be the sole focus of the picture. The bright, clear sky works as the best background, especially if it is a sunset scene.

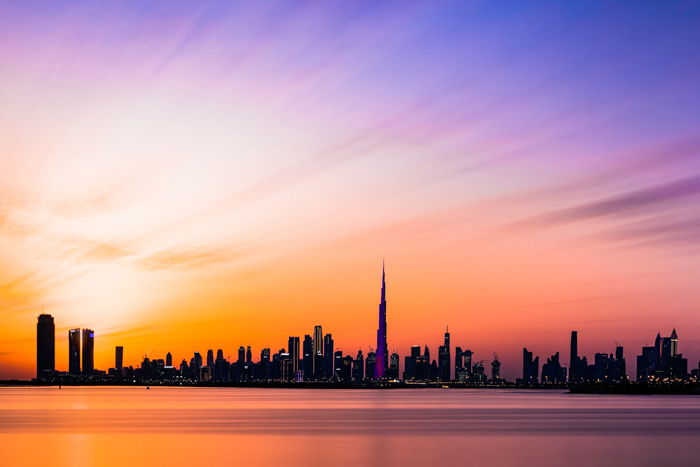
The silhouette of a city skyline
The buildings in the city’s skyline merge together and lose their distinctive shapes.

Position Yourself For Better Silhouette Photography

If you have a distinct subject and a strong light source, but you’re not getting a silhouette, change your position. The trick is in the relationship between elements.

Stand in front of your subject, so that it is placed between you a strong light source. 

You can choose to include the light source in your image or block it completely with your subject. It’s all about the angle. A slight step to the side will change your relationship to the subject and the light source.

You can also create a sunburst in your images by choosing a narrow aperture, such as f/22. Please take note that on such aperture values, you might experience lens diffraction.

If you want to get a bit more creative, include rim light in your silhouette photography. Rim light highlights at least one edge of the silhouette. The strong backlight wraps around the subject and allows some detail to appear.

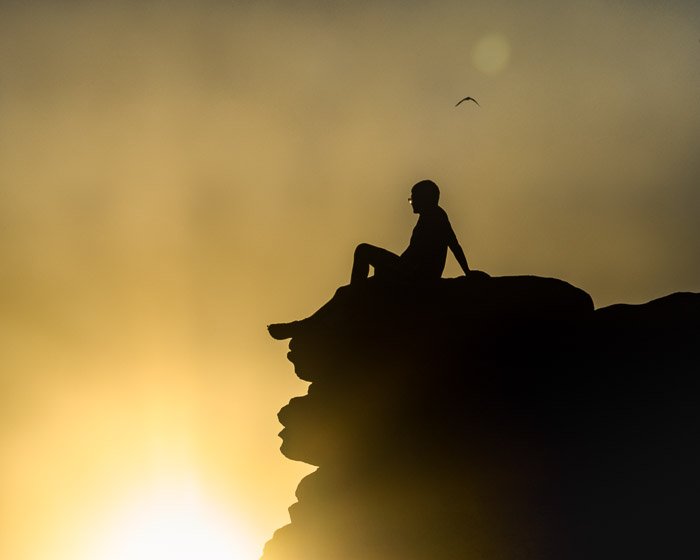
Silhouette of a boy sitting on the edge of a cliff
A boy watches the sunset at Garden of the Gods in Shawnee National Forest. My camera 
settings were 1/320th of a second at f/32, ISO 100.

Creating stunning silhouette photography is all about where you stand in relation to your subject and the light. Place your subject between you and the light source. Use Spot metering mode and a small aperture.

Look for an uncluttered background. It’s all about the shape of the silhouette, keep everything else simple.

Now that you’re equipped with all the info you need, go and take some silhouette photos of your own!

 --------------------------------------------------------------------------------------------

Another Free Photography Ebook 

Lightroom: Setting Tone – Free Quick Guide


Thursday, December 30, 2021

# Times, World, Photo

14 Tips to Improve Your Forest Photography


Capturing pictures of forests with a camera is a unique challenge.

I live in the core of the Boreal Forest in the interior of Alaska. These woods offer a landscape of spindly spruce trees, quaking aspens, and birches. Endless opportunities for forest photography.

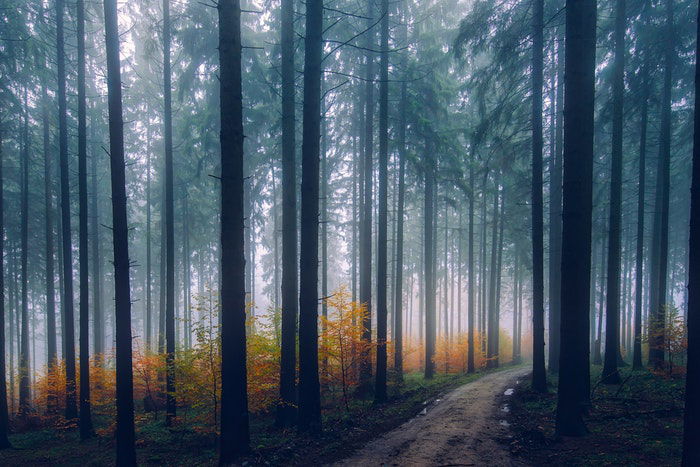
I spend a great deal of time wandering the woods, camera in hand, searching for the composition that captures the quiet beauty of the place. A moody picture of forest covered in mist


Whether it’s your local woods or the rainforest of the Amazon, the standard rules of landscape photography are difficult to apply. Finding images within the environment of the woods requires a new mindset for the landscape photographer.

For those aiming to improve their forest photography, here are a few tips to keep in mind. 

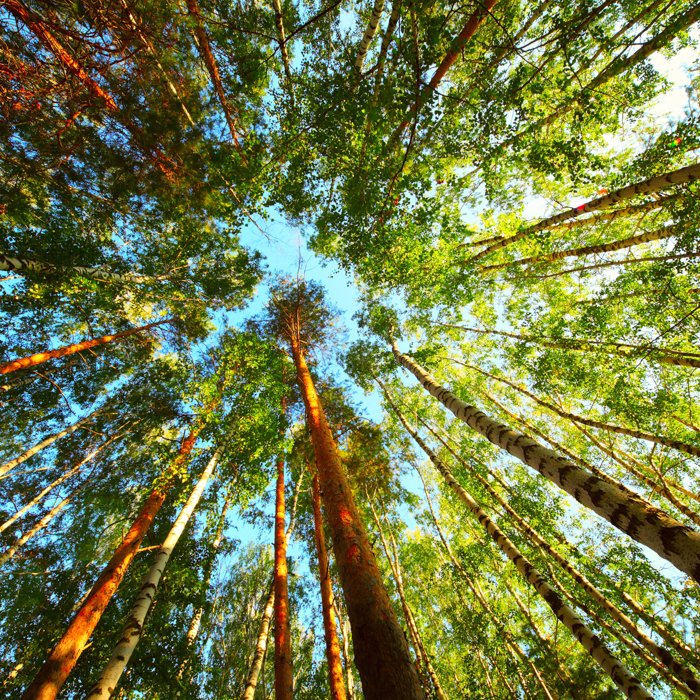
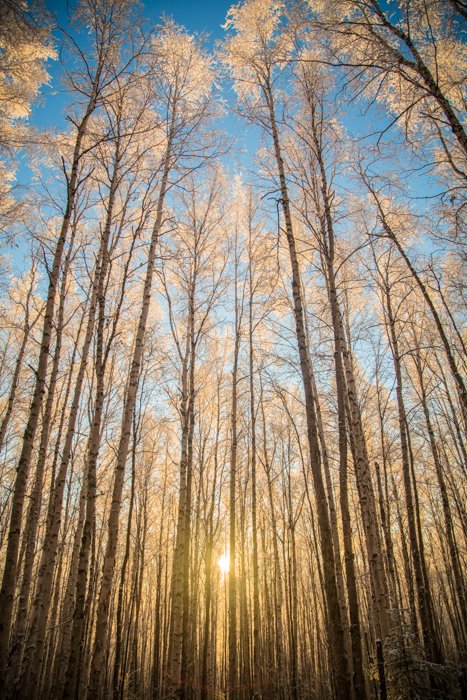
14. Take Low-Angle Shots Looking up at the Treetops

When you take a shot of the trees from a low angle, it places the viewer into the forest. They will feel like they are looking up at the immense trees.

It emphasizes the enormity of these mighty plants, making the viewer feel humbled and small against their size.

Low angle photography of trees

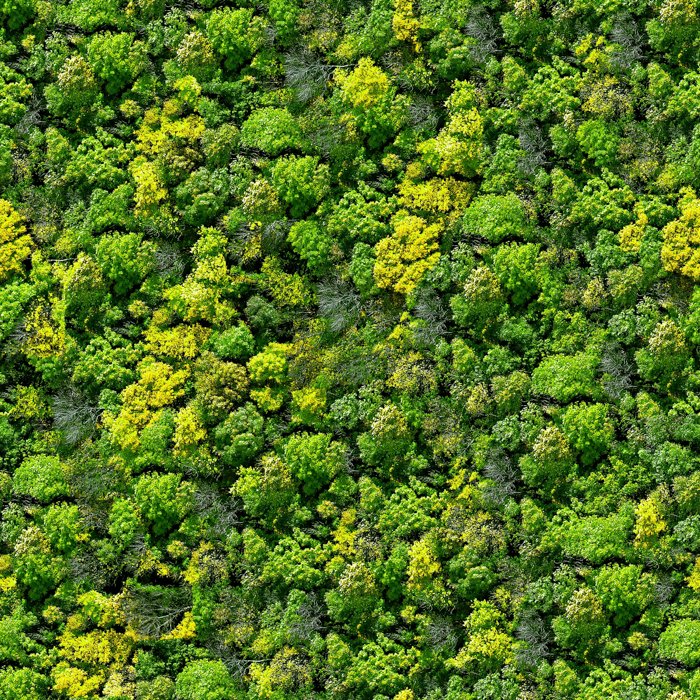
13. Use Aerial Photography to Capture the Vastness of the Forest

With modern advances, you can now take impressive aerial photography with a drone. This technique is amazing for photographing forests. From above, the trees seem even vaster and never-ending.

It is best to take aerial photography on a clear day, to get a full view of the tree-tops. In misty weather, you can also create some great moody shots.

An aerial photography view of a dense forest

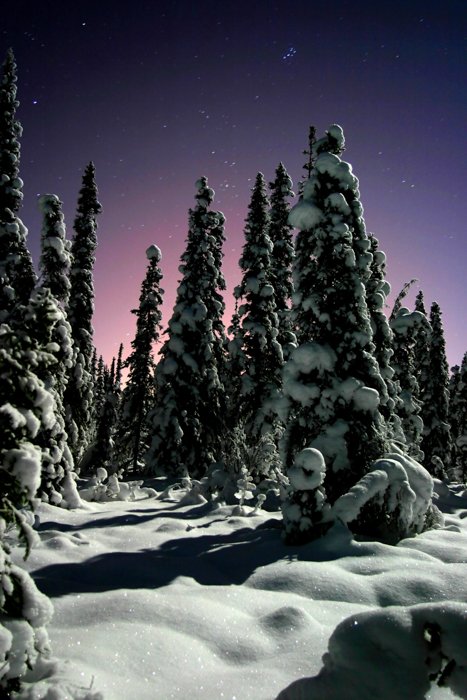
12. Use the Moonlight for Unique Forest Photography

Forests are dark places, especially at night and during the blue hour. At those times, pale starlight and the dim glow of the sky struggle to reach the ground.

In an open woodland, there is more potential. Moonlit forest photography is a chance to make unique images. The moon, when full, casts a surprising amount of light onto the landscape. It also provides a potential subject in itself.

Shooting dark woods is much like other night photography. The foregrounds of trees require extra attention. Consider how the limbs and trunks fall across the sky. Compose so that they complement, rather than obstruct the background.

Forest photography of snow-covered trees during twilight with stars above

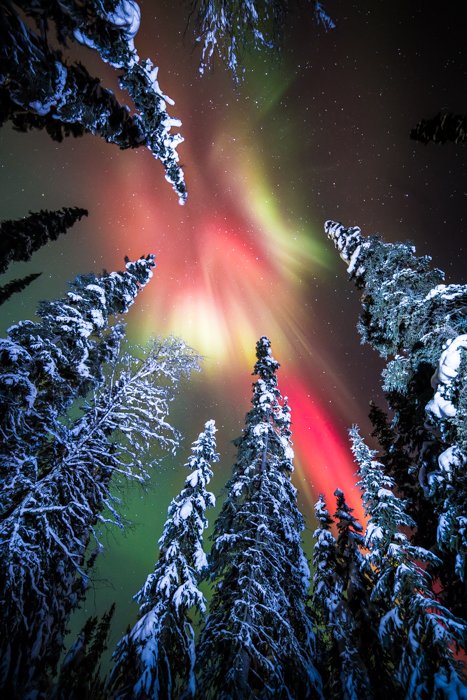
11. Capture the Stars and Night Sky Through the Trees

If you look upwards, the trees frame the night sky. You can take beautiful shots of the night sky surrounded by nature.

Where I live in Alaska, I often have the chance to photograph the northern lights through the trees.  This can be a major challenge. As the lights move across the sky, I’m constantly shifting position to assure that they are visible through the trees.

Forest photography of the Aurora Borealis seen from the ground during winter

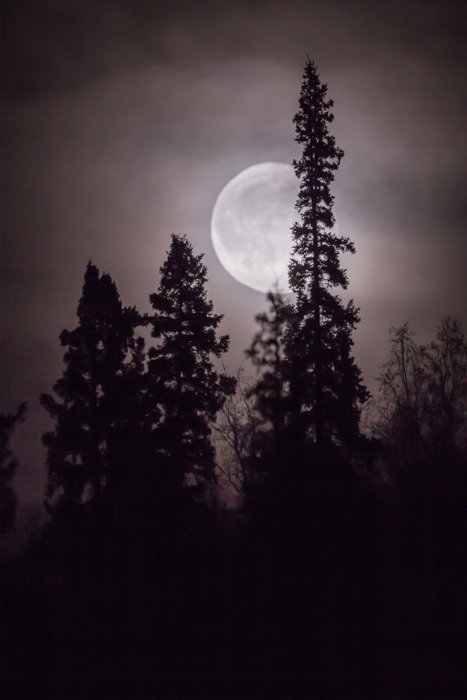
10. Capture the Silhouette of the Forest for Striking Images

The dim light before dawn or after dusk is a very hard time to shoot in the woods. Trees, already dark, become black silhouettes. Within the forest things are even dimmer, rendering even basic image-making difficult.

The only hope for a successful shot during these hours is to find a tree silhouette against a backdrop of sky.

Forest photography of the silhouettes of a tree with full moon in background

9. Use the Best Gear and Settings for Night Forest Photography

What Camera Gear to Use

A tripod-mounted camera is an absolute must for shooting in the woods in low light. The long exposure times make hand holding an impossibility. A fast wide lens, like an f/2.8 or faster, will also be useful in the dark conditions.

What Camera Settings to Use

Embrace long exposures and higher ISOs for night forest pictures. When the moon is not your subject and the night is dark, consider something like f/2.8, for 3 or 4 seconds at ISO 1600 as a starting point. From there, adjust your shutter speed or ISO up and down (but leave your aperture wide open) until you find the exposure you want.

8. Make the Most of Golden Hour

The low-angle light of the golden hour is often muted on the forest floor. The trees block most of the incoming sunlight, leaving behind beams to track across the ground, and through the branches.

That warm light will create a juxtaposition of the cool, shaded tones, and the yellow sunlight. This can be a beautiful time of day. If you are fortunate to find a bit of fog rolling through the trees, these hours are matchless.

Forest photography with golden hour sunlight

What Camera Settings

The right camera settings vary a lot during the warm light of the golden hour.

I tend to constantly shift my shutter speed and aperture depending on the final product I want to create. Since I often work handheld in the woods, I try to keep my shutter speed up around 1/60th second or faster, particularly when using a telephoto lens.

An aperture of around f/8 will usually yield sharp images while maintaining a pleasing depth of field. But again, there is no ‘correct’ setting.

7. Shoot at Midday for Contrasting Lights

At Midday, any sun reaching through the trees will result in a blasting contrast of hot sunlight and cool shade.

A forest scene shot midday, with strong light and nice shadows

6. Embrace Overcast Weather for Forest Photography

Clouds are like a studio softbox for the sun. They soften the harsh light, mute shadows, and provide illumination. This is a perfect formula for photographing forests.

The harsh contrast caused by sunlight disappears. The complex patterns of undergrowth, tree trunks, branches, and leaves emerge. While far from perfect for the grand landscapes, cloud cover is perfect for the woods. On those grey days, I head for the forest with my camera.

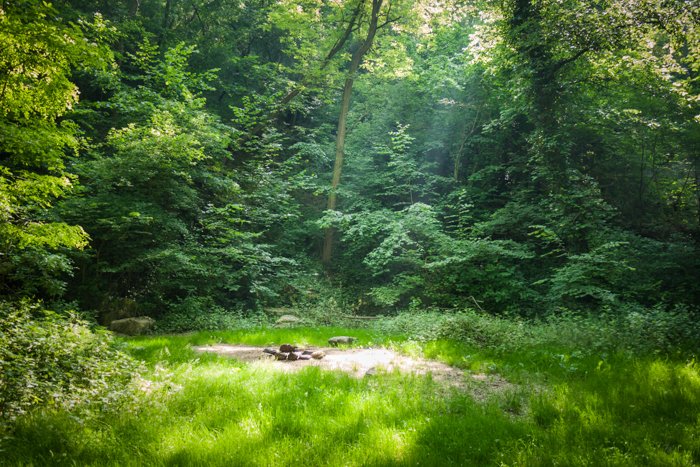
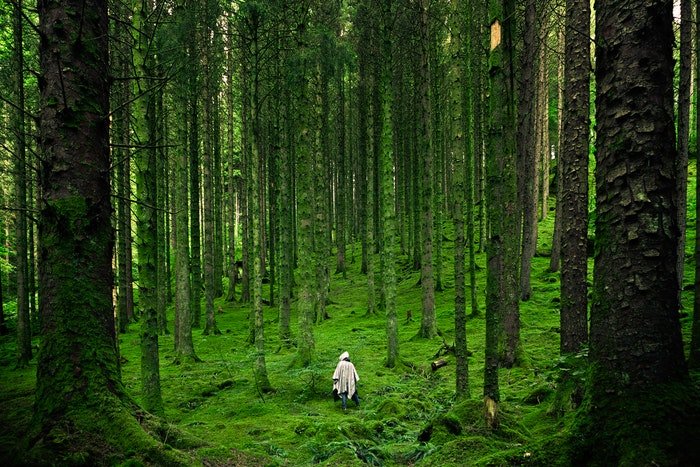
a person walking in a light filled forest

5. Capture the Forest Details

The easiest way to create successful forest photography is to remove all the clutter of the woods. Look past the chaotic branches, the crowds of tree trunks, the mess of leaves on the forests floor. Focus on one specific part.

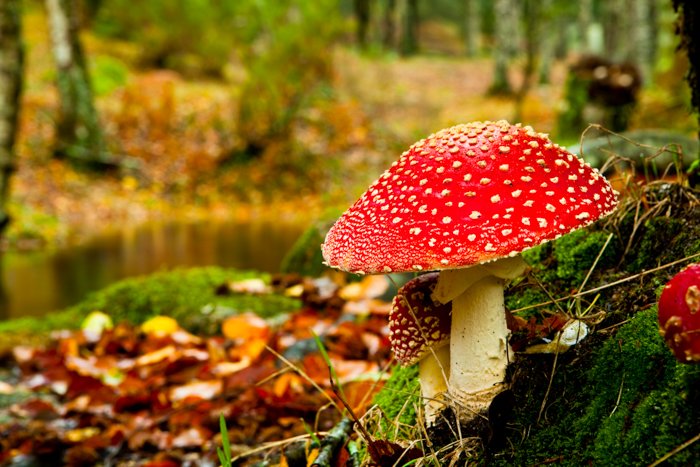
With the dappled light of morning, this can be done to great effect. Sections of the forest are illuminated. Look where the light is falling, or where it will soon arrive, and compose an image on those locations. A detail of the forest floor, a flower, a single backlit leaf.

closeup of a fly-agaric in a forest

4. Use the Woodland to Tell a Story

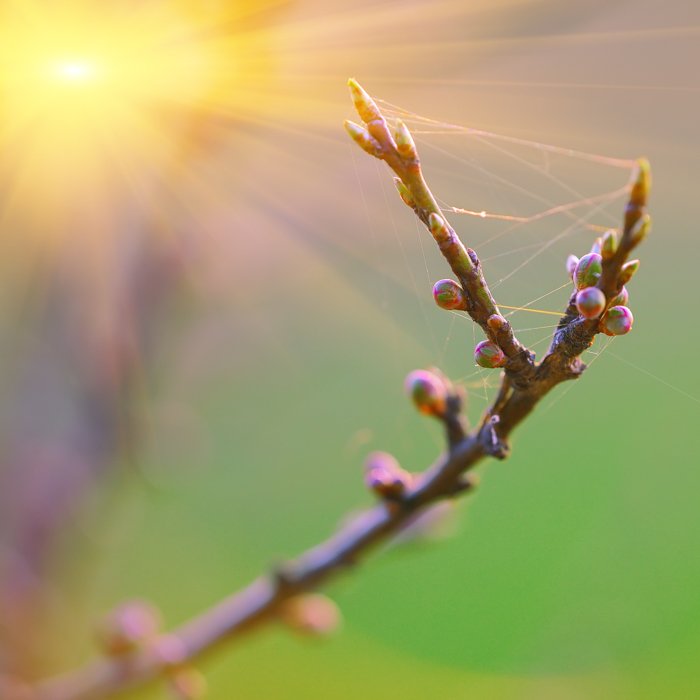
Look for small parts of forests that tell a bigger story about the place. What is the season? Can you tell that with a single detailed image? An autumn leaf or a spring bud may be good choices to share a bigger story.

For this kind of image, a short telephoto lens or even a macro lens is a great choice. Images with a shallow depth of field that turns the background into a pleasing blur will be more effective.  A deep depth of field can have a tangled background, which distracts from the scene you want to highlight.

closeup of a browsing, with spiderweb

3. Create Interesting Compositions with Different Elements of the Forest

Stepping back from the details to large sections of forests can be much more difficult photographically. The woods are full of chaos. There is often too much happening to effectively isolate a clean and interesting composition.

This is where perspective matters. In the previous section about details, I suggested looking for the single element that will tell the viewer a bit about the place. Here, when trying to go a bit bigger, to show more of the forest landscape, you’ll want to keep those details in mind.

In the woods, find a detail, a branch, flower, or leaf that you find compelling. Then, using a wide-angle lens, allow your focus to fall on your detail, while also showing the surroundings.

This is standard practice in many types of landscape photography. In the woods the method is more complicated. You have to find the right combination of detail and background that provides a wider perspective on the forest.

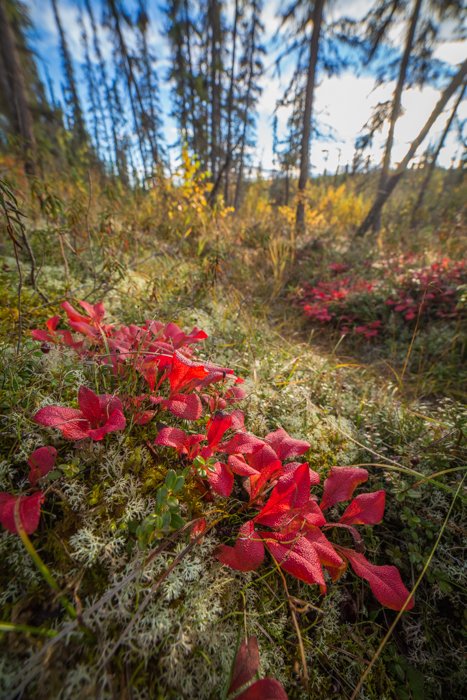
Forest photography close up of tundra flowers

This is tricky stuff but can be an enjoyable challenge in composition. Images that show off the forest in all its glory, while retaining the fine details of the place are some of my favourite woodland images.

2. Experiment with Focal Lengths to Capture the View

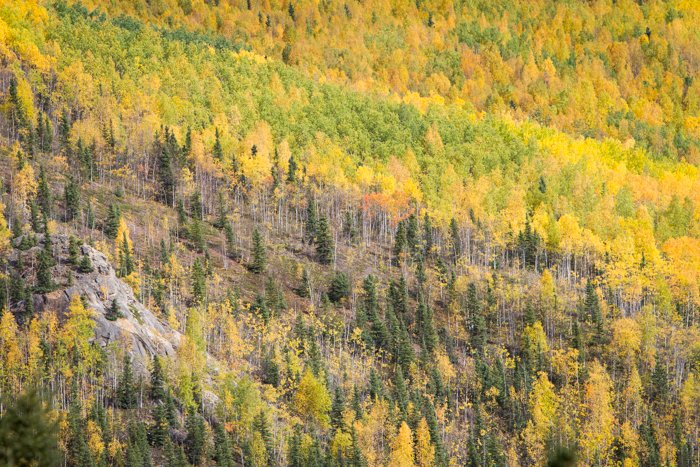
When the forest opens up, we are offered a rare chance to see a broad landscape of trees. These images blur the line between open landscape and forest landscape. But the composition holds some challenges not usually encountered in open country.
Forest photography of broad landscape view of tree-covered hillsideTight and wide-angle compositions are both options in these scenarios. A wide scene might provide a sense of scale, the drama of a seemingly endless patch of forest.
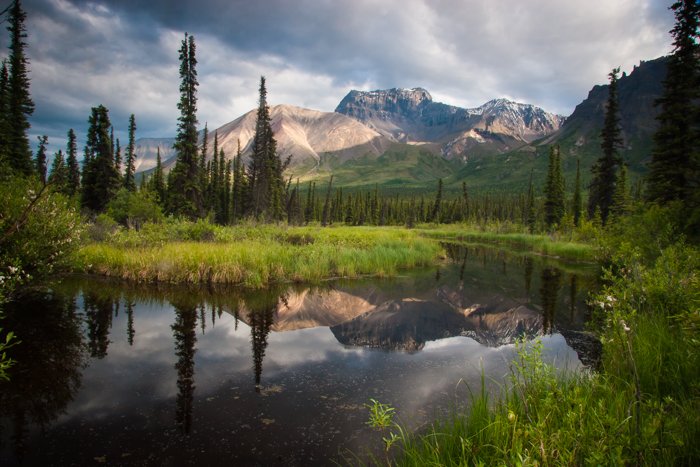
The composition can become challenging. It is easy to end up showing too much of the nearby surroundings, reducing the impact of the scale.

A telephoto image, on the other hand, has the advantage of isolating the scene from the surrounding chaos and allowing a clean composition.
Forest photography featuring a broad landscape view of tree with mountain in backgroundThere isn’t a right or wrong way to make these forest images. What will work and what won’t depends entirely on the scene at hand.
Experiment with multiple focal lengths and see what works, but keep in mind the story of the forest, and where you are. Make an effort to tell that story by providing context in your images.

1. Try Black and White Forest Photography

Look up the classic images of the Redwoods in black and white by Ansel Adams. You’ll understand that forests translate beautifully into black and white. The stark tree trunks against shaded, dark backgrounds result in compelling compositions.

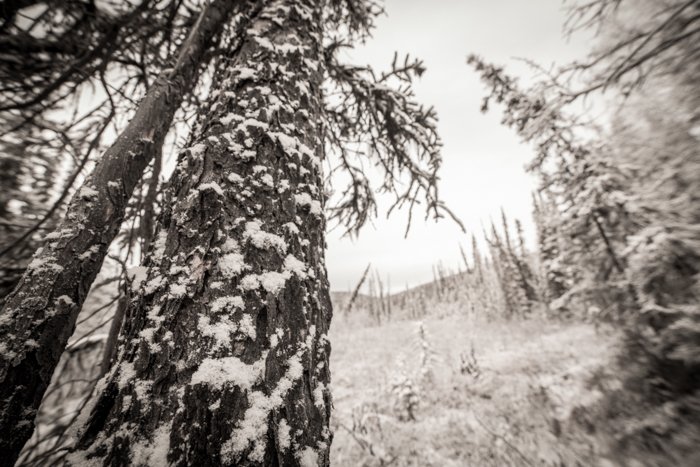
Forest photography of snow covered trees in black and whiteBut black & white photography is tough. In the woods, it takes time to learn to “see” in B&W. We view the world in colour, and determining how a colour scene will appear in black & white is challenging and requires practice. Here are a few guidelines:
Look for contrast. Scenes with a mosaic of brights and darks tend to translate well into black and white.

Take advantage of backlight. Light coming from behind your subject can be difficult to use in colour photography. It is very effective in the contrast world of black and white.

Embrace the shadows. Exposing for the bright parts of your frame will often turn the dark shadows to near black. This can help you eliminate distracting elements in your frame.

There are few natural environments where leaving the colour behind can be as effective as in the forest, so give it a shot.

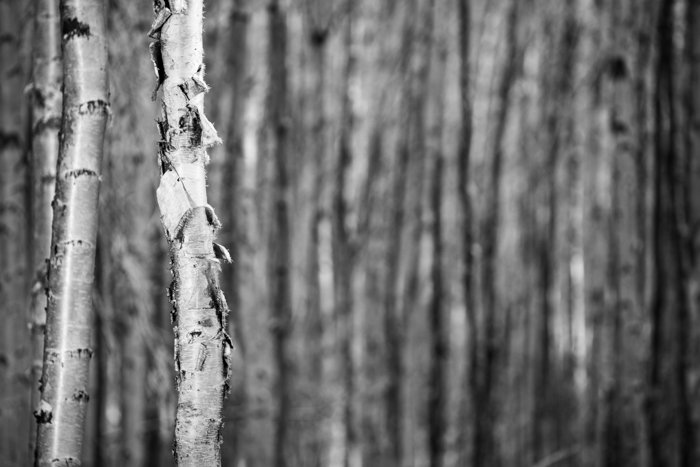
Monotone Forest photography in shallow focus

Deep in the woods, the sounds of the outside world are hidden behind layers of trees, branches and leaves.

Even in small patches of woodlands, you can find isolation. Forests are a place to turn off the daily grind and find yourself in the quiet with a camera. This is a big part of why I enjoy forest photography so much. Even a short walk from my backyard, I can feel as though I’m in the wild.

Many of us live within a short distance of a patch of woods. Find yours, explore it. Take the time to find those photographic compositions and then share what you make. I look forward to seeing your forest images!

-----------------------------------------------------------------------------------------------

Free Photography Ebook


Six Tips for Getting the Camera Focus in the Right Place at the Right Time – Free Quick Guide


There are numerous articles on the topic of producing sharp pictures.

You’ll often see advice on how to hold the camera or what your shutter speed should be for a given lens.

However, we noticed that there is one aspect of image sharpness and focusing that is rarely discussed, and that is the theme of this free guide.

The autofocus systems on your camera are highly technical. If you don’t tell your camera how and where to focus, and at what point in time that the camera focus should be achieved… well, then your camera will decide for you.

That’s not practical or advisable to achieve success with your photography.

In this eBook, Jenn Mishra gives you six precious tips on how to get your camera focused, where you want it, and at what point you want it.

“Auto focus is amazing on today’s cameras. Point your camera in a general direction, press the shutter halfway down, and the camera does all the work. But the camera does not always know what you want in focus. You may be looking at a flower in the foreground, but your camera focuses on a tree further away. When you use the autofocus mode, your camera is guessing at what you want in focus. It might be a good guess most of the time, but it is still a guess. Your camera does not know what you are looking at and what you want to be sharp.” – Jenn Mishra.