Thursday, February 3, 2022

A Complete Guide to Shooting Night Landscape Photography

Tags: Shutterbug, Photography for Beginners, Newbie Photographers

Astrophotography vs. Night Landscape Photography

When I talk about ‘night landscape photography’, I mean shooting the starry sky with nighttime scenery. I do not mean astrophotography.

Astrophotography has its own set of challenges. But I still consider it much easier than shooting night landscape photography for one simple reason. Exposure time is not an issue.

What makes night photography so challenging is the nighttime landscape. Following the stars blurs the landscapes. Following the nighttime landscapes will blur the stars. To record stars as fixed points rather than trails, you are forced to use a short exposure time.
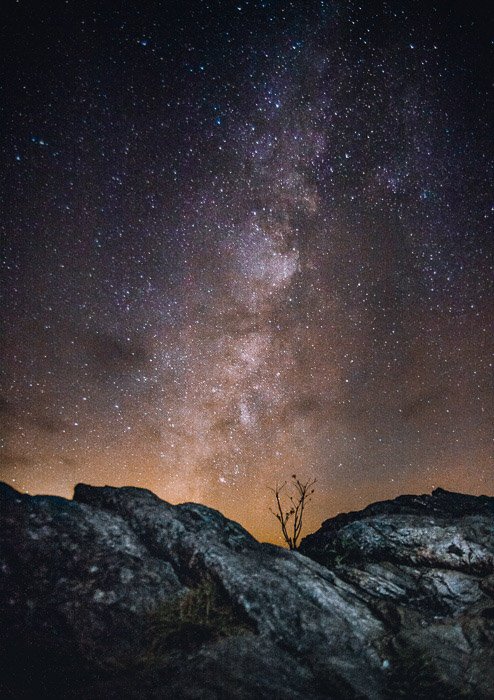
A stunning star filled sky over a rocky landscape

How to Escape Light Pollution

It’s becoming more and more difficult to find a really dark sky. In Europe, at least. This is due to increased light pollution. It comes from street lamps almost everywhere across the continent.

The best thing you can do is to travel as far as possible from large cities and towns. Look for the dark countryside. To get an idea of the light-pollution in the world, visit the Light-Pollution Map website. There you can also see how light- pollution has changed over the last 5 years.

I live in Belgium, under one of the most polluted skies in Europe (do I dare to say in the world?). Even when I travel far away from the major cities, the darkest sky I can achieve will score a 5 or 9 in the Bortle scale. Still, as we will see, there is hope. You can capture satisfying night landscapes, even in light-polluted locations.
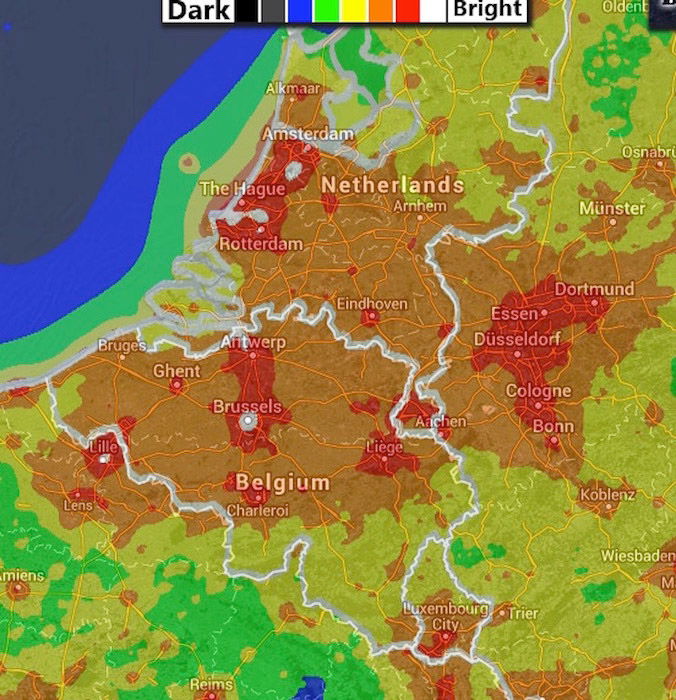
A light-pollution map for Belgium: brighter areas are in red while the darker ones are in black
Light pollution map for Belgium: brighter areas are in red while the darker ones are in black. 
As you can see, the Belgian sky is, on average, a very bright one.

What’s the Best Location for Nighttime Landscape Photos?

Unfortunately, the Universe is quite indifferent to your photography needs. Which stars and how much of the Milky Way you can see depends on the period of the year. And on your coordinates on Earth.

In the Northern hemisphere, the galaxy core is visible in the night sky from April until late September. How much of it you can see, as well as its height above the horizon, will depend on your latitude. The closer you are to the Equator, the better.

Moving north, the core becomes lower and lower in the sky. Until it reaches a point just above the horizon where the orange glow from light pollution is at its max.
During winter, the nights are longer. The core appears below the horizon, visible from the Southern hemisphere only.

Anyway, there are plenty of websites and mobile apps that calculate the location of the core. They will let you know in advance if, when, and how much of the core you will see from a given location.

You should also focus some of your attention on the nighttime landscapes. Having a good location isn’t only about the stars, but also the nighttime scenery you will include.

Gear and Camera Settings for Shooting a Perfect Night Landscape

Ideally, you’re growing your own money tree in your garden. And then you could buy the latest medium format digital camera with a giga-pixel sensor. No visible digital noise. Even when using ISO one-gazillion. And some ultrafast and amazing lenses.

Alright, enough dreaming. If you are on a budget like most of us, fear not. You will still get plenty of amazing shots of that majestic starry night. You just have to follow some simple rules.

Gear does contribute to amazing shots. It’s not all about it, but it has a role to play. The night landscape image is 50% planning/composition, 20% gear and 30% editing skills.

Here are the things you need to be able to wet your feet in night photography.
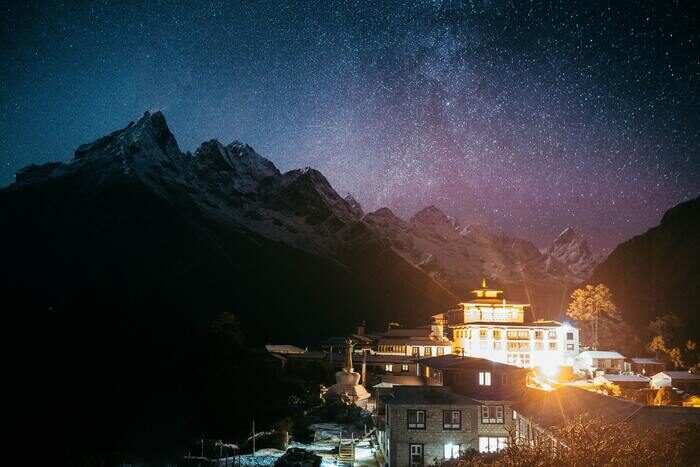
Photo of building under the night sky

Camera

Full frame cameras are the best here. This is because of the low noise at high ISO. But modern APS-C, four thirds or micro four-thirds cameras work too.

Let’s be honest here: you can take amazing shots even with one of the latest high-end compact cameras. Make sure it’s sporting a wide, fast lens and 1” sensor.

Examples include the Sony CyberShot RX100 I, II, III or IV, and Canon PowerShot G7X. Or larger, such as the Panasonic LX 100.

There is much more than “pixel” quality when it comes to making a photo a good photo. More important than the sensor size are:

  • The possibility to shoot in RAW;
  • An in-camera long exposures noise reduction and good performances at moderate ISO;
  • Remote trigger for the shutter and an intervalometer;
  • Bulb mode;
  • Decent battery life (or allow for the use of a battery grip).

For compact cameras, you need a wide and fast lens as well as manual focus it. Some form of focus peeking or Live View magnification is a nice feature. It will help you to focus properly on the stars.

Lenses

The most important feature for a good lens is speed. This means an aperture in the f/1.4 to f/3.5 range. It should allow you to focus in manual mode. And it should have good optical performances such as sharpness, vignetting, chroma and astigmatism when used wide open.

As for the choice of the focal length, for night landscape photography, the wider, the better. I would not go higher than 50mm on a full-frame camera. The possibility to mount filters is a plus.

As far as I know, you can’t use any fisheye lenses with a filter. But some wide angles for micro 4/3 cameras have threads to screw one on.

Tripod

Let’s be clear here. You cannot shoot a night landscape without a tripod. You will need a sturdy one to avoid camera movement/shake.

A good choice is one that allows you to shoot from down low to up above your head. This will give you max flexibility when composing your shot.

A loop or hook from which to attach a weight can be beneficial. This will help to stabilise the tripod in windy conditions. These are common in coastal and mountainous locations.

Other materials:

  • Spare batteries;
  • Spare memory cards;
  • Remote triggers;
  • Headlamps (with a red light to keep your eyes in “dark mode”).

Filters

Yes, filters. This is an important lesson on how to shoot at night, getting the image you want.

These are by no means a substitute for a dark sky. But filters can help to fight back the evil orange glow present due to light pollution.

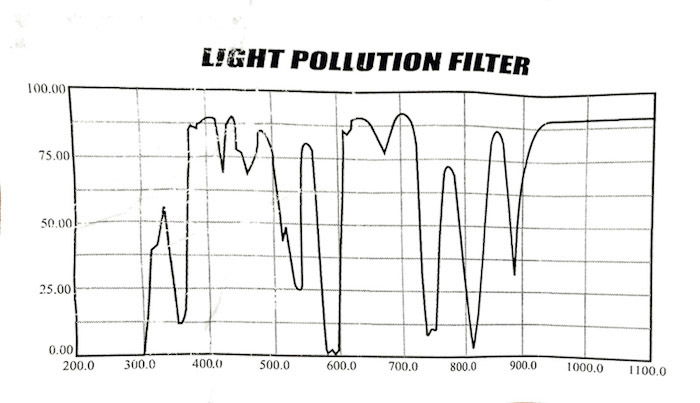
Here is the transmission spectrum for my Skywatcher LPR (Light Pollution Reduction) filter. See where the line drops? The filter will absorb light with that wavelength, and it will not reach the sensor.
A chart showing absorption spectrum for the Skywatcher LPR filter.
Absorption spectrum for the Skywatcher LPR filter.

In short, the filter will reduce/remove lights of specific wavelengths from the light hitting the sensor. You can’t create this in editing software. These filters are worth investing in if you live in a light-polluted area.

All filters will reduce your exposure by 1 stop. A good LPR filter will reduce the pollution from Sodium lamps of about 4EV and Mercury lamps 2EV.
This allows for longer exposures (or increased ISO). But you won’t burn the highlights or the sky above the horizon in your night photography.

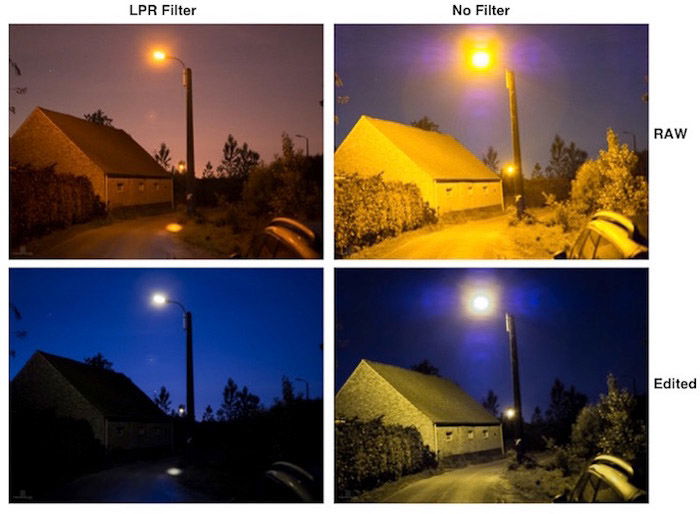
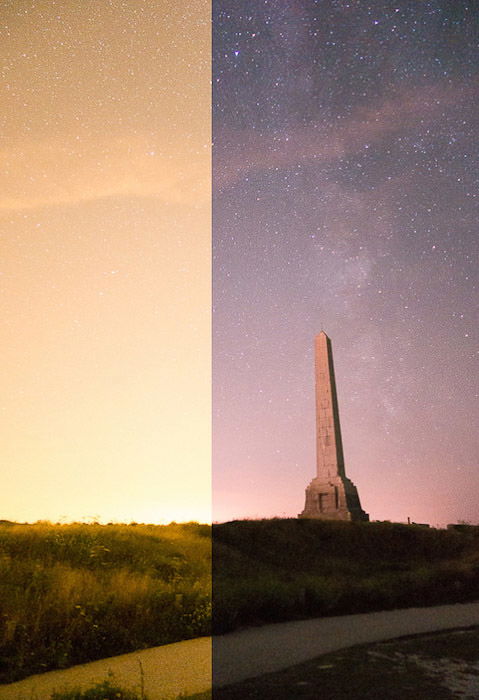
The images below show two examples. The images are straight-out-of-camera with and without the Skywatcher LPR filters.
A four photo grid showing the effects of the LPR filter on Belgian streetlights at night
This image shows the effects of the LPR filter on Belgian streetlights.
A split photo showing the effect of the LPR filter in a rural area (Cap-Blanc-Nez, France) on unedited images. Sony RX100Mk2 + LPR filter.
The effect of the LPR filter in a rural area (Cap-Blanc-Nez, France) on unedited images. Sony RX100Mk2 + LPR filter.

LPR filters, being broadband filters, are not able to reduce moonlight. To achieve this, a better choice would be an H-alpha filter or another narrowband filter.

These are interference filters, like the polariser. This is one negative aspect. They will produce nasty colour banding in the photo when mounted on ultra-wide angles. This is because of how they affect light entering from different angles.

One way to avoid this is, if you have a Canon DSLR, is to use the clip-in CLS filter from Astronomik. The filter will sit between the mirror and the back of the lens, so the light hits it at the same angle. Also, you can’t use this filter with EF-S lenses.

My Gear

To give you an idea of my equipment at the moment, I am using the following gear:

Simple Night Sky Photography Rules to Remember

There are a few simple empirical rules to learn so you can handle the night sky. As I mentioned above, stars move across the sky at about 15 degrees/hour.

If you are not interested in recording star trails, your exposure time should be quite short. But how short should it be exactly?

A simple way to estimate what the exposure time (ET) should be is to solve the following equation:

ET = N / ( CF * FL )

N (the detail in which your image will be displayed) can be 400, 500 or 600. CF is the crop factor for your camera. And FL the focal length of your lens. The choice of N depends on what you want to do with your photo:

For a website, go with N=600. You will get short trails with the stars appearing as dots in a small image with a low resolution. Do you want to print your photo in large format? Go with N=400, and you will have pretty much no trails at all.

I tend to use N=500 as I find it to be a good compromise. For example, for my Olympus EM-10, CF=2, I have the following max ETs for the following lenses:
1) Samyang 7.5 f/3.5, ET = 500 / ( 2 * 7.5 ) ~ 33 sec.
2) Samyang 12 f/2, ET= 500 / ( 2 * 12 ) ~ 21 sec.

If I were to use my old Zuiko 50mm f/1.4, my ET time would be just 5 seconds. This is why telephoto lenses are less useful than wider ones.

Once you know your ET (exposure time), work with the ISO to expose your photo. Keep an eye on the histogram.

A good starting point is given by using an ISO value calculated with the following equation:

ISO = (6000 * f ^2) / ET

Here, f^2 is the f-number (aperture value) elevated to the power of two.

Let’s take my Samyang 12mm f/2.0 on my Olympus OM-D (CF=2). With an ET of 21 seconds, a good value for the ISO should be ISO = 6000 * (2^2) / 21 = 1142, rounded up to ISO 1150.

If, say, the aperture was set to f/4.0 instead of f/2.0, the ISO would need to be: ( 6000 * (4.0 ^ 2) / 21, OR ( 6000 * 16 ) / 21 = 4571.
With digital sensors, it is better to expose to the right (ETTR) of an image. Overexpose it a bit to register the max amount of data possible in the camera. Then correct the exposure in post. This way, you don’t lose out on detail.

Another welcome effect of the ETTR method is that there will be less digital noise due to the high ISO settings. Underexposing overexposed photos results in considerably less noise in the final image. Don’t increase the exposure of an underexposed one.

Don’t be afraid to use high ISO settings (3200 and above) if that’s what you need to bring the shot back home. There are methods for dramatically reducing digital noise in post.
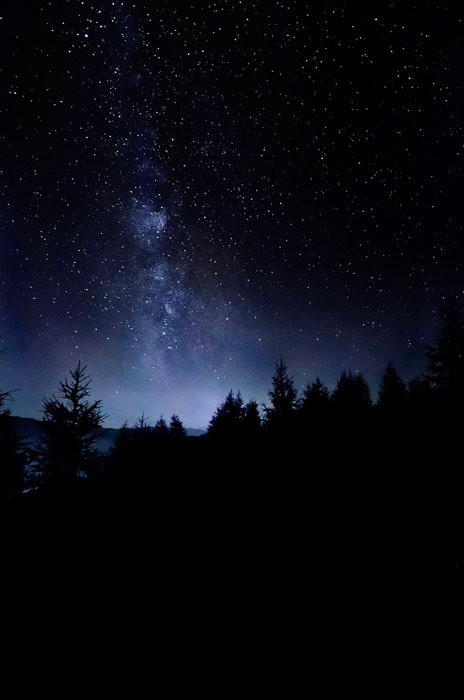
Atmospheric shot of a star filled sky over a forest at night

How to Get The Best Night Landscape Shot

What to Do Before Heading Out

1. Make a checklist: you don’t want to arrive at the location and discover you are without batteries or memory cards.

2. Find the location: if you have no idea where to go, start looking at one of the light-pollution maps available online. Find a dark enough region. Use social networks such as G+ or photo-sharing websites like Flickr and 500px. You can see if there are any worthy night landscapes within your chosen dark region.

Use Google Maps. Move around and zoom in/out to see if anything catches your attention. Once you have a location, get informed about it:
Is the sky dark enough? Are there major cities visible or nearby?
Will the Milky Way and the galaxy core be visible from that location and at what time?
In which phase will the Moon be? Will the Moon be high up in the sky and, horror, in front of the Milky Way? What will the weather be like?

You can answer all these questions from the comfort of your couch, long before you head out. Use apps and software such as Dark Sky, Stellarium, Skywalk, PhotoPills, PlanIt! for photographers and TPE (The Photographer’s Ephemeris).

Look up the latest weather report, the forecast and a moon calendar on the internet. Most software and apps cannot show you the real horizon. Be careful when determining whether the galaxy core will be visible.

3. Know your lens’ field of view: this is important if you plan to shoot for a panorama stitching. It enables you to rotate the camera at night, relying on the graduated scale on the head of your tripod.

4. Know where the infinite for your lens is: in broad daylight, manually focus your lenses to the infinite. Mark the position on the lens barrel. More often than not, the factory mark for the infinity is off. Doing this during the day avoids wasting time struggling to do so in your dark location.

5. Clean your lenses: another job that is better to get done in daylight and at home.

6. Arrive early at your destination: so to be able to explore the location in daylight. Look for possible compositions to create great daytime landscapes. Use the night augmented reality in apps like PhotoPills. You can preview how the sky will appear for the chosen night landscape composition.

Composing the Shot

It’s just like daylight landscapes. You can follow or break the same composition rules. The only challenge you have here is lighting the landscape in front of you with limited focal lengths. Long telephotos will reduce your exposure time, as discussed above.

Framing an interesting composition with the Milky Way (or the Polar Star) is not hard. It’s like including the Sun at a particular point in the sky in a daylight landscape.
All you have to do is wait for the right period of the year and time of day.

If you are composing your image with star trails in mind, here’s a good rule of thumb. Try to have Polaris (northern hemisphere) or Sigma Octantis (southern hemisphere) in the frame.

Trails will appear as concentric circles, centred on these stars. Star trails will look different depending on what direction you’re pointing your camera in.

You may want to experiment a bit to work out which kind of trails will best suit your composition. Another thing to consider when composing your shot is the following

A magnificent sky with a pitch-black landscape as a foreground tends not to work. Unless you are aiming for a silhouette against the sky.
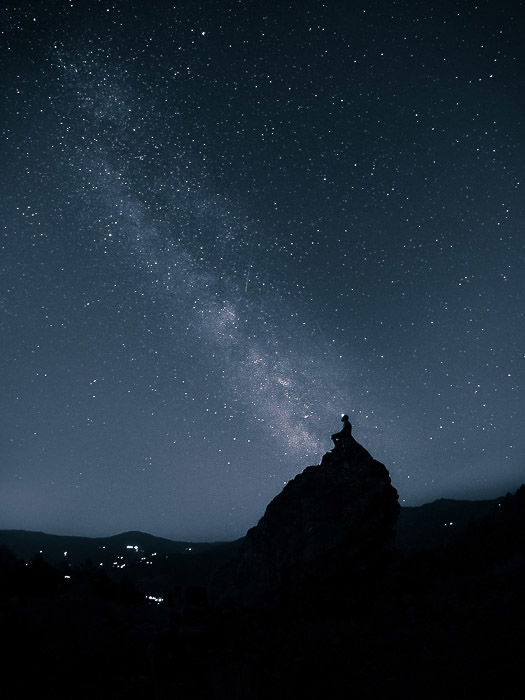
A person sitting on a rock in silhouette against the sky (nearby Bobbio, Italy)
Me, sitting on a rock in silhouette against the sky (nearby Bobbio, Italy). Olympus OM-D EM-10.

You’ll want to avoid a pitch black or dark and very noisy foreground. Try to shoot when you have a low to moderately bright moon above the horizon. It should be low in the sky and behind you. This lights the foreground and the scene in front of you.

Or you may want to consider bringing some lamps or flashguns with you. This allows for light painting, making the foreground and/or interesting objects visible.

One way to frame more interesting landscapes is to exploit objects in the foreground. Those can fill the frame, adding interest. Try using isolated trees, mountain peaks, vehicles, buildings, roads or rocky formations.
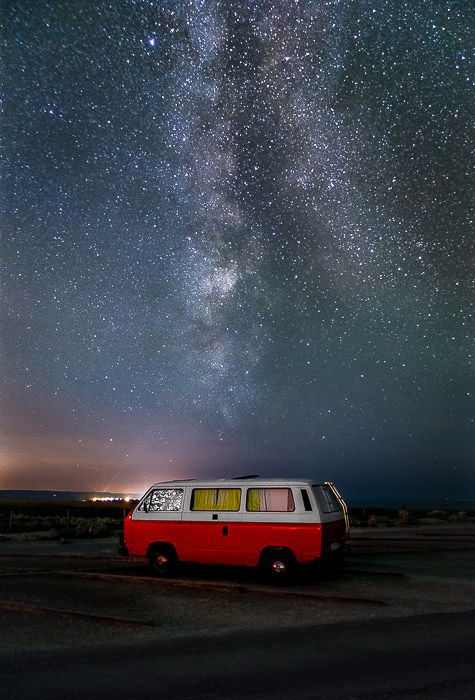
A red van parked right in front the Milky Way in Cap-Blanc-Nez (France)
A lucky shot thanks to this van parked right in front of the Milky Way in Cap-Blanc-Nez (France). Sony RX100Mk2 + LPR filter.
The lighthouse in Bresken (the Netherland) against the winter sky.
The lighthouse in Bresken (Netherlands) against the winter sky. Olympus OM-D EM-10.

Or introduce some objects in the frame. This will stage a more eye-catching landscape at night. Consider placing tents lit from the inside, or include a person in the frame.

Either as a silhouette or them holding lights/lasers pointed at the sky. You can also light a campfire or create light trails by driving a car into the scene.
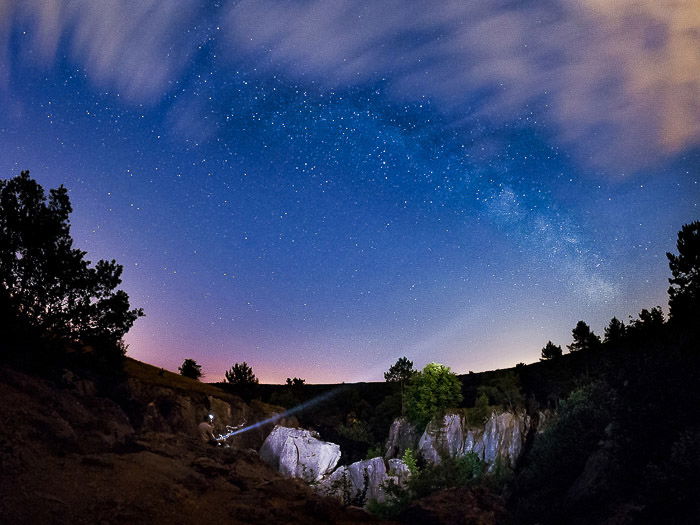
A night view over the Giant’s Tomb (Belgium).
View over the Giant’s Tomb (Belgium). The Moon in its late quarter, low on the sky on my right,
 helped to lit the foreground and the fog rising from the river. Olympus OM-D EM-10, Panorama 
of 12 photos (focal length 24mm on a full-frame DSLR) in a 4×3 grid.

Sometimes, you can improve an image by intentionally allowing some movement in the sky against a fixed landmark.

I was in Cap-Blanc-Nez (France) at a time when the Milky Way was behind the obelisk. I shot ten photos of the same scene in order to do some MFNR for my final image. As I said, since I had a fixed landscape, MFNR required me to create two stacks and process them individually. This was to account for both the landscape at night and the sky.

I always start by applying MFNR to the landscape. The Milky Way and the stars showed some degree of motion blur. In the end, I decided that the image with the blurred, yet recognisable Milky Way was a lot more powerful than the image without a blurred sky.
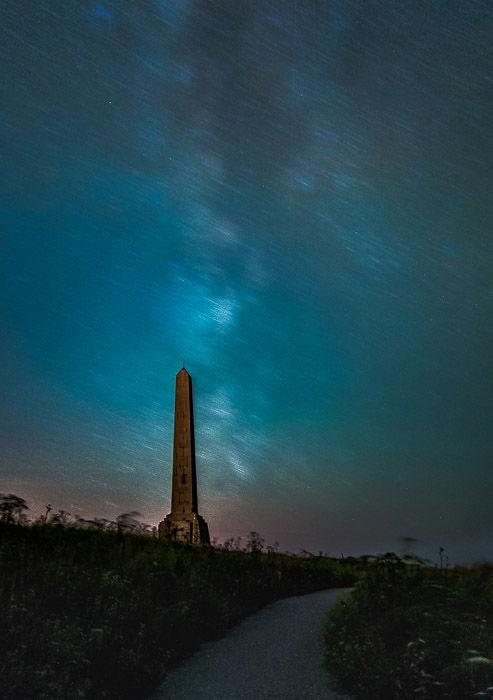
Atmospheric night view of the Obelisk in Cap-Blanc-Nez (France).
The Obelisk in Cap-Blanc-Nez (France). Sony RX100Mk2 + LPR filter.

How to Shoot Different Types of Nighttime Landscapes

Before you begin, lower the LCD brightness to the minimum. This gives you a better idea of the brightness of your image and stops you being blinded five minutes every time you look at the screen!

Take a test shot to verify that you are using the correct camera settings for stars, that the focus is on the stars and that the composition works. Next, decide whether you want to obtain star trails or star dots (and the Milky Way).

Star Trails

If you are shooting star trails, take a new test shot, this time several minutes long. Your image will be horribly noisy and probably overexposed. But this gives you an indication of what the trails will look like in your final image. It also shows you whether the Polaris (the South Star) is in the frame or not.

Next, make sure that you have turned off any long exposures noise reduction. Your battery must be fully charged and your memory card empty with enough space to record plenty of images.

If only it were true that you could record star trails by shooting a single photo with night-long exposure time. Only using film can do this in reality.

In practice, leaving your digital sensor on record for a very long period of time results in it heating up. This causes purple hot pixels and luminance noise which cripple your image quality.

You are better off using an intervalometer, and taking a huge number of relatively short exposures, say 30 seconds to 1 minute. Then you can stack them together in post-production to give you your trails. You may want to allow a few seconds between each shot to give the sensor time to cool down.

At the end of the sequence, put your lens cap on and take a photo. This is called a “dark frame”, which you can subtract from your stacking to help suppress hot pixels in your final image.

For decent trails, you will need to record the sky for at least 30 minutes. The longer you record for, the longer and more defined your trails will be. So you may wish to increase this time.

To avoid draining your battery too quickly, if you do not have a DSLR with an optical viewfinder, turn off the LCD screen in favour of the smaller electronic viewfinder if possible.
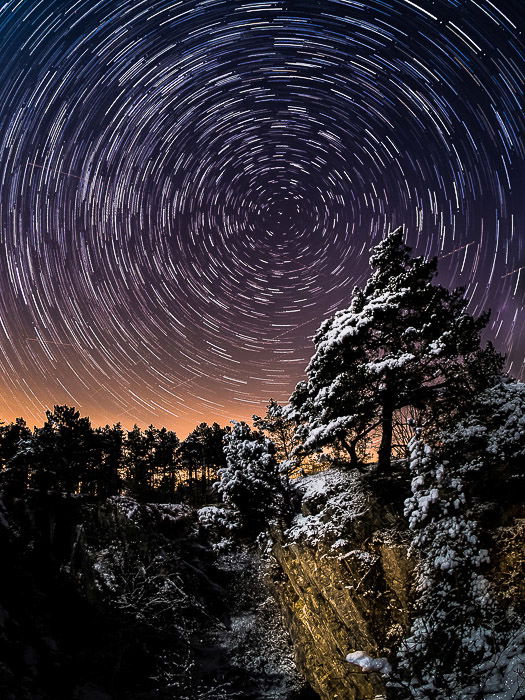
Pine tree in Fondry des Chiens (Belgium). Star trails are obtained by star photography settings of stacking 60 images, each 30 seconds long. 
Pine tree in Fondry des Chiens (Belgium). Star trails are obtained stacking 60 images, each 30 seconds long. Olympus OM-D EM-10.

The beauty of star trails is that you can almost always record them, even in less than ideal conditions. So long as you can see some stars up there, you’ll get stars trails, even above a luminous cityscape.

A word of caution. The bright cityscape, if not darkened by the use of neutral density graduated filters, will force you to use an exposures time of just a few seconds at best. You will have to record (and then process) hundreds of images before you get some good trails.

Finally, I may be wrong but, as far as I know, this is the only kind of night landscape you can achieve when shooting film.
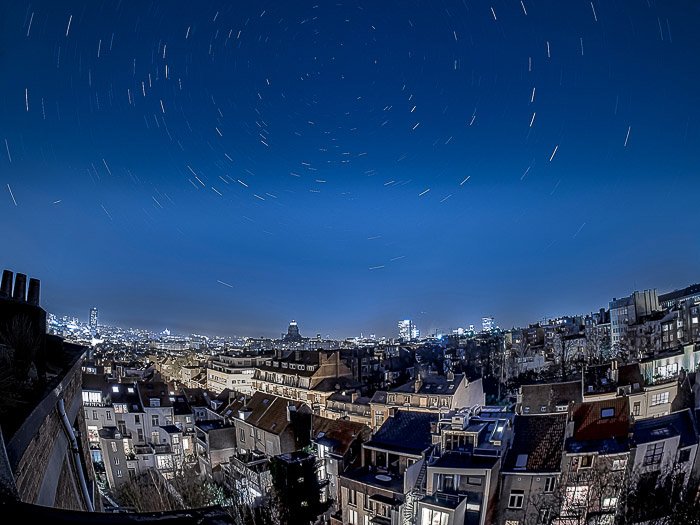
A stunning shot of the night sky over a cityscape

Point Stars and the Milky Way

If your aim is to avoid star trails, you need to determine your maximum exposure time. Use the 600, 500 or 400 rule I introduced above. Adjust your ISO to expose to the right of your image.

Be careful to avoid blowing out the highlights and the horizon (usually the brighter part of the sky on a moonless night).
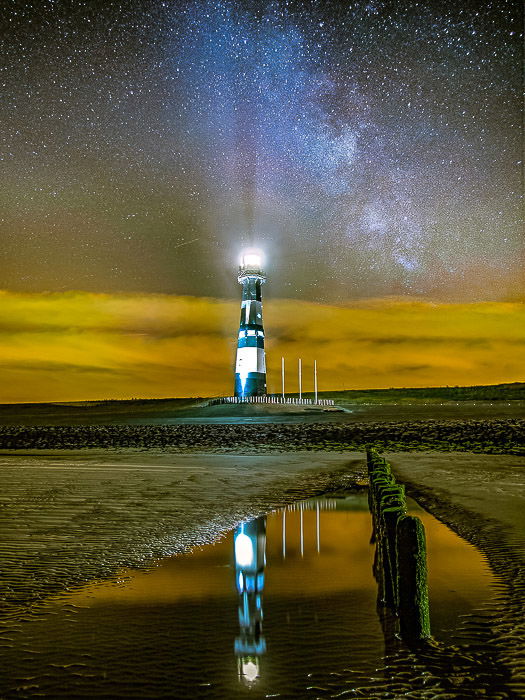
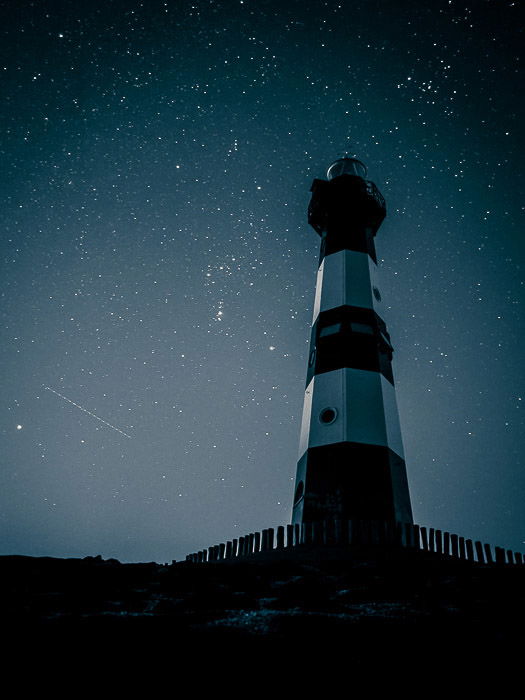
A night shot of the lighthouse in Breskens (The Netherland)
The lighthouse in Breskens (The Netherland). Olympus OM-D EM-10.

This may result in having to increase your ISO above a value you are comfortable with. If you’re concerned that, in doing this, you are going to ruin the image, think again.

You will more likely ruin it by keeping your ISO too low. This will underexpose your image.

Here are a few techniques you can use to deal with digital noise:
1. Turn on the in-camera long exposure noise reduction.
2. Use denoise algorithms available in all the major editing software and third-party plugins for Photoshop and Lightroom such as Noise Ninja or Topaz Denoise.
3. Shooting more photos and apply a Multi-Frame Noise Reduction (MFNR) technique.

Number 3 is my personal favourite of the three. In a minute, I will explain how MFNR works and why you should give it a try.

Shooting Night Landscape Panoramas

There are many reasons why you may want to shoot a panorama. The most obvious being to capture a scene that you cannot fit into a single shot. You may want to take the kind of “panorama” that you could get with a wider lens because your wider lens doesn’t allow you to mount an LPR filter.

Finally, you may intend to print the image in a very large format; panoramas can have a resolution of many tens to a few hundred megapixels.

I mainly use panorama because, until now, I could only use my small 48mm LPR filter on the Sony RX100 Mk2.

For shooting panoramas, it is best to allow a superposition of 30-40% between shots. You’ll do best to know the angular field of view of your lens and rotate the camera by half of this value.

Here is the link to a handy online Angle of View calculator http://www.radical.org/aov/.

Since one tends to shoot panoramas with the camera mounted in portrait orientation, you will have to consider the vertical angle of view. For example, for my Samyang 12mm on the Olympus EM-10, the vertical angle of view is 58.72 degrees. This means I can rotate the camera by 30 degrees at a time. I can do this quickly and easily using the graduated scales on the tripod head (if you have them).

One of the best tips for shooting night landscape photography is as follows. Whether you are shooting star trails, the Milky Way or a night landscape panorama, you want to shoot multiple sets of images. One with the correct exposure for the sky and one to properly expose the foreground, for example. This allows you to get the best exposure across your final image through bracketing.
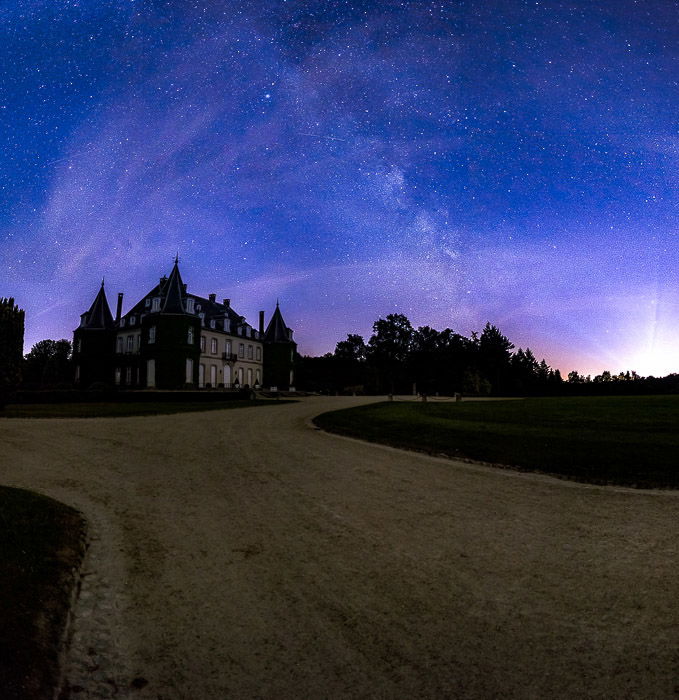
A night photo of the Chateau de la Hulpe, few miles from Brussels (Belgium)
The Chateau de la Hulpe, few miles from Brussels (Belgium). This is a night landscape 
panorama of 12 photos (focal length 28mm equivalent on full-frame) arranged in a 4×3 
grid. The final image has a resolution of about 80 megapixels. Sony RX100Mk2 + LPR filter.

A Few Tips for Editing Your Night Landscape

After having photographed your night landscape in RAW format, you need to edit it.

I usually choose the white balance that best suits the image first. Then I fix the image exposure by adjusting the black and white point. And then I alter the highlights and shadows. Following this, I will make other minor adjustments such as amending the contrast and so on. Nothing fancy.

Don’t be afraid to sharpen and micro-contrast (clarity) your sky. This makes the milky way and stars pop out BUT … be careful not to overcook it.

If the Milky Way you have captured isn’t as detailed and saturated as the one you saw online, deal with it, suck it up and keep it real.

Sometimes you just have to accept that your location on the good Earth has not allowed you to get those incredible images of the colourful core of the Milky Way. And, no, the Universe is not conspiring against you… it is simply indifferent to your needs and wishes.

A big “don’t” is to assess the quality of your photos solely on the basis of pixel peeping. You already know that the sky will be super noisy when you blow your image up to full size. Do it to look at the improvements gained by applying the Multi-Frame Noise Reduction technique to reduce digital noise in your shots.

Multi-Frame Noise Reduction

MFNR is a great technique to both clean photos of random digital noise and to increase the details. The technique consists of shooting multiple shots of the same scene. Then you average them to smooth out the random digital noise, whilst enhancing details.

In practice, MFNR will improve the signal-to-noise ratio. If nothing moves, MFNR is straightforward. Simply stack the images as individual layers in Photoshop and blend them using either the “mean” or “median” mode.

The median mode is a bit better at reducing ghost. The improvement in photo quality is dramatic, as you can see in the comparison below.

Here, I took 8 shots indoors on my Sony RX100 Mk2, f/2.0 1/30 ISO 12800. The photo is in 100%crop. The top half shows the image without any noise reduction, while the bottom half shows the final result after using all 8 shots to perform MFNR. I guess results speak for themselves.
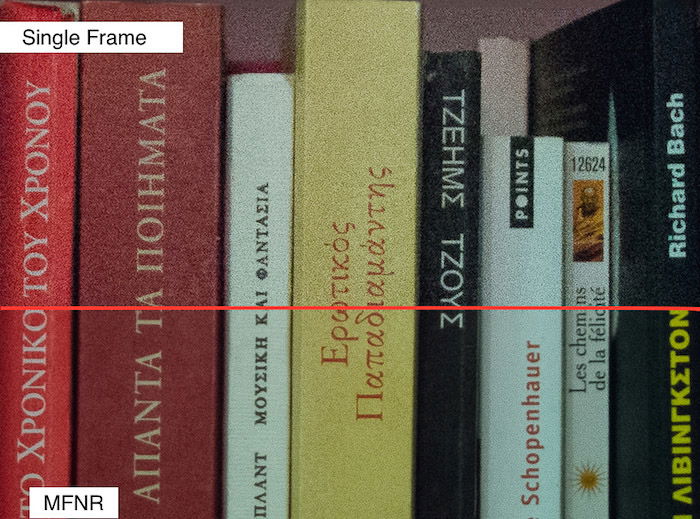
Comparison between a shot before and after doing MNFR.
Comparison between a shot before and after doing MNFR. Sony RX100Mk2 ISO 12800.

Things get a bit more complicated when dealing with objects that move in or out of the frame between the shots e.g. stars. Recently, I shot a starfield with my Olympus using the old legacy lens Zuiko 50mm f/1.4 (100mm equivalent on a full-frame).

I took 32 photos (exposure time 5 seconds, f/2, ISO 12800) with the camera mounted on a fixed tripod, aimed roughly in the direction of the Milky Way above my head.

Obviously, in the almost 3 minutes I needed to record the 32 images, the stars had moved quite a lot; simply stacking and averaging these shots will result in a blurred image, as demonstrated below.
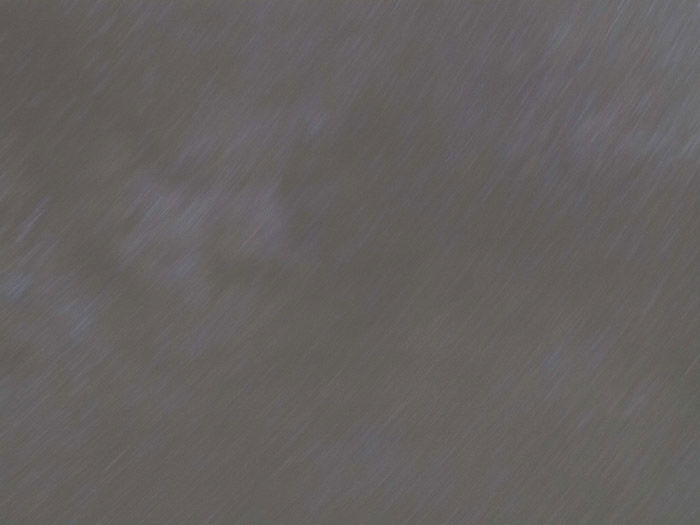
Stack of 32 non-aligned images of the same star field: this is how much stars move in less than 3 minutes.
Stack of 32 non-aligned images of the same star field: this is how much stars move in less 
than 3 minutes.

The trick is to align the stars between shots before stacking and averaging them. This can be a tedious task to perform by hand, in particular with many frames.

Fortunately, if you have Photoshop CC, you can use the auto-align function to align all frames by their content.

If your image contains enough contrast and useful details, the auto-align works beautifully. You can get a very clean image out of many high ISO shots.

See the image below for a comparison between 100% crops of a single shot, left, versus the final image after MNFR, right.
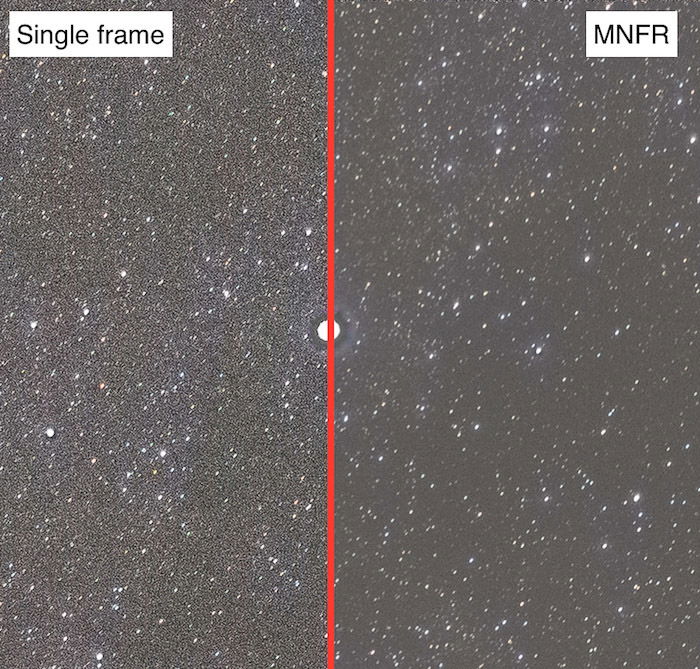
Comparison of the effect of doing MFNR on a Star field after auto-aligning the 32 frames.
The effect of doing MFNR on a Starfield after auto-aligning the 32 frames. Olympus 
OM-D EM-10 12800 ISO.

When the landscape, which does not move across the frame, is visible, you have an extra step in the process.

Under these circumstances, you will have to do two stacks: one for the sky, one for the foreground. Blend the two stacked and averaged images together. There are great in-depth tutorials online for this.

Edit your night sky photos with an open mind. Sometimes you’ll find that during editing, you come across something fantastic that you can do with your image that you never considered whilst on location. Don’t dismiss this just because it’s not what you were originally going for.

I recently went to Cap-Gris-Nez in France. I planned on capturing the lighthouse with the Milky Way next to it. Because the lighthouse was on with the lamp revolving, I wanted to capture the light beams passing out of the lighthouse.

I snapped some images of the sky, some of the foreground (for HDR) and of the lighthouse. Then I followed with a series of photos with very short exposure times to freeze the light in distinct beams coming out the lighthouse.

Once at home, I started processing this huge volume of photos. And then an extremely underexposed image I took for the HDR of the landscape at night came to my attention.

I could have easily turned it into a very moody, low key portrait of the lighthouse. As I edited it with this new idea in mind, it became clear that this was how I wanted to portray the location.
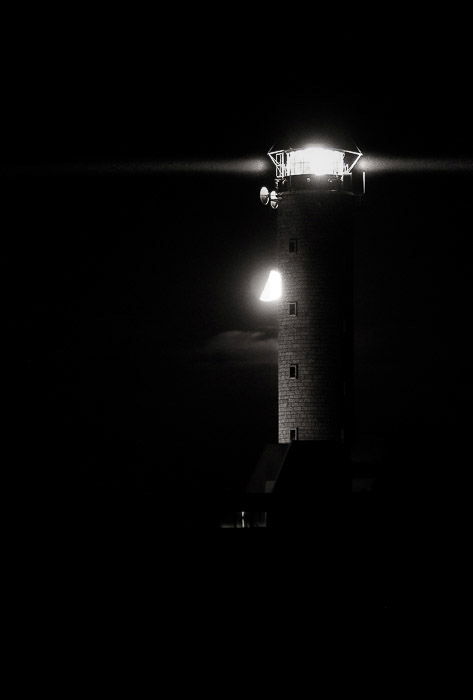
Atmospheric shot of the lighthouse in Cap-Gris-Nez (France) at night.
The lighthouse in Cap-Gris-Nez (France). Olympus OM-D EM-10.

I hope you enjoyed this article. Go out and capture the beauty of that starry night above your head!
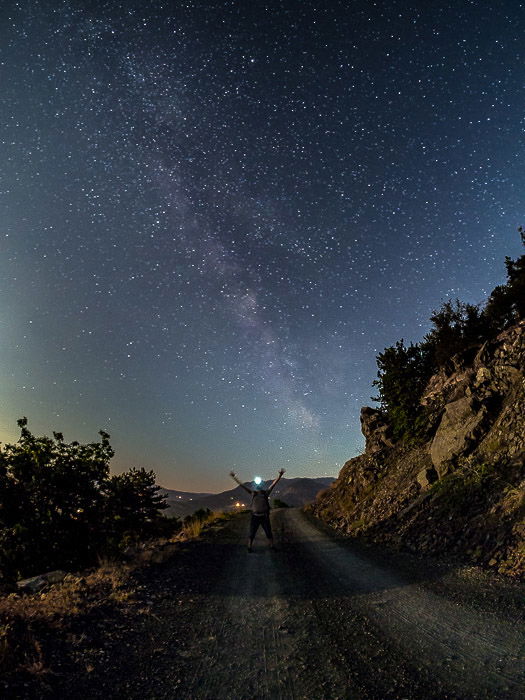
A man with outstretched arms under the Milky Way (Bobbio, Italy)
Me and the Milky Way (Bobbio, Italy) 


------------------------------------------------------------------------------------------
Free Photography Ebook
 

Five Tips for Low Light Photography – Free Quick Guide


Low light is the bane of every photographer. It wreaks havoc on quality, and working with it places additional demands on both the photographer and the camera.

What do we mean when we talk about low light?

And how do you take great photographs when there isn’t much light available?

This guide will look at these questions and more, as Jo Plumridge gives you her top five tips for low light photography.

People often shy away from taking photos in low light, mistaking it for simply ‘bad’ light.

And yes, shooting in low light is technically and compositionally challenging. Still, it’s possible to produce visually stunning images with a bit of know-how.

Here’s what we’ll cover:

  • Types of low light
  • What gear do you need to successfully photograph in low light conditions?
  • 5 tips for creating outstanding low-light photography!
If you’ve ever had an image ruined due to low lighting, you really need to read this informative guide!

Grab your copy now.

Photo Credit: Amir Doreh


Monday, January 31, 2022

Congratulations Qiana Fields! qiana fields

You're our chosen "blog follower" for the month of January.  We hope you'll enjoy spending that "Benjamin".

FREE $100

depositphotos_54556961-stock-photo-stack-of-money-dollars - International  Products Corporation

I'd like to GIVE you one of these!

 Tell your friends about following this blog, which automatically registers them for our February 28th pick.  If they have any questions, just have them type this link into their web browser "www.bit.ly/3IHdDOr"  and click ENTER.  

How to Choose Horizon Placement in Composition

Tags: Shutterbug, Photography for Beginners, Newbie Photographer

Why Horizons

When a frame is divided by a single, dominant line, more often than not this is due to a Horizon. They’re fairly common in outdoor photography, particularly landscapes.
If the photo is of nothing particularly interesting, this line can become the dominant part of the photo for the way it separates the frame.

Where to Place the Horizon and Why?

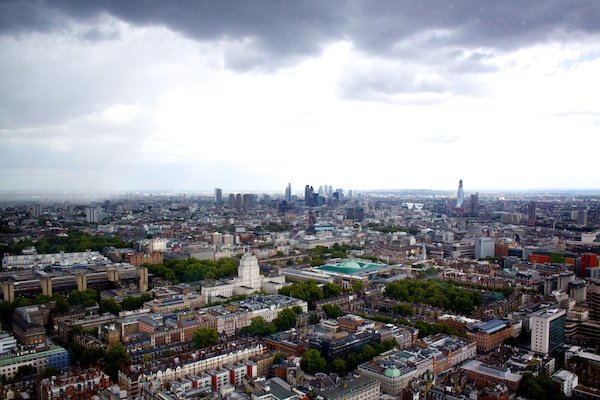
Firstly, I think it’s important to realise where you don’t want to place the line, and that’s directly in the middle of the frame. That’s not to say that you shouldn’t ever it, this just has a tendency to divide the photo in half, creating an uneven photo.
The contrast between the two halves makes it look more like two separate photos.
Exactly where you place the horizon is completely up to you but it helps to remember that, if a feature of a photo does nothing to improve it, it has no place in the photo to begin with.
Here’s a photo where the horizon has divided the frame in two. Notice that it doesn’t really favour either half.A cityscape to show correct Horizon Placement
If you take the horizon and place it slightly lower in the frame, you regain a feeling of stability which balances out the photo better.
You also remove the feeling of division and the whole photo starts to come together as a single image made up of multiple elements, rather than just two photos stuck together.
Have a look at the photo below to see what I mean.
If you were to decide that the top half of the frame was much more interesting than the bottom, you may want to adjust your composition so that the horizon is a lot lower in the frame.
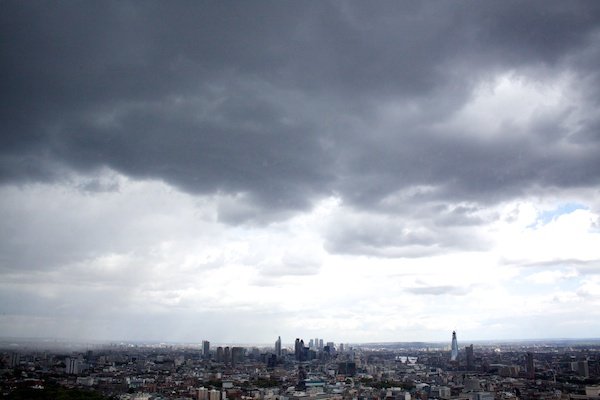
The photo below was taken from a tower in London on a rainy day with emphasis on the sky.
The cityscape adds an interesting texture to photo but holds much less visual weight. It serves to make the man made city look small in comparison to the powerful sky and weather.
This is one of the many interesting, extra feelings which can be evoked when you consider the importance of different aspects of a photo and adjust your composition accordingly.A cityscape to show an interesting Horizon Placement
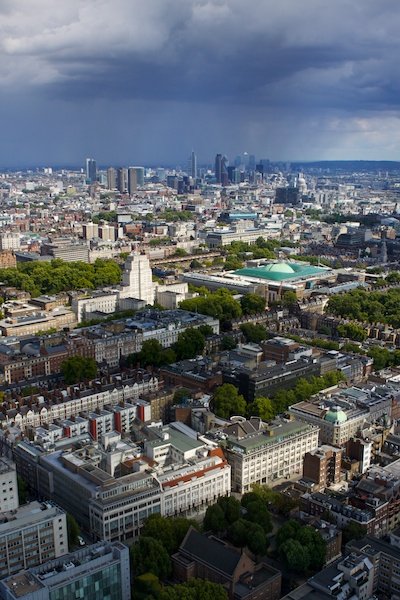
The photo below was taken directly after the photo above and focuses largely on the ground, rather than the sky.
This photo contrasts greatly with the one above because it doesn’t evoke the same feelings, instead focusing more on the colour and lines in the city.
Your eyes are naturally drawn up the photo from the colour of the trees and houses at the bottom of the frame to the sharp and jagged nature of the buildings by the sky at the top.
An equally interesting photo but for different reasons, all because of the decisions made over the placement of the horizon. Importantly though, you’ll see that both images are stronger than the original image which cut the photo in half.A cityscape to show an unusual Horizon Placement
If you want to include both the sky and the ground but don’t want to cut the photo in half, I recommend changing the orientation to portrait.
Again, you’ll probably want to avoid placing the horizon in the middle of the frame but the decision is up to you.
I personally feel that the composition in the photo below is stronger than any of the photos above as it includes the most interesting parts of each photo.
The weather had changed slightly between photos, meaning that there was less uninteresting sky in the photo. This certainly helped towards finding the perfect balance between sky and ground.
It’s all about thinking it through and experimenting with what works for you.A cityscape to show correct Horizon Placement in portrait

High Horizon

Now that we’ve covered why you want to include a high or a low horizon, let’s have a look at some examples.
The high horizon in this photo was an obvious choice as the sky was particularly plain and uninteresting on the evening that I took this photo.
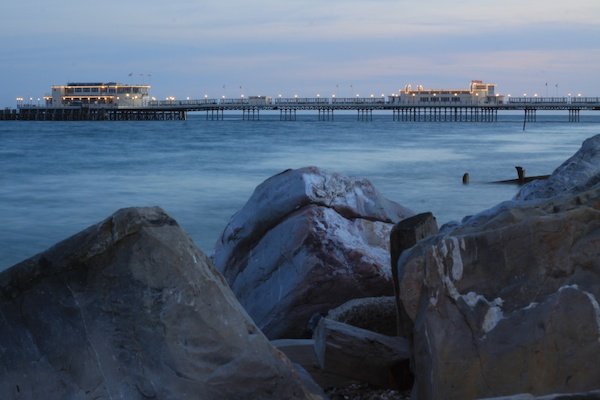
Realising this, I made a special effort to include the foreground a little bit more to strengthen my photo. I found these strong, jagged rocks which contrasted nicely with the sky while blending in with the colour of the photo.A beach scene to show correct Horizon Placement
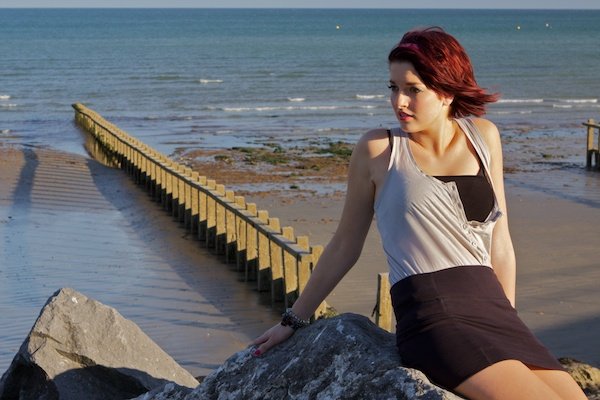
Below is an extreme example of a high horizon – I chose to include it because it focuses the interest onto the subject and foreground below.
It makes it look as though the visual weight of the subject forces the camera down, at the same time keeping the photo stable by remaining straight across the top of the frame. There’s a lot going on in the lower half of this photo and the inclusion of the sky would have distracted from this.A girl in a beach setting to show A cityscape to show Horizon Placement

Low Horizon

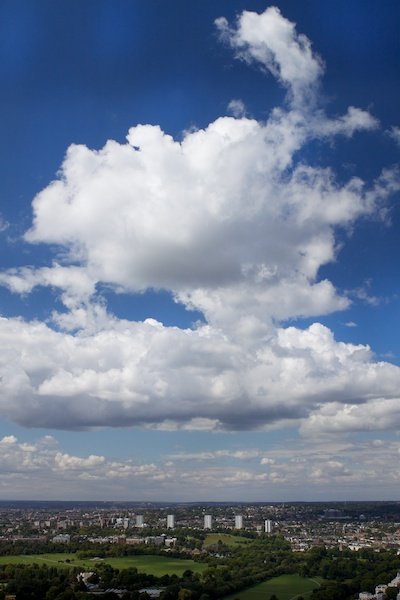
Photos of clouds from below can be pretty boring and rely heavily on being ‘pretty’ for attention. If you raise your angle, the clouds rely more on their shape and form to attract viewers.
Because I had a higher vantage point and the shape of the clouds was particularly interesting, I chose to include as much of them as possible, which meant using a lower horizon.
I included just enough of the ground to make the colour interesting and complimentary to the colour of the sky, while focusing most of the viewers attention towards the subject: the clouds.A portrait of Horizon Placement
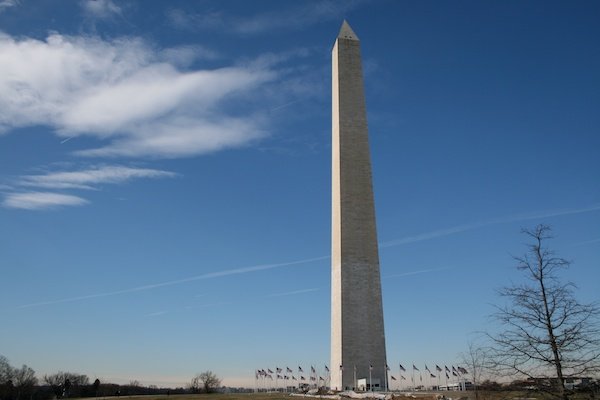
This is an example of a very low horizon. I chose to take the photo this way not because I wanted to emphasis to be on the rather uninteresting sky, but because I wanted to focus on the dominance of the building.
With the horizon that low, the feeling of balance is lost which draws your attention towards the bold building standing on top of it. By removing many other potential features from the frame, you focus the attention onto one specific point – the building.An image of an obelisk to show horizon placement

Do you want to compose stunning images, even in ordinary situations?

You don’t need an expensive camera or a beautiful location to do that… you need a broad range of composition knowledge.


--------------------------------------------------------------------------------------------

FREE Photography Ebook 

Composition and Subject Framing – Free Quick Guide


A frame is a potent and easy to use tool of composition.

In this guide, Tobie Schalkwyk will tell you all about frames, including what they are and how to use them.

Here is what he covers:

  • The purpose of using a frame within a photographic composition
  • The two main categories of a composition frame
  • The vignette and blur technique
  • Panning as a frame
  • Using a zoom burst as a frame
  • The camera rotation and flash burst technique
  • Finding natural frames
  • Contrast as a frame
  • Light and shadow as a frame
  • Posing as a frame

Photograph by Tobie Schalkwyk

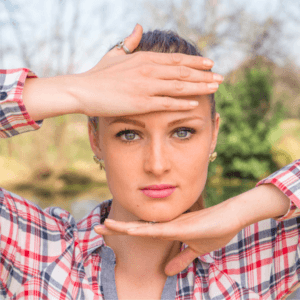
Where do your eyes go to when looking at this picture? The eyes move immediately toward her face, of course. The hands form a sturdy frame that pushes your eyes toward the model’s face!

What is the purpose of a frame, you ask?

  • To emphasize your subject (to place focus on it)
  • To draw attention toward your subject (perhaps more of a forced drawing of attention to it – the same as leading lines)
  • To create a mood
  • To create a specific artistic effect
  • To remove clutter from around the subject (or to make it less prominent)
Cover Photo Credit: Tobie Schalkwyk


Thursday, January 27, 2022


The 5 Most Abused Rules of Composition

Tags: Shutterbug, Photography for Beginners, Newbie Photography

Rules of Composition

Single Point

I often argue that this is likely the most abused rule of them all, because people don’t really seem to understand that it exists.
The general rule is as follows:

The farther you place a single point of interest from the centre of the frame, the more interesting it becomes, but the more justification you need for it to be there.

When you place a single point in the centre of the frame, such as a person’s face, it needs no justification for being there, but it’s by no means interesting.
Conversely, when you place a single point way off into the corner, then it will portray a very different feeling.
Have a look at the photo below.
I wanted to display a feeling of loneliness and a great expanse by placing the boat in the corner. This would not have been achieved if the boat was in the centre of the frame.
A serene view of a  boat at sea - photography composition rules
Always consider what you’re trying to portray with your photos, as this will dictate your placement.

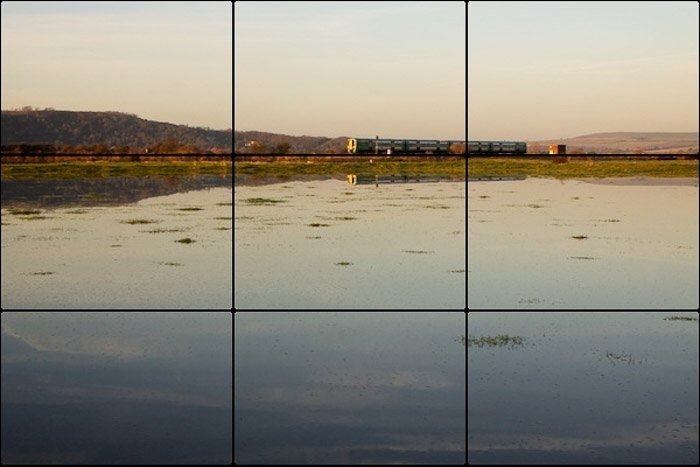
Rule of Thirds

This is likely the first rule that you ever learned, as it’s probably the most popular rule. The trouble is, some people treat it as gospel, when in reality, it’s just a good guide.
The rule is as follows:

Divide your frame up into thirds – two equally spaced horizontal and vertical lines. Then align important features in the frame with these lines, and the intersect points.

While it’s a very good rule, and it will help to make your photo more interesting, and add depth, it’s not a rule which should be followed blindly. Just because the rule says so, doesn’t mean that you should.
The truth of the matter is that it all comes down to placement, like it does with a single point. Too close to the centre and it’s boring, too close to the edge and it’s too drastic.
The rule of thirds is there to guide you to a safe area of the frame, where you’re not stepping on any toes, or making dramatic moves with your composition.
While it’s a great rule, and one that you should all know about, you need to consider what you’re trying to convey with your photo.
It can start to look very structured if you follow the rule blindly, and that appears to be quite obvious.
A serene landscape with rule of thirds overlayed - photography composition rules

Horizon Placement

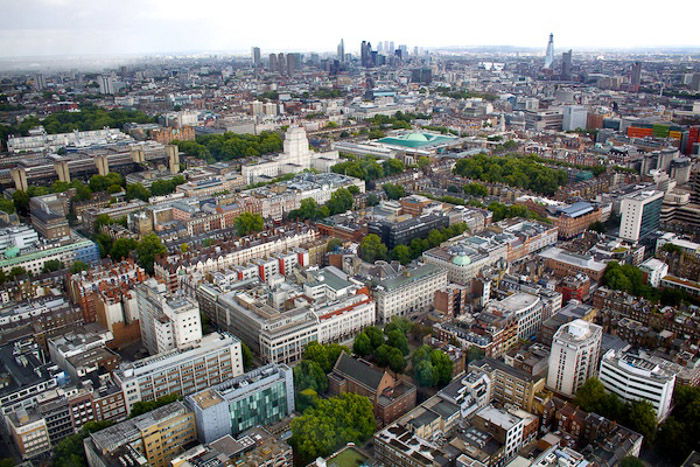
All too often people think it’s a good idea to place their horizon in the middle of the frame, when in reality, this is just diving the photo in half, and making it look dull.
Here’s the general rule:

If you were to decide that the top half of the frame is much more interesting than the bottom, then you may want to adjust your composition so that the horizon is low in the frame. And vice versa. Find the interesting part of the frame, and adjust the horizon placement to emphasise this.

It’s a great rule, and one you should absolutely follow, although most people don’t.
Think about it. How interesting is a plain blue sky in your photo, compared to what’s happening on the ground? Not very.
Aerial view of a cityscape  - photography composition rules

Triangles

Triangle have a strong hold on your photos, although it seems that most people don’t quite understand exactly what they do.
It all comes down to the apex (Latin for summit, peak, tip, top, extreme end) of the triangle, and where that’s positioned.
The general rule is as follows:

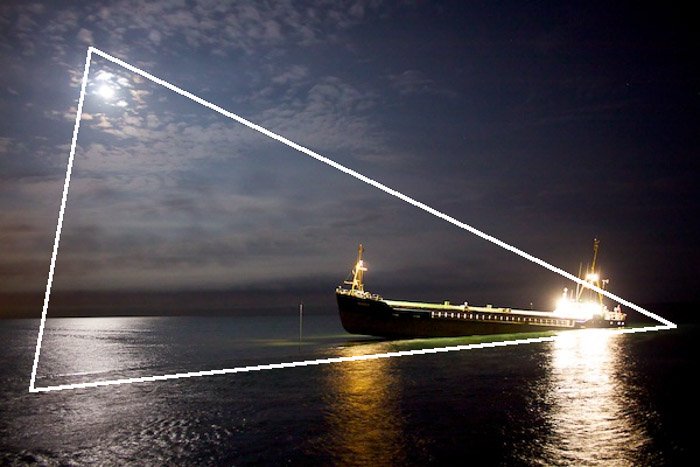
Lines, paths, and points of interest in a photo, are combined to create a triangle. The positioning and direction of this triangle can change the perceived stability of a photo.

Because a triangle has so much control over the stability, you need to be more careful about using the incorrectly, than not using them at all.
For a photo of a building, you would likely have a flat ground at the bottom, with an apex at the top, which appears to be very stable, but if you rotate the angle of your camera, this will start to appear less and less stable.
If you want to make your photo appear unstable, then this is a really powerful rule to be able to control.
A picture of a ship at sea at night with a composition triangle overlayed - photography composition rules

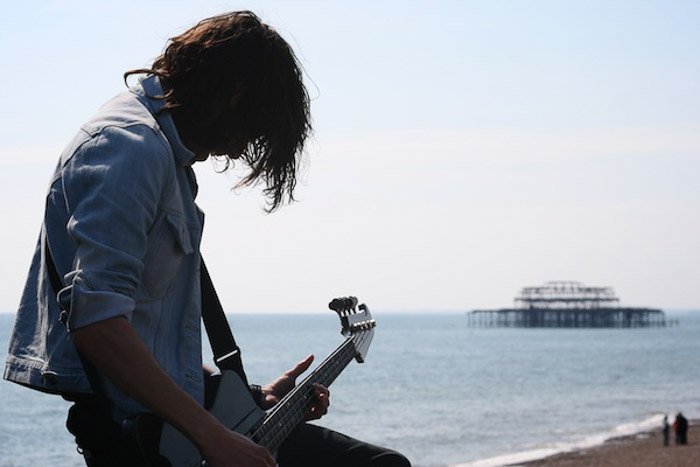
Balance

There is some form of balance in every photo we look at, and it’s up to us to determine whether we want a balanced, or unbalanced, photo.
Here is the general rule:

Balance is at the base of every composition; it determines whether the photo is pleasing and harmonious to look at, or rather uncomfortable and unresolved. It all comes down to visual weight and placement, which decides whether the left side is heavier than the right, or vice versa.

I won’t go into too much detail about balance, because you can read all about it here, but the general gist is that we look at a photo like a weighing scale.
If there’s too much going on, on the left, then the photo is unbalanced to the left. Whether we want the photo be balanced or not us up to us, but it pays to know why you may or may not want it to be.
A balanced photo is pleasing and harmonious, and unbalanced photo is uncomfortable and unresolved. Which do you want your photo to be, and more importantly, why?
The more aware you are of the effects of balance on your photos, the better your photography will be, so it pays to think about how you want to portray your image before you pick up your camera.
Degrees of balance is at the heart of every photo and can’t be ignored so use it wisely, and remember, that any technique, if used to excess, is going to lose its worth.
Porttrait of a guitarist playing in front of the ocean - photography composition rules 

-------------------------------------------------------------------------------------


Isolating the Subject for a Spectacular Composition – Free Quick Guide


Some photos just pop off the screen and grab your attention. There is one primary reason why.

The Subject is Clear and Concise!

Isolating the subject is a critical compositional tool in photography.

It simplifies and increases the impact of your image. It also clearly communicates to your viewer what the photograph is meant to convey.

Isolating the subject seems like it should be easy. You look at something. Click, the camera shutter releases.

How hard can it be?

If you’ve been taking pictures for any length of time, you realize that it isn’t easy. Quite the opposite, actually.

Many photographers struggle with having an exact center of interest in their photos.

There are a couple of reasons for this.

  • The photographer has an unclear vision of what the subject truly is.
  • Our brain fills in the gaps outside of the camera frame while looking at the scene, something the viewer of a photograph cannot do.
  • The area surrounding the subject is busy and complicated.
  • The photographer hasn’t a clear understanding of making the subject stand out from the surrounding areas.

In this eBook, Photzy Author Jenn Mishra will share with you some tried and true techniques for isolating and emphasizing a subject within a photo.

Here are some of the topics covered:

  • Simplifying Backgrounds
  • Using Shallow Depth-of-Field
  • Cropping and Filling the Frame
  • Cloning and Other Post-Production Techniques to Eliminate or De-emphasize Distractions
  • Using Contrasting Elements to Emphasize a Portion of the Image Frame

You’ll find all the answers right here!   

Download Your Free Guide Now →


Monday, January 24, 2022

Fantastic Fisheye Lens Photography: A Basic Guide

Tags: Shutterbug, Photography for Beginners, Newbie Photography

Fisheye lens photography is a genre that depends completely on one thing: the extreme panoramic perspective created by the fisheye lens.

These lenses are wild beasts in the world of camera lenses, due to their huge field of view and strong visual distortions.

Some people love them, some hate them. Some consider them to be toy lenses, with no real use other than creating funny and weird-looking portraits. And others see them as a way to make a statement through a distorted but eye-catching image.

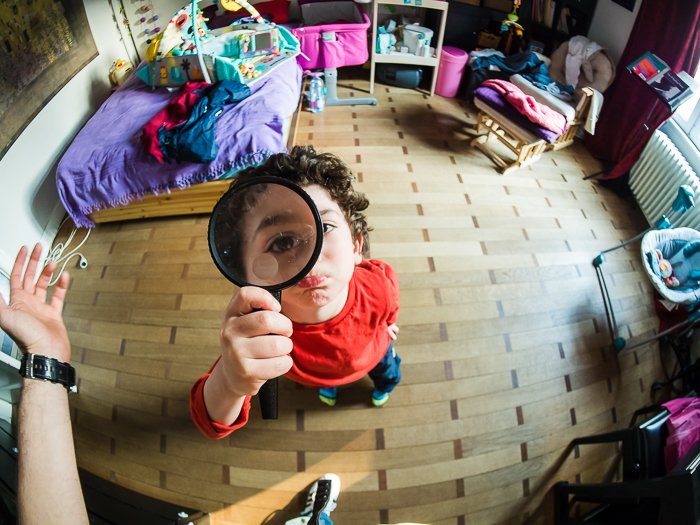
Fisheye lens photo of child holding magnifying glass
A funny portrait of my oldest child taken with my fisheye lens.

In reality, fisheye lenses are much more than curiosities. They are a very particular tool that can produce powerful effects in the hands of a skilled photographer.

This article is all about how to master your fisheye lens so that you can create strong and original images that will stand out from the crowd with their unique characteristics.

What Is A Fisheye Lens?

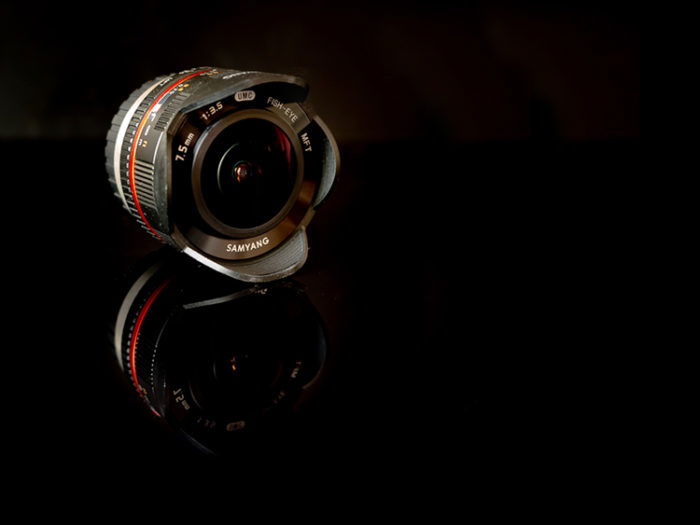
Samyang 7.5mm f/3.5 UMC MFT Fisheye with black background
The Samyang 7.5mm f/3.5 UMC MFT Fisheye lens.

A fisheye lens is a type of lens that produces an extreme wide-angle image with distortions that make straight lines appear curved.

As its name indicates, it is based on how a fish would see things beneath the surface of the water, with an ultra-wide hemispherical view of everything in front of it. By ‘ultra-wide hemispherical view’, I mean precisely that the lens has a 180° field of view (which is half of the 360° of a sphere, hence the term hemispherical).

The term ‘fisheye’ was first used to describe these kinds of photographic lenses in 1906 by Robert W. Wood, an American physicist and inventor.

While fisheye lenses will always project a circular image on the camera sensor, they can be grouped into two families: circular and full-frame fisheye.

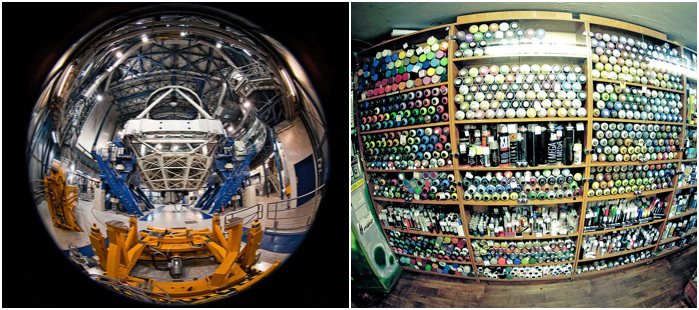
A circular fisheye lens will project the whole hemispherical image onto the camera sensor. A full-frame fisheye lens, however, will project an image larger than the camera sensor. This leads to a non-circular photo with a field of view smaller than 180°. The photo below shows a comparison between images produced by the two kinds of lenses.

Comparison between photos made with circular and full-frame fisheye lenses
Comparison between circular (left) and full-frame (right) fisheye lenses. 
(Image credit: Wikipedia.)

Some Fisheye Lens Recommendations

Due to their huge field of view, fisheye lenses are usually found in action cams (e.g. GoPro cameras). Relatively cheap fisheye lenses are also available for iPhone and other camera phones (e.g. the Olloclip 4-in-1 set). And all the major camera lens manufacturers, such as Canon, Nikon, Olympus, Sigma, Sony, Samyang, etc., have a fisheye lens available in their catalog.

Finally, fisheye lenses come in all sorts of prices. From the $950, pro-grade Olympus M.Zuiko Digital ED 8mm f/1.8 Fisheye PRO lens all the way down to the much cheaper, but fully manual, Samyang / Rokinon / Bower fisheye lenses.

I own the fully manual Samyang 7.5mm f/3.5 UMC Fisheye lens for my Olympus micro 4/3 camera and it is a joy to use. If you are tempted to get a fisheye but don’t want to spend too much on it, do not be afraid to go fully manual. Thanks to the very large depth of field, manual focusing is actually quite a pain-free process.

[Note: ExpertPhotography is supported by readers. Product links on ExpertPhotography are referral links. If you use one of these and buy something, we make a little bit of money. Need more info? See how it all works here. — Ed.]

Fisheye Lenses and Optical Distortions

Fisheye lenses, together with rectilinear wide-angle lenses, have a focal length less or equal to 24mm (equivalent to full-frame sensor size). This means they fall into the ultra wide-angle lens category.

Rectilinear wide-angle lenses are built in such a way that straight lines in the scene will be rendered straight (uncurved) in most parts of the image, with increasing amounts of distortion towards the edges of the frame.

In general, the shorter the focal length, the more difficult it is to rectify the lens.  Fisheye lenses always manifest a strong curvilinear barrel distortion, as shown in the image below.

Fisheye Lens Photography: Barrel Distortion
This image illustrates well the curvilinear barrel distortion typical of fisheye lenses.

Many people do not like the fisheye effect because they do not like the resulting distortion in the images. In some cases, you can use post-process methods, such as defishing techniques using Lightroom or more specific software (e.g. IMADIO Fisheye-Hemi), to lessen the amount of distortion, or remove it altogether.

In general, though, careful composition and choice of subject can greatly reduce the visual impact of the fisheye distortion without the need for extra editing, particularly with full-frame fisheye.

So, how does a fisheye lens work in practice? All you need to remember to start doing serious fisheye photography is:

  • The central part of the frame is less affected by the distortions
  • The more you close in on your subject, the larger the distortion in the resulting image will be
  • If you want a flat horizon, place it in the middle of your frame, and crop the photo later on to satisfy composition rules, such as the rule of thirds
  • Tilt the lens upward to achieve a concave horizon
  • Tilt the lens downward for a convex horizon

What Are Fisheye Lenses Good For?

In general, fisheye lenses are great travelling lenses for your camera. Because they are generally fast and you can easily use them indoors, they are great for taking photographs in museums, churches, and monuments.

They are equally good lenses for walking around the city. Fisheye lenses allow you to emphasise the height of buildings and monuments, as well as capture wide birds-eye views looking down at the city from high vantage points.

If you like the natural landscape, fisheye lenses are perfect for capturing wide panoramic views and also to photograph nocturnal landscapes and the Milky Way in all its glory.

One thing’s for sure—because they are quite different from any other kind of lens, if you are stuck in a photographic rut, fisheye photography is a great way to get your creative spark back.

Let’s take a look at a few subjects you can photograph with a fisheye lens, and how to get some strong effects.

Fun and Weird Images

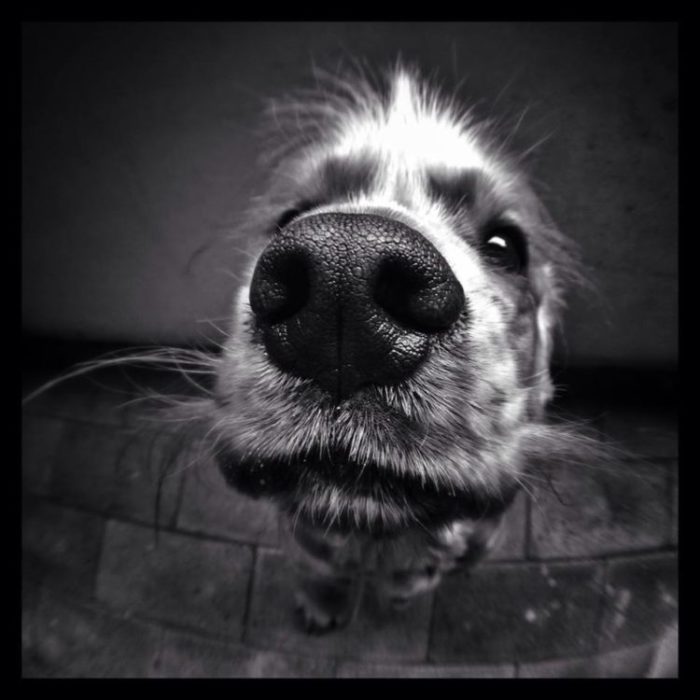
The most straightforward way you can use a fisheye lens is to create funny and weird-looking images. Try to use the fisheye distortions when photographing a pet’s nose from up close, as with the dog in the image below. Big nose and begging eyes, teeny tiny body, great fun.

Fisheye Lens Photography: Close-up of dog's nose
Having your dog look at you is a great chance to use the fisheye distortions to make his nose 
appear huge and his body look tiny. This photo of my dog has been taken with the 
Olloclip 3-in-1 set on iPhone 5.

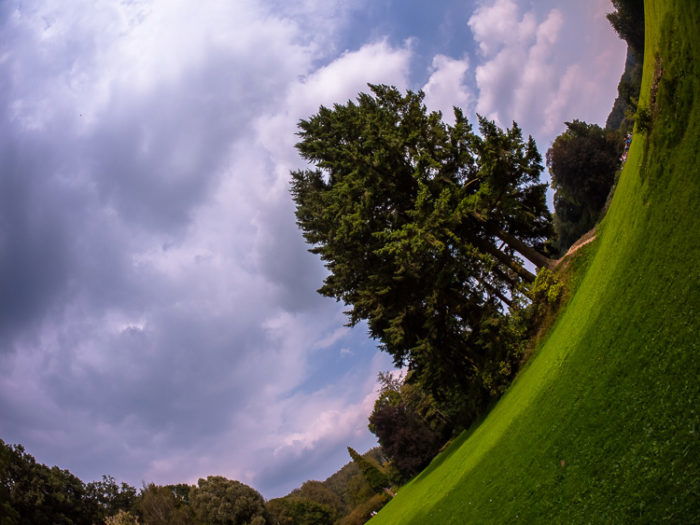
You can also tilt the camera upward or downward and rotate it to create funny landscapes from your otherwise unremarkable city park.

Fisheye Lens Photography: distorted view of park and sky
A weird-looking landscape.

Finally, you can take advantage of the huge field of view and place your camera in small, secluded spots.
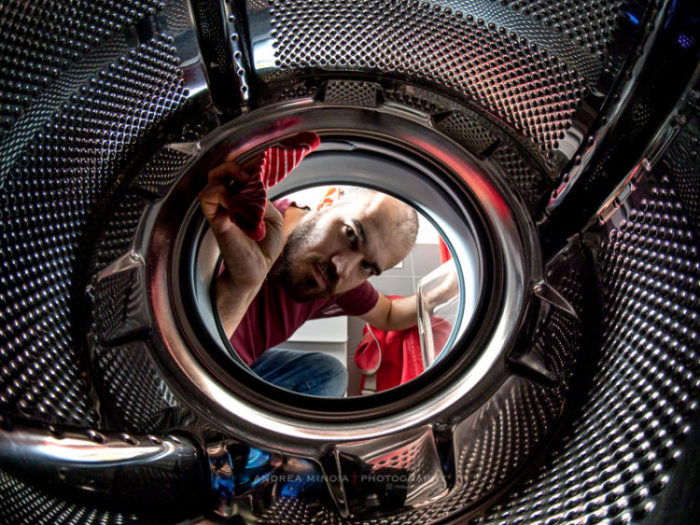
What about a selfie from deep inside your washing machine?
Just make sure the place is dry and remove your camera before washing your clothes. 

Note how, in the photo below, I managed to place myself towards the centre of the frame, thus avoiding strong distortions on my face.

Fisheye Lens Photography: inside-washing-machine view
A selfie from deep inside your washing machine is something you cannot easily do 
without a fisheye lens.

Portraits

Usually people will not be flattered by having you taking their portrait with a fisheye lens—the nose will be too big, while the ears and body will be too small. In short, you will mess up the typical proportions of the face, particularly if you go for a headshot or for close-ups.
But, in toddlers and very young children, face proportions are still quite different from those of the average adult. Kids of this age have small noses and huge, beautiful eyes in contrast to the rest of their faces.
With a fisheye lens you can enhance these youthful proportions by making the toddlers’ eyes even larger, particularly if shot in close quarters, like from just beneath a car seat canopy.

Fisheye Lens Photography: close-up baby picture
Fisheye portrait of my 4-month-old daughter. She was really amazed (or scared) by 
the camera, so it was easy to get her eyes wide open.

Natural Landscapes

Of all subjects, perhaps the one that suits a fisheye lens best is a natural landscape. This is generally because landscapes have no straight lines in them. And if you place the horizon in the middle of the frame, it can go unnoticed that you have used a fisheye lens.
This is a great way to avoid buying a wide-angle lens, particularly if you rarely shoot wide.

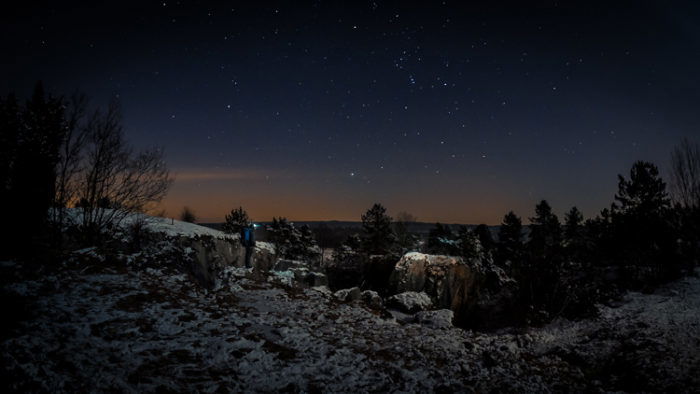
Photo of a natural landscape at night
Natural landscapes with their lack of straight lines can be photographed nicely with a 
fisheye lens.

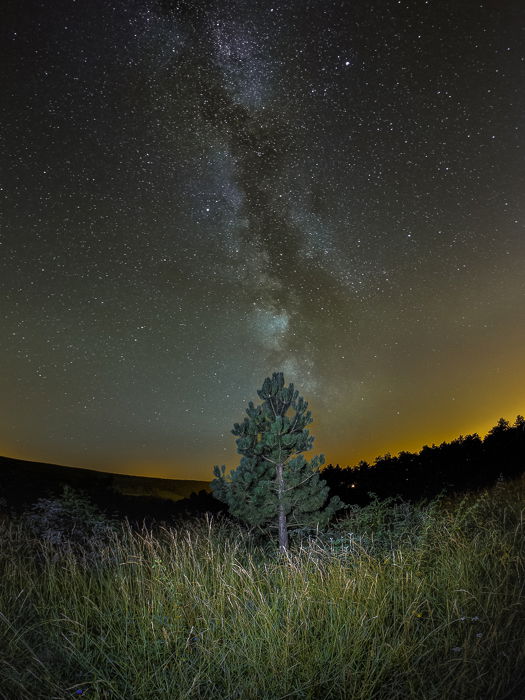
Fisheye lenses typically have a fast aperture, useful if you want to capture a large portion of the Milky Way while having a strong foreground with a large and interesting subject, like this small tree lost in tall grass shown in the photo below.

Fisheye Lens Photography: small tree with Milky Way in the background
If you have a fisheye lens, it’s worth spending few hours out under the starry sky with it to capture images of the the Milky Way.

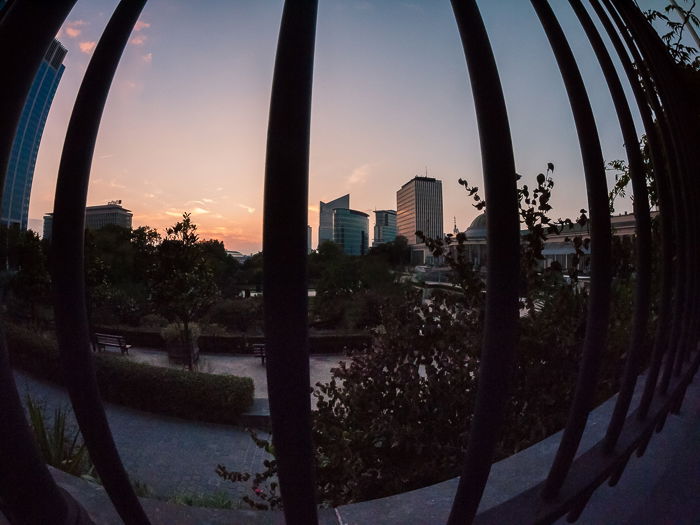
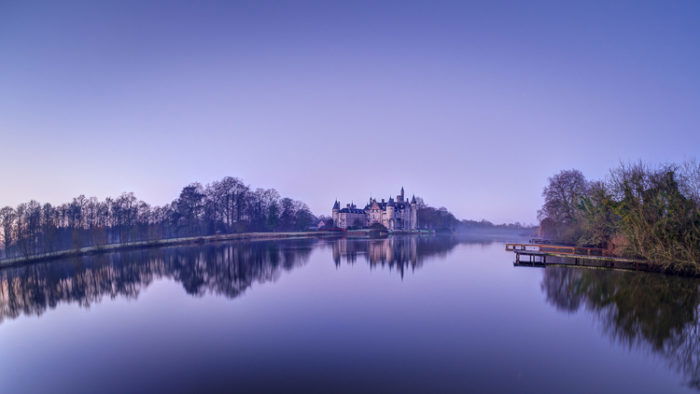
Sometimes, it is nice to have a curved horizon in a landscape, in order to create stronger lines that will lead the viewer toward the subject, as in this morning shot taken at the castle of Bornem, in Belgium.

Fisheye Lens Photography: view of a castle at the horizon line
By curving straight lines such the horizon, the left bank of the channel, and the dock on 
the right, the fisheye naturally draws the viewer’s attention towards the subject: the castle.

Fisheye and the City

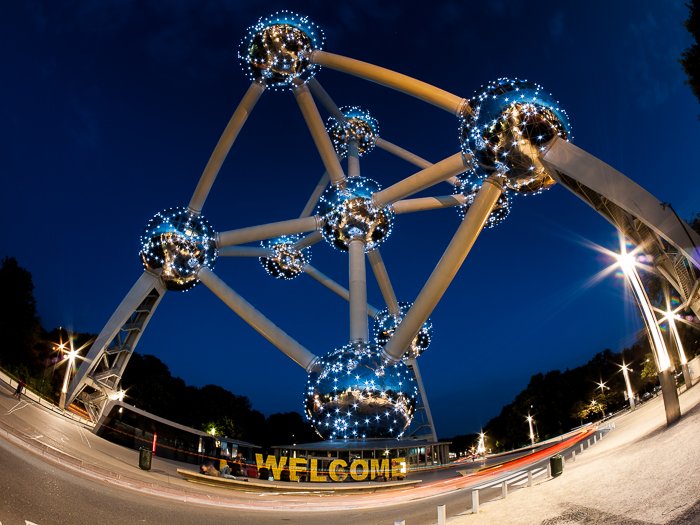
As I said before, if you are a fan of urban environments, you should get a fisheye lens to capture monuments and tall buildings. For instance, the Atomium is a world-famous monument in Brussels. It also happens to be 102m tall.

To capture it entirely at 24mm (equivalent to full-frame), you have to move back about 80m from it. With my fisheye I was able to get it all into the frame from 15-20m away. The distortions helped create an original image of this famous location.

Fisheye Lens Photography: The Atomium
The Atomium. The fisheye helped to capture this 102 metre tall monument entirely from 
just 15 metres away and the distortions worked to create an original view of this 
world-famous landmark.

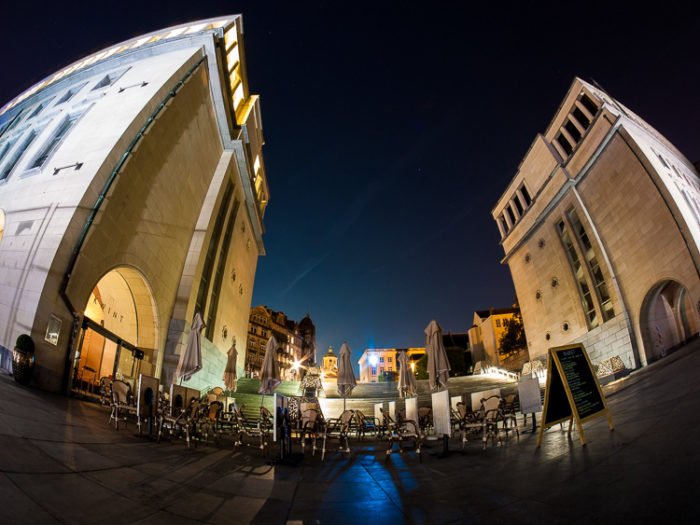
Another nice way to play with tall buildings is to use the distortions to make them bend around the image as if they were huge waves about to break.

Fisheye Lens Photography: city square with buildings
Tall buildings warped, looking as though they’re huge waves about to break.

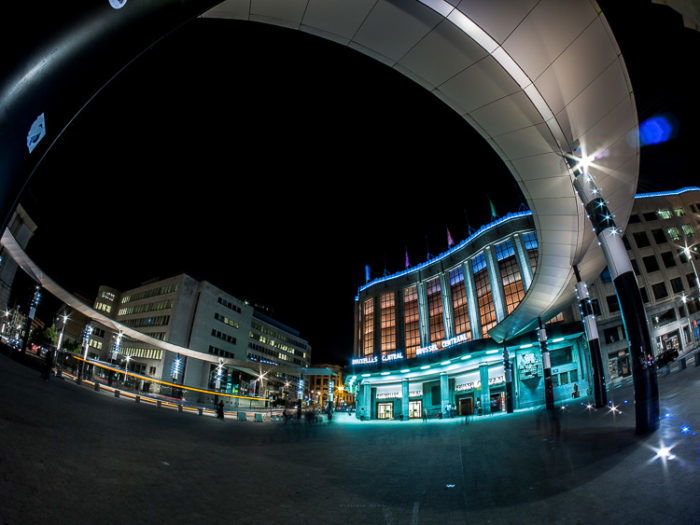
You should also take advantage of curved lines and amplify them to create strong leading lines, like this circular platform roof in front of Brussels Central Station.

Fisheye Lens Photography: Curved leading lines
Taking advantage of curved lines to create strong leading lines.

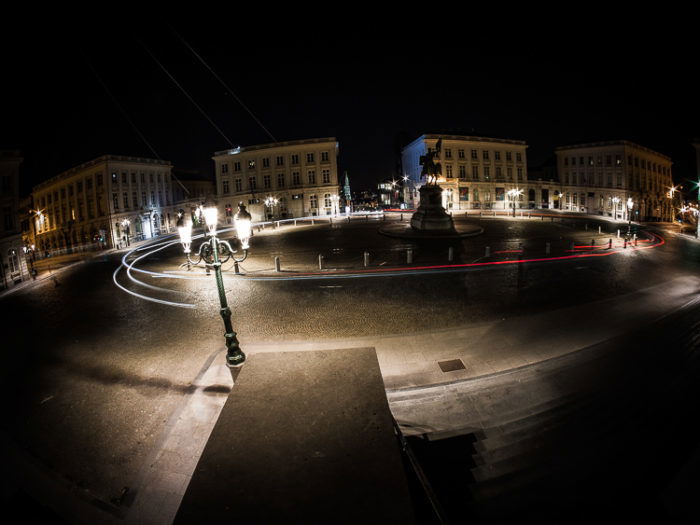
Finally, everybody shooting in the city has tried the classic photo with night traffic light trails. Usually those trails are straight or snaking into the distance following the road.
With a fisheye you can get a full roundabout into the frame and have some space left to get circular trails. This creates a nice ‘traffic light carousel’.

Fisheye Lens Photography: Light trails at night
Turning a roundabout into a light carousel.

Before moving on to another subject, I would like to point out that I didn’t find lens flares to be an issue, as these nocturnal cityscapes (with their many street lights and other artificial light sources) show.

Interiors

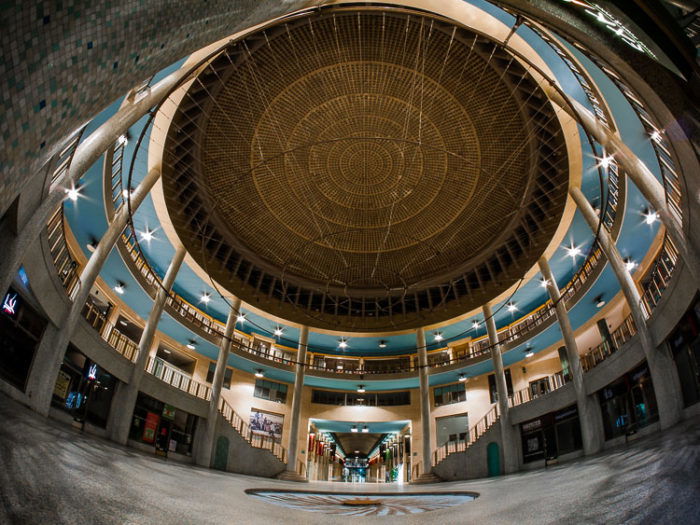
You can do indoor photography with a fisheye and easily get everything into a single image. I took this picture of a gallery in Brussels, which has some nice interior architecture.

Fisheye Lens Photography: Ravelstein Gallery
Interior of the Ravenstein gallery, near Brussels Central Station.

Bird’s-Eye Perspectives

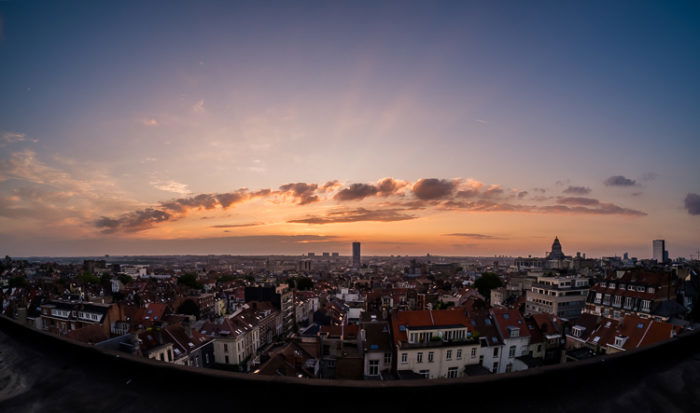
It sounds funny to say, but you can get some great bird’s-eye views with a fisheye lens. If you have access to a high vantage point, you can have a nice panoramic view over the city.
I’m lucky to live in a tall building on top of a hill in Brussels. As such, I found myself climbing to the building roof quite often with my fisheye to take photos.

Fisheye Lens Photography: Sunset panorama
Sunset over Brussels.
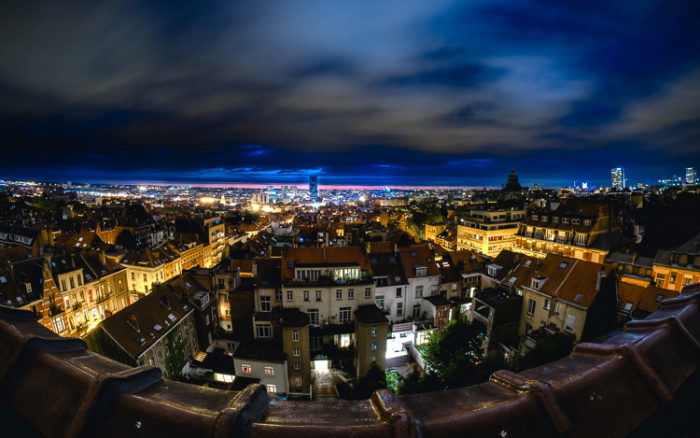
Fisheye Lens Photography: Nighttime panoram
Brussels by night.

Need More Ideas?

Sports cars and motorbikes, as well as airplanes are great subjects for fisheye photography, provided that you can shoot from up close. People doing sports, like skaters in a skate park, also make for interesting subjects.

The real limit in using a fisheye lens, though, is your creativity and willingness to explore different possibilities.

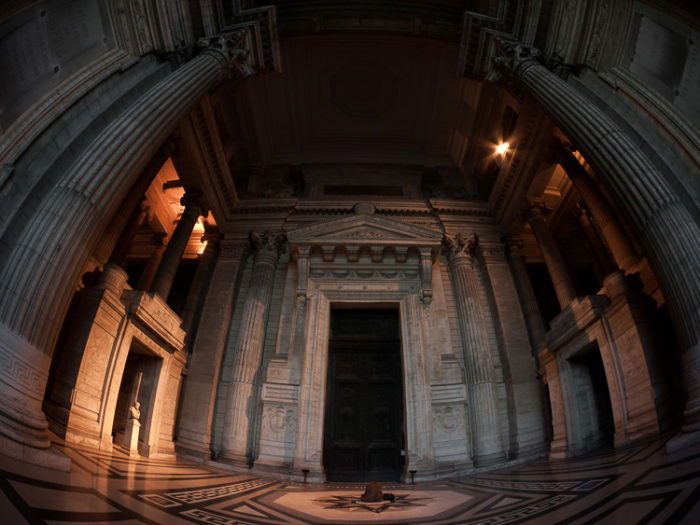
Are you into street photography? With a bit of luck you can do it even with a fisheye lens. I managed to get a lucky shot of a praying man in the hall of the Justice Palace in Brussels at night.

The great merit of the fisheye lens in this photo lies in the way it highlights how huge the Justice Palace hall really is, compared with the praying man in front of the large door. The lens’s distortion make it seem as though his surroundings are stretching to dominate the space above him.

Fisheye Lens Photography: Size contrast
The praying man, dwarfed by his surroundings.

The Major Drawback in Fisheye Lens Photography: No Filters

Working with fisheye lenses is not great if you are addicted to photographic filters. As far as I know, no fisheye lenses can mount standard filters. This is due to the bulging front element of the lens. But you may find some custom made or DIY solutions.

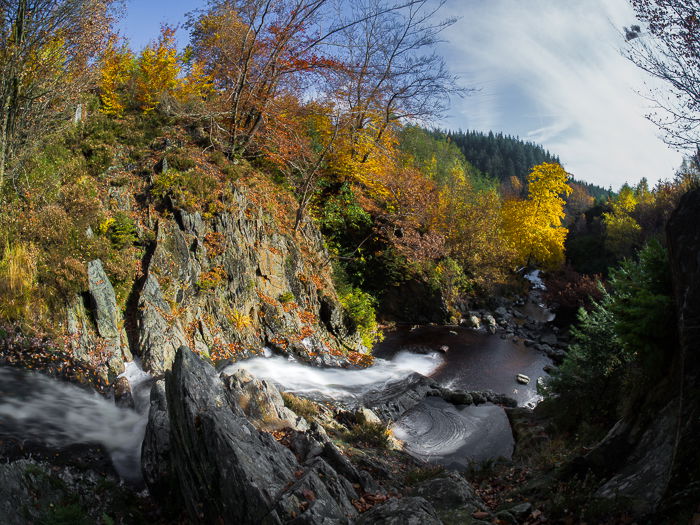
Below, you can see an example of why you may need to use a filter with a fisheye lens.
I took this photo from the top of the Bayon waterfall in Belgium.

The use of a fisheye lens provides a nice, dynamic view of the area. I could combine many interesting elements, such as the water rushing down the waterfall, the colourful foliage, and the streaky clouds in the sky beyond

Fisheye Lens Photography: Bayon waterfall
The Bayon waterfall (Belgium). Olympus OM-D EM-10 with Samyang 7.5 f/3.5 
MFT fisheye lens.

I wanted to have a scene that was dynamic, colourful, and large enough to capture the grandeur of the place. From where I was standing, I had to use my Samyang 7.5mm fisheye lens to do this.
I also wanted to incorporate the nice, silky look of motion-blurred water over rocks, which meant I had to take a long exposure.

How to Deal with the Problem: Two Workarounds

Placing a handheld filter in front of the lens may work with GND filters but for long exposures this is a ‘no go’. Light leakage will be unavoidable.

As mentioned earlier, because these wide-angle lenses have the front element bulging out, some, such as the Canon EF 11-24 f/4L USM, have a rear slot for gelatin filters. Some people have taken to taping small pieces from ND gelatin filters to the rear element of a fisheye lens. 


-------------------------------------------------------------------------------------------

Another FREE Photography Ebook 

A Focal Point Defined and How to Use One – Free Quick Guide


A focal point is one of the more straightforward composition concepts for a photographer to grab onto.

However, many photographers don’t really understand what a focal point is and, more importantly, how it works to their advantage.

A focal point is most simply defined as the point of interest in an image and the area that is the center of attraction for a viewer. In the fine arts, the focal point is referred to as the point of interest that makes an artwork unique. This is an exciting concept to carry over to photography.

When you choose your focal point, you’re essentially telling a viewer where you want them to look.

Keep in mind that there are essential steps in the use of a focal point.

In this guide, Jo Plumridge provides you with an introductory lesson on focal points in photography.