If you told me you didn’t like background blur, I would call you a
liar. Everyone loves background blur! The reason is that it resembles
exactly how our own eyes see the world.
Put your hand 6 inches in front of your face and focus on it. While
focusing on your hand, everything else in view will be slightly blurry.
When you learn how to use your aperture settings, you will be able to
produce pictures that mimic what your eye is actually seeing. Aperture
is secretly my favorite part of photography. Because honestly who
doesn’t love he blurry background photos with a sharp focal point. It
really gives you control over what you want the photo to look like to
other people.
Aperture is the opening of a lens used to control the amount of light needed to expose the sensor/film; in addition, the aperture is used to control the depth of field (or background blur).
Let me make it less technical. Think of aperture as a pupil of the
eye. In a dark room, your pupil dilates. It gets bigger to let is more
light. In a bright room, your pupil constricts. It gets smaller and will
let in less light. This mimics the aperture function on your camera. It
is measured by the “f stop”. You may be thinking “what the heck is F?”.
Well, the larger the ‘f’ is, the smaller the camera opening, and visa
versa. In a darker room, you will want to use the smaller “f”, because
it is a larger opening- which will let in more light.
Additionally, the smaller the ‘f”, the blurrier the background. Or a
‘narrower’ depth of field. You want to use the setting that works best
for the picture you want to take.
f/ 2.8
f/11
In the image on the left, I used a f/2.8 aperture setting to focus on the flower and make my daughter blurry. On the right, I used a f/11 aperture setting to focus on both my daughter and the flower. So to me aperture serves two purposes.
It allows me to take pictures in low light
Adds the blurriness to the background
I owe all of my favorite photos to my aperture setting. It allows me
to focus in on what I want the viewer to see. It captures the memories
exactly as my eye remembers them. Such as on this particular day when I
thought these were the cutest square baby hobbit feet I had ever seen
and I never wanted to forget them.
I personally LOVE to use a low aperture, around f/3, whenever
possible. However, if I am photographing multiple people I take a
different approach. If you take a photograph of 2 subjects using f/2.5
and one person is even SLIGHTLY behind or in front of
the other (which will happen), one subject will be a little out of
focus. I made this mistake a lot in the beginning. I would always take
pictures of my 2 kids at that time in f/2.5, and one kid always was out
of focus. If I am photographing more than one person I use at least an f/4 if they are all generally the same distance from the camera. This ensures that no subject is sharper than the other. Get the Moments Collection as Photoshop Actions or Lightroom Presets
Here are some examples where I used the aperture setting to get the picture I wanted:
Considering the eye analogy again- when you step out into the sun,
your eyes do not stay dialated- they constrict. If you try to use a
small “f” number on a sunny day, your pictures will be OVER-exposed
(white). This is because the camera is open wide and letting in all of
the light it can. On a super sunny day, I use f/16. The background is
as clear as the focal point, but the exposure and color is spot on and
not washed out.
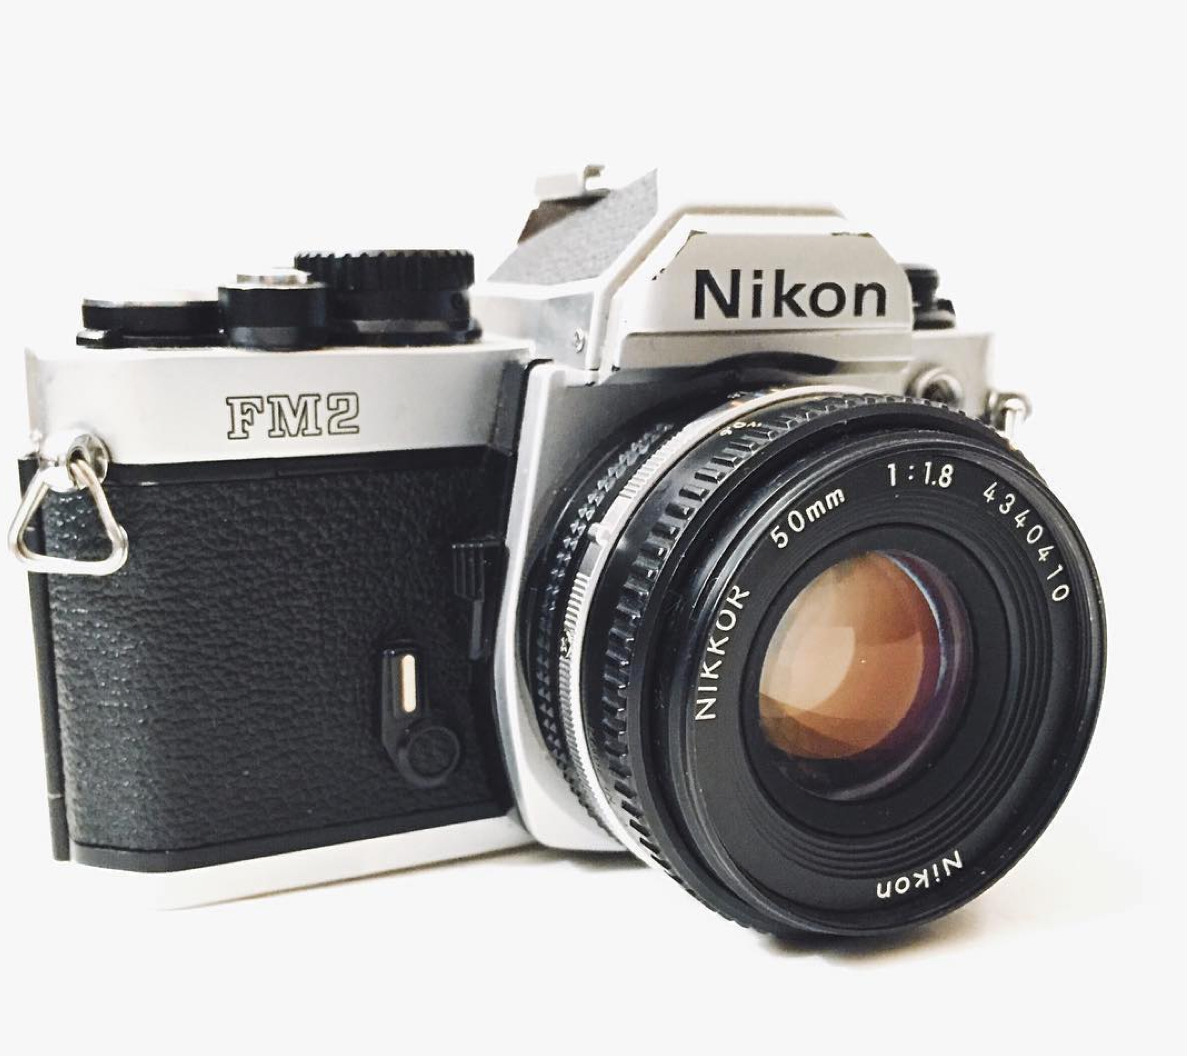
Keep in mind that some lenses will allow for “lower” F (more blur)
than others. You may want to consider a lens such as my 50 mm lens below
if you would like the option of a lower ‘f’. I used my Nikor 50 mm lens
for every single picture in this post, and I love it! Here it is:
Camera Settings
Now that you understand what aperture is, it is time to practice to
really get the hang of the different options. There are two good ways to
do this.
Read more and jump into manual mode
Try “aperture
priority” mode. With this mode, YOU adjust the aperture and the camera
automatically adjusts other settings to optimize exposure.
To try Aperture Priority Mode set your camera to this setting. Note: based on your camera brand and edition it may look different. Consult with your manual.
Practice time. Choose an item to photograph. For starters, find one
that will not be moving a lot so that you can practice focusing. Zoom in
on whatever you are photographing and make sure at the background is 20
feet or so behind the subject. If the subject is right up against a
background it does not give that back on the opportunity that get that
blurry effect.
Photograph images that are different distances from each other –
and with different aperture settings. Focus on something close up to
understand how the background changes when you adjust this setting.
Also, you will start to get a feel for how changing this setting affects
the exposure/lighting on your photos.
Hi!
My name is Renee, a working mother of 3, with a photography love (or
obsession). I am passionate about two things- parenting and photography.
I wanted to share what took me years to learn as I am simply snapping
along! If I can learn all of these while being a full time pharmacist,
anyone can!
Courtesy of: Simply Snapping Mom
You can spend hours of researching camera settings. You can spend
thousands of dollars on THE fanciest camera gear. The fact is, with all
the expensive gear and all the knowledge in the world, you won’t get the
photos that give people the warm and fuzzies unless you put some LOVE
into them.
My best pictures are not the ones where everyone is looking and
smiling. My favorite shot is one that is full of personality. When I say
a picture has personality, I mean that you feel something when you look
at it. You feel an emotion. It makes you remember the feeling you had
at that time the picture was taken. It captures specific traits about
the subject.
I have pictures of my oldest son, Luca, on his first day of kindergarten
where he is smiling and standing alone. Sure it’s cute…but when I see
this one I feel something.
I remember the story of this day when I look at this one. Luca was
excited for his first day, but also a little nervous. He tried to hide
his nerves in front of his little brother and sister, but when they all
saw the bus coming around the corner it became reality. My daughter,
Lyla, and Luca did everything together until this moment. Even though
they were only 4 and 5 years old they were hit with the big realization
that they would be apart. Also, I laugh when I see the baby, Nico,
hanging onto the back, not understanding what was going on but just
doing what his siblings were doing- like always.
Follow these three tips to add personality or emotion to your pictures!
1) Get on Down
Go ahead, get on down. I imagine I look like a crazy person when I am
taking pictures of kids. I take every picture on the level of my
subjects (usually my kids)- even if that means laying on the ground in
he middle of a park. Kids see the world totally different than how you
see it. Check it out. Get on their level when you take pictures of kids,
animals, or anyone!
You will get an entirely different shot if you get down to their
level. You will get a picture of their face square on, not looking down
at them like you usually do. You also get to see from their
perspective.
Here are some examples:
This also works for animals:
2) Don’t Stress over Smiles
“If you smile for this picture you can have candy…” Do you ever find
yourself saying that? Don’t be ashamed. That was me too. Until I
realized that sometimes the best pictures are kids showing ALL emotions,
deep in play, or interacting with other people.
If your kid is always happy, GOOD FOR YOU- consider yourself lucky.
You are the minority. It is better to capture other honest emotions,
than fake and forced smiles. Or sometimes the best pictures is when your
subjects aren’t even looking at all. I love the ones when they are
interacting with each other.
I love this one of them not even looking. I just remembered how they
looked like a tiny married couple brushing their teeth this day. Tiny
babies, yet gaining independence.
3) Capture those Personalities and Moments
I am not going to pretend like my 5 year old daughter is a calm,
happy-go-lucky sweetheart. She is a strong, powerful force who knows
what she wants and she gets it. And I love her for that- maybe not 10
minutes before the bus gets here and she is demanding to wear shorts
when it is 40 degrees out, but I still respect her for it. I love
capturing her sometimes terrifying, dictator-like personality in
pictures.
I mean come on… THIS is Lyla. Tough girl in a Tutu.
And this moment. No one is looking. No one is smiling. But I crack up
with when I see it. I forgot how tiny baby Nico was. Forgot how much
the kids were a little confused by a new baby in the house, but also
didn’t want to leave his side (they are IN his crib here).
My curious, oldest son Luca had a dinosaur obsession starting at age
2. He talked about them constantly and knew the names of about a hundred
dinos. When we brought him to see the dinosaur bones at the local
museum for the first time his little his mind was literally blown seeing
how big the dino-bones were. This picture and those big eyes bring me
RIGHT back to that day.
Capture kids being kids. Getting dirty. Running around. Making
messes. Before you know it there will be no more messes, and you will
miss it.
Summary
You will start to develop your own photography styles, but following
these three tips will guarantee that your personality and the subjects
personality will shine through in your pictures. THOSE are the
photographs that you will remember for a lifetime.
Lifestyle photography is one of my favorite things. It is 100% my
favorite style of photography. Over the last years since I purchased my
camera, I have focused more and more on capturing life to share on my Instagram
and my Blog. There is just something so beautiful about capturing life
in action and un-posed. Today I am sharing with you five tips to help
you in your Lifestyle Photography game because you do not have to be a
professional to take photos of the ones you love and the memories you
make!
BRING THE CAMERA
When you can, just bring your camera! I’ve started bringing my camera
bag on coffee dates, family gatherings, and backyard parties with
friends. The best way to achieve “lifestyle” shots is to have them be a
real moment. Bring out your camera to grab some pictures of your best
friend drinking her beautiful latte or catch your friend throwing his
daughter in the air and catching her. I was initially wary about
bringing around my camera because it was expensive and I was worried
about carting it around. But here is the thing, cameras were meant to be
USED! I don’t leave my bag in the car (just to be smart) and have to
carry around a little more weight but it is worth it to catch so many
lifestyle moments. You can also easily “downsize” for these type of
events – leave the extra lenses, tripods, props, etc at home and just
bring the camera! Side Note: Just because you have your camera doesn’t
mean you have to take photos. If you are not feeling it, don’t like the
lighting, or feel like others wouldn’t be down – no worries! Leave it in
the bag. But I think you will find you will find more times you are
glad you brought it along!
USE YOUR PHONE
When you don’t have your camera bag with you (because you forgot or
didn’t want to pack extra), don’t be afraid to use your phone! Camera
phones are always advancing and you can still get some quality shots
with your phone! Don’t miss out on the opportunity to capture a moment
just because you only want the best quality or perfect photo. I have
many phone photos printed in my home and even in my instagram feed!
UN-POSE
When you get out your camera for a fun photo moment or for a planned
photo shoot, let people know they don’t need to suddenly squish in and
awkward smile. People expect posed photos – we’ve been trained that way
since we were kids, “okay everyone look at me and say cheeeeeeese!”
Encourage people to just continue what they were doing and capture the
laughter when someone tells a joke. If you are planning a photo shoot
and taking intentional photos. Let people pose in ways they most feel
comfortable with – some of my favorite style photos are un-posed posed
photos. Try to step outside of the desire to get a “good, normal photo”
and capture something a little more personal.
CAPTURE THE LITTLE THINGS
It is tempting to try to capture everything in one picture. We love
group pictures because everyone is in them but there is also a beauty in
the details. Detail shots are what brings lifestyle photo shoots to
life – they show the little moments that are part of the bigger picture.
Your friends and family may initially think you are weird because you
“forgot” to include someone’s face or entire body but you should do it
anyways! Telling the story of your life requires looking at the details –
a novel without details is not worth reading.
BE CONFIDENT
If you want to start practicing and working on your lifestyle
photography, just start! Be confident. There may be times you are afraid
how a photo will turn out, try to capture it anyways. You may fear what
your friends will say, ask if you can take photos anyways. You may
wonder what people will think when you bring out your camera at a coffee
shop or a bar, take it out anyways! You are a photographer (whether
trained or not, professional or not) and it is cool that you are taking
photos of your life and things you never want to forget! Be proud, smile
at strangers who ask you questions about your camera, and confidently
take a million photos to edit later! You’ve got this!!!
Courtesy of: Oakandoats
Sunday, January 27, 2019
Yashica is teasing a comeback to the camera market
The legendary Yashica brand may be planning a comeback to the camera
market, and people are kind of freaking out. Unfortunately, very little
detail is available at this point, but a teaser video and website published by Yashica show a woman using a camera that looks like an old film model, and even taking selfies with it.
There is no way of knowing if this means Yashica will release a film
camera or a retro-style digital model, but it would certainly be
intriguing to see a digital version of an old Yashica like the Electro
35.
According to Wikipedia,
the Yashica brand name disappeared from the camera market in 2003 when
Kyocera, which owned the brand, halted production on all Contax,
Yashica, and Kyocera-branded cameras. In 2008 the Yashica trademark
rights were sold to the Hong Kong-based MF Jebsen Group and in March
2015, 100 Enterprises International Group Co. Ltd. was appointed as
Yashica Global Sole Agent.
If you want to keep up with future developments and see the
information that has been posted so far, you should have a look at the Yashica website where you can also sign up for email updates.
Courtesy of Digital Photography Review
Canon Updates the Digital Rebel
The Canon EOS Digital Rebel XT is an 8-megapixel digital camera that
is compatible with all of Canon's EF and EF-S lenses. Starting at $899
for the body-only model or $999 for a kit that includes the EF-S 18-55mm
f/3.5-5.6 zoom lens, the new XT has higher resolution than the original
6.3-megapixel Digital Rebel, which was introduced last year.
Canon plans to continue to offer the original Digital Rebel at a reduced price
of $799 for the zoom lens kit. The new XT model will be available in
both silver patina and matte-black finishes when it reaches store
shelves in March.
The
EOS Digital Rebel XT can shoot up to 14 consecutive large JPEG images
at Fine quality, five RAW files, or four RAW + Large/Fine JPEGs at up to
3 frames per second--more and faster than the original Digital Rebel,
which could only do bursts of four JPEG or RAW frames at 2.5 frames per
second.
Users can shoot images in lossless 8.0-megapixel RAW
format and a range of sizes and quality JPEG settings. And while the
original Digital Rebel required users to extract JPEGs from the RAW
files, the new XT model stores them both as separate files on the
CompactFlash card.
New features on the EOS Digital Rebel XT
include user-selectable metering and auto-focus models, flash exposure
compensation control, better evaluative flash metering, and custom
function control borrowed from Canon's upscale EOS 20D digital SLR
model. A monochrome mode lets the camera shoot in black and white as
well. Other improvements include faster startup time, faster autofocus
speed, and PictBridge direct printer output support. The Digital Rebel
XT is about 35 percent more energy-efficient than its predecessor, too.
Canon's
new SELPHY CP600 is a compact and portable dye-sub photo printer that
works off an AC current or using a supplied rechargeable battery.
Weighing less than two pounds, the CP6000 can output a borderless
4x6-inch photo print in about 63 seconds, according to Canon. The
USB-equipped printer sports 300 x 300 dots per inch output and faster
print speed and better image processing than its predecessor.
It
supports four print sizes and works with PictBridge-compatible cameras
for direct output without using a computer, and can also print out
images from cameraphones wirelessly using infrared (IrDA) connections.
Look for it for $249.
We have previously listed Where To Buy Photographic Film Online and Where To Get Film Developed Online
(via snail mail of course) so now it’s time for a round of where to buy
film cameras online! Some of these are super obviously (like eBay or
B&H) and others you may not have been aware of until just now:
Contrary to popular belief,
you do not need to live in a major international city to get access to
good film developing. For anyone who lives in an area with limited or no
film options, we’ve put together a list of places which offer
mail-order film developing:
For
anyone interested in shooting film without available resources in your
area, here is a (relatively) comprehensive list of websites which sell
photographic film (35mm, 120, medium and large format.) Many of these
websites also sell darkroom equipment, photographic paper and bulk
loading supplies.


 Join Our Newsletter