Tuesday, January 15, 2019

5 Senior Portrait Ideas and Posing Made Simple

#photographyhobbyist  #photographybestoftheday #photographyforever

 
Business, Lifestyle
5 Senior Portrait Ideas and Posing Made Simple
Working with High School Seniors is one of the highlights in my photography business. This is such an exciting time in their lives—they are about to embark on a new adventure, heading out into the world to begin exploring who they are.
These portraits are a great opportunity to capture who they are at this very moment, both in personality and style. I LOVE working with these kids because they are excited and I LOVE working with the parents because I know their excitement (mixed with angst) too. I’ve been a Senior mom and it’s truly a time to be cherished and celebrated!!
Read more: 5 Senior Portraits Tips
Today I’m sharing my top 5 poses that I use at every Senior portrait session and I’ve added a bonus pose just for these readers.

Senior Portrait Ideas for Posing:

  • No.
    01
    Sitting
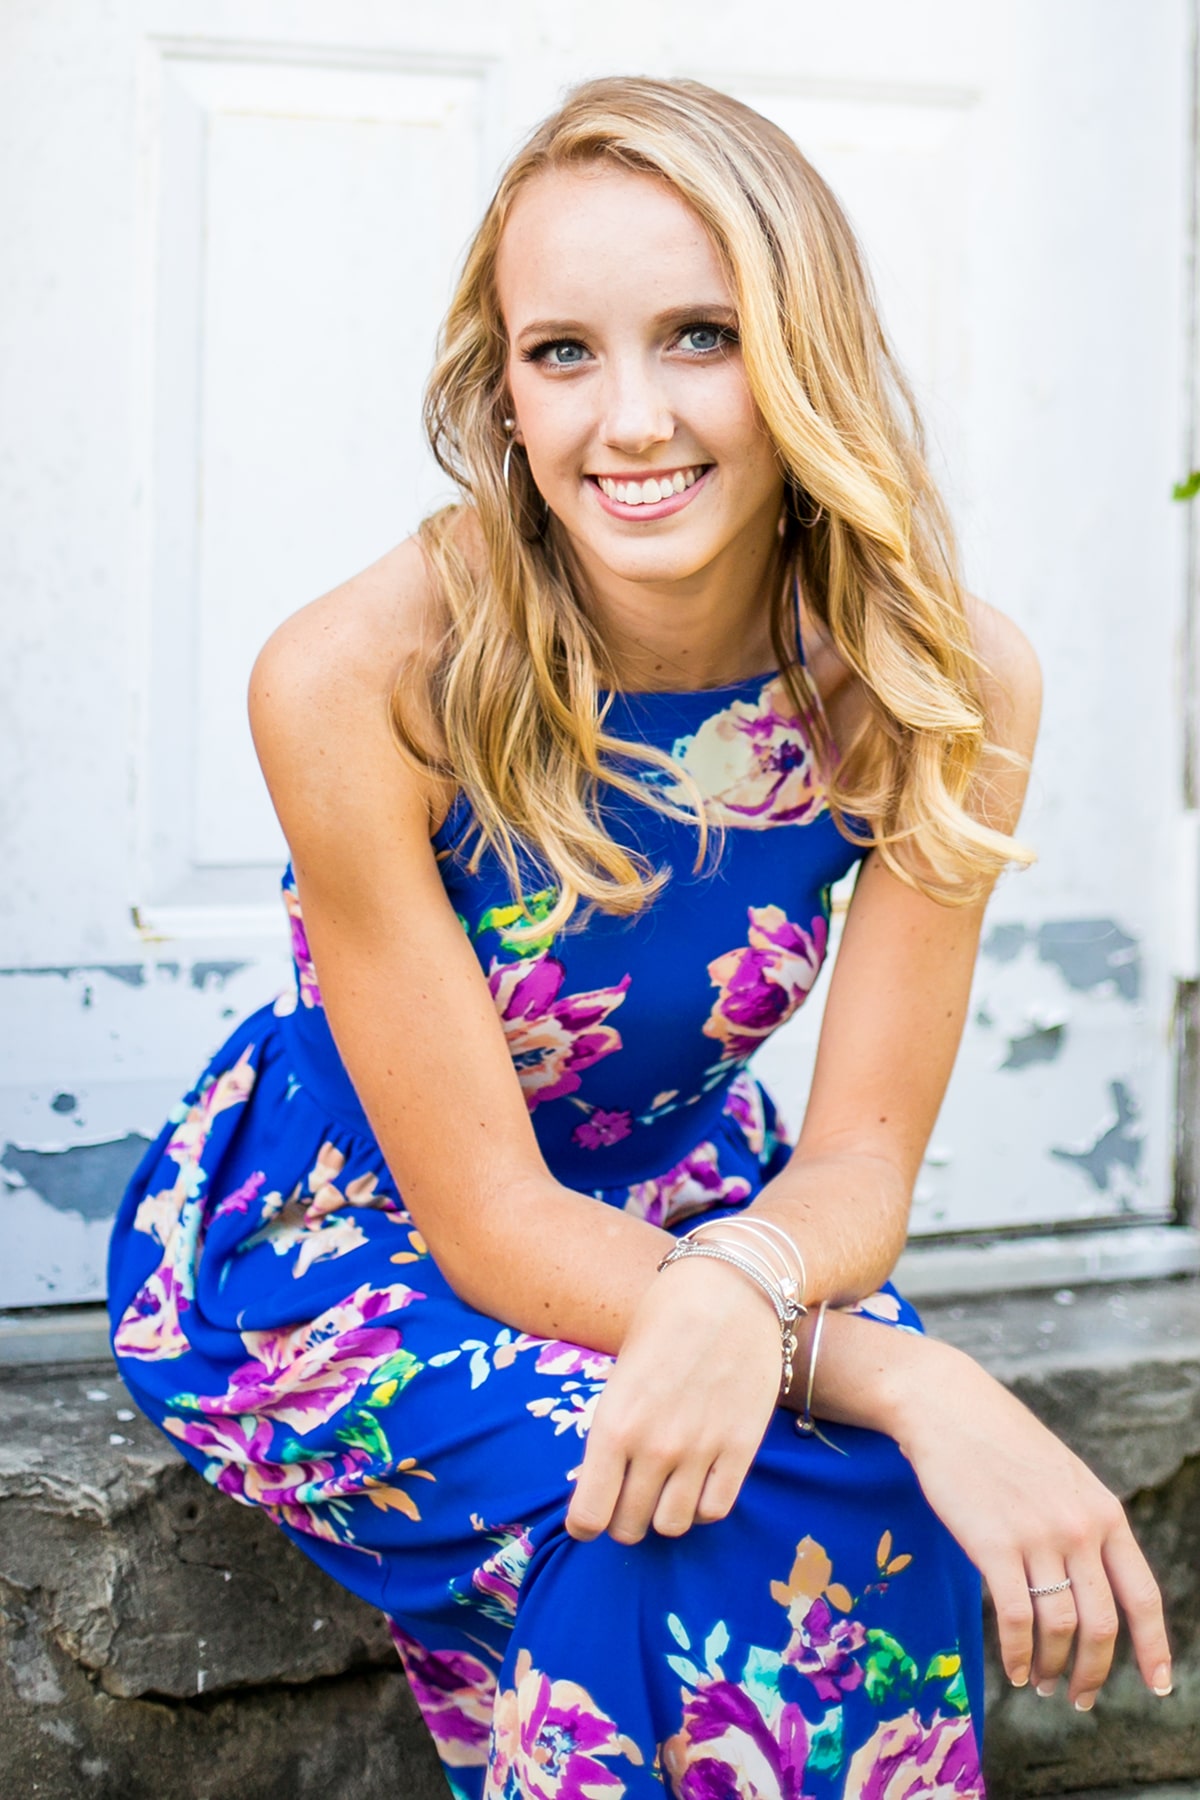
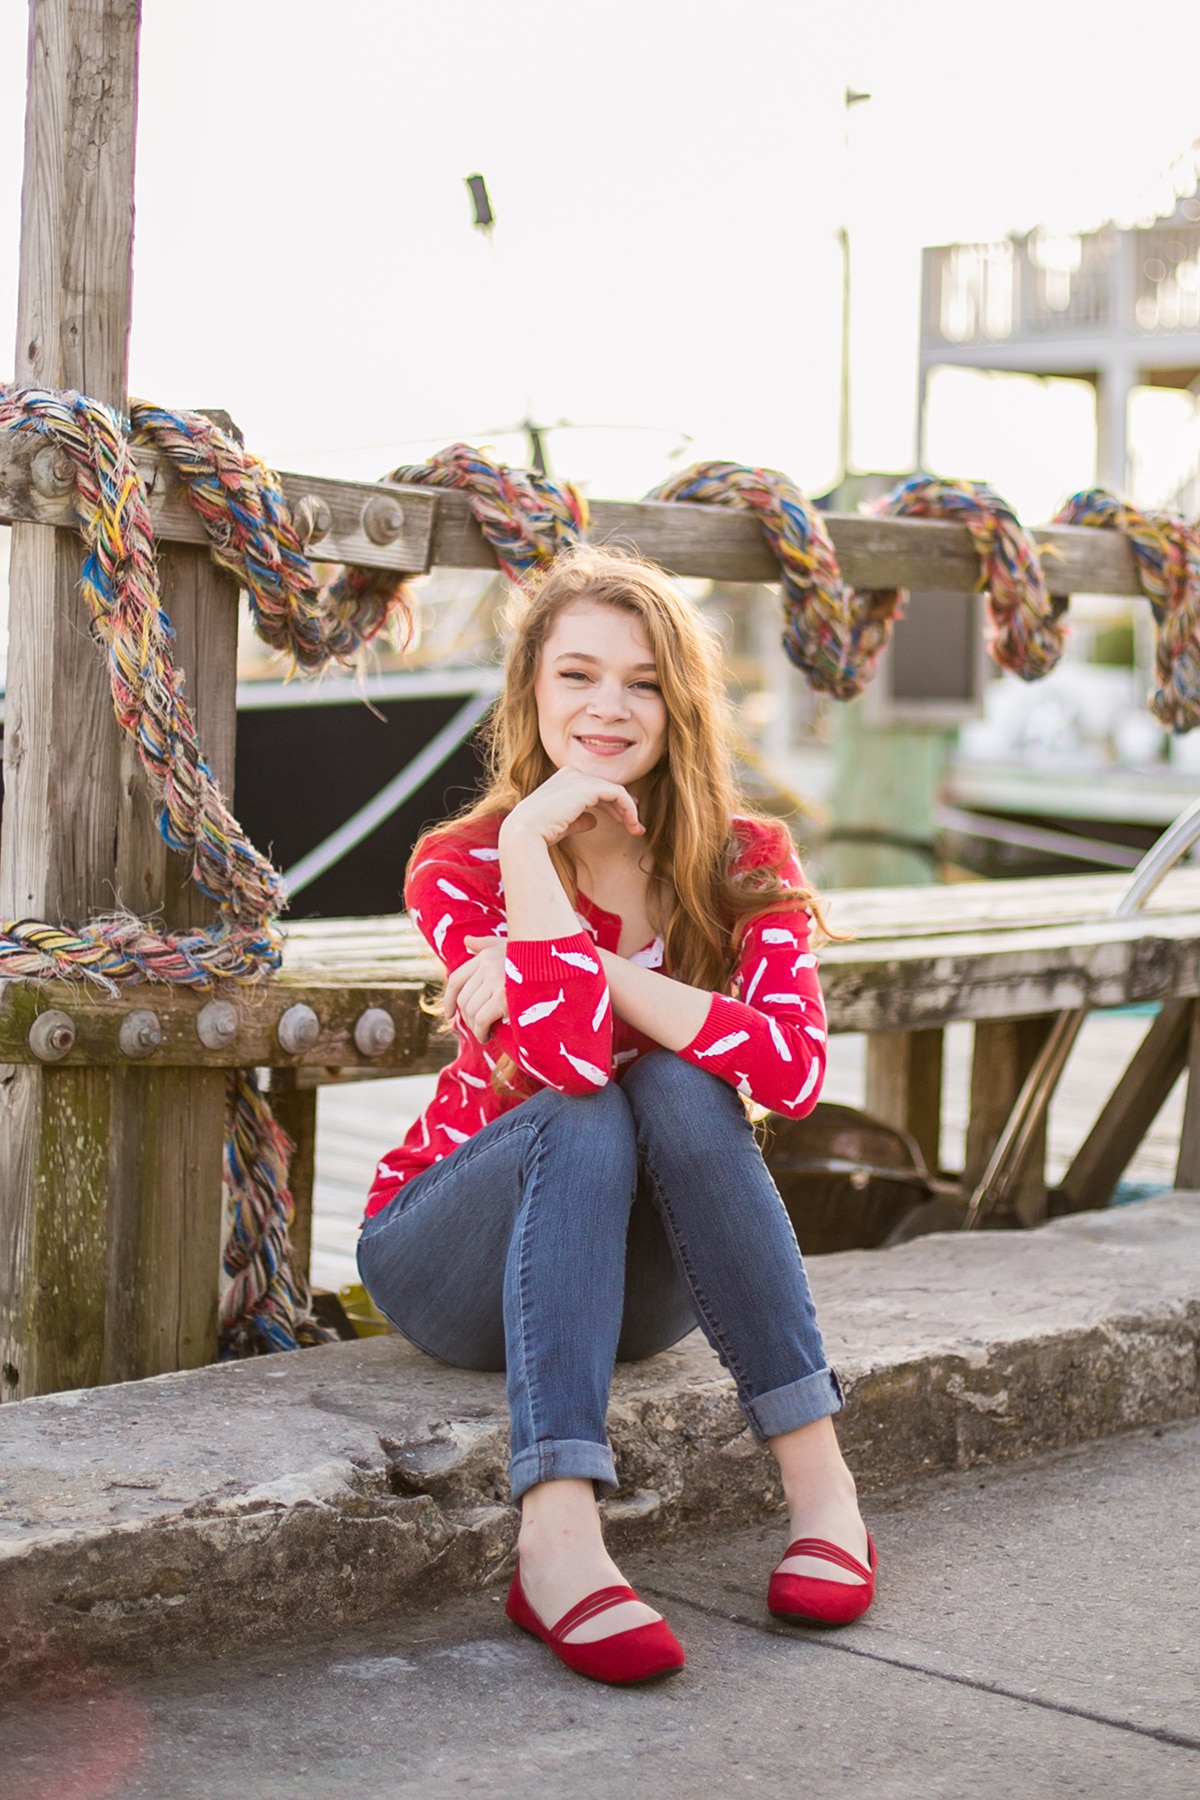
    I typically start with a sitting pose. Sometimes Seniors are a little nervous when we get started. It’s our job to help them get comfortable. With standing poses, you can often see their early awkwardness so I get them to sit first. It’s an easy way to start helping them with posing techniques. 
    Senior Photography posing idea
    I often try to find steps or something for them to sit on. If that isn’t available, I look for texture like the grass or the door in these pics. Once I snap a few and show them the back of the camera, they sit a little taller and smile a little bigger because the confidence grows.
    I always try to follow the rule of thumb “If it bends, bend it”. That goes for arms and legs especially. So get them to sit right away and you’ll be off to a great start!!
    Senior Pictures posing tips
  • No.
    02
    Standing
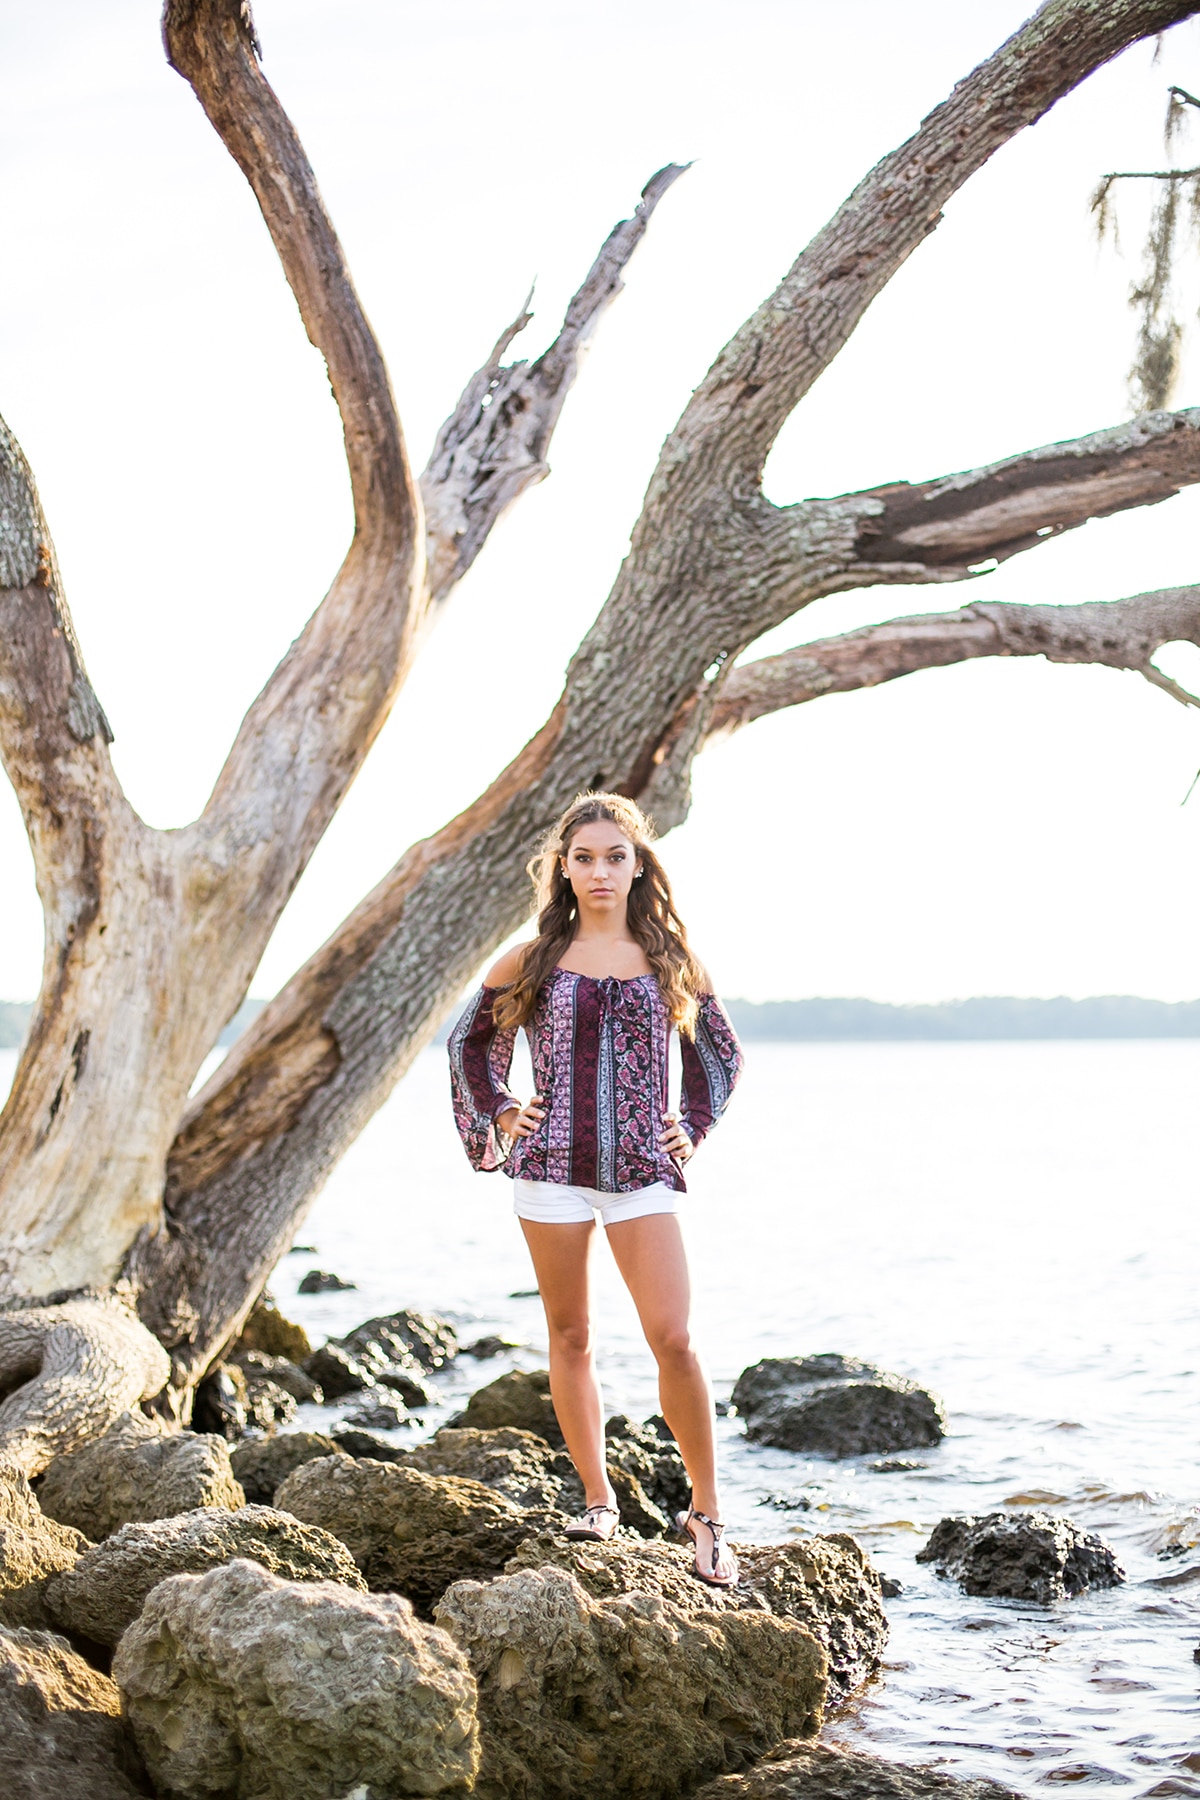
    Once my clients begin feeling a little more confident, I move into standing poses.  We do full on “POWER POSE”…think girl power, then move on to other poses.
    How to pose for senior pictures
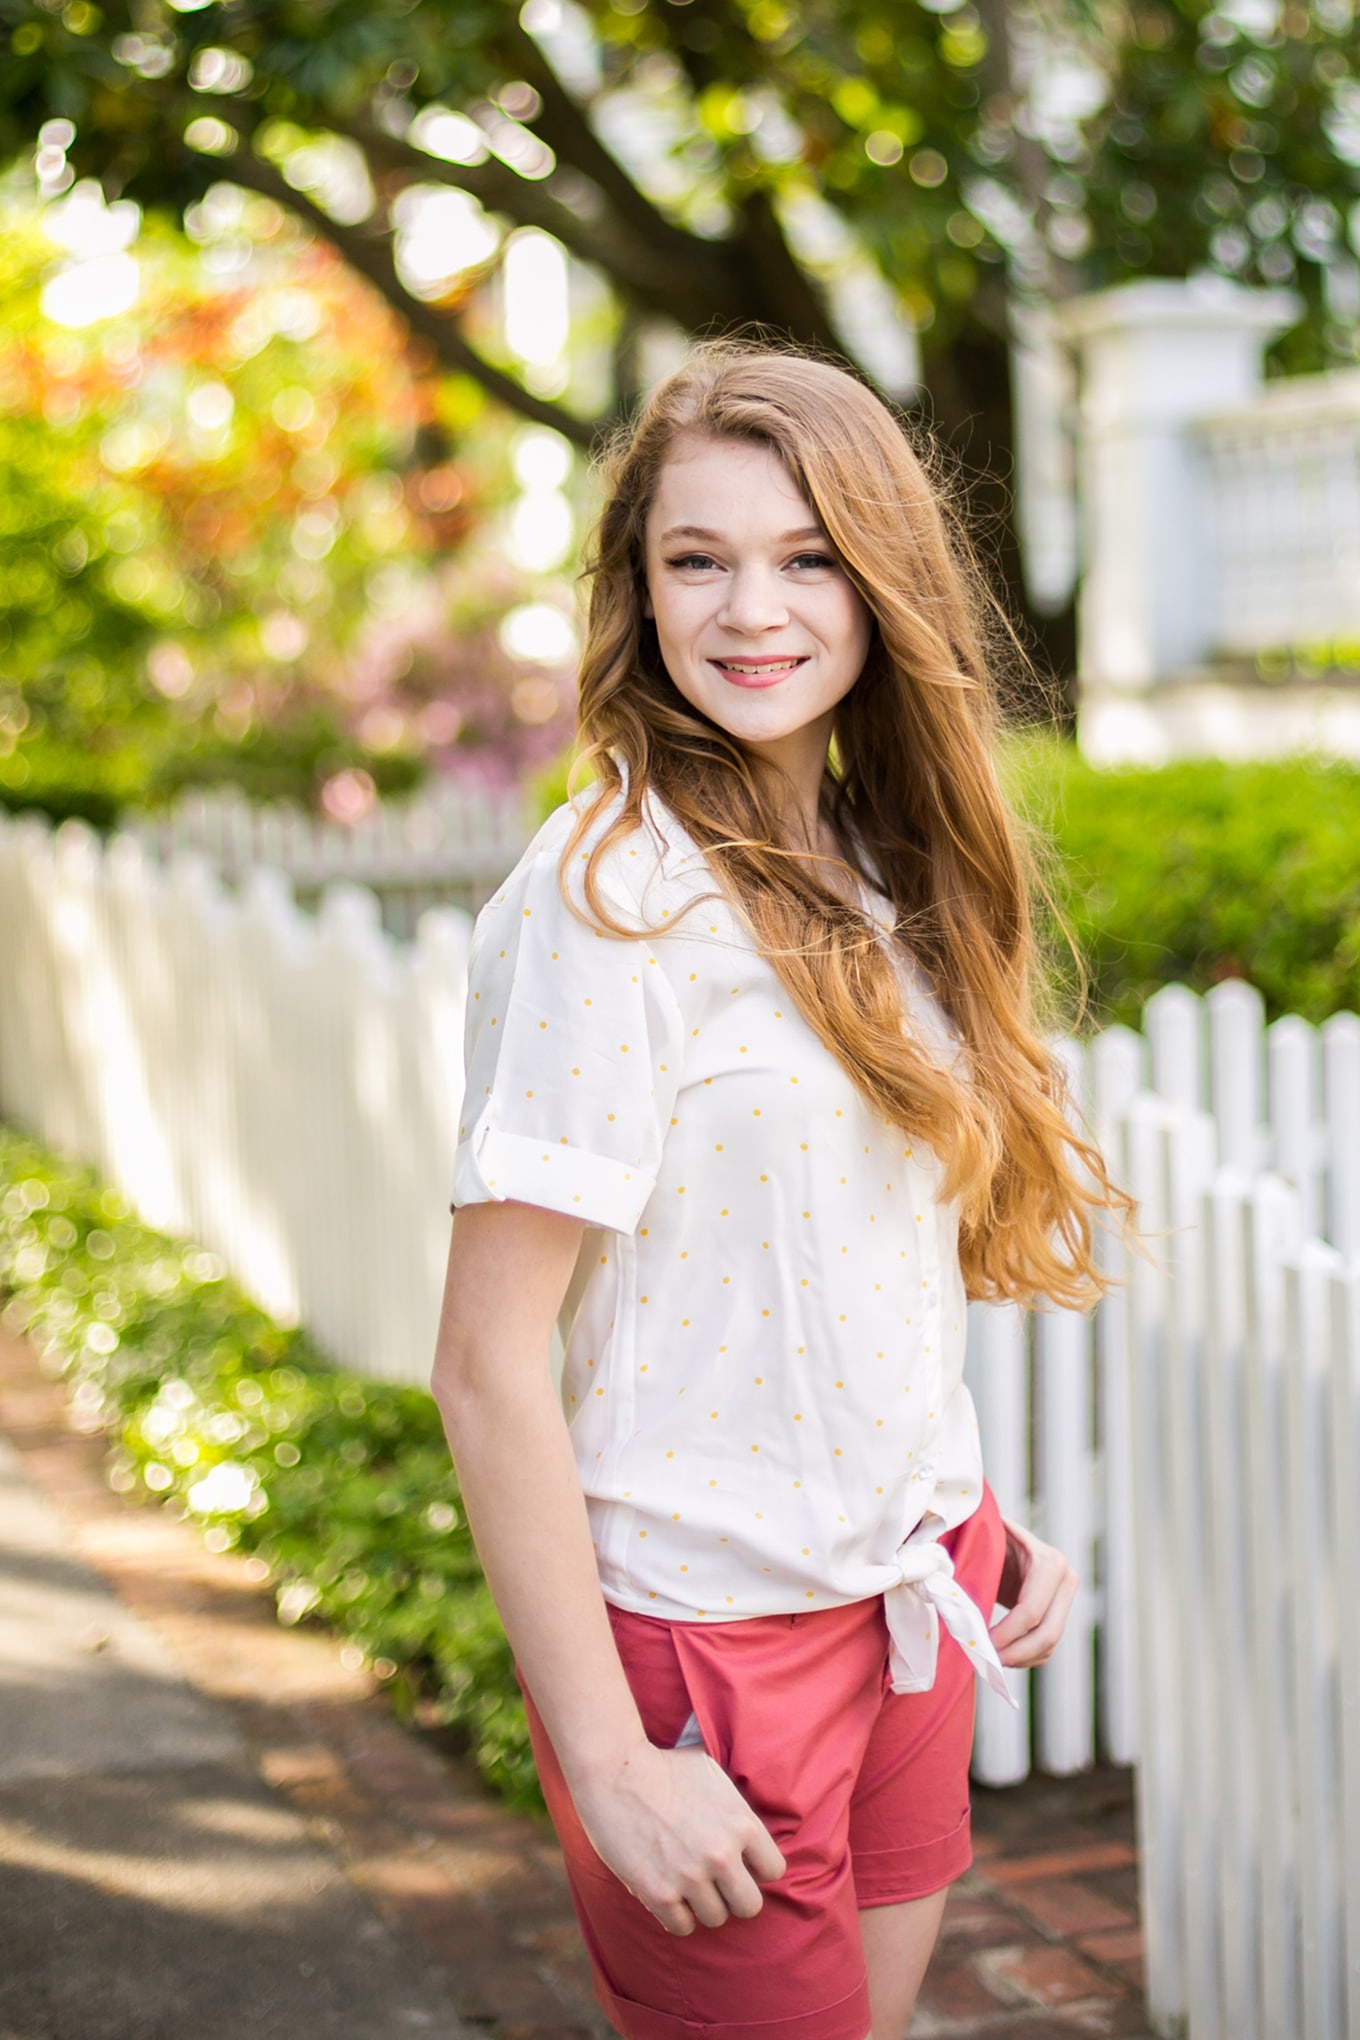
    We always do serious faces, smiling faces (I call these the “Grandma Shots” because no Grandma wants pics where they aren’t looking and smiling at the camera), and then I do the “Lean and Laugh”. Where I have them lean toward me and do a fake laugh…which feels super awkward and actually makes them do a real laugh.  Works every time!! (Where are my Legally Blonde fans?!?!)
    Also, if the girls are wearing a long skirt, have them twirl it a little. It’s creates beautiful movement.
    Posing tips for Senior Portraits
  • No.
    03
    Leaning
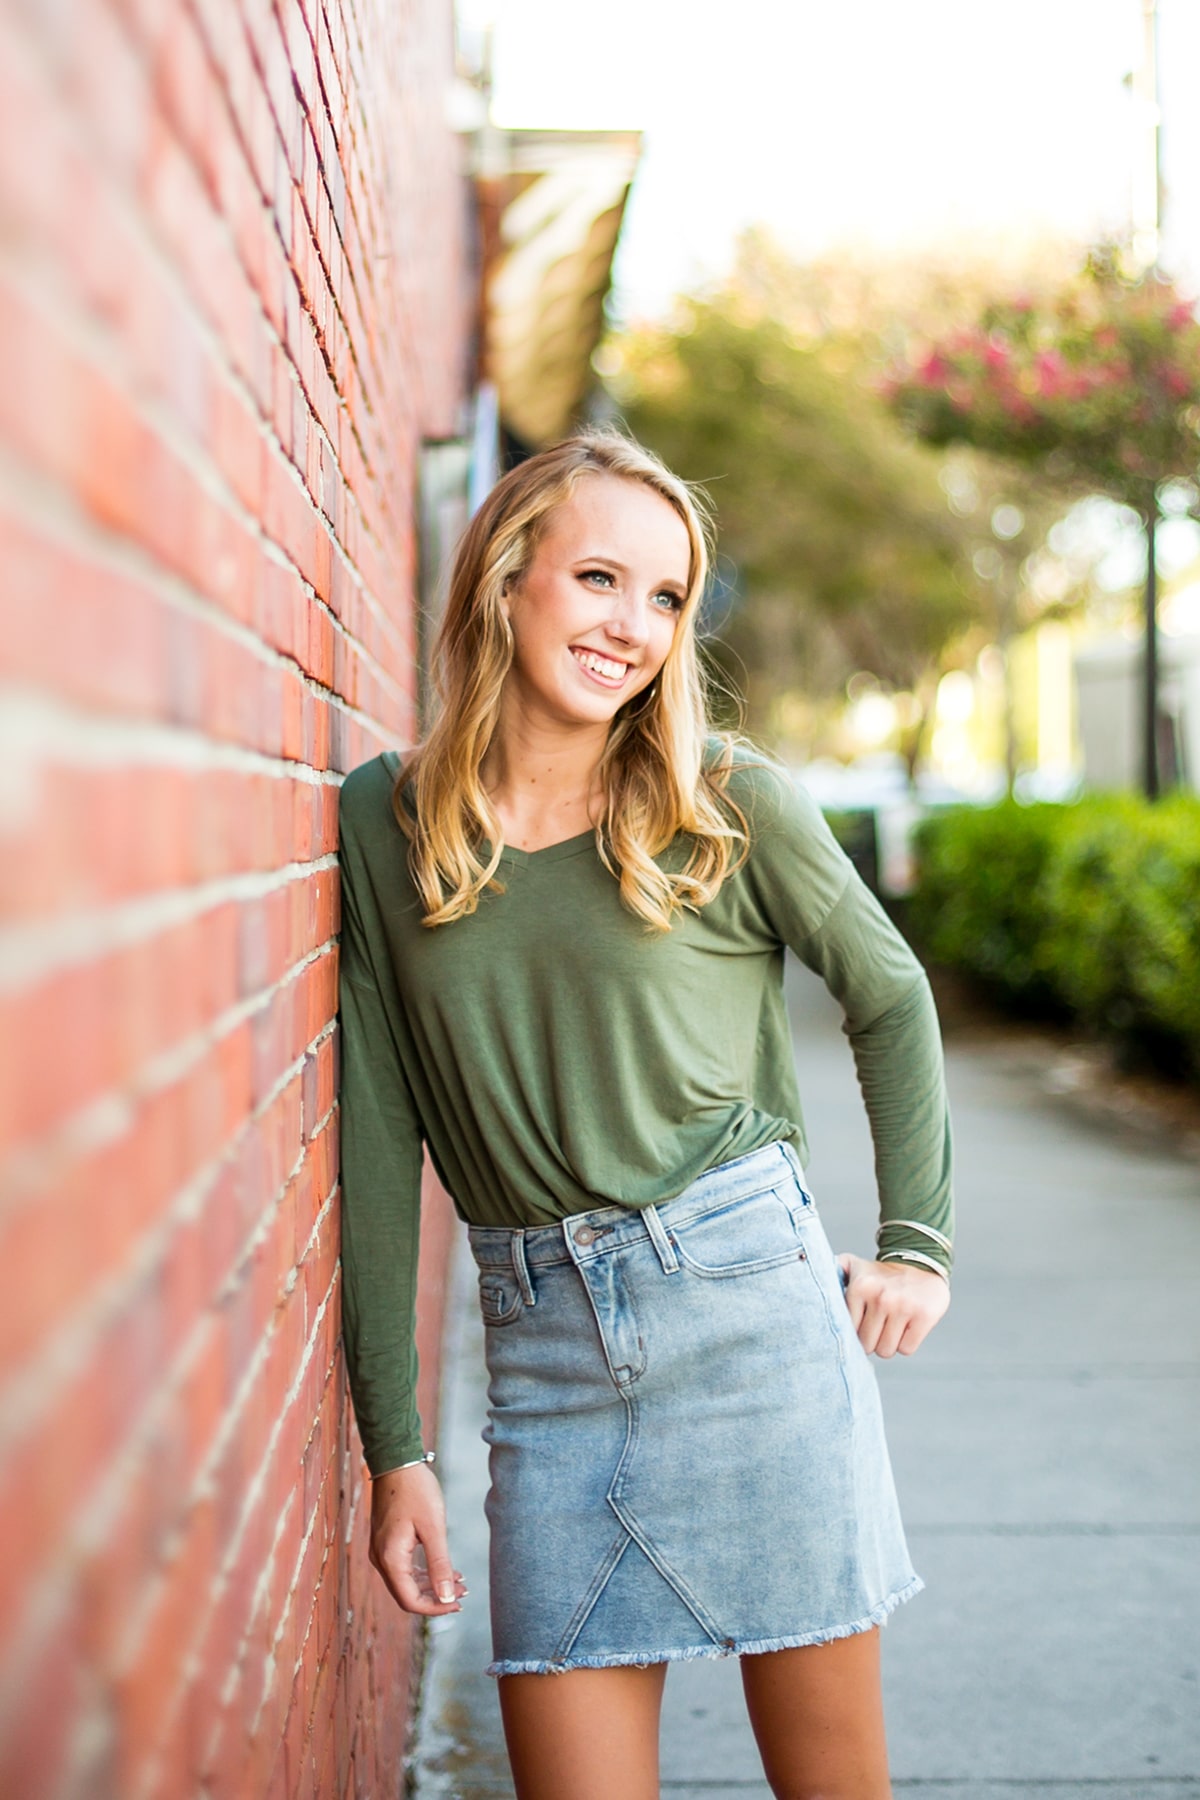
    I LOVE this leaning pose because it helps to anchor the kiddos.  It gives them something to do.  It also makes them feel a little more comfortable, so you’ll get all kinds of killer looks. Everything for giggly and laughing, to those super serious eyes. 
    For guys, it’s such a natural pose and doesn’t make them feel awkward like just standing there may. 
    It can also be a great opportunity for capturing leading lines, depending on the background. 
    I use this pose a lot to capture those half body or 3/4 body shots. Very rarely do I shoot a full body look, but these are great for capturing more of the look.
  • No.
    04
    Action
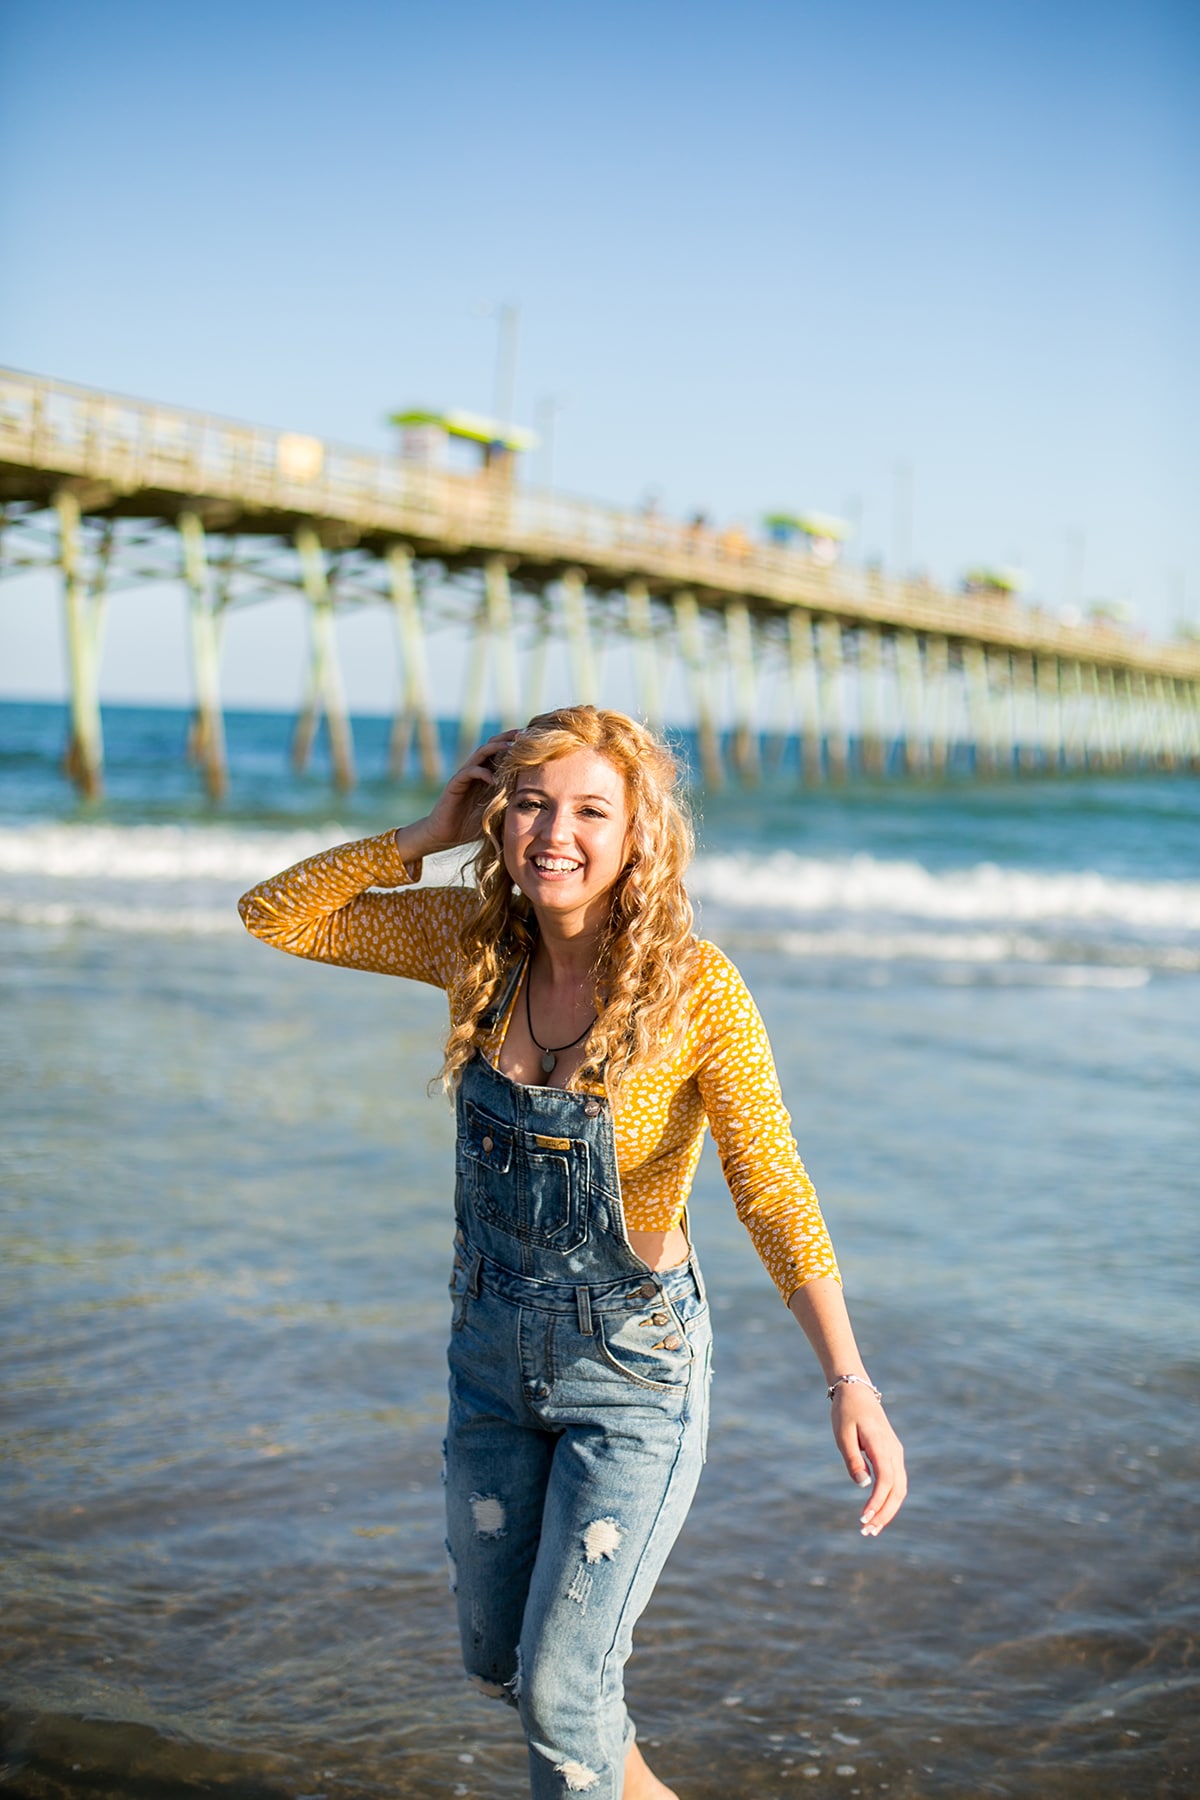
    So these are my walking or action shots. 
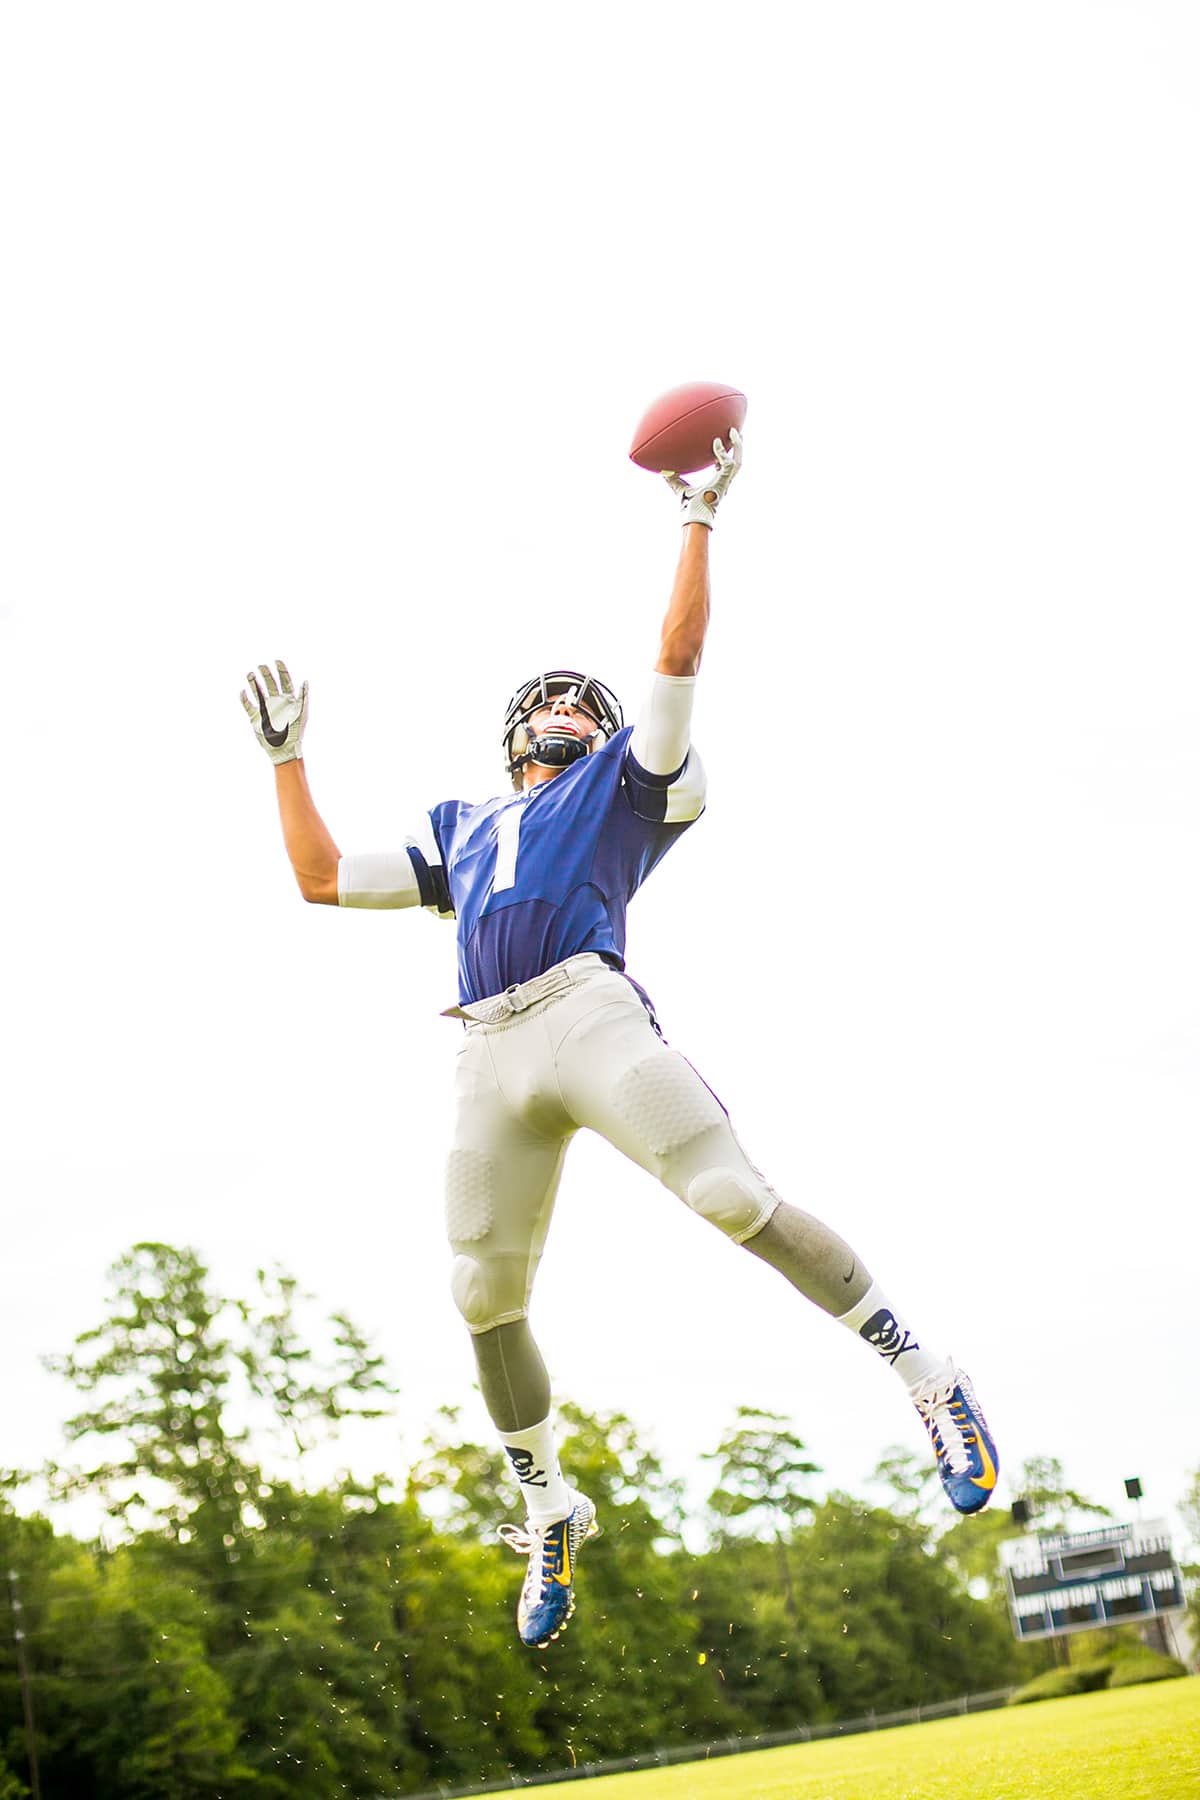
    I LOVE to get them moving!!! If we’re on the beach, we’re usually running through the water. If we’re in sunflower fields, we’re jumping. If we’re on a boardwalk by the marina, we’re walking. If we’re on the football field, we’re passing the ball and jumping high for catches!! 
    Basically, just get involved in with them, make it fun, make them laugh, and you’ll capture true joy!! 
    Senior Posing tips
    I’ll never forget when I was shooting this football shot… y’all, I was on laid out on the football field on my tummy in the wet grass shooting it over and over again until I caught just the right angle and catch. He probably did like 20 catches. I told him he didn’t know he was going to get a workout while doing his senior portraits!!! 
    One of the coaches happened to come out on the field to chat with Jared’s parents and myself and as he stood there watching us work…he said, “Ok DANG, I’m gonna have to get your name and number because I have a Senior daughter and she HAS to work with you!!! You are AMAZING!!!!!” 
    Needless to say, they called that night and I did her session a few weeks later. You never know where your experiences will lead you, but trust the process, always deliver, and you’ll see amazing growth!
    Senior Photography Football Action Shots
  • No.
    05
    Shoulder
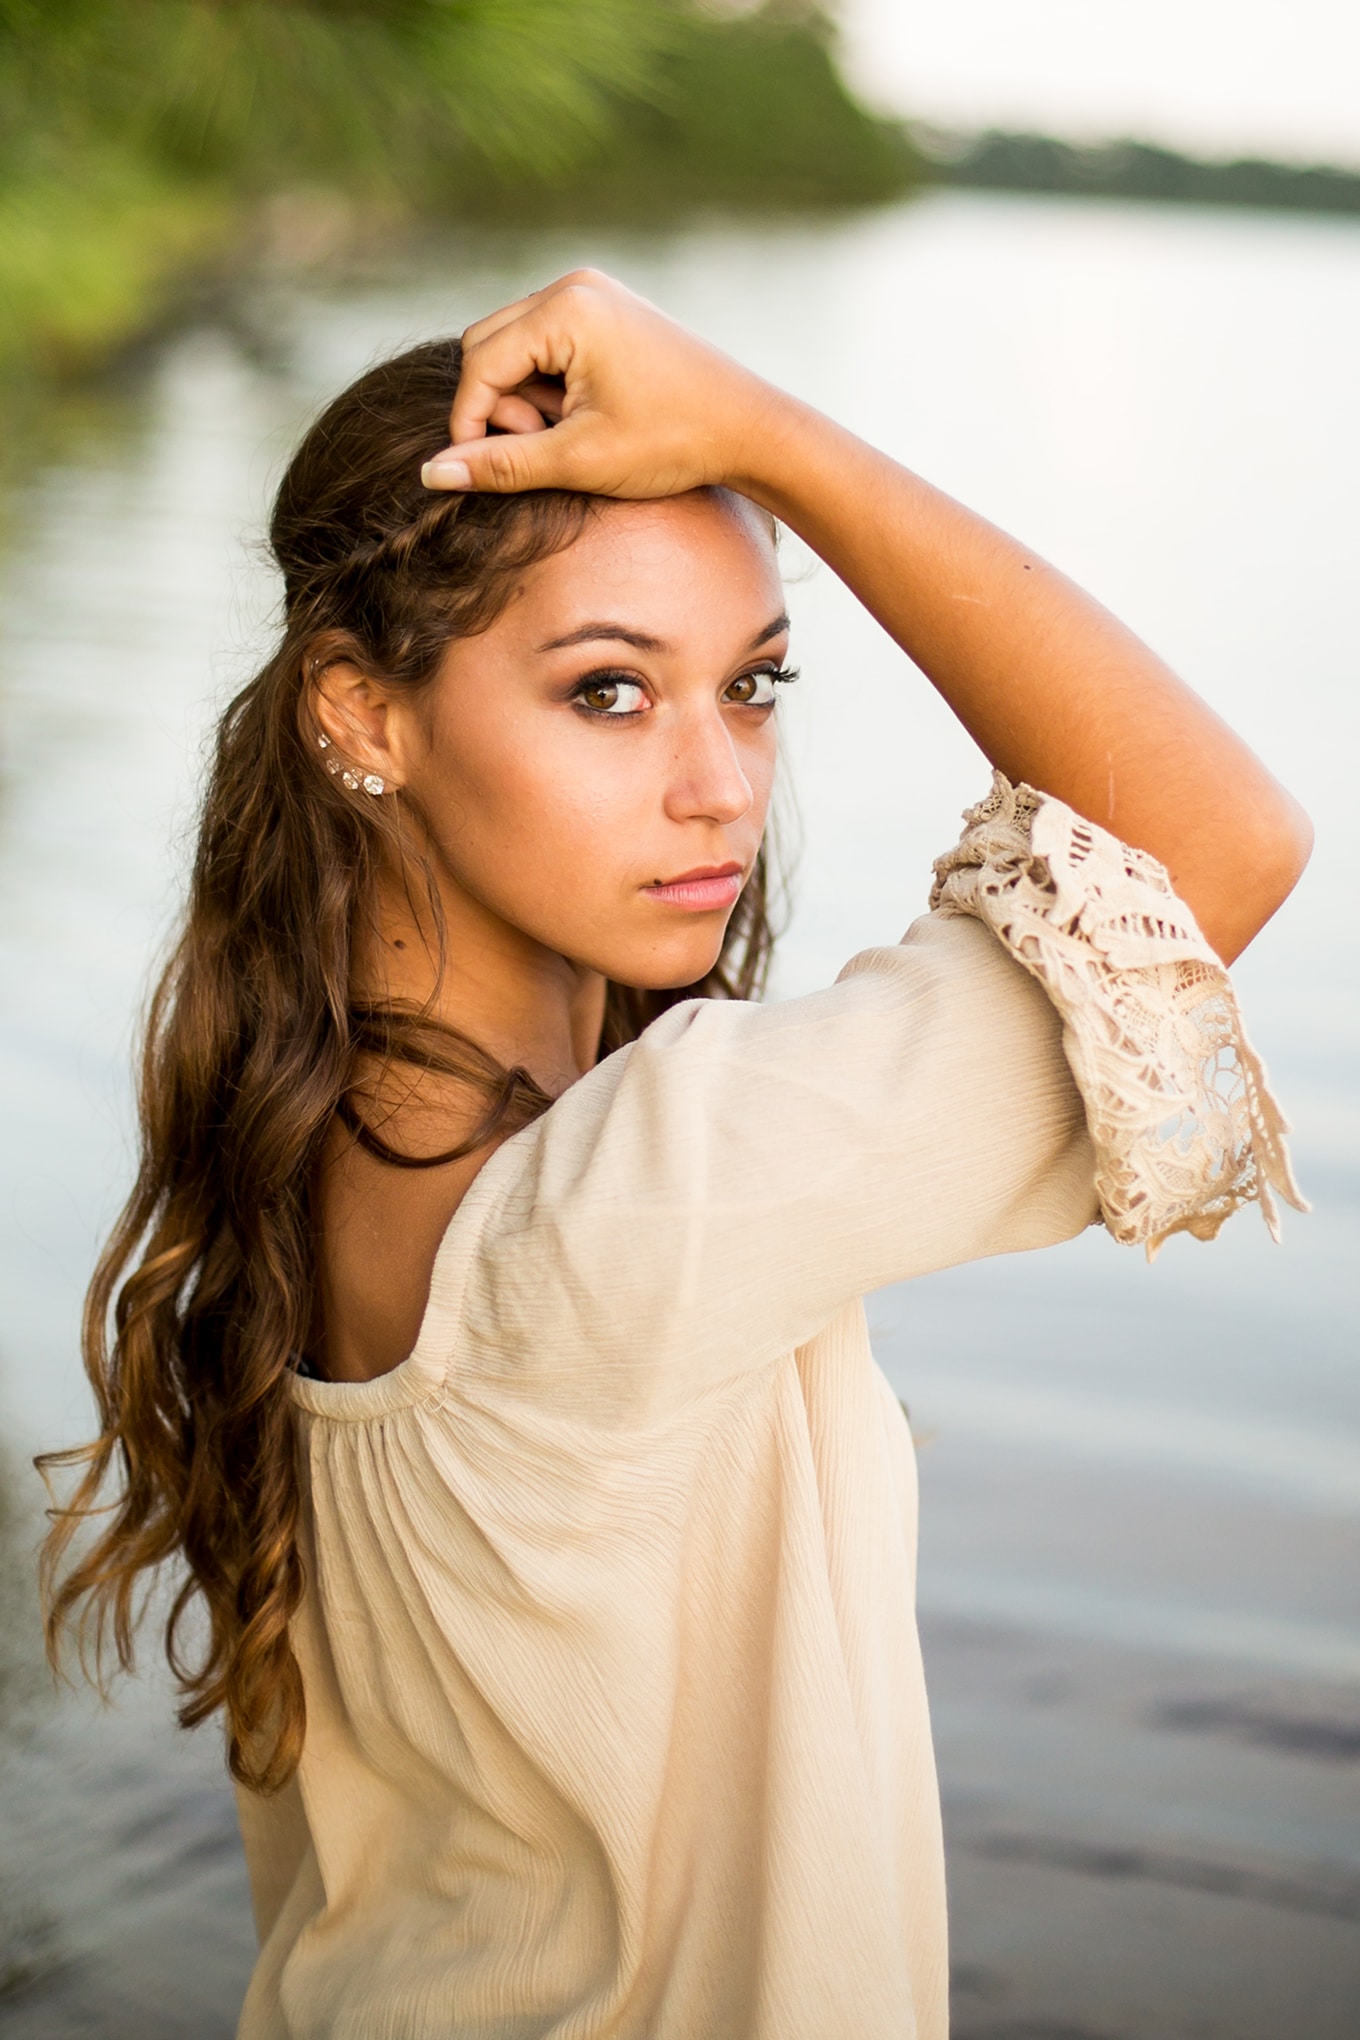
    For our last pose, let’s talk about the power of the shoulder! 
    I use these “over the shoulder” looks all the time! They are a GREAT way to capture those swooning eyes and eyelashes!! It helps their posture and is a great way for their attitude and “power” to come through. I usually have them serious first and then have them “lean and laugh” towards me. These make for great up close shots too. 
    Have them face away from you and then have them come back over their shoulders. I usually have them drop their eyes, then lift just their eyes to me and then give me a good laugh. You’ve just created THREE totally different looks and vibes from literally ONE pose. Think of that posing work flow and how simple it can really be!!!
    Senior Girl Posing Ideas

Bonus Tips

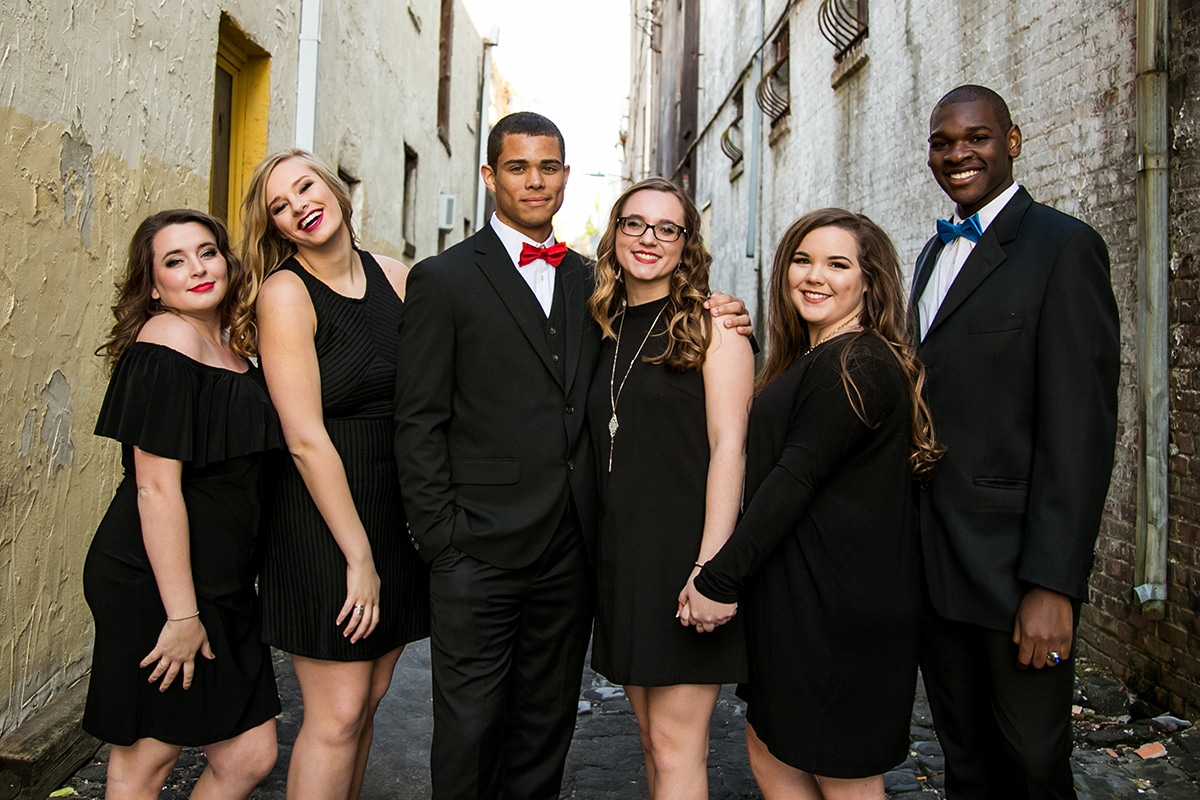
Groups – My best tip for working with groups is to have them all interact or touch in some way. That way they all feel connected and cohesive. I have done a few poses where it was very editorial feeling and I had them all “power posed” and separated, but that’s a rare pose I use. 
I love it when they are all laughing and looking like they are having fun!!!  A few fake “everyone look at each and laugh” directions usually makes them all break into genuine laughs because it feels silly at first!!! 
Senior Photography Group Shot
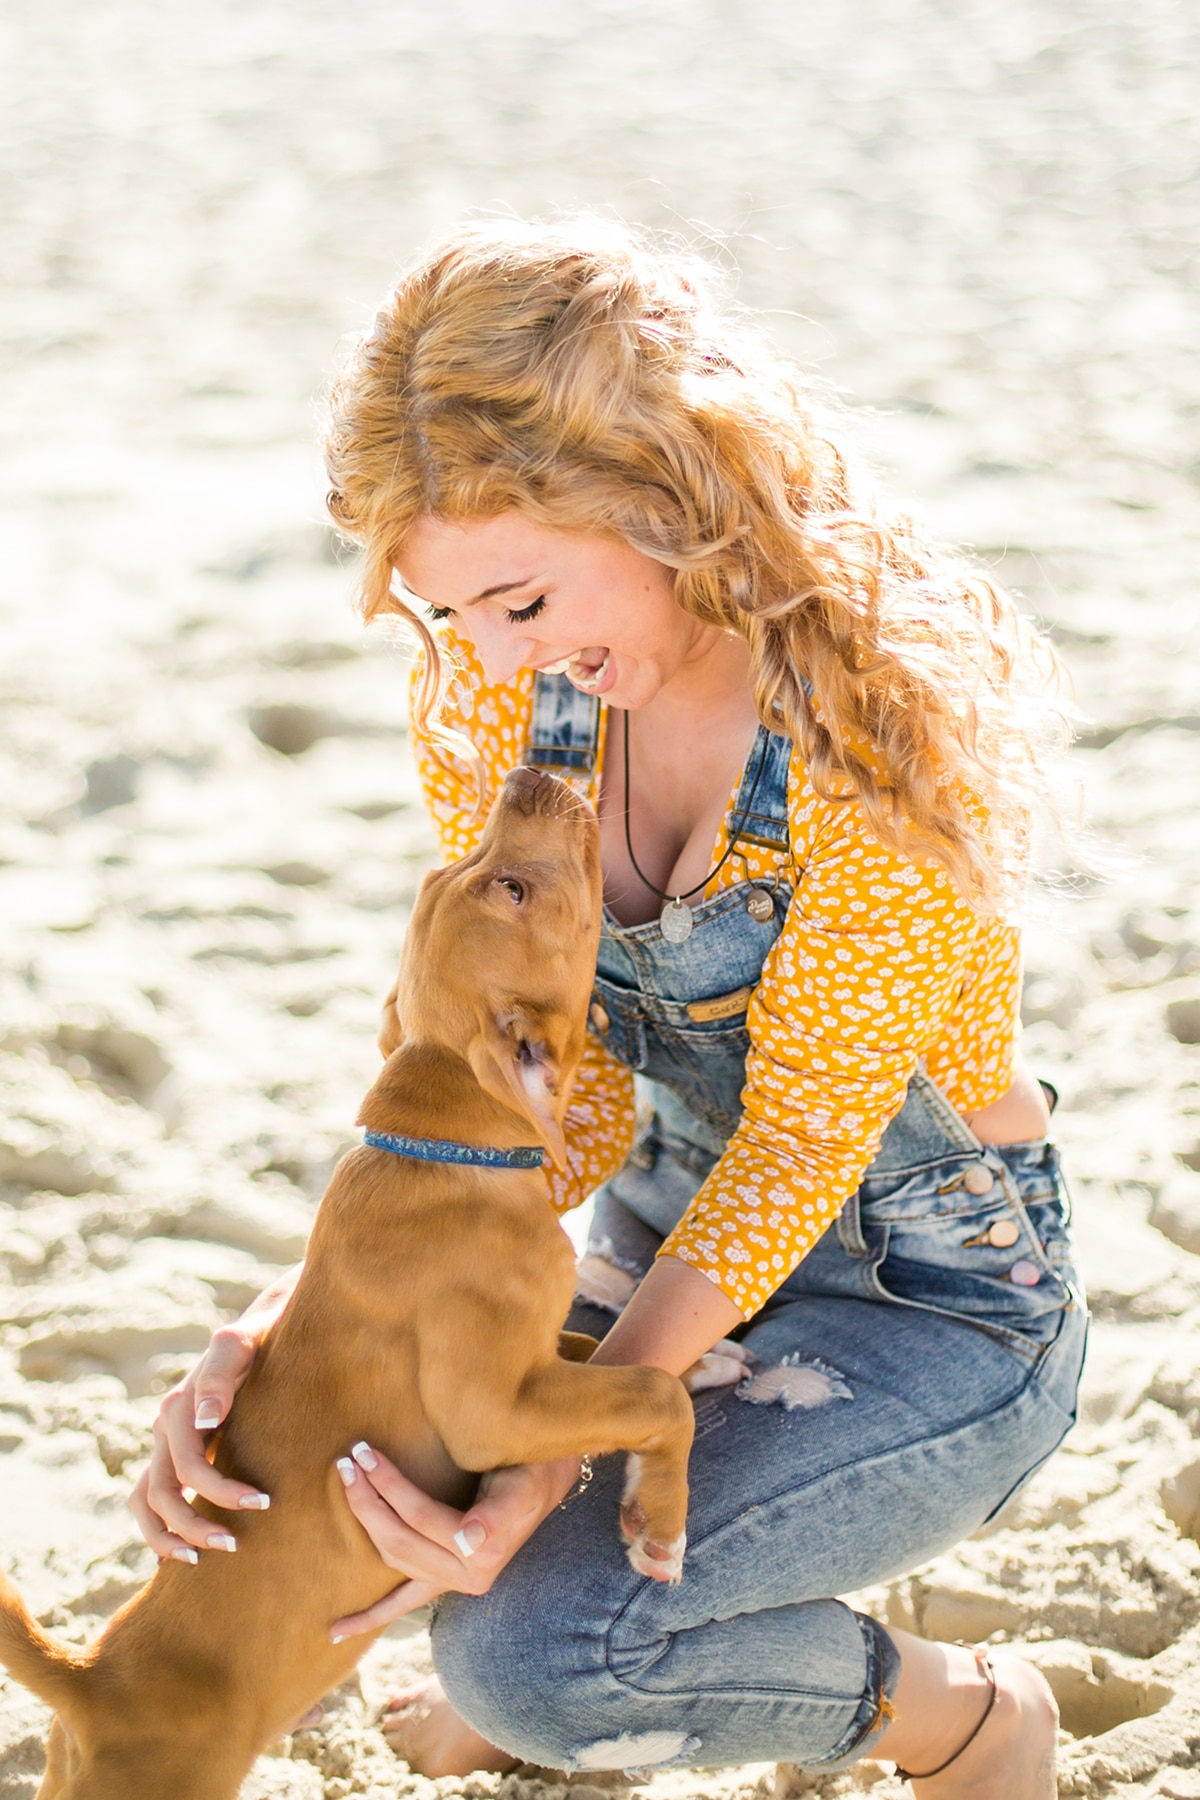
As for incorporating pets, I get this request a lot. And I LOVE for them to bring their animals to their session. We usually start with the pet, do those shots, and then have the parent take them or we have the other parent bring the pet out right at the end. But it’s a great way to make their session special by making memories with their “best pet friends”!!
Senior Photography Pets
In closing, I try to be open minded to their requests and make it work as much as I can!!! They’ll thank you for that and sing your praises all day long!!
I hope some of these posing tips give you a few new ideas to use with your clients.

By Courtney Slazinik
Canon vs Nikon: Which is better?
One camera setting that ruins your pictures
(and more, keep reading):
Among our users, we have some of the most talented photographers in the world share advice that you won't find even in the most expensive subscription magazines. That's because some of them only post on our website, so you won't find this information anywhere else! Some of them post under an alias, others disclose their studio name, it's up to them. But in either case you get to read and discover photography techniques that will make you very good at taking pictures.
Unlike other websites, we don't try to pitch DSLRs, lenses, and other gear while collecting sales commission. We don't sell photography tutorials, books, videos and courses while promising that your photography will improve only if you buy what's being promoted. We promise that your photography will get better without you ever having to pay us a penny. Knowledge is supposed to be free.
Instead, our users, who are professional photographers and serious amateurs, some with decades of experience, will share with you what they learned, what gear they use, which products really work and which are useless, which techniques work and which don't.
It's all completely unbiased. Our users simply have no reason to lie to you. They are people just like you.
And we provide a free website for you to read about what exactly made them really good at taking pictures. So you get to discover this information straight from the source, from people just like you, not from editors of some magazine or sales reps of some company. It's what makes us different from other photography websites out there that try to sell you something while claiming they are trying to help you.
Discovering what our other users have to share will help you figure out which gear to use and how to use your existing gear to its fullest potential. So it doesn't matter if you are only thinking of which camera to buy or if you already have all your equipment -- you'll still find plenty of solid advice for any situation.
• We cater to beginners, intermediate, advanced, and professional photographers. It doesn't matter whether you are just getting into photography or you have decades of experience -- you'll still find plenty on our website that will interest you because we cover all bases. We make it all simple for the newbies, yet interesting for professionals who've shot hundreds of gigs and would gladly be reminded of things they once knew but forgot. So no matter what your expertise level is -- keep reading below.
• We cover both film and digital photography.
• We talk about professional DSLR cameras, mirrorless cameras, mid-range/prosumer models, point-and-shoot, and even camera phones. Because as they say: the best camera is the one you have with you. So it doesn't matter if you shoot with an iPhone or with the biggest, bulkiest, newest, most expensive DSLR with an array of light modifiers. You need to know how to take great pictures with whatever you have on you right now, while the shot is still there, not later when you get you gear out, yet the opportunity to take the the picture is long gone.
• We cover all types of photography from portraits to landscapes to weddings and events to action shots to macro photography. (Which one interests you the most? Stop and ask yourself right now. You'll need to be able to answer that in just a minute. No matter what you shoot, you'll get better at just that. Read below to find out why.)
• We cover all aspects of photography from picking gear to composition to working with models to handling strangers in street photography, and everything in between. If you are lacking in some aspect, you'll improve. If you are a total newbie, you'll learn it all.
• You'll be receiving new tips and techniques on how to take the kind of pictures that will make your friends, relatives and peers just stare in amazement, speechless, when they see your work. Yep! That's how good your photography will become. Trust me, I know the feeling. And you'll know it too. People telling you "oh wow, it's like in the magazines" when seeing your pictures. (Surprisingly, the most common response you hear from people once you get really good at taking pictures is "it's like in the magazines". Not Instagram/Facebook/Snapchat feed or whatever, but quality magazine. That's the first association that comes to their mind. The mark of a true professional, even if you are an amateur and do this just for fun. I love it when people say that while looking at my pictures, even when they are looking at my pictures on a screen. Oh, the irony! Just imagine that feeling. Pretty soon, they will be saying that to you.)
• You'll be receiving our photography digest with tips, tricks, reviews and discussions that you won't see anywhere else. All original content. Only posted on our website, as explained above. Most of what you read on our site is only posted here -- not the same old and tired copied and re-copied "tutorials" of people who claim to be "professionals" which seem to be flooding all the photography sites out there.
• If you ever have a question or need help, you can always ask, and we'll cover your question in the following digest issue.
• And of course, it's all completely FREE!
• Let me repeat that. Since for some reason a lot of people contact us asking if the membership is really free: we are a social website for photographers, so we don't sell anything, and we don't charge any fees. It's as simple as that.
Here is how to proceed and what to expect:
The signup process is completely automated, so you are just a few minutes away from discovering what our existing users already received earlier today. You'll get up to speed right away on what's the latest on our website, without any long introductions or other delays.
And if you don't like what you are reading, you can always unsubscribe. Just like subscribing, the unsubscribing is done automatically instantly. So you have nothing to lose by checking out our digest.


Going forward, the next digest will be released in just a few hours. So please make sure to sign up right now, because otherwise you'll miss it.
Here are just some of the things we talk about:
(see if something in particular interests you, as you will learn this today)
- How to make almost anyone look great when taking their portrait. Regardless of facial features, type of face and hair. (A few tricks to position the light and the angle of your camera that work on 95% of people.)
- Is there a better way to compose than the "rule of thirds?"
- One simple technique that allows you to use your flash in a way that makes your pictures look as if flash wasn't used at all. (The opposite of deer-in-headlights amateurish pictures you would normally get when using flash.) So if you hate using flash because it makes your pictures look bad, then you really need to learn this.
- Which camera brand (Canon, Nikon, Sony, Pentax, Olympus, etc.) has the best sensor and the best electronics? We cover this in great detail through discussion with real photographers who speak from experience, not just dry tech specs. (The answer will definitely surprise you.)
- How to make HDR pictures without them looking either soft (with no contrast what so ever) or over-saturated to the point of looking like a cartoon?
- How to make sure pictures taken indoors and without flash aren't blurred.
- How to make money off of your photography no matter where you are located?
- Which camera gear is right for your specific needs.
- Buying a fast prime lens vs. buying an external flash unit -- which is a better upgrade?
- How to take a giant shot of the moon (or some other distant source) while keeping your foreground subjects sharp. Imagine a picture where the moon fills the entire frame, yet the silhouettes of people and trees and other objects in the foreground are crisp and clear. Can you do that now? Would you like to learn how? Keep reading.
- Is good "glass" always more important than expensive "body"? (you would be surprised!)
- How to reduce camera shake without using a tripod.
- How to make those beautiful blurred backgrounds (bokeh) you see in professional photos while keeping your subject entirely perfectly crisp. Not just the eyes or the ears with having to choose due to shallow depth of field, but the entire subject.
- Which cameras have the best performance in low light situations?
- Are macro lenses better for regular photography than regular glass? Curvature of the focal plane actually matters.
- Is it generally better to increase ISO or to lower shutter speed? (for non-action shots)
- And much more. Way too much to list it all here.
Sign up today and start receiving photography advice, techniques and reviews in just a few minutes from now.
Here is how to proceed and what to expect:
The signup process is completely automated, so you are just a few minutes away from discovering what our existing users already received earlier today. You'll get up to speed right away on what's the latest on our website, without any long introductions or other delays.
And if you don't like what you are reading, you can always unsubscribe. Just like subscribing, the unsubscribing is done automatically instantly. So you have nothing to lose by checking out our digest.


Going forward, the next digest will be released in just a few hours. So please make sure to sign up right now, because otherwise you'll miss it.  Just type this URL into your browser "https://www.uglyhedgehog.com"  and click ENTER.

Ugly Hedgehog Photography Forum

5 Tips For Shooting With Expired Film

image

#photographyhobbyist  #photographybestoftheday #photographyforever


Shot on Polaroid Time Zero film, expired 2004 by Andy Jenkins}
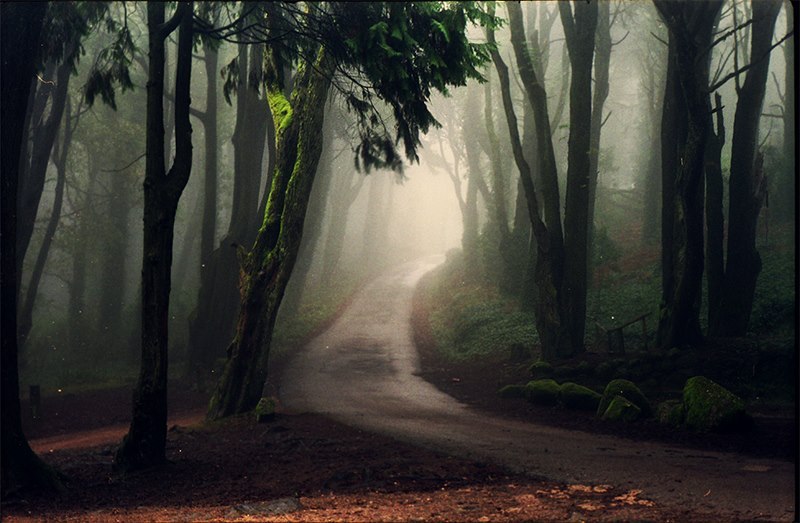
Expired film was once bad. After all “expired” means it’s no longer good, right? Except at some point photographer’s figured out that expired film can give some amazingly dreamy and surreal results – making something undesirable into something people want A LOT. Crazy colors, vintage atmospheres, hazy streaks and unique textures are just some of the interesting results you can get from shooting film that’s past its date.
However expired film has some drawbacks - with the biggest one being you have absolutely no idea what will happen until you shoot it. It could be gorgeous, it could be hideous, you really won’t know until you put in your camera.


1. Get to get as many rolls as you can

Once you find a type of expired film you like, it totally sucks to have only one roll! To be able to fully take advantage of the effects once you know what they are, it’s important to snag as many rolls of the same expired film as you can at the same time. The same lot of film will offer some consistency even when it’s past its prime. Photographer Neil Krug stocked up on mass quantities of expired Polaroid film for his hugely successful “Pulp” series and book, allowing him to develop a unique style that is all his own - and which many other photographers try to imitate.


2. Avoid Portraits for the first roll

One frequent result of film being past it’s expiration date is that the grain appears enlarged. Not always, but frequently enough. Also there are the previously aforementioned color shifts, which can leave people looking ill or unrecognizable when applied to skin tones. When trying out a new roll of expired film, stick to landscapes and still life since there’s a good chance your portraits won’t turn out the way you want them.
*An exception to this rule is for those who are shooting expired instant film, which generally speaking turns out quite lovely for portraits.


3. Don’t research expired film effects for a particular film

Honestly this can only lead to disappointment since the nature of expired film is so unexpected. What happened for one photographer may happen for you, but it probably won’t because of so many varying conditions. The way you store your expired film, the camera you shoot it with, the season when you’re shooting, the age and temperature of the chemicals to develop your film… are just a few of the factors that determine your final result. Don’t go in trying to get a specific effect - instead be open to a wide variety of results.
image
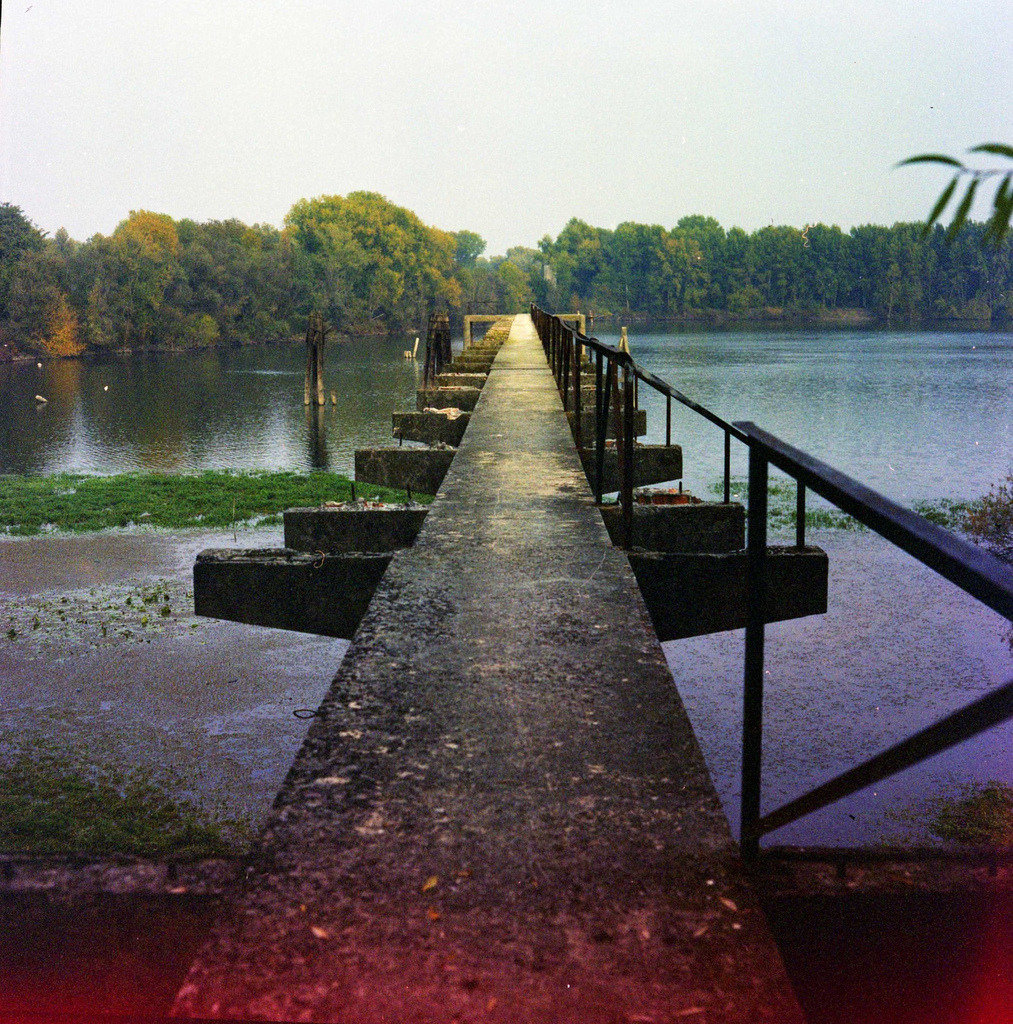
{Shot on Fuji Reala 100, expired 2007 by Pedro Terrinha}


4.Bracket

What is bracketing? It’s basically saving your ass on a shot you really love. Find your correct exposure and shoot that, then shoot one stop up and one stop down. Voila. So easy.


5.Shoot in optimal lighting conditions

Go outside, during the day or if you have a studio go there. Why risk not having enough light and essentially wasting your money on photos that you consciously know will probably not turn out. Every photographer on earth has been guilty of the crime of blatantly ignoring his or her trusted light meter at one point or another. Why would you suddenly not trust your light meter? Has it ever led you astray before? Probably only when you didn’t change it’s batteries. Expired film is not the time to test your exposure limits. Trust me.
image
{Shot on Kodak Portra 400 UC, expired 2004 by Marcello Rossi}
Lastly, be prepared for the worst…
Full disclosure: a lot of the gorgeous expired film images you see online do not represent the majority of photos taken on expired film — and yours may turn out really ugly. But that’s just a risk you’ll have to take. Even when keeping the above tips in mind, go into shooting expired film with absolutely zero expectations and you’ll never be disappointed!
Check Out: more photos shot on expired film
Looking for more tips on film photography? Head on over to our Beginner’s Guide for the basics or our Learn page for more in-depth techniques!
Courtesy of: I Still Shoot Film

5 Female Photographers Capture Bridal Portaits in 15 Minutes

Sunday, January 13, 2019

What Is Slide Film: An Introduction To Color Reversal & E-6


image

#photographyhobbyist  #photographybestoftheday #photographyforever


Ahhh slide film… a once completely standard medium has now become quite illusive - like personal space on an airplane or a pair of heels to fit my size 10 feet in France. (Seriously you would not believe how small French women’s feet are!) Contrary to popular belief, your grandfather’s preferred medium has not disappeared once and for all, and is in fact alive and well. As of 2015 Fuji is the only original major manufacturer of slide film which continues to produce it today, but you can also get it from Lomography, Rollei and some other independent companies.

Let’s start with the basics: what is slide film? In simple terms, it’s the opposite of color negative film. Instead of a negative, it makes a positive. This is why it is also called color reversal film. When you develop it, you see a tiny photo - no print needed. Think of it as bizarro world color film, or opposite day color film if you prefer. If you were born before 1990 there is a very high chance you were forced to watch old slideshows of your parents’ vacations from the 1960s. In fact, the term “slideshow” comes from the ancient practice of subjecting one’s friends and family to sit in the dark and stare at images projected on a wall for hours while they drone on and on and on about that camping trip to the Grand Canyon that one time. When you make a slideshow presentation on your computer, the icons resemble the plastic mounting used on actual slides.

image
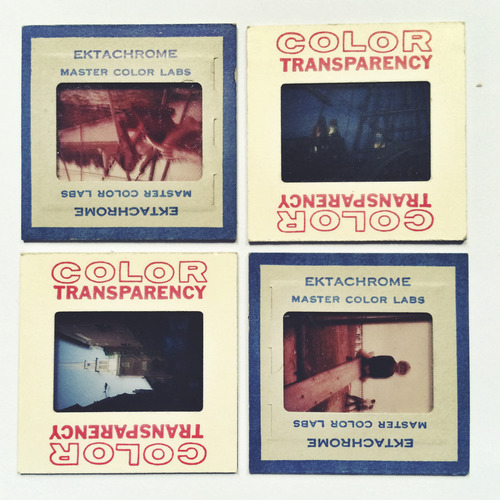
{Vintage color slides on Kodak Ektachrome, from ISSF’s private collection}

You may have heard the term “E-6” in relation to slide film. E-6 refers to the developing process for slide film (as opposed to color which uses C-41.) E-6 processing is not that different from traditional black and white processing in theory; it consists of 6 baths which include developer, stop and fixer. However that’s about where the similarities end, as other steps in the process include a color developer bath, bleach bath and even an anti-fungal agent. Some tutorials are out there for home-developing E-6, but personally I wouldn’t recommend it unless you have a fully equipped professional darkroom at your disposal – considering formaldehyde is essential to the bleach bath, best left in the hands of professionals. For more on the chemical composition of slide film itself, check out How Film Works.
image
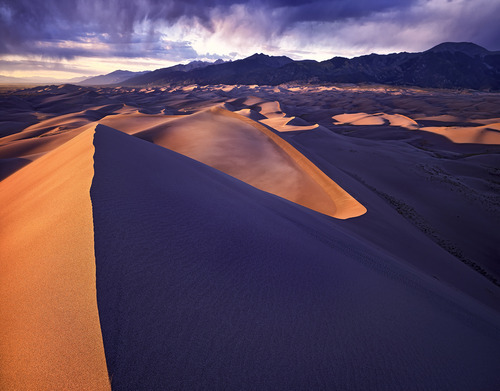
{Star Dune by Zach Boumeester, shot on FujiChrome Velvia 50}

Slide film has a one-and-a-half stop range. If you happen to be familiar with the principles of exposure, then you know that’s not a lot room for error. If you aren’t familiar with these principles, let me tell you: THAT IS NOT A LOT OF ROOM FOR ERROR. I’ll explain:

  • Black and white film has a 5 stop range, meaning you can be underexposed or overexposed by up to five stops and still have detail in the highlight or shadow areas. Don’t speak photographer? Translation: The correct exposure for your photo was at F/8 for your ISO and shutter speed, but you shot at F/16 - and your photo will still be okay.
  • Color film has a 3 stop range, meaning you’ll still have detail even if you’re off by up to three stops.

Which brings us back to slide film, and it’s very very low stop range of 1 ½. (Side note: I have seen articles online which state that slide film has a 3 stop range, color film a 5 stop range and B&W film an 8 stop range. This basically contradicts everything I ever learned in any darkroom class ever… and I have to assume these people are scanning and not printing in a darkroom. Scanning and tweaking in Photoshop probably will get more out of lost highlights and shadows, but I would not approach shooting with these larger stop ranges in mind.) When shooting slide film, correct exposure is essential - hence the reason it’s often referred to as “professional” film. If you feel comfortable enough with your exposure skills, there are some great benefits to shooting slide film.

image
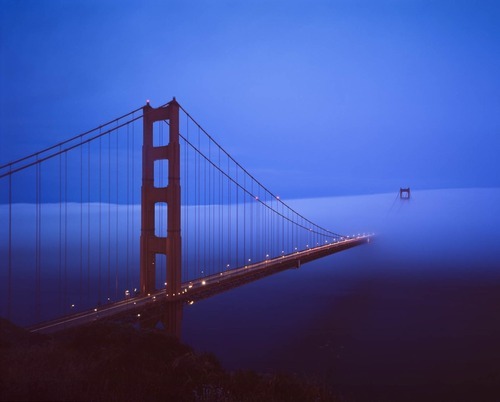
{The Golden Gate Bridge by Matt Nuzzaco, shot on 4x5 FujiChrome Velvia 100F}

Advantages of Shooting Slide Film

  1. You see what you actually shot. This is a BIG ONE. Whenever you scan or print from negatives, there is always the interpretation of the scanner/printer (I’m talking about humans here not machines) and how he/she thinks the print should be exposed. When you make a contact sheet in the darkroom, you can make it lighter or darker according to what you want and what you need. When you develop a roll of slide film, you see exactly how you exposed your film - zero change due to processing and printing.
  2. Crisp, bright colors and higher contrast range. This is probably the largest broad appeal of shooting slide film, considering all of the Photoshop actions out there designed to mimic its effects. When exposed correctly, slide film produces beautiful colors, with extra brightness and pop or ridiculously accurate skin tones depending on the brand of film.
  3. Very long archival life with little effort. Slides often come in a little plastic box which you can just tuck away without having to sleeve… even if you chuck them in a cigar box like someone I know and leave them in the basement for 40 years they’ll still probably be okay. Prints on the other hand, need acid-free sleeves if you don’t want them to fade and deteriorate.
  4. No need to order prints to see your final images. So at least that saves on what you spent on the slide film.
  5. Cross processing is fun and can create some cool results if you’re looking to experiment.

Before you run out and spend all your money on a brick of Fuji Velvia (actually that’s not a bad idea) let me just stop you one second - there are also quite a few serious downsides to shooting slide film:

Disadvantages of Shooting Slide Film:

  1. Exposure must be on point. If you push the limits in low-light situations, shoot fast-paced street photography in varying conditions, or tend to use automatic settings slide film is not for you. When it goes wrong it goes very wrong and there’s a good chance your roll will be mostly blacks or mostly whites if you don’t know what you’re doing.
  2. It’s expensive! Slide film is not cheap - mostly because people are using it less and less. Kodak doesn’t even make slide film anymore - and they were frontrunners of the original process!
  3. It’s highly specialized. Most slide films are good for one specific thing and that’s it. This is not a 100% rule, but for example the previously aforementioned Fuji Velvia is excellent for landscapes. It can also be a recipe for super weird and orange skin tones.
  4. Making prints is difficult and expensive. Yes, not needing to make prints is technically an advantage, but if you do want to print from a slide, you’ll have to procure some color reversal paper - and good luck with that considering I’ve never held a box in my hands ever. That doesn’t mean you can’t find it (Fujichrome Paper Type 35 still exists), it just means making prints from slides was never a particularly common practice and it’ll cost you some $$$$.

image
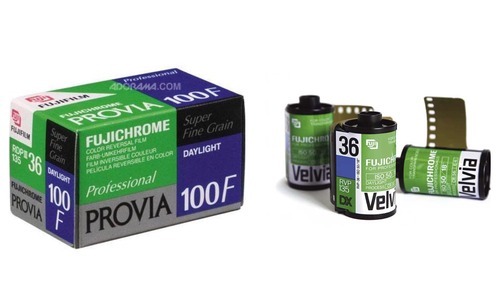
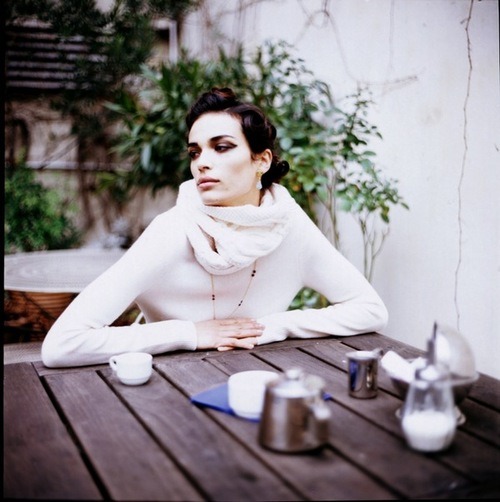
{Marie Meyer in 2006 by me, shot on FujiChrome Provia 100F}

Tips for Shooting with Slide Film:

  • Avoid low light. If you’re not working with artificial lights that you can adjust to fit your needs, stay away from low-light situations with slide film in the beginning - it’s a recipe for disaster, and totally black photos. If you’re trying it out for the first time, shoot in broad daylight to give yourself options.
  • Bracket. What is bracketing? It’s basically taking extra pictures at different exposures because you love a shot so much you just don’t want to risk it. Meter the scene, shoot it at the correct exposure, then shoot one stop up and one stop down. There, you just bracketed.
  • Use reflectors and diffusors to control light and shadow. If you have the space and time (and possibly an assistant or very nice friend to help you out) using reflectors and diffusers can seriously increase the information in your shadows and help you control blown out highlights. Not a great option for street photography, but a life-saver for portraits.
image
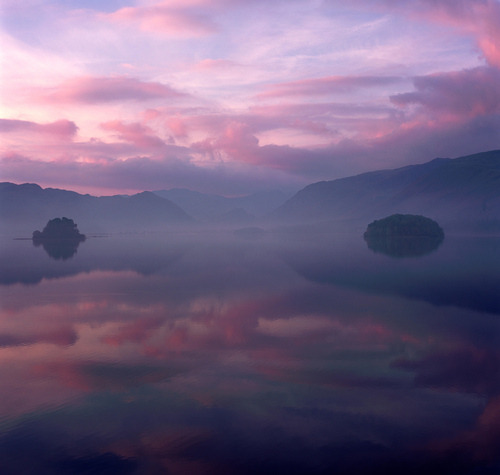
{Borrowdale in Pink by Tim Haynes, shot on Fuji Velvia RVP100}

Voila, an idiot’s guide to slide film. Now you can wow your friends with your technical knowledge on chemicals and stop range! Want to see more photos shot with slide film? We’ve got tons of great shots on Fuji Provia, Fujji Velvia and even Kodak Ektachrome.
For more information and help about getting into film photography, head on over to the Beginner’s Guide to Film Photography.
Courtesy of: I Still Shoot Film

I Still Shoot Film’s Guide to Buying Used and Vintage Film Cameras

#photographyhobbyist  #photographybestoftheday #photographyforever


So, you want to buy a film camera… you may think that they are no longer manufactured, but you would be mistaken. Fuji, Leica and Hasselblad are just a few of the companies that still manufacture film cameras - even if the latter may cost you your first born child after refinancing your house. Now is the perfect time to snag up as many film cameras as possible, while people are upgrading to digital and 35mm isn’t old enough to be considered “antique.” You would be surprised how often you can find great film cameras for a couple of dollars… I believe I paid $2.50 for my Moskva 5 and it’s one of the cameras I use the most. Purchasing used and vintage film cameras may seem intimidating if you are not familiar with them, but it’s actually easier than you think. First you have to remember: if you don’t buy the camera from a dealer or shop, there’s always a risk of something being wrong with it, even if it looks perfect. That’s a chance you’ll have to be willing to take. But let’s consider these important points:

First, ALWAYS stop at thrift stores. No matter where you are. I have found cameras in the following extremely obscure places: Cape Cod, MA, Owensboro, KY, Carthage MI, Culpeper VA and even the Jersey Shore. I have also found cameras in bustling tourist markets in Paris, New York, Barcelona, Bangkok and Ho Chi Minh. Whether or not a place seems like it would have vintage cameras is irrelevant; always keep your eyes open.

If a camera is less than 5 bucks and it’s not in crap condition, buy it. Who are you kidding? You know you want to, so why bother playing this game with yourself. You can always take it apart and use the pieces for a super cool camera hack.

If you go camera shopping at flea markets, GET THERE AS EARLY AS POSSIBLE. Seriously, I am that person who shows up at 7:00 am, buys every camera for sale and leaves before anyone ever even knew there were vintage cameras available. I have gotten TONS of super fabulous cheap cameras like this, including my Kodak Retinette, Dacora-Matic and Zenit-E.

When you are considering buying a camera, start by looking at the body. Normal wear and tear is no biggie but these are the things you should look for in a working camera:

  • a smooth shutter advance
  • a back that fully opens and closes
  • shutter pops at all speeds (open up the body and watch the shutter pop to make sure, I usually pop the shutter at least 10 times to verify it’s working properly)
  • you can easily slide the aperture ring
  • you can easily adjust the shutter speed without the dial getting stuck

On top of these, it is also important that:

  • the interior of the body has no mold or fungus
  • the lens is free of mold and fungus (very small spots on the lens are okay - they’ll give your photos a vintage touch, but if you look through the lens and it’s cloudy, blotchy or you can clearly see foreign matter, it’s a no-go.)

On another note, beware of people selling their cameras for over $50, and even at $50 it should be a kit with multiple lenses or extra accessories. If someone tells you their camera is worth x amount and they’re not willing to bargain, walk away. I’ve seen my beloved FM2 for sale for under a hundred bucks and it makes me sad, but film cameras are not worth what they used to be. *Obviously, this does not apply if you come across a magical suitcase of medium format Mamiyas or something glorious like that.*

These are the main things that I have looked for and it hasn’t failed me yet. You can also get great deals by buying a body with a damaged lens and then a damaged body with a clean lens and swapping the two (obviously they need to be the same model, but it’s easier to find than you think; I once saw 5 Canonets in the same flea market).

That being said, I now release you into the wild to buy your own vintage cameras. Feel free to submit any babies you find :)
Courtney Holmes

Create Family Films and Preserve Your Memories


#photographyhobbyist  #photographybestoftheday #photographyforever


Log in or Sign up for FREE and get full access to these and thousands of other Open Lessons in our catalog!
  1.   Class Trailer
  2. 1 Class Introduction
  • Duration:09:38
  • 3 What Are Family Films?
    1. Duration:06:15

    Class Description

    Create Family Films and Preserve Your Memories

    Portrait photographers capture moments in time for families, parents, and children. But in order to tell the whole story, you need to switch your camera to video mode, and become the storyteller behind the camera. Join Courtney Holmes, family photographer, filmmaker, and founder of FilmingLife Academy as she empowers you to add video to your photography business.
    In this class, Courtney takes you on location to a home in Seattle to see how she organizes a family shoot from start to finish. You will learn in a unique way how Courtney works to capture authentic family moments on video and how to stay flexible in a new home environment that you’ve never filmed in before. 


    Courtney Holmes is an American born Australian photographer who utilizes a documentary approach to create beautiful, emotional films and photos for families. 
    read full bio


    Ana Brandt  

    Photographer

    #photographyhobbyist  #photographybestoftheday #photographyforever


    (Please left click on the "full Screen" icon, it looks like this {X},  in the lower right corner of the screen above so that you can view the video in a full screen)


    Watch Now

    Log in or Sign up for FREE and get full access to these and thousands of other Open Lessons in our catalog!
    1.   Class Trailer
    2. 1 Get the Sellable Shot


  • Duration:42:51
  • 9 Studio Light Shoot: Newborn and Toddler with Moon Prop


    1. Duration:37:38


    Class Description

    Create unforgettable newborn and maternity images

    Ready to explore the art of photographing mothers and babies? Join Ana Brandt for a comprehensive class on everything you need to know about pregnancy and newborn portraiture.

    During live photo shoots, Ana will show you how to work with pregnant moms, babies and toddlers, and new families. You’ll learn how to wrap babies and how to work with a variety of props — from buckets to fabrics. Ana will also cover essential techniques for safely posing and photographing babies and toddlers, including how to identify when you need an assistant.

    Ana will walk you through integrating pregnancy and newborn services into your existing photography business. You’ll learn how to market to new moms and create pricing packages that appeal to both your clients and your bottom line. The skills you learn in this course will give you the confidence and skill you need to give new families photos they’ll cherish for a lifetime.  
    Duration:42:51
    5 Baby Safety Duration:36:01
    Duration:37:38
    11 Baby Emma Edit Duration:33:43
    12 Maternity Photography 101 Duration:31:46
    13 Clothing Options and Metering Duration:17:59
    14 Shoot: Transitional Posing Duration:29:02
    15 Shoot: Studio Lighting Duration:28:49
    16 Shoot: Couple and Monochrome Duration:35:29
    18 General Q&A Duration:15:38
    19 Shoot: Movement with Fans Duration:15:59
    25 Get Motivated to Market Duration:13:42
    26 Model Calls Duration:11:11
    28 Getting the Word Out Duration:23:54
    29 Capturing the Legacy Duration:19:19
    30 Marketing Materials Duration:24:58
    32 In Person Sales Duration:27:08
    33 Selling Your Work Duration:19:27
    34 Sneak Peak and Sales Duration:33:12
    36 Are You Good Enough? Duration:11:51
    37 Battling Insecurities Duration:26:35


    #photographyhobbyist  #photographybestoftheday #photographyforever


    Ana Brandt

    Class Description

    Capturing the beauty of expectant motherhood is a delicate art. Learn how to delight your pregnant clients with luminous photographs in this 90-minute workshop with maternity photographer Ana Brandt. Ana will cover everything from lighting and posing basics to the intricacies of working with a fan and fabric in order to master the art of maternity photography

    Lessons

    3 Interview with Ana Brandt Duration:12:42

    Saturday, January 12, 2019

    Learn Inside Secrets of Professional Photographers

    Want to learn
    how to take brilliant photographs?

    Watch this FREE lecture from National Geographic photographer Joel Sartore as he explains the role that composition plays when crafting the perfect photograph.
    Watch Free Lecture Today

    #photographyhobbyist  #photographybestoftheday #photographyforever

    Photographs are more than just snapshots. When taken the right way, they become dramatic personal statements with the power to last forever. They can transport you to distant landscapes, capture fleeting emotions, recall cherished memories, reveal the beauty of daily life, and even change the world.
    National Geographic photographer Joel Sartore has crafted a course that will hone your photographer's eye so you can capture the greatest moments in nearly every situation and setting imaginable, from a field of flowers to a friend's birthday party to a grand mountain range. Taking you both inside the photographer's studio and out into the field, this course is a chance to learn, in a way anyone can grasp, the basic insights and hidden secrets of photography.

    24 Episodes (31 Minutes Each)

    1. Making Great Pictures
    2. Camera Equipment—What You Need
    3. Lenses and Focal Length
    4. Shutter Speeds
    5. Aperture and Depth of Field
    6. Light I—Found or Ambient Light
    7. Light II—Color and Intensity
    8. Light III—Introduced Light
    9. Composition I—Seeing Well (Free Lecture)
    10. Composition II—Background and Perspective
    11. Composition III—Framing and Layering
    12. Let’s Go to Work—Landscapes
    13. Let’s Go to Work—Wildlife
    14. Let’s Go to Work—People and Relationships
    15. Let’s Go to Work—From Mundane to Extraordinary
    16. Let’s Go to Work—Special Occasions
    17. Let’s Go to Work—Family Vacations
    18. Advanced Topics—Research and Preparation
    19. Advanced Topics—Macro Photography
    20. Advanced Topics—Low Light
    21. Advanced Topics—Problem Solving
    22. After the Snap—Workflow and Organization
    23. Editing—Choosing the Right Image
    24. Telling a Story with Pictures—The Photo Essay

    Courtesy Of: National Geographic


    How To Photography: Train your Eyes and Mind to See Basic Shapes First


    #photographyhobbyist  #photographybestoftheday #photographyforever

    composition image One of the fundamental skills that digital photography enthusiasts and amateurs often lack is a trained eye (and mind) that sees a potential composition at different levels. A major part of what makes a pro successful is having this skill. What the enthusiast or amateur’s eye/mind does first is to identify the objects, subjects and scenes he or she sees through the viewfinder. Humans have needed this skill to survive and thrive in both a prehistoric and contemporary world; and digital photographers must certainly recognize what they’ve captured in the frame.
    The accomplished digital photographer doesn’t start at the level of identification, however. He or she tries to disregard the details of the objects and subjects and instead looks for the basic geometric shapes that define the primary subject matter, peripheral or distant objects and the “open” space between them.
    The Rule of Thirds is one of the first compositional concepts many digital photography beginners and hobbyists learn. As beginners, they focus all their attention on placing the primary subject or object in the rule-of-thirds’ positions. With a bit of practice and study of photos, the enthusiast can obtain a deeper compositional understanding and use the Rule of Thirds more effectively. Instead of focusing on the positioned object, find the basic geometric shape that may be formed to the right or left of it. A tree in the right third of an image is also the right side of a horizontal or vertical rectangle that encompasses the space to the left of the tree.
    In landscape photography, one of the critical compositional techniques is to include a smaller object in the foreground to create a balance with the grand sweep of landscape across the background. This object may suggest a circle that leads the eye to the landscape scene. Similarly, it may be an arch of a wind-blown sapling or a curved arm of driftwood on the beach. Often, the strongest element is not the object itself, but how its form reveals the geometry of the open space to its right or left.
    Use a wide-angle lens for a landscape image and straight lines in nature begin to curve, which is a more pleasing guide for the viewer’s eye than the reality of straight lines. In the same way, diagonal lines become all or part of the outline of a triangle. Often, a foreground diagonal is positioned lower left to middle right. Then a distant diagonal becomes another side of a triangle, since it is positioned middle right to upper left.
    Squares of different sizes, in the foreground and background, can become repetitive shapes within a composition. Your challenge is to position your camera such that you can create a balance with a series of squares. One may dominant, while smaller squares accent or support it.
    It’s equally important to develop a photographer’s eye to recognize lines, both parallel and converging. Many beginners and hobbyists struggle with these compositional elements because they are often much more subtle than basic geometric shapes. In addition, parallel and converging lines that can be used creatively are only revealed when you first position your camera creatively. Almost anywhere you point your camera will result in rectangles, squares, circles and triangles, but parallel and converging lines are likely to remain hidden until you’ve found the optimum location and angle for your composition.
    Your photographer’s eye must also be developed to see three-dimensionally, with the spatial factor added to the compositional equation. You and your camera exist within the three-dimensional space of your image, not just the objects and scenes in front of you. Your spatial relationship to the elements you want to feature in your digital photos is critical. It takes practice and experimentation to determine the correct distance between you and a foreground object and its distance from the background.
    An excellent exercise to help you recognize shapes and spatial relationships is to print a number of your photos or buy an issue of a photography publication. Study the images carefully and mark the basic geometric shapes and parallel and converging lines you find with different colored markers. Then, use these as practical guides when you are in the field with your camera.
    Courtesy of : Photography Tallk