Monday, October 29, 2018


National Photography Program

The National Photography Program enables youth to develop their creativity and cultural awareness through the appreciation of photography.
National Photography Program

The National Photography Program enables youth to develop their creativity and cultural awareness through the appreciation of photography.


The National Photography Program is designed to help youth ages 6 to 18 go beyond taking snapshots and develop the necessary skills to take photographs that can really impact the viewer. The current popularity and accessibility of photography makes it a powerful means to engage youth of all ages in creative programming, while simultaneously teaching them skills they will use for the rest of their lives. For some youth, photography opens a door to creative self-expression that no other art form allows. Others may discover a career path.

Sunday, October 28, 2018


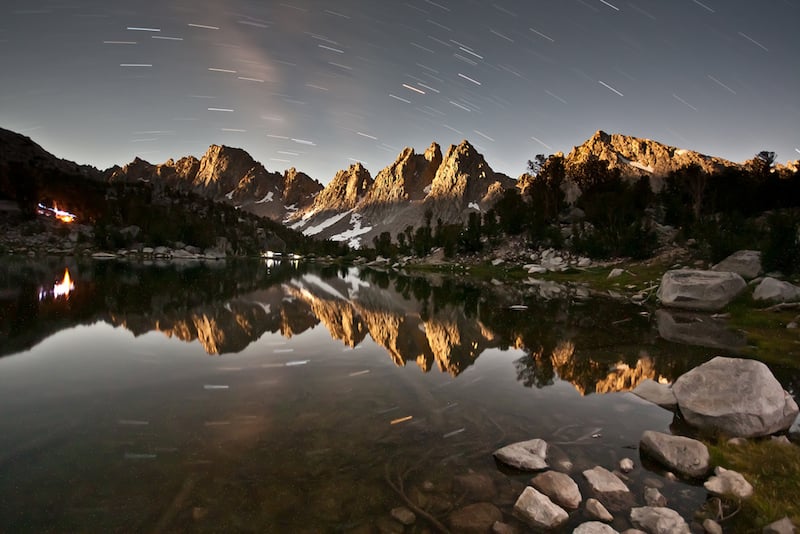
Kearsarge Pinnacles by Moonlight Lisa Clarke

40 Tips to Take Better Photos

“How do I take better photos?” 

I was extremely lucky to have many talented and generous photographers take me under their wing to show me the ropes. Without their valuable advice there is no way I would have become the photographer I am today. 


Ironically, the number one question I now get asked as an Open producer is “How do I take better photos?” 


So along with some tips that I’ve picked up over the years, I’ve recruited some outstanding snappers across Australia to share their own secret techniques about how they take their photos to the next level. 


1. Get in close

It was the famous photojournalist Robert Capa who once said “If your photographs aren’t good enough, you’re not close enough.” He was talking about getting in amongst the action. If you feel like your images aren’t ‘popping’, take a step or two closer to your subject. Fill the frame with your subject and see how much better your photo will look without so much wasted space. The closer you are to the subject, the better you can see their facial expressions too. 


2. Shoot every day

The best way to hone your skills is to practice. A lot. Shoot as much as you can – it doesn’t really matter what. Spend hours and hours behind your camera. As your technical skills improve over time, your ability to harness them to tell stories and should too. 
Don’t worry too much about shooting a certain way to begin with. Experiment. Your style – your ‘voice’ – will emerge in time. And it will be more authentic when it does. — Leah Robertson
Leah Robertson is a super talented Melbourne based photographer and videographer, specialising in music and documentary photography.You can see her work here.

3. See the light

Before you raise your camera, see where the light is coming from, and use it to your advantage. Whether it is natural light coming from the sun, or an artificial source like a lamp; how can you use it to make your photos better? How is the light interacting with the scene and the subject? Is it highlighting an area or casting interesting shadows? These are all things you can utilise to make an ordinary photo extraordinary. 


4. Ask permission

When photographing people, especially while in countries with different cultures and languages, it can be hard to communicate. In certain countries if you photograph someone you are not ‘supposed’ to photograph, it can get ugly and rough very quickly if you are not careful. So out of respect you should always ask permission. 

I have started shooting a series of school children in Pakistan. These are all posed portraits and they are looking down the lens. My guide helps me with the language and I limit myself to smiling, shaking hands, giving ‘hi-five’ and showing them the image on the back of my camera once it is done. You would be amazed how quickly people open up. — Andrea Francolini 

Andrea Francolini is a well known Italian born, Sydney based sports photographer. He is also the founder of My First School, as trust which has the aim to facilitate educations in Northern Pakistan. You can see his work here.

5. Use flash during the day

You might think that you should only use flash at night time or indoors, but that’s not the case at all. If it is an extremely bright day outside and the sun is creating harsh shadows on your subject, switch on your flash. By forcing extra light onto your subject, you will be able to fill in those ugly shadows and create an even exposure. 


6. ISO

There are questions to ask yourself when deciding what ISO to use: 


What time of day are you shooting? If you are shooting outside during the middle of the day you will need to use a lower ISO such as 100 or 200. If you are shooting at night time without a tripod you will have to increase the ISO to a higher number to be able to record the light on the camera’s sensor.


Will the subject be well lit? If your subject or scene is too dark you will need to use a higher ISO such as 800 or 1600. 


Do you want a sharp image or an image with more movement in it? Using a high shutter speed to capture fast movement might mean that you need to use a high ISO to compensate. Likewise, if you’re using a slow shutter speed to capture blur you will need a low ISO to compensate. 


Don’t forget, increasing your ISO increases the grain or pixel size in your photo. So don’t use an ISO of 3200 or 6400 if you don’t want a photo with a lot of ‘digital noise’.

7. f/4

f/4 is my ‘go to’ aperture. If you use a wide aperture with a long lens (200mm-400mm) you’re able to separate the subject from the background. This helps them stand out. Works every time. — Peter Wallis
Peter Wallis is a sports photographer extraordinaire, working for The Courier Mail in Brisbane. You can see his work here.

8. You’ve got to be joking

A well timed joke will always yield a more natural smile, than simply saying “smile” — Dean Bottrell
Dean Bottrell is a Emerald based photographer who specializes in portraiture. You can see his work here.

9. Buy books, not gear

Having expensive camera equipment doesn’t always mean that you’ll take good photos. I’ve seen some absolutely amazing images shot with nothing more than a smart phone. Instead of having ten different lenses, invest in some fantastic photography books. By looking at the work of the masters, not only do you get inspired, you come away with ideas to improve your own photos.

10. Read your camera’s manual

The best way to know what to do with your camera is to actually read the manual. So many people miss this really important step on their photographic journey. Every camera is different, so by reading the manual you’ll get to know all the funky things it’s capable of. 


11. Slow down

Take time to think about what is going on in the viewfinder before pressing the shutter. How are you going to compose the shot? How are you going to light it? Don’t jump straight in without giving it some thought first. — Brad Marsellos
Brad Marsellos is the Wide Bay über Open producer. You can see his photos, videos and musings on life here.

12. Stop chimping (checking the photo on the back screen) 


It’s a bad habit digital photographers can develop. Time and time again I see photographers take a photograph and then look at the back of the screen straight away. By doing that you could miss all the special moments. You can look at your photos later. You can miss ‘the shot’ and it affects the flow of your work, so just keep shooting! – Marina Dot Perkins
The lovely Marina Dot Perkins is a news, travel and wedding photographer who worked for The Canberra Times and is now based in Newcastle.

13. Framing

This is a technique to use when you want to draw attention to something in your photograph. By framing a scene or a subject, say with a window or an archway, you lead the viewer’s eye to the primary focal point.

14. Shape with light

Never shoot with the sun directly behind you. It creates boring, flat light on the subject. If you shoot with the light source to the side or behind the subject, you are able to shape with the light, creating a more interesting photo. — Patria Jannides
Patria is not only a talented news photographer, she is also my long term friend, mentor, and personal cheer squad. She even helped me to land my first job as a paid photographer. Thanks for everything P xxx

15. Watermarks

This tip isn’t in direct relation to TAKING photos, but it does affect the look of photos. When it comes to watermarks, the smaller the better. And if you can avoid using them, do.
Chances are, unless you are a paid professional, there’s not much of a chance of your photos getting nicked. But in reality, they won’t prevent your images from getting stolen. They only distract from the fabulous image that you’ve created, because once you’ve slapped a watermark all over it, that’s all the viewer will be looking at. The only way you can prevent your images from being stolen is to not publish them on the internet. 


Read Open producer Luke Wong’s blog post on watermarks here.

16. Be present

This means make eye-contact, engage and listen to your subject. With the eyes – lower that camera and be human. Bring the camera up for a decisive shot. But remember to lower it, like you’re coming up for air, to check in with your subject. Don’t treat them like a science experiment under a microscope. Being there with your subject shows them respect, levels the playing field in terms of power dynamics, and calms them down. You’ll get much more natural images this way. — Heather Faulkner 


Heather Faulkner is a photographer who convenes the ePhotojournalism major at QCA, Griffith University. She is also the executive director of The Argus, a student-run, visual journalism online magazine. See her personal work here.

17. Shutter speed

Being aware of your shutter speed means the difference between taking a blurry photo and a sharp photo. It all depends on what you are after. If you are shooting a sporting event or children running around in the backyard, you probably want your subjects to be in focus. To capture fast action you will have to use a shutter speed over 1/500th of a second, if not 1/1000th to 1/2000th. On the opposite end of the scale, you might want to capture the long streaks of a car’s tail lights running through your shot. Therefore you would change your camera’s shutter speed to a long exposure. This could be one second, ten seconds, or even longer. 


18. Charge your batteries

This seems like a simple one, but pretty much every photographer on the face of the planet has been caught out before. Including myself. The trick is to put the battery onto the charger as soon as you get home from your photo shoot. The only thing then is to make sure you remember to put it back into the camera after it has been recharged… 


19. Focal length

Keep it simple. I shoot with two prime lenses and one camera; A 28mm and a 35mm. For everything. I use the 35mm lens 70% and the 28mm lens 30% of time. It takes some time to get used to it, but once you work it out, shooting primes is the only way to go. It means you have to work with what you have and you can’t be lazy. Basically, this means more pictures and less fiddling around with zooming and maybe missing moments. It also helps for consistency. If you’re working on a project or a series, keeping the same focal lengths is a great way to maintain a powerful sense of consistency. — Justin Wilkes
Justin Wilkes quit his job in Sydney this year to cover the political and social change in post revolution Egypt. He has since had his photographs published in The New York Times, TIME magazine, and The Jakata Globe to name but a few. You can see his amazing documentary work here.

20. Be part of a photographic community

Like ABC Open! Not only will you be able to publish your photos for the rest of the country to see, you’ll be part of an active group that offers feedback on how great you are going. You can learn new things to help you improve your technique, and you might even make some new photography buddies.

21. Shoot with your mind

Even when you’re not shooting, shoot with your mind. Practice noticing expressions and light conditions. Work out how you’d compose a picture of that scene over there that interests you, and what sort of exposure you might use to capture it best. — Leah Robertson

22. Return the favor

Always remember that if you are shooting people in a different country, they are probably doing you a favor by posing. So the least you can do is return this favor some way or another.
I often return to the same places year after year, so I bring along prints and look for the people I photographed previously. In some areas people do not have a picture of themselves. Imagine not having a picture of you and your family? Strange don’t you think? Yet many people don’t. So a $0.50 print can really make someone happy. It also opens doors for more photography further down the track. — Andrea Francolini 


23. Have a camera on you at all times

You can’t take great photos if you don’t have a camera on you, can you? DSLR, point-and-shoot or smart phone, it doesn’t really matter. As long as you have access to a camera, you’re able to capture those spontaneous and unique moments in life that you might have otherwise missed. 


24. The golden hour

Shoot portraits and landscapes in the golden hours — the light is softer and the colours are more vibrant. — Dean Bottrell 


25. Keep it simple

Don’t try to pack too many elements into your image; it will just end up looking messy. If you just include one or two points of interest, your audience won’t be confused at where they should be looking or what they should be looking at. 


26. Don’t get bogged down by equipment

We’ve all seen these types of photographers out and about. They usually have three or four different cameras strapped around their necks with lenses long enough for an African safari. In reality, there’s probably no need for all that equipment. One body with one or two lenses means that you’ll be freer in your movements to capture interesting angles or subjects on the move. 


27. Perspective

Minimize the belly-button photograph. This is a reference to Moholy Nagy of the Bauhaus movement in photography (which was all about lines of perspective). In other words, perspectives are more engaging when we crouch down, or lie down, or elevate our position in reference to the subject. Look at how changing your perspective can change the visual language and implied power dynamics of the image. Crouching low can make your subject more dynamic, whereas gaining height on your subject can often minimize their presence in the image. One of my favorite exercises is to make my students lie down and take pictures, often in the dirt. I am a little cheeky. — Heather Faulkner 


28. Be aware of backgrounds

What’s in your frame? So often I see great photos and think “didn’t they see that garbage bin, ugly wall, sign, etc?” It’s not just the person or object in your frame, it’s everything else in the background that can make or break a great photograph. So don’t be afraid to ask the person to move (or move yourself) to avoid something ugly in the background. — Marina Dot Perkins

29. Shade

Shade can be your best friend. If there is no way you can make the available light work for your photo, shoot in the shade. You’ll get a nice even exposure with no patchy highlights throughout your shot.

30. Rule of Thirds 


This is one of the most common tips that pop up when it comes to improving your photos.
To break it down, you cut your frame into thirds by using both horizontal and vertical lines. You then place your point of interest over the cross sections of the grid.
Check out this article for further details about using the rule of thirds.

31. Exposure 


I’ve been shooting a lot of protests lately. Basically, they’re just a lot of people really close to one another; often moving. After having made many mistakes with getting my exposures right, I worked out that if the sun is behind me and in the face of protestors I will set exposure compensation to underexpose by a stop to bring out even tonal range. When the sun is behind the protestors I like to over expose just slightly to bring out the shadow details on their faces. This could apply to street photography when the light is in front or behind your subject. — Justin Wilkes

32. Don’t spend too much time post-processing

The key is to get it right in the camera first, so you don’t HAVE to spend time editing. Over working a photo in editing software very rarely looks good, unless you are trying to achieve a super-artsy effect. If it takes you longer than ten minutes to alter your photo, maybe think about going back out into the field to re-shoot it. 


33. Variation

Variation is key. I often use a recipe from Life Magazine picture editors for building a story narrative. I look for: over-all shots or scene-setters, interaction, action, portraits, details, medium shots and of course the signature image. Having this list in my head helps me start photographing a story that sometimes isn’t visually apparent until you get into it. This is great when you’re in a crowded or busy place. — Heather Faulkner

34. Become one with the camera

Push the button regardless of the outcome so the camera becomes part of your hand. — Dean Saffron
Dean Saffron is a photojournalist and an ABC Open superstar. His video The Spokesman, has had over 170,000 views. Woah!

35. Hold your camera properly

You might not know it, but there is a right way and a wrong way to hold a DSLR camera. The correct way is to support the lens by cupping your hand underneath it. This is usually done with the left hand, with your right hand gripping the body of the camera. This helps to prevent camera shake. If you are gripping your camera with your hands on either side of the camera body, there is nothing supporting the lens, and you might end up with blurry photos. To get an even stabler stance, tuck your elbows into the side of your body.

36. Limit your palette 


When photos have too many colours spewing out from them, they’re often hard to look at. Unless it’s a photo of a rainbow or the Mardi Gras. Try to focus on having one or two colours predominately featuring in your photograph. It will be more pleasing to the eye and will help set the tone of the image. 


37. Get your subject to relax 


This applies mostly to portrait style photography. As a press photographer, I spend most of my time doing one on one portrait shoots. I think it’s really beneficial to take the time (if you have it) talking to your subject, asking questions, showing an interest in whatever it is they do. I find it really helpful in relaxing the person and often they’ll say something and that can lead to a better photo opportunity. — Marina 
Dot Perkins

38. Inspiration from all forms

Take in as much photography as you can – online, and in books and magazines. But not passively. Look at different styles. Work out what you like or don’t like about them. Look at the technical elements of pictures and think about how they were made, and what the photographer is trying to say. The more you take in, the more arsenal you’ll have when creating your own work. — Leah Robertson

39. Be patient and persevere 


With time, patience, and perseverance, you will get better; with each and every photo you take.

40. Break the rules

Now that you know some of the rules, go ahead and break them! Experiment. Have fun. Learn from your mistakes. Make up your own tips and techniques for taking fantastic photographs. I’d love to hear them.
Go forth and shoot!


Friday, October 26, 2018

http://app.autoaffiliatemachine.com/pro/pdf/PhotographyJobs1539496451.pdf

Photography: a beginners tale

Photo: Elf Statue in Botanic Gardens.
It’s the twenty first century and just about everyone takes photographs; on phones, on computers, on games consoles and of course on cameras. Photography is easy?
Well yes – on lots of levels it is – but what if you want to take more artistic or technically accomplished photographs? How easy is that?
Here are a few thoughts on my own experience of learning to be a photographer; an experience that made me feel that photography was a very hard skill to learn. That might just been me of course, however I suspect not. Hopefully this article will re-assure those going through the same learning process, i.e that they are not alone – and that there is light at the end of the tunnel (or the end of the lens).

Getting started with a new camera

I started taking photographs seriously (so to speak) when my wife Pat started a website about Glasgow West End; our local area. Being a typical puffed up male – it wasn’t going to be good enough for me to buy a cheap camera and take snaps – I felt a ‘need’ to take good photographs. The year was 1999 and taking decent photos was my goal.
So, aiming high, I bought a good second-hand SLR camera, a Canon T90 (built in 1986 and top of the range for the time). A fancy camera with all the required knobs. I thought a ‘real’ camera was what I needed to take real photos. Not something I think now I have to say; it turned out that the camera is not as important as I first thought, i.e. it’s more about how you use it, and more importantly, about having an eye for a good photo.
I very quickly realized that professional cameras are not just cameras built with better quality plastic than the ‘automatics’ I had been using – they are completely different machines. I was daunted by the camera – it felt like I would need the equivalent training to someone learning to fly the the Space Shuttle in order to understand it.

Trying to figure out how to use it

So my next task was to track down the Manual and buy a few photography books. A jargon and acronym fest ensued as I plowed my way through the manual; SLR, TTL, exposure, f-stops, exposure compensation, spot metering, Program AE…… and on and on – and all completely baffling. (As a side note – the T90 turned out to be a fantastic camera which had features that I came to rely on – and which no other camera I’ve had since has been able to match; i’m feeling nostalgic about that manual focus camera – and it used real film; just like in the olden days.)
Ok – got the camera – got the manual and read a few books, so what were the things that I found most difficult to understand?

Underexposed to the techniques of photography

Photo: Young guns play.
Undoubtedly I have to say that ‘exposure’ was one of the main things that first gave me a feeling of insecurity (yes there is a joke in there – but not from me); I struggled to understand just what it was; it felt like trying to harvest smoke, as I couldn’t get a handle on it at all.
In very simple terms, exposure turned out to be about how to actively control how light or dark I wanted my photos to be. That’s my short and stupidly simplified definition – you can read an article I’ve since written about it, which expands that idea in marginally more detail. To understand exposure I had to understand those two totems of photography, shutter speed and aperture; i.e how long should my film be exposed to light and how big should the hole that the light passes through be? In essence it’s no more complicated than that (I lie obviously).
(Rather than try to explain these topics at any length in this article, i.e. shutter speed and aperture – check out the two beginners articles I’ve written about these topics at, which you will find by clicking the other two links on this page related to beginners photography).

What did I learn of a practical nature?

To cut a short story short, in terms of exposure spot metering became my friend. Spot metering is metering from a very small area of the scene you are photographing , i.e. you calculate your exposure from an area that you can roughly guess the reflectivity of (i.e a person’s face which tends to be equivalent to approximately +1 stops). This turned out to be the most dependable way for me to control the exposure of my photos.
In our ‘face’ example – what you do is set the exposure compensation to plus one – set the camera to spot meter – and then point at the person face and use whatever button is on your camera to set the exposure from an area on the person’s face. The rest of the image will be darker or light in relation to the metering taken from the person’s face. (the traditional way to spot meter is to use a gray card and point your camera, or a light meter, at that with no exposure compensation – but I’m too embarrassed to carry a gray card around).
Once you having been doing this for a while you will learn to adjust the exposure a bit one way or another depending on the results you are getting. While out and about taking photographs I would take my exposure from a blonde sandstone building or a patch of grass; even though those weren’t the things I was photographing; however, because I knew what settings these related to I got fairly consistently exposed images.
I also use spot metering to take different exposures of the same scene; by spot metering from different areas of the image. An example would be taking photographs of a sunset and metering from different parts of the sky to get darker or lighter images; this way you can take lots of different images to find the one that works best.
If you are unaware of what spot-metering is and therefore the above explanation makes no sense, I recommend you spend some time researching it and then using it. I’m confident it will give you much more of a feeling that you are in control of your photography. Google ‘spot metering tutorial’ to find some useful articles.

Photo: VW toy car.Getting control of depth of field

Up next on the confusion stakes was the ‘depth of field’ thingy and the associated ‘in and out of focus’ thingy. In other words controlling the blurry and sharp bits on a photograph.
Though I instinctively grasped what that was about; controlling it was another matter. I was keen to really understand this as I could see that many photographs in magazines used the ‘get the background out of focus’ trick to make the subject stand out. I was very pleased with myself when I could accomplish this. In fact in my early photographic attempts I was a bit obsessed with it and took hundreds of photos of flower with nice soft out of focus backgrounds; I still like this effect more than I should.
Although I could understand what depth of field was – it wasn’t the simplest thing to control – as the particular part of a photograph that can be completely in focus is reliant on the size of the ‘aperture’ used. This is made even more complicated as the control you have over these things is dependent on the available light, i.e., in very dull light I might want a very sharp photograph but because there isn’t much light I have to have a very short lens and a big aperture which translates to a very narrow depth of field. The large aperture makes it much harder to have a photo that is sharp in all areas. (Note: These remarks assume you are not using a tripod; as that would help you take a photo with a smaller aperture in low light situations.)

What did I learn of a practical nature?

Big apertures produce a very narrow depth of field (i.e the depth of the part that is in focus). For example, you you could use a large aperture for portraits, as you get the person nicely in focus and the background out of focus (and therefore soft). This is handy as it makes the person stand out against the background.
As a side note: portraiture isn’t of course just about depth of field; very short lenses for example can give a photograph a bit of a convex look that isn’t desirable (hey my nose looks awfully big in that picture) so a slightly longer lens can give a more pleasing result.
On the other hand a very long lens flattens the image (don’t call me flat face) so you want something in between; 60mm up to 100mm would be in the right ball-park. Portraiture isn’t just about the size of your lens either, it’s about artistic considerations among a million other things; too many things to discuss in this particular article.
Small apertures produce much sharper images; for example you might want to use a small aperture for taking landscapes; were you want the entire photograph to be sharp.

The wonder of being a beginner

Photo: Cirkis fashion.
You might not think it at the time but the when you are new to photography and learning about it, this is the best times you will have with your camera. I remember having the feeling that I was seeing the world afresh as I stared at it through a camera lens. I had never really been aware (to the same extent) of the shadows, the abstract shapes and the sheer beauty of the world around me as I was when I started taking photographs.
Strangely, shadows took on a new importance; one because the light and shade was what made the shapes in the photograph and two, because with a scene where the difference between the dark and light regions was large, it may be impossible to capture a decent image.
Film (or digital sensors) are not capable of capturing the range of light and shade that our eyes can. This is one reason why photographs at the beginning or the end of the day tend to be nicer; the shadows are both softer and more visible, i.e. they define the elements of the image more as they are longer.
The other thing that makes photographs taken in the morning or evening more attractive is the ‘colour of the light’. Again this isn’t something I had noticed to any great extent before; light has colour (although I know we are all taught that in physics class at school). Take a photograph indoors with only a lamp as a light source and you’ll notice a colour cast on your photograph; that is the colour of the light in the room – which you hadn’t noticed before; because your brain had adjusted your perception of the light.
Morning and evening light tends to be ‘warmer’ (i.e more red/orange) than that during the height of the day; and that nice warm colour makes photographs very attractive – particularly when combined with long soft shadows. The colour of the light is warmer because it has traveled through a greater amount of the earths atmosphere on its way from the sun. Handy for photographers.

The most important thing I learned

One of the most important thing I have learned is that ‘it’s all about the light’. Good light makes a photograph – bad light can mean there is no photograph worth taking. However, good and bad light cannot be simply defined; high contrast photography can make a career – as it did with the crime photographer Weegee (Arthur Fellig), whose photographs were to a large extent defined by the bright light from his flash.
Nothing excites a photographer more than looking out of the window and noticing that the light is fabulous. Time to grab the camera. Sheer bliss
Happy snapping.

Written by :

4 Excellent Photography Courses for Beginners

Whether you’re picking up a DSLR for the first time or just looking to improve your photography skills, one of the best ways to learn is to take the advice of an experienced photographer. Depending on your creative style and professional aspirations, it could be as simple as following a workshop or reading a blog, or as in-depth as a long-term mentorship or year-long university course.
Whatever your photography goals are, there are plenty of great resources readily available. Even if you’re short on cash, you can find the information you need online. You don’t have to take an expensive, week-long workshop or go back to school for a photography degree. All you need is an Internet connection and a dedication to learning and growing as a photographer.
One Google search will give you many fantastic resources and articles to help you improve your photography skills. In addition to blogs like ours, you can take online classes through companies like Udemy, which connects industry experts with students. As one of our partners, we routinely use their courses to help further our own photography skills as well as recommend them to our readers to help further their own expertise.
Founded in 2010 as a global marketplace for learning and teaching online, Udemy now has over 65,000 courses in over 50 different languages. There’s something for every level and interest. Best of all, you get to decide your own pace and learn from home. You don’t have to rearrange your schedule to learn a new photography skill; you can move forward whenever you have time.

Beginner Photography Classes

Here’s a list of some excellent photography courses from Udemy that we recommend for beginners or even casual, Instagram photographers. Know someone who could benefit from a few photography tips and inspiration? Share this list with them, since friends don’t let friends post bad photos!

Photography Masterclass 2.0: A Complete Guide to Photography

This course is built to teach you the ins and outs of photography. It’ll help you create unique and interesting images in a range of scenarios, like family portraits or landscape photography. You’ll learn how to operate your camera manually, use natural and flash lighting, incorporate the rules of photography in your shots, and much more. The course includes over 20 hours of on-demand video, 60+ articles, 30 supplemental resources, assignments, and lifetime access.
>>> Learn More
Josh Katz - Outdoor

The Ultimate Beginner’s Guide to Outdoor Photography

From beautiful landscape sunsets to incredible cityscape compositions, this course allows you to jump directly to the concept you want to learn right away. You can browse through an array of genres, such as street photography, astrophotography, cityscapes, long exposures, HDRs, and more. The course includes over 9 hours of on-demand video, 20 supplemental resources, and lifetime access.
>>> Learn More
Snapchick - portrait

The Beginner’s Guide to Classic Portrait Photography

One of the best areas to start improving as a beginner is in portrait photography. Good portrait-taking skills will not only dramatically improve your everyday shots of friends and family but also make it easier for you to become a professional photographer. Even if you’re wanting to get into architecture or landscape photography, it’s becoming increasingly important to incorporate a human element in every genre. This course offers over 3 hours of on-demand video training and lifetime access for those looking to establish a comprehensive foundation in classic portraiture.
>>> Learn More
eric kim - entrepreneurship

Ultimate Beginner’s Guide to Photography Entrepreneurship

One of the most difficult challenges of being an artist and photographer is figuring out how to make a consistent living doing what you love. In this course, you’ll learn from experts on how to monetize your passion with a variety of services and products. By the end, you’ll know how to effectively market and brand yourself online and in person, as well as set up your own photography workshops and courses. With 5 hours of on-demand video, supplemental resources, and lifetime access, you’ll kickstart your adventure and begin the journey to becoming a professional photographer.
>>> Learn More
With all the photos available online today, it’s important to work hard at standing out from the crowd. With the classes above, you can push yourself to reach a higher level of photography and, hopefully, have a lot of fun in the process.

5 Essential Tips for Street Photography Beginners

Street photography is a type of photography that aims to document everyday life. If you’re set to master street photography, give these tips a go and you’ll be on the right track.
Unlike other types of photography, street photography is generally about taking candid photos of people in public. It aims to capture stories and emotions without the influence of the photographer, which is, let’s all face it, not an easy thing to master.
But don’t lose hope! Every great photographer starts somewhere. To help you get started on your journey to becoming an impressive street photographer, follow these essential tips.

Overcome your fear

Not just any fear — your fear of of taking photos of random people in public. Capturing images of strangers is easier said than done. There’s always this sense of privacy invasion when doing candid photography. It’ll surely be uncomfortable, especially when you start getting different kind of looks from people. This is not surprising as there are those who’d rather not have their photos taken without permission.
To avoid this, you can always ask permission. Remember, street photography is generally about taking candid images. This means that there will also be times when your photos won’t be candid. But don’t worry. You will still be able to tell stories and photograph emotions even if you ask permission through street portraits.

Be an observer

By being aware of everything around you, you’ll be able to find the perfect stories for your photographs. Not only that, you will find it easier to compose images and decide on what to include in the frame to complete your story. It’s best to train your eyes and mind to observe your surroundings early on and develop it further as you continue to hone your technical photography skills.

Choose the right gear

Unfortunately (or maybe fortunately), there isn’t one perfect camera for street photography. The right gear is what you’re comfortable at using: a DSLR, a point-and-shoot camera, a mirrorless camera, a film camera, or your smartphone camera. It’s up to you.
Of course, they all have upsides and downsides. But you’ll find the ideal gear to be just what you need to take the images you want to take. It’ll feel right — like it’s an extension of your eyes, like it fits perfectly in your hand.
So don’t be afraid to try different cameras and see which one works best for you.

Be patient

You’ll need a lot of patience when taking street photographs. Waiting for the right moment is key to having a good photo — you’ll need to wait for the subject to move, to look into the camera, to do something unpredictable, and more. Sometimes, you’ll even have to wait for a subject to walk into the frame of your photo!
Take your time, and you’ll be rewarded with nice images.

Get out there and shoot street photos!

Nothing will happen if you only read articles like this and not put everything you have learned into practice. The best thing to do to improve in street photography is to take street photos. Make sure you have your camera with you all the time so when the perfect moment presents itself, you’re fully equipped to capture it.
Street photography is interesting and fun but challenging at the same time even if you have the best cameras for photography. If you want to be successful in this type of photography, all that’s been discussed here will help you reach that goal. Happy shooting!

Photographing the Northern Lights: Tips from Neil Bloem

15th October 2018
“The Northern Lights were the main reason for me wanting to live at the top of the world. I was hooked from the very first moment I saw them.”
Neil Bloem
In 2017, photographer Neil Bloem packed up his life in Melbourne and moved across the world to arctic Norway. Trading his busy city life for the solitude of Northern Norway’s mountains, he now spends his days photographing the spectacular light show known as the Aurora Borealis (or Northern Lights).
Here, Neil shares his advice on travelling in the Arctic Circle, and tips on where, when and how to photograph this eerily beautiful natural phenomenon.

Understanding the Northern Lights


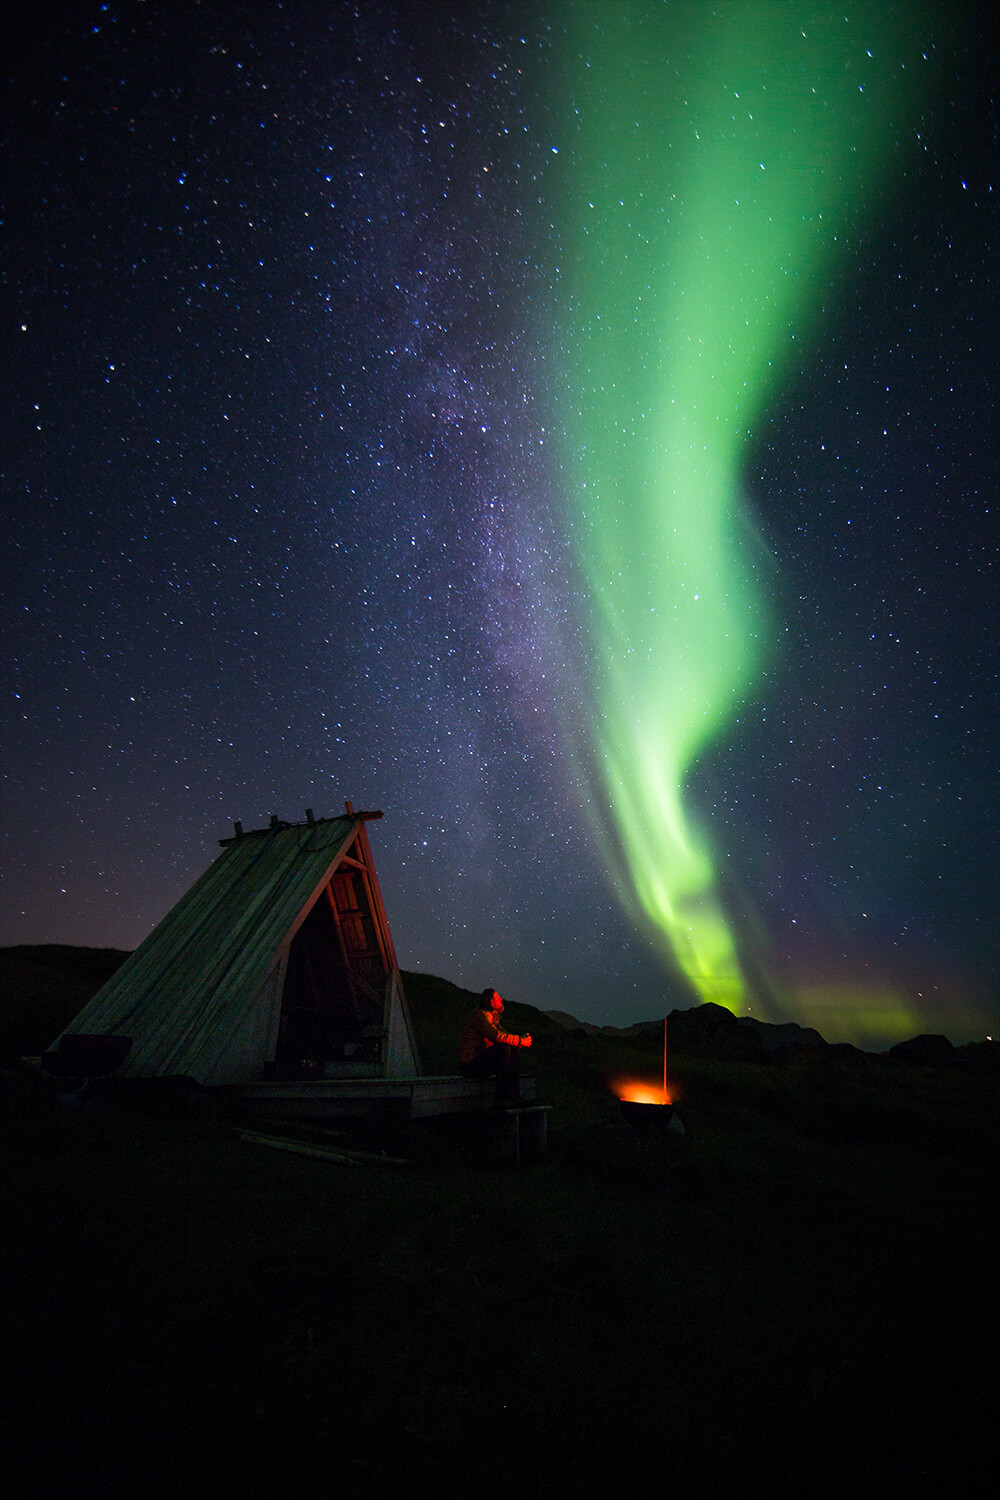
A person in front of a bonfire under the northern lights. Image by Neil Bloem
Aperture f/2.8, ISO-1600, 25 sec, 14mm
The Northern Lights, or Aurora Borealis, are charged particles that have been released from the Sun’s surface into outer space. Occasionally these particles line up with Earth and hit our magnetic field at great speeds, entering our atmosphere through the North and South Poles. These charged particles from the Sun interact with the oxygen and nitrogen in our atmosphere, creating the dancing lights and colours that we see in our night skies.
“Norway’s landscapes are a photographer’s dream, and the Northern Lights are unbelievably beautiful.”
Neil Bloem
Auroral displays appear in many colours, although pale green and pink are the most common. Shades of red, yellow, green, blue, and violet have also been reported. The lights appear in many forms from patches and scattered clouds of light to streamers, arcs, rippling curtains and shooting rays that light up the sky with an eerie glow.

Where to Photograph the Aurora Borealis


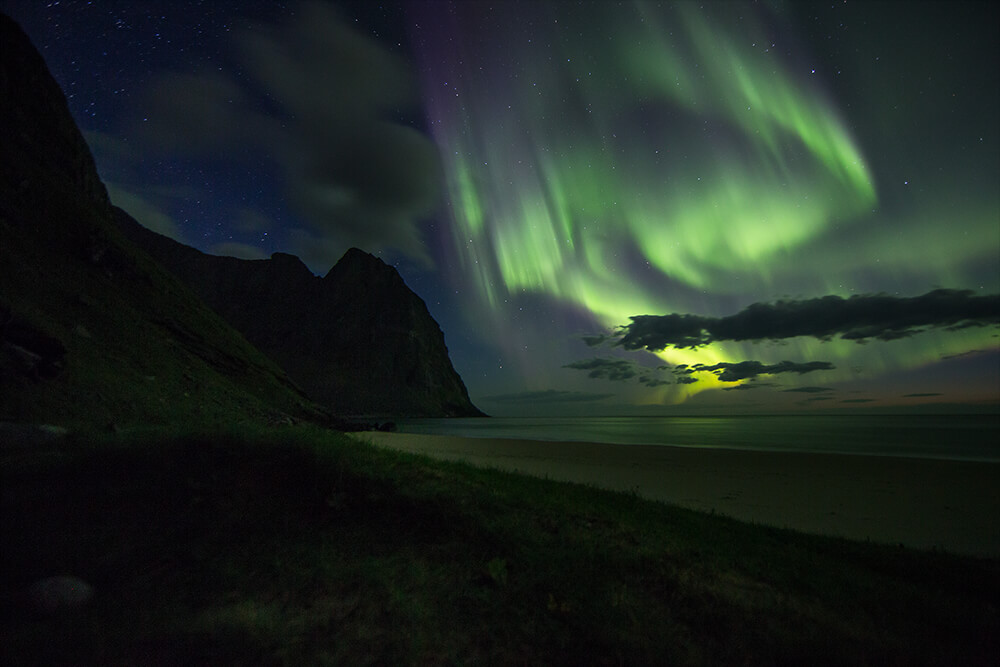
image of the Aurora Borealis. Photo by Neal Bloem
Aperture f/2.8, ISO-1600, 8 sec, 14mm
As long as you have darkness, it is possible to see the Northern Lights in Norway, Sweden, Finland, Russia, Greenland, Iceland, Alaska and Canada.
I’m currently living on the Lofoten Islands at the top of Norway, which is my favourite place to photograph the Auroras. The only downfall of this location as a Northern Lights photography destination is that the weather can often be bad, reducing your chances of seeing the Lights here in winter.

When to Photograph the Aurora Borealis


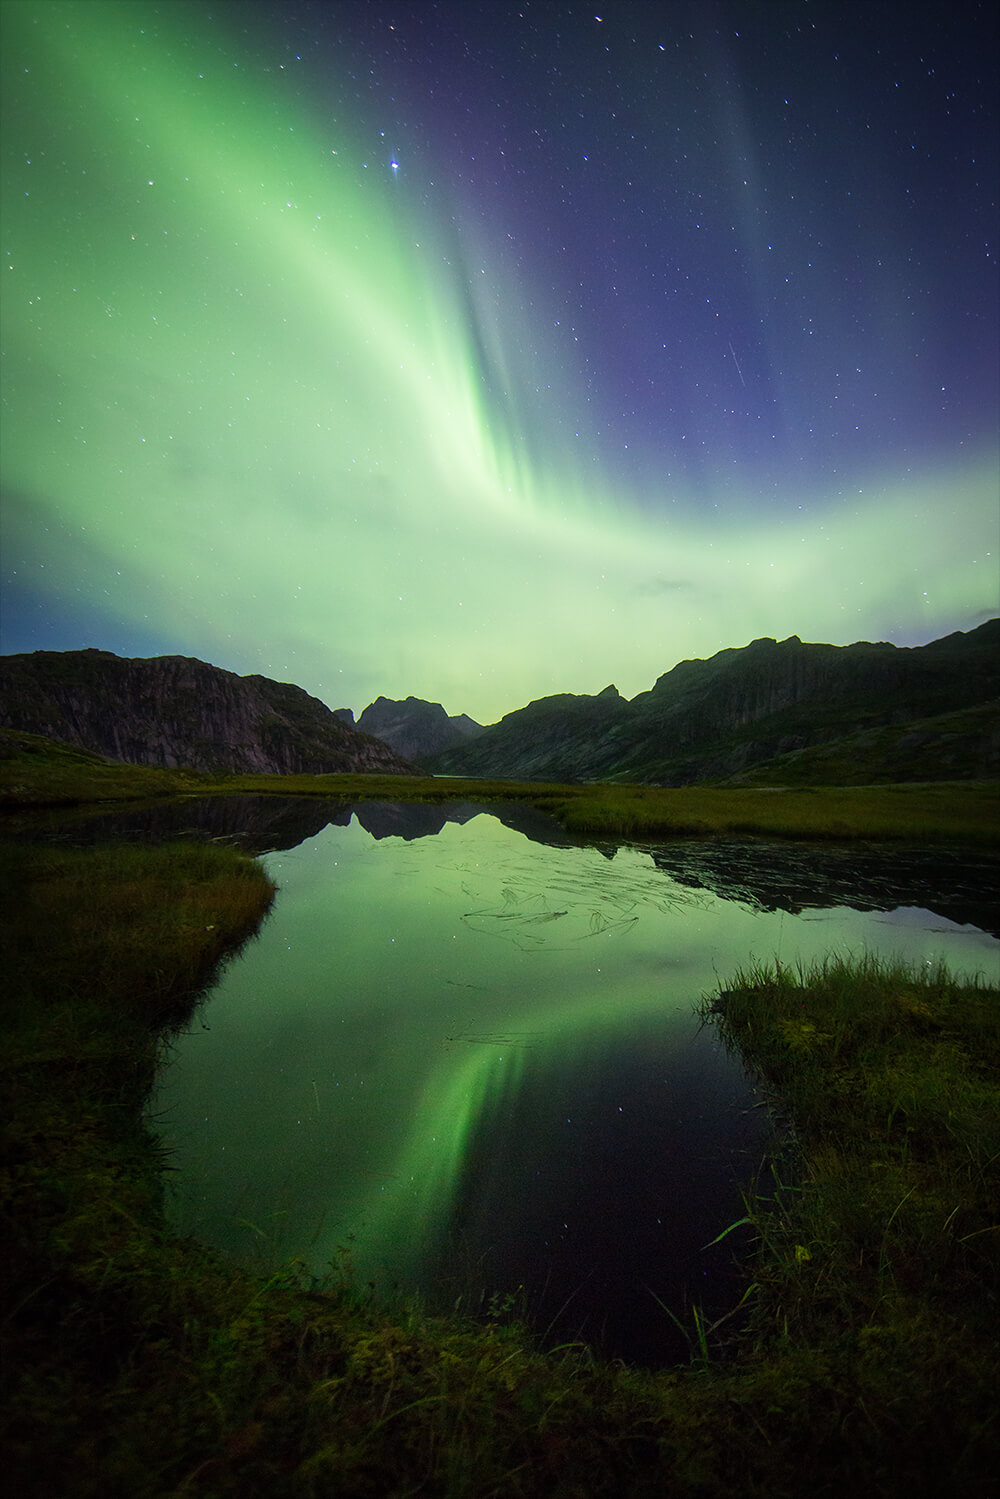
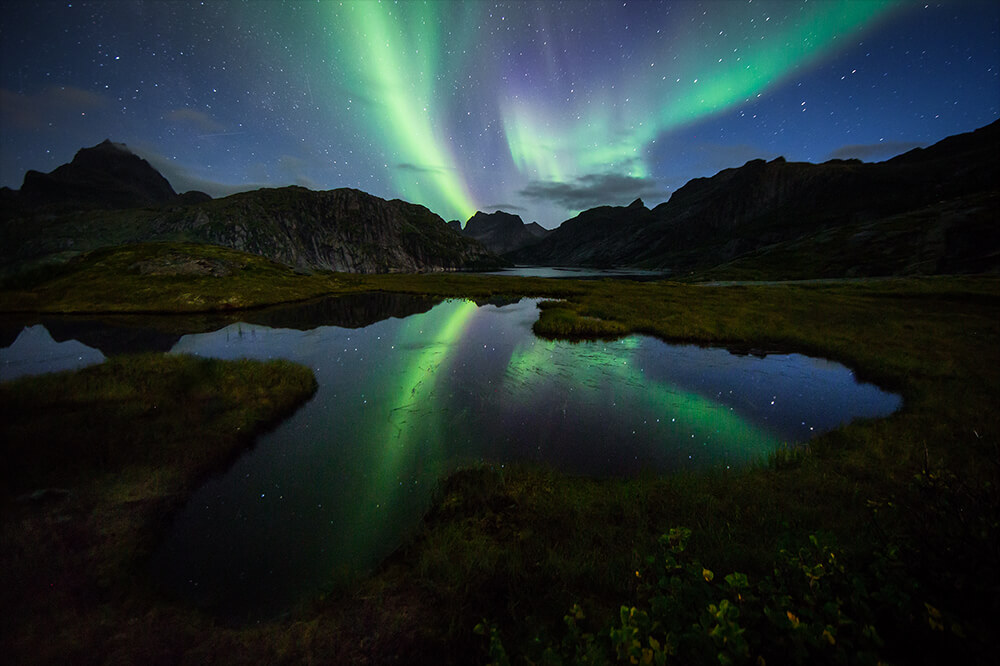
Image of the Northern Lights and its reflection on a lake. Photo by Neal Bloem
Aperture f/2.8, ISO-3200, 15 sec, 14mm
In the Arctic Circle we experience the Midnight Sun in summer, where the Sun doesn’t drop below the horizon, creating 24 hours of daylight. We also experience Polar Nights in winter, where the Sun doesn’t rise above the horizon, resulting in 24 hours of darkness.
From the end of August, it starts getting dark enough at night to view the Auroras. Personally, I prefer September and October for viewing the Northern Lights, as the temperatures are more comfortable for being outside all night.
“Most people come to Norway and other parts of the Arctic Circle around December. During this time of year you have 24 hours of darkness, giving you nearly all day to find and enjoy the Lights.”
Neil Bloem
The weather is generally better coming out of the summer months, with clearer skies and lakes that haven’t frozen over yet, allowing you to take beautiful reflection photos in the water. There’s also no snow at this time of year, making locations easier to get to.
In mid-April it becomes too light at night to see the Northern Lights, as it shifts back to the Midnight Sun period.

Best Camera Lenses and Gear for Photographing the Northern Lights


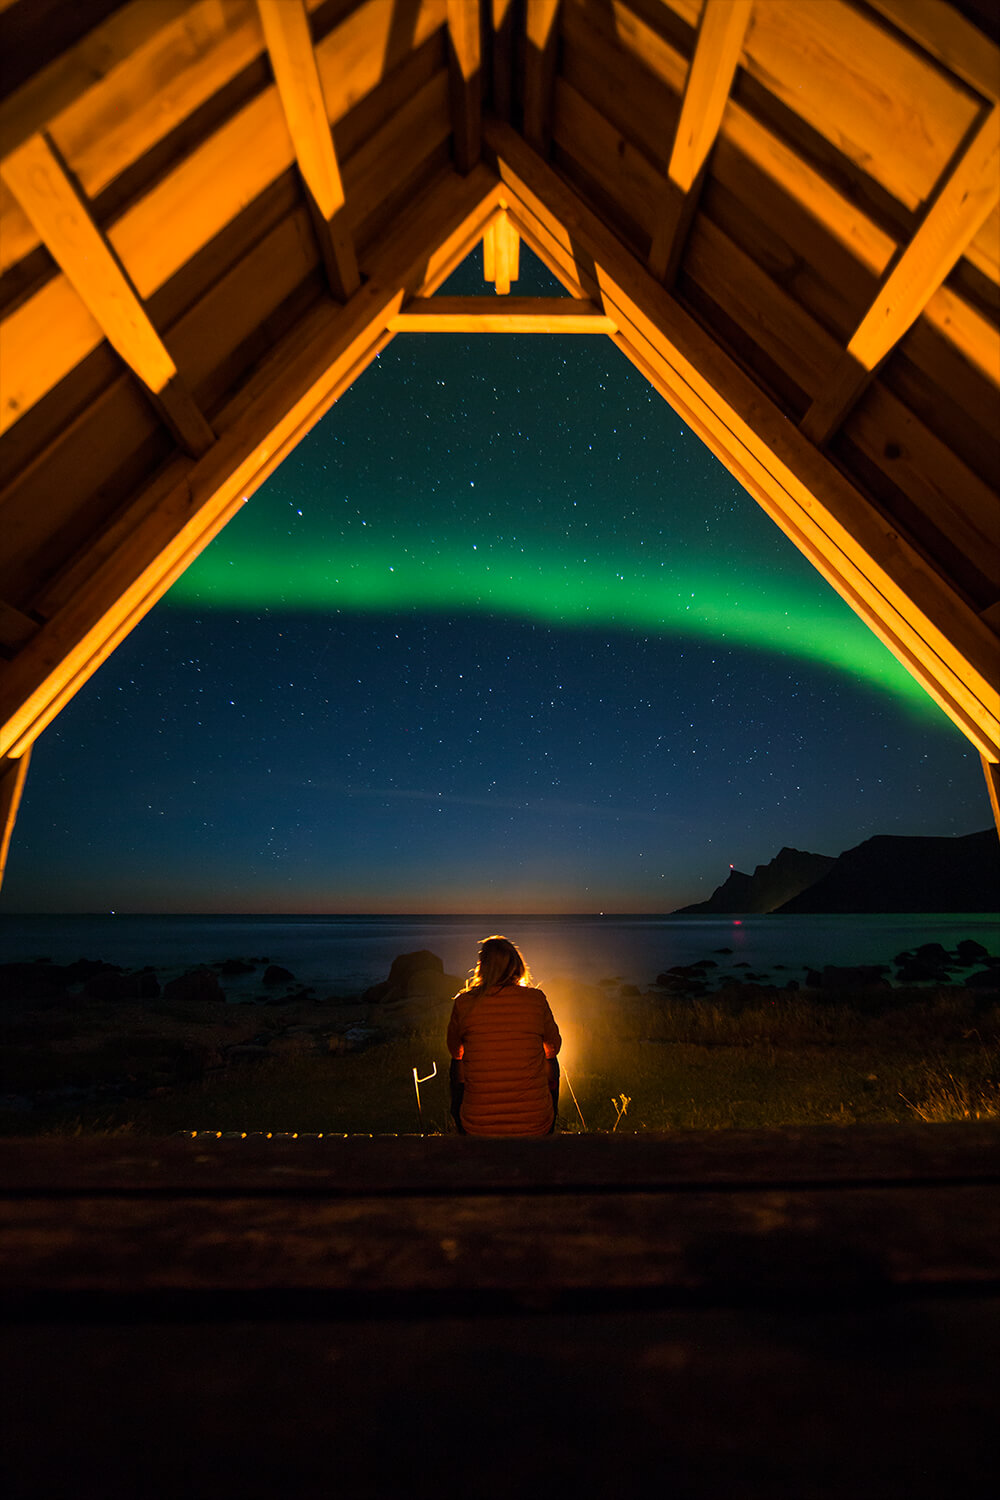
Image of a person under the Northern Lights
Aperture f/2.8, ISO-1600, 20 sec, 14mm
Camera Body: Most DSLR cameras are capable of taking decent photos at night. I use the Canon 5D Mark III body with a 14mm f/2.8L lens.
Lenses: What will really help your night photography and shooting the Northern Lights is having a wide angle lens with a high aperture, such as f/1.8 or f/2.8. The higher the aperture, the wider the opening of your aperture will be, which will let in more light. If the whole sky is covered with Auroras then you will want to capture as much of the scene and landscape as possible in the frame. Using a wide angle lens of 20mm or below is ideal.
Tripod: Before taking your photos of the beauty in the sky, you’ll first need to set up your tripod. Unless you have a super power of holding a camera completely still for 20 seconds, a tripod is critical for night photography and capturing the dancing Northern Lights.

Recommended Camera Settings for Photographing the Northern Lights


photography of the Northern Lights with purple tones. Shot by Neil Bloem
Aperture f/2.8, ISO-1600, 2 sec, 14mm

“It’s best to have full control over your equipment when shooting at night.”
Neil Bloem
Start by switching both your camera and lens to manual mode. Focusing manually at night is surprisingly easy and most lenses have an infinity symbol you can adjust to. You can also use your live view to zoom in on a subject in the distance—either a house light or someone standing far away with their phone lit up—and manually adjust your focus to make the light as sharp as possible.
ISO
Photo of the Aurora Borealis over a cabin in Norway. Photo by Neil Bloem
Aperture f/2.8, ISO-1600, 2 sec, 14mm
Generally speaking, once you’ve got the ISO and aperture locked in, you will only need to adjust the shutter speed. Be aware that, depending on your camera, going over 1600 ISO will likely start bringing a bit of grain and noise into your photo.
Shutter Speed
Every night will be different, so if the Lights are faint in the sky you will want to have the lens wide open for a lot longer to bring in more light. But if the Lights are strong and moving quickly across the sky, then having a shorter shutter speed like 3 or 5 seconds will result in sharper photos. If you have a shutter speed of 20 seconds and there are dancing Auroras, your shots will just be a green blur.
Aperture
The higher your aperture, the more light will be able to let in. Keep your aperture open as wide as your lens will allow. Apertures of f/1.8 or f/2.8 are generally best for photographing the Northern Lights.
There are a few different ways to shoot the Northern Lights depending on what’s happening in the sky, but here are two quick guidelines to get started with:
Camera Settings for Photographing Faint Northern Lights
ISO – 1600 / Aperture – f/2.8 (or as high as your lens will go) Shutter Speed – 20/25 seconds
Camera Settings for Photographing Strong/Dancing Northern Lights
ISO – 1600 / Aperture – f/2.8 (or as high as your lens will go) Shutter Speed – 3/5 seconds
Learn more about the aperture, shutter speed and ISO with this tutorial.

Tips for Photographing the Northern Lights in the Arctic


Keep Safe


photo of the Northern lights with green and purple tones. Shot by Neil Bloem
Aperture f/2.8, ISO-1600, 3.2 sec, 14mm
Safety is a very big thing to keep in mind when going out searching for the Auroras. A lot of the time you’ll be quickly pulling your car over to the side of the road as the lights appear. Shooting on the road like this can be dangerous, especially because many of the roads are narrow and covered with ice and snow.
Make sure your car is safely and completely off the road. Wear reflective vests or jackets and move away from the road as far as possible. Having a head torch is important as well, as navigating your way in the darkness is very risky, especially in places you are unfamiliar with.

Keep Shooting


Aurora Borealis. Image by Neil Bloem
Aperture f/2.8, ISO-1600, 2 sec, 14mm
Being in such cold climates while shooting the Auroras, brings your gear some unexpected challenges and you need to take extra precautions. Your batteries will drain more quickly than usual in the freezing temperatures, so be sure to bring plenty of spares.
Avoiding condensation on and inside your camera is important too. When quickly moving from cold to warm, or warm to cold climates, you should place your camera in a ziplock bag or camera bag before changing temperatures. Leave the bag in its new environment for your equipment to slowly adjust.
Your tripod will most likely ice over as well, so always remember to handle your tripod with gloves.

Keep Warm


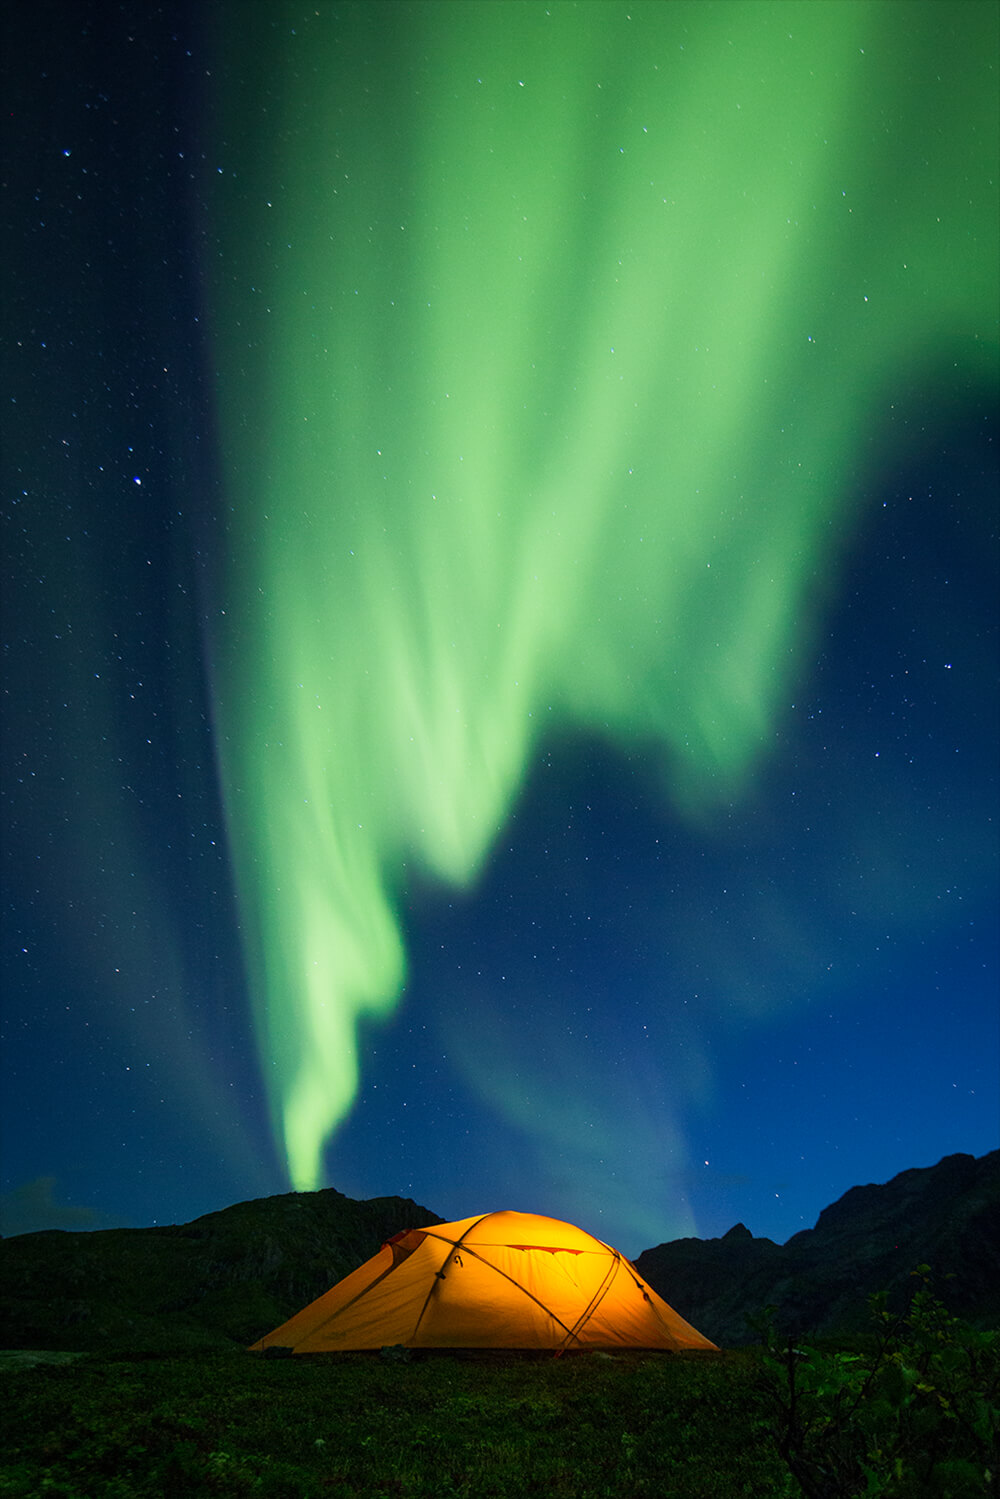
photo of a camping tent under the Northern Lights. Image by Neil Bloem
Aperture f/3.2, ISO-1600, 10 sec, 14mm
It’s important to pack the right clothing to make sure you keep warm while exploring with your camera. Being warm, dry and comfortable will make your photography trip a whole lot better.
Layer up using wool thermals and socks, down jackets and windbreakers. Always avoid using cotton as it works the complete opposite way of what you want in cold climates. Wool beanies, hats, gloves and waterproof boots are also all essential.
Stacking on the right layers and making yourself comfortable out in the arctic cold will ensure you have a great night of shooting.
“I’ve dealt with frostbite a couple of times, and let me tell you: it’s not fun!”
Neil Bloem
Another part of making yourself comfortable in the cold is using hand warmers. Apart from doing the obvious of warming your hands, they’re great at keeping your spare batteries warm too, which makes them last longer. And sticking them in your boots and gloves is always a nice feeling when you’re out in -20 or below all night.
Reflection of the Northern Lights on a lake. Image by Neil Bloem
Aperture f/3.2, ISO-3200, 25 sec, 14mm
Use these tips and techniques and you’ll be taking great photos of the Northern Lights at the top of the world in no time!
Follow Neil on Instagram to see more of his Northern Lights photography.
Would you love to photograph the majestic Northern Lights? Enter Canon’s Christmas competition for a chance to win 1 of 30 life-changing trips exclusively crafted by Canon. Find out more and enter here!

NO TIME TO BROWSE? PIN IT FOR LATER!

15 of the best photography blogs and sites to help you become a better photographer

I love my site – but it can’t do everything for everyone. I’d like to suggest some of the best photography blogs that might help you out on your quest to become the photographer you dream of being.

Clickin Moms


Clickin Moms (https://www.clickinmoms.com/ )

If you’re a ‘chap’ rather than a ‘chapette’ – don’t be put off by the title of this site. It offers great advice – especially for those interested in capturing stunning pictures of their kids.

Perfect For – Parents/photographers looking to take wonderful photographs of their children.

FStoppers


https://fstoppers.com/

FStoppers is a fantastic photography blog sharing great stories and obviously some wonderful photographs. But check out their education section for some awesome tips.

Perfect For – Photographers looking for short, simple tips and advice.

Chase Jarvis


https://blog.chasejarvis.com/blog/

Chase Jarvis produces short and very well produced videos about all aspects of photography. He’s built his reputation and brand with these videos and by being a master of his craft.

Perfect For – Photographers who prefer to learn via video.

Lightroom Killer Tips 


https://lightroomkillertips.com/

Combining a mix of blogs articles and videos – this site is narrowly focused on getting the most from Adobe Lightroom. So if you have reached the point where you want to delve into post processing – give this a whirl!

Perfect For – Photographers who like to tweak and improve their images after the shoot

Digital Photography School 


https://digital-photography-school.com/

Darren Rowse has created one of the most popular digital photography websites in the world. There is something for everyone on here. They keep it simple and easy to follow. You may well lose a few days with the sheer volume of content!

Perfect For – Digital photographers of all skill levels.

Fro Knows Photo


https://froknowsphoto.com/

Jared Polin (AKA The Fro) is a photography personality in every sense of the word! He produces short, very entertaining videos sharing excellent photography tips and advice.

Perfect For – Photographers looking for energetic video lessons.

Photo Focus


https://photofocus.com/

Founded by Scott Bourne, Photo Focus now has a huge number of contributors and a vast catalogue of content. What I like best is the ease of use, particularly the ‘Your Focus’ menu that can get you to the most relevant advice quickly.

Perfect For – Photographers looking for inspiration as well as knowledge.

Click it up a notch


https://clickitupanotch.com/

Although Courtney Slazinik proudly describes herself as a ‘momtographer’ being a mum isn’t a prerequisite to learn from her excellent site.

Perfect For – Momtographers, wannabe Momtographers and ermmm…. non-momtographers. It’s really for anyone who wants to switch to Manual photography.

Strobist


https://strobist.blogspot.co.uk/

Strobist is a site dedicated to getting the most from your flash. It describes itself as “world’s most popular resource for photographers who want how to learn to use their flashes like a pro.” But don’t let that put you off if you’re a rookie. There are great entry-level flash tips as well.

Perfect For – Photographers looking for the light!

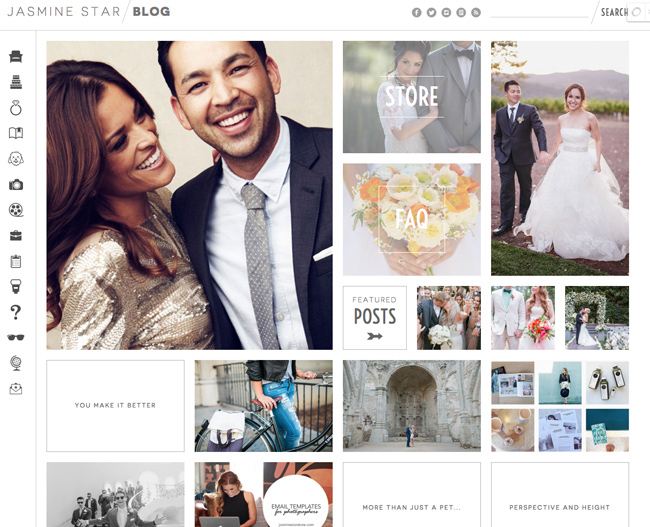
Jasmine Star


https://www.jasminestarblog.com/

Jasmine’s fabulous blog features helpful ‘how to’ guides on all aspects of digital photography, but is particularly focused on Wedding Photography.

Perfect For – Wedding and Event Photographers

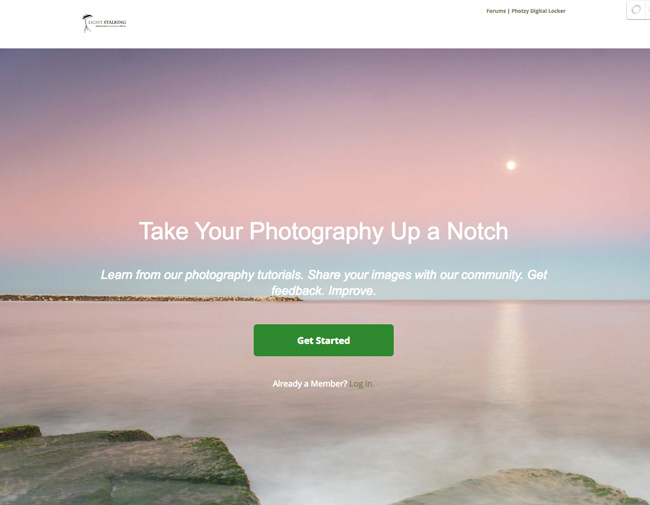
Light Stalking


https://www.lightstalking.com/

A wide range of professional and talented amateur photographers share their tips and advice along with their gorgeous images. Articles are usually short and to the point.

Perfect For – Photographers looking for straightforward advice and feedback on images.

Scott Kelby


https://scottkelby.com/

Scott is an accomplished photographer, writer and teacher. He has created an educational community for photographers, Photoshop and Lightroom users.

Perfect For – Photographers looking to get the most from Photoshop & Lightroom.

Joe McNally


https://blog.joemcnally.com/

Joe opts for a more photo essay style approach to his photography teaching. His posts tend to be longer than most showcased here, which I personally love, they are also broken up by his stunning images.

Perfect For – The photographer who wants the story behind the lesson.

Creative Live


https://www.creativelive.com/

While this site is focused on selling courses, they are free if you’re willing and able to watch them live. Some of the world’s best photographers teach here.

Perfect For – The photography video webinar fan.

Skip Cohen University


https://www.skipcohenuniversity.com/

A slightly different approach, in that they advocate live learning – rather than self-serve photography education. That being said, the blog has some great content & advice.

Perfect For – Talented amateur photographers interested in going pro.

Now it’s your turn


That’s our Top 15 Educational Photography Blogs – what do you think? Have we missed out any you regularly use? If so, share in the comments and we will update the blog later with your suggestions!

Courtesy of: Tea Break Tog

Thursday, October 25, 2018


5 Simple Photography Tips for Beginners


By: TJ Donegan


Photography is one of the most exciting hobbies you can pick up, but when you're first starting out it can all just seem so daunting. But don't get discouraged! It's important to remember that everyone started somewhere. There are no Mozarts in photography, virtuoso geniuses who were born knowing everything there is to know about the craft. More often we began like Beethoven, sitting at the piano in tears.
But while learning how to compose a symphony would take years of practice, composing a great photo can be done at the click of a button—if you know what you're doing. Fret not if you don't, however, we've got some simple tips that are easy to remember, easy to follow, can be used with any camera, and will improve your photos in no time—no technical knowledge required.

1. Exposure

REVIEWED-FIVE-BEGINNER-TIPS-EXPOSURE.jpg
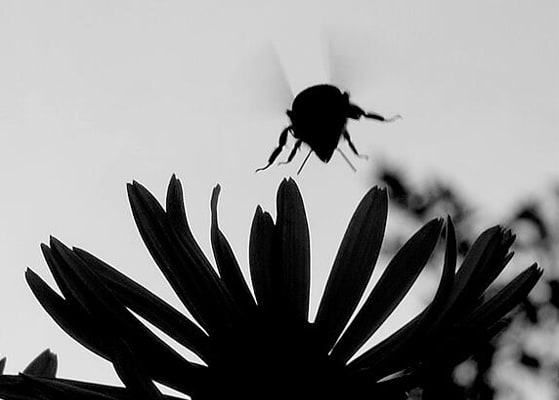
By using lots of exposure compensation toward the negative, we're left with a dark flower and bee silhouetted against the sky. This lets us just focus on the contrast and shape of the scene.
The first thing you're going to want to know is that light is an elemental particle that exhibits wave-particle duality in accordance with the laws of quantum phys... Just kidding. This is the easy version. While you can spend literally your entire life studying the way light moves through the universe, you budding photographers just need to concern yourself with one concept: brightness.
Ever walk into a dark room after being outside on a bright day? You know how your eyes have to adjust before you can see anything? Your camera is the same way. The world varies from very bright to very dark and your camera can only capture so much of this range in a single shot. Controlling this range is very simple to do and can be a powerful way to change the character of your photo.
The easiest way to do this is with your camera's "exposure compensation" button, which is always signified with a +/- symbol. It might be a dedicated dial, a button on the camera, or an option in the menu. Whenever you shoot in an automatic mode on a camera, it tries to figure out how bright the scene should be. But cameras are dumb, and sometimes you have to nudge things in the right direction.
Have a sky that's way too bright? Slide that sucker towards the negative. Trying to brighten up an area in the shadows? Move it to the plus side. Play around with it until you get the idea. Congratulations! You just figured out the most powerful concept in photography.

2. Light

REVIEWED-FIVE-BEGINNER-TIPS-LIGHT.jpg
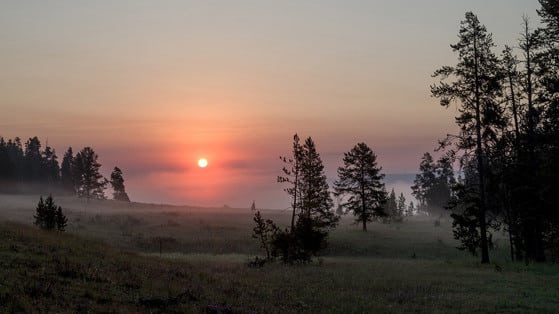
By shooting when the sun is low we get a wonderful golden light as well as more interesting atmospheric effects.
So now you kinda sorta get how light is affecting your shots. Now you want to go find it. Specifically, you want to find situations where light is dramatic. The best time to do this is during something called the "golden hour." The golden hour is simply the hour right around dawn and right before sunset. It's named this for the beautiful golden color the sun often takes on at these times of day.
The golden hour is also important because it tends to create really wonderful shadows. While at noon shadows tend to be nonexistent because the sun is directly above you, at sunrise/sunset the sun is low. This low angle naturally creates shadows. That interplay between bright and dark areas is called contrast, and it tends to drastically improve the look of your shots. Carve out some time during the golden hour and you'll instantly see just how quickly the changing light will improve your photos.

3. Perspective

REVIEWED-FIVE-BEGINNER-TIPS-PERSPECTIVE.jpg
This shot gets on the dog's level for a much more interesting perspective, seeing the world how he sees it.
Most of us see the entire world from between five and six feet off the ground. BOOOOOORING. While there are entire books on the creative use of perspective, how different lenses affect your perspective, and other wonderful tips, a beginner only needs to know one thing: experiment. Get lower, get higher, get directly above your subject, or directly below them. Zoom in on your subject, zoom out and show how your subject fits in the world around you.
The beauty of digital photography is that you can constantly experiment. Stand in one place with a zoom lens and you can see the world in a hundred different ways. Stand in a park and you can turn left and see one landscape, or turn right and see another. You can get lower and see things from a bug's view, or aim downward and take a picture of your shoes. Always try to think up a new way to see what's around you. Do this long enough and you'll probably also see a crowd, gawking at the odd person spinning in circles in the park.

4. Focus

REVIEWED-FIVE-BEGINNER-TIPS-FOCUS.jpg
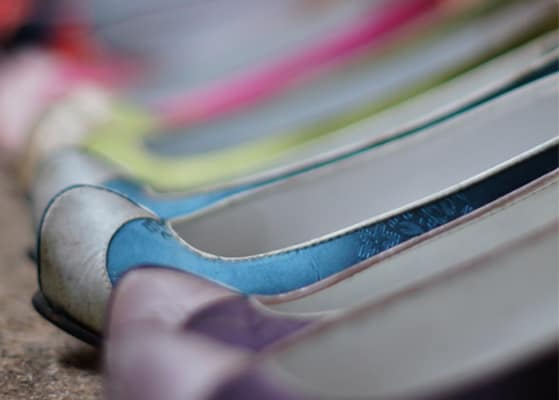
By focusing on the blue shoe we draw the viewer's eye towards it, blurring out the rest of the background.
When you're trying to capture something in a photo, you want that subject to be in focus so the details are crisp. On a smartphone this is easy; you just tap whatever it is you're trying to shoot on the screen. For other cameras it can be a little more complicated, but typically speaking if your camera has a physical shutter button, you can focus by holding the button halfway down. When the camera thinks it's locked in it'll usually surround the subject in a green box of some sort and give a cheerful beep indicating everything's good to go. Press the button the rest of the way and voila, you've got an in-focus photo.
While there are lots of advanced things you can do with selective focus, for starters just concentrate on getting what you want in focus. With software these days you can fix nearly any problem you may have with a shot, but you can't fix focus. That said, here are some simple things to keep in mind: With landscapes you usually want everything in focus, which the camera sometimes doesn't understand. Most cameras have a "landscape" scene mode for just these occasions. Also, when capturing portraits of people or animals, it's best to focus on the eyes above all else. They're the windows to the soul, after all.

5. Composition

REVIEWED-FIVE-BEGINNER-TIPS-COMPOSITION.jpg
By placing the subject on the left side of the frame we leave room for him to move into, so your eyes move from left to right with the ball.
Composition is essentially three things: what you keep in the frame, what you leave out, and where you put things that are in the frame. While the first two aspects are fairly straightforward, the third is a bit trickier. When we're starting out as photographers we tend to just put our subject in the center. This is fine, but it also gets boring, quickly.
Our brains naturally break things down into patterns, but having things slightly off-center is appealing. In photography there's actually a very simple method of composing called the "Rule of Thirds" that takes advantage of this. Basically, if you cut the frame up into thirds horizontally and vertically, you'll get something that looks like this:
In this animated example, following the rule of thirds leads to a pleasing asymmetrical composition, with the tree placed slightly to the right. (Credit: Wikipedia)
Place your subject on one of the four points where the lines cross and most of the time you'll have a nicely balanced composition. Why does this look better to us? Because we're animals made of star junk and our brains defy logic. Just run with it. Most cameras can even lay the rule of thirds guides over your screen so you can quickly and easily put your subjects there.

Well that pretty much covers the basics. These are the foundational elements of photography, and they're generally pretty easy to wrap your head around. Keep these five things in mind when you're out shooting and you'll see a drastic improvement in your photos in no time.
For some more advanced lessons, check out some of our other beginner guides:
What is shutter speed and how do I use it?
What is aperture and how do I use it?
What is ISO and how do I use it?
New System Camera Owner's Guide
(Photos: Ben Keough and T.J. Donegan)

Wednesday, October 24, 2018

Wedding Photography for Beginners

Weddings are a once in a lifetime (hopefully!) occasion, and a day that the bride and groom will cherish forever. Wedding photos play a large part of this, but this can also put a huge amount of pressure on the photographer - missing a shot simply isn't an option.
While wedding photography is possibly the most stressful challenge a photographer can face, it can also be one of the most rewarding. If you're lucky, it might even lead to a lucrative and enjoyable career.
If you've been asked to photograph someone's big day, or if you're interested in gaining some experience with an eye to making it your profession, follow these tips to make sure everything goes as smoothly and stress-free as possible.
Wedding couple on a beach
Weddings are a lot of fun but can be hugely stressful for the photographer. Image by Hiroki Nakamura.

Are You Sure?

Wedding photography can be very stressful and lots of hard work. The first thing to decide is whether you actually want the responsibility. If you've been asked to photograph a friend's wedding, remember that you can always say no.
It's a good idea to gain some experience before going it alone as a wedding photographer - see if there's a local photographer who will let you tag along and observe; just remember to stay well out of their way, and don't expect to get paid. You'll then be much better prepared when it comes to your first solo shoot.

Be Prepared

Weddings are very busy and hectic, so preparing for your shoot in advance is essential. Start by getting an itinerary of the day so you know exactly where you have to be and when. Visit the venues (church, reception hall etc) before the big day so you know how to get there and how to get around.
This is also the time to start scoping out good photo opportunities. If possible, take a couple of friends to pose for some test photos, or even better take the wedding couple so you can discuss what they like and don't like.

Make a Shot List

Sit down with the wedding couple and make a list of all the photos they are expecting in the final album - everything from the group family photo to the snapshots of Auntie Marj. Although it can be a tedious process, on the day this list will be your saviour, helping you to stay focused among the hustle and bustle.
Bride and two bridesmaids
A shot list will help you stay calm, and ensure you don't miss any crucial photos. Image by Jonathan Day.

Let the Guests Do the Hard Work

A great idea is to put disposable cameras on all the tables at the wedding reception meal so that the guests can take their own snapshots of the day. This will provide you will a whole bunch of photos for no effort on your part, which you can use to compliment your more professional shots, or even use to make a separate album altogether. You might also find that the guests feel more comfortable being photographed by their own friends and family, particularly after a few glasses of wine!

Take Two Lenses

You'll want to pack a couple of different lenses for the wedding day - a wide angle lens for interiors and group shots, and a longer lens for candid shots and portraits.
Even better than using two lenses is to use two cameras, saving your precious time changing lenses and reducing the chances of you dropping a lens.

Batteries and Memory Cards

The absolute worst thing that can happen when photographing a wedding is running out of power or memory card space (or film). Can you imagine asking the vicar if he wouldn't mind postponing the ceremony for half an hour while you recharge your batteries? No, neither can I!
Take at least two batteries (fully charged) and enough blank memory cards - you'll be taking lots of photos and you won't have time to delete unwanted shots on the day.
By stocking up on batteries and memory cards you'll also give yourself the peace of mind to concentrate on what really matters - taking photos.

It's All In the Detail

As well as the more obvious photos (bride and groom kissing, family group photo etc), be on the lookout for the small details that add character and depth to the album. Close-ups of the rings, bouquets of flowers, or hanging dresses are all important reminders of the day, and they also allow you exercise a little more creativity than some of the more common wedding photos.
Bride holding her wedding bouquet
Get creative and photograph some interesting details to put a unique spin on the album. Image by Tim Forbes.

Inject Some Humour

At weddings, people often get caught up in the formal side of things. Unfortunately this can cause them to act in a "prim and proper" way that doesn't allow their personality to shine through. Watch for those brief moments where they let their hair down, such as the bride taking her shoes off to rub her weary feet, the best man pulling a funny face, or a baby chewing on a bridesmaid's bouquet. These can often be some of the most personal and memorable photos of the day.

Silence Your Camera

There's nothing more distracting during a wedding ceremony or speech than the sound of your camera bleeping away as it tries to focus. Be sure to turn off your camera's sound at the start of the day and leave it off.
A silent camera also makes it easier to shoot candid photos without alerting your subject, allowing you to get a much more natural photo.

Have Fun

Finally, remember that weddings are a time for celebration and fun. Although they can be stressful for the photographer, make sure that you take the time to let your hair down a bit, have a chat with the guests, and enjoy yourself.

Courtesy of: https://www.photographymad


Photography Basics for Noobs | Beginner Guide