Monday, May 5, 2014

Edited by Lewis Collard, Teresa, Krystle, Eric and 6 others
The Canon A-1 is a legendary, hugely influential and (for its time) extremely sophisticated late-70s manual focus camera that, like many other 35mm cameras, can be bought extremely cheaply, and gives superb results. If you've bought or inherited one, you may find using one to be a little daunting if you're used to fully-automatic point-and-shoot digital cameras. These simplified instructions will guide you through the basics of setting up and using an A-1.

Method 1 of 3: Basic Preparation


  1. Fit your lens if you haven't already. The steps below describe how to fit original FD lenses with a silver locking ring, the kind which were typically sold with the camera at the time. If yours doesn't have this, it's a late-70s-and-onwards "new FD" lens, and the instructions will differ somewhat; in the instructions below, replace the part with twisting the silver locking ring with twisting the whole lens itself until it audibly locks into place.

    • Remove your body cap.
      Remove your body cap if you have one, as well as the rear lens cap on the lens.
    • Line up the two red dots...
      Line up the red dot on the lens with the red dot on the body and gently drop the lens into the mount.
    • ...and twist the silver locking ring to tighten it into place.
      Twist the locking ring clockwise, that is, clockwise if you are looking from it from the front. It won't lock into place, but instead it will get progressively tighter. Don't overtighten this, but do make sure it is firmly in place.


  2. Turn the camera on. Rotate the main switch from "L" to "A". Canon's manual recommends leaving this at "L" when you're not using the camera to conserve battery life. It might not be worth bothering with this, especially if you're not using one of Canon's power winders for the A-1; just handle your camera carefully (so as not to hit the shutter button) and you'll be okay.

  3. Turn on your viewfinder display. This is a small lever right next to the large ASA dial on the left of the camera (if you're looking from the back). Turn it clockwise to uncover the white dot. This will turn on the display in your viewfinder (and you want this).

  4. Open your viewfinder blind. Uncommonly, the A-1 has a blind on the viewfinder to stop stray light entering the viewfinder on long, tripod-mounted exposures. It's a neat enough feature, but most of the time, you will not need this. If it hasn't been done already, turn the small lever to the left of the viewfinder window clockwise to open the blind.

  5. Check your battery. The A-1 is an electronically controlled camera that will not work with a low or dead battery; the shutter will refuse to fire if it is. Press the battery test button (illustrated). If the LED next to the shutter button doesn't blink at all then your battery is dead. If it does not blink very rapidly (several times per second), then it's low, and you should replace it. Pick up a few cheap 4LR44 (aka A544) cells and replace them.

  6. Load your film. This is just like any other rear-loading SLR.
    1. Pull your film rewind knob upwards to open the back of the camera.
    2. Place your film in the film chamber, and draw the leader of the film over to sit in one of the slots, and so that the bottom of the leader is engaging the film transport sprocket.
    3. Close the back of the camera, push the shutter and then wind the film on. Repeat until the frame counter shows that you're on the first frame. While you do that, watch the rewind knob on the left as you wind the film on on; this should turn as you wind it on, and if it doesn't it probably means your film isn't loaded correctly.

  7. Set your film speed. This is necessary for automatic exposure to work accurately. The film speed dial sits around the rewind crank, and has a silver unlocking button on the side, as illustrated. Push this in, and then rotate the dial to the same as the ASA (same as the ISO) speed rating of your film.

  8. Set your lens' aperture ring to "A". This will allow the aperture to be set by the camera; for the most part, this is what you want (it always is, unless you're doing fully manual exposures for some reason).

  9. Get up and get out there and take some photographs. The next part of this guide will walk you through using the A-1.

Method 2 of 3: Taking Photographs with the A-1


  1. Uncover your AT dial. This is a cover for the dial which sets your shutter speed or aperture. Slide it down to uncover the dial. This is the single most important control on the camera, so play with the dial a little to get the feel of it. ("AT dial" is a hideous term from Canon's literature, borrowed here for lack of a better one, sorry.)

  2. Set your exposure mode. The A-1 has three modes that you'll be interested in: fully-programmed AE (which is fully automatic), shutter-priority AE, aperture-priority AE and fully manual.

    • Turn your mode dial to "Tv" and the shutter speed to "P" for program automatic.
      Programmed AE will make the camera set both aperture and shutter speeds for you automatically. Turn your mode dial to "Tv" ("Time value", which is Canon's silly name for "shutter priority"), and use your AT dial to select the green "P" as the shutter speed. Most of the time, this will be what you want to use if you're not using your aperture for creative depth of field tricks, or if you're not using your shutter speed to creative effect; it generally does a good job of picking something that works for most photos most of the time. (Sorry, but this is 1978; you can't shift the program.)
    • For shutter-priority auto-exposure, turn the mode dial to "Tv" and select your shutter speed (here, 1/125 sec).
      Shutter-priority AE will allow you to select a shutter speed, and then the A-1 will pick an aperture for you. If you want either very fast or very slow shutter speeds for creative effect, then use this. Turn your mode dial to "Tv" and select a shutter speed. Remember that the speeds in yellow on the dial are shutter speeds in seconds, the white numbers are ones in fractions of a second.
    • For aperture-priority auto-exposure, turn the mode dial to "Av" and select your aperture.
      Aperture-priority AE will allow you to select an aperture, and then the A-1 will select a shutter speed for you. Use this if you want to use very wide or very small apertures (i.e. if you want creative control over depth of field). Turn your mode dial to "Av" and select an aperture with the AT dial to get aperture priority AE.

      Note that this won't allow you to select apertures smaller than f/22, but you shouldn't be doing that anyway.
    • Fully manual exposure is a last resort for using in extremely dim[1] or otherwise impossible lighting conditions. You can select fully manual mode by setting your mode dial to "Tv", selecting a shutter speed, and turning your aperture ring on your lens off "A" and to your preferred aperture. You'll need an external light meter for doing this; the A-1 shows no indication of over- and under-exposure in fully manual mode.

  3. Look through the viewfinder and very gently half-press the shutter button. Your shutter speed and your aperture (either the shutter or the aperture or both or none could be automatically selected) will be displayed in the viewfinder. If either the shutter speed or aperture readouts are blinking, it means you've selected a shutter speed that is either too fast or slow for the largest or smallest apertures on your camera, or an aperture that requires a shutter speed faster or slower than the camera has available.[2] Select a different aperture or shutter speed if this is the case.

  4. Focus. The A-1 provides you with two useful focusing aids to ensure that your shots are sharp. One is a split image, right in the center, which splits the images into two pieces, which are aligned when the image is in focus.

    The other (more useful) aid is a microprism ring around the outside of the the split screen. this will cause any defocus to be far more obvious than it would be otherwise; when it's out of focus, this area will flicker and display a very obvious "cross-hatched" pattern. Turn the focus ring until either the split image is no longer visibly split, or until the image in the microprism ring is visibly sharp.

  5. Set exposure compensation, if required. This feature of the A-1 forces the camera to either under- or over-expose your shot by a given amount. You'll need this in tricky, inconsistent lighting conditions. Press the button to unlock the exposure compensation dial and turn it to give you the desired amount (you can do this in 1/3 stop increments). Turning this clockwise will give you underexposure, and counter-clockwise will give you overexposure.

    Actually, the A-1's exposure compensation dial is annoying and difficult to do one-handed, so you might not want to bother with this. The ASA dial, on the other hand, can be changed with a fingertip. Neither the ASA nor exposure compensation dials will give you any indication (other than by looking at them) that you're forcibly over- or under-exposing, and the ASA dial has the advantage of being much easier to use. It's up to you.

  6. Press your shutter button. The viewfinder will temporarily blank out and the shutter will fire. If you're using one of the optional power winders, the film will advance itself to the next frame, otherwise, wind it on yourself.

    Keep photographing until you get to the last frame. Don't pay any attention to the frame counter; you're only at the end of the roll when the winder becomes difficult-to-impossible to wind on (don't force it!), or when your power winder (if you have one) refuses to wind it on any further.

Method 3 of 3: Unloading your film


  1. Press the rewind release button on the base of the camera.
  2. Flip out the rewind lever on the rewind knob and turn it clockwise to wind the film back into its canister. The frame indicator will go backwards as you wind. Keep winding until the rewind lever goes very stiff, and then suddenly turns much more freely. When the latter happens, this means your film is free of the transport sprocket. Wind it in a bit further if you like.

  3. Open the back of the camera by lifting the rewind knob upwards. The back of the camera will spring open. Remove your film and get it developed. Load in another roll and carry on enjoying this superb classic camera!
Article by: Wiki How 

Hearst Castle

Museum Guidelines for Film Crews

Filming for commercial projects is not permitted at Hearst Castle. The guidelines below apply to the filming of non-commercial projects only. All non-commercial filming requests must submit a written proposal to: Hoyt Fields, Museum Director, 750 Hearst Castle Road, San Simeon, CA 93452. Proposals are assessed on a case-by-case basis.
  • Our primary concern as a California State Park is that visitors experience a quality tour. Filming may not disrupt or interfere with tours in any way; therefore, all filming must stop and lights must be extinguished when the visitors are in view.
  • A certificate of liability insurance must be received before film crews arrive on-site. Without the proper paperwork, filming cannot begin.
  • All members of the film crew must be escorted at all times by a Hearst Castle staff member. This includes short trips to the car or bathroom. Nametags must be visible at all times.
  • No alcohol or drugs are permitted at any time. The project will be terminated immediately if it is believed that drugs or alcohol are present. Photography of security systems is not permitted.
  • Only the working film crew will be permitted on the Hilltop. No spectators, such as family members, will be allowed. Complimentary tours are available by prior arrangement with the Public Relations Office.
  • A shooting schedule must be received 48 hours prior to date of filming. Security concerns demand that filming adheres to the approved schedule. Filming will occur only between 7:30 a.m. and 5:00 p.m. There will be no exceptions. Cancellations must be received 48 hours prior to date of filming or staff costs will be charged.
  • Food or drinks will be permitted only in areas specified as lunch facilities. Hearst Castle is not equipped with storage areas or large refrigerators, so please be prepared with coolers. Smoking is allowed only in designated areas.
  • Protecting artifacts is our main concern on filming projects. Do not touch, lean on, or move any objects. Use special precautions when setting up equipment and carrying large items.

Hearst Castle On-Site Photography

Photography for personal enjoyment is encouraged. However, photographs taken on site may not be used for commercial purposes, nor may they be published in any medium or format without prior written permission from the State of California. All commercial rights to use photographs taken on the premises are reserved by the State of California unless expressly granted otherwise in writing.
Please note: Although tripods are not permitted either inside the buildings or on the grounds, monopods are permitted in both locations. Flash photography is not permitted inside the buildings, but it is allowed throughout the grounds.
Photography for publication requires written permission. If you are planning to publish information about Hearst Castle and require photos, please keep in mind the following On-Site Photography Policy.
All on-site photography project proposals must be reviewed by Hearst Castle’s Museum Director. Photographers whose on-site project proposals have been approved should be aware that the following requirements must be met:
  • No weekend appointments will be scheduled.
  • The photographer (or the organization s/he represents) must provide $1 million liability insurance. A certificate of insurance must be provided before any on-site work begins.
  • There is a site fee of $500, payable in advance.
  • Since all visitors must be accompanied by a staff member at all times, a fee of $26 per hour will be assessed, with a 4-hour minimum.
Use of all images generated from the photo shoot will be restricted, in writing, to the project specified in the Photo Permit issued to the photographer by Hearst Castle. Speculative projects are not permitted; photographers must provide information about the publisher and publication in the project proposal submitted to the Museum Director.
The Museum Director reserves the right to modify these requirements without prior notification as needed. High quality stock photography is available upon request. Inquiries should be directed to the Museum Director by fax at (805) 927-2110 or by email at curator@hearstcastle.com.

Sunday, May 4, 2014

Photographic Film 101

Here is a very very basic rundown of what film is, in general, for those of you who are curious or interested in understanding more about chemical composition in photography. I will say that once you have a solid grasp of how paper and film are made and the chemicals used to develop them, it’s easy to venture off into the world of alternative processing… which is super fun. I’ll go more in depth later about alternative processing (personally I have always wanted to do albumen prints but have never had a darkroom to myself where I could) but for now let’s start with the 101 of how film works:
Film is composed of layers. Many layers. These are different for color, slide, black and white, and instant film but all contain millions of light-sensitive silver halide crystals (what we call grain) that you expose when you pop the shutter. While the other layers are crucial, for our purposes we will be looking at the light sensitive layers. Color film has three layers of silver halide: red, blue, and green.

Slide film has a few more layers than C-41:

Black and white paper is what we call “orthochromatic” which is basically a fancy word for “red blind.” This is why you can print black and white in a darkroom with the redlight on, allowing for minimal vision, whereas when printing color you must remain in total darkness. Very weird, and kind of fun. Technically you can still buy orthochromatic black and white film, but it’s not very common. Most black and white film today is panchromatic, which means it is sensitive to all colors of the visible light spectrum. The layer composition of black and white film is simpler:

You’ll notice they all have what we call an “antihalation” coating or layer, which is basically applied to the back layer to absorb stray reflecting light from the film emulsion.
So basically, that sums up how film absorbs light… um, for beginners.

Article from: I Still Shoot Film Blog

NYFA Photography LA Co-Presents Q&A with Prominent Industry Creatives: Tierney Gearon and Charlie Hess

Photo LA Q&A
MOPLA‘s closing event last Sunday evening was Vision & Visionaries: A Conversation Series About Inspiration and the Creative Process, a co-presentation between NYFA Photography Los Angeles and the Lucie Foundation.
Held at historic Mack Sennett Studios in Hollywood, acclaimed photographer Tierney Gearon and design director Charlie Hess discussed Tierney’s early family portraits, her move from advertising to fine art photography and her recent short films for the New York Times magazine (where Charlie discovered her work). The studio was packed to capacity, the audience comprised of NYFA Photo LA students and instructors as well as members of the art community.
“We’re honored to have Tierney and Charlie at this inaugural event,” commented NYFA Photography LA Chair, Bobbi Fabian, “and look forward to hosting other prominent creatives in the series. Both Tierney and Charlie pushed students to shoot, shoot, shoot, work on their style and stick with it. I hope that many of our students take up Tierney’s generous offer to contact her for feedback on their work. It’s an invaluable offer of assistance from a renowned photographer!”
This Q&A is the first of a series of conversations between photographers and their collaborators. The event was filmed and will be available soon on both the NYFA and Lucie websites.

Going Home to Momma…. Film Photography Returns!

By mark hilliardatelier

Ahhh… It Feels So Good!

Rollei IR400 Film - Leica M7 50mm Lux - Rodinal 1-50
Spring in the South…  Rollei IR400 Film – Leica M7 50mm Lux – Rodinal 1-50
Oh my, I do NOT know where it came from but I got the BUG again for more film photography!  I have a cabinet here in the Gallery just full of old film cameras plus a Leica M7 film body that works with ALL OF MY M MOUNT LENSES!  (see the last post HERE for more info on the lenses).  I decided to purchase a new stock of several films:
  • Kodak Tri-X 400, Ohh
  • Eastman Double X 200, Ahh
  • Rollei IR400  400, WOW!
  • Kodak Tmax, Ho hum…
  • Ilford HP5+ 400
Rodinal One Shot
Rodinal One Shot
I picked up some stainless 2 roll developing tanks with a bunch of Hewes (don’t skimp on your reels, buy the best!) Stainless Steel 35mm Reels.  For developing I like Rodinal One Shot due to its ease of use and a life span of around 40 years.  I simply mix it one tank at a time usually at a 1:50 ratio with water using a small syringe. It allows a very wide latitude of contrast and iso control.  I have used several other developers but I keep coming back to Rodinal!
Now, I am playing with several cameras. As I said my main and BEST camera is my Leica M7.  But here is a list of those cameras I am using:
  • Leica M7 with Leica & Voigtlander Lenses
  • Petri 7s, 1962 
  • Olympus XA
  • Olympus 35 RC (comming)
  • Shen Hao 4×5 Field Camera (about 12 years old)
1962 Custom Petri 7s Film Body
Leica M7 Film Body
Leica M7 Film Body
The Leica and Petri are my main two systems that I use most of the time. The Petri has been in my hands since 1962 and still shoots great ( I did send it off to have the light seals replaced and a new leather covering ).
Both cameras are fun to use and reliable.  With the Leica you get the world class glass but with the Petri you get a link to the past, specifically MY past as this was my 2nd camera I owed when I was young!
The Leica uses batteries and sports a center weighted spot meter measured either off the film or off the shutter.  I find that it meters very reliable.
The Petri has no batteries but rather a solar cell around the lens that drives a needle exposure meter that you simply place into its center notch for a good image!  You will see examples from both of these cameras towards the end of this post!
I usually develop my negatives on Sundays.  I have a film drying cabinet that I use to dry the film without dust spots overnight.  I then will scan the negatives on Monday or Tuesday using a Nikon 4000 ED film scanner at 4000 dpi into the DNG format for editing and cleaning later in the week.  I usually shoot 2 or 3 rolls a week.
Rollei IR400 Film
Rollei IR400 Film
My favorite film is Rollei IR400.  This is available at the big camera stores like Digitaltruth, Freestyle and B&H.  What makes this film so special is the fact that is very much like Kodak Tri-X 400 as shot.  It has a VERY THIN film base which really makes scanning easy.  BUT the most amazing thing about this film is that it is sensitive to INFRARED!  If you place a Hoya R72 IR filter on the camera lens the film will record 720nm IR images!  There is an ISO hit due to the filter being so dark down to 12 ISO but it is worth it being able to shoot in both normal B&W and IR B&W!
Next I like the Kodak Tri-X 400 film.  It gives great contrasts and has a very wide latitude in development.  It is well known and tested and for ultra long exposures.
Eastman Double X 5222
Then comes Eastman Double X Cinema film.  This is a GREAT B&W film that gives a very smooth gradation and lovely warm tonality with slightly increased contrasts.  This is motion picture film so unless you are going to buy a 400 foot reel you will need to purchase it from the store at Film Photography Project. They will sell it in either 24 exposure rolls or a 100 foot bulk loader roll.  It develops nicely in Rodinal at 1:60 for ISO 200 but there are rations for 100 up to 800 ISO!  This film is very much worth experimenting with.
Whatever film you decide to use you will be pleased with the results. Processing is easy to do with a VERY small investment. You will need:
  • Film Camera
  • Film
  • Chemestry:  Developer, Stop (you can use water), Fixer and water bath with a Wetting Agent.  $40 to get started
  • Film drying hanger clips $3 for a bag of 2
  • Film tank, either stainless steel or a Peterson. Peterson tank and reel is about $40
  • Film tank reels (if stainless do not skimp on these).  Hewes Steel are about $25 each
  • Dark changing bag to move the film from the canister to the developing tank.   $40
  • You will also need some way to scan your film into a digital image or pay someone to do it for you.
That is it.  It normally takes me about an hour to develop 2 rolls.  I will let them dry for several hours then cut them into strips of 6 and put them into plastic storage sheets.
Ok, lets take a look at the results of 3 types of film in 2 cameras!
Pawleys Pier  M7 Elmarit 28  Rollei IR400 film in Rodinal at 1:50
Pawleys Pier M7 Elmarit 28 Rollei IR400 film in Rodinal at 1:50 240 second exposure
1962 Petri 7S, Eastman Double X film in Rodinal at 1:60
Eastman Double X Film - 1962 Petri 7S  - Rodinal 1-50
Eastman Double X Film – 1962 Petri 7S – Rodinal 1-50
1962 Petri 7S, Eastman Double X film in Rodinal at 1:60
Rollei IR400 Film - Leica M7 50mm Lux - Rodinal 1-50
Rollei IR400 Film – Leica M7 50mm Lux – Rodinal 1-50
Rollei IR400 Film - M7 28mm Elmarit - Rodinal 1-50
Rollei IR400 Film – M7 28mm Elmarit – Rodinal 1-50
Rollei IR400 Film - M7 50mm Lux - Rodinal 1-50 240 second exposure
Rollei IR400 Film – M7 50mm Lux – Rodinal 1-50 240 second exposure
Rollei IR400 Film with R72 IR Filter - M7 50mm Lux - Rodinal 1-50
Rollei IR400 Film with R72 IR Filter – M7 50mm Lux – Rodinal 1-50

Rollei IR400 Film - M7 50mm Lux - Rodinal 1-50
Rollei IR400 Film – M7 50mm Lux – Rodinal 1-50
I hope that you enjoyed this post and its associated images.  I have been using film since I was 9 years old.  At 13 I had my first darkroom at home.  I worked in film in my own darkroom until I was 18 when that period of my life can to an end.  42 years later I re-engaged film photography again and cannot help but ask “Why did I wait so long?”  I have been shooting digital since my career at Eastman Kodak when you could ONLY get B&W digital camera systems!  I have spent fortunes on digital and have loved every moment of it.  Film will NOT take any of that away, I still have digital and continue to use it.  But I have to be honest and admit that working in film again fills me with a sense of peace that I have not experiences in a very long time….


Saturday, May 3, 2014

What is ISO (Film Speed)?

As a follow up to understanding aperture, I thought it would be nice to go over the basics of film speed or ISO (formerly known as ASA.)

ISO is the speed of the film, also known as the number printed on the box and the canister. FujiChrome Velvia 50 has an ISO of 50; Ilford Delta 400 has an ISO of 400.
ISO or Film Speed is expressed as a number, which is generally doubled as it gets higher. For example 50, 100, 200, 400, 800, 1600, 3200. There are several exceptions to this, such as Ilford FP4 which has an ISO of 125.
As I explained in How Film Works, photographic film is made up of millions of light-sensitive silver halide crystals, which we call grain. The lower the film speed, the finer the grain; the higher the film speed, the fatter the grain. Larger silver halide crystals have more light sensitivity than smaller ones, so a higher ISO will be more sensitive to light than a lower one. An ISO of 50 or 100 is not very sensitive and requires bright light, which means that if your camera’s fastest f-stop is 3.5 or higher, you would not have enough light to do interiors (for example) without a flash. An ISO of 3200 is extremely light sensitive, but also has very prominent grain and therefore a specific style. It’s also very easy to overexpose if shooting in direct sunlight.

This is where fine tuning the balance between f-stop, ISO, and shutter speed comes in to achieve the desired result.  When you look at a manual SLR, you’ll see a little dial with all of the film speed numbers going from 25 or 50 up to 3200 or 6400 (depending on make/model). Setting this dial is only for the light meter and will not have an effect on your exposures. Ideally, you would set the ISO, and use the light meter to balance between f-stop and shutter speed. If you’re not sure what the light meter is, it’s that little needle you see when you look through the view finder, and you want it to be in the middle for a correct exposure. My next sentence may seem obvious, but hey you never know: You need to have batteries in the camera for the light meter to work. This is why manual cameras take batteries; the batteries have nothing to do with the shutter or any mechanical part of the camera.
Here’s a little film speed guide (these are just my personal recommendations):
  • ISO 50 (or lower): Bright sunlight (the beach in the afternoon, for example), studio lights
  • ISO 100: Bright sunlight, bright overcast, studio lights
  • ISO 200: Sunlight, overcast, some shade, studio lights
  • ISO 400: Outdoor (sunlight/overcast), indoor (during the day or very well lit)
  • ISO 800: Outdoor (very overcast), dusk, interiors, motion/high speed
  • ISO 1600: Night, interiors (day or night), motion/high speed
  • ISO 3200: Night, interiors, motion/high speed
Again, there are always ways around this, such as using an external flash head at night with an ISO of 100.

From: I Still Shoot Film Blog

The Glossary of Analogue Photography

Film photography can be complex and the various terms can be difficult to understand. Here's a glossary contains an alphabetical you will find some of the common terms used in analogue photography.

120 – A popular film format for still photography used in various medium format cameras. The 120 film format is a roll film which is nominally 60 mm wide (in fact, about 61 mm).

135 – Also called 35mm is a film format used for still photography. It is a cartridge film with a film gauge of 35 mm, typically used for hand-held photography in 35 mm film cameras.

Agitation – Gently moving developing chemicals to evenly process film or photographic prints.

Aperture – The aperture stop of a photographic lens can be adjusted to control the amount of light reaching the film or image sensor. In combination with variation of shutter speed, the aperture size will regulate the film's or image sensor's degree of exposure to light.

Aperture Priority – Often abbreviated A or Av (for aperture value) on a camera mode dial, is a setting on some cameras that allows the user to choose a specific aperture value while the camera selects a shutter speed to match.

ASA – American Standards Association is a now defunct rating system for film speed. The ASA system has been replaced by the universal ISO system. However, it is still a commonly used term.

Auto Exposure (AE) – The aperture and shutter speed are automatically determined for exposure.

Auto Focus (AF) – The ability of a camera lens to automatically find a point of focus.

Bellows – The pleated expandable part of a camera, usually a large or medium format camera, to allow the lens to be moved with respect to the focal plane for focusing.

Black and White (B&W) – A term referring to a number of monochrome forms in photography.

Photo by Barry Yanowitz

Blur – Subjects within the frame move during a long exposure and are recorded during movement. This will cause them to look out of focus and blurry.

Bulb (B) – A setting on the shutter speed dial of a film camera that allows you to keep the shutter open for as long as the shutter release is held.

Burning- A darkroom technique that singles out specific pieces of a photograph to add more light to the exposure of the photographic paper, thus darkening the spot.

C-41 – A chromogenic color print film developing process. C-41 is the most popular film process in use.

Caffenol – A photographic alternative process whereby caffeine, sodium carbonate and optionally Vitamin C are used in aqueous solution as a film and print photographic developer.

Cable Release – A cable that plugs into your cameras shutter release button and eliminate camera shake from the force of pushing the shutter release by hand.

Canister – A container for 35mm film for use in cameras.

Close-Up – Photographing an object at very close range.

Color Negative – When shooting in color film, the negative will show exact opposites of the original color. When printed to photographic paper, the negative becomes a positive and shows in full color on the print.

Color Reversal – Color film that shows the actual color on film. This film cannot be printed through common darkroom techniques as it requires a negative to positive, but can be shown through a slide projector.

Composition – Putting together various visual elements to create a unique organization or grouping to achieve a unified image or photograph.

Contact Print – A photographic image produced from film; sometimes from a film negative, and sometimes from a film positive. The defining characteristic of a contact print is that the photographic result is made by exposing through the film negative or positive, onto a light sensitive material that is pressed tightly to the film.

Contact Sheet – A set of multiple images printed at the same size as the negative, on one page. In film photography, contact sheets were often used to quickly scan for the highest quality images from a roll of film.

Contrast – The relative difference between light and dark areas of the photograph.

Crop – Enlarging a photography to purposely cut-off certain edges of an image when printing negatives.

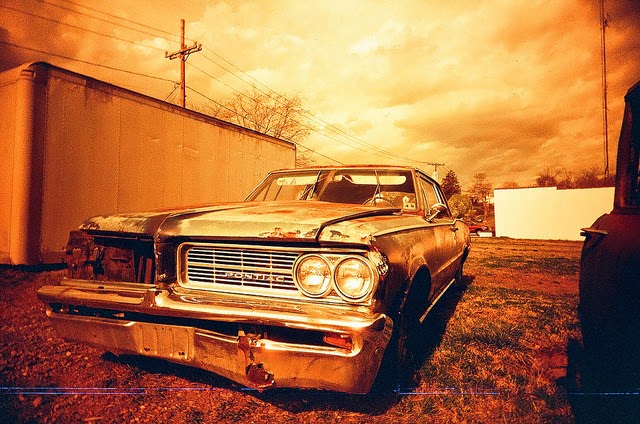
Cross Processing (or Xpro) – The deliberate processing of photographic film in a chemical solution intended for a different type of film. The effect was discovered independently by many different photographers often by mistake. Color cross processed photographs are often characterized by unnatural colors and high contrast.

Photo by arigatogozaimasu

Darkroom – A room without lights that is used to develop and process film and prints.

Depth of Field (DoF) – The area between the nearest and furthest objects that appear to be in focus. This technique is controlled by the aperture of a camera lens.

Developer – The chemical that removes the first layer of emulsion from film or photographic paper and allows the image to be seen.

Developing Tank – A light-tight container used for developing film. A developing tank allows photographic film to be developed in a daylight environment. This is useful because most film is panchromatic and therefore can not be exposed to any light during processing. Depending upon the size and type, a developing tank can hold one to many roll or sheet films.

Dodging – Blocking light from an area of the photographic print to lessen the amount of exposure and lighten that particular spot.

Double Exposure – Exposing film twice allowing for two similar or different images to overlap on a single negative.

Photo by Sandy Phimester

E-6 – A chromogenic photographic process for developing Ektachrome, Fujichrome and other color reversal (slide) photographic film.

Emulsion – A light sensitive layer on film that contains one or more silver halides and captures an image when exposed to light.

Enlarger – A system used in the darkroom that exposes the negative to photographic paper to create a positive image. Enlargers can be moved up and down to make images larger and smaller and focused to provide maximum detail.

Exposure – The amount of light that is allowed to hit photo film or photo paper, creating an image on the respective source.

Exposure Meter – A light reading that gives you specific information regarding which shutter speed and aperture setting to use for a consistent, well-toned image.

Exposure Setting – The combination of aperture and shutter speed used to expose film.

F-number – Numbers on the aperture of a film camera lens.

F-stop – Another term for the numbers on the aperture of a camera lens. May also be referred to as “stops.”

Fast Film – Film with a high sensitivity to light. The term is usually used when referring to films ISO 800 and higher.

Film – An emulsion covered strip or sheet that captures light when exposed and leaves a negative or positive image.

Film Holder – A device that holds one or more pieces of photographic film, for insertion into a camera or optical scanning device such as a dedicated film scanner or a flatbed scanner with film scanning capabilities. The widest use of the term refers to a device that holds sheet film for use in large format cameras, but it can also refer to various interchangeable devices in medium format or even 135 film camera systems.

Film Scanner – A device made for scanning photographic film directly into a computer without the use of any intermediate printmaking.

Film Speed – The number given to various films to describe how fast the film can capture an image when exposed to light. This number is most commonly referred to as the International Organization for Standardization (ISO) film speed.

Film Swap – Double/triple exposures made by swapping film between two (or three) persons.

Photo by Wei Jie

Filter – Tinted glass, gelatin, or plastic discs that fit onto a camera lens or under the lens of an enlarger to emphasize, eliminate, or change color, contrast, or density.

Fisheye Lens – An extreme wide-angle lens that rounds edges instead of maintaining sharp rectangular edges.

Fixer – A chemical used during film processing and print development that makes the film or print no longer sensitive to light.

Flash – A brief and sudden burst of light used to create more lighting for a particular scene or subject.

Focal Length – The distance between the point of focus and the film plane when the lens is focused at infinity. Lenses generally have the focal length engraved on the front of the lens and is expressed in millimeters.

Frame – May refer to the areas of a single exposure on film, an element in the scene, like a doorway, that frames the subject, the boundaries of the camera’s viewfinder, or a decorate border around a final print.

Grain – Fine silver crystals in the light-sensitive emulsion of film that react when exposed to light and turn black. The slower the film speed the finer the grain and the faster the film speed the more present the grain. Larger film formats can be enlarged without much grain is noticed whereas 35mm formats may see noticeable grain beyond an 8 x 10 inch print.

Photo by raquel fialho

Gray Card- A neutral card that is helpful for measuring light and leads to consistent exposures.

Half Frame – A type of 35mm camera in which the film plane is half its normal width. This allows you to expose twice as many frames as usual on one roll of 35mm film by taking two portrait-rectangular shots where there would normally only be one landscape-rectangular image.

Highlight – The brightest area of a photograph.

Incident Light – Light that falls on a surface and is not reflected by it. An incident light meter would be used to measure this for proper exposure settings.

Instant Film – Film which develops into a photographic print without the aid of outside chemistry, usually in 90 seconds or less.

Interchangeable Lens – Some camera systems offer the ability to swap lenses at any time and offer a magnitude of lenses for any given situation. Most commonly found on single-lens reflex (SLR) cameras.

ISO – Stands for “International Organization for Standardization,” a universal system to measure film speed. You will see this used as ISO 100 for 100 speed film.

K14 - The chemical process for developing Kodachrome slides.

Large Format – The largest film available to capture the most detail possible with negatives that start at 4 x 5 inches in size.

Leader (film) – The small tab at the front of a 35mm film canister to help load film into the camera.

Lens – The lens is a combination of pieces of glass with curved surfaces that receive light rays from an object and are able to form an image on the focal plane. A lens may have variable vocal lengths for zooming, macro, or wide angle shots.

Lensbaby – A line of camera lenses for SLR cameras that combine a simple lens with a bellows or ball and socket mechanism for use in special-effect photography. A lensbaby can give effects normally associated with view cameras. The lenses are for use in selective focus photography and bokeh effects.

Lens Hood – An accessory that attaches to the front of a lens to prevent light flares and help protect the glass from scratches.

Lens Speed – The widest aperture setting possible for a camera lens. A fast speed also allows for faster shutter speed settings.

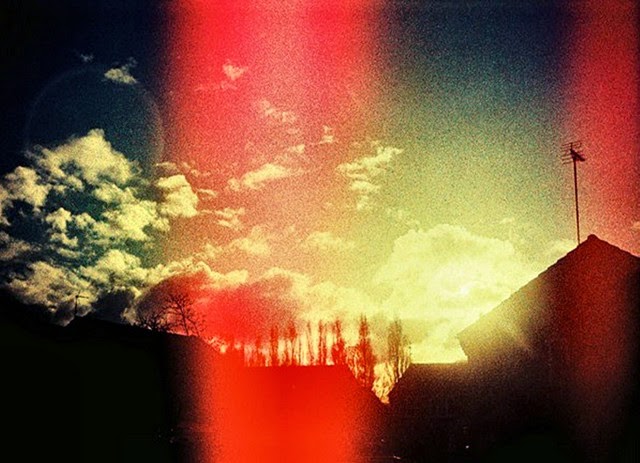
Light Leak – A hole or gap in the body of a camera where light is able to "leak" into the normally light-tight chamber, exposing the film or sensor with extra light. This light is diffuse, although parts within the camera may cast shadows or reflect it in a particular way. For most purposes this is considered a problem. Within the lomography movement it is seen as a positive effect, giving photos character.

Photo by Green Isaac

Light Meter – An instrument used to measure light for proper exposure settings.

Lomography – A community of Lomographic photographers who advocate creative and experimental film photography.

Long Exposure – Involves using a long-duration shutter speed to sharply capture the stationary elements of images while blurring, smearing, or obscuring the moving elements. The paths of moving light sources become clearly visible. For best results, practice in low-light conditions or with a very slow film speed.

Macro Lens – A lens with extreme close-up abilities to focus on small objects and make them larger-than-life sized.

Medium Format – Camera system that uses larger film that 35mm, commonly sized at 6 x 4.5 cm, 6 x 6cm, and 6 x 7cm.

Midtone – The area of the photograph that is average in tone. Also referred to as “mid gray.”

Multiple Exposure – Exposing a single frame more than once to create layers of images.

Negative – Film that is developed and shows the opposite of a printed image. In black and white photography, white on the negative will print black and black will print white.

Overexposure – An image that receives too much light for an exposure. Overexposed images are bright, often with a complete loss of detail and contrast in the highlights.

Panning – Using a slow shutter speed and tracking the movement of the subject with the camera lens. If done successfully, the background will have motion blur while the subject appears to be in clear focus.

Parallax Error – An instance where the camera lens and viewfinder do not see the exact same frame, causing the photographer to compensate for the offset. Close-up photography suffers heavily from the parallax error as it makes it difficult to compensate and focus correctly. Problematic for viewfinder cameras or twin-lens reflex cameras.

Pinhole Camera – A simple camera without a lens and with a single small aperture, a pinhole – effectively a light-proof box with a small hole in one side. Light from a scene passes through this single point and projects an inverted image on the opposite side of the box.

Point and Shoot (PnS) – A camera with fully automatic settings, allowing the user to create photographs without setting a shutter speed or aperture.

Polaroid – A brand of instant film and cameras which has sadly ceased production as of February 2008.

Print – A piece of photographic paper with a finished image on it.

Processing – Producing the image on exposed film or photographic paper with proper chemicals to develop it.

Rangefinder – An instrument that measures the distance from the photographer to a particular object and assists in proper focus.

Redscale – A technique of shooting photographic film where the film is exposed from the wrong side, i.e. the emulsion is exposed through the base of the film. Normally, this is done by winding the film upside-down into an empty film canister. Depending on the type of film used, the resulting colors seem to range from maroon, to red, to orange, to yellow.

Photo by Red Kiwi Photography

Reflex Camera – A camera with a mirror directly behind the lens that captures the image and reflects the image to a viewing screen.

Roll Film – Film with a light proof backing that is rolled on a spool and contains a strip of film to allow more than one exposure.

Safelight – Lights found in a darkroom that will not expose light sensitive materials. Film cannot be exposed to any light before development, not even safelights.

Self-Timer – A feature on many cameras that allows the user around 10-seconds before the shot is taken. This is typically used in shots that involve the photographer.

Shutter – Blocks light from traveling through the lens and exposing film until it is opened during exposure. Shutters can be made of blades, a curtain, plate, or other movable covers and control the amount of time light is allowed through the lens.

Shutter Priority – An automatic setting that will automatically change the aperture depending on the chosen shutter speed.

Shutter Speed – How fast or slow the shutter opens and closes to expose the film behind the lens. Plays a pivotal role in motion photography.

Single-Lens Reflex (SLR) – A camera with a single lens that is used for viewing and capturing the image. The image is reflected with a moveable mirror in the camera body that allows the photographer to see directly through the lens. The mirror flips up when the shutter is opened to allow light to expose the film.

Slide Film – Film that when processed shows a positive image. Also known as “reversal film” or “transparency film.”

Snapshot – An image captured informally, usually with a disposal or quick shot camera.

SOOC – An acronym for Straight Out Of the Camera. Meaning the images that come directly from the camera or film without photoshop.

Spot Meter – A type of light meter used to read reflected light in a concentrated area of a scene.

Stop – Short name for the numbers on an aperture, called f-stops. Going “up a stop” or “a stop down” refers to increasing or decreasing the aperture size.

Subject – The main object in the photograph, such as a person or thing. May also refer to the theme or topic discussed in the photograph.

Sunny 16 – A method for achieving exposure without a light meter on a sunny day by setting the aperture to f/16 and the appropriate shutter speed.

Through The Lens (TTL) – Refers to a light meter built into the camera that measures light through the lens and single-lens reflex cameras that allow the photographer to see exactly what the lens is pointed at.

Tonal Range – Various shades of gray between white and black.

Toy Camera – A simple, inexpensive film camera.

Tripod – A three-legged post used for support heavy cameras during operation and minimizing blur during long exposures. May also be used for panning and tilting techniques.

TTL Meter – A light meter built-in cameras to provide accurate light metering directly through the lens.

Twin Lens Reflex (TLR) - A camera having two separate lenses of the same focal length – one for viewing and focusing; the other for exposing the film. The lenses are mechanically-coupled so that both are focused at the same time.

Underexposure – An image that does not receive enough light for a proper exposure. Underexposed images are dark, often with a complete loss of detail and contrast.

View Camera – A type of large format camera that typically uses negatives sized 5” x 7” or 8” x 10”. These cameras offer the most control of any camera type.

Viewfinder – The viewing device on the camera that allows the photographer to see the approximate or exact view of the camera’s lens. Only single-lens reflex cameras give the user the ability to see exactly what the camera sees.

Viewpoint – The camera’s location relative to the subject.

Wide Angle Lens – A camera lens with a wider view than that of a standard lens. Wide-angle lenses have a focal length smaller than the diagonal size of the film format.

Zone System – An exposure method developed by photographer Ansel Adams for determining optimal exposure and development for each negative.

Zoom Lens – Variable focal length lens that allows the photographer enlarge or reduce the image.

(Information from Guide to Film Photography and Wikipedia)

Found: Photos of Adolph Hitler

Hitler came on our honeymoon! Unseen pictures of The Fuhrer on tour in Naples unearthed in long-lost black and white collection of family vacation photos found in a Virginia thrift store

  • Pictures of the infamous leader were found in rolls of an unidentified family's holiday snaps from the 1930s 
  • Photography enthusiast Matt Ames was shocked to find the historical images on the film he bought at a thrift store

Photography enthusiast Matt Ames was pleased to find some rolls of old film among the usual collection of discarded bric-a-brac lining the shelves of a backstreet thrift shore in Virginia.
But what Mr Ames didn't realise was that he'd accidentally stumbled upon a piece of Europe's wartime history - as captured by a young American couple who appeared to be on their honeymoon in Italy.
For among the 400 or so negatives on the 35mm nitrate films, he was shocked to uncover previously unseen photos of Adolf Hitler touring Italy at the height of his powers.
The pictures were taken by a mystery photographer, who Mr Ames believes may either have ended up living in the city of Roanoke, where the films were purchased, or New York, which is featured in many of the photos.
Among the scores of holiday snaps and family photos, the pictures - taken in the years before the Second World War - reveal the unknown photographer's brush with the 20th century's most infamous leaders.
In one of the forgotten photos, Hitler is pictured sitting next to King Emmanuel III of Italy during a parade in Naples in 1938 after the Fuhrer had viewed fellow fascist leader Benito Mussolini's naval fleet in the Mediterranean.
Mr Ames, who has held an exhibition of the photos in Martinsville, Virginia, said: 'In 2013 I found several rolls of negatives in a thrift store in Roanoke, Virginia. They were standard 35mm, black and white and some of the rolls were clearly nitrate film.
'Much to my surprise the film included photographs of Hitler and King Emmanuel on parade, other Nazi images from Naples, Italy in the Spring of 1938, numerous photos of Naples city life, Pompeii and photos of Manhattan.'
Pictures of Adolf Hitler - sitting on the left beside King Victor Emmanuel III of Italy - were uncovered on films found in a thrift store in Roanoke, Virginia by photography enthusiast Matt Ames
The roll of film also includes a picture of a woman, thought to be the photographer's wife or girlfriend
The unknown photographer (pictured) would have had little his idea of the carnage Hitler was about to unleash, or that his photos would later end up in a thrift
Mystery couple: The roll of vacatation snaps also includes a picture of the photographer and a woman thought to be his wife. The man is thought to have worked for Mobil Oil
Hitler visited Italy in 1938 to meet with fellow Axis leader Benito Mussolini. The photos uncovered in Virginia are believed to show him after he viewed Italy's naval fleet
Hitler (circled) is pictured receiving fascist salutes from Italian troops, who lined the seafront road in Naples for his visit

The images show Hitler's cavalcade surrounded by motorcycle outriders as he is paraded along the streets of the southern Italian city

The pictures also appear to show young members of Mussolini's Gioventu Italiana del Littorio or GIL youth movement, which was similar to the Hitler Youth in Germany
Hitler took a tour of Italy in 1938, and joined Mussolini and the king on board the battleship Conte di Cavour in Naples to watch military exercises
The photographer managed to capture a picture of the Italian fleet, which was amassed of the coast for the Fuhrer's visit
The pictures also offer an insight into the fascist architecture being built in Italy at the time, with swastikas adorning a number of public monuments (above and below)
The pictures also offer an insight into the fascist architecture being built in Italy at the time, with swastika's adorning a number of public monuments
Hitler's visit to Naples was one of many meetings between the two leaders, pictured here ahead of the 1938 Munich conference. File Photo