How to Understand Depth of Field in Photography
Depth of field (DoF) is one tool that will make your images more powerful and interesting. It is an artistic focusing choice with a technical foundation.
In this article, I’ll help you understand depth of field and how you can use it in your own photography.
Understanding Depth of Field
Depth of field in photography describes how much of your scene is in focus. Technically, depth of field is the distance between the closest objects in focus and the farthest point of focus. Imagine looking out into a landscape through your camera. Depth of field starts at the first thing you see that’s in focus and extends to the furthest object in focus.
Deep and Shallow DoF
We talk about depth of field in terms of “deep” and “shallow”. Deep DoF is also called “wide” or “large”. Shallow DoF is also called “small” or “narrow”.
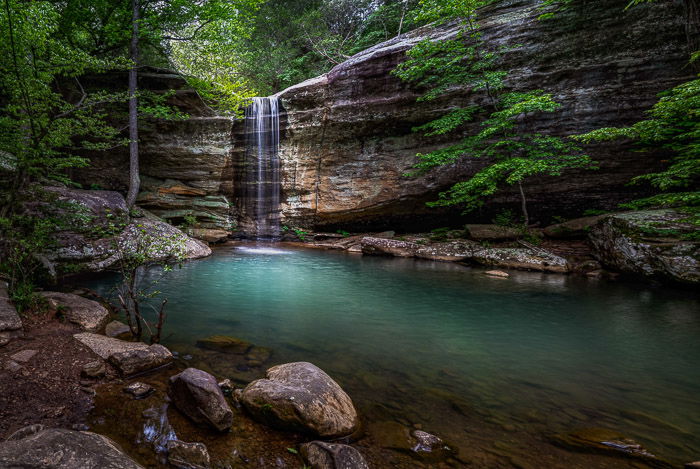
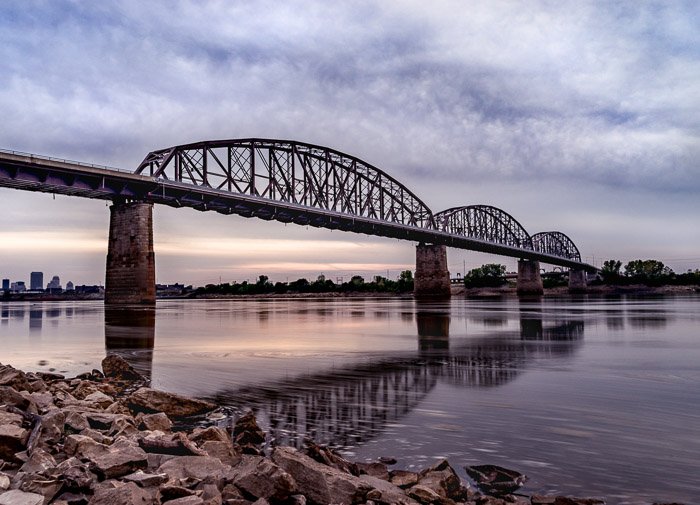
Landscape photographers often want the entire scene in focus, from the closest rock to the furthest mountain. This is a “deep” depth of field.
In this image, the waterfall in the background and the rocks in the foreground are both in focus.
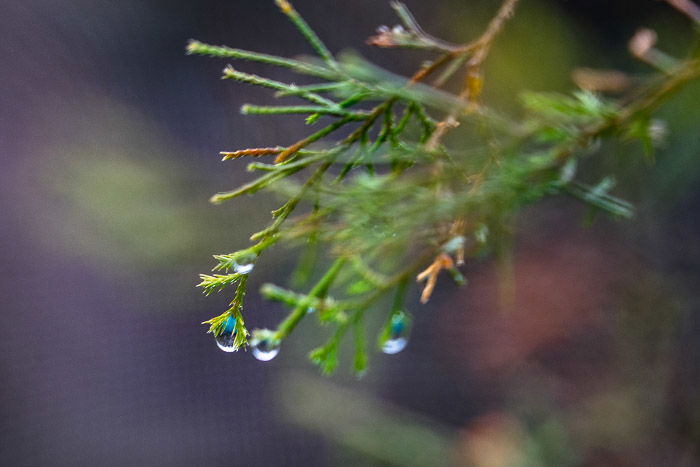
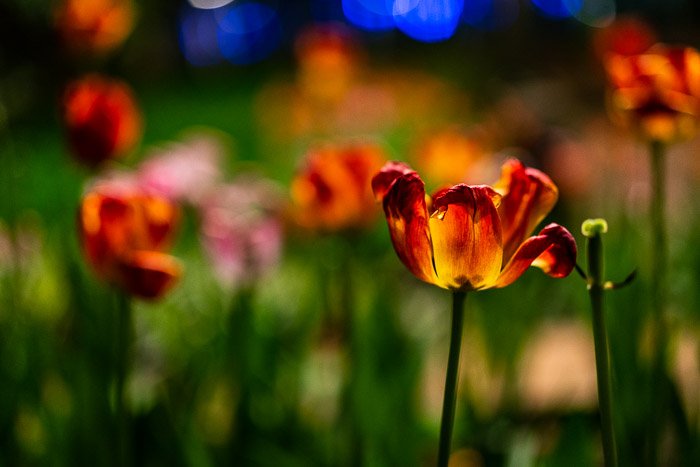
Portrait photographers don’t necessarily want the entire scene in focus. If you’re walking around a city taking street portraits, you want the person to be the main focus. A distracting background should be minimized. To do this, you use a shallow depth of field. Your foreground is in focus, but the background is not.
In this image, only the foreground holy man is in focus. The background gives a sense of the environment without distracting from the foreground.
Shallow DoF is a great way to separate your foreground from the background. The background might be uninteresting or distracts attention from your subject. Check out this article about more ways to use shallow depth of field.
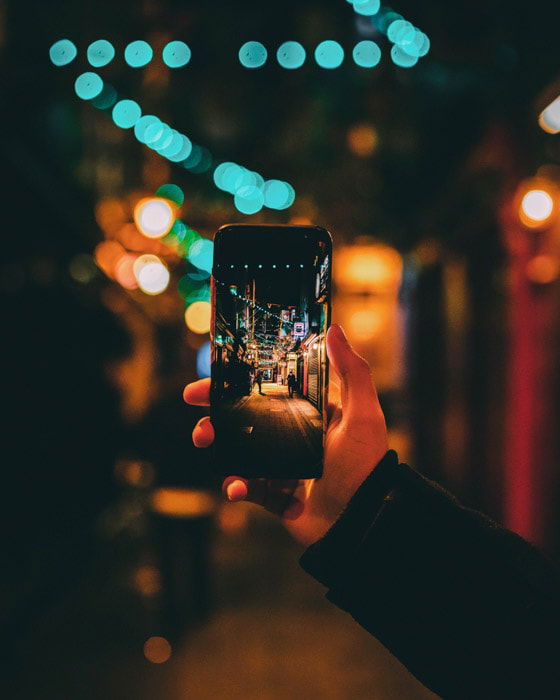
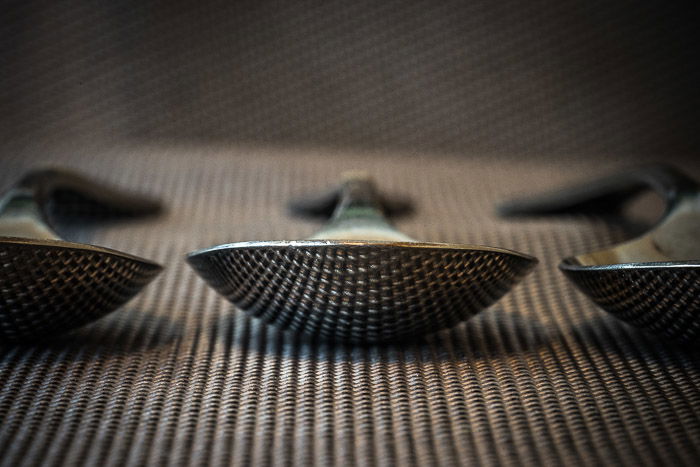
It is possible to cleverly combine shallow and deep DoF in one photograph. In this image, the photographer used a smartphone to capture a wide DoF. Then photographed the image using a shallow DoF.
I’ll show you in a minute how to achieve deep and shallow depth of field. But before I do, there’s one more thing you need to know about the focus area.
What is Focus Distribution?
Focus draws the eye. So as a general rule, you should focus on the point of greatest interest. Depth of field tells you how much of the scene will be in focus in front of your focus point and how much of the background will be in focus.
When you select a focus point, focus isn’t equally distributed in front of and behind this point. Often one-third of your focus falls in front of your focus point and the other two-thirds behind it.
Let me give you an example.
I’m going to use an online depth of field calculator to compute how far in front of and behind a subject will be in focus. It might help to open the calculator yourself and follow along.
- I enter my camera body. Sensor size makes a difference to DoF. I use a Sony A7R4
- I enter the focal length of my lens. I’m going to use my 50mm lens set at f/11.
- I enter how far away I am from my subject. Let’s say 3 meters (about 10 feet).
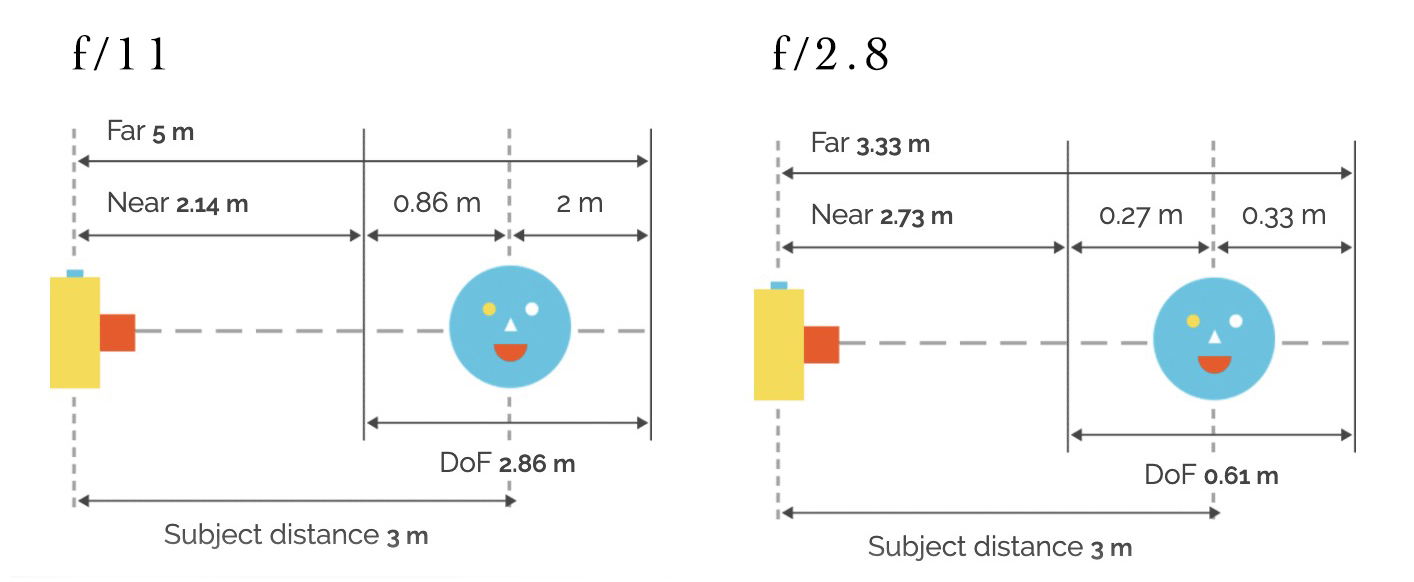
The DoF calculator says that the nearest point in focus is 2.14 meters away and the furthest point is 5 meters. This calculator also tells me that 0.86 meters in front of the subject will be in focus (29.97%). Two meters behind my subject (70.03%) will be in focus. This is roughly the one-third versus two-thirds I just mentioned.
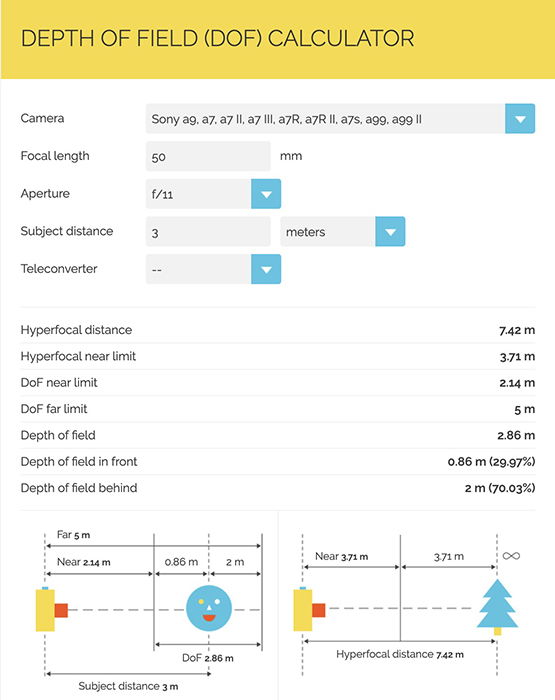
The DoF calculator also tells me the hyperfocal distance. This is important for landscape photographers.
Hyperfocal distance tells me where to focus in the scene so that I’ll have sharp focus all the way to infinity. Infinity is as far as the eye can see.
In landscapes, if you focus on the foreground, the background will appear blurry in the image. If you focus on the background, the foreground will look out of focus. To fix this, focus needs to be somewhere in the middle, between the foreground and background. This focusing point is the hyperfocal distance.
Now that I’ve introduced you to the DoF calculator, play with it a bit. Enter your camera body and different focal lengths. Notice that the numbers change. All sorts of factors control depth of field.
Now that you have a little theory under your belt, let’s get practical. Let me show you how to control depth of field in your images.
How to Control the Depth of Field
Deep and shallow depth of field fall on a continuum. You can go for an entirely sharp scene or you can have the very slimmest line of focus. It’s up to you. Most photographers find a sweet spot somewhere in the middle.
I’m going to talk about three elements that change how much of the scene is in focus: aperture, focal length, and relative distance. Once you know how to control depth of field, you’ll be able to decide how deep or shallow you want your focus to be.
Change the Aperture
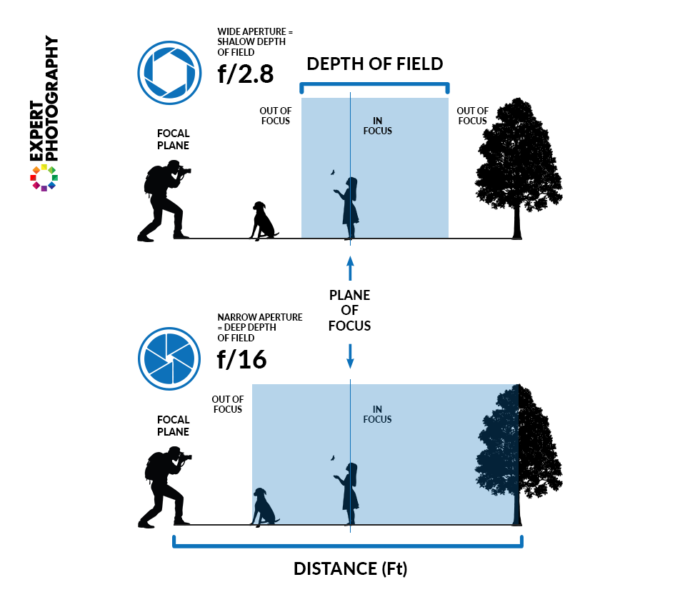
Changing your aperture (f/stop) is one of the major ways of changing depth of field. In general, the wider the aperture, the shallower the depth of field and vice versa. Remember that wide apertures have small numbers.
Take a look at this illustration. The top highlights DoF when using an aperture of f/2.8. The girl is in focus, but the dog in the foreground and the tree in the background will be blurred. The bottom shows how the focus area expands with an aperture of f/16. The dog, the girl, and the tree will be in focus.
Neither is right or wrong. It depends on what you want in focus.
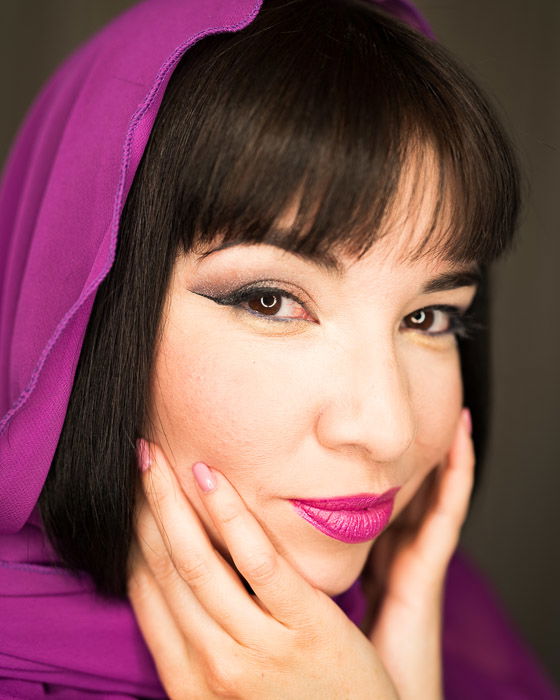
If you are taking a portrait, a very wide aperture like f/1.2 can put the eyes in focus, but make the nose and ears blurry. Using the same f/stop, you can focus on the nose, which will blur the eyes. To get both eyes and nose in focus, you may need to use f/5.6 or f/8.0.
Let’s return to the online depth of field calculator and put in a couple of different f/stops to see what happens.
- I enter my camera body (Sony A7R4) and lens (50mm).
- This time, I’ll choose f/2.8 instead of f/11.
- I’ll keep my subject’s distance at 3 meters to be consistent.
Notice that the DoF in front and behind my subject changed a lot. With f/11, my DoF was 2.86 meters. With f/2.8, only 0.61 meters will be in focus. It’s a much narrower range.
In general, an f/stop of 2.8 will have a blurrier background than an f/stop of 16.
If you want to create a shallow depth of field, select a wide aperture. If you want more of the scene in focus, select a smaller aperture. This is one reason portrait photographers prefer apertures of f/1.4 to f/5.6 while landscape photographers prefer apertures from f/11 to f/22.
But that’s not all there is to it. Other things factor into how wide or narrow your depth of field is.
Change the Focal Length
The focal length of the lens also affects depth of field. Without getting too complicated, a longer focal length like 300mm gives you a shallower DoF than a 35mm wide-angle lens.
Let’s return to our online depth of field calculator and put in a couple of different focal lengths to see what happens.
- I enter my camera body (Sony A7R4) and choose f/8.0.
- I’ll keep my subject’s distance at 3 meters to be consistent.
- I’ll first enter 50mm as the focal length of my lens.
- Then, I’ll change my the focal length of my lens to 200mm
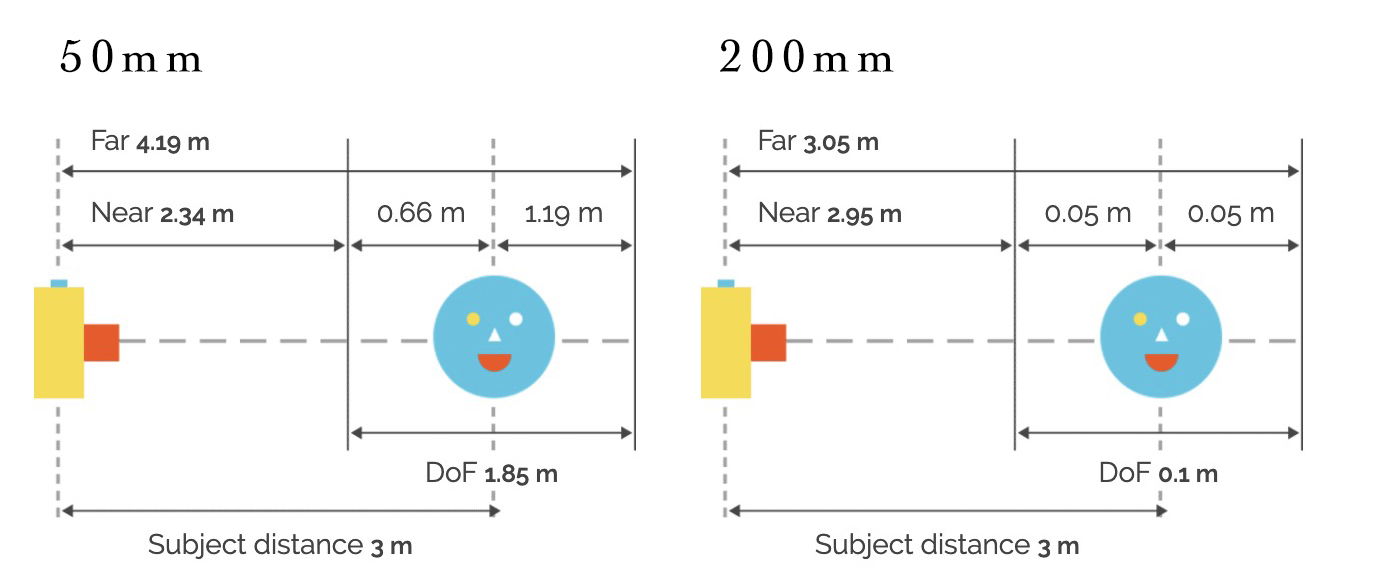
With a 50mm focal length, my focus area would start at 2.34 meters and extend to 4.19 meters. Everything between these distances (1.85 meters) will be in sharp focus.
But with a 200mm focal length, my focus area would start at 2.95 meters and extend to 3.05 meters. This is a much shallower depth of field. Only 0.10 meters will be in focus!
But there’s a bit more to it than that.
A 200mm lens focused at 3 meters isn’t showing you the same composition as a 50mm lens focused at 3 meters. A 50mm focal length gives you a field of view of 40°. A 200mm focal length gives you a field of view of about 10°. The composition is very different.
Compare these two images taken from the same vantage point. The only setting that changed was focal length. The image on the left was taken at 133mm. The image on the right was taken at 100mm. Notice the change in blur in the waterlilies in the background.
You can equalize the compositions by walking closer to your subject with the wide-angle lens. If you do this, the depth of field difference is less noticeable.
Consider the Relative Distance
Depth of field has a lot to do with distance. But relative distance rather than absolute distance in terms of feet or meters.
- Distance from you to your subject.
- Distance between your subject and the background.
Moving farther away from your subject will make your depth of field wider. Moving closer to your subject will make it narrower.
If you want shallow depth of field, your subject needs to away from the background. For instance, if your model is standing up against a wall, you won’t be able to blur the wall. The model and the wall will be on the same plane of focus. Ask your model to step towards you.
There is one instance where your depth of field can be manipulated. That is by using a tilt and shift lens. By playing around with the ’tilt’ of a lens, you can place an entire scene in focus when using a wide aperture.
How to Get the Depth of Field You Want
Depth of field isn’t one setting on your camera. You can change three different variables to affect DoF: aperture, focal length, and relative distance.
Your sensor size also affects depth of field. Larger sensors have a shallower depth of field. So, a crop sensor camera will generally have a narrower depth of field. I didn’t cover this variable because most photographers don’t change their camera body as a way of controlling depth of field. I mention this in case you’re comparing images with a friend who has a different camera body.
If you’re not getting the depth of field you want, the next thing to change is relative distance. Get closer to your subject. If that doesn’t help, then move your subject away from the background. It will be impossible to create a blurred background if your subject and the background are right next to each other. Creating depth of field is all about depth relationships.
If you’re trying for a deep depth of field, you may need to figure out exactly where your focus point should be. Computing the hyperfocal distance will tell you this.
Finally, know that the focal length of your lens also impacts depth of field. If you have a zoom lens, try a wide-angle lens for greater depth of field and zooming in for less. Changing focal length also affects your composition, so you’ll have to balance the perfect depth of field with the perfect frame.
Next Level Depth of Field
I’ll finish this article by introducing you to a couple of related depth of field topics. Focus stacking is a way of creating a very deep depth of field. It is also possible to simulate shallow depth of field. This is particularly useful when using a smartphone.
Focus Stacking
There are situations where it is impossible to get a deep enough depth of field in one image. Landscape photographers sometimes struggle to get a very close foreground element in focus while at the same time keeping distant elements in focus.
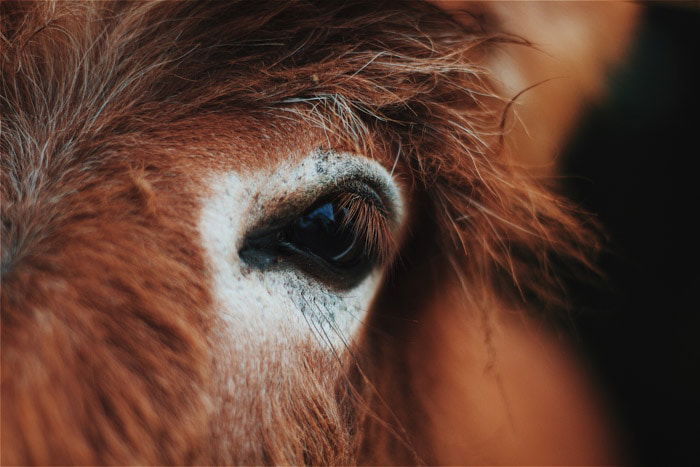
Macro photographers capture very small subjects like flowers and insects with a long macro lens. A macro lens allows photographers to get very close to their subjects. Because they are close to their subjects with a long focal length lens, the depth of field is often very shallow.
To combat both situations, photographers focus stack images. They take many images of a scene. With each image, they slightly change the focal point. A landscape photographer may take three or more images. The first focused on the foreground element, the second focused on the mid-ground, the third focused on the background. Later, the images are stitched together in Photoshop. The in-focus parts of each image are merged to create one image.
If you want to know how to focus stack image, see the article “How to Use Focus Stacking for Sharper Photos“.
Simulated Shallow Depth of Field
It is possible to simulate the blurred depth of field effect of a shallow depth of field. You can add a blur effect in Photoshop or you can use apps or software that digitally simulate the effect.
Smartphones are limited in the ability to create blurred backgrounds. But you can still achieve the effect by getting close to your subject or using a depth of field simulator app.
Newer versions of the iPhone have made it easier to control the effect. I still can’t change the aperture on my iPhone 11S, but I can simulate and control shallow DoF.
Let me give you an example.
I used portrait mode on my iPhone 11S to take a photo of my cat. Because I selected portrait mode, the camera automatically applies a background blur to the image. I can use this mode even if I’m not shooting portraits to get a blurred background.
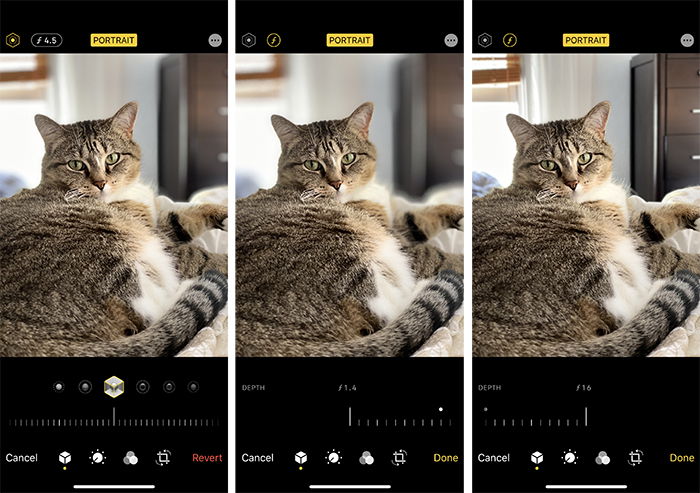
When I click the EDIT button, I have some options. The left image is the original. You can see that the camera chose an aperture of f/4.5. If I click the aperture, I’m given a slider tool that I use to change the aperture. The middle image shows what happens if I select f/1.4. The right image shows what happens if I select f/16.
If your phone’s camera doesn’t have this feature, apps like Focos on iPhone or Android simulate depth of field by virtually changing the aperture.
To increase your depth of field, you have three options:
You can narrow your aperture by increasing the f/stop, move further away from your subject, or by shortening the focal length of your lens.
To decrease your depth of field, you have three options:
You can widen your aperture by decreasing the f/stop, move closer to your subject, or by lengthening the focal length of your lens.
----------------------------------------------------------------------------

No comments:
Post a Comment
Note: Only a member of this blog may post a comment.