3 Lighting Setups for Photographing Headshots
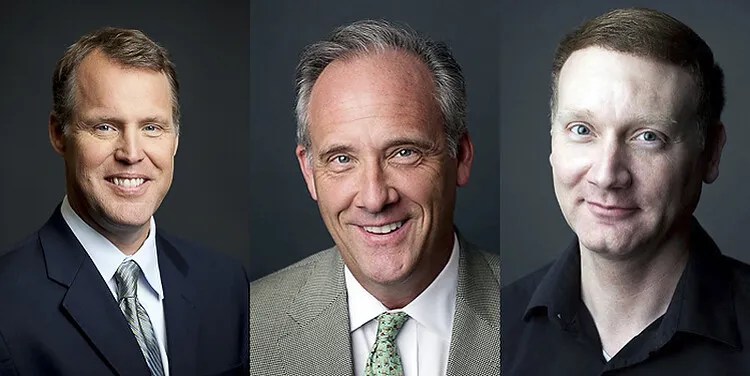
I do a lot of corporate and actor headshots around Washington, DC, and I wanted to share some of the simple but effective lighting setups that I use over and over, which you can easily copy and use yourself.
The One-Light Wonder
My standard setup consists of a large soft light source to the left or right of the subject, a reflector under the face, and another reflector opposite the main light source. I shoot hundreds of headshots per year using this simple setup.
I use a Paul C. Buff Einstein unit with a large octabox in my studio, but you could easily put together something similar with a cheap speedlight, an umbrella, and a couple of $20 reflectors.
You can see this setup in the photo below, with my poor wife Karen standing in as a subject. She was just coming downstairs to make some tea and got ambushed!

Reflectors and adjustments
Once my subject is in place, I do some tweaking. First I will adjust the light source so it is slightly above their eye level. For most people, I think it looks best to have the light coming from above to cast subtle shadows under the chin, accentuating the jaw and helping to hide any double chin.
Then I will adjust the reflector underneath their face and bring it up to about their mid-chest level. This reflector helps fill in shadows on the face and provides a really nice extra catch light in the eyes. Some folks will use another (powered) light source down here, but I find the reflector to be much simpler to set up, and it also has the virtue of being idiot-proof.
For example, if you have another light instead of a reflector below the subject and you accidentally overpower it (so it is more powerful than the main light), you have created some horrible Frankenstein lighting! It is physically impossible to do this with a reflector, which can save you from costly mistakes.

You can see the side reflector in my studio in the photo above (it’s just to Karen’s left).
Finally, we have the reflector opposite the light source. For this one, I will often use a black-sided panel to create a darker shadow on that side of the face. This effect can be very dramatic, and has the added benefit of slimming the face. The downside is that, if your subject is very wrinkly, you’re not filling those wrinkles with light from that side. So it doesn’t work for everyone.
Here’s an example of a headshot where I used this effect to create a nice dramatic edge:

Some additional tweaks
With this simple setup, it’s very easy to make tweaks and see what works best with a particular person’s face. Often I will leave the basic setup in place with the black reflector, but a few examples where I might make changes are:
- The subject has a double chin, so I really want to define the jaw. In this case, I may raise the light up extra high to cast more shadow under the chin (but make sure you don’t go too high and lose your catchlights), and/or lower or remove the reflector under the chin.

- The subject has long, dark hair. In this case, the dark reflector is not necessary, because we already have a dark edge there from the hair. So in this case I would go with a white reflector on the side or bring in a hair light from behind (more on that in the next section).
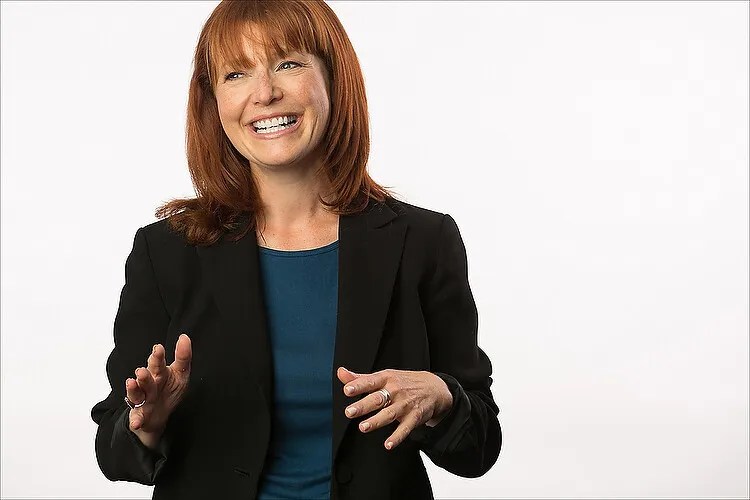
In the photo below, you can see a lot of detail in her hair on the shadow side. That’s because I brought my big white reflector in close.

- The subject has deep-set eyes. We want to fire more light into those sockets or our poor subject will end up looking like a serial killer or a caveman! In this case, I might lower the main/soft light so it is right at eye level.
Two Lights
You could run a whole business just using the one-light system, but if you’re anything like me you get bored and like to try new things. So let’s bring in a second light.
The second light for me is usually a “kicker” (also called a rim or accent light) coming from behind and opposite the main light. I use this to accentuate the jaw, especially in men, or to accentuate the hair in women. It’s especially nice to create a little highlight on darker hair.
In the photo below, I needed a way to separate this young man from the dark background. My kicker light did the trick!

In my studio, I use a strip softbox for this purpose, but you could also use a bare head with a grid or even an old speedlight with a paper towel roll taped to it to make a simple snoot. The important thing is that you want to control the light so it doesn’t spray into your lens and create flare or lack of contrast.
You can see my kicker light in this setup shot with Karen.

Three and Four Lights
I use lights three and four to create a clean white background. You can either use one light fired at the background from just behind the subject, or two lights off to either side.
The white background is my favorite look these days for a lot of reasons. I think it looks super bright, modern, and happy. It also really pops on LinkedIn and other online profiles.
It is also a great way to go for companies because it is easy to replicate and get a consistent look from shoot to shoot (for example, when photographing a new employee months after the initial shoot, or replicating the same look with shoots done across the country by different photographers).


Whether you use one or two lights for the background depends on your budget and the space in which you are working.
Two lights can give you a larger, more even spread of light, whereas with one light you might have some fall off around the edges that you need to clean up in post-production. So I usually stick to two lights unless I’m on location somewhere and space is tight.
Conclusion
So I hope you found this article helpful, and you can use the lighting setups for your headshots. Share this article.
No comments:
Post a Comment
Note: Only a member of this blog may post a comment.