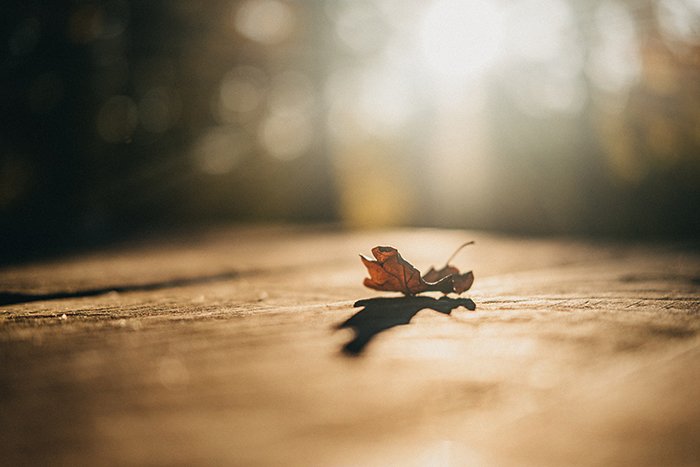
But what exactly is aperture priority mode and when should you use it?
What Is Aperture Priority Mode?
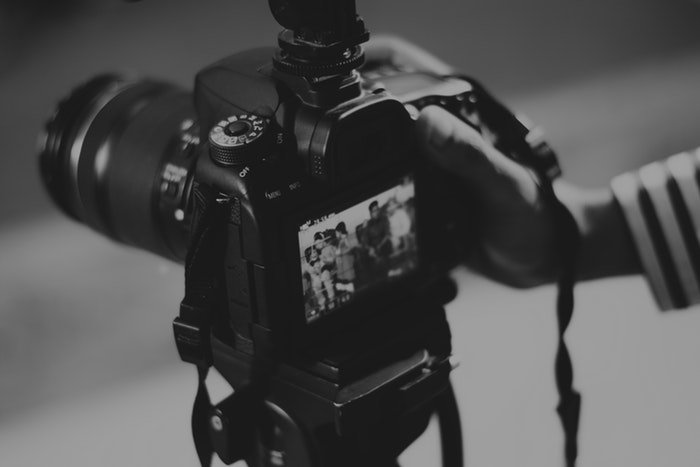
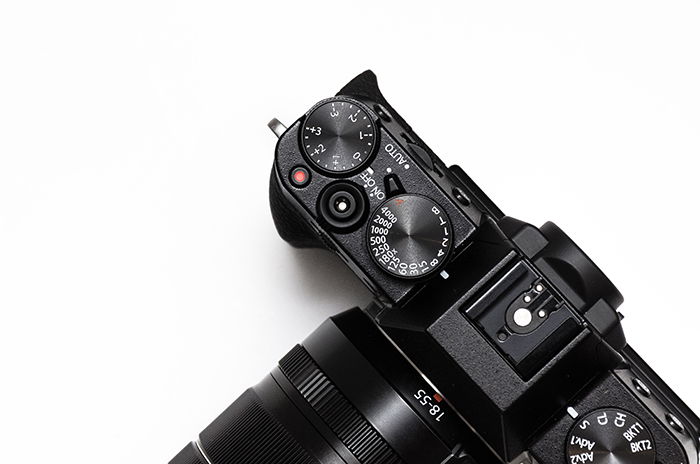
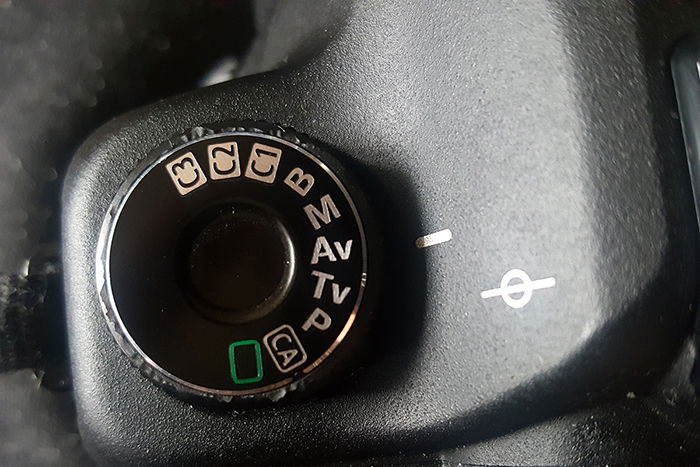
You can find aperture priority on your camera mode dial. It’s usually symbolised by the letters A or Av.
When you switch to this mode, you can control your aperture, ISO, and white balance. Your camera will change the shutter speed every time the light changes. You can’t manually adjust your shutter speed in this mode.
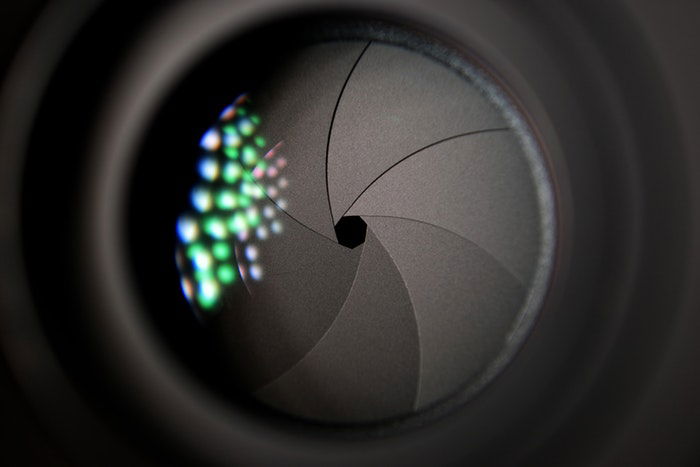
What Is Aperture?
Your aperture determines how blurred or detailed your backgrounds will look. A large aperture, such as f/1.4, will make your background look very soft. It’s also great for shooting in low light. A small aperture, such as f/22, will capture more details in your background.
Aperture is a great way to experiment with deep and shallow depth of field. It comes with many additional benefits that can make your photography stand out.
The Difference Between Aperture Priority Mode and Manual Mode
Many photographers use manual mode to have full control over their camera settings.
It’s something you should familiarise yourself with as you learn more
about photography. But it’s not a mode you need to use all the time.
Having full control over your settings can be time-consuming. You need to be aware of exposure compensation, ISO, shutter speed, and so on.
When you switch to aperture priority mode, you let the camera do most
of the work for you. All you need to do is select an aperture. You can
also manually change your ISO, but this isn’t necessary. Your camera
will automatically decide what shutter speed is suitable for a given
situation.
Avoid Automatic Mode for More Control
When you use the automatic mode,
you let the camera do all of the work for you. No matter where you are,
your camera will try to find the best settings for you to take
beautiful pictures.
The downside of using automatic mode is that it doesn’t give you any
control over your pictures. You can’t control how sharp or blurred your
images are.
This is a great way to take decent photos in any lighting situation.
But it’s not the best option for photographers who want to have at least
some control over their settings.
Aperture is something that many photographers prioritise in their
work. Some people want their backgrounds to have a specific amount of
blur. Others want to capture as much detail as possible. Aperture
priority mode is perfect for you if you fit into this category of
photographers.
When Should You Use Aperture Priority Mode?
Using this mode all the time may not be a good idea. If you use it in
the right situations, you can significantly improve your photography.
Here are a few instances in which you can make the most of it.
To Achieve a Fixed Depth of Field
A fixed aperture means a fixed depth of field. This means consistent photos, which can be very important in some photoshoots.
Let’s say you’re a portrait photographer who regularly uses an aperture of f/5.6. You want to take as many decent photos as possible on a cloudy day. The lighting is inconsistent, so you have to adjust your settings regularly. This can be a big obstacle.
Instead of doing that, you can switch to aperture priority mode,
select your desired aperture, and take as many photos as you like. Your
camera will make sure that your shutter speed and ISO are properly
adjusted.
To Get Better at Changing Aperture as a Beginner
As a beginner, you might find manual mode overwhelming. Constantly
switching to different shutter speeds, apertures, and ISO values can be
stressful.
Aperture priority mode is an upgrade from automatic mode. It can help
you get ready for manual mode and introduce you to different aperture
settings at the same time.
When You Want to Experiment With Different Apertures
You might be a beginner photographer who wants to figure out how
aperture works. You might also be a professional who wants to get better
at adapting to different kinds of apertures.
You can achieve this quickly with aperture priority mode. Instead of
worrying about shutter speed or ISO, you can quickly go through each
aperture to find your favourite one. You’ll get decent photos as you do
this, which is always a plus!
How to Use Aperture Priority Mode
1. Switch to Aperture Priority Mode
Different cameras have different buttons for aperture priority mode.
Look for a symbol that represents this mode. It should say something
like A or Av.
On the Canon 5D Mark II, you just need to turn the mode dial. Your camera should have a similar feature.
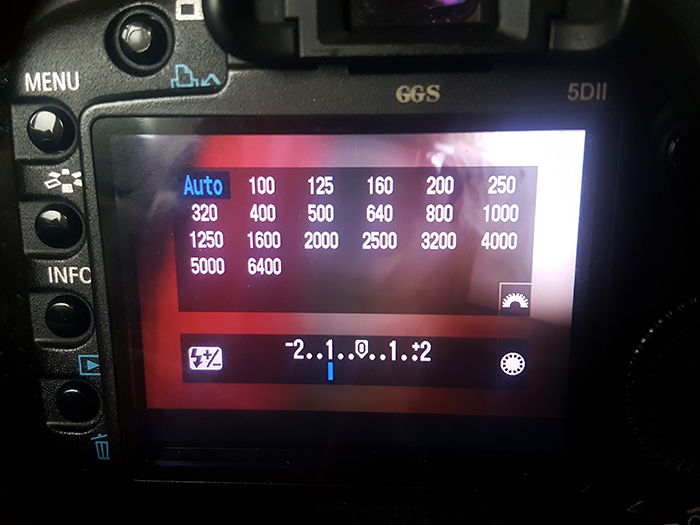
2. Choose Between Manual or Automatic ISO
This important step can save you a lot of editing time. If it’s not very bright outdoors, or if you’re shooting indoors, you might want to use a manual ISO.
ISO can help you compensate for a fast shutter speed
or a small aperture. Too much ISO can make your pictures look grainy.
It’s possible to remove grain in an editing program, but this can take
some time if you have hundreds of images.
If you have some extra time on your hands, select an ISO manually.
Automatic ISO is great for experimentation, but it might not be your
best friend if you have a specific vision in mind.
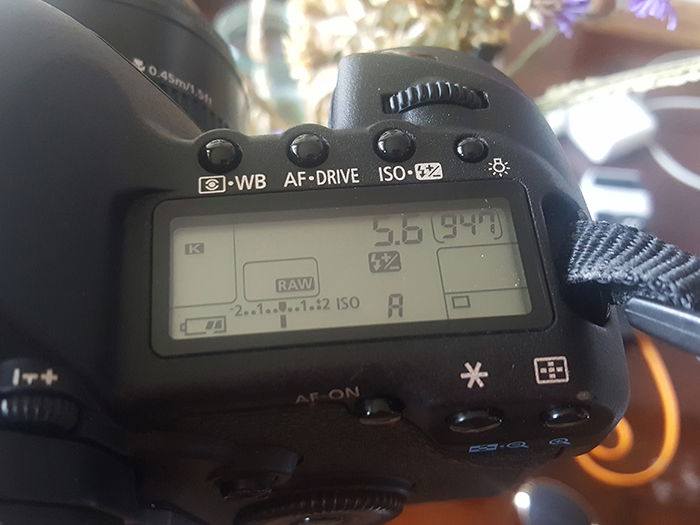
3. Change the Value of Your Aperture
Aperture priority mode makes it very easy to change your aperture
setting. On the Canon 5D Mark II, all you need to do is turn the little
gear right above the ISO button.
You’ll notice that your camera will change the shutter speed as you
change your aperture. It will also automatically change the shutter
speed when the light changes.
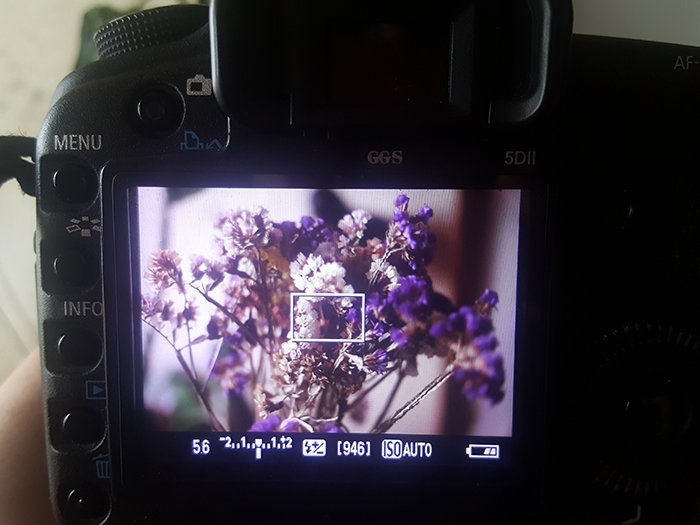
4. Focus on Your Subject and Take a Few Test Photos
You don’t need to overthink this step. Just choose a subject and take a few test photos.
I started out with a relatively large aperture, but it wasn’t large
enough for my desired style. To achieve a dreamier look, I changed my
aperture to f/1.8.
There’s really no specific rule for this. The aperture you choose depends on your subject and your style.
5. Experiment With Different Apertures
Even if you like your results, experiment with different apertures.
You might find an even better option. If not, at least you’ll figure out
what aperture values you’d rather stay away from.
This is especially important for beginner photographers. The more
apertures you experiment with, the more variety of pictures you’ll have
in your portfolio.
Common Aperture Priority Mode Questions
Do Professional Photographers Use Aperture Priority?
Yes. Many professional portrait and landscape photographers use aperture priority. This is also a great mode for beginner photographers in any genre.
Which Is Better Aperture Priority or Shutter Priority?
Aperture priority keeps your aperture fixed and changes your shutter
speed. This is great for those who want to have the same depth of field
in their pictures. Shutter priority keeps your shutter speed fixed and
changes everything else. This is ideal for action photography.
Using aperture priority mode can help you take better photos without
stressing you out. All you need to do is adjust your aperture and ISO.
Your camera will experiment with different shutter speeds for you.
This mode is perfect for beginners, portrait photographers, and
landscape photographers. It’s ideal for you if you want to achieve a
fixed depth of field without worrying about shutter speeds all the time.
The question I hear most during any portrait photography session is about hand poses. And it’s usually accompanied by a nervous laugh.
What do you do with your hands in a picture?
Hand poses can make or break what’s otherwise a great portrait. Getting those hand poses right can be tricky to do and tough to communicate.
Here are 11 essential techniques that will help you find the best hand poses in any situation.
11. Give the Hands Something to Do or Touch
People feel awkward when they cannot figure out what to do with their
hands. The fastest way to get the model comfortable is to give them
something to do with those hands.
Something simple like placing their hands in their pockets. Or ask
them to fold the arms in the front. This can help both put the subject
at ease and get the hands in a flattering position.
Giving the hands something to do isn’t the only option here. Give your model something to touch instead.
Ask the model to place their hands against something specific. It can
be a wall or a desk. This is an easy starting point for posing the
hands.
Your model can also hold something. A ball, a glass of wine or
flowers look great in hands. Personal objects also allow the viewer to
learn more about the model in the photos.
10. Use Hand Poses to Flatter the Rest of the Body
Sure, this article is to learn where to put the hands. But where the subject places the hands can change the entire body shape.
In general, use the hand pose to create space between the torso and
the arms. The subject will look wider if you don’t. Try placing the
hands on the hips, for example.
That’s not a hard and fast rule, though. Crossing the hands in an X at the front can exaggerate curves (often used with women).
Crossing the hands with the elbows out can make the shoulders look
broad. This hand pose is often used by men because it also highlights
the arm muscles.
9. Avoid Foreshortening
Foreshortening is a posing error that applies to any limb of your model.
Posing the torso parallel to the camera makes the subject look wider.
So does posing any limb pointed straight towards the camera makes that
limb look shorter.
Watch out if your model poses their fingers so that they are pointing directly at the camera. The perspective will make those body parts look short and stubby.
If the fingers are placed straight at the camera, they take up less
space in the photo. They appear to be shorter than hands that are
angled.
The same concept applies to arms, legs, and feet.
If you see hands pointing into the camera, adjust the pose. Make sure the fingers and arms aren’t headed straight towards the lens.
8. Don’t Hide (or Crop) the Entire Hand
Hands can add beauty and personality to the images. Why leave them
out of the photos? While obscuring part of the hands is fine, avoid
hiding everything from the wrist down.
If you ask a model to put his hands in his pockets, you want him to
look relaxed, not nervous. Don’t put the hand all the way into the
pocket or the hand will disappear. This could even make the model’s hips
look a little larger than they are. (Even Hollywood agrees.)
The same applies to determine where to crop the photo.
Don’t crop at the joints, wrists and finger joints included. Cropping
at a limb feels incomplete. If you’re going to shoot a pose that’s not
full-body, crop mid-way between joints for a more natural look.
Photo by Samarth Singhai from Pexels
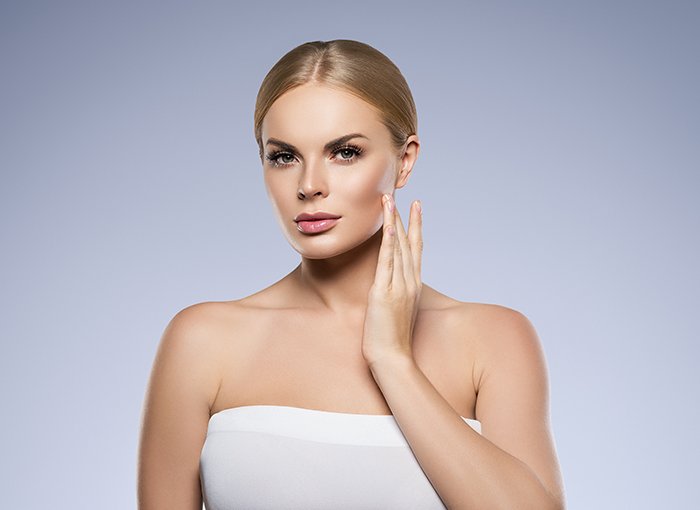
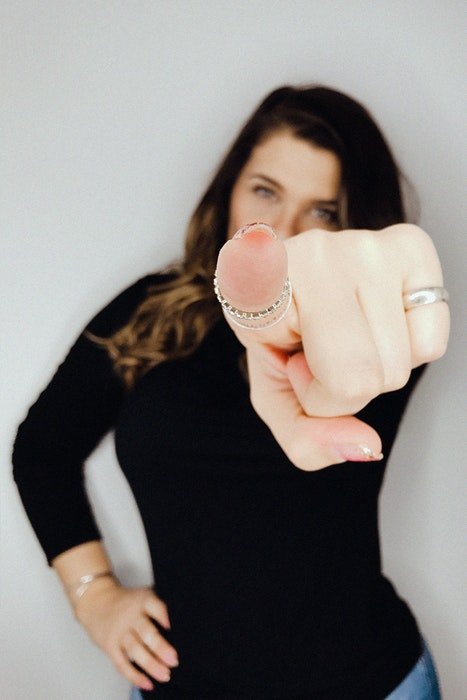
7. Don’t Place the Hands too Close to the Camera
Cameras should come with a warning almost identical to the one in the
corner of the mirrors on your car. Objects are larger than they appear.
If something is closer to the camera, it’s going to look larger than
anything that’s farther from the camera.
Avoid placing the hands closer to the camera than the rest of the
body. Or the hands will look larger in the photos than they are in
reality.
In a seated position, don’t place the hands beyond the knee. And in a
standing position, don’t move the hand more than a few inches closer
than the face.
Of course, there are exceptions to every rule. I sometimes ask engaged couples
to hold the ring out towards the camera while they kiss in the
background. But that’s okay because the ring highlights their
engagement.
The first photo below isn’t wrong. But in the second image, the eye
goes straight to the faces. The hand is no longer competing with the
faces.
6. Use an Angle to Make Hands Look Smaller
The placement of the hands can make them look larger. The hand poses can also influence the perceived size.
A hand straight on to the camera will look larger in the photos. But
if you can only see the side of the hand, the hand will look smaller.
Hands should be at least at a slight angle away from the camera. Or you should photograph hands from the side.
This is most important when the pose keeps the entire hand visible.
It’s less essential when it’s only a portion of the hand in the shot.
Why? Larger hands will compete with the face. Of course, if there’s
no face in the image, getting the hands angled is less important.
5. Avoid Poses Where the Hands Push Against the Body
I learnt one of my first hand posing tips when I was in front of the camera for a professional portrait, and not behind it.
Use hand poses that create a soft touch and not a push.
The photographer was referring to a classic hands-on-the-face pose.
But the same applies to hands placed anywhere on the body. On the arm,
for example, the hand can push skin out to the side and make the arm
look wider.
When posing with the arm touching any part of the body, ask the model to be gentle.
The last thing you want is to squish the face while trying a lovely traditional pose with the hand on the face.
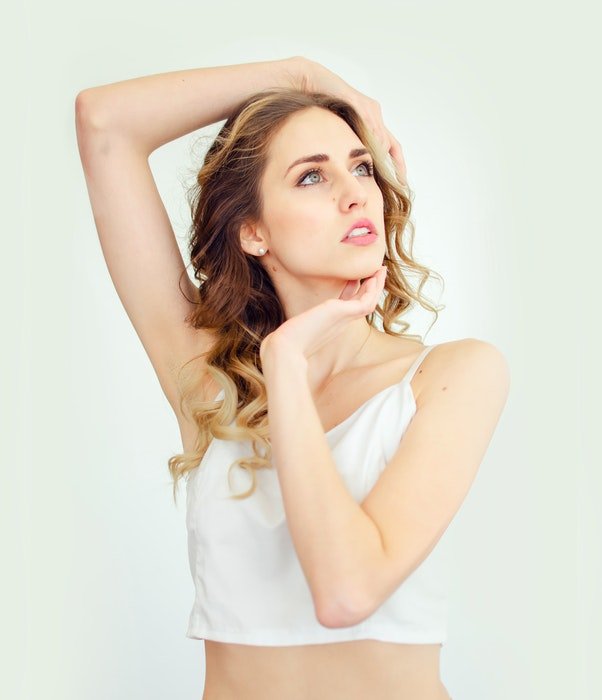
4. Use Hands to Highlight Specific Bodyparts
The arms and legs create natural lines in portrait photos. Anything the hands are touching is drawing the eye in the photo.
The hands can direct the attention to the waist. Or create the
illusion of a smaller waist by placing them in a bit from the actual
waist.
That traditional hands-on-the-face pose became a favourite. This is because the hands draw attention to the model’s face.
In couples photography, the light placement of a hand on a cheek can direct the eye to both faces.
Avoid placing the hands on areas that you don’t want to draw
attention to. Sometimes when I ask a groom to wrap his arms around the
bride, his hands end up resting on her stomach.
Re-directing his hands to the waist draws less attention to the model’s gut.
A perfect time to break this guideline is in maternity photography. You actually want the eye to be drawn towards the belly.
Placing one hand on top of the belly and one below can also help make
that baby bump pop. Especially in a stance that’s straight on to the
camera.
3. Avoid Hands Crossed in Front
For some reason, many people stand with their arms crossed in front in wedding images.
It makes a great joke (for the right crowd) that they look like
someone walked in on them in the shower. But it draws attention to the
wrong area. You want to avoid focusing the viewer’s eye on someone’s
lap.
2. Watch Out for Tense Hand Poses
How do you spot tense hands? They’re flat and tight or curled up into fists. Make sure you avoid both poses.
In case of tense flat hands, ask the model to relax their hands and curve the hand a bit.
In the case of fists, ask the subject to place his or her hands softly instead.
Like any photography rule, there are always exceptions. This includes photos when your aim is to create tension.
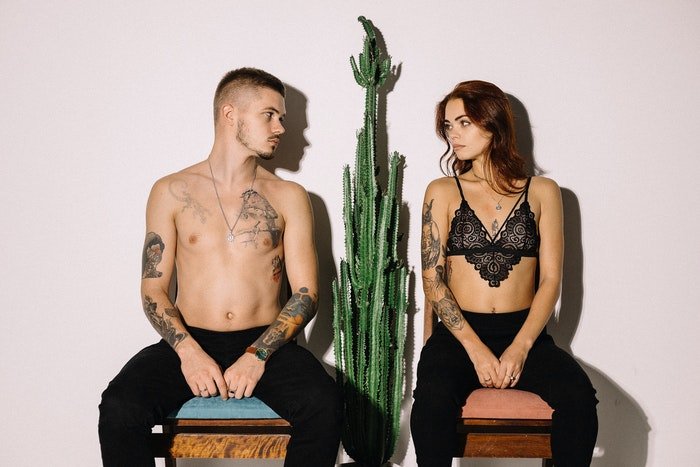
1. Avoid Symmetrical Hand Poses
When posing, it’s easy to group the hands together. You’ll actually
get a more dynamic pose if the hands are in different positions. Or in
other words, if the pose isn’t perfectly symmetrical.
Instead of both hands in the pocket, leave one out resting on the
thigh or waist. Or when placing hands on the hips, place one slightly
higher than the other.
A symmetrical pose isn’t wrong. But asking the model to do something
different with the other hand can create a stronger image. When photographing groups in a short time frame such as family formals after a wedding, symmetrical poses makes it possible to take many images in a short time frame.
But when you have the time to work, using hand poses that aren’t symmetrical can help create more creative photos.
Photo by Євгеній Симоненко from Pexels
Hand placement is one of the first questions photographers face when working with posing. Hand poses can make or break photos.
Start by asking the model to do or touch something with the hands. Use hand poses to flatter the body.
Remember, placing the two hands separately can also create a
stronger, non-symmetrical shot. Follow the tips above and search for the
best hand placement for your model.
Then, perfect the hand poses by checking for each of these potential problems:
Foreshortening (or fingers placed straight towards the camera)
Hidden or cropped out hands
“Large” hands with the largest sides flat to the camera
“Large” hands because the hand is closer to the camera
Hands drawing attention to the wrong part of the body (like hands crossed straight down in front)
Tense hands
Ward off that dreaded ‘where do I put my hands?’ question before it even starts by working hand poses into your posing instructions from the start. You’ll have more confident clients and better photos as a result.
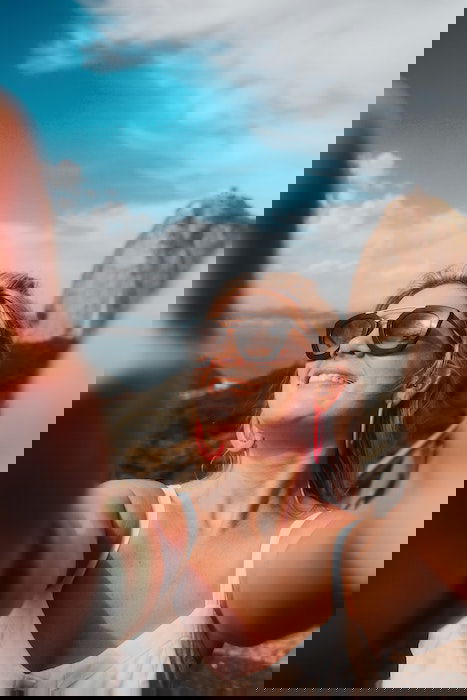
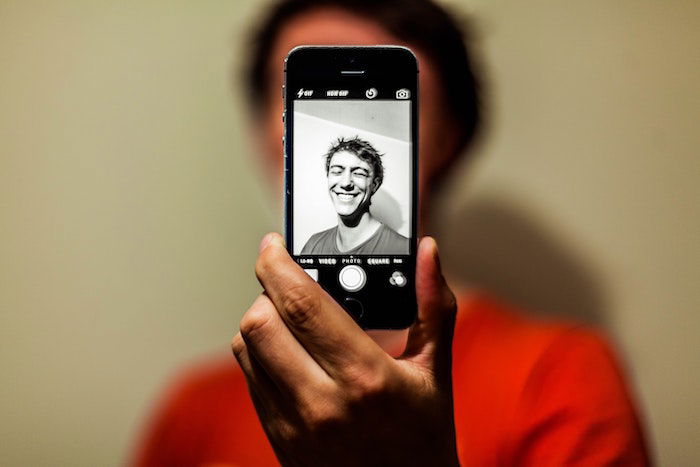
Today, I’ll be guiding you through my top selfie poses to have you take the perfect selfie! You will have some fun selfie tips to keep your social media fresh and exciting by the end of this article.
I’m sure we’re all familiar with the modern art of the
selfie. It can be tough to get such a straightforward photograph just
right—especially when you want to show off your best side!
Use Your Current Mood and Atmosphere
The biggest tip I can give you for a good selfie is to let
your mood and atmosphere on that particular day dictate the shot. We
have all seen pictures where the selfie pose looks too forced or
unnatural. You can even tell when a person is forcing a smile.
The best selfie poses are the ones that reflect how you’re
feeling, your attitude, or your personality. Perhaps you feel tired and
cozy, or you’re outgoing and loud. Pick a selfie pose that reflects
your current emotions and who you are.
Of course, the more thought you put into a selfie, the
better it will be. But, that isn’t to say it’s a must. Sometimes a
spontaneous source of inspiration or lighting will call for a quick
snap, which is sometimes the best.
It comes down to familiarity with what works and what
doesn’t. The best way to find out for yourself is to try out several
different poses in different scenarios. The second best way is to read
all these posing tips to help get you on the right track!
The Best Selfie Poses and Posing Tips
I will now guide you through some easy selfie posing tips to help you find your best creative selfie poses.
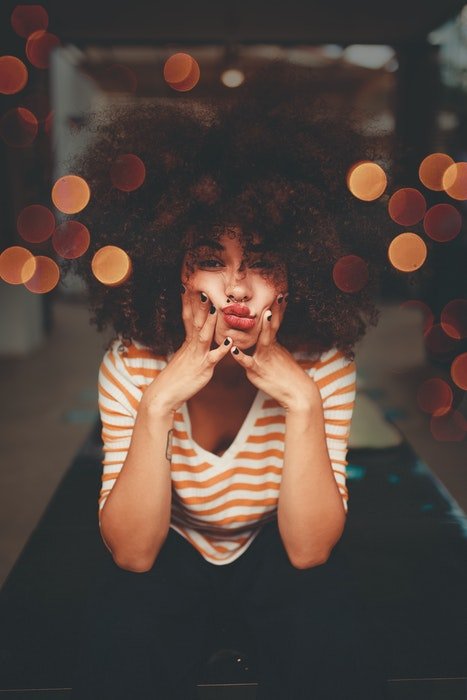
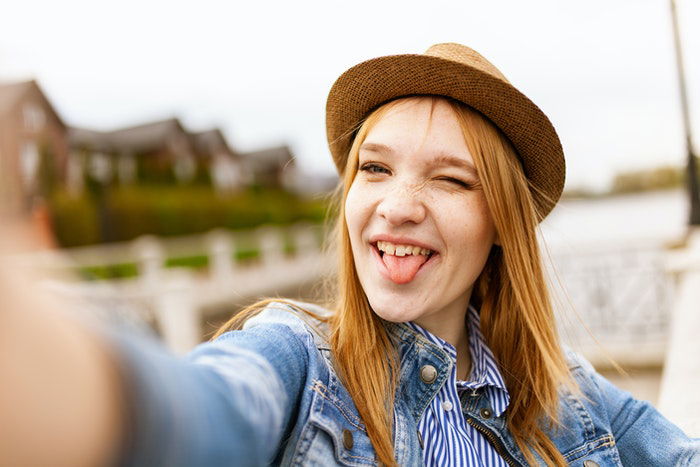
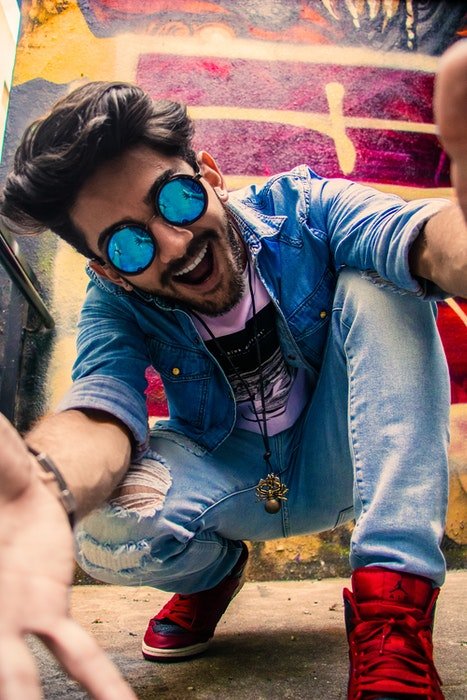
16. Show Your Best Silly Selfie Poses
In the beginning, it might feel awkward or forced to pose for your selfie. Let that pressure go!
Try silly poses and expressions that make you laugh. This selfie pose gives your photo playful and easy vibes.
The problem with selfies is that they often seem
unnatural. You can avoid this by being yourself and capturing whatever
you feel like doing. Remember, no one needs to see these pictures of
you. So have fun and try out as many poses as you can.
One tip is to put the camera into burst mode
and start playing around. You can also set your phone to video and
record yourself trying different, creative selfie poses. Afterward, take
a screenshot of the frame you like the best.
15. Relax Your Lips
Ever wondered why professional models’ lips look so soft
and kissable? It’s because they’ve learned to relax their mouth (the
opposite of the duck face).
For sexy selfie poses, open your mouth a tiny bit and
pretend you are breathing through them. Your lips won’t be pressed
together anymore and will look fuller.
Avoid the unnatural duck face with the pouty lips and
pressed in cheeks. Pretend you are about to give a gentle kiss to
someone. That way, you make your lips look even more enticing.
14. Practice Easy-Going Smiles
You might feel awkward when taking selfies alone. But a
smile makes every photo look better—even if you have to fake it at
first.
To avoid looking uncomfortable, practice in front of the
mirror. Think about something that makes you laugh or someone you would
love to smile at.
A good technique in selfie posing is first to look down
and relax your facial muscles until you are ready to take the shot. Then
look up and give your camera a big smile. It will be a more natural
smile because you only start smiling a second before striking the selfie
pose.
13. Make Your Eyes Stand Out
Eyes are always the focus of selfies, so you have to make
sure they stand out. Find poses that emphasize them as the focal point
in your selfie.
You can look straight into the camera. This pose makes you
look honest and direct. But keep in mind that many people look like
they have cross-eyes if they look at something close to their face. You
can reduce this effect by looking a bit underneath the camera lens.
If you use a selfie stick, try raising it in the air. It
forces your eyes to open a bit more. (This selfie pose also guarantees
you won’t have a double chin!)
And if you have bright-colored eyes, they pop even more if you take
the selfie from above your head, especially if you use good lighting.
You can also “squinch” in your selfies. It’s a popular
facial expression for models. It looks a little bit like squinting, but
your eyes shouldn’t narrow too much. The pose gives your face a cheeky
and playful look.
Or you can also look away from the camera and pretend you don’t see it. This is an excellent candid pose if you are camera shy.
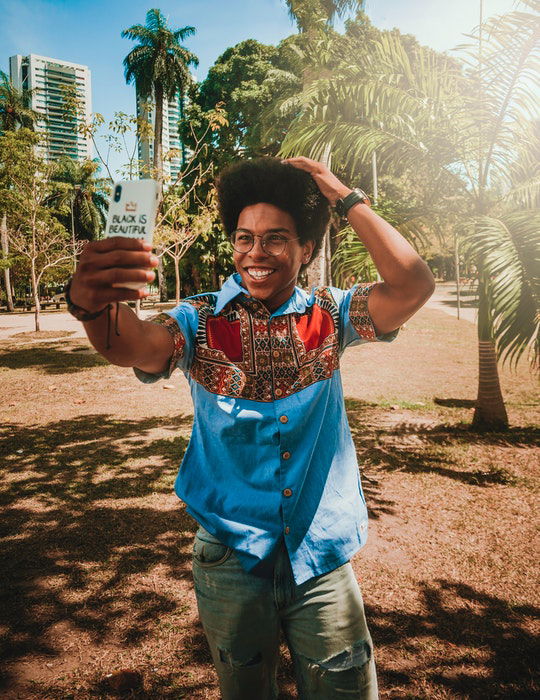
12. Show-Off Your Style With Full-Body Selfies Poses
People often take selfies that only include their faces. But a popular pose is to include your whole body.
This can be tricky, but it is one of the best selfie poses
when executed well. That’s because the full-body selfie allows you to
show off your outfit and environment to reflect who you are too!
It may be tough to find the best angle and the most
flattering selfie poses to highlight your features. Again, test out a
couple of posing ideas each time you take one.
An excellent idea for the full-body selfie is to make a
mirror selfie. It’s an easy way to fit your whole body in the frame. You
can also see yourself and correct a pose if you don’t like what you see
with mirror selfie poses.
Use a mirror at home.
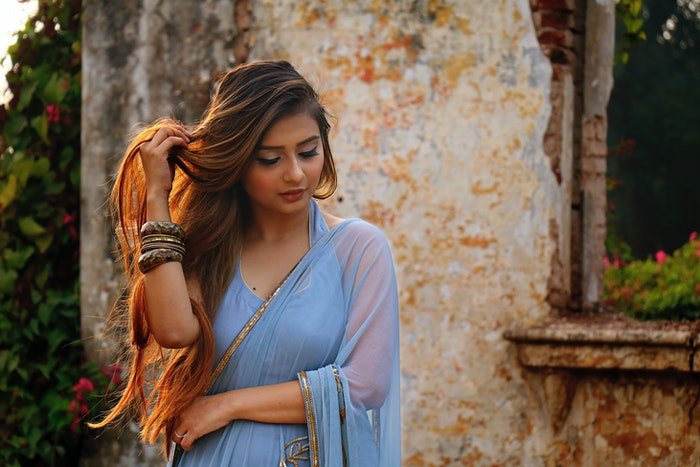
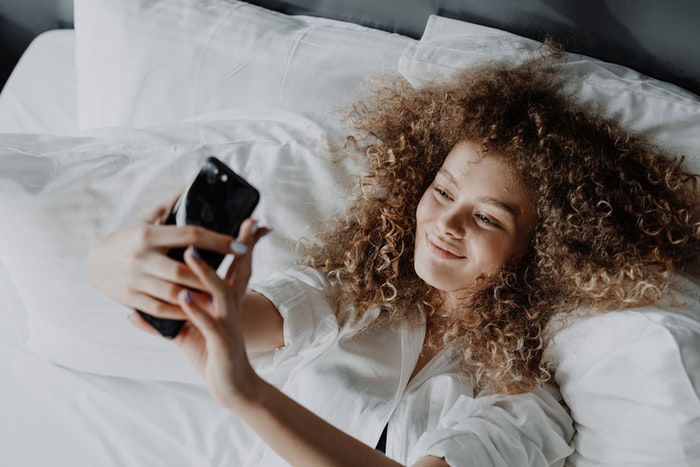
11. Include Your Hands for Natural-Looking Portraits
Poses using your hands can make your selfie look more natural. Gently touch your face or place your chin on your palm.
One popular selfie pose is to play with or lift your hair.
It’s another selfie pose that makes your image look candid. You can
also use your hair to cover parts of your face if it’s long enough! If
you are wearing a hat, you can also place your hand on it.
We touch our faces a lot more than we realize. If you do the same in your selfie, it will convey a more spontaneous shot.
10. Steady Your Selfie Pose With Both Hands
Take a selfie while holding your camera or phone in both
of your hands. Your arms will steady the photo’s composition and allow
you to frame yourself with more control and intention.
Holding your camera with two hands and raising it high
forces you to stick your neck forward. And having your neck forward
means more definition in certain areas and will eliminate any unwanted
double chin.
9. Use Unusual Angles
Many people take selfies from or a bit above their eye level. Spice things up and look for different angles. Taking a selfie from the ground gives an exciting perspective to your photo.
Or use a selfie stick and place it way above your head.
Selfie sticks can create many new angles you can experiment with. Plus,
selfie sticks help you avoid facial distortions.
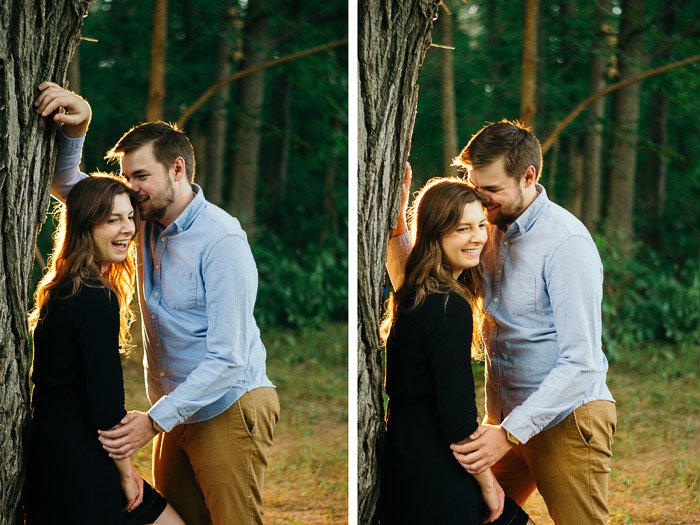
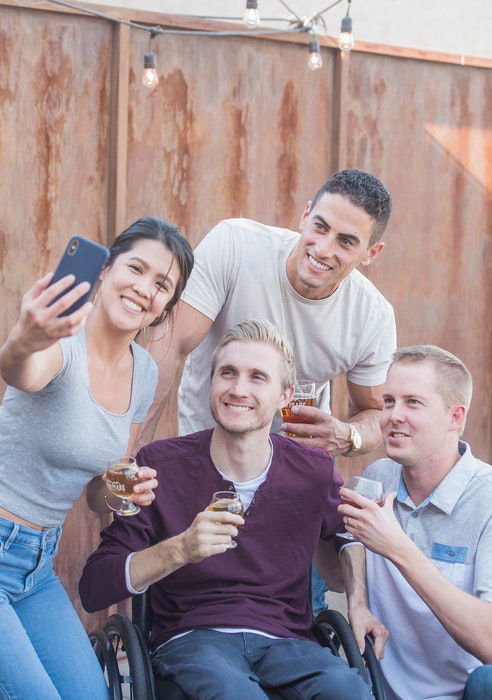
8. Capture Moments Together
You don’t have to be alone in your selfies. Involve your friends and take group selfies!
To fit everyone in, make sure that the person taking the
photo is standing a bit further from the rest of you. They’ll be in the
foreground and the rest of you in the background.
The selfie photographer can also stand on a higher or a lower spot to ensure everyone fits in the frame.
This is another technique that works beautifully as mirror
selfies. Luckily, many bars and art galleries have attractive mirrors,
so keep an eye out for mirror selfies with friends!
Pictures with friends tend to be the best selfies as they’re the ones you will cherish the most!
7. Invite a Furry Friend
Selfie poses with pets are always fun. Plus, you never know what the result will be.
Many animals don’t like to stay in one position, so they
constantly change how they pose for the photo. This means you will need
more patience to get the perfect selfie pose.
Be mindful that your pet is comfortable and that you aren’t forcing them to be in uncomfortable positions.
When you take a selfie with your pet, gently hug them or
hold them to ensure their movement is not too sudden. Otherwise, you end
up with a blurry selfie.
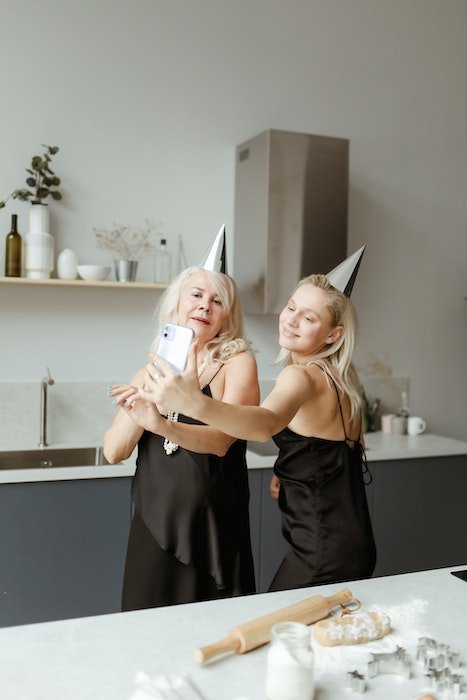
6. Take Selfies While Doing Something You Enjoy
Do you like riding bikes? Capture poses with your bicycle. Do you enjoy dancing? Snap a selfie while you dance around.
Do you love cooking or baking?
Try selfie poses while you are preparing a dish in the kitchen. Not
only does this give you the chance to show off your food, but also to
show off yourself!
The best selfies always come from a place where you are enjoying what
you are doing! You will naturally have the best selfie if you capture
an activity you love.
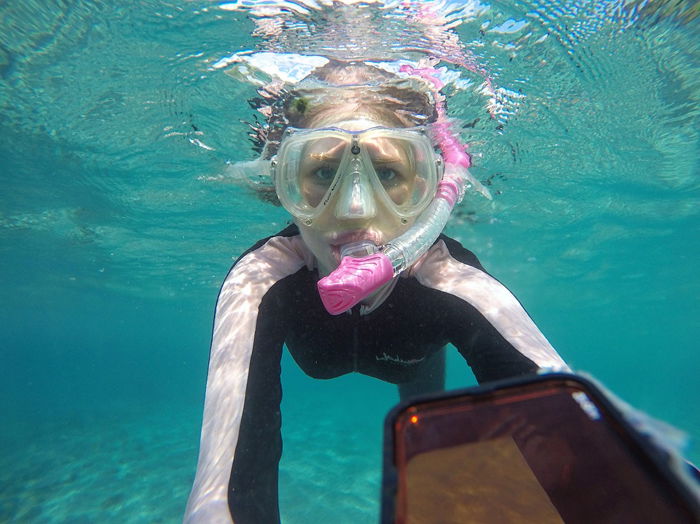
5. Go Underwater
Underwater selfie poses are unique and fun. You can take them with an underwater camera, GoPro, or even the newest, waterproof smartphones.
If you can, try to keep your eyes open. You can also try to smile for the underwater selfie.
But don’t stress too much about your facial expression. You can also blow up your cheeks and hold your breath.
This selfie was taken snorkeling in Indonesia. Everyone
looks ridiculous in a snorkeling mask. So the photographer thought she
would embrace the look and capture her frog face under the water.
Many people take selfies while standing or sitting down.
Why not spice things up and capture yourself in more exciting selfie
poses?
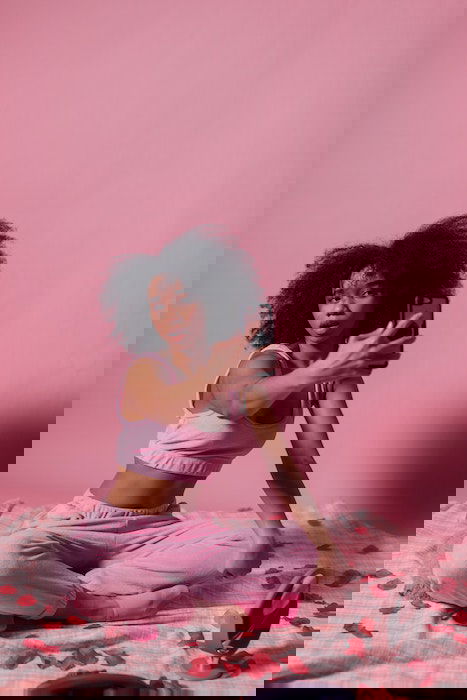
Stand on your head or do a gymnastic bridge if you can. Or any yoga position can work well.
Take a selfie while bungee jumping or on a rollercoaster if you’re feeling adventurous. Just remember to hold onto your phone!
The main goal is to be creative and find new posing ideas for your selfie game.
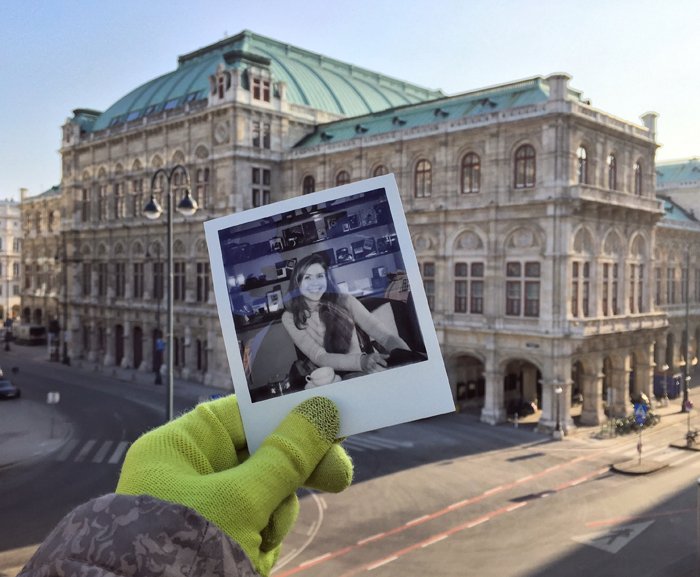
3. Go Meta
This concept belongs to the category of more abstract selfie ideas. But the results can be pretty effective. Find or print a photograph of yourself and take a picture of it.
A fantastic idea is to capture a Polaroid photograph with
a fascinating location in the background. Polaroid photographs are
perfect for this idea as they have a terrific aesthetic.
It’s not a traditional selfie, but it’s creative and unique. It’s an easy way to get your best selfie.
Selfies get much better when the background includes an
exciting location. Strike a pose if you travel to a well-known city, if
you are in nature, or have a famous building in the background.
Make sure you use natural light
the best you can. Sometimes, the sun won’t agree with you when trying
to fit a specific location into the background. Try different angles to
see what you can get away with!
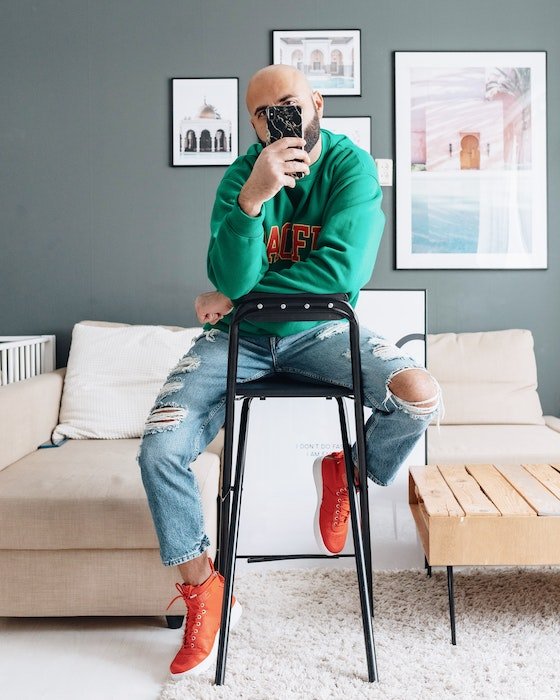
Mirror selfies are an easy way to get your best selfie.
There is no surprise the mirror selfie is one of the most popular selfie
poses. But, an excellent way to stand out is to think outside the box!
Take a photo of yourself while focusing
on a mirror with your camera. You can use a car mirror. Or maybe you
would like to photograph yourself in a shop reflection or even a warped mirror!
There are lots of different options for some creative results. Keep an eye out for mirrors wherever you go.
4 Tips to Take the Perfect Selfie
1. Consider Your Lighting
Lighting
is the most critical factor to consider when taking a great selfie. If
you are not familiar with how your face changes depending on where the
light source is coming from, you should watch this YouTube video.
One golden rule is to not shoot with the light source behind you or the camera pointing toward the light.
You will likely work with natural light for most of your self-portraits. This is my favorite type of light to use. Look for a warm glow during golden hour or nice even lighting on an overcast day.
Be careful about the direct sun that can cause harsh lighting.
It can often cast unwanted shadows across your face, taking away from
your beautiful natural features. You may also get a dark shadow in your
eyes,
Even light tends to be the best selfie light. Models and influencers use a ring light
around their cameras to get the most even light. You can now get small
ring lights to attach to phones or ones that act as a lamp that you can
have at home!
2. Be Aware of the Background
Often, we can overlook what is going on in the background
while trying to get our best selfie poses. When we see our photos
later—sometimes too late—we notice how a simple detail can ruin the
whole image.
An easy way to address this is to look for a neutral
background. Maybe there’s a wall with a simple color or pattern. Or
maybe there’s a tree or bush that looks interesting.
If you’re trying to get a specific location in the
background, your subject will likely be so far from the camera that
there will be a clear separation. If there isn’t, you can always use the
sky to ensure nothing is distracting directly behind your face.
Be mindful of particular objects that can ruin the mood of
your selfie. Small things like trash bins or toilets never look great
in a selfie. Make sure you adjust your angle slightly to take these
objects out of the frame.
3. Use Portrait Mode
Smartphones nowadays have an excellent AI ability to simulate a shallow depth of field. The camera focuses on the focal point, and everything else is slightly blurred out.
This method makes sure that no attention is taken away
from your beautiful face. It also makes the image look sharper as
everything else is out of focus.
Sometimes the AI will only work when you are a certain
distance from the camera. That means that a full-body shot most likely
won’t work in a Portrait mode image. This restriction is worth keeping
in mind!
4. Let Out a Great Big Laugh
Sometimes, we want to show our friends and family we’re
happy—but not in a fake way. One method of looking happy naturally is to
simulate a great big laugh.
Often, this will cause us to laugh for real, especially if we are with friends. There is even a whole yoga practice around fake laughing.
So next time you pose for a selfie, give it a go. You can even try it with a friend!
Top Tips For Men and Women
Poses for boys and girls can be a bit different at times. But don’t
box yourself into one category or the other. Use what works best for
you.
Easy Selfie Poses for Boys
Square your shoulders for a broad look
Stand with good posture for a confident pose
Squint your eyes slightly for an inquisitive look
Push out your jaw for a stronger line
These are a few examples of how you can make guys look better in selfies. For a more in-depth look, check out our article on poses for men.
Selfies are great fun and an excellent way to practice
your posing and self-portrait skills. To avoid taking mainstream
selfies, try out new selfie poses and see what works best for you.
Remember, a good photograph takes practice! So, find the poses and the situations which work best for you! Soon, you’ll have an Instagram feed covered in pictures that show you living your best life!