Portrait photography is about capturing people
and their personality. But portraits often go beyond a photo of a
smiling person. There are many different sub-genres or types of portrait
photos.
Ready to explore the different types of portrait photography? To get
more creative and find the genre that fits your subject? Here are the 10
different types of portrait photography you should know.
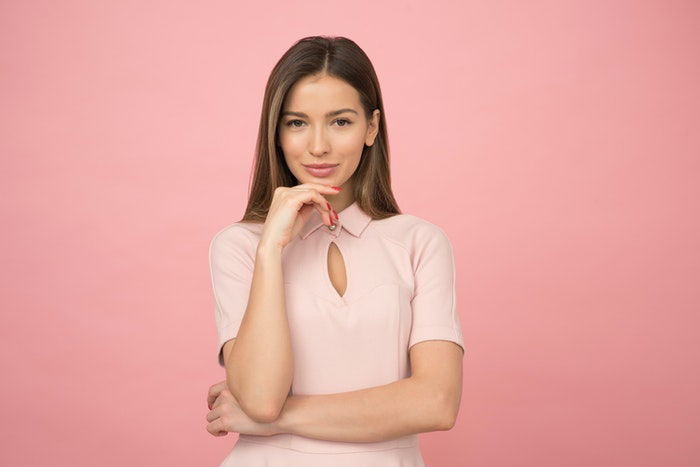
10. Traditional Portraits
A traditional portrait often depicts the subject looking at the
camera. Traditional portrait photography is posed. It helps the subjects
look their best. Often, traditional portraits are shot in a studio with a formal photography backdrop.
The genre also tends to favour the most traditional portrait
composition. This means the head and shoulders crop rather than a
full-body portrait. But that’s not always the case.
Traditional portraits are often what comes to mind when thinking
about the portrait genre. This type of image has been around for a long
time. But it remains popular because the mix of posing and studio lighting is flattering.
A sub-genre of the traditional portraits are formal portraits. They
apply the same posing and studio setting, but with formal or business
attire.
Photo by Moose Photos from Pexels
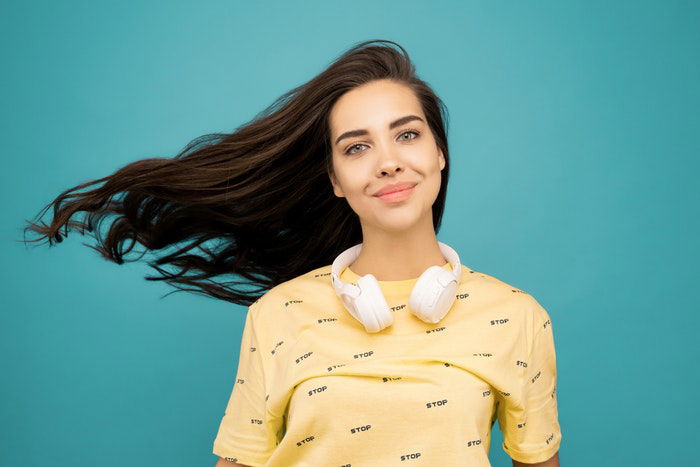
9. Lifestyle Portraits
Lifestyle portraiture
is the polar opposite of traditional portraits. Yes, it’s still a
portrait of a person (or many people). But lifestyle portraits capture
people in an everyday environment, often doing ordinary things. Instead
of a studio, this genre of photography
works in an environment familiar to the subject. You can take
lifestyle portraits, for example, in a family’s home. Lifestyle
portraits aren’t posed in the traditional sense.
A lifestyle photographer often has a limited time frame to capture a
series of portraits. Lifestyle photographers will often direct the
subjects. For example, they ask siblings to jump on the bed or ask a
family for a group hug.
But this type of direction isn’t posing. Lifestyle photographers
don’t adjust the placement of the hands. They don’t position their
subjects.
Clients that choose lifestyle photography like the genre because it
resembles real life. Lifestyle family photography also captures the
interaction between family members. This way, you can create some
touching memories.
Photo by Anna Shvets from Pexels
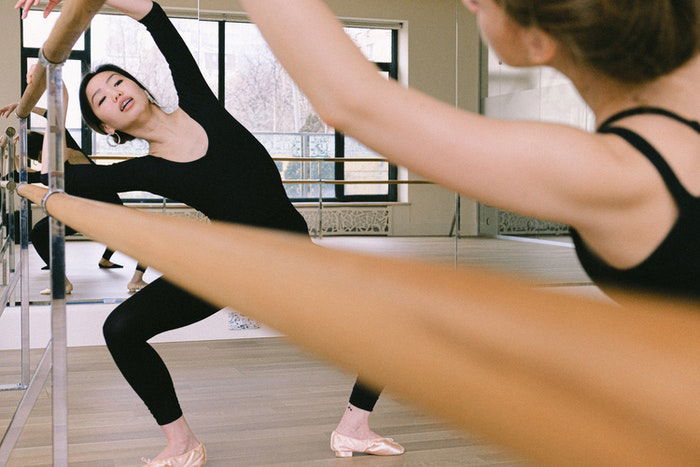
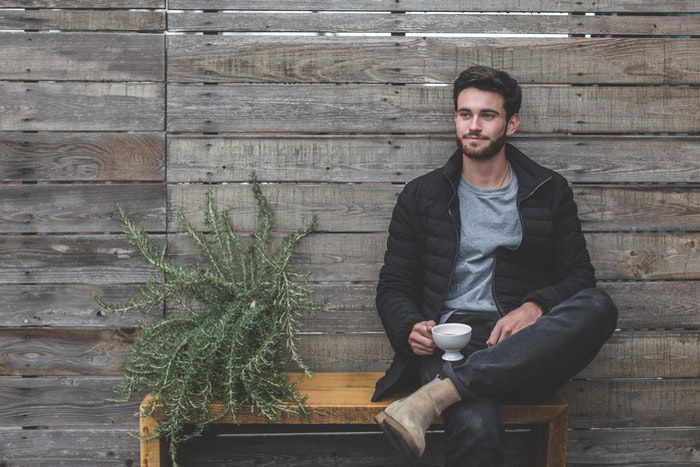
8. Environmental Portraits
Environmental portraits
are a mix of traditional portrait photography and lifestyle portrait
photography. In environmental portrait photography, the environment and
the person both have importance.
This type of photoshoot takes place in a specific location which has a
special meaning to the person. It is a way to give the viewer clues to
that person’s personality.
That location could be a home, an office, or a favorite place
outdoors. Or if you photograph a dancer, it can be a ballet studio.
While the location is important, environmental portraits can still
use posing techniques. It is not as informal as lifestyle photography.
The photographer sets up a pose and lighting, like in the case of
traditional portraits. The pose, lighting, person, and background all
work together in an environmental portrait.
Photo by Anna Shvets from Pexels
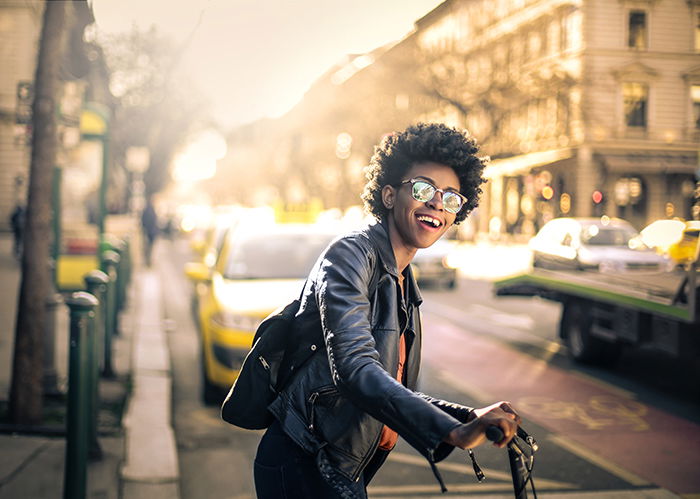
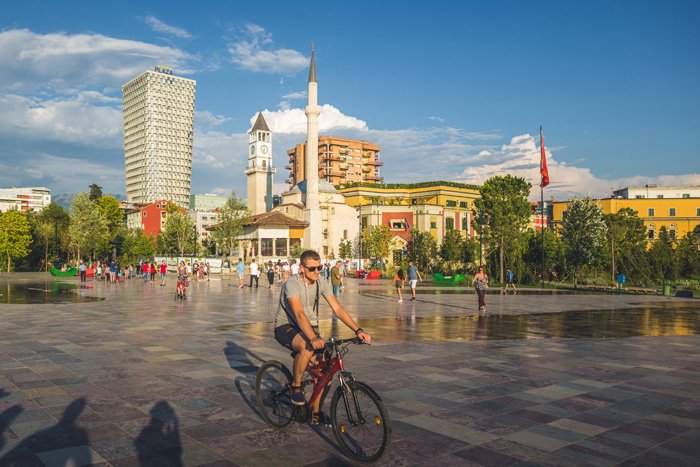
7. Candid and Street Portraits
You don’t plan candid portraits. The best example is street photography featuring people.
Photographers don’t have to photograph strangers to take a candid portrait. But candid portrait photography doesn’t use any direction or posing from the photographer.
Street photographers often take candid portraits of the people they
meet. There’s often no setup. The photographer gets inspiration from the
position the person is taking. The light, the environment or any other
factors create a spontaneous photoshoot.
Qualities of candid photography can influence different genres. Some
photographers use a mix of posing and prompts to encourage candid
moments.
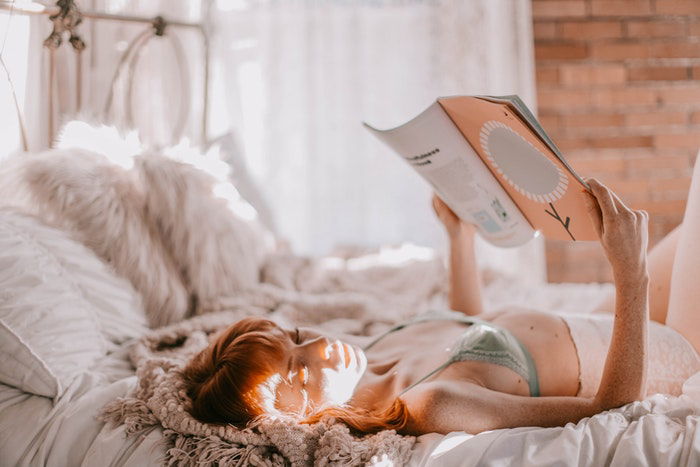
6. Glamour & Boudoir Photography
You might know glamour portrait as beauty portrait.
The beauty of the subject is in the focus of glamour photography. It
often involves planning the wardrobe and using professional make-up
artists.
Glamour photography is also sensual. It’s designed to highlight a
woman’s beauty, sometimes in lingerie and sometimes nude. Glamour and fashion photography often has a similar feel and similar posing. But glamour still emphasizes the person, not what they are wearing.
Boudoir
is a similar but not identical type of portrait photography. Glamour
photography often takes place in different locations, including
outdoors. Boudoir, as the name suggests, takes place in a bedroom or
home.
Boudoir celebrates sensuality. Women often book a boudoir session to
give these photos to their significant other. Boudoir isn’t about sexual
poses and lingerie. Many say a boudoir session can help boost a woman’s
confidence.
Photo by Leah Kelley from Pexels
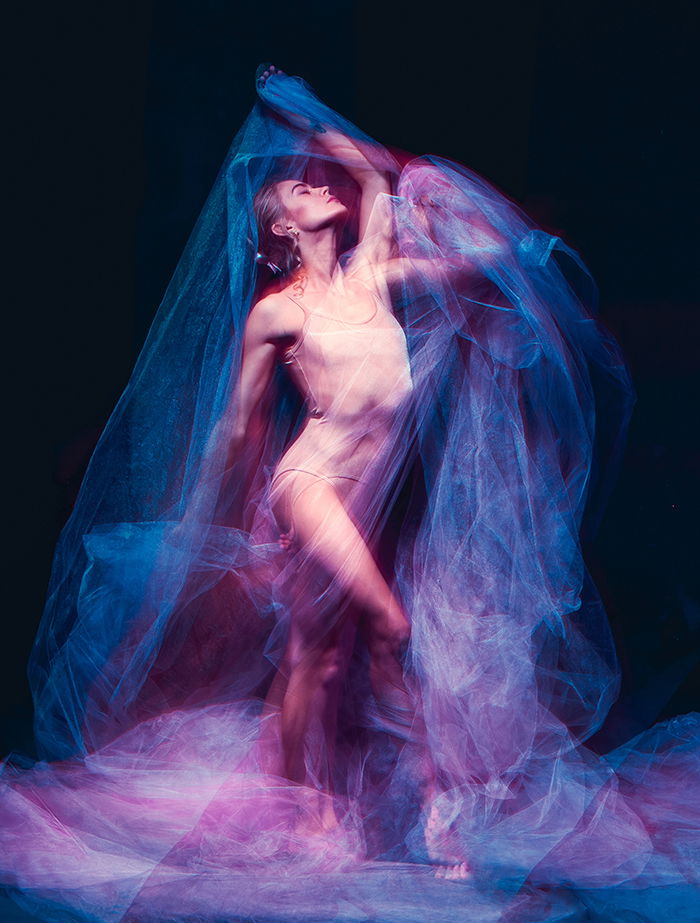
5. Fine Art Portraits
The fine art genre is controversial. Artists debate what classifies something as fine art.
Many agree that fine art is something that would hang in an art
gallery. That’s different than the placement of a portrait that hangs on
the walls of a family home.
Other types of artwork often inspire fine art photography. Some fine
art photographers, for example, model their portrait photography after
Renaissance paintings.
Others get creative with wardrobe and makeup, posing, and photo
editing. Fine art photography also often encompasses conceptual
portraits and surreal portraits.
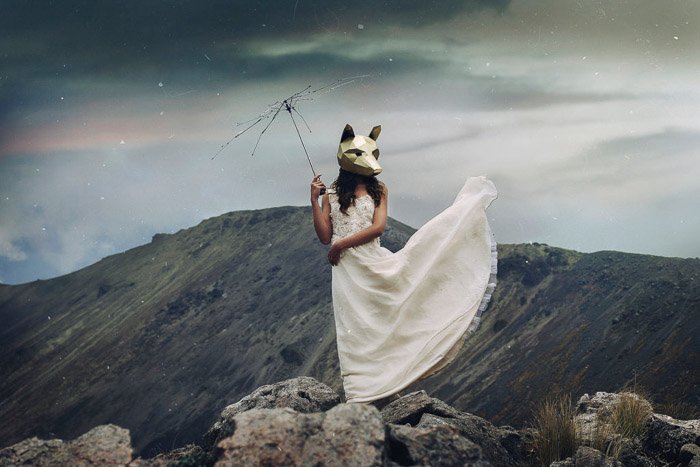
4. Conceptual Portraits
Conceptual portraits capture an idea or concept within a portrait
image. Photographers often use props, setting, or photo editing to
achieve that concept.
Because conceptual photography encompasses an idea, the possibilities
are endless. Levitation, perspective manipulation, makeup or wardrobe
tricks are common. Photoshop stunts and post-processing are part of this
concept.
Image by Johnathan Emmanuel Florence
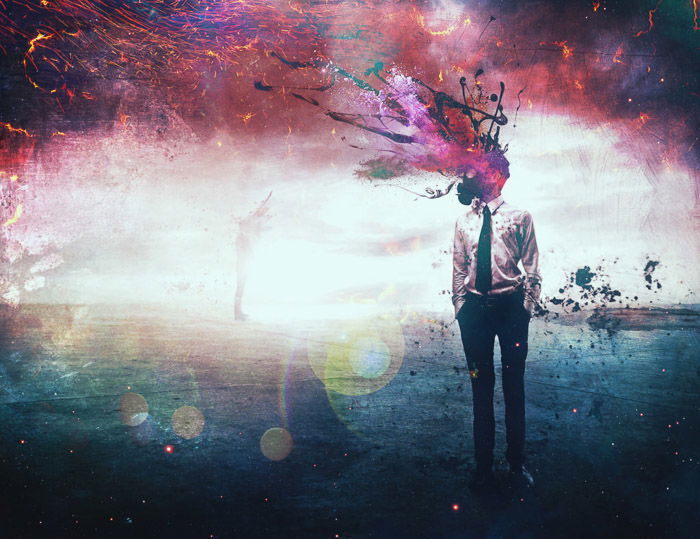
3. Surreal Portraits
Surrealism is an artistic style that feels dream-like. That style can apply to portrait photography as well.
You can’t photograph something that doesn’t exist. That’s why surreal portrait work often involves Photoshop. You can also create some with props, wardrobe, and other photo tricks.
A surreal portrait turns dreams into real photos. That’s tough to do,
but when done well, the results are often stunning. For inspiration,
look at photographers like Brooke Shaden.
Photographers use the more elaborate term self-portrait on a serious
portrait. A selfie is a quick snapshot. Self-portraits need insight and
planning.
Taking a photo of yourself beyond holding a smartphone out at arm’s
length is not easy. You can use a tripod to get rid of that selfie look
and extended arms.
Focusing and composing when you’re in front of the camera instead of
behind can be tricky. Try using a remote release or a smartphone with a
WiFi-enabled camera. Then get creative.
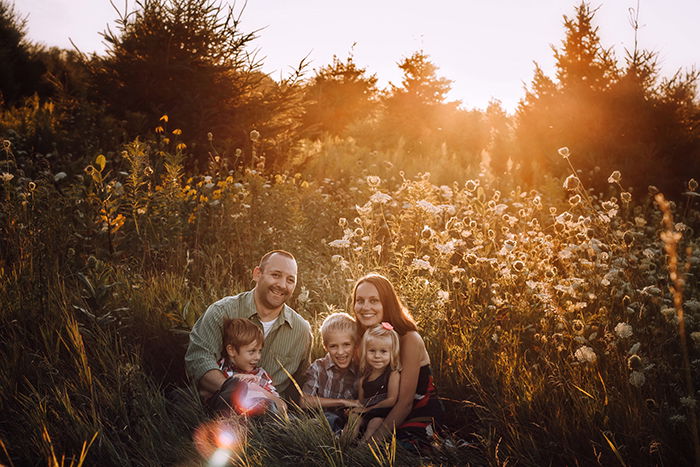
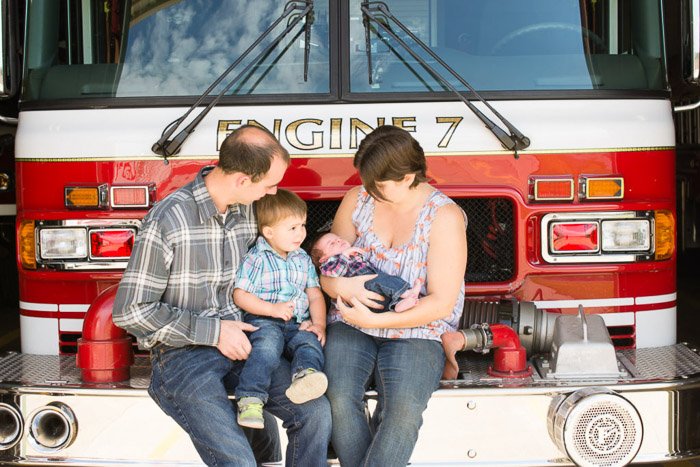
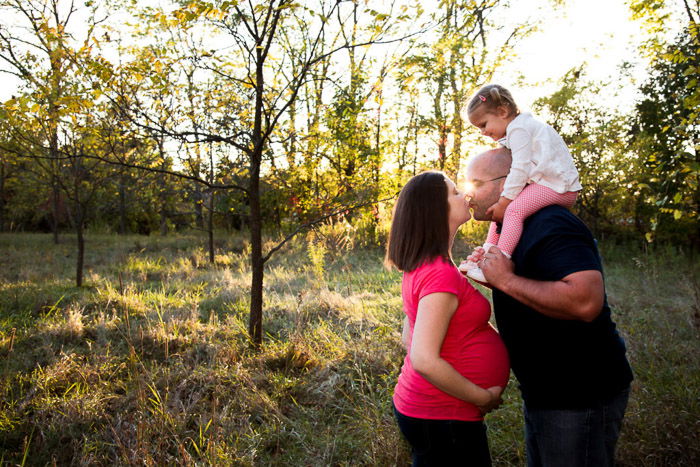
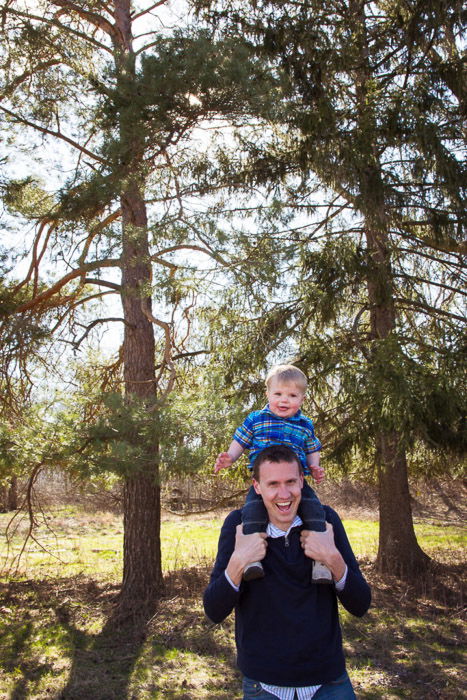
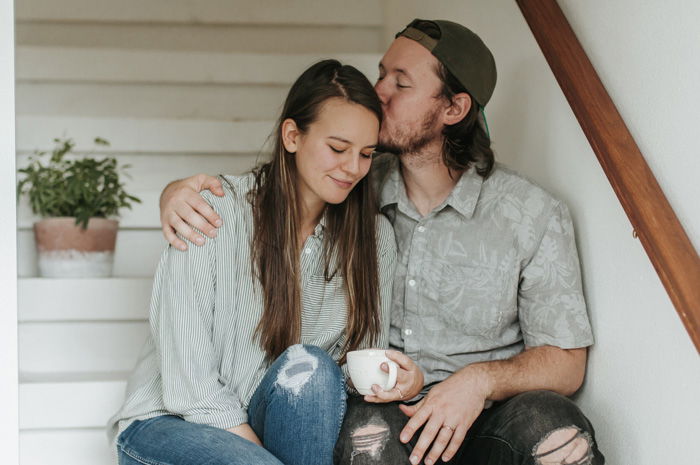
1. Couple, Family and Group Portraits
A portrait isn’t always a single person. Photos of couples, families and other groups together are still portraits.
Pictures of more than one person are often harder than portraits of
an individual. You have more people to pose together and interact within
the photograph.
With more people, you can also capture genuine interaction. You can’t achieve this with a single person.
Portraits of groups can still fall under other sub-genres too.
Lifestyle photography, for example, is a popular genre for family
photography.
Portraits capture people and personality. Every person is different; that’s why the genre has various styles.
Try to understand the different types of portrait photography. Practice their unique setups.
Get to know the person you take photos of! See what your subject is
like and which genre fits the person. You’ll capture better portraits
that represent the subject in the best light.
You
love photography. You’ve been taking pictures for a while now. Maybe
you’ve invested in a better camera, or more lenses, perhaps an external
flash, or, you still have that simple little point and shoot digital
you’ve had for years. But something is pulling at you from within.
You’re tired of taking pictures of barns, fences, trees, dilapidated
buildings, bridges, etc.
You find that your photographs are often void of the most interesting subject of all – PEOPLE.
In this free guide to portrait photography you’ll learn:
Lighting
Focal length of the lens (wide to zoom?)
Focusing
Framing – Portrait Type (head shot, 1/2 length, 3/4 length, full length, group, large group)
Camera shutter speed
Lens aperture
Background
Clothing
Props
Thursday, December 9, 2021
Essential Family Photography Equipment for Better Portraits
Tags: Photography for Beginners, Newbie Photography
Families come in all different sizes — and so does family portrait gear.
But, there are a few essentials followed by a few accessories that
can play a significant role in capturing great images of families.
Let’s look at the most important family portrait gear.
The Camera
The best camera for family photography
mixes both resolution and moderate speed. Resolution, for capturing
those details. And speed? Because you’ll often be photographing kids
that have a hard time sitting still.
You don’t need the crazy double digit speeds of a sports camera, but you should at least have a 5 fps burst speed.
Interchangeable lens cameras are ideal for photographing families. But
choosing between mirrorless and DSLRs is a matter of personal
preference.
Both have great image quality and performance. And both can easily meet the needs of a professional family portrait photographer.
Full frame cameras will offer the most quality. But a crop sensor DSLR or mirrorless is still a solid camera for photographers with limited gear budgets.
Just remember, if you decide to upgrade later, you’ll also need to
upgrade to full frame lenses. This is only the case if the lenses you
choose are for crop sensors.
Finding a solid interchangeable lens camera with good resolution and decent speed isn’t tough. Here are a few excellent options currently on the market:
A good camera needs good glass to match — so what is the best lens for family portraits?
There are several things to look for in a good family portrait lens — and you may want to pick up more than one.
Zoom or Prime
A zoom lens isn’t a requirement for family photography. Just zoom with your feet.
That doesn’t mean there aren’t benefits to a zoom lens. It can help you
capture a greater variety of poses faster than a prime lens. This is a
big help when working with young kids that only have so much patience
for photos.
Prime lenses tend to have wider apertures. You won’t use an f/1.8 photographing a large group, or most of the faces won’t be in focus.
But, you might use that wide aperture photographing just mom and dad. Or
to intentionally focus on only one member of the family.
A bright prime lens also tends to sell at a much lower price point than a bright zoom lens.
Wide Angle Lens
Families can be as small as two people — or they can push upwards
into double and triple digits. For photographing larger families, you’ll
need a wide angle lens to fit them all in. You don’t want a crazy wide angle lens, or you’ll end up with too much distortion.
A 35mm is a good length for capturing the entire family, either within a wide-angle zoom or as a 35mm prime lens.
Try:
Wide angle lenses will be sure to fit everyone. But longer lenses
tend to be more flattering for portraits. A standard or shorter telephoto lens like a 50mm or 85mm is the most common.
You can still use shorter telephotos and a standard focal length like a 50mm. You’ll need a wide open space to stand farther back when photographing larger groups.
This is why many family portrait photographers will still have a wide
angle. It’s for those times when they can’t stand that far back from the
subjects.
Try:
A flash can make a significant impact on your work. Some family
portrait photographers use all natural light. But sometimes, natural
light won’t give you the best result.
That’s where flash comes in. Unlike studio lights, a flash is easy to
bring on location. You can use one whether you’re photographing families
in a park or shooting lifestyle family photos indoors.
The easiest (and maybe even best) way to use a flash is to create
catchlights in the eyes. All you need is a flash with a diffuser left on
a low manual setting. This means the existing light won’t be affected
much at all.
Flash can also add interest to a shot, prevent you from blowing out the sky in the background and so much more.
The good news is that you don’t need the most expensive flash for shooting a family portrait.
The priciest flashes will reach farther and overpower the sun. But since
you’re (probably) not using a 300mm lens for family photography, that
expensive flash is overkill.
Look for a flash that has manual controls. A range between 1/1 and 1/128
is great for family portraits. The flash should also have an adjustable
tilt to bounce it.
Look at the specs for the zoom range, and make sure that the range
covers the lenses that you use. Most flashes should cover the typical
lenses used for family portraits.
Try:
The key to using flash and actually liking the results is to “clothe” your flash. Avoid shooting with a naked flash.
A flash diffuser will soften the light. It’ll make it look like a flash
wasn’t used at all while still offering the benefits of using one.
Flash diffusers come in different types. The key is to get something
that’s actually larger than the flash head itself. You can pick up a
basic flash soft-box for around $20, or use something like the MagMod
diffuser.
This is my personal choice. It never falls off the flash like the cheaper soft-boxes have a tendency to do.
An alternative to diffusing the flash is to bounce it. Flash bounce
cards allow you to bounce a flash even when you’re not close to a wall.
It creates a similar softer light. And it eliminates those harsh shadows
that make it obvious even to non-photographers that you used a flash.
Another helpful flash accessory are gels. Gels will change the colour of
your flash. I often use an orange flash gel to create a more golden
light that looks closer to a golden hour sun.
Try:
Some flashes have this capability built in, like the Phottix flash
above. All you need is a transmitter or a second flash to use as a
transmitter.
But many of the more budget-friendly flashes don’t have the capability built-in.
Taking the flash off camera allows you to create studio lighting effects
anywhere. It creates more depth to the image than on-camera flash by
creating soft but visible shadows.
Flash transmitters, like lenses, are designed to work with a specific brand of flash. Make sure you pick up a compatible set.
Try:
Unless you happen to work with an assistant, you’ll need a spot to
put that off-camera flash. Tripods will do the trick, and unlike a light
stand, you can also use it to hold your camera if needed.
The best tripods for family photography will be portable but sturdy options. They’re similar to what wedding photographers look for in a tripod.
Family photographers typically don’t need a tripod for the camera. This is because of the fast shutter speeds.
Some kids and even adults can be intimidated by the camera, however.
Leaving it on a tripod and using a remote to snap the photos, is an
option.
Try one of the tripods on this list.
Camera Bag
Pick up a camera bag
with padded dividers for your camera, lenses, flash and other
accessories. Backpacks are more spacious and the double straps can be
more comfortable. Shoulder and sling style bags tend to be more stylish
and offer faster access.
The options for great camera bags are even wider than the number of great cameras out there. Here are a few suggestions.
Along with protecting gear with a proper bag, don’t forget to pick up the essentials for keeping lenses and the camera clean.
Small Accessories for Family Portraits
Sure, the camera, lenses and lighting gear are some of the most
expensive items that you’ll need to buy, but there are a few smaller
essentials too.
When setting your family photography equipment budget, don’t forget to factor in:
Memory cards: Choose something that’s a Class 10 or better to keep up with RAW burst shooting.
Batteries: Make sure you have enough batteries for both the camera and the flash.
Protective lens filters: Keep your lens from scratches with a UV filter.
Reflectors: Reflectors aren’t large enough for big
groups, but you can use one for taking individual portraits of each
family member or for families of 2-3 people.
Non-Photo Accessories for Family Portraits
I also bring along some non-typical accessories that you wouldn’t pick up at a photo store.
These items may not be necessities. But they can add variety and make it easier to get smiles out of the littlest subjects.
I usually bring along a few “smile items” that most kids tend to go
crazy for. For kids a year old and younger, a musical toy can help get
them to look in the direction that you’d like them to.
The more enjoyable the photo experience is for the kids, the better the results.
Depending on the location, I may also bring along a few simple props. A picnic blanket is nice for posing variety, for example.
And don’t laugh, but on many shoots, I bring a step stool so I can get a
greater variety of angles during the shoot. Getting higher up can help
fit more people into a large group, and allows me to play with
perspective.
That’s a lot of gear — so how do you carry it all?
On small shoots, I can fit everything in a backpack and carry a flash-tripod combo. When I need to grab everything, I use a folding wagon.
With any photography gear, it’s important to find a balance. You want
to enough gear to get the shot but not so much you can’t actually bring
it all to the shoot.
The gear you need will also vary based on your style and budget.
Photographers with a light and airy style, for example, don’t use a fill
flash.
Start with a good camera and a lens or two. Then expand with lighting
gear, extra lenses and other accessories as you find your style.
If you’re in doubt about what to buy, try renting equipment. This is
helpful for trying out the most expensive family photography equipment.
Exposure works in three parts: aperture, shutter speed, and then ISO. But what is ISO?
What Is ISO in Photography?
ISO is an important parameter that determines how bright your image
will be. It’s helpful because it gives photographers an extra option to
manipulate their exposures. It gets its name from the International
Standards Organisation, which has set this standard in 1988.
ISO works slightly differently in film and digital cameras. In this first, larger part of the article, we’ll discuss ISO in digital cameras.
Unlike shutter speed and aperture, ISO doesn’t change the amount of
light coming into the camera when brightening or darkening the image.
Rather, it determines how the camera deals with that already set amount
of light after the exposure is done.
So thus ISO generally defines the sensitivity of the sensor or film.
Because of this, it’s not technically a component of exposure.
However, in all practical situations, we’re better off treating it as
one.
Why Do We Use ISO?
We use ISO because the two basic exposure parameters, shutter speed
and aperture, don’t offer enough leeway for creating a correct exposure
under all circumstances.
Both shutter speed and aperture can be used to change exposure, but
they also have important side effects. The shutter speed controls the motion blur. The aperture controls the depth of field and sharpness.
With only these two, you can’t freely combine any shutter speed with any aperture value. The image would be under or overexposed, and hardly ever correct.
So, ISO has been introduced to control brightness independently from
the other two by setting the sensitivity towards the incoming light and
the amount of grain on the picture.
Stops of ISO
ISO can be measured relatively in exposure value stops (or stops).
The camera’s ISO scale is like shutter speed in the sense that when it’s
doubled, the exposure is also doubled. A stop in ISO means double or
half the light compared to the previous stop.
They are proportional to one another. A low ISO number will give a
dark exposure and a high ISO will give a bright exposure. It’s simpler
then aperture.
ISO most often starts at the value of ISO 100. This is the lowest,
darkest setting, also called the base ISO. The next full stop, ISO 200,
is twice as bright, and ISO 400 is twice as bright than that. Thus,
there are two stops between ISO 100 and 400, four stops between 100 and
1600, and so on.
This series goes on, but it has practical limits. Exactly where that limit is, varies from camera to camera.
However, generally, we can use ISO up to ISO 6400 to 25600. This
means 6 to 8 stops of extra brightening potential. In other words, you
can correctly expose for a 64 to 256 times darker environment than at
base setting.
There are also even higher settings included in modern digital
cameras, but they reduce image quality so much that they’re basically
unusable. More on this further down.
When setting the ISO, most cameras offer more precision than just
full stops. You’re more likely to find that all exposure parameters are
variable in 1/3 stop increments.
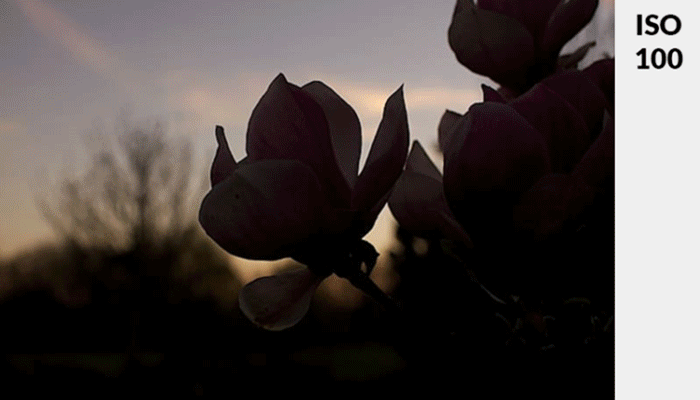
Changing Exposure with ISO
Let me demonstrate ISO using actual photos as you can see in the slideshow below.
The photos are displayed in the following order: 100, 200, 400, 800,
1600, 3200. The aperture and shutter speed remain constant throughout
them. Only the ISO is changing so that you can see its effect on a
photo.
The ideal exposure is shown in the fourth photo which was taken at ISO 800.
As you may have noticed by now, nothing affects the exposure in one
single way. There are consequences to using different ISO values.
Side Effects of ISO
If we could brighten our images without any penalties, that would be a
paradise for photographers. It would almost be too good to be true.
But it’s not the case: increasing ISO has detrimental effects on image quality, to varying degrees in different cameras.
There are two (almost) separate consequences. For sure, you know one of them: increasing ISO introduces more noise (grain) into an image.
This is because all camera sensors have a certain noise floor. When
you brighten the image, you not only brighten the valuable content, but
also the noise.
The other one is loosely based on the noise floor issue, but worth
mentioning on its own. Increasing ISO also reduces the dynamic range.
The higher you go with ISO settings, the less detail you find in shadow
areas and the sooner bright highlights start to clip.
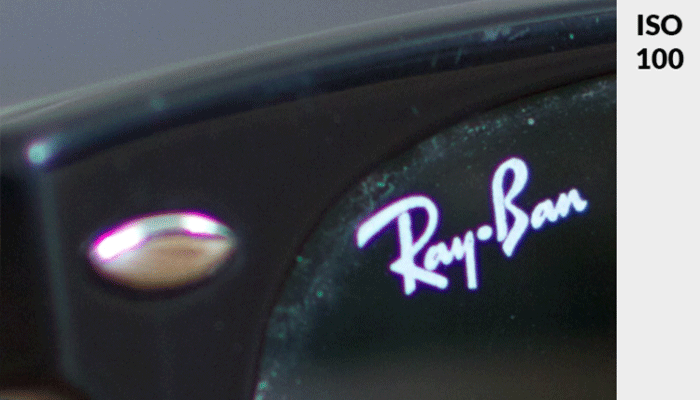
Lower number = Lower sensitivity = Finer quality photos
To best show how camera ISO affects the image quality, I took another series of photos and displayed them below.
For this experiment, I changed the shutter speed and aperture of each
photo to compensate for the exposure changes. Thus, it’s easier to
compare the difference in quality.
The photos have ISO in the following order: 100, 200, 400, 800, 1600, 3200.
As you can see, the higher the number, the stronger the noise becomes.
For this reason, I advise keeping your ISO levels as low as possible, but without impacting the image in other ways.
For example, if you’d need to set a shutter speed that introduces
camera shake in the image, it’s much better to set a higher ISO instead.
Reducing noise is possible in editing software, and also in-camera, to
an extent. Correcting motion blur, on the other hand, is nearly
impossible.
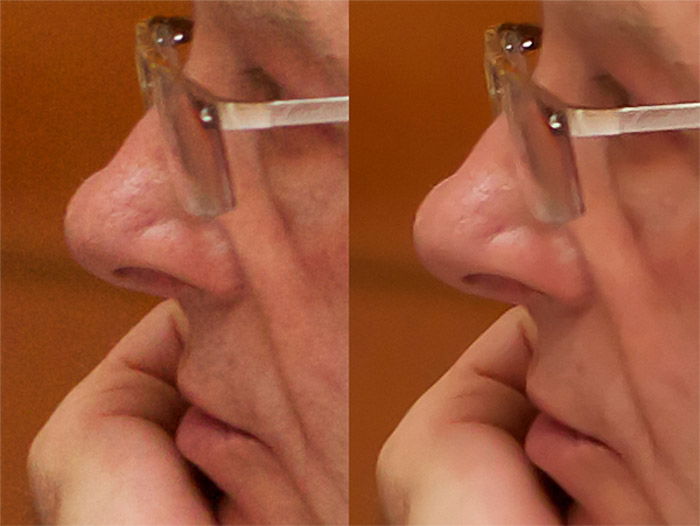
So, let’s talk about noise reduction for a minute. There are many kinds of noise reduction software out there. Such algorithms are also built into popular post-production tools, like Lightroom.
But you’ll find that this only “smooths out” the noise.
Excessive noise reduction can result in an airbrushed effect on
faces. It reduces the detail and sharpness in a photo as shown below
(cropped to better show the effect).
It has its uses but in moderation and with consideration as to what you’re using the photo for.
How to use ISO
It’s quite apparent that you should use low ISO in bright environments and higher ISO in darker environments.
But besides the environment, you must also take into account your other two exposure parameters, and set ISO accordingly.
Let me bring a few real-life examples (case studies, if you will) of using ISO.
Scenario 1 – Travel Photography in Daylight
You’re using a 28-70mm lens at 28mm to get a decent, wide field of view.
In bright daylight, you have plenty of light. For casual street and travel
shooting, you want to freeze the motion of people and your own hands.
This will require you to set a shutter speed of 1/250s or faster.
You choose an aperture of f/5.6 because you want most of your image in focus.
Clearly, in this case, you will be using ISO 100. Even so, you might
find yourself actually overexposing – compensate by decreasing your
shutter speed.
Scenario 2 – Family Photo Indoors
You’re in a moderately well-lit room during the afternoon. There is
some natural light leaking in, but not nearly as much as in the previous
case.
You’re using the same lens, but this time at 50mm to get a clean shot of two family members. You open up your aperture to f/4 this time, because you want the two of them fully in focus, but the background blurred.
On this occasion, you can slightly reduce your shutter speed, because
you’ll be holding your camera more steadily, and your subjects will be
posing. Their movement will be much more subtle. You’ll get along with
1/125s.
These circumstances require you to raise your ISO to somewhere
between 400 and 800. Here, you’ll be using ISO only to get the correct
exposure – your other parameters are set.
Scenario 3 – Music Show at Night
You’re in the mosh pit of an outdoors stage.
The musicians are very well-lit, but they’re also moving quite quickly.
You choose to use a longer lens, an 85mm at f/2, to separate one of
them and get a clean image.
You’re limited to 1/400s in shutter speed because you want to fully freeze their motion.
The lights are changing quickly in intensity. So, you decide to grab a
moment when the performer you’re aiming to capture is brightly lit, and
the background is quite dark.
To get a correct exposure on the person, you’ll need to choose a high
ISO setting. This can be anywhere between 1600 and 4000. You’ll get
plenty of noise in the background, but your subject will be
well-exposed, and the picture will look fine.
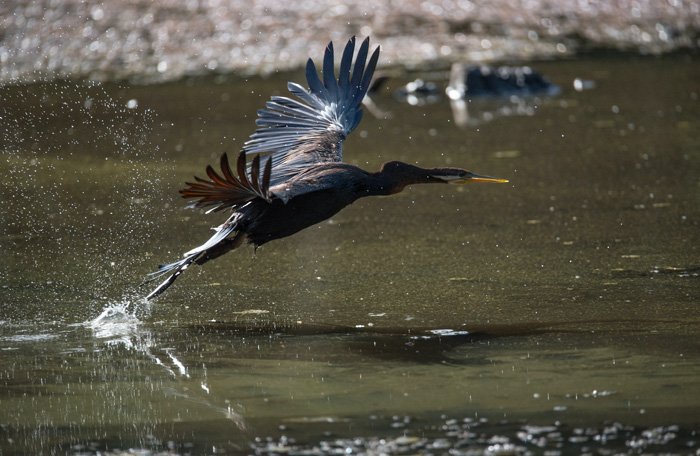
Scenario 4 – Wildlife in Overcast Weather
Next day, you decide to take on some adventure and capture some wild birds.
You grab your 100-400mm lens, which is not fast but reaches far. The
day is overcast. There is plenty of light, but not as much as if it was
direct sunlight. You like this better because this diffuse and soft
light looks nicer on animals.
To freeze the motion of a bird taking off close-up, you’ll need to choose a very fast shutter speed. At least 1/1000s, but it can go up to 1/4000s. Here, we choose the easier option of 1/1000s.
You’re limited by the f/5.6 aperture of your lens on the zoomed-in end.
In this instance, you’ll need to use a higher ISO setting of 800 to 1600, even outdoors in the daytime.
Scenario 5 – Landscape Photography at Dusk
You’re out in a field, surrounded by beautiful mountainous scenery. You want to capture right at dusk, in the last light of the day.
The light is dim, but fortunately, you have a tripod. This means you
can use basically any shutter speed you want. In this shoot, that will
be your main variable. Your aperture is locked at f/16 for good focus
across the scene.
Your ISO is fixed at 100 – you want the highest possible quality and
detail. As landscape images are more likely to be printed large, this is
more important than, let’s say, in the case of a sports or music show
shoot.
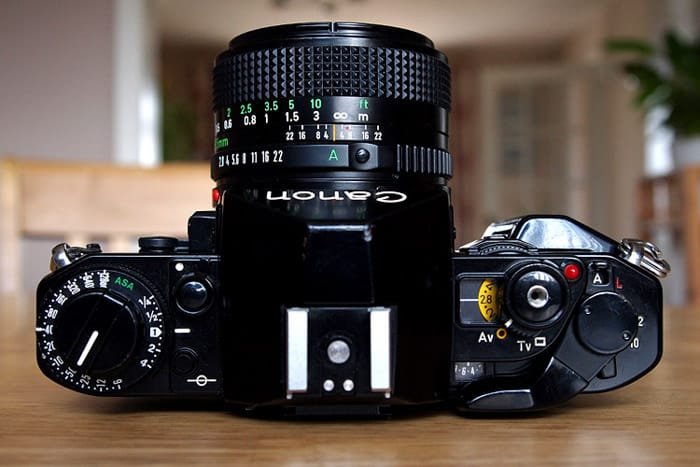
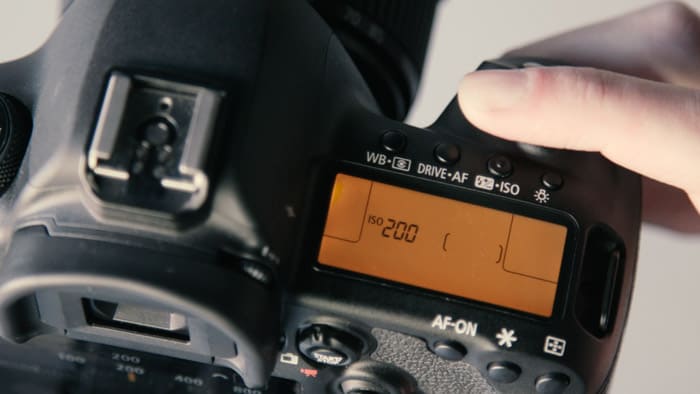
Where Is ISO on my Camera?
To be able to change ISO, you need to set your camera to manual, or one of the semi-automatic modes (S/Tv, A/Av, P).
Depending on the make and model of your camera, there are different ways of adjusting ISO.
On professional and prosumer cameras there is always a separate
button for ISO, without exception. This is because, in a fast-paced
professional environment, you need quick access.
On entry-level DSLR and mirrorless cameras, it’s usually hidden in a menu or accessible by pressing two buttons (or dial and a button) at the same time.
On compact cameras which offer manual control, it’s also in the
menus. If your camera doesn’t offer manual control, it will set the ISO
automatically as well.
ISO Across Cameras
ISO noise and dynamic performance are not the same across all
cameras. There are huge differences, depending on age, sensor size,
camera category, and sensor technology, among others.
Let’s start with age. ISO performance has been one of the
ever-evolving features of digital cameras. Every new generation of
cameras brings lower noise levels, higher dynamic range, and better
low-light performance overall.
Cameras from 2019/2020 give you a 2 to 3-stop advantage over their
precursors from a decade ago because of software and sensor
developments.
At least equally important is the effect of sensor size on low-light
operations. Because smaller sensors get less light when using lenses
with the same f-stop, their ISO noise levels are also higher.
A full-frame camera from the same generation usually performs 1-1.5
stops better than an APS-C crop model. Which, in turn, is 0.5 to 1 stop
better than a camera with a Four Thirds sensor.
Today’s modern full-frame cameras give very usable images up to ISO 25600.
Compact cameras and smartphones, of course, are the losers of this race with their tiny sensors.
Camera category, or price range, is also a determining factor,
although not as much as the prior two. A low-tier model, such as a Canon Rebel, won’t perform as well as a Canon 7D-series
model (both APS-C), even if they’re from the same generation. They also
have identical sensor size, but frankly, more money just buys more
sophisticated technology.
How ISO in Digital Cameras Actually Works
It’s time to get slightly more technical. If you’re aiming to understand how your camera works, read on.
What does ISO mean in a digital camera, really? Nine out of ten
photographers will tell you that ISO refers to the sensitivity of the
image sensor.
This explanation is great for simplified illustration purposes, but
it’s not the full story. Indeed, it is the case if you shoot film, but
not on digital.
To be fair, ISO does behave just as if it was changing sensor
sensitivity. The higher – the more sensitive – it is, the brighter the
outcome will be. The more voltage you send into the sensor, the more
sensitive it becomes. Sounds plausible, right? It’s not.
Rather, ISO determines signal amplification, after the shot has been taken. This amplification can be analog or digital, or both at the same time.
In ISO-variant cameras, such as most Canon models, full stop ISOs are
always amplified in an analog way. Third stops are differentiated with
digital gain. However, due to the circuitry not being optimised for a
set level of gain, and being variable instead, these sensors generally
provide a worse dynamic range.
ISO-invariant cameras make up a majority of modern mirrorless and
DSLR devices, including almost all Nikon, Sony, and Fujifilm models.
These work slightly differently.
In the case of the base ISO (80 or 100 on most cameras), there is
some analog gain applied, but no digital. Thus, the image will be as
clean as possible of noise. At any step above base ISO, there is digital
amplification added, but no analog. This raises the noise floor,
resulting in more visible noise. However, because the system is
optimised for a set level of analog amplification, ISO-invariant cameras
are actually slightly better performers in dynamic range and low-light
noise.
There are some modern digital cameras that are built with a so-called
dual native ISO feature. This essentially means that such cameras have
two base ISOs, with all the advantages that brings. In most cases, these
are 100 and 800. If you’re shooting at any value below 800, you get a
low-level analog amplification and additional digital gain on it above
100.
Once you reach 800, another level of analog gain kicks in, removing
the need for lower-quality digital gain. The noise floor is lowered
again. As you go up from 800, digital amplification is added back again,
but only up from 800. The image quality is thus better at 800 than,
say, 640, or even 400. This technology is a significant step up in
low-light performance.
Cameras that employ this feature are quite rare today and are mostly video cameras. We’ve seen dual native ISO on the Panasonic S1H, the Panasonic GH5S, and the Fujifilm GFX100 cameras most recently.
Is ISO the Same in All Cameras?
Most photographers assume that any concrete ISO value (say, 200)
represents a fixed level of amplification in all cameras. This is not
nearly true.
To understand why, you need to understand how different sensor sizes
influence exposure and other properties. I have written about this in
great length in my article explaining equivalence.
Essentially, even though we have three variables to exposure, only
one of them is an absolute value, shutter speed. Shutter speed will
always be the same and will have the same effect, no matter what camera
use.
Aperture is a tougher question. When we talk about f-stops, we mean relative aperture. F-stop
gives a good indication of the amount of light that falls on a
specifically sized sensor at a set distance from the lens. So, it’s
usable to determine exposure within a given system.
However, when the goal is comparing and standardising exposure
between different sized sensors, it’s less helpful. As I mentioned,
smaller sensors get less light when using lenses with the same f-stop,
in proportion with their surface area.
The point of ISO is to standardise exposures between systems. An
exposure of, say, ISO 100, f/4, and 1/100s, must look identical in every
camera, in terms of luminance.
Consequentially, ISO values mean higher levels of amplification in
smaller-sensor cameras. If we expand this, you’ll also see that higher
resolution cameras need higher amplification than lower resolution ones
at the same size. Thus, pixel-level noise is generally more noticeable
in high-resolution and small-sensor cameras.
Photo by Alex Andrews from Pexels
Raising ISO vs Brightening Your Photo on a Computer
When you step away from your camera and place the image on your
computer, you can’t raise the ISO any more. Editing software such as Adobe Lightroom will only allow you to interpret the digital data that’s already in there.
The exposure slider increases in points. +1 stop looks just as if you
collected one more stop of light. It has a similar effect in overall
tones as raising your ISO from 100 to 200 would have.
As Lightroom can only deal with digital data, tweaking exposure
during editing will generally give you noisier results than correctly
exposing your shot at the first place. Aim to get a correct exposure
during the shoot.
An exception is ISO-invariant cameras. With RAW files from such
cameras, you’re much less limited when setting exposure after the fact.
If you’re using uncompressed files, your image will almost behave as if you were changing ISO, and not seeing much more noise.
Still, you’re better off actually correctly setting ISO, because
previewing your images is easier then. Also, you risk building a bad
habit of forgetting correct exposure, which is detrimental to your
photography in the long run.
ISO in Film Cameras
As I mentioned, the “sensitivity” explanation originates from the film era. When shooting a film camera, you don’t set your ISO at the press of a button.
Instead, each film type has an ISO rating which relates to the
light-sensitive emulsion layer on the film. This rating is also called
speed.
Depending on what you’re shooting, you choose a film that matches
your sensitivity needs. For daylight, you use ISO 100 or 200 film, for
indoors, you generally use ISO 400 film, and so on.
You will find that film and digital both have increased noise levels
at higher ISO settings. However, film noise, or film grain, is generally
considered to look more pleasing. I have to agree with that. While
digital noise can be hurtful to your image, especially if you’re used to
the ‘clean’ look, film grain adds to the image most of the time.
Of course, this is an enormous generalisation, but if you’re ever
thinking about shooting film (or going digital from shooting film), keep
this in mind.
A Short History of the ISO Standard in Photography
The International Standards Organisation (ISO) is an international
body composed of representatives from various national standards
organisations. This is where ISO gets the name from. It was formed in
1947 and has it’s headquarters in Geneva, Switerzland.
Ever since the photographic emulsion was developed, different
countries tried to enforce standards. This is so photographers knew what
sensitivity they could expect from the film.
There were multiple companies and institutions who tried to come up
with a method that classified their film in the most straightforward
way. This was the early process of trying to work out what we now call
film speed.
Numerous standards have been developed before settling at what we
know today as ISO in photography. The most notable of them are the
following:
Hurter and Driffield – These two worked on emulsion
sensitivity since 1890. It was the standard until 1928. Their system
had an inverse system of classification and exposure. The higher the
number, the lower the exposure the emulsion needed.
GOST – From 1928 the Soviet Union used this as
their standard until 1951. They then replaced it with the GOST system,
which was the Eastern version of ASA.
DIN – Deutsches Institut für Normung was introduced
in 1934. They used degrees for classification. A 3° change would either
double or halve the sensitivity.
ASA – American Standards Association started in
1943. A linear scale showed that 400 ASA is twice as fast as 200 ASA,
and 100 ASA is half as fast as 200 ASA. These film classifications have
been kept when the world adopted the ISO photography standard in 1988.
Photo by Tetyana Kovyrina from Pexels
I hope this article has helped you understand and comfortably use ISO on your camera.
I recommend practising manual control of the camera as much as you
can. Being able to adjust all the basic exposure parameters
instinctively will open up new ways in photography, I can promise that.
Once you no longer have to think about all the basic stuff – that’s when your photography really takes off.
Friday, December 3, 2021
The Photographer's Ephemeris ®
It's all about the light.
See how the light will fall on the land, day or night, for any location on earth.
Photo Ephemeris helps you plan outdoor photography in natural light. It's a map-based Sun, Moon, and Milky Way calculator. Plan your shot with perfect precision.
“ One of the most useful apps for any nature photographer. ”
“ Head and shoulders above the crowd is The Photographer’s Ephemeris. Odd name, great app. ”
Understand natural light
The
Photographer's Ephemeris is especially designed for photographers
working with natural light. If you're shooting landscape, wildlife,
architecture, real estate, weddings, or natural light portraits,
Photo Ephemeris will tell you everything you need to know about
sunlight, moonlight, and starlight.
See directional light on a map
See
the exact direction of sunrise and sunset on the ideal map for your
location. Follow the changing direction of the sun across the day as you
adjust the selected time.
Plan for the future
Choose
the dates you're interested in. Whether your trip is tomorrow or ten
years from now, you can check out light conditions past, present and
future.
Minute-by-minute
The
timeline includes key celestial events of the day, including rise, set,
civil/nautical/astronomical twilight times, golden hour, moon phase
events, new moon visibility and more.
Night or day
Planning
night photography? Photo Ephemeris has what you need: rise and set of
the galactic centre, a 3D visualization of the band of the Milky Way,
meteor showers and more. Our iOS app includes major stars, asterisms and
lunar eclipses, so you can plan the perfect 'blood supermoon' shot.
Night photography essentials
Photo Ephemeris
tells you when astronomical twilight ends, when the moon is new, and
when the Galactic Centre, the most photogenic part of the Milky Way,
will rise - the essential data for night photography planning.
Milky Way in 3D
To
achieve the perfectly composed Milky Way shot, you'll want to know how
the band of stars will stretch across the sky. Photo Ephemeris gives you
a 3D representation showing the orientation of the arch of the Milky
Way - ideal for visualizing your shot.
Meteors and more
See
details of upcoming major meteor showers and more. Our iOS app shows
lunar and solar eclipse information, plus positions of major stars and
asterisms, such as the 'Teapot'.
Augmented Reality and 3D
When
2D isn't enough, Photo Ephemeris includes 3D graphics to help you
visualize and plan more effectively. Evaluate the angle of light or the
position of the sun, moon or Milky Way using our advanced tools.
Augmented Reality
Photo Ephemeris
on iPhone/iPad includes AR (augmented reality) so you can see the sun,
moon and Milky Way overlaid directly on your device's camera feed -
ideal for scouting future shots on location, or getting perfectly lined
up just before full moonrise.
3D Celestial Sphere
On
desktops or laptops where augmented reality is not possible,
Photo Ephemeris Web includes a 3D Celestial Sphere integrated with the
geodetics and visual search features.
Sunlight, moonlight, starlight in 3D
For
the ultimate 3D photo planning, use The Photographer's Ephemeris 3D, a
unique mobile app for iOS, to see a three dimensional map of the
landscape lit by realistic directional light and shadows - perfect for
landscape photographers composing photos with mountains or hills.