Tuesday, October 26, 2021

5 Best Techniques for Black and 

White Still Life Photography 

Tags:  Photography for Beginners, Newbie Photography


Black and white still life photographs are beautiful in their simplicity. Still life 

photography is all about inanimate subjects. You can photograph food, flowers

ornaments, toys. Anything that doesn’t move.

Read on for my top 5 tips to get the most out of your black and white still life 

photography.

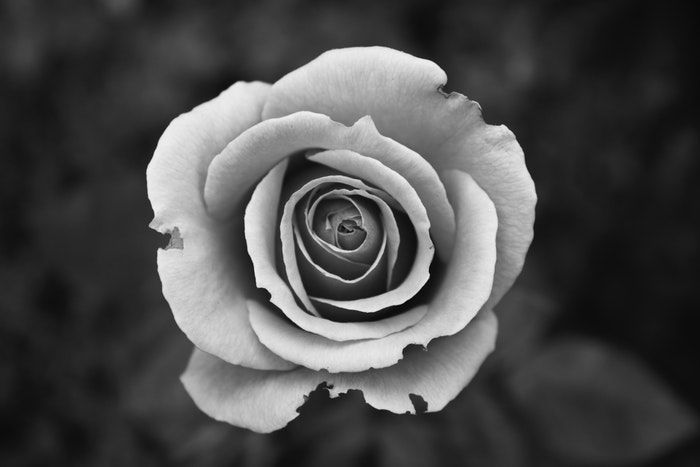
Black and white close up image of a rose
Photo by Jack Hawley 
 

1. Learn to Think in Black and White

Planning and researching a black and white still life photo shoot is essential. The 

process requires a bit of brain re-wiring. That way, you’ll ‘think’ in black and white 

and choose the right objects, lighting, and story for your photo.

Check out work by famous still life photographers to help with this.  

Grand masters such as Edward Weston and Karl Blossfeldt were pioneers 

of photography. They created unique works of art in black and white from 

everyday objects.

Give yourself time and space. Create a rough sketch about the way you 

want your photo to look.

What are the first features of the object that catch your eye? Make notes of the  

lines, textures, or tones you want to emphasise.

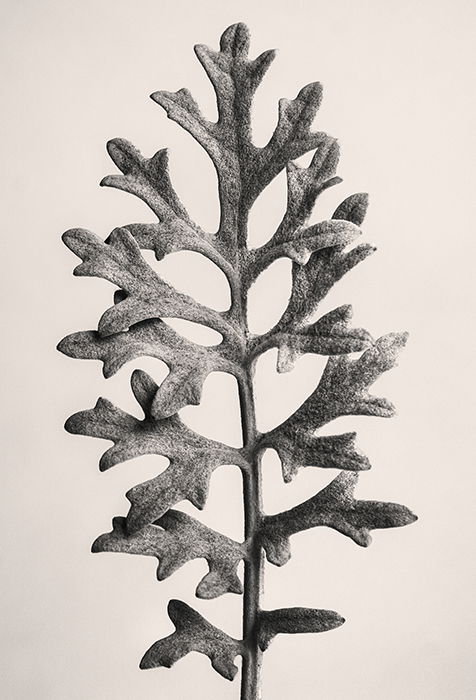
A black and white still life photo of a Blossfeldt-inspired Centaurea Cineraria
My Blossfeldt-inspired Centaurea Cineraria. f/8, 1/8sec, ISO100. © Heather Milne

2. Enhance Textures and Shapes With Lighting

Without colour getting in the way, you can play to the great strengths of black 

and white – texture and shape. Look to see where lines intersect and how light 

accentuates different textures.

Think about this throughout the black and white still life photography 

process. From selecting your subject matter and photographing it, to 

post-production and presentation.

I prefer to use low key lighting with either natural light from a window 

(on a cloudy day), 

or a soft sidelight. I often experiment with and without a reflector. Then I 

review the photographs in post-production. That way, I can see which version 

works best for texture and shape.

Move your subject around and see how it catches the light from different angles. 

Sometimes a subtle move of half a centimetre can make a big difference.

Black and white still life photography can often feel quite physical. You’re 

moving back and forth from the camera to the subject matter!

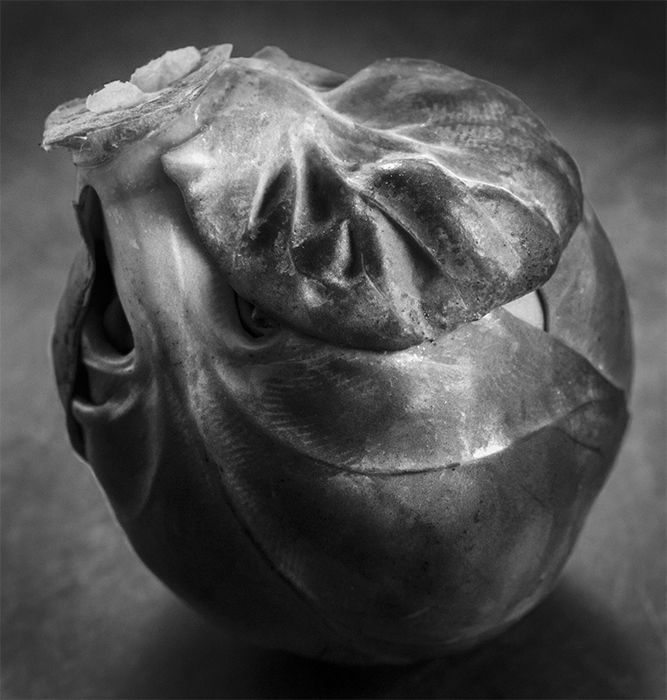
A black and white still life of a brussels sprout.
My take on a Brussels Sprout. f/7.1, 1/2 sec, ISO 100. © Heather Milne

3. Turn Simple Objects Into Art With B&W Photography

You’re making a photo without people or movement. But that doesn’t mean that 

you can’t tell a story. Consider shapes of leaves at different stages of their life 

cycle. And how grey tones can convey emotion into the photograph.

Black and white photos of flowers reveal the true beauty of their lines and shapes. 

Black and white flower photography is a great starting point for monochromatic 

still life photography.

The style and texture of a weathered shoe in black and white tell us about their 

owner. Even without a human in the photograph.

Antique objects look beautiful in black and white photographs. And you can 

enhance their story by using warm or sepia monochrome tones.

Look around your home or garden. See what subjects you can find that tell 

a personal story. Even the most mundane object can become a work of art. 

All it needs is the right texture and shape with careful lighting and 

post-production.

Have a go at some of these black and white still life photography ideas:

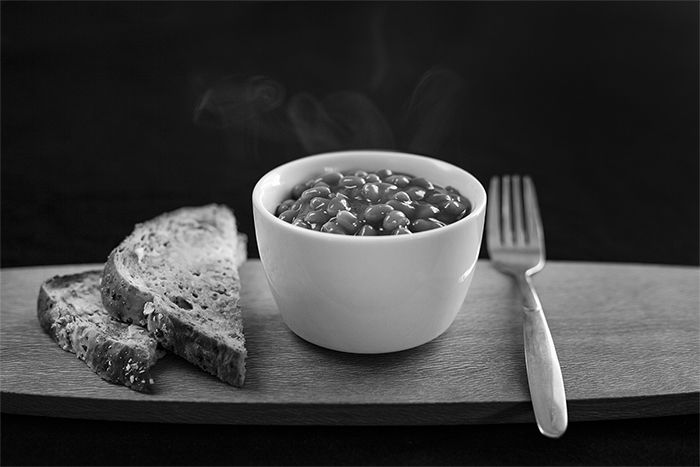
A black and white food photography shot of baked beans and bread on a wooden tray
© Heather Milne

4. Use Simple Compositions to Make B&W 

Still Life Photos Stand Out

Black and white photography is all about shapes, lines, and textures. It’s 

important to use a very clear and simple composition that doesn’t distract from 

these elements.

With still life photography, I tend to be a stickler for the rules of thirds and odds

And the golden triangle and ratio.

If you’re uncertain of your composition, remove something from the frame. Or 

take a step back to include more negative space.

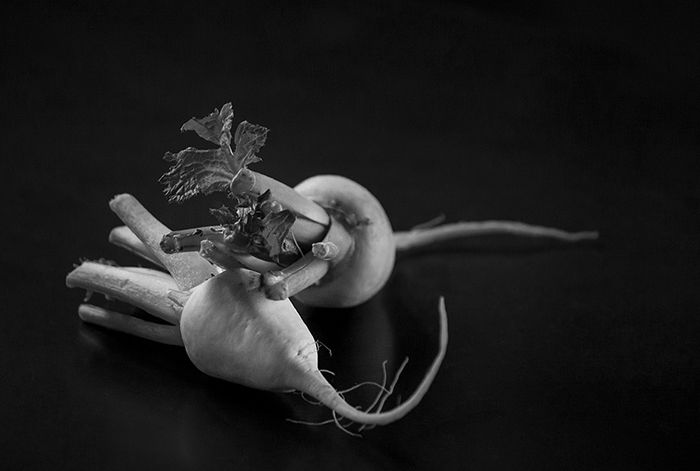
A black and white food still life shot of vegetables
© Heather Milne

5. Use the Colour Sliders to Enhance Black and 

White Still Life Photos

When it comes to black and white still life photography, clicking the shutter 

is only part of the process. Fine-tuning images in post-production is the 

important final step.

Clarity adjustment, dodging and burning, and spot removal are standard 

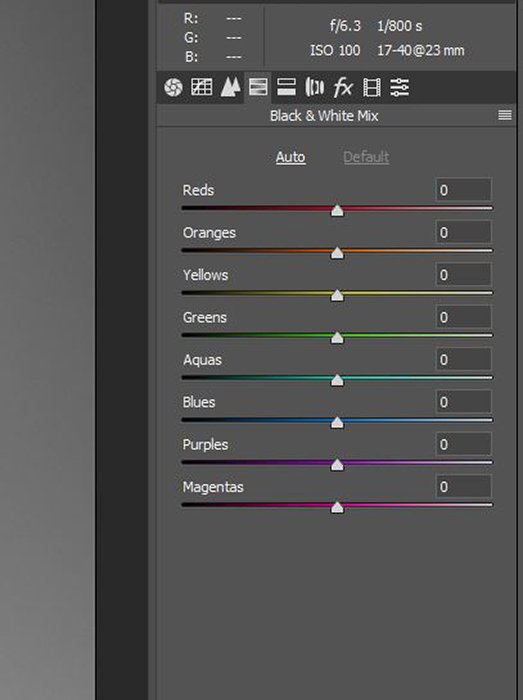
techniques to tidy up your photo in Lightroom or Camera Raw. But the 

tool I use most with my black and white still life photographs is the

 HSL (hue, saturation, luminance) colour slider.

Moving individual sliders up or down gives you great control of light and shadows. 

It can transform your photograph by defining textures and shapes and even 

changing the focal point.

Adjust Blacks, Whites, and all the Greys In-Between

Like most black and white photography, it’s important to include ‘true black’ 

and ‘true white’. Plus a full range of greys.

Adjusting the HSL sliders is an easy way to lighten or darken parts of a photo. 

And you’re doing this without over-using the dodge and burn tools.

Still life photographs can be quite complex. Get familiar with zooming in and 

out of your image (ctrl, +/- or cmd, +/-) to check the black, white, and grey tones. 

Make sure they work together in harmony.
A screenshot of adjusting the HSL sliders on Lightroom

Adjust Colour Sliders to Change the Mood

Moving the HSL colour sliders can change the mood of a photo. Do you want to 

tell a story about the strength, clarity, and bold qualities of a flower in black and 

white? Try adjusting the sliders to show contrast and definition.

For a more subtle approach that portrays a flower’s fragility, try softer greys and 

less contrast.

There’s no ‘right’ or ‘wrong’ with this method, and it can be quite a subjective 

approach. Try different versions and review them with fresh eyes the next day.

If in doubt, less is always more!

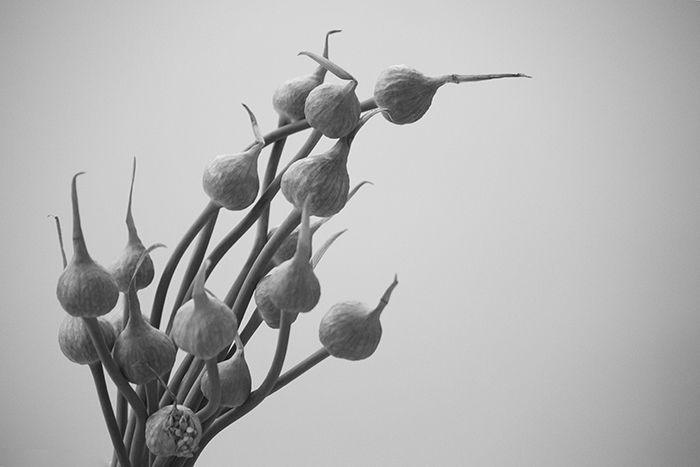
A black and white close up of garlic flowers
Garlic flowers converted to black and white, with no adjustment of 
HSL colour sliders. © Heather Milne
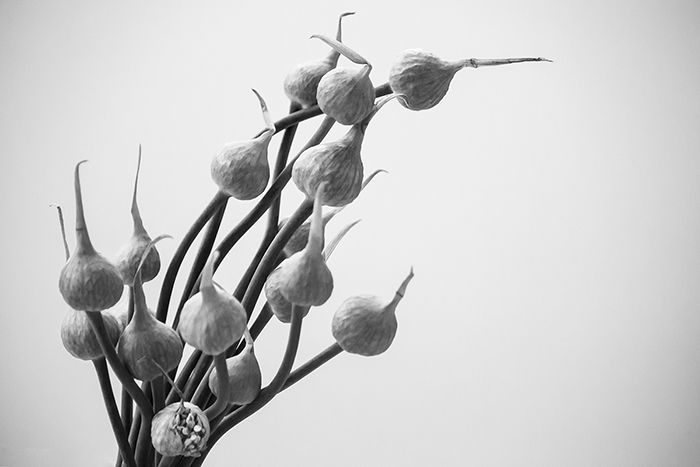
Garlic flowers with green, yellow, and orange HSL colour sliders adjusted.
Garlic flowers with green, yellow, and orange HSL colour sliders 
adjusted. © Heather Milne

Photographing still life in black and white provides great creative opportunities. 

I’m always surprised at the beauty of a still life scene when the colour is removed.

Keep it simple; start with objects you’re familiar with. Experiment with whatever 

light and equipment you have on-hand.

Push the boundaries with your black and white still life photography, and don’t be 

afraid to get a bit arty!


------------------------------------------------------------------------------------------------ 

Ebay Camera Deals!                               


I bought this film camera for approximately $35 in 2006.  The good news is
film cameras are still going for near that price today on Ebay.  Yes, you will 
need to wade through the listings to find the bargains - but they are there!
Click Here and enjoy the savings.
------------------------------------------------------------------------------------------------


Thursday, October 21, 2021


What Is Phase Detection Autofocus? (And Why It’s So Important)


What Is Autofocus?

Let’s start with the basics. There are two types of focus: auto and manual.

Manual focus is when the user has to control the focus by turning the focusing ring left or right to achieve focus. In new cameras, we often have a so-called focus peaking feature, helping this procedure.

Autofocus is when the camera does this all for you. It uses a computer to run a miniature motor that will turn the focus ring.

You even have the option to switch AF-MF back and forth on your lens or in-camera. If you press the shutter button halfway down, you activate AF. After this, you can use the manual focus ring to fine-tune your focus.

This focus ring moves an internal component of the lens in and out. This action repeats until the sharpest image of the subject is projected. But let’s break it down into a more detailed explanation.

A live music shot of a guitarist onstage

All digital cameras have a histogram. These tell you the exposure of what you are photographing. The histogram shows you a review of how evenly exposed your photo is, after you have taken it.

Contrast detection autofocus works by evaluating this histogram (which communicates with the sensor). The camera then moves the lens incrementally. It keeps reevaluating to see if there is more or less contrast to what you are shooting.

If the camera detects contrast increase, it moves the lens in that higher contrast direction until it hits its full potential. If the contrast decreases, the camera moves the lens in the other direction.

This process is repeated over and over again until there is high contrast. Contrast detection helps you to achieve a well-focused image with high contrast.

An action shot of a man playing baseball

With phase detection autofocus, think a bit of the moon and its various phases. For the camera, when a specific point finds itself being in perfect focus, there are light rays.

A photograph that is in focus will have light rays that will cast a light on the opposite sides of the lens. This is when the term ‘in phase’ comes about, like how phases of the moon work.

The camera can figure out when the focus is not achieved because the opposite side is no longer illuminated (known as not being in phase). This happens when the lens is not focused correctly on the point. It may be in front of or behind it.

How to Understand Phase Detection Autofocus

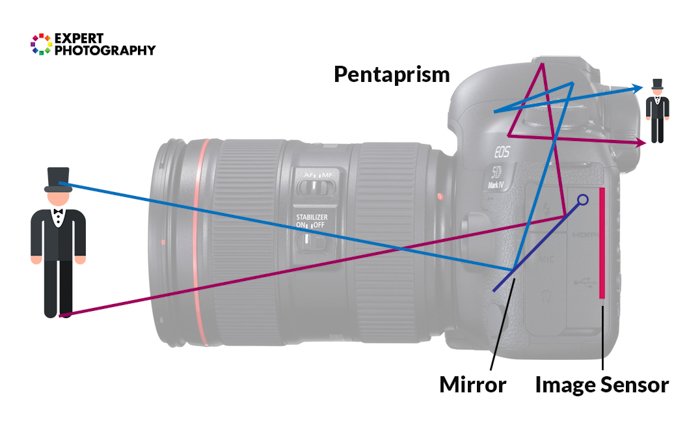
There are prisms located inside your camera. For phase detection, the image you see hits the prism and then separates into two images. If these images line up together, your subject is in focus. If they don’t line up together, then your subject is out of focus.

Part of the reason that DSLR cameras are so heavy is that they have an actual prism inside of them. This splits the image onto the focus sensor.

infographics showing how the prism works inside the camera

So, how do you get something in focus in this case? It sounds a lot like a guessing game, doesn’t it? Actually, cameras are smarter than that.

The sensor inside the camera is aware of which split image is which. As such, it can communicate to the camera and let it know in which direction it should move the focus to ensure that the images line up.

Let’s make it more advanced.

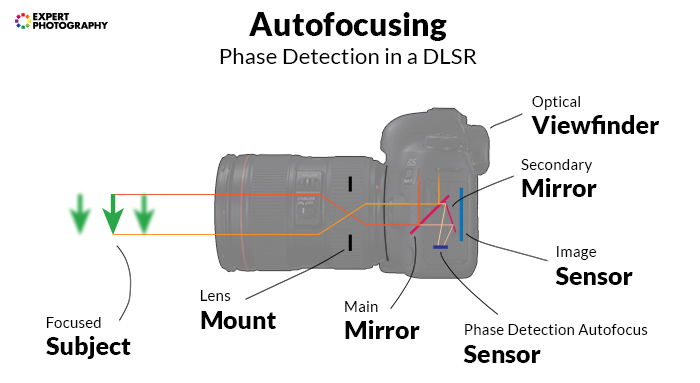
Remember us mentioning light rays above? Light rays pass through the lens, and this light gets detected by the AF sensor. The autofocus system can then determine if the subject is focused on the front or the back. The camera receives direct information on how it should turn the focus ring to lock on the subject.

infographic about autofocusing in a DSLR

Mirrorless cameras are smaller and lighter because they achieve the same result by doing this on the sensor.

Once the images are aligned, the system sends a confirmation message that the subject is in focus. And all of this complexity happens in a fraction of a second!

Phase detection AF system is great for capturing movement because it is incredibly fast.

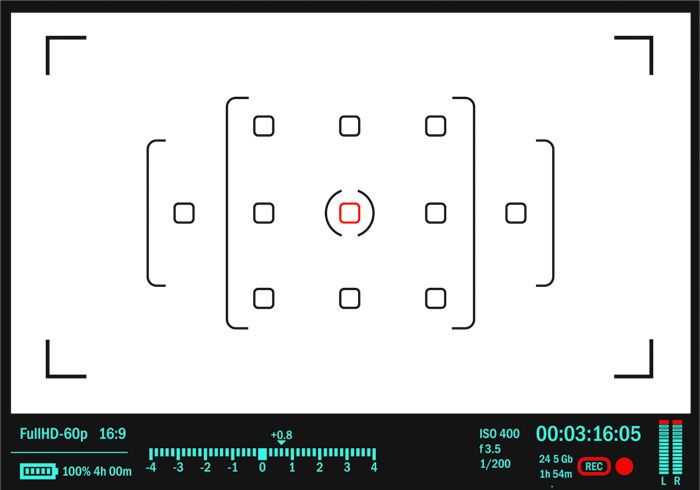
Now, if you’ve ever been in the buying game, you’ve likely heard about phase detection points. A digital camera has a certain number of these points. There are many AF sensor points where it can compare the split image. The more of these you have, the more accurate the focus is.

A graphic of autofocus points inside a camera's viewfinder

Sony’s A7 III mirrorless has the lead in this, with 693 points, which cover 93% of the image area. This means that it has a much higher chance of focusing correctly than a camera which has significantly fewer focus points.

What Is Phase Detection Autofocus Used For?

This type of autofocus is very well suited for action photography. It works best when used with image tracking and AI/AF Servo/Continuous Focus modes.

Some newer focusing techniques have been introduced in the last couple of years as well. For example, Sony’s Eye AF system is specifically made for animal photography. It is tracking the animal’s eyes to find focus. Face detection AF system does the same but for human faces and is pretty accurate.

Phase detection works for other types of photography too, such as portraits and still life. But action photographers will be the most grateful for the inclusion of this system.

There are several other advantages of phase detection autofocus. These include being fast and allowing the sensor to assess the image’s depth of field.

You can also get an accurate idea of how the depth of field will look before you even take a shot.

What Are The Downsides Of Phase Detection?

This is a complex process that needs precision. The phase detection software needs to be installed and aligned properly. Otherwise, it can cause the autofocus to be off. This causes a sensor alignment problem.

Once the camera detects this problem, it automatically calibrates the focus points. This is why it is super important to keep your camera’s firmware updated.

It may not be able to focus on low contrast subjects as accurately as other focus modes. It also finds it hard to focus in low light.

These problems apply to contrast-detection autofocus as well. But overall, that way of focusing is more accurate when it comes to difficult light situations. With contrast detection, there is no need for lens calibration.

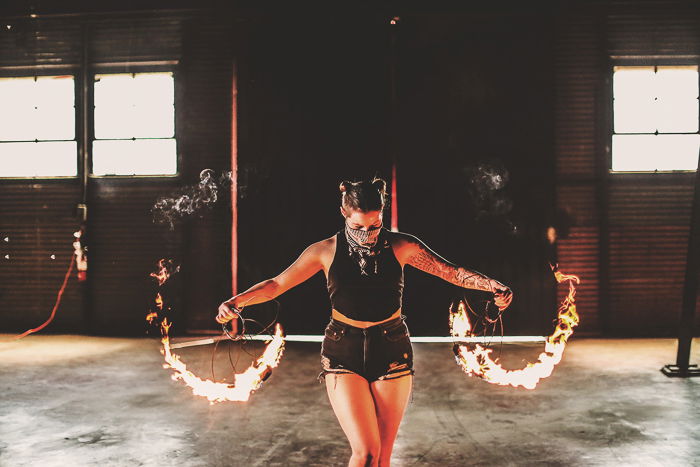
A portrait of a female fire dancer

Understanding how phase detection autofocus works definitely comes in handy. You can get rid of several focusing issues, and know when something isn’t working correctly in your camera.

Try it out, experiment and enjoy the benefits! 


------------------------------------------------------------------------------------------------ 

Ebay Camera Deals!

 Click Here and enjoy the savings.
 
------------------------------------------------------------------------------------------------ 

PHOTOGRAPHY INCOME

How to make money with your Photography even if you're not a Pro.

Copy & paste this link into your browser, click ENTER, and enjoy: 

https://mrdarrylt.blogspot.com/2020/01/how-to-make-500-month-from-your.html

                                                         or

                                                   Click Here  

Monday, October 18, 2021

11 Best Entry Level DSLR Cameras in 2021

Tags: Photography for Beginners, Newbie Photography

What Is an Entry Level DSLR?

A DSLR is a digital single reflex camera. This type of camera uses one lens to view the scene and capture it on the sensor. It does this by using a mirror that changes it from viewing to capturing.

DSLRs can range from $400 for the Canon Rebel T6 to $6,500 for the Canon EOS-1DX Mark III. The former is an entry-level camera, while the latter is a professional DSLR.

There is a world of difference between these systems, but they have the same basic functions. Both cameras have a digital sensor, the same exposure triangle settings and other basic functions, such as autofocus, burst shooting, and mirror lockup.

Where they differ is the extent of these functions.

There are smaller learning curves with entry-level DSLR cameras because their settings and features are limited. But as I said, the basics are the same across every digital camera.
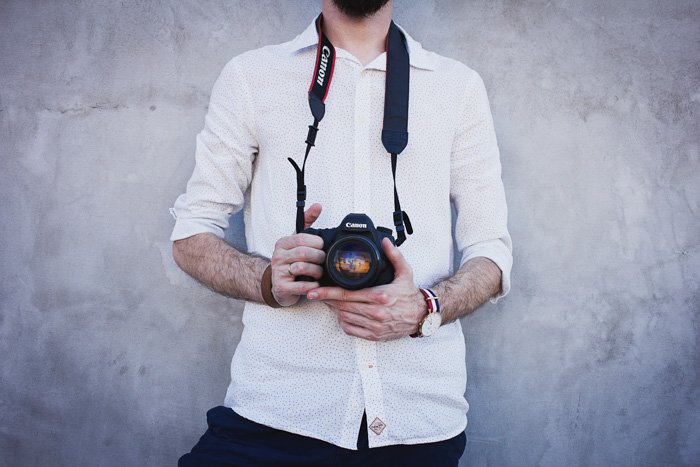
A closeup of a photographer holding a canon dslr camera

Warning – Don’t Buy the Bundle

When it comes to searching for an entry-level DSLR camera, we really want you to heed the following warning: Don’t go for the bundle package.

There’s a reason we link and show photos of the camera without any extra stuff, and particularly lenses. This is because the lenses that come with the camera are usually not great.

These lenses are what we call ‘kit-lenses’ and are of lower quality than other lenses, traditionally. Modern kit lenses are much better, but still often don’t give you the best experience. Of course, there are great kit lenses, but they usually come with more expensive camera bodies.

As for options one step above the ‘kit’ level, a few options come to mind. On the Canon side, the EF-S 15-85mm f/3.5-5.6 IS USM is a cost-effective option offering a great image. Nikon offers the excellent 16-80mm f/2.8-4 DX lens, although that’s quite a bit more expensive. There are fantastic third-party options, too, such as the Sigma 18-35mm f/1.8 (Canon version).

With a bundle, you get a lot of junk that you won’t need. Because of this, these bundles are actually overpriced. The items are of low quality, and perhaps items you don’t need or never use. If you need memory cards and bags, source them individually. You’ll save money and get what you actually want.

You might find discounted kits which are actually cheaper than the camera body alone; if this is the case, go for it, of course.

Now, let’s see our favourite entry-level DSLR options from the four manufacturers that still produce them.

Canon

1. Canon EOS Rebel T7i

  • 24.2 Megapixels
  • 1.18 lbs
  • APS-C sensor (Cropped Sensor)
  • Built-in WiFi & Bluetooth
  • High-Speed continuous shooting at up to 6 fps
  • 45 AF points
  • Vari-angle touch LCD
  • 25,600 ISO range

The Canon EOS Rebel T7i, otherwise known as the EOS 800D has all the bells and whistles you’d expect from a Canon DSLR. It comes with a 24-Megapixel sensor, dual-pixel AF and even a tilt-flip touchscreen.

The viewfinder shares the same 45-point autofocus system from the 77D, making it a pretty good contender for sports photography. This also matches with the possible 6 fps.

This camera shares most of the same specifications as the T6i. The resolution is the same, the weight is similar and they both have WiFi built-in, alongside a vari-angle LCD screen.

The advantages with the T7i is the advanced technology, the longer usage time and the slightly faster burst rate. These come at a higher cost of around $150.

This is one of the best DSLRs at entry-level available, and possibly the best that Canon digital cameras have to offer in this list.
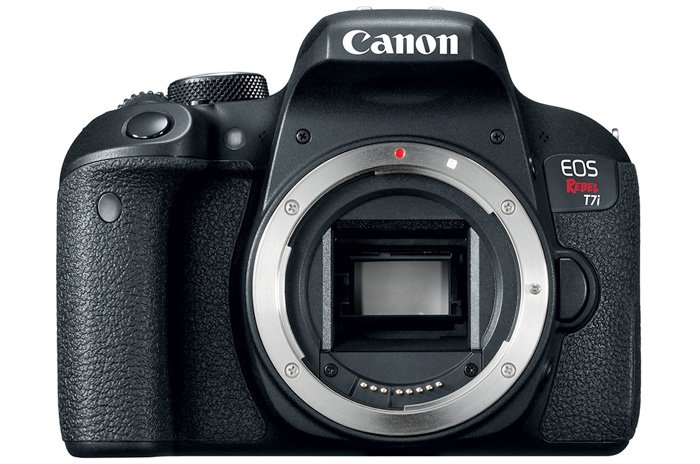
Canon Rebel T7i

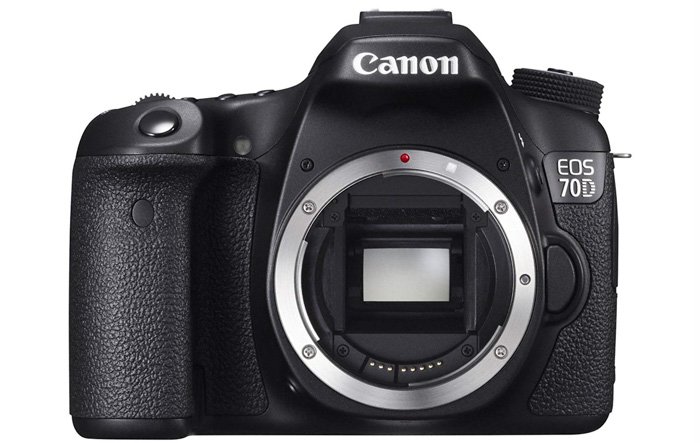
2. Canon EOS 70D

  • 20.2 Megapixels
  • 1.7 lbs
  • APS-C sensor (Cropped Sensor)
  • Built-in WiFi
  • High-Speed continuous shooting at up to 7 fps
  • 19-point Autofocus
  • Vari-angle touch LCD
  • 25,600 ISO range

The Canon EOS 70D is the most expensive option among their entry-level DSLR range. It’s actually an older midrange model, which slowly descended into more affordable territories. It’s almost 7 years old now, but we still consider it to be a great digital camera.

It has a resolution of 20.2 megapixels. Its autofocus system is one of the first implementations of the Dual Pixel technology. This means each pixel is split into two separate readable photodiodes, which face left and right.

This means that, in principle, it is capable of phase detection autofocus. This feature works across 80% of the frame, down to 0 Exposure Values and up to f/11. All these attributes make this a very capable autofocus system.

Other attributes are the 7 frames per second and the Digic 5+ processor that was first seen in the beast we know as 5D Mark III.

Video mode is accessible with the flick of a lever. The camera provides continuous autofocus tracking during live view and video recording.

The 70D bridges the gap between entry-level and professional cameras. There are many similarities between the 70D and Canon’s 6D and 7D lines.

It has the separate top LCD for showing exposure parameters even when the main LCD screen is turned off. It has two control dials, making manual operation a lot easier.

Its function buttons are laid out next to the top LCD, which makes it quicker to operate blindly. You can concentrate on getting the image and what happens in the viewfinder.

So, if you’re planning to upgrade but don’t yet have the budget, it might be the perfect option.Canon 70d dslr
3. Canon EOS Rebel SL3

  • 24.2 Megapixels
  • 1 lb
  • APS-C sensor (Cropped Sensor)
  • Built-in WiFi & Bluetooth
  • High-Speed continuous shooting at up to 5 fps
  • 9 AF points
  • Vari-angle touch LCD
  • 4K video

The Canon EOS Rebel SL3 boasts a great deal. It has Dual Pixel autofocus, WiFi with NFC and Bluetooth. It even comes with a new interface, making it more accessible to beginners.

Its small size might be misleading, but as the Nikon D3500’s main competitor, it is just a tad smaller and lighter. The less weight is a welcome feature, perfect for long hikes and country hopping.

Compared to the SL1, it’s almost the same. Except here you get better focusing in live view. In terms of the Canon Rebel T7i, you do get more, but for a higher price.

If you don’t need the extra autofocus points, stick with this model. It will capture scenes excellently without breaking the bank.

In live view mode, you can use the excellent eye detection Canon has added to Dual Pixel systems. 4K video recording lets you capture memories in higher resolution than ever before in an SL camera.
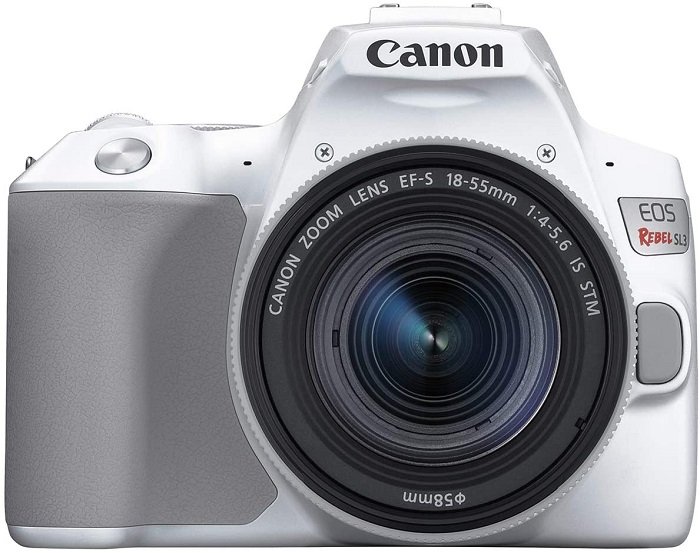
Canon Rebel, one of the best entry level dslr cameras

4. Canon EOS Rebel T6i

  • 24.2 Megapixels
  • 1.22 lbs
  • APS-C sensor (Cropped Sensor)
  • Built-in WiFi
  • High-Speed continuous shooting at up to 5 fps
  • 19 AF points
  • Vari-angle touch LCD
  • 25,600 ISO range

The Canon EOS Rebel T6i was the newer version of the Rebel T5i, adding more megapixels, a slightly faster burst capacity, and 10 more phase-detection points to its autofocus system.

Also coming with this system is the addition of WiFi and Near Field Communication (NFC).

Here, you’ll find the Hybrid CMOS AF III. Canon claims that the performance of the Hybrid CMOS III is close to that of the original Dual Pixel AF found in the 70D and 7D II.

It’s a great camera to use. The image quality is excellent, and it performs well in low light situations, making it one of the best entry-level DSLRs out there.
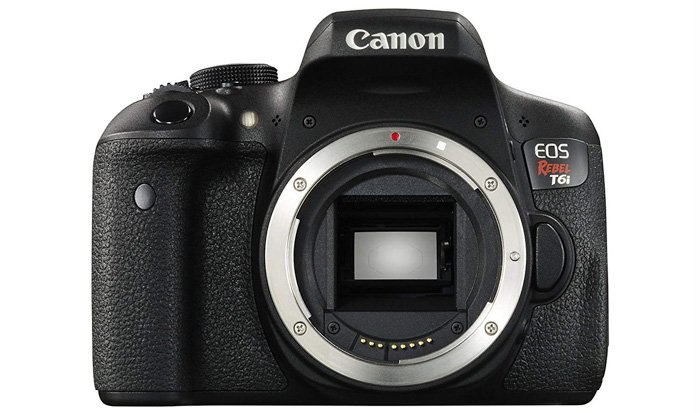
Canon Rebel T6i


Nikon

1. Nikon D5600

  • 24.2 Megapixels
  • 1.04 lbs
  • APS-C (Cropped Sensor)
  • Built-in WiFi & Bluetooth
  • High-Speed continuous shooting at up to 5 fps
  • 39-point Autofocus
  • Vari-angle touch LCD
  • 25,600 ISO range

The first thing you will notice about this miniature beast is its lightweight body. It is also very connected, having WiFi and Bluetooth built into the camera.

As we look across these entry-level cameras, we see they are very similar. The most important thing that really separates the Nikon D5600 from the Nikon D5300 is the addition of Snapbridge.

Otherwise, this is an incremental, but useful update.

Snapbridge, if this is a new term for you, is Nikon’s answer to syncing the images you capture with your DSLR to other devices, such as a smartphone or tablet.

The image quality is excellent, and in terms of the high ISO range, it is one of the best in our list. It keeps the quality high even in the lowest light situations.

Its dynamic range is outstandingly wide, market-leading in the entry-level segment.

For the Nikon range, this is one of the best cameras for excellent image quality.
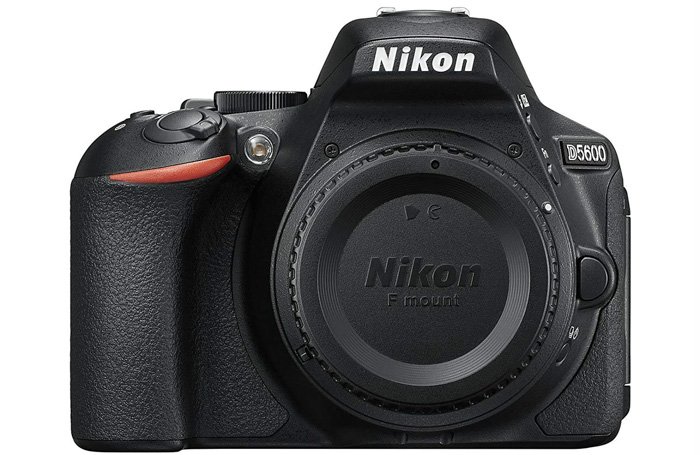
Nikon D5600 camera

2. Nikon D3500

  • 24.2 Megapixels
  • 0.86 lbs (without battery)
  • APS-C sensor (Cropped Sensor)
  • Built-in WiFi & Bluetooth
  • High-Speed continuous shooting at up to 5 fps
  • 11-point Autofocus
  • Vari-angle LCD
  • 25,600 ISO range

The Nikon D3500 is the update on the Nikon D3400. It is specifically made for those first-time photographs with no experience of ILC (Interchangeable Lens Cameras).

The difference here is the Snapbridge connectivity across devices using built-in Bluetooth. The battery life increased, but they scrapped the Ultrasonic sensor cleaning.

In terms of competition, this is a very similar Nikon version of the Canon T6i. The one thing that does set them apart is the battery life. The Nikon can capture 3 times more images on a single charge on paper, although the difference is smaller in real life.

This camera is great for travel or any field of photography where you’ll need to hold your camera for extended periods of time. It doesn’t even weigh 1lb, so your arms and back will thank you for it.
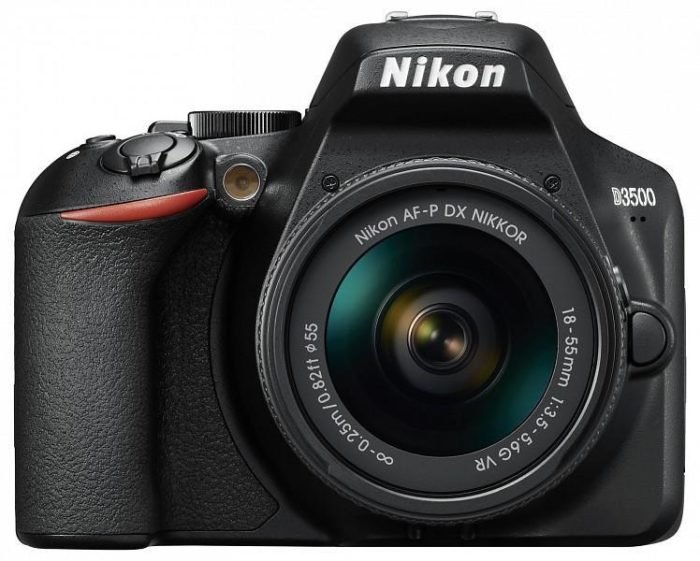
3. Nikon D5500

  • 24.2 Megapixels
  • 1.4 lbs (with lens)
  • APS-C (Cropped Sensor)
  • Built-in WiFi
  • High-Speed continuous shooting at up to 6 fps
  • 39-point Autofocus
  • Vari-angle touch LCD
  • 25,600 ISO range

The D5500 falls between the D5300 and the D5600 in terms of age and features, but also price. It also has the competitive WiFi feature built-in, and a usual 39 point autofocus and 25,600 ISO range.

These settings are usually in this area of entry-level cameras. It does have a solid noise reduction capability and is smaller and lighter than the Nikon D5300, also on this list.

How did they manage to make it lighter? Instead of polycarbonate, this camera uses a carbon fiber composite. It’s a great camera to use. One of the reasons for this is the curved grip, making it easier to hold.

Although it utilizes a pentamirror rather than the brighter and clearer pentaprism, you won’t notice any problems with this easy-going system.
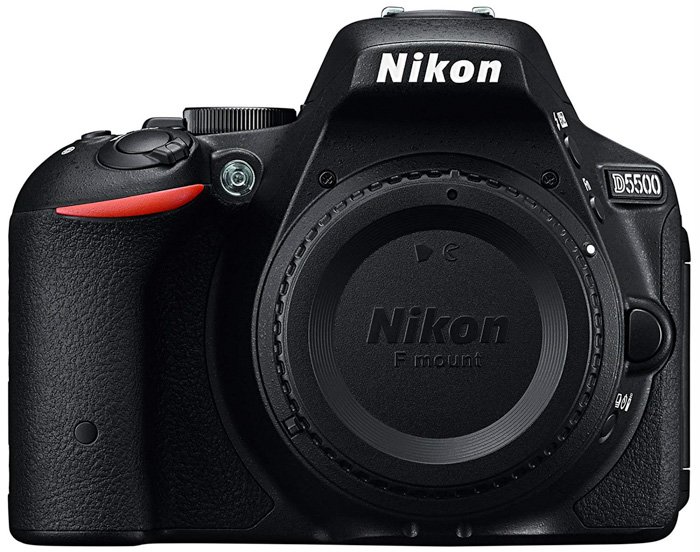
Nikon D5500 dslr camera

4. Nikon D5300

  • 24.1 Megapixels
  • 1.05 lbs
  • APS-C sensor (Cropped Sensor)
  • Built-in WiFi
  • High-Speed continuous shooting at up to 5 fps
  • 39-point Autofocus
  • Vari-angle LCD
  • 25,600 ISO range

The benefit of having an entry-level camera is its ease of use. There is no need to have all the bells and whistles if you aren’t going to use them. They’ll just hinder your learning curve as a hobbyist photographer.

With the Nikon D5300, you get a very competitive range of features and settings. These are the 39 autofocus points, the 25,600 ISO range, and the 24-megapixel resolution.

The difference with this system is the added GPS. This makes it easy to reference your images, especially with Lightroom’s map module.

While this is not the newest generation of the Nikon 5X00 series, it’s still a viable choice if you’re on a slightly lower budget.
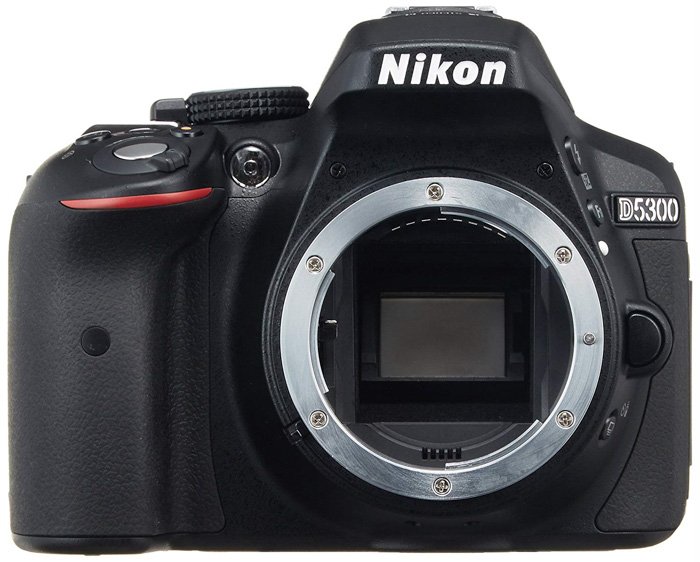
Nikon D5300 camera


Pentax

1. Pentax K-70

  • 24.2 Megapixels
  • 1.5 lbs
  • APS-C (Cropped Sensor)
  • Built-in WiFi
  • High-Speed continuous shooting at up to 6 fps
  • 11-point Autofocus
  • Vari-angle LCD
  • 102.400 ISO range

There is a lot to like about this camera. Its incredibly high ISO range, faster frames-per-second than other entry-level DSLR cameras and image stabilization are among them.

There is a function where the camera automatically detects a slanted horizon and corrects it. On top of this, there is a pixel shift function. Here, the camera takes four images to produce one huge photograph. This will give you a high-resolution image without having to invest thousands of dollars into top-notch specialised gear. You need a tripod to fully use this feature, though.

Image stabilization allows you to shoot sharp images in darker conditions than usual, by reducing the movement caused by your own hands.

The body is splash-proof and can be used in inclement weather conditions.

The K-70 has two unique buttons to Pentax cameras. On the top is a green button that switches functions back to their default settings.

On the left-hand side, the camera offers a button that allows the user to toggle between JPEG and Raw mode. The camera offers two Raw formats: Pentax’s own “PEF” format and Adobe’s “DNG” format.
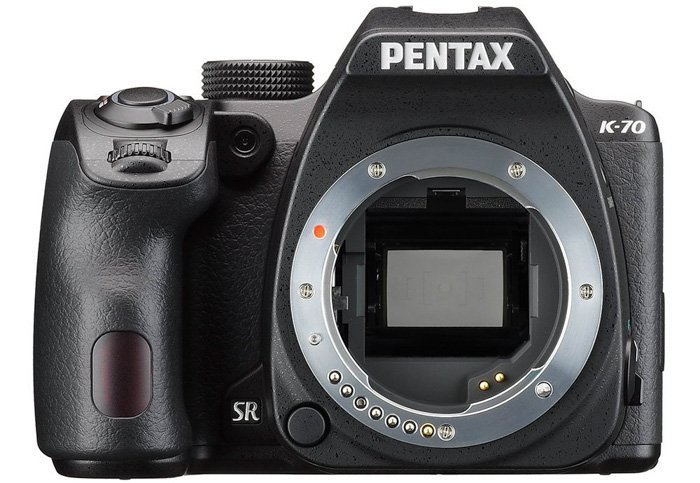
Pentax K-70 entry level dslr camera

2. Pentax KS-2

  • 20 Megapixels
  • 1.49 lbs (with lens)
  • APS-C (Cropped Sensor)
  • Built-in WiFi
  • High-Speed continuous shooting at up to 5.4 fps
  • 45-point Autofocus
  • Vari-angle LCD
  • 51,200 ISO range

You might only be aware of Canon and Nikon DSLRs. Yet, Pentax makes a few really great entry-level DSLRs that might surprise you.

The Pentax KS-2 is an all-weather camera. This means you can embrace the elements with landscape and adventure photography, without worrying about your device.

Image stabilisation counteracts hand movement and ensures sharper images when shooting handheld.

It is compact, yet is slightly heavier than the other entry-level DSLRs. Some people prefer that, as the weight makes it easier to grip, hold and shoot with.

It offers excellent quality and decent performance for its class. The biggest area you will find that sets itself apart is its extended ISO range of a maximum 51,200. This is perfect for low light situations.

If you’re a fan of vintage manual lenses, a Pentax camera is a great option you. Pentax has kept the same lens mount for many decades now, allowing intercompatibility with old lenses.
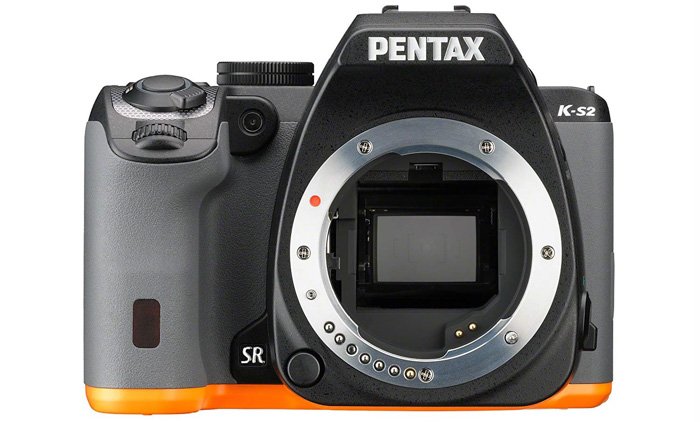
Pentax K-S2 camera


Sony

Sony Alpha a68

  • 24 Megapixels
  • 1.34 lbs
  • APS-C (Cropped Sensor)
  • No Built-in WiFi
  • High-Speed continuous shooting at up to 8 fps
  • 79-point Autofocus
  • Vari-angle LCD
  • 25,600 ISO range

The a68 is technically not a DSLR, but in many aspects, such as size and weight, it’s similar to one. However, it has an electronic viewfinder instead of an optical one.

What you’ll find with this system is a 24 megapixel cropped sensor. It gives you a 79-point autofocus selection, and a frame rate of 8 shots a second.

These two settings make this camera great for fast-moving subjects that vary in distances from the camera.

This camera has lots of dials and buttons, making it easy to flip between the settings you need. Everything is viewed from the display panel, which can illuminate when dark.

Most of these buttons are customizable, allowing you to make the most of your device.

You won’t find WiFi or a touch screen – but these are bonus points and not necessary for amazing photography.

At this price, you’d be hard pushed to find another camera system that has this many advantages. If you don’t mind the electronic viewfinder on this mirrorless camera, this camera is for you.
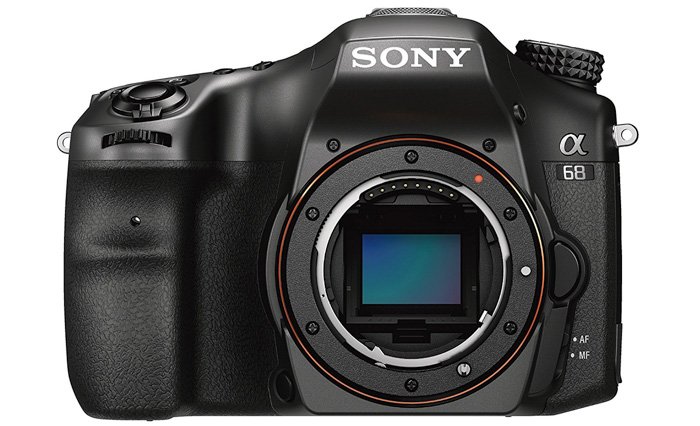
Sony A68 entry level dslr camera


Like anything else in photography, your camera needs to reflect your field and involvement.

There are many DSLRs on the market across 4 or 5 different manufacturers. they come in a range of prices, suited to attracting hobbyists and professionals alike.

------------------------------------------------------------------------------------------------------------------

Copy and Paste the link below into your browser, and click ENTER to get YOUR shirt.

https://teespring.com/photo-shutterbug?pid=328&cid=6276Photo Shutterbug Black T-Shirt Front


Thursday, October 14, 2021

Senior Citizens Nunchucka


Todays' post is about making short videos.  I made this one 6 years ago (I was about 30

pounds heavier then than I am now).  Most of us know we can use our smart phones to

take pictures, but they can also be used to create videos.  Above is an example of a 

video made by a grandfather (me) who wants to impart some of his skill to younger

people about a particular skill set.  I was 61 years old when I made this video.  If you

enjoy watching this one, Please click on the link below to learn how to make one of 

your own. 

https://amzn.to/3b76mGJ