Monday, July 26, 2021

The Ultimate Guide to Street Photography

Tags: Photography for Beginners

Street photography is a diversified and very exciting photography genre. It’s hard to master it because you need to be talented in many photography fields.

We have created with this guide that includes everything you ever need to know to become successful in street photography.

An orange and cyan toned street photography shot with a tram and crowds


What is Street Photography?

It’s a difficult question to answer because this photographic field is all-encompassing. It can involve architecture, landscape, portraiture, black and white, long-exposure and even macro.

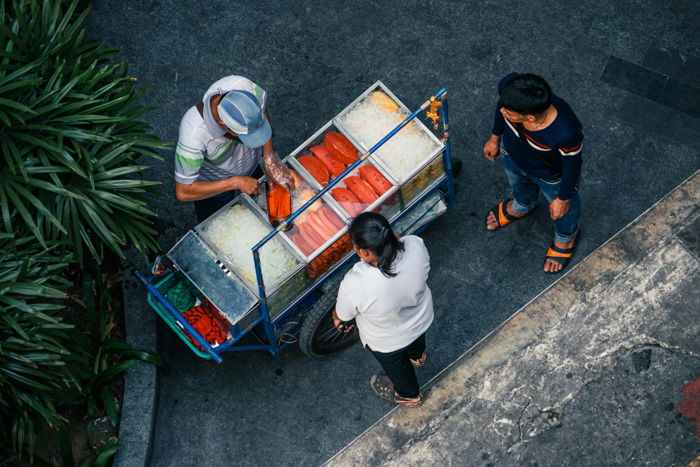
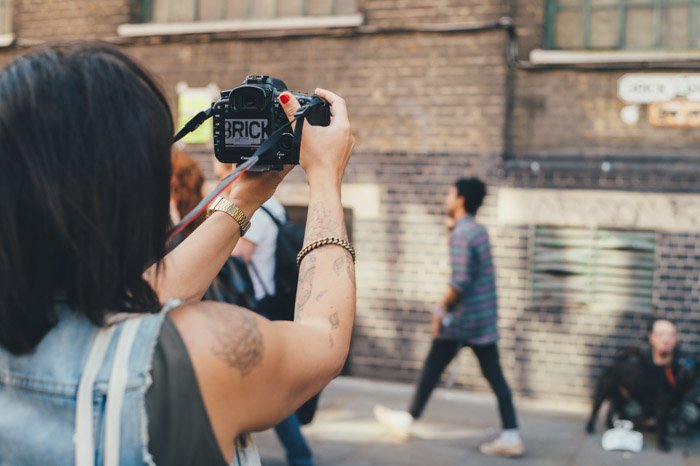
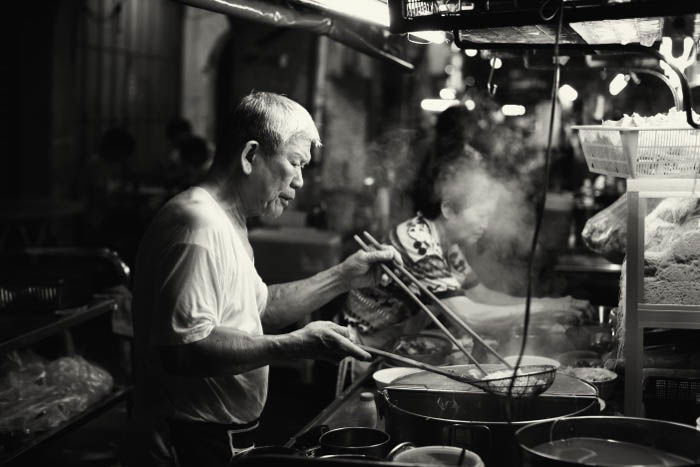
To many photographers, street photography is everything. Fashion, documentary, and at the most basic, real. Street photography aims to capture people in public places, warts and all.

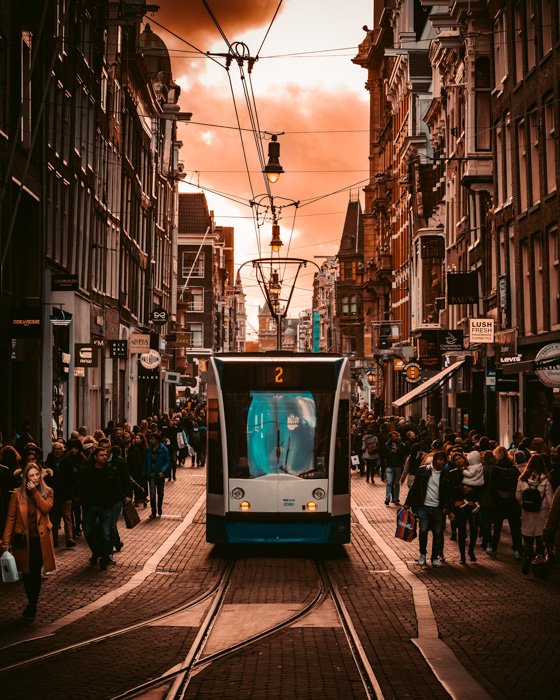
Urban photography connects to street photography. But not any photograph taken on, off or from the street counts as urban photography.

Landscapes are not street photographs and neither are studio portraits, for example.

Urban photography takes into account specific compositional guidelines. The speed of capturing images and also different camera equipment separate photographic fields.

Street or urban photography covers a very wide range of styles and subjects. It does so while embodying its own techniques.

No other area of photography is so diversified. The public space is an ever-changing environment, and it needs a wide range of themes to capture it.

Only in street photographs would you want shot-from-the-hip. Or even blurry, out of focus, images. They still work in telling a visual story.

It’s also one photography area where you need to be aware of many things. Read as much as you possibly can about the law.

Understanding what you can and can’t photograph is essential. Especially as there are strict ethical codes and unwritten laws to follow.

A street photography shot of a food vendor serves food from his cart

Camera Equipment

How to Choose the Best Camera for Street Photography

Like urban photography itself, the camera choices for it are very diverse. The possibilities come down to what you are going to photograph, your budget and your own style.

Focusing on people, capturing them fast and candidly requires one type of camera. Photographing empty spaces, another.

This article goes through eight of the best cameras to use for street photography. It looks at rangefinders, digital cameras and mirrorless options.

A female photographer taking a street image

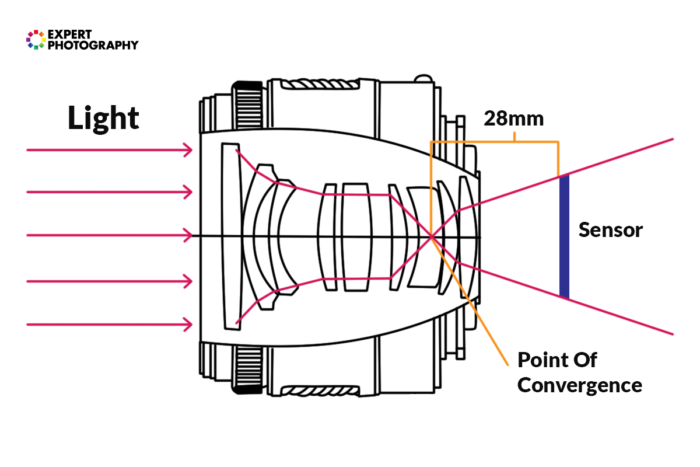
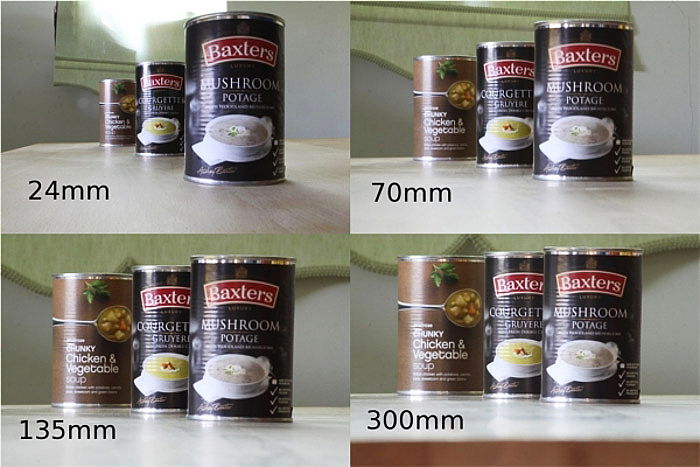
The Best Lens for Street Photography

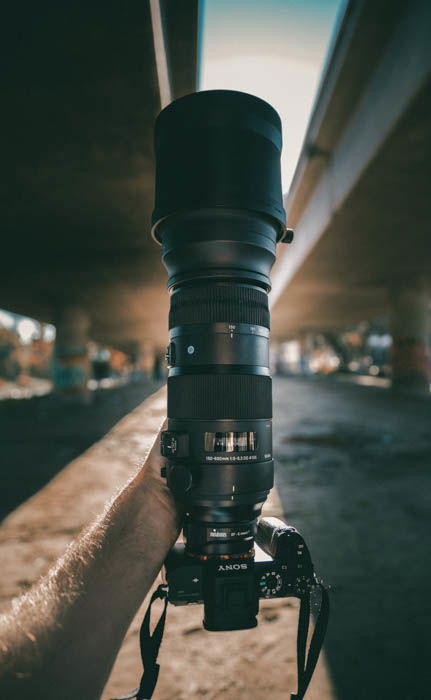
Lenses, like camera options, come down to what you want to photograph.

Are you aiming to get into people’s faces like Bruce Gilden, who uses a 28 mm lens? Or are you going for something that keeps you a little more hidden, like a telephoto lens?

Either way, lenses are the tool that defines your relationship with the subject. They also offer you emphasized the depth of fields.

This article helps you understand what lenses are available. Knowing the benefits of each is very useful.

A DSLR with a large lens for street photography

35 mm or 50 mm Prime Lens or Both?

If you are trying to decide between the 35mm lens and the ‘nifty fifty’ 50 mm lens, why not have both?

These are both prime lenses. This means zooming isn’t possible, as they have a fixed focal length. Yet attaining a greater depth of field is possible.

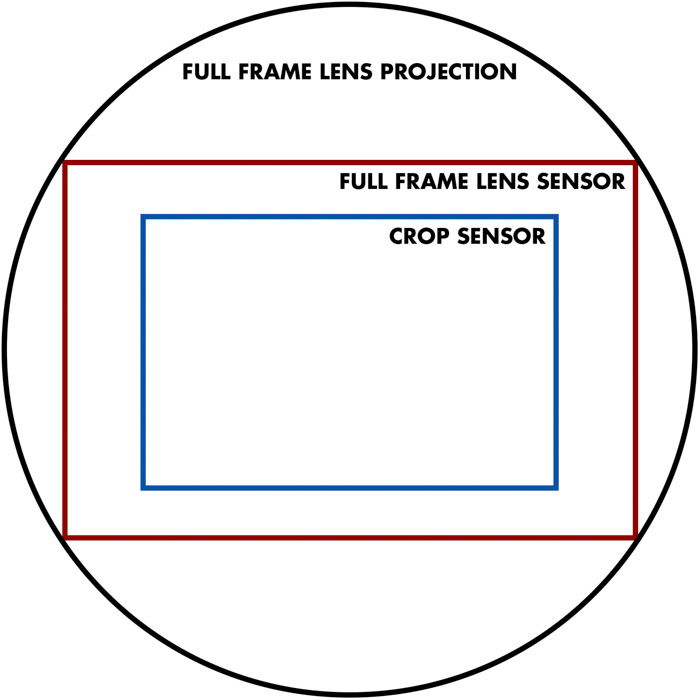
They both offer different results. The 35mm will capture more of the scene. Whereas the 50 mm has no distortion, unlike the former lens option.

This article goes through the positive and negative points surrounding both lenses. It will help you choose the right one (or both).

A black and white portrait of a woman using a 50mm lens

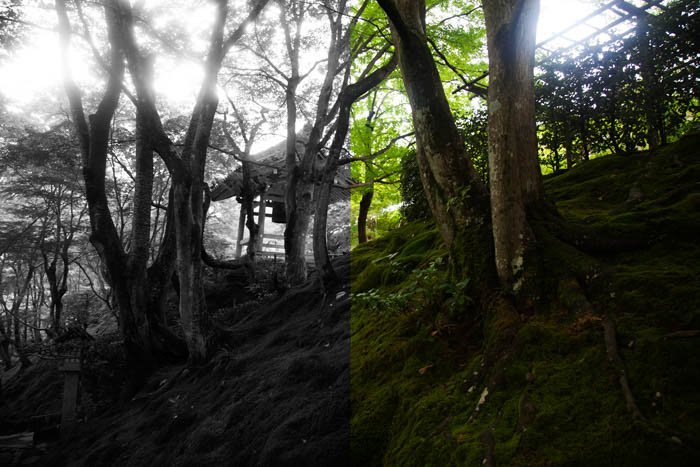
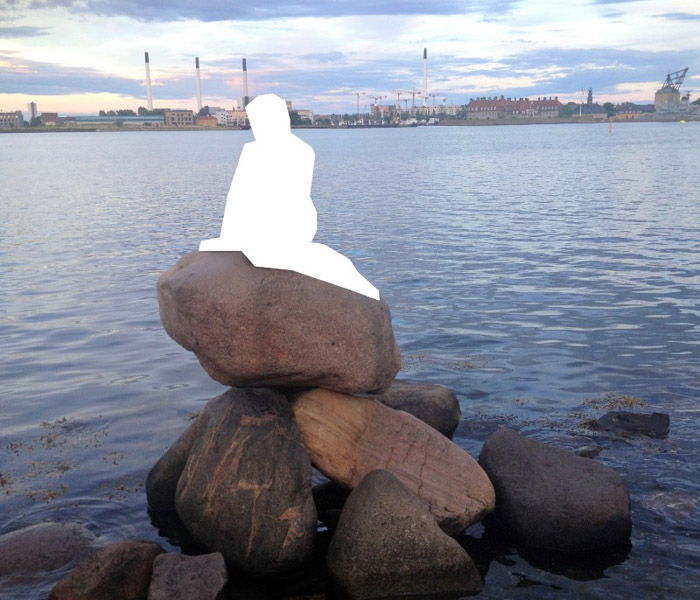
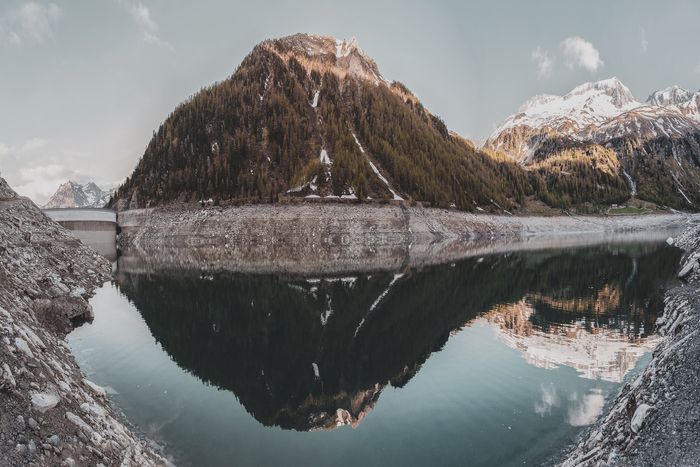
How to Shoot Street Photography in Any Light: From Rainy Days to Bright Sunshine

One of the great things about being a street photographer is that it’s not time-dependent. If you miss that perfect, morning light, you can still shoot.

Whether harsh or muted, reflected or fired from a flash, there is no bad light in street photography.

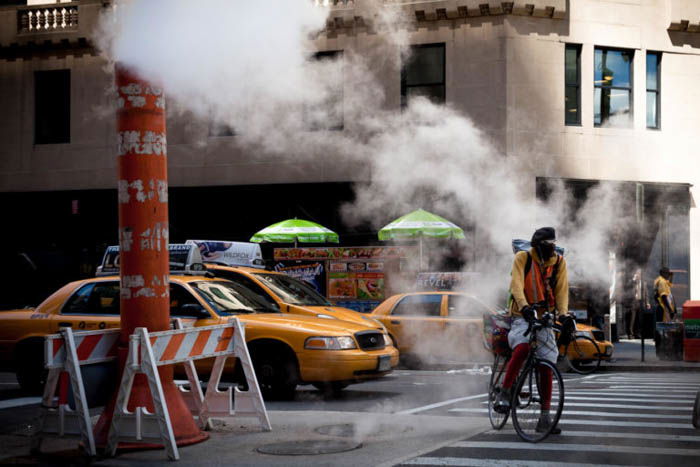
Shards of light, falling through buildings in a metropolitan city like New York. Light bouncing off windows and creating a dappled look on the pavement in Paris. These are only a few of my favourite possibilities.

Have a look through this guide for inspiration. Take advantage of all of those different light sources.

Black and white street portrait of a man playing a flute outdoors on a bright sunny day

9 Essential Smartphone Street Photography Tips

The number one rule of street photography is: always have a camera on you. The usual DSLR, point-and-shoot or mirrorless systems are possible. So is your smartphone.

Nowadays, smartphones have the capacity to photograph using a large pixel size. This means good quality and instantly sharable too!

There are also tons of downloadable apps that can help you adjust the settings. Some even replicate old film styles.

Mobile shooting is its own niche within the expansive world of photography. This article gives you the low-down on how to use your device to capture great images.

Photographing lights with a smartphone

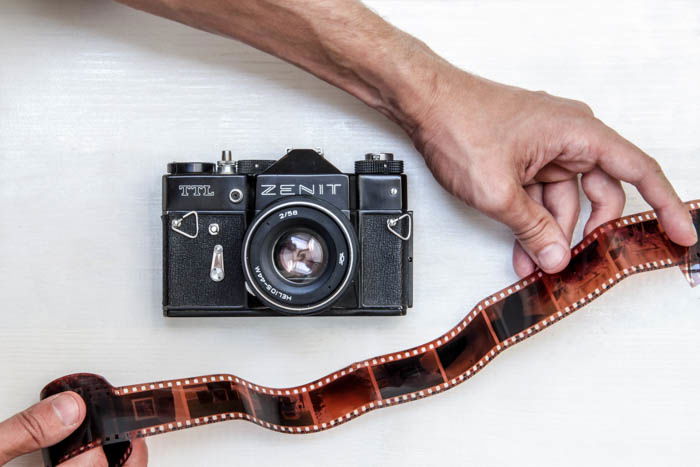
Using Film for Street Photography

There are benefits to photographing digitally (immediate images) over using film (subject selectivity).

Digital photography allows you to make sure you have the photographs. This is before you move on to your next location. There could be 10 shots or 1000.

Film, compared to digital, is slow, costly, time-consuming and problematic. But it still has a huge following in the photography world.

Read here to get the best out of your photographic film.

A 35mm film camera and film

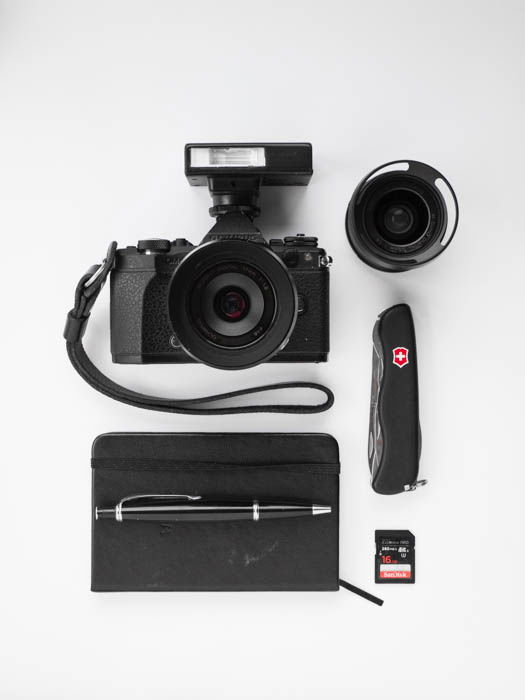
Important Accessories for Street Photography

The camera and lens are important to get the most out of your images. There are other few things you will enjoy having, out in the street.

A good, ergonomic bag (your back says thanks) is a must. An umbrella is necessary for those moments of harsh weather.

A lightweight, mini-tripod could also be an advantage for long exposures.

Read here for a few other suggestions to help you get the most out of your time on the street.

Flat lay of accessories to take with you on your street photography journey

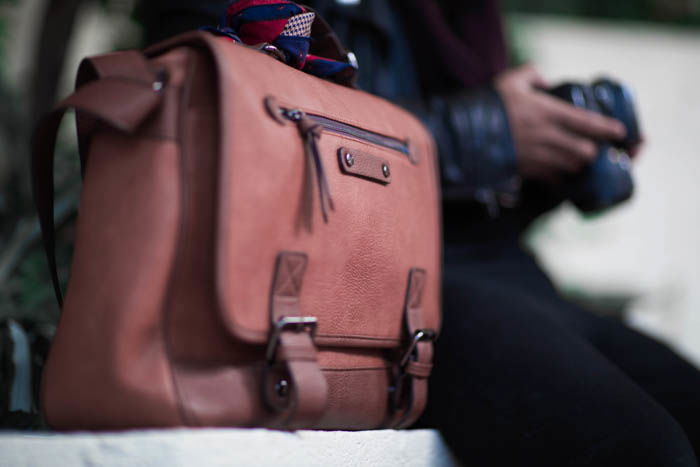
Best Bag for Street Photography

Because you are taking your camera everywhere with you (rule no.1), you will need to put it somewhere. Especially when you aren’t using it.

A bag is also very important to keep your camera safe. Both from the weather and theft.

It is the storage unit for all your camera gear and accessories. Best to have them all neatly compartmentalized in one area.

Pockets or separators within bags are very helpful. They keep your equipment from getting damaged and knocked about.

Some will even have space for laptops and reading material. On top of these, all those little things you have no idea what to do with (tripod heads, cables, etc.) also need space.

What this article recommends is to use a bag that is spacious yet compact.

Read more to find out why and other tips for choosing the best camera bag for street photography.

A camera bag for all of your street photography needs

Camera Settings for Street Photography

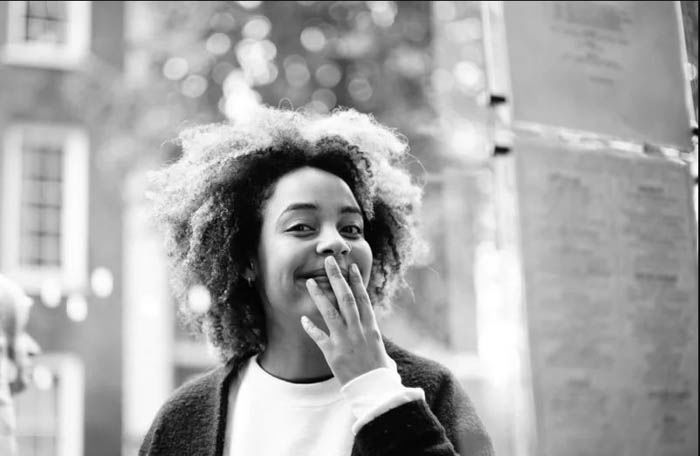
Colour or Black and White: Which Is Better for Street Photography?

One question you might need to ask yourself is “Am I going to photograph in color or monochrome?”

Black and white images have very definitive qualities. You’ll find ones that you won’t find with color photography. And vice-versa.

They might focus more on contrast. Or the varying degrees of detail in the mid-tone greys. These fall between the blackest and whitest areas of your scene.

Some photographers shoot in black and white and revert back to color during post-processing. Others do the exact opposite.

If you are using digital (and Raw) this decision can be changed at a later stage. But film photography doesn’t offer the same freedom. Unless you digitalize the negatives.

Have a run through this article to see where color might be a better choice over black and white.

An splitscreen forest image showing both black and white and colour

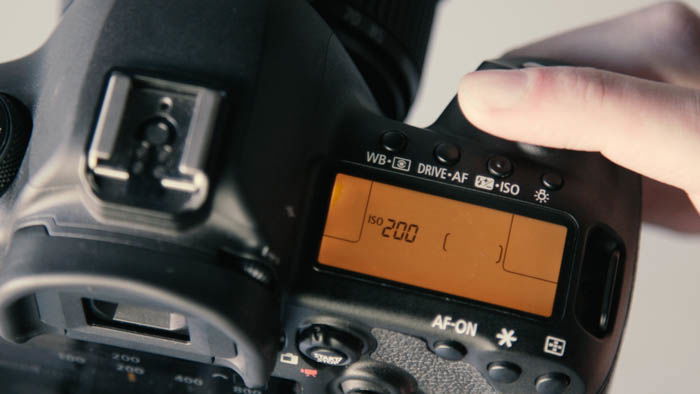
What Are the Best Camera Settings for Street Photography

There are settings you can apply to your camera and lens before you start shooting. They will allow you to work faster and more efficiently.

One great tip that this article recommends is to use pre-focusing. It is better and faster than the auto-focusing.

The basic idea is similar to playing space invaders. Shoot where they are going, not where they are.

This means that you are anticipating the subject, not trying to catch them up.  Read here for more camera settings for street photography.

Changing the camera settings

How to Shoot Powerful Street Photographs

What Is Street Photography?

This great article runs through the (lack of) definition of what street photography is. To which there is no one answer.

Street photography encompasses many other photographic themes. These could be portraiture and landscape photography.

They don’t even necessarily have to be taken on, from or of an actual street.

It’s all about human essence. To be a good photographer of the street, you need to show this in all its glorious forms.

You may feel overwhelmed to see the world play out on this stage in front of you. Especially at the beginning.

It could take some time and practice to gain a selective vision of what you want. There are so many available possibilities.

This article will help you get a better understanding of street photography. Hopefully, it makes it a little less daunting.

The reflection of a father and son walking down a street

Getting Started With Urban Photography

Getting started can be the most difficult task in street photography.

You have your equipment and accessories packed away in your bag, and you are ready to hit the road. What next?

This article comes from a weathered street photographer. It helps to give you a comprehensive look at all aspects of urban/street photography.

Going from a brief history, to what equipment she uses. They help her capture the amazing images she does.

She also goes through tips on how to start and areas you should focus on. Get out there and have fun!

Girl sitting and looking out at urban scene

7 Tips Every Street Photographer Should Know

Whether you are shooting from the hip or going for a more set-up shot, life on the street is fast. You will need a high shutter speed to capture all this.

Something else that might help you get the images you want is not to move too much.

If you spend a decent amount of time in one place, you might find that the action comes to you.

This is very helpful, especially if your location has a high-interest value. These could be leading lines or natural frames.

These are only a few of seven great tips to help you progress with your street photography. You’ll be on the way to create images you are happy with.

A cyclist and taxicabs in New York City

Street Photography Ethics

There are ethics in most areas of photography, typically when photographing people.

This could be travel, documentary or fashion photography. Street photography is no different. You might be photographing people in the public domain.

Empathy and respect should be the watchwords of photographing people on the street. You are putting yourself in their sphere of influence and into their everyday life.

Some people will not want their picture taken. They might ask for you to delete your images. Others may even become confrontational.

Be aware of your surroundings. Take time to look around and getting a feel of a person before you photograph them.

Put yourself in their shoes. This is the best piece of advice from this article on street photography ethics.

a street vendor sitting by hisi stall

Street Photography Types: From Bruce Gilden to Doisneau

Photographing the street covers many themes. There are many styles to go about doing so.

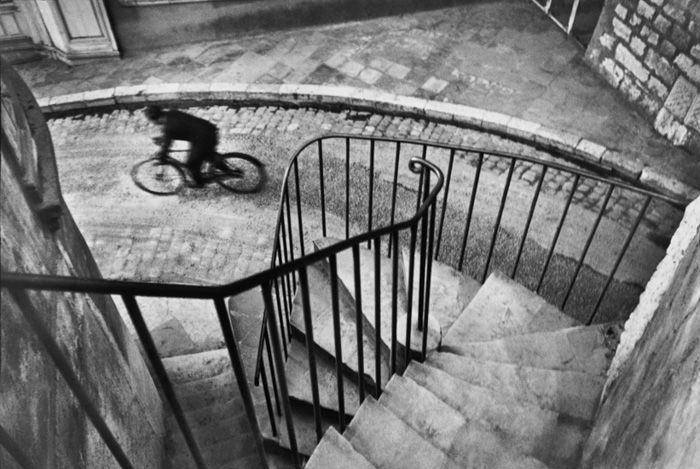
If you wanted to follow in the footsteps of Doisneau, then you would be part of an unobtrusive style.

The opposite would be following the style of Bruce Gilden. Getting into people’s faces would be very obtrusive.

Are you looking for more of a documentary project of life on the streets, or something more fine art related?

The former focuses on speed and realism. The latter would need time finding locations and setting up shots.

In this article, the writer goes through many different possible styles.  With this, you can narrow down what kind of street photographer you aspire to be while giving you tips and ideas.

A greyscale street photo from Henri-Cartier Bresson
Henri-Cartier Bresson

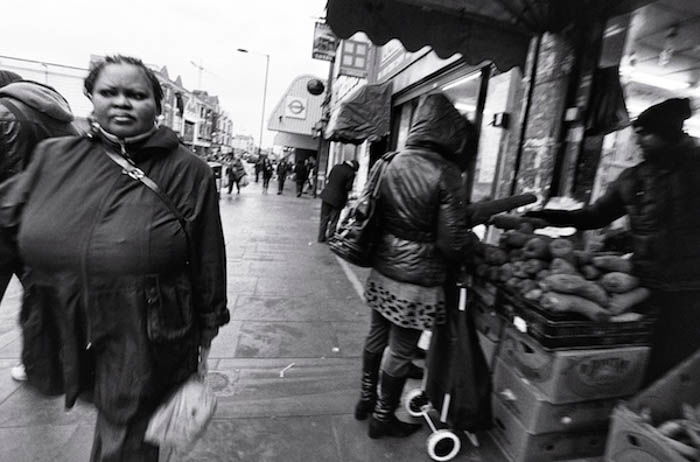
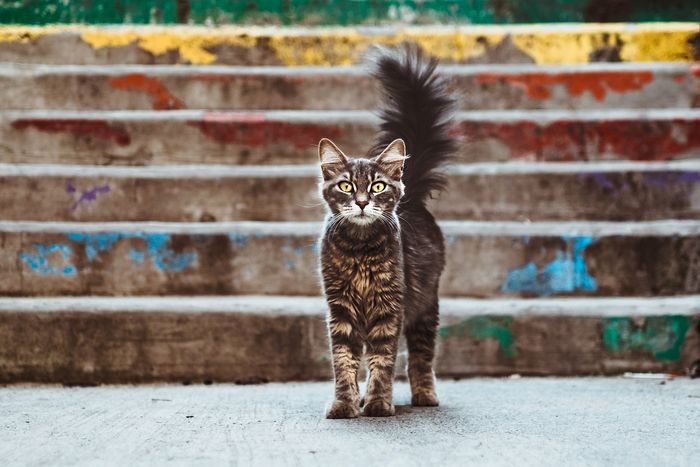
Street Photography: How to Take Pictures of Strangers

We have already covered the ethics of photographing people. But how do you do it? You might be a little timid at the beginning and stick to shooting from afar with a telephoto lens.

It takes guts and nerves of steel to close that gap when photographing people. And that’s okay. Take it slow and build up the courage. Rome wasn’t built in a day.

Once you do get close enough, you might even realise that most people either turn away or play up to the camera. This stops all ideas of candid street photography fast.

This article has great tips on photographing people. Either asking and setting up portraits or adopting a more stealthy approach.

street photography portrait of a man in a green hat pointing to his blue mirrored sunglasses

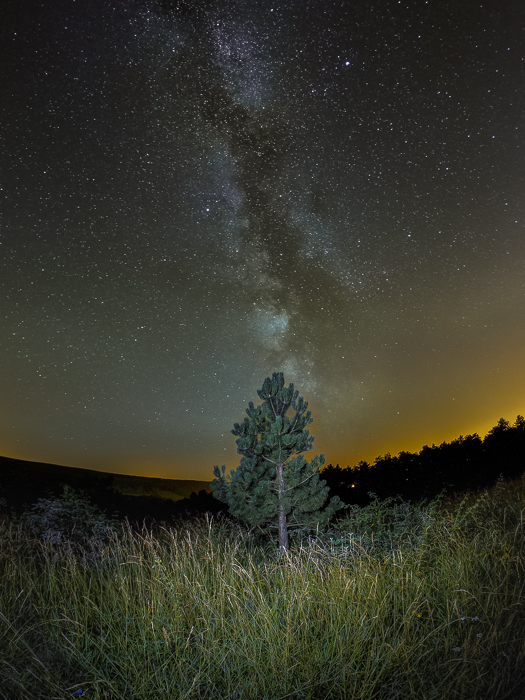
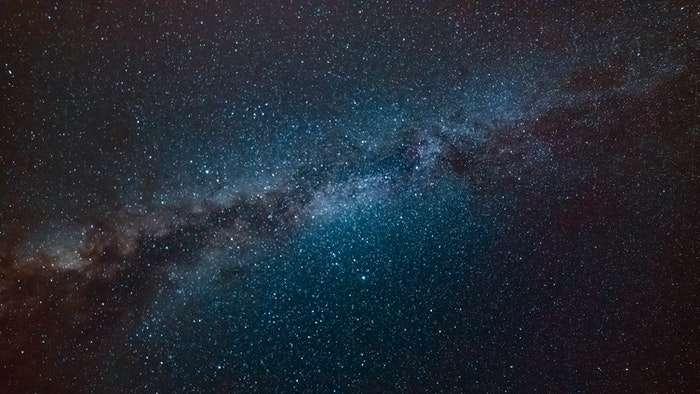
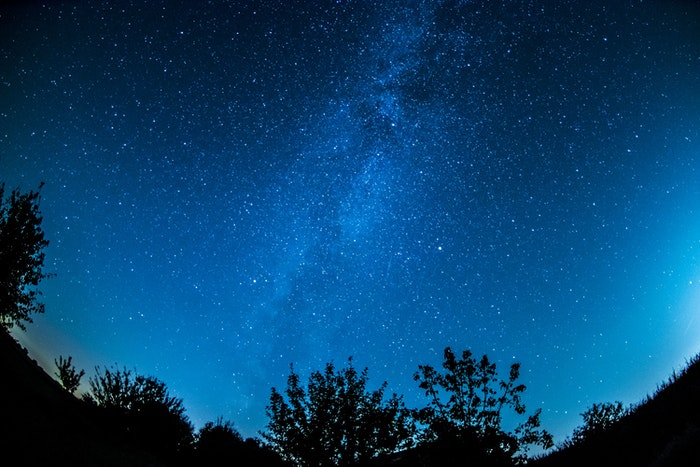
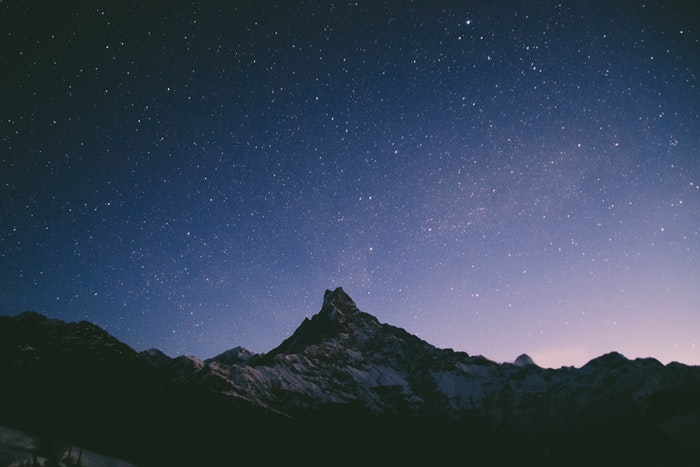
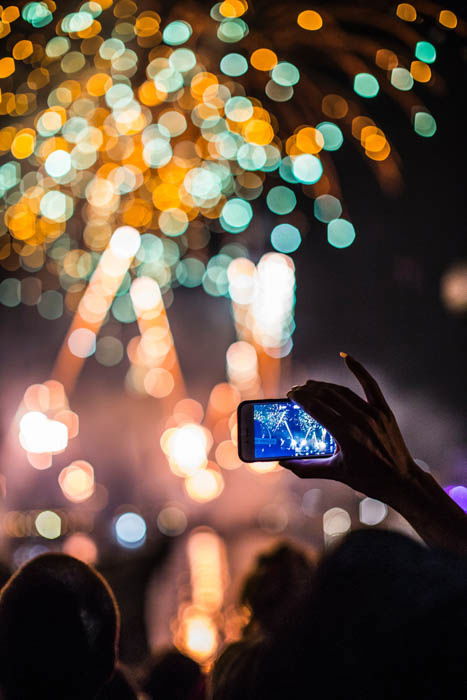
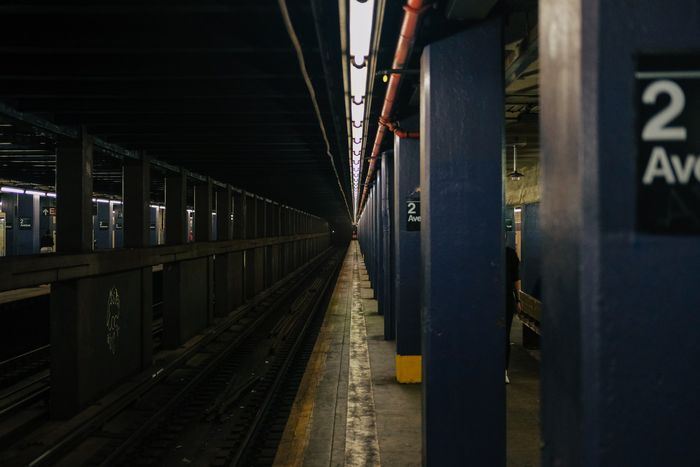
15 Tips for Night Street Photography | Stunning Low Light Photos

One of the best things about being a street photographer is that after sundown, you have a new landscape to photograph.

The locations you have spent all day photographing are now revamped areas of neon lights and speeding taxi cabs.

Here, the light becomes the prominent focus. Your ISO will need to shoot up to balance the loss of light. Or your exposure time needs to lengthen.

These are only a few tips that this article covers, and gets you out shooting all night too.

Night street shot of a man cooking in a food stall

10 Creative Street Photography Project Ideas You Can Try Today

There are many ways you can take fantastic photos of the street. This you can see from the thousands of photographs published each day.

If you lack inspiration, there are no shortage of photographers to emulate. From old masters to new Instagram feeds.

When we look at the street, one of the biggest tips is to try and take a photograph that makes the area different.

Remember, the street is what people see all the time. We need to make it captivating to steal the viewer’s attention.

Let your creativity run wild. A part of you goes into every photograph. A creative photograph over a technically perfect image will win every time.

Street photography isn’t only about the street, it looks at the human condition. Fashion, portraits, and daily routines.

Researching these topics might get you to see the street in a different way. Check out these creative street photography ideas to create unique art.

Street photography of three women in purple dresses walking down the street.

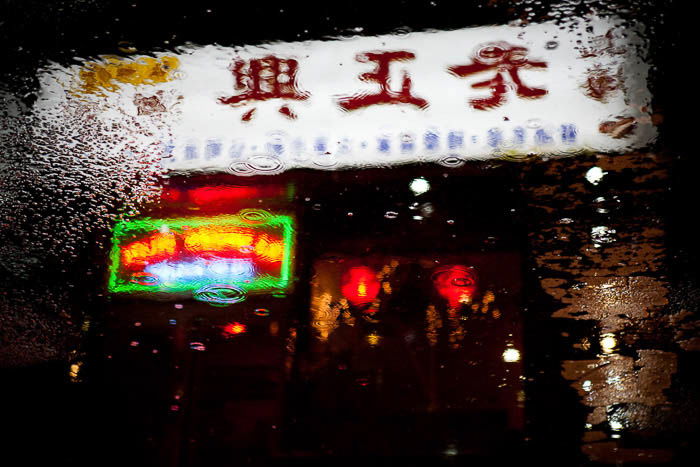
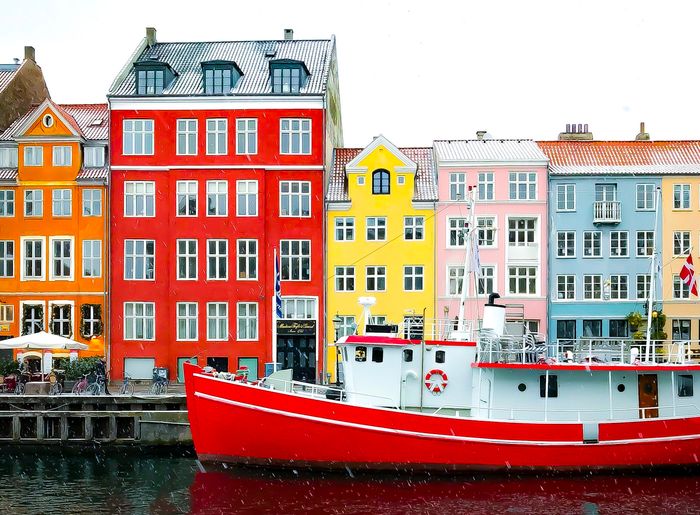
10 Tips for Better Street Photography in the Rain

Rain and other harsh weather conditions can add power to your street photography. It can turn a dull street into a sea of reflections.

These, in turn, bounce back images of the passing people and the buildings above. It adds a stunning textured effect to otherwise plain windows.

The people’s reaction is also a great theme to capture, which you might find easier than other areas. You’ll see the public will concentrate on staying dry, not you with the camera.

The weather shouldn’t stop you shooting. Grab an umbrella, take a camera you can put in harm’s way (Ricoh GR II rather than your Leica M) and get out there. Read our ten tips for shooting street photography in the rain.

A woman photographed through a window doused in rain

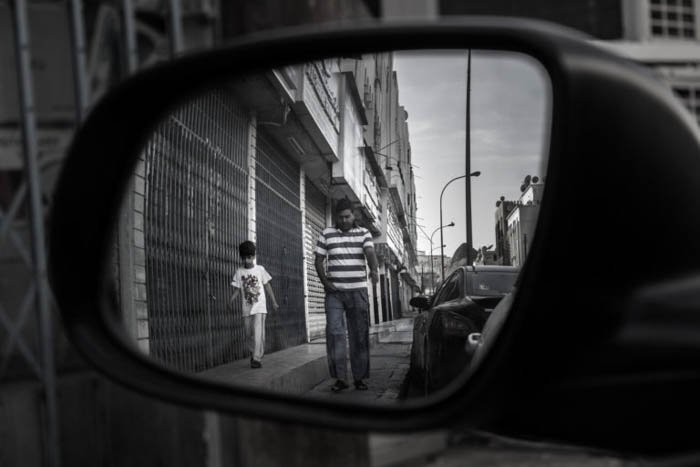
9 Ways to Try Creative Reflections in Your Street Photography

Reflections in and around the street are everywhere. You can find them in shop windows. They are present in all kinds of transport, such as cars and buses.

Look at the pavement after a rainy afternoon. These are great ways to show the city bouncing towards you.

One huge benefit of these is that you can find ways to include two scenes in one. You are able to make what is almost a double exposure. You get two scenes for the price of one.

A great way to take advantage of these reflections would be a self-portrait project. Use Vivian Maier’s images as inspiration.

This article gives you an in-depth idea of what to look for and how to shoot them.

A reflection of a Chinese restaurant in a puddle on the street

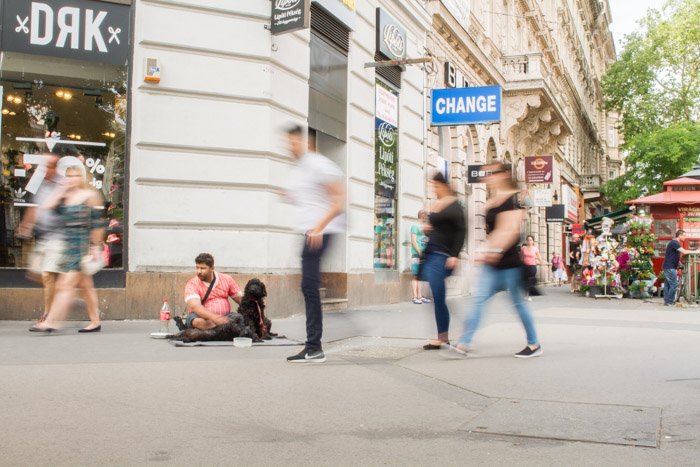
How to Use an ND Filter to Remove People from Long Exposure Shots

We get it, people can be a drag. You saved up enough money to be able to travel far enough to photograph your favourite landmark. The time has come.

Except, it is already swarming with people. These people ruin the shot, and it wouldn’t be the same with them in it. It’s no good hung on the wall now.

We have a solution for you. Use a long exposure and an ND filter to remove those waves of people. Read our article here on how to do it.

Use an ND filter to remove people from your street photography

Composition

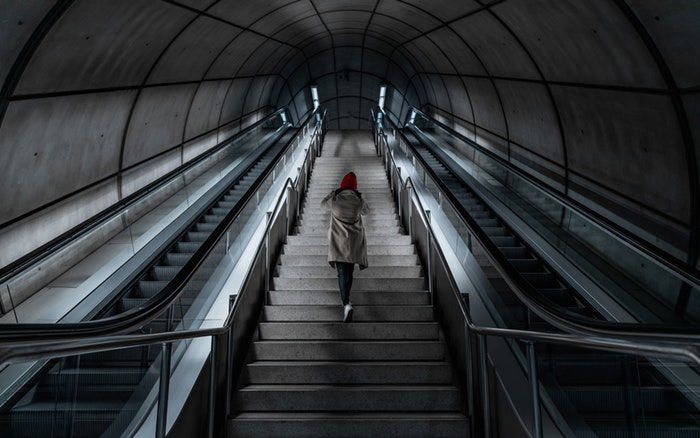
How Diagonal Lines Add Direction and Dynamics to Your Photos

Lines are a great way to help compose your images to give them that extra wow factor. Lines can draw your eye to a subject. Or take it away, out of the frame.

They can also give a sense of direction. This in itself is movement in a still image and interesting.

These lines are everywhere. If you stand under a very tall building looking up, all the lines converge. You will notice your eyes will follow them to the top.

A long street, handrail, or zebra crossing are all examples of what is available. You only have to keep your eyes open and look around.

This article gives great tips on what to look for and how they dramatize your image.

High angle street photography

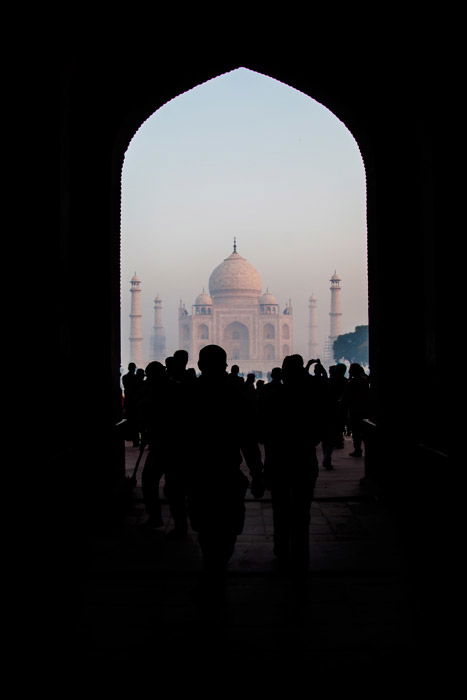
How to Use Natural Frames for Better Photo Composition

Natural frames are a great compositional tool. And a great way to frame your subject. These exist everywhere, from doorways and windows to arches and vegetation.

It is all about focusing on your subject. By framing them, you isolate and highlight what you want the viewer to focus on.

Street photography is all about photographing your surroundings. This technique helps you use the street as a tool or element in creating captivating images.

Our article gives you examples and tips of successful natural frames and how to get the best out of them.

Photo of the silhouettes of people walking through an archway which is naturally framing the photo.

How to Shoot From The Hip

Photographing people on the street is not easy. Even when you take the courage to get close enough, the people do not react how you want.

They shy away, pose or start interacting with you. Worse, they could become confrontational or even violent.

One great tip to avoid this is to shoot-from-the-hip.

This term means to photograph without using your eyes to compose the photograph. This is a faster, sneakier way to take images, but way less accurate.

Some photographers use what is known as a TLR (Twin Lens Reflex camera). This allows you to frame by looking down into the viewfinder. The camera doesn’t go up to your eye level.

This is a great way to take candid photographs because people focus on eyes and faces. Bringing a camera to your face cuts the eye contact between you and strangers. It would be almost impossible to miss that you are photographing them.

By shooting from the hip, you end this problem. But, it’s a compromise between a candid photograph and a well-framed composition. Learn more about how to shoot from the hip from this article.
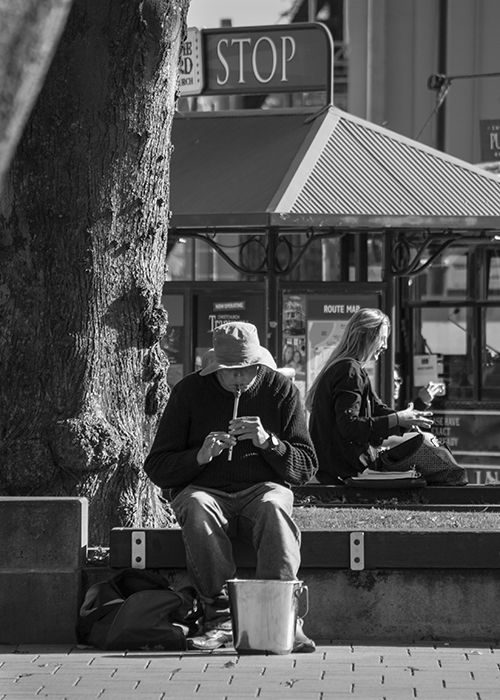
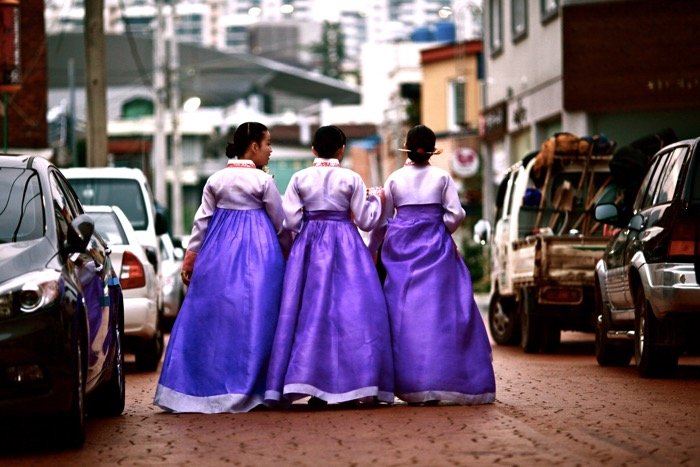
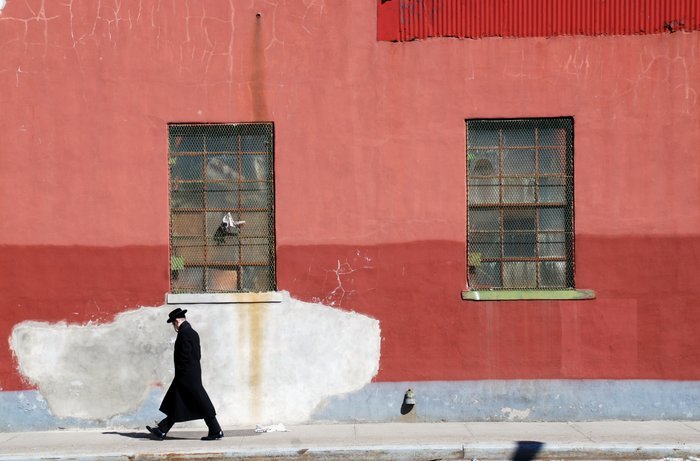
A street portrait of a woman walking down the street while others buy vegetables

Using Juxtaposition

Using juxtaposition is a great tool in the world of picture-taking. These work very well within the theme of street photography.

The basic idea is that you place two or more contrasting objects next to each other.

This can be something physical, like light and dark areas of a scene.

They can also be something more ideological. A homeless person sleeping outside of Louis Vuitton is a juxtaposition. So are old and young people with happy and sad emotions.

The two subjects add photographic weight from their presence. They offer a balance or imbalance.

These images work because they invoke emotion or a feeling from the viewer. They show the world we live in and how life is so contrasted.

Two conflicting subjects bring out the extremes in each other. Either colour, theme or physical shape – there is no end to these ideas. Check out these 27 best examples of juxtaposition.

a man carrying flowers against a strong, yellow backdrop

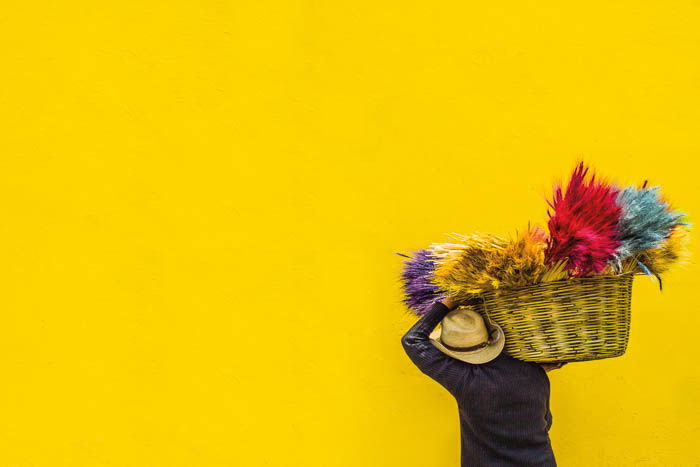
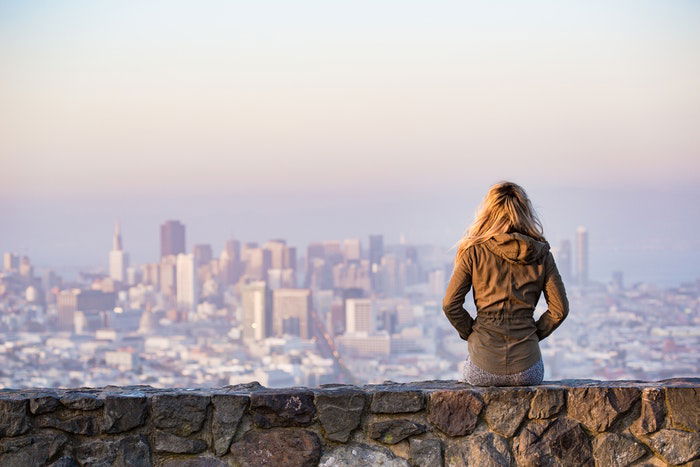
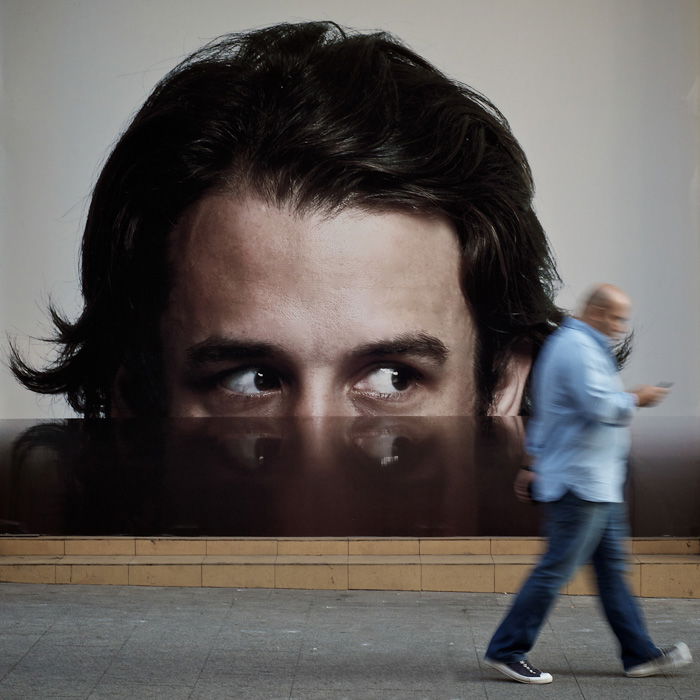
How to Use Negative Space in Photography for More Powerful Images

Negative space refers to the area that surrounds the subject or subjects in your image. The technique of using negative space effectively is about creating the right balance.

Here, you concentrate on the relationship between the subject(s) and the background. You can make the background almost feel like it is receding away.

Positive space refers to the primary subjects of a photograph. Positive and negative space can dance well together.

For more information on how to create and utilize negative space, read our article here.

Person climbing stairs in a metro station

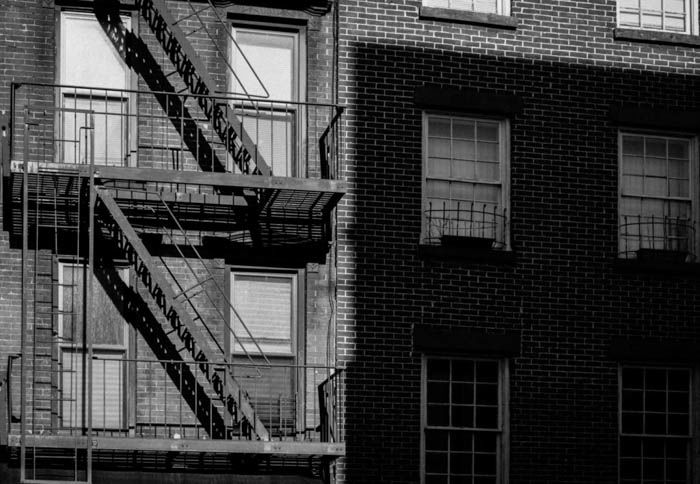
Creative Tips for Using Repetition and Pattern in Photography

Once you start looking for patterns, you’ll start seeing them everywhere. Everything has a pattern if you are close enough or far away enough to see them.

Many of the best street photographers are adept at recognizing (and often breaking) patterns. They can be both man-made and natural.

Architectural photography is an excellent genre for finding geometrically perfect patterns. Finding the patterns and showing them off is a challenge in itself.

Read our article here on how to find and capture those defining designs.

Black and white photo of the exterior of a building
Hillary Grigonis

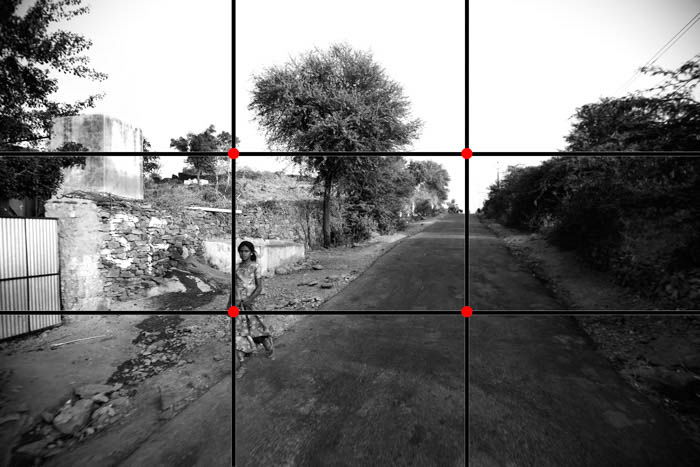
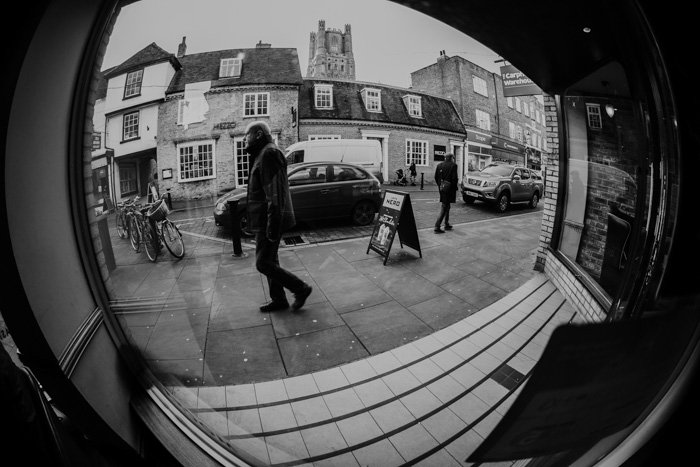
10 Composition Tips for Street Photography

We know about the main ideas of composition. Rule-of-thirds, leading lines, and contrast are the standard.

But as the street is ever-changing and very dynamic, it requires competent compositions.

Step out of the box a little. Don’t be afraid of trying something new and even going against the general compositional rules.

You might find that it works for you and your style in creating something unique.

Be bold, direct and shock people. Use lenses you are not used to. Try perspectives you haven’t tried, such as lying on the floor and shooting up.

The outcomes will surprise you. They might just be the best images you have ever taken. Check the rest of the composition tips for street photography here.

A street photography scene with the rule of thirds grid overlayed
Megan Kennedy

Street Photography Inspiration

15 Best Street Photography Quotes

Street photography has been a passion since the invention of the camera. 1826/27 brought us the oldest remaining image of French inventor Nicéphore Niépce. The street photography print was aptly called View from the Window at Le Gras.

Since then, many photographers have tried their hand. Some of them, masters of photography. Others are more contemporary.

One thing is certain; each one of them could say something about the field in which they captured.

To get a sense of their experiences, for better or worse, we have our top pick. 15 quotes by some of the greatest photographers await you.

Black and white street photography of four men stand in a bleak corridor urinating
Josef Koudelka

17 Most Famous Street Photographers You Should Know

Most photographers look toward the masters for inspiration. Street photography is no different.

Most of the masters of photographers captured the streets in one way or another.

I would like to say that it was a challenge to find 17 street photographers. The problem was, there were too many to choose from.

Read our article here to see our choice. You won’t be disappointed.

A man in a suit and hat walks past a red wall

The 10 Coolest Street Style Photographers to Follow in 2021

The biggest thing that sets street photographers apart is their style. Each street shooter has a different background and aim.

Technical abilities, skills of observation and talent help to hone and separate them.

If you are a street photographer who is more interested in fashion and style, this article is for you. Here you can find the top ten street style photographers on social media today.

Have a look at their work. I guarantee you’ll take something away from it; either a name, an idea or a concept.

16 Awesome Contemporary Street Photographers to Follow in 2021

Following the masters of photography is a great place to start. But, it might not be the best place to settle in for the night.

Many of the older photographers experienced fewer people and more exotic locations.

But, they were limited to their equipment and how far they could travel. Today, we can go anywhere and photograph anything. Within reason of course.

Here, you’ll find our favourite 16 contemporary street photographers you should follow in 2021.

Eyes on an advertisement seems to follow a man walking - street photography
Thomas Leuthard

Post-Processing Street Photography

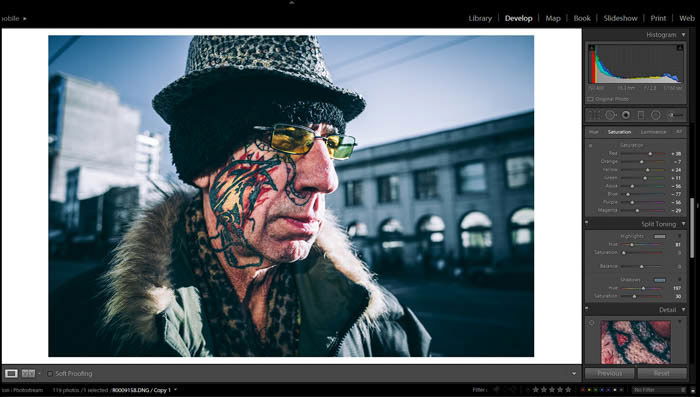
Editing Street Photography in Lightroom, All You Need to Know

Lightroom is one of the easiest ways to post-process your images. It has everything you might need, it is fast and can house many presets to do the work for you.

It also acts as a library for all the photographs you take, accessible at the click of a button.

This article helps run through the whole process from start to finish. Starting by selecting your images in the library module and ending with the finished result.

You will be very happy with your images, even after only tweaking them a little bit.

A screenshot of using Lightroom for your street photography work flow and editing process
Camil Adell

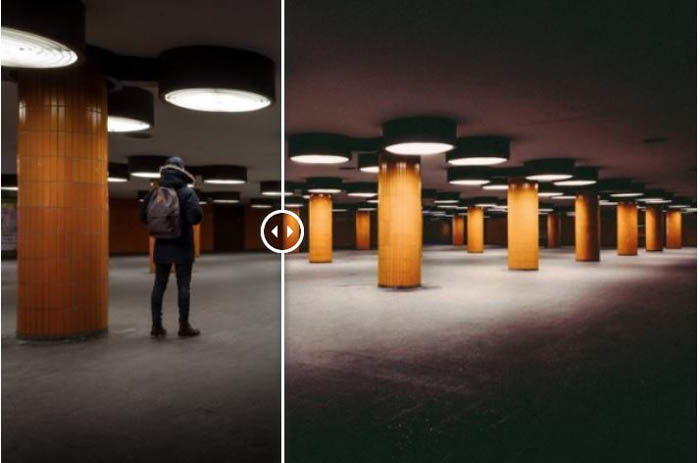
Best Lightroom Presets for Street Photography

Presets are a great addition to any photographic workflow, not only street photography. These preset manipulate your images in a quick and efficient way.

This means you can focus more on photographing and still get the best out of your work.

It is also a great advantage to have a series of works with the same look and feel, which you can do effortlessly.

This article gives shows you ten free presets and lets you know what the changes are to your images. You are in control, every step of the way.

A man on a subway platform, shown using a before and after Lightroom preset

Street Photography Laws

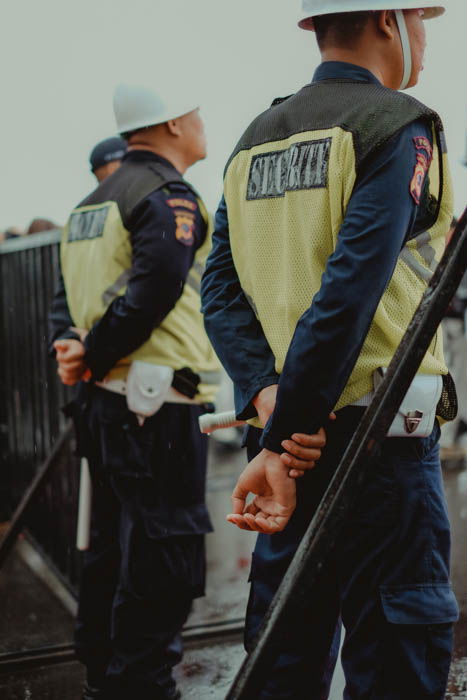
Street Photography – Know Your Rights

You might be photographing the street. Then turn your camera to point it at a building that seems interesting. As soon as you do, a security guard comes to tell you that you need to have permission.

Photographers in the past have seen harassment and police searches. This could be down to them photographing things others tell them they shouldn’t.

This is where knowing your rights really help you as a photographer. These laws are to help you be creative and as free as possible, but you need to know them.

Wherever you might be, there are rights and laws protecting photographers. They also aim to protect the people in public spaces.

This article links to pages looking at the rights and laws in different countries. Ranging from Australia to the USA.

Two security guards photographed from behind

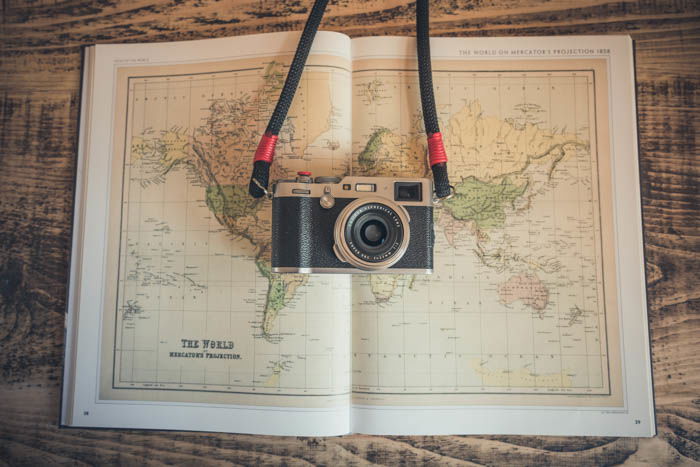
Country-Specific Consent Requirements

Every country has different laws on photography. Some are very strict, like Brazil. Here you need consent to photograph, share and use images commercially.

Others are very relaxed, such as Singapore. Here, photographic consent is not needed, apart from a few exceptions.

Use this list for a basic idea of what gets frowned upon and what is OK. In some countries, the risks are just too great.

North Korea is a good example. It is difficult to get the opportunity to photograph there. You might find yourself banned from sharing such images online.

A camera on a map of the world

Freedom of Panorama – What It Means for Photography

The freedom of panorama is the legal right to publish pictures of artworks which are in public space. This is an exception to copyright law and differs from country to country.

These artworks encompass sculptures, buildings, or monuments in public space, and under copyright. You are still able to photograph these without a problem.

Some countries are very strict when it comes to their artworks. A few have made it illegal to share these images on social media.

For example, you can take as many photographs of the Eiffel tower in the daytime with no problem. But at night time, it is illegal.

You can’t share images of the tower’s illumination as it is a separate installation.

Educational platforms such as Wikipedia will have images deleted if the law doesn’t change. This could affect your workflow and creativity. Check this article to learn more.

A cut out image of the Little Mermaid sculpture in Copenhagen
Photo by Agamitsudo


Street photography is a fantastic mixture of urban, portrait, architecture, landscape and documentary photography. You can choose to focus on one aspect. But it is even better to try yourself in different fields.


-----------------------------------------------------------------------------------------------

PHOTOGRAPHY FREEBIE:

How to make money with your Photography even if you're not a Pro.

Copy & paste this link into your browser, click ENTER, and enjoy: 

https://mrdarrylt.blogspot.com/2020/01/how-to-make-500-month-from-your.html

_______________________________________________________________


           Kick Covid 19s' butt Tee shirt

                                                                  undefined         

                                         Kick Covid 19's butt!   Classic Tee Shirt   

Encourage your friends, neighbors, and family members to get the vaccine...without saying a word. 


Thursday, July 22, 2021


What is Focal Length? (And Why it Matters in Photography!)

Tags: Beginner Photography

Why Focal Length Is Important?

Knowing what focal length means in relation to your camera is very important when it comes to buying lenses. Read this post to find out what different lenses are used for. You’ll see which ones are right for you, how to use them creatively, and all the technicalities.

Lenses are divided into two categories based on whether they can zoom. There are the ones that have a fixed focal length (prime lenses). And there are those that have a variable focal length (zoom lenses). In general, prime lenses are sharper and often have a wider aperture. These are great for low light conditions.

Zoom lenses allow you to use one lens to cover a range of different photography fields. One lens means less time spent searching for and changing lenses. There are advantages and drawbacks to both types of lenses. So, having a mixture of them gives you versatility and power.

We can use the human eye as an example. Its focal length varies between 17mm and 25mm, depending on who you ask and who you examine.

We have an approximate field of view of over 180°. This is different from the 90° angle of view from a lens, which is down to the fact that we have two eyes.

The area that we actively perceive is smaller, similar to a 40-50mm lens. That’s why the 50mm is called the ‘standard’ focal length.

Photo of a subway station in low light

What Does Focal Length Mean?

The focal length of the lens determines how ‘zoomed in’ your photos are. The higher the number, the more zoomed your lens will be.

It is often misunderstood that the focal length is measured from the front or rear of the lens.

In reality, it’s the distance between the point of convergence in your lens and the camera sensor. This is the case of simple lens designs (like Double-Gauss). There are also plenty of complex optical designs that work differently. In many cases, that distance is not equal to the focal length.

The key takeaway is that the focal length of a lens is identical to the focal length of a single lens that would provide the same field of view.

Take a look at the diagram below that explains this.

A diagram showing the point of convergence in a lens

You might ask: why do we use complex, multi-element designs and large lens housings if a single lens will also provide an image for much cheaper?

There are many reasons for this. First, to use a lens for photography, you need to make that lens focus somehow. This, on its own, doesn’t require multiple elements. But it does require a mechanism that allows the user to move the lens closer to or further away from the sensor. If designers want to seal off the moving element, it means two more elements on the front and on the back.

Second, an image coming from a single lens is not nearly as clear as you’d expect. Because of different wavelengths being present at the same time, colours shift very noticeably, causing a distracting effect. Special elements and coatings are necessary to counter this. And even in complex designs, the issue doesn’t disappear.

These elements, however, might introduce additional geometric distortions to the image. So, even more lens elements are needed potentially. In some expensive lenses, you’ll find aspherical elements. They, too, are there to provide a cleaner image with more detail and less distortion.

Zoom designs are a whole new world. They often use more than a dozen lens elements, sometimes even 20.

Ultimately though, their angle of view and focal length can be compared to single lenses. Hence, we’re able to use focal length as a measurement of “zoom”, and angle of view.

Different Focal Ranges and What They’re Used For

Ultra Wide Angle and Fisheye (14-24 mm)

These lenses are often considered speciality items. Usually, they are not included as part of a starter kit. They create such a wide angle of view that can feel unnatural to work with at the beginning. This is down to the lens having to fit more of the scene into the image than what your eyes can see at once.

Ultra wide-angle lenses are often used in event and architectural photography. They help to get a lot into a photo when shooting in a confined space.

These lenses are not suitable for portraits. They enhance the perspective so much that facial features can look unnatural.

Landscape photographers and adventurers, however, love them. An ultra-wide lens is able to distort perspective in ways that these genres value. In a landscape scenario, it’s possible to have a flower in the foreground be larger than the mountain in the background, while still fully including both in the frame.

When used for journalistic scenes, ultra-wide-angle lenses can provide a dramatic, interesting angle. Especially if you’re close enough to the subject. A 16-35mm or 14-24mm zoom, for example, is a crucial tool in the bag of a press photographer. These focal lengths can be found in the lineup of most manufacturers.

You might recognise the work ‘rectilinear’. Rectilinear wide angles project an image in which the straight lines remain straight. Fisheye lenses distort the scene into a spherical shape.

If a lens is not designated as fisheye, it’s more likely rectilinear, as that’s the standard. Fisheyes are rather special tools. Apart from fisheye DSLR lenses, they’re most commonly included in action cameras, such as GoPros.

Their angle of view is the largest among all lenses, often reaching 180 degrees diagonally.

A black and white image of a street scene, shot using ultra Wide Angle focal length

Wide Angle (24-35 mm)

This is where you’ll find most kit lenses for full-frame cameras start. 24mm is the point at which the distortion that appears to stretch the side of an image stops appearing unnatural.

Wide-angle lenses are used by photojournalists for documenting situations. This is because they are wide enough to include a lot of the context, whilst still looking realistic.

Nature and landscape photographers love them for the same reason.

The widest lenses commonly used in movie production also fall into this range of focal lengths. Their field of view is ideal for showing plenty of the environment. But thanks to the wide aspect ratio, subjects can be far enough away to not appear distorted.

Photo of a mountain reflecting on a waterscape

Standard (35mm-70 mm)

It’s in this range (at about 45-50 mm) that the lens will best reproduce what our eyes see (excluding peripheral vision). I like to use this range when shooting on the street or with friends in a closed setting. Examples would be at the dinner table or the pub.

Standard lenses as called standard for a reason – these are the most common lenses, in both prime and zoom format.

Their focal lengths can be used for virtually anything, from nature to action.

A standard lens such as a 50mm f/1.8 is an excellent, inexpensive addition for a camera. It will provide excellent results. A prime lens will always provide better results than your kit zoom lens, as it is built with a single purpose. It does one job well.

Kit zooms also fall into this category. They usually cover a zoom range of 18-55mm (on crop cameras) or 28-70mm (on full-frame and film cameras). Both of these zooms cover the entire standard range, as well as some wider angles.

Photo of a ship with colorful houses in the background

Short Telephoto (70-105mm)

This range is often where kit lenses stop. Here, you’ll start to get into the range of telephoto lenses and portrait primes (around 85mm). This is a good range for portraits as the perspective of the lens will make human faces look natural.

Most short telephoto lenses separate the face from the background, without completely isolating it.

A large proportion of dedicated macro lenses also falls into this category. This is because short telephotos are long enough to provide enough working distance. But they are short enough to not make huge macro lenses. Their fairly natural perspective also plays a big role in this.

Photo of a cat in front of stairs

Telephoto (105-300mm, and Above)

Lenses in this range are often used for distant scenes such as buildings or mountains. They’re not really suitable for landscape photography because of the way they flatten the perspective of a scene. But they can provide interesting perspectives in that field, too.

Lenses in this range are often used for sports and animal photography. The most popular lenses for such applications are 70-200mm f/2.8 lenses on the shorter side, and 150-600mm lenses on the longer side.

Portraits are also a great genre to use them in. Shooting portraits with long lenses can provide exceptional subject separation and background compression. But it also expands working distance, so if you’re going for more intimate images, they might not be the ideal lens to choose.

There are hard-to-imagine extremes in this range. The longest modern DSLR lenses (800mm f/5.6) from both Canon and Nikon cost more than a small car. But there are longer ones not in mass productions. Canon’s groundbreaking 1200mm f/5.6 has only sold a few dozen copies before production ceased. They are owned by select companies in special fields.

Photo of a pelican on a lake

How Does Focal Length Affect Perspective?

I tackled most of this in the previous section. Let me give you a better idea of how the focal length affects the perspective of a photo. I took four photos of the same subject at different focal lengths and compared them below.

The subjects (three soup cans) remained in the same position (about 10 inches apart from one another) in every photo. It’s worth noting that these photos are shot with a crop sensor. This means the effective focal length will be higher than listed.

To say it’s the focal length that changes the perspective is, however, quite misleading. You see, it’s the distance from the subject.

The focal length of a lens is an indicator of the distance from the subject: the images are all framed the same. Differences arise because the focal length is getting longer (zooming in) as the camera moves further away from the subject.

Remember, the distance from the subject is changing the perspective. The focal length is just used to compensate for this.

Four photos of three cans shot with different focal length lenses

What About My Crop Sensor?

Shooting on a crop sensor has what’s known as the ‘crop factor’. What you’re doing is zooming in on an image, and avoiding the widest parts of the scene. The diagrams below show the way this works.

Even lenses built for crop cameras such as the EF-S range (Canon) and DX range (Nikon) will still have this effect. This is because lenses are listed by their physical focal length rather than their effective (or equivalent) focal length.

However, these lenses will not work on a full-frame body without heavy vignetting. This is because the image will not project onto the whole of the sensor.

That’s it!

a diagram showing the crop factor for full frame lens projection, full frame lens sensor and crop sensor


                             Kick Covid 19s' butt Tee shirt

                                                                   Advertisementundefined         

                                         Kick Covid 19's butt!   Classic Tee Shirt   $21.99

Encourage your friends, neighbors, and family members to get the vaccine...without saying a word. 


Wednesday, July 21, 2021

The No Control Photography Challenge


The No Control Photography Challenge 

I found this cool video on Pinterest.  mangostreetlab.com is the author of this work.  If you'd like some great ideas for your next photo shoot, watch the video and then check them out at their page on Pinterest.com

Monday, July 19, 2021

 # Photo, Time

Post Exposure Advanced Techniques

post exposure ebook 
Thanks for stopping by.  We appreciate each and every one of you for taking the time to visit our blog.  Here's another FREE Ebook we think you'll enjoy.  One hundred and seventy three pages of FREE Photography "how to" information.  Yours to download and read at your convenience.  Just copy and paste the link below into your browser, click enter and enjoy.  
https://ctein.com /PostExposure2ndIllustrated.pdf  

If you like the posts and freebies here, (See the post directly below this one for more free stuff) can we ask a small favor of you?  Please "share" this (or any of our other) blog page(s) on your social media sites.  Facebook, Twitter, Pinterest, My Space etc.  We want to get the word out about our blog.  And we hope you'll consider helping us to spread the word.  Thanks in advance.


-----------------------------------------------------------------------------------------------

PHOTOGRAPHY FREEBIE:

How to make money with your Photography even if you're not a Pro.

Copy & paste this link into your browser, click ENTER, and enjoy: 

https://mrdarrylt.blogspot.com/2020/01/how-to-make-500-month-from-your.html

_______________________________________________________


Wednesday, July 14, 2021

Free Photography Ebooks 

 Photo book to download

Based on the growing number of visitors to this blog each month, we're re-posting some FREE Photography E-books we gave away last year.  Many of you may not have been active visitors then so we're giving you access to those freebies now. Just
click on the title of each book and you'll be taken to
the free download page to receive your FREE copy.


This one’s been around for a while but the information is just as relevant today as ever. Photographers are often introverted characters, and this free photography ebook gives advice on how to gain the confidence to interact with your subject and become a better photographer.


An interesting read on a topic that’s not very often discussed – the planning that goes behind a photography trip. You’ll learn essential tips and techniques to get the most from your next trip, to be well prepared before you even pick up your camera.
 
Free photo book
Starting a Photo Business – by Photo Shelter
These guys know what they’re talking about when it comes to building a successful photography business. If you need a hand with where to start, check out this free ebook.
 
Stunning landscape photography and an entertaining read about  a journey to discover the art, craft and passion that lies behind landscape photography.


For more Photography Books, click on the 3 words below. (sorry, these aren't free), but they are awesome! 
 
P.S.  We're not done yet.  Check out the post directly above this one for another FREE Ebook.  And, the posted article below for even more photography insights.
 

-----------------------------------------------------------------------------------------------

PHOTOGRAPHY FREEBIE:

How to make money with your Photography even if you're not a Pro.

Copy & paste this link into your browser, click ENTER, and enjoy: 

https://mrdarrylt.blogspot.com/2020/01/how-to-make-500-month-from-your.html

_______________________________________________________


Monday, July 12, 2021

What Is the 500 Rule in Photography? (And How to Use It!)

Tags:  Photography for Beginners, 500 rule, Photography

The 500 Rule Explained

The idea behind the 500 rule is to provide you with an easy-to-remember formula to freeze the movement of the stars. This way, you will get images without any star trails.

Of course, if your goal is to make star trails, you should ignore this rule. Otherwise, you need to use it so that you can capture clear pictures of the Milky Way and the starry sky in general.

Other worldly night sky photography of a tree in the centre of a grassy landscape, starry sky and star trails above
If you have a fisheye, it is worth spending a few hours under the starry sky, to capture the Milky Way. I took this on a fixed tripod by using the 500 rule to prevent blurry stars.

But why are you getting trailing stars in the first place? That’s because the Earth is rotating on itself once every day. This rotation creates the rather fast 15º/hour apparent motion of stars.

The gif below shows how stars move around the North celestial pole, roughly indicated by Polaris, the North Star.

The night sky gif shows how stars move around the North celestial pole, roughly indicated by Polaris, the North Star shot using the 500 rule.

In astrophotography, we make a big deal out of freezing the stars. To be rigorous, the length (in mm) of a star trail on your image will depend on the field of view, sensor size, image resolution, exposure time and the star angular speed and declination.

While this is not rocket science, the formula that links all those variables together is not the simplest one to remember and to use in the field.

If you are an occasional star shooter, knowing how to use the much simpler 500 rule will let you capture trail free starry skies.

The rule reads like this: SS = 500 / (FL * CF)

SS is the shutter speed in seconds. FL is the focal length expressed in mm and CF is your sensor’s crop factor, i.e., the ratio between the size of a full-frame sensor and yours.

Here you can find the crop factor for different types of cameras:

  • 1 for full-frame cameras;
  • 1.6 (1.5) for Canon (Nikon) APS-C cameras;
  • 2 for micro four-thirds cameras;
  • 2.7 or higher for compact cameras with a 1″-type sensor or smaller.

As far as I know, while it can be related to image resolution and field of view at a specified focal length, the number “500” doesn’t have an actual meaning. It is an arbitrary constant chosen so that the guideline will work in most cases.

Impressive starry sky at night

Example of the 500 Rule in Action

Let’s consider my Olympus OM-D EM-5 Mk II micro four-thirds camera. It has a crop factor equal to 2. Now let’s see how this rule works.

With a 50mm lens, for example, the guideline will tell me the exposure time for which the stars will not trail.

See the calculation below:

SS= 500/(50*2)= 5 seconds.

With a full-frame camera with the same lens, the result will be:

SS=500/(50*1)= 10 seconds.

The image below shows how much stars are trailing when I use a shutter speed of 3 minutes with my 50mm lens on my Olympus. This exposure time is much longer than the rule suggests.

Night sky photo of star trails from a 3-minute long exposure with 50mm lens on Olympus OM-D 10.
Star trails from a 3-minute long exposure with 50mm lens on Olympus OM-D 10.

With this guideline, you can even get decent results when photographing bright deep sky objects such as M42 (The Great Orion Nebula) using a telephoto lens.

While the level of details will not be impressive, it will be a very satisfying experience. I would recommend you give it a try.

a night sky photography shot of M42 on fix tripod. Olympus OM-D EM-10, 150mm, f/4, 3.2 seconds, stack of 50 images.
M42 on fix tripod. Olympus OM-D EM-10, 150mm, f/4, 3.2 seconds, stack of 50 images.

The 400-, 600- and NPF Rules

There are two common variants of the 500 rule; the 400- and 600-Rule.

In the 400-Rule, the number 500 in the formula above is replaced by 400. This results in even shorter exposure time. With the 600-rule, the number 600 is used instead, resulting in slightly slower shutter speeds, i.e., longer exposure times.

If you want better results, you should switch to other rules, such as the NPF rule. These are more accurate and rigorous than the 500 rule.

You can find many star trail calculators online, as well as smartphone apps such as PhotoPills. You can also calculate the values online.

For Android, there is also PinPoint Starts available. These can help you choose the best exposure time for your camera-lens combination.

Image Stacking and 500 Rule Combined

The first thing to do to improve your night star pictures is to shoot in RAW instead of JPEG. This will ensure you have the maximum flexibility when you need to edit your images.

If you are not tracking the sky movement with a tracking head, the stars will always move across the sensor. The light you can collect for each pixel depends only on how long the star will stay over the same pixel.

You may be tempted to bump up your ISO. But this will only increase image noise, with no extra benefits.

Allowing stars to trail a bit more by using longer exposures will not help either. The time a star will excite the same pixel will not change. You will only record a trail.

The solution is called image stacking. So how do you do that?

You take many photos at a quite low ISO. You expose each according to the 500 rule. Then you can combine (stack) them later on in Adobe Photoshop. This technique will improve the number of details in the final image a lot.

The process involves masking and aligning the sky among all the exposures. But softwares like Deep Sky Stacker, Sequator (windows, free) and Starry Landscape Stacker (Mac OS X, commercial) will make the whole procedure faster.

Below you can see the comparison between a single raw from my Sony RX100 Mk II pocketable compact camera (1″ sensor type) …

Image of a red camper van parked under an impressive starry sky
Sony RX100 Mk ii on a tripod and set to ISO 6400, 15″, 28mm EFL (equivalent focal length), f/1.8. Single RAW.

… and the final image, obtained by staking 8 different exposures. You can see how stacking has boosted details and enriched the sky.

Image of a red camper van parked under an impressive starry sky after using focus stacking to help remove star trails
Stack of 8 different exposures.

You can read more about image stacking in this article about editing techniques for astrophotography.

The Science Behind the 500 Rule

The idea behind the 500 rule is to provide an easy way to guesstimate the longest exposure time for which the stars’ movement is not noticeable.

The sky rotates 360 degrees in 24 hours or 0.0042 arc degrees per second. A full-frame camera with a 24mm lens will have a horizontal view of about a 73.7 degree.

Let’s assume we have a 24 Mpx sensor (6000px X 4000px). Those 73.7 degrees are projected onto 6000 horizontal pixels, giving 81.4 pixels per degree.

Assuming a 24mm lens, the “rule of 500” gives you an exposure time of about 21 seconds (500/24).

In 21 seconds the sky will move about 0.09 degrees (0.0042*21).

For our 24 Mpx full-frame camera with a 24mm lens, 0.1 degrees translates to 7.3 pixels (81.4*0.1).

Those 7.3 pixels represent the maximum acceptable movement blur before point-like stars will turn into trailing stars. But is this movement really acceptable?

We are used to looking at our images on a computer screen. If you blow up your full resolution image to 100%, you will see that the star is not a dot.

But what about prints?

It turns out that if you print your image in 30x45cm format, those 7 pixels will make up a trail on your print only 0.5mm long!

Impressive starry sky over silhouettes of trees

Experimenting With Camera Settings

You might already understand that the shutter speed is only dependent on your camera’s crop sensor and the lens’ focal length.

But what about the other camera settings, you might ask. How should I set my ISO and my aperture? Not all combinations of ISO and aperture will result in successful Milky Way photos.

As I said before, cranking up your ISO may result in digital noise. But you still need to have a high ISO to get enough light.

Your aperture should be wide open. So try to work with the lowest possible F-stop. Remember, your shutter speed is fixed. You can only play around with the two other elements to get enough light.

Impressive starry sky over a rocky landscape
Photo by Ashan Rai on Pexels


If you find yourself struggling to capture that starry night sky photography, using the 500 rule will improve your results a lot. If you combine it with image stacking, the difference will be dramatic.

This rule is something you should remember when you find yourself under the Milky Way Galaxy shining through the night. 


-------------------------------------------------------------------------------------------------------------

PHOTOGRAPHY FREEBIE:

How to make money with your Photography even if you're not a Pro.

Copy & paste this link into your browser, click ENTER, and enjoy: 

https://mrdarrylt.blogspot.com/2020/01/how-to-make-500-month-from-your.html

_____________________________________________________________________

Play Station $50 code.  Just copy & paste this link into your browser, 

click "ENTER" and follow the easy steps:  bit.ly/3g2Ghhi


Wednesday, July 7, 2021

 Blog Pictures from the Video Below

  
These pictures come from the video below.  I spent part of my July 4th weekend
enjoying the nice weather and the atmosphere of Forest Park in St. Louis, Missouri.
 
Occasionally I post some of my photos in an effort to encourage you to post some of yours.
I checked my statistics for the number of visits this blog had during the month of June.  Over 
400,000 of you visited.  Thank you for stopping by.  If you're an amateur photographer like me,
please feel free to post some of your photos here.  In May we had over 200,000 visits.  Last month 
that number more than doubled.  So, if you post your pics here, they will be seen. (keep it clean. NO nudes or porn)   If you'd like to
learn how to get paid for your pictures, be sure to scroll down past the video directly below this
post, and  check out the Photography Freebie that describes how a fellow amateur shutterbug 
is averaging $500 per month as a hobby photographer.  Thanks for stopping by. 'til next time,
Happy Shutter bugging!


Monday, July 5, 2021

More Photos from my Blog


-------------------------------------------------------------------------------------------------------------

PHOTOGRAPHY FREEBIE:

How to make money with your Photography even if you're not a Pro.

Copy & paste this link into your browser, click ENTER, and enjoy: 

https://mrdarrylt.blogspot.com/2020/01/how-to-make-500-month-from-your.html

_____________________________________________________________________

Play Station $50 code.  Just copy & paste this link into your browser, 

click "ENTER" and follow the easy steps:  bit.ly/3g2Ghhi