Monday, March 22, 2021

Best Exposure Settings for Pet Photography

Tags:  Photography for Beginners, Pet Photography, Exposure


Pet photography is one of the best niches of the craft. From the beautiful galloping horses to sweet bouncy puppies, animal photography is both a captivating endeavor and a difficult one.

The first step of becoming a great photographer is nailing the exposure. This can be a bit difficult when capturing pets. You have to factor in the fact that the animals move. They will not sit still for you.

That’s why we’ve put together this guide to finding the right exposure settings for your pet photography.

Acton shot of a dog running with a frisbee outdoors - pet photography exposure settings 

What Is Exposure?

Let’s start with the basics. Exposure is the brightness or darkness of a photograph. Every photographer strives to achieve what is known as ideal exposure. That’s an image that has the right amount of brightness to it!

In an ideal exposure, your whites still have details and your blacks aren’t too dark. If your whites are too bright, your image is overexposed. If your blacks are too dark, it’s underexposed.

Cute pet portrait of a boxer puppy on grass - exposure settings for pet photography

Exposure is made up of three key components: ISO, Aperture, and Shutter Speed. This is basically the formula, all three of those added together equal your exposure.

But what do they all mean?

Cute pet portrait of a dog lying on a sandy beach - exposure settings for pet photography

ISO

The ISO is your camera’s sensitivity to light. The lower the ISO number, the less sensitive the camera is to light (but the less noise the photograph has).

The higher the ISO number, the most sensitive the camera is to light (but the more noise the photograph has). Noise happens because the camera is trying to fill in information that it does not know.

This is why something that is completely black may have red, green, and blue speckles. The camera is trying to fill in the missing information.

ISO is the numbers on your camera that range from 100 – 126000 and higher.

Action pet portrait of a dog jumping for a frisbee - exposure settings for pet photography

Aperture

The aperture is the window in the lens that controls how much light does (or doesn’t) hit your sensor. It’s a hole really. I like to call it a window because it can ‘open and close its curtains’ in order to control the light impact.

The aperture mimics how the eye works. Think of a cat. When a cat is sitting in the dark, its pupil is very wide and round. Nature intended this to allow the cat to use the available light in order to expose the scene and see in the dark.

When a cat is sitting outside in bright sunlight, the pupils turn into a very narrow slit in order to let less light in. That way the cat can see the whole frame without the light being too bright!

The aperture also has a secondary use. When this window is wide open, something changes in the depth of field. It gets more shallow.

Depth of field is how much of your image is in focus. A deep depth of field indicates that both the foreground, subject, and background are in focus (and not blurred).

A shallow depth of field is when just the subject is in focus and everything else blurs away.

Cute pet portrait of a Labrador dog lying among autumn leaves - exposure settings for pet photography

Shutter Speed

The shutter speed is how fast your camera takes the photograph. The higher the shutter speed number, the more frozen the action will be (but the photograph will be darker).

The lower the shutter speed number, the more motion blur your photograph will have (but the photograph will be lighter).  

Shutter speed is the numbers on your camera that range from 1/-15 to 1/8000. 1/2000 – 1/4000 are the best to freeze action. 1/300 is great for portraits. Anything lower than 1/100 will begin to slow the camera down a lot.

Now, to break down the tricky aspect of it all. All three of these individual components make an image darker or brighter individually. It’s good to keep the following in mind.

  • The higher the ISO level, the brighter the image. The lower the ISO level, the darker the image.
  • The higher the shutter speed, the darker the image. The lower the shutter speed, the lighter the image.
  • The wider the aperture, the brighter the image. The narrower the aperture, the darker the image.

Cute pet portrait of a brown and white puppy on grass - exposure settings for pet photography

The ISO controls light sensitivity, the shutter speed controls motion, and the aperture controls depth of field.

So, how can you use this in the field?

General Exposure Guideline for Pet Photography

The easiest way to both practice exposure and to find the right exposure for your photo shoot is to eliminate one factor and only focus on the other two.

Set one of the three components at the level you need it to be at and work the other two around that.

Pet portrait of a brown and white dog resting on rocks - exposure settings for pet photography

For the most part, I use my aperture as my baseline. I prefer very shallow depths of field, so therefore I leave my aperture open all of the time.

As mentioned above, a wide aperture equals a brighter image. My ISO and shutter speed now need to be adjusted accordingly.

You’ll want your ISO at a lower level. Depending on the kind of photographs you are capturing, your shutter speed will either be fairly high for action or in the mid-range for portraits.

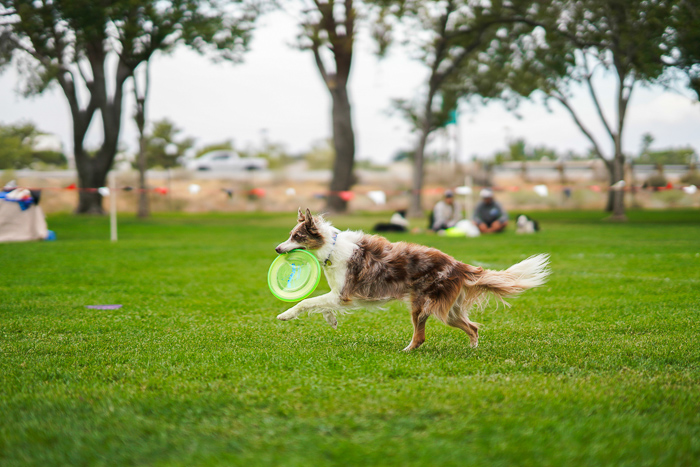
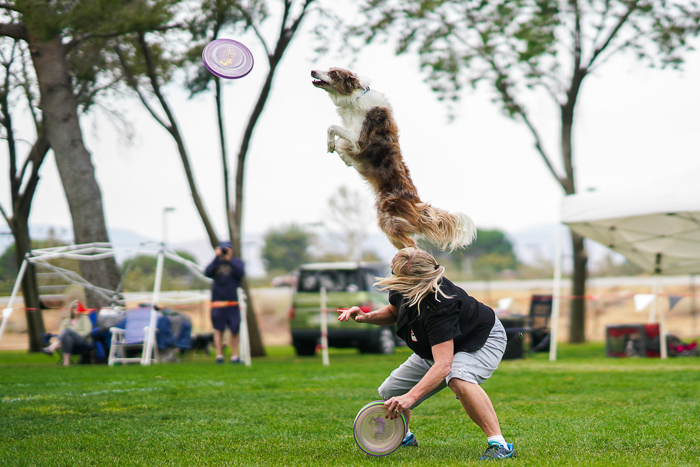
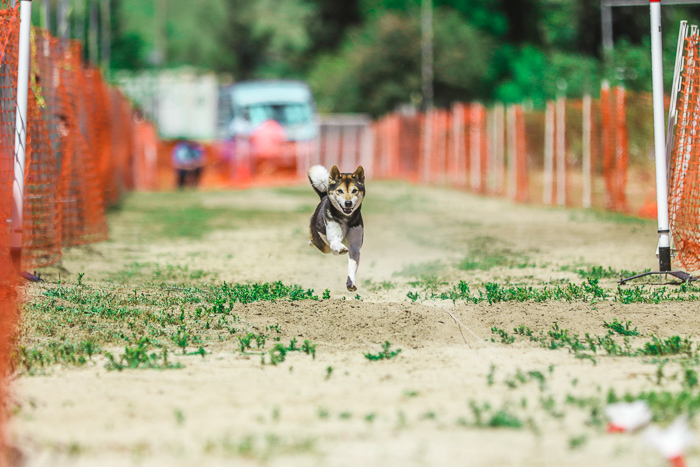
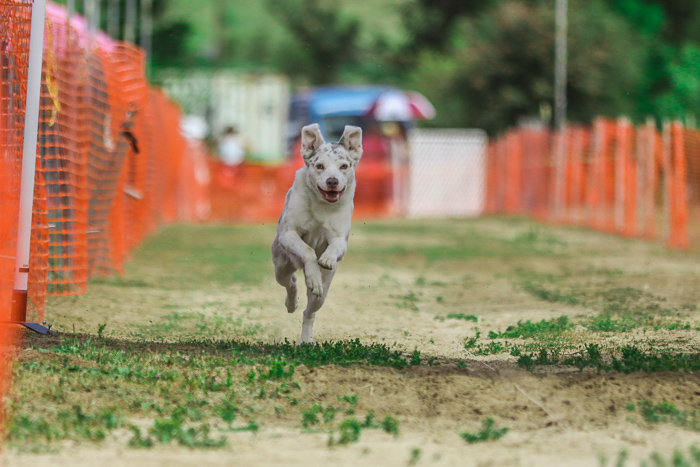
If you’re photographing dog sports that feature lots of action and moving objects, you’ll want to have a different baseline. Your baseline will be your shutter speed, as that controls motion.

You then adjust your ISO and aperture to account for higher shutter speeds equating to darker images.

Cute pet portrait of two sheltie dogs sitting on grass - exposure settings for pet photography

It’s okay to chimp in order to figure out if you’re exposing properly. Chimping is a photography term given to checking your camera review screen in between taking photographs.

Some photographers like to be a bit mean to others about it, which is pure silliness. You should be checking your camera LCD, especially with a client, to ensure you’re capturing the images properly.

All cameras have a light meter in the display when you look through the viewfinder, whether it be electronic or not, or use the LCD screen.

This meter is just a little line with numbers and marks on it, along with an arrow that moves up and down.

The ‘ideal’ exposure can be found in the center point of the line, everything to the left is too dark and to the right is too light.

The arrow will move from side to side and settle somewhere depending on how your adjustments to one of the three components changes the exposure of the image.

Use this line as a guideline. It is not perfect and it is not a tell-all, so don’t rely on it exclusively.

Some Basic Exposure Settings

Here is an exposure guide for some of the most common circumstances you’ll likely find yourself in as a pet photographer!

Cute pet portrait of a brown and white puppy on grass - exposure settings for pet photography

The type of equipment you use will also affect your exposure settings. Every lens has a different aperture width (F-stop on the lens barrel).

The smaller the number, such as f/1.2, the wider the aperture. The larger the number, such as f/22, the narrower the aperture.

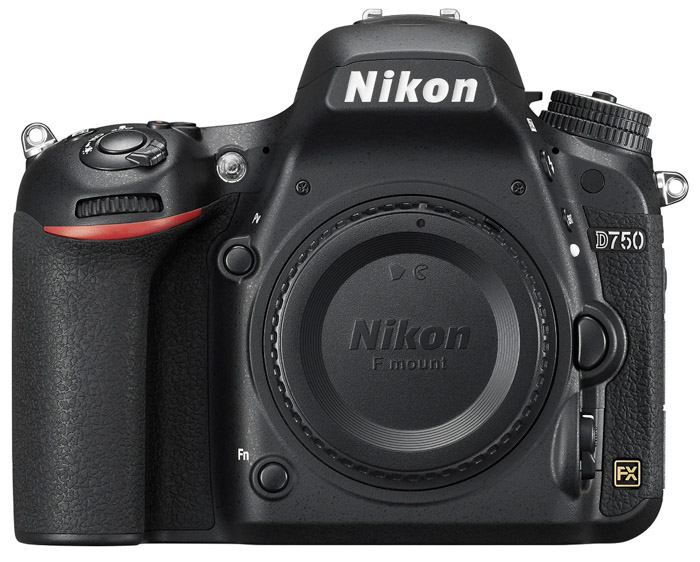
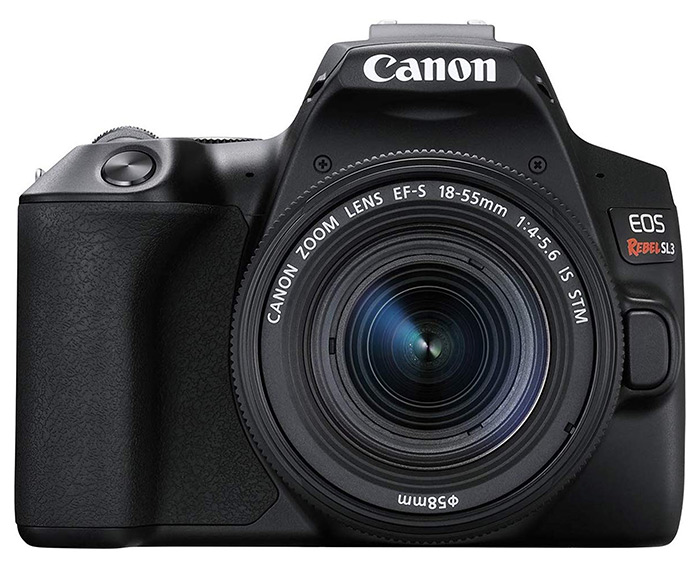
Every camera body is different as well, cameras have different maximum ISO levels, different performances at the same ISO levels, and have maximum shutter speeds.

The combination of equipment you use will be affecting how you handle the three components to the exposure formula.

Look at the below information as a general aid that you will then tailor to your specific tools.

Sunny Days

Cute pet portrait of a brown dog sitting in a field of orange flowers - exposure settings for pet photography

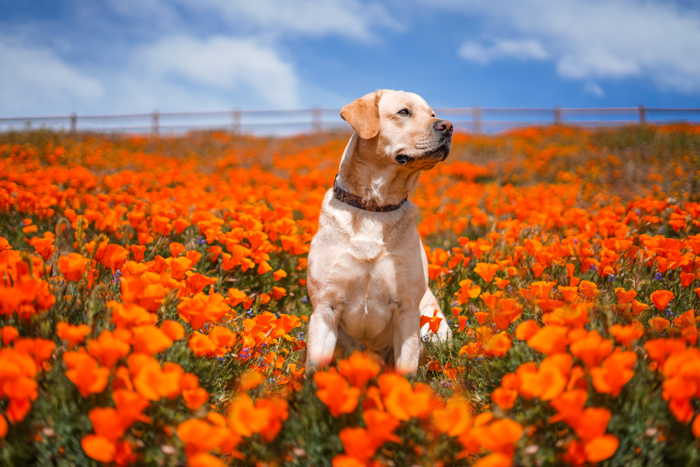
Most people who don’t do photography think that the ideal is a bright sunny day! But once you start actually taking pictures, you’ll find that sunny days are the most difficult to work with.

The sun acts as a super bright spotlight and it is directly overhead. Ideal spotlights are placed at eye level or lower and aimed upwards.

This causes shadows that you may not want. And the shadows are super dark while the highlights are super bright. But fear not, there are ways to expose for this.

Firstly, your goal is going to be to dim the super bright frame caused by the sun. If you’re like me and want a shallow depth of field, set your ISO as low as it can go. The lowest in DSLRs is 100 primarily and the lowest in mirrorless systems is 50.

Set your shutter speed as high as it can go (for the most part, the fastest shutter speed is 1/8000). See how the exposure looks from there.

Then adjust them accordingly. In some situations, it may be too dark.

Action pet portrait of a dog running at an agility competition - exposure settings for pet photography

If you’re doing portrait photography for pets, you have leeway to keep your ISO as low as possible and just lower your shutter speed.

If you’re photographing action, you’ll want to prioritize having a fast shutter speed. You might need to raise your ISO a bit higher (which is okay).

On nearly all cameras (whether you have a Nikon, Canon, or Sony), the ISO won’t start showing any form of noise or quality loss until much higher levels. For shutter speeds for action, anything about 1/2000 tends to be great.

If you pair your lens with an ND (neutral density) filter, you’ll be able to work with extremely wide apertures in the brightest of days.

Neutral density filters are filters that can modify the amount of light that enters your camera. This allows you to shoot at your desired aperture without worrying about it being too bright outside.

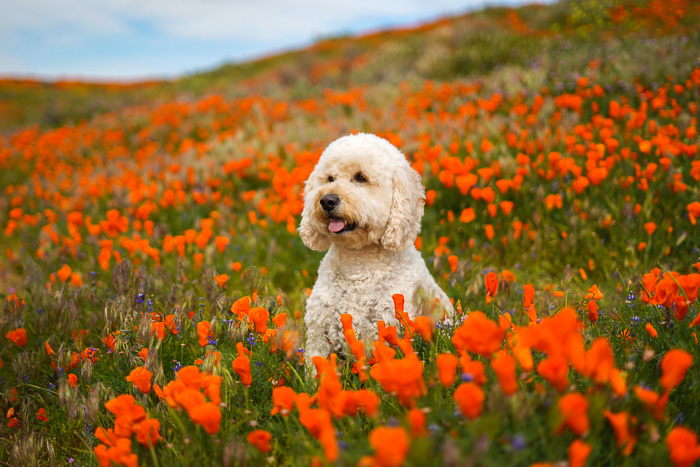
ND filters make life a thousand times easier if you have to photograph a white or light colored pet outside in bright sunlight! Or to be able to shoot with a very low aperture number during the noon sun.

Action pet portrait of a dog running at an agility competition - exposure settings for pet photography

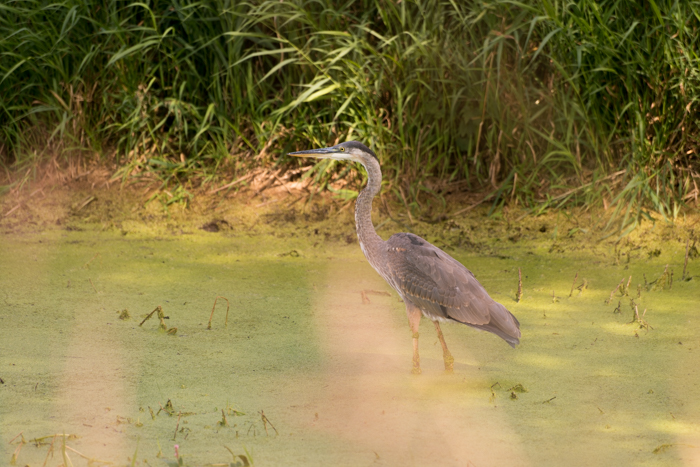
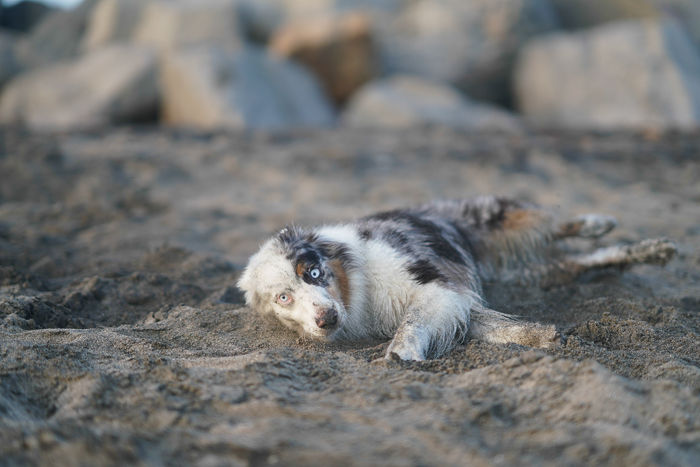
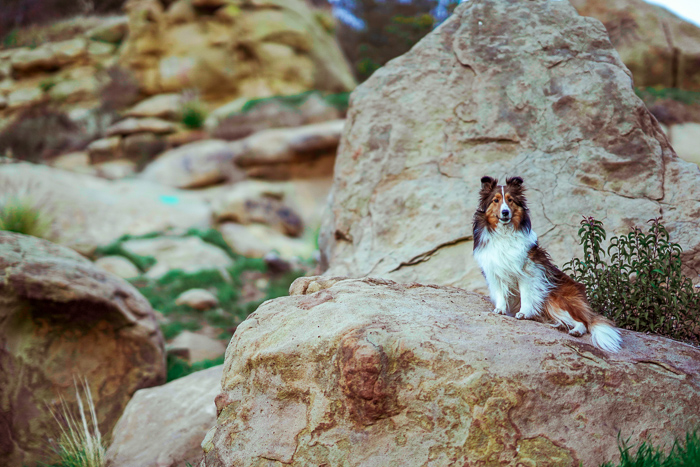
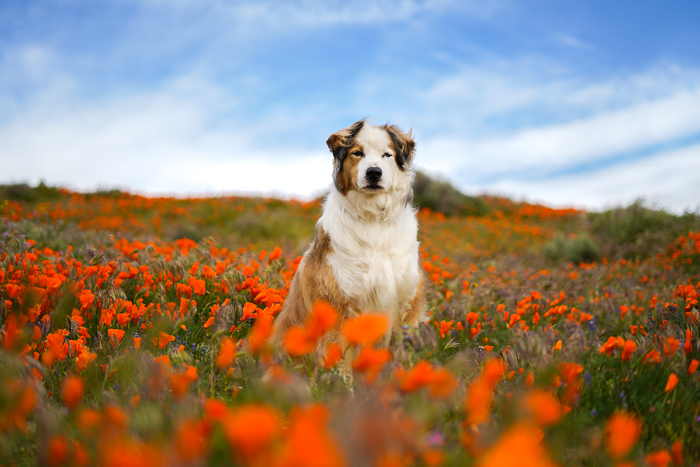
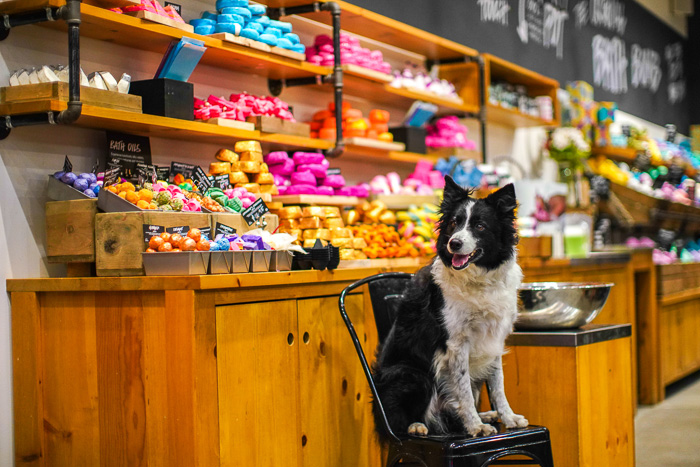
This brings me to my next point, pet colors. For animals colored in any color besides white or black, the exposure will be pretty even and fairly easy to achieve.

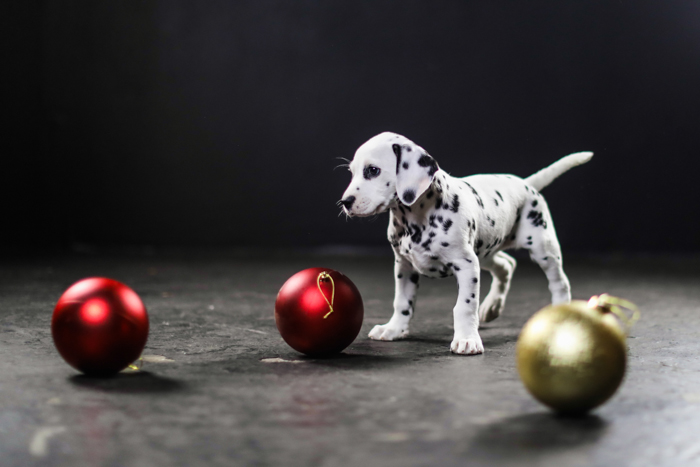
If you’re photographing an all-white dog or an all-black dog, life might get a bit more difficult. For a white dog, you’ll want to underexpose and darker your frame a bit more. A black dog will need to be slightly overexposed and lighten the details of the fur.

If you’re capturing a pet that has both black and white on them, choose the predominant color and the color most seen on the face. Keeping faces bright is a big component of animal photography. Viewers relate with the face more than anything else.
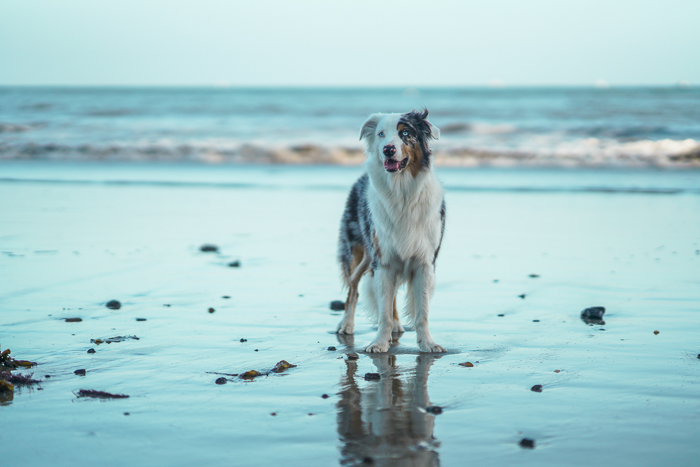
Cloudy Days

Cute pet portrait of a brown and white dog sitting in a field of orange flowers - exposure settings for pet photography

Cloudy days are akin to a massive softbox placed over the sun. The light becomes diffused and spreads very easily. You won’t be plagued with harsh shadows and highlights, and everyone will look very soft.

If anything, this is kind of a perfect blank canvas for photo editing. The colors may be a bit more muted, but this is an easy fix in post.

You should care more about your shadows and highlights. That’s more difficult to fix. 

Cute pet portrait of a white dog sitting in a field of orange flowers - exposure settings for pet photography

For cloudy days, I tend to keep my settings all fairly even. Middle ground with ISO, middle ground with shutter speed. There is a lot of leniency with high shutter speeds or high ISOs. 

Don’t be afraid to sit in the ISO 400 range and shutter speed 1/3000 range. That’s a good combination. Pair with a wide aperture and you are golden.

I can usually keep these numbers even with an aperture of F/2.8.

Cute pet portrait of a black and white dog sitting in a field of orange flowers - exposure settings for pet photography

Pets that are very light colored or dark colored stop being a problem as well!

Keep in mind that if the sky is too cloudy, you won’t have a sunset hour. The world will simply get dark very, very fast.
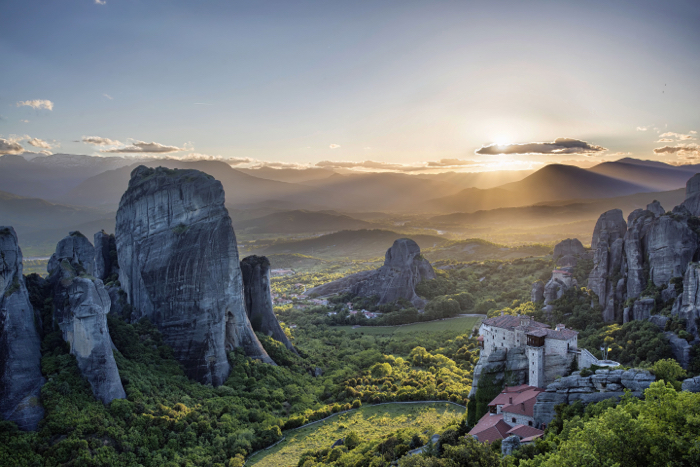
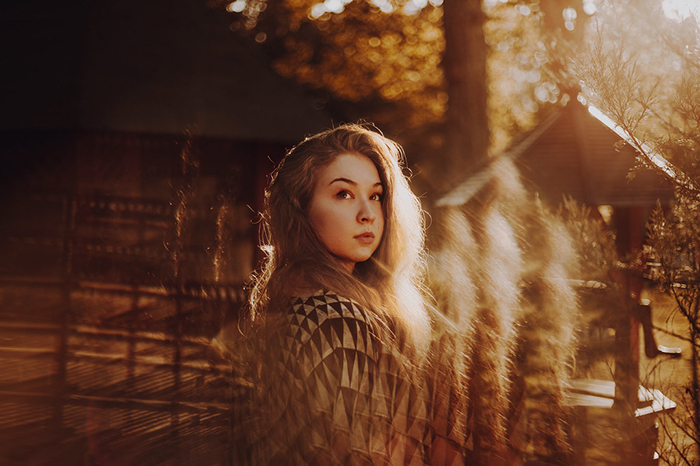
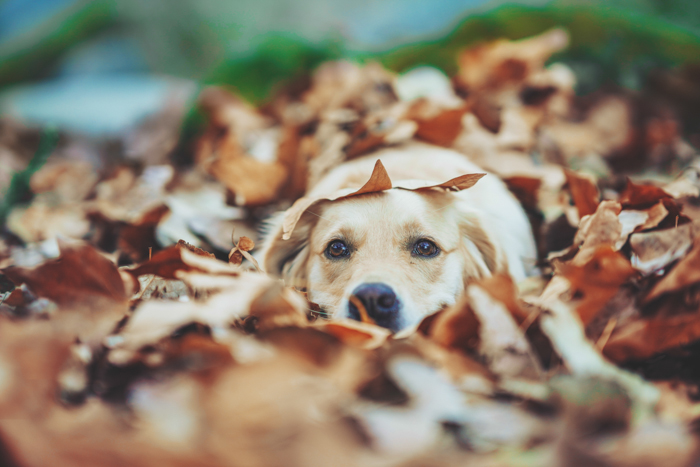
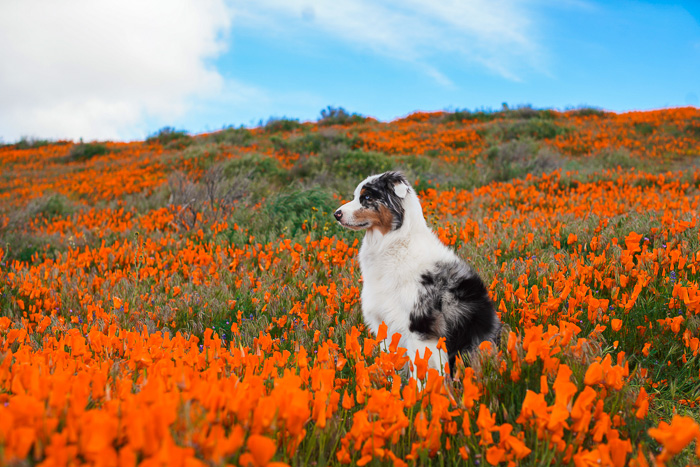
Golden Hour

Cute pet portrait of a black and white dog standing on a beach during golden hour

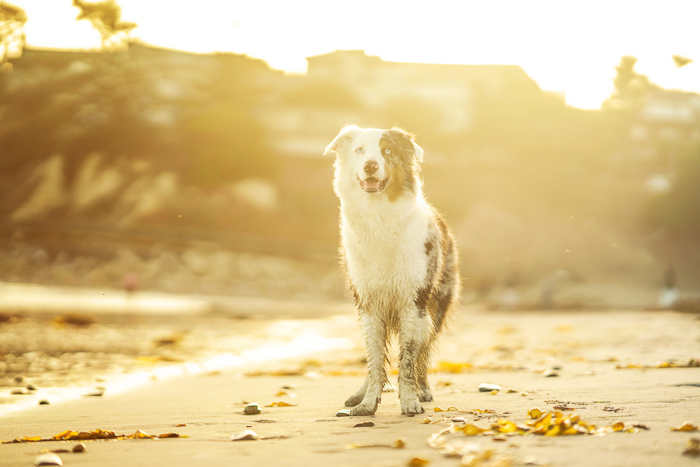
The golden hours include the first hour after sunrise and the last hour of light before sunset. What makes this lighting situation so ideal for photography is the sun’s positioning relative to what you are photographing.

Due to the sun beginning its speedy rise or setting in the sky, the light source is now closer in relation to your subject. It is also going through more of the earth’s atmosphere at this low angle.

When this occurs, soft diffused light is produced. The golden hour casts a warm color temperature as well. You can enhance or correct this via post-processing in Lightroom or different software.

This warm color lends itself to being a flattering illumination upon any subject of your choosing.

Cute pet portrait of a black and white dog standing on a beach at evening

You can adhere to cloudy day exposure guides. You’ll want to dark your frame just a bit (lower ISO level) at the beginning of the golden hour. And then raise your ISO levels slowly as the golden hour nears its end!

Remember, you have a short window, so work fast.

What About Uneven Lighting?

Cute pet portrait of a white dog standing in a forest

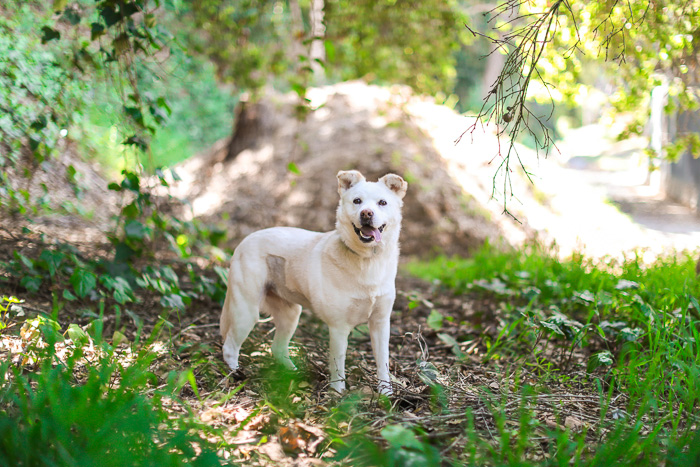
Sometimes your lighting is uneven, or spotty. There are lots of shadow spots, maybe due to a tree, and lots of bright ‘hot spots’ (due to no cover).

Much like exposing for a pet that has both bright and dark colored fur, you need to prioritize one or the other.

Prioritize whatever part the pet is standing on. If the pet is in the shadows, expose for the shadow, and vice versa!  

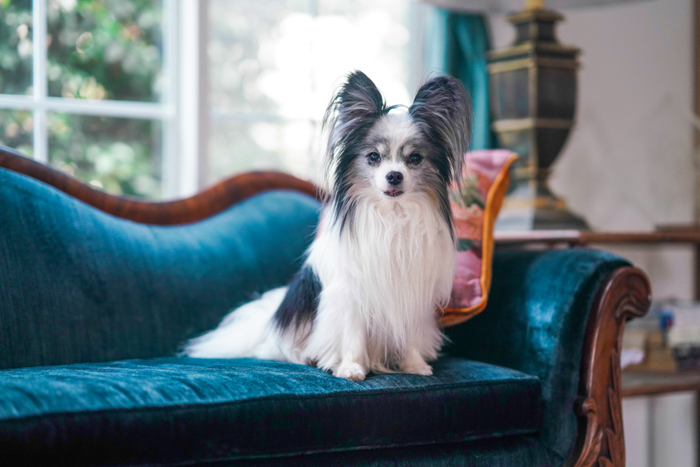
Indoor Natural Light

Cute pet portrait of a small brown and white dog sitting on a fancy chair indoors

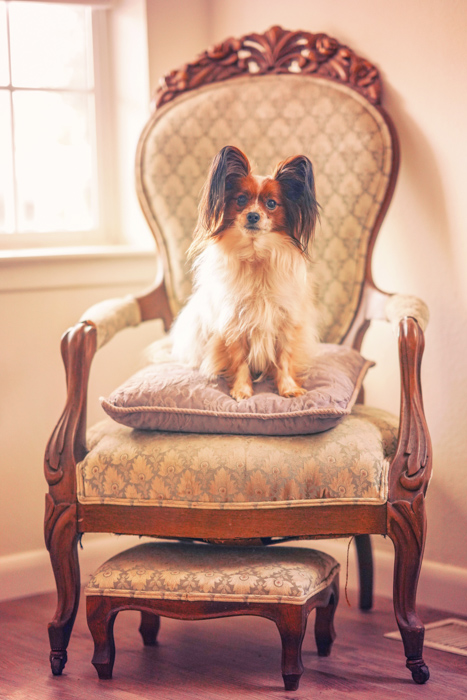
Indoor lighting is where things can get a bit trickier. You don’t have the sun to base your exposure off of, indoors, everything tends to be much darker or in low light.

You’ll be working with high ISO levels and lower shutter speeds.

Cute pet portrait of a collie dog sitting on a chair in a store

Most indoor lighting tends to be a form of fluorescent or tungsten and can run pretty warm. The warmth of the lamp will darken your frame. Especially if you’re shooting at night with less natural light from a window.

This is where the kind of pet portraits you’re capturing really matter. If you’re doing portraiture, you’ll have your shutter speed likely fairly low, like, around the 1/400 – 1/800 range.

This is in order to keep your ISO as low as possible so that noise doesn’t come out. Your ISO will likely still linger around the 1000+ range.

Cute pet portrait of a small brown and white dog sitting on a fancy chair indoors

If you’re capturing action, things get a bit harder. You will still need to prioritize your shutter speed in order to freeze the frame. As such, your ISO will rise.

The nifty trick about shutter speed is that if you pair it with burst mode / continuous shooting mode on your camera settings, you can actually lower it a little bit. Just make sure to shoot in burst (multiple images in a row)!

Generally, you’ll want your shutter speed higher than 1/800 for true action shots.

Indoor Studio Light

Cute pet portrait of a dalmation puppy sitting on a fancy chair indoors

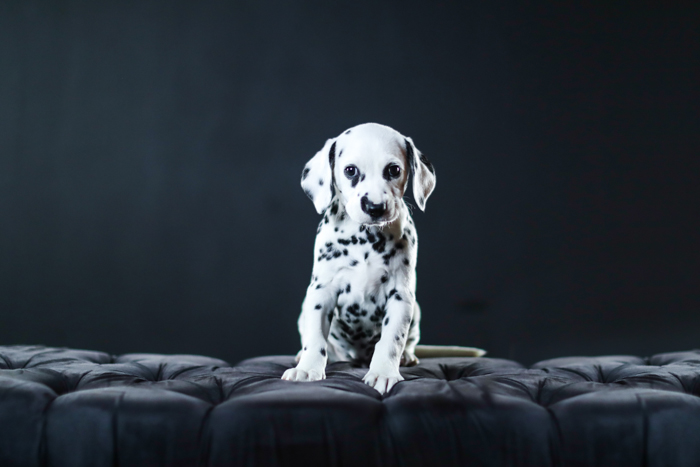
If you include a studio light, everything will be a lot easier for you. The studio light (or multiple lights) can brighten a room to whatever level you need to achieve a perfect exposure.

At that point, you don’t even need an exposure guide from us. You can set your exposure to exactly what you need and either brighten or dim the lights to fit your need.

If you’re shooting with strobes or flashes, your shutter speed will be limited. You don’t want the camera to take a photograph faster than the strobe can flash!

Usually, your shutter will be limited around 1/250 max. Continuous lights don’t have this issue.

Cute pet portrait of a Dalmatian puppy playing with Christmas decorations


Much of exposure really is dependent on your own individual circumstance and toolkit. We hope that these photography tips can help you find the right settings that suit your needs! 


---------------------------------------------------------------------------------------------------------------------

PHOTOGRAPHY FREEBIE:

How to make money with your Photography even if you're not a Pro.

Copy & paste this link into your browser, click ENTER, and enjoy: 

https://mrdarrylt.blogspot.com/2020/01/how-to-make-500-month-from-your.html

                                                         or

https://www.photography-jobs.net/?hop=darryl54

 ----------------------------------------------------------------------------------------------------------------------

Visit me on Facebook and post your pictures.

https://www.facebook.com/Darryl-T-363867387724297/  
----------------------------------------------------------------------------------------------------------------------
Need a camera?  Try this link (Tri State Camera) for discounted prices:  https://ebay.to/2Smb1ho


Thursday, March 18, 2021

The 10 Best Street Photography Camera Options in 2021

Tags: Photography for Beginners,  
 

Street photographers are always searching for the best street photography camera. Luckily, there are always new cameras developed and released on the market.

So, what is the best camera for street photography? It depends on what you are photographing. Candid images are going to be challenging to capture with a hefty DSLR camera. Architectural images won’t have the HDR (high-dynamic range) they deserve from a point-and-shoot.

But the camera is not the only important factor for great images. A stunning photograph comes from a multitude of areas. You need a useable camera and a quality lens, of course. But patience, planning and confidence are just as essential.
A black and white street photography shot of a girl standing in front of a carved stone wall

What to Look for in a Street Photography Camera

There are a few things your camera will need for capturing street photography. No matter what your focus is, shooting in RAW is a must. It gives you more play when editing your images.

A system that allows you to change your lens is a plus, but not a necessity.

What is the best focal length for street photography? You’ll get the best, most inclusive shots with a medium-wide lens. Around 28mm, in my experience.

A High ISO range is beneficial in low-light conditions. Perfect for shooting behind windows and night-time photography.

Portability is also essential. You may find yourself traipsing far-and-wide over a city, capturing all it has to offer. You don’t want to have a camera that is too bulky.

Speed is essential in capturing those moments that happen in a blink of an eye. A high burst rate is really useful. It will allow you to have more chance to snap an image at the perfect moment.

A large, bulky camera is easily spotted a mile-off. This can stop you from catching those candid shots. It will not fit in your pocket for discreet, spy-like captures. A poorly designed camera body also means more time to navigate through those buttons and settings.
A female street photographer holding a DSLR camera and taking candid shots of passers by

DSLR

DSLRs are not for every type of street photography. If you want powerful sensors, high framerates, and other fancy features, you’ll pay a lot. And the camera will be big and heavy. If you want a smaller, cheaper package (say, under $1000), you have to make sacrifices on other fronts.

For some, a DSLR camera is still the preferred type for street photography. So, let’s see the camera options I recommend.

Nikon D780

The 24-megapixel D780 is a fresh update of the well-known D750. It’s relatively inexpensive and has all the advantages of a typical full-frame DSLR.

This includes a wide dynamic range, lens options, great control surfaces, and two card slots. So, if you ever want to use it for something else than street photography, it won’t fail you.

It also features a new EXPEED 6 image-processing engine besides WiFi connectivity and an unbelievable ISO capacity of 204,800. Besides these, Nikon recently started using backlight illuminated sensor technology to ensure that your images will be tack sharp and detailed.

It’s a workhorse camera, that’s for sure, and a great choice for street, too. A sturdy and reliable model which probably won’t disappoint you. Nikon D750 DSLR cameras for street photographers

Canon EOS 250D / SL3

Canon’s best cameras for street photography are no longer their DSLRs. But when it comes to less expensive choices, one still stands out.

The SL3 is one of the smallest and lightest DSLRs ever made, yet it’s packed with powerful features. First in Canon’s Rebel series, it shoots 4K video. Its 24MP APS-C sensor produces nice images throughout the day. But don’t expect a revelation in low light.

Its autofocusing system is quite outdated in viewfinder mode. But Dual Pixel autofocus is accurate in live view mode. It tracks subjects well. A flip-out screen helps composition from unusual angles. Wireless connectivity options make it a great choice for on-the-road sharing.

Pair it with a 24mm f/2.8 pancake lens for a compact, affordable and expandable DSLR camera setup for street photography.
Canon EOS 250D / SL3 street photography cameras

Rangefinder

Leica M (240)

The Leica M (240) Digital Rangefinder Camera is a one-of-a-kind. The 240 is bigger than it’s older brother M model. However, it has a very quiet shutter action. This is perfect for close-ups and candid street photos.

It has live view capability, through its 3″ LCD screen. The rangefinder is a treat for all those who miss it from the newer generation of cameras.

ISO runs all the way to 6400, yet only minimal noise comes even from the 3200 ISO setting. It has a full-frame sensor with a resolution of 24MP. The image quality of the jpegs is amazing, but it is a Leica we are talking about.

It is the most expensive camera here, coming in at well over double the price as other cameras. You pay for the brand and the feeling here. If that’s something that inspires and motivates you, the 240 won’t fail you.

It is a powerful camera for street photographers; just don’t be afraid to take it out.
e Leica M (240) Digital Rangefinder Camera for street photography

Fujifilm X100V

Fujifilm’s new fixed-lens rangefinder camera is similar in feel and handling to a Leica. Its price is quite high, too, but you get what you pay for.

Its brand-new, 23mm f/2 lens produces razor-sharp, colourful image quality. Paired with the 26MP APS-C sensor, the X100V promises excellent detail and dynamics.

It’s weather-sealed (if you add a UV-filter), and it’s built from high-quality metal. Durability won’t be an issue. Straight-out-of-camera tones (especially skin tones) are beautiful. If you can justify this price for a fixed-lens camera, you’ll love the X100V camera for street photography.

Fujifilm X100V street photography cameras

Mirrorless

Sony A6600

Sony’s fantastic new crop-sensor camera promises a lot for street photography. Its blazing-fast hybrid autofocus system and high burst rate make sure that you’ll rarely miss any shots.

Its grip, while still not giving the same feel as a large DLSR, is comfortable to hold for longer periods. Yet, the body is still small. If you pair it with small or medium-sized lenses, you’ll get a stealthy street combo.

My recommendation is to use it with Sony’s 20mm f/2.8 pancake lens for street photography, the size and focal length are perfect.

Sony A6600 mirrorless camera for street photography

Canon EOS RP

Canon’s tiny and cheap full-frame mirrorless is also an excellent option. Its 26MP sensor offers solid full-frame performance in terms of image quality.

Its Dual Pixel autofocus is fast and accurate, even in dark conditions. A recent firmware upgrade fixed many issues that earlier reviews criticised.

In a kit with the RF 35mm f/1.8 lens, it’s a fantastic deal for street photography.Canon EOS RP street photography cameras

Canon EOS M6 MkII

Canon’s flagship APS-C mirrorless is a mini power station. It has a 32MP sensor and incredible tracking capabilities. Yet, it still fits in a similar-sized body as the A6600.

The issue with Canon sensors’ dynamic range is finally gone. The M6 MkII (like the 90D) is now up there with the competition. One downside is that it doesn’t have a lot of native lens options. The EF-M mount is not a wide-spread one.

Pair it with the EF-M 22mm f/2 lens, and you have a small, lightweight kit – perfect for capturing candid street moments.
Canon EOS M6 MkII cameras for street photography

Point-and-Shoot

Ricoh GRIII

The Ricoh GR III is tiny, fits in my pocket and allows me perfect spy-like images. A 28mm-equivalent, f/2.8 lens extends of the camera body but folds back when the camera is turned off.

Thanks to its phase-detection-based autofocus system, locking in on subjects is quick and accurate with the GR III.  Its magnesium-alloy body makes this a very durable, easy-to-tote street photography camera.

Its 24MP APS-C-sized sensor produces dynamic and colourful (raw) photos, with low noise levels. Ricoh omitted its optical low pass filter for ultra-sharp and detailed images. We love that!Fujifilm X70 street photography cameras

Fujifilm X70

Very similar in size and handling to the GR III, Fujifilm’s X70 is another advanced point-and-shoot. It has all the advantages of Fujifilm. Beautiful colours, film simulation modes, retro-like layout, and a beautiful, durable body.

Its autofocus is quick and snappy, utilising on-sensor phase detection. A 28mm-equivalent, f/2.8 lens projects clear and colourful images to the 16MP APS-C sensor.

It’s cheaper than the GR III – but it’s also one generation older. Both are designed and best used for street photography.Fujifilm X70 cameras for street photography

Your Smartphone

It’s a common saying, but true: the best camera is what you have with you.

This is particularly relevant for street photography, where your aim is to capture everyday scenes. You need to have your camera ready for that.

You most likely have a useable camera on your phone. It will be more than enough for shooting street photography with good image quality.

Most smartphone lenses are around the 24-28mm effective range. Thanks to intelligent algorithms, their sensors are getting better every day. Even for low-light performance. That’s what I recommend for street photography anyway – great!

A person shooting street photography at night with a smartphone

Each one of these cameras has a specific area it will shine in. The DSLR captures the meat and majority of your work, due to lenses and settings.

The mirrorless systems are not far behind. They let you move freer and get more shots. They are also lightweight, meaning you won’t be frustrated with carrying the camera around.  We value your input.  Let us hear from you in the comments below.


---------------------------------------------------------------------------------------------------------------------

PHOTOGRAPHY FREEBIE:

How to make money with your Photography even if you're not a Pro.

Copy & paste this link into your browser, click ENTER, and enjoy: 

https://mrdarrylt.blogspot.com/2020/01/how-to-make-500-month-from-your.html

                                                         or

https://www.photography-jobs.net/?hop=darryl54

 ----------------------------------------------------------------------------------------------------------------------

Visit me on Facebook and post your pictures.

https://www.facebook.com/Darryl-T-363867387724297/  
----------------------------------------------------------------------------------------------------------------------
Need a camera?  Try this link (Tri State Camera) for discounted prices:  https://ebay.to/2Smb1ho


Thursday, March 11, 2021

Which Type of Landscape Photography Is For You? (Choose From 21 Types!)

Tags: Photography for Beginners, Landscape Photography, Nature, Urban, Sunsets
 

Landscape Subject

The first decision you’ll need to make is what subject you want to concentrate on.

There are lots of different subjects you could approach, below you’ll see a summary of these.

You could choose more than one subject and use a single photographic technique to portray it.

Photo of an urban cityscape with skyscrapers
Urban cityscapes are very popular subjects, like this one in Bangkok.

1 – Urban

This is an exciting area of photography for many photographers. Not least because it’s likely you already live in, or near a big urban centre.

The larger the city you’re photographing, the more interesting it will be. Bigger cities tend to have the type of architecture you’ll want to photograph.

Urban landscape photography can roughly be divided into three sub-categories.

  • Cityscape – This type of photo aims to show a large part of the city. It needs to give a sense of scale to the place. You’re looking for a vantage point, and you’ll use a wide angle lens for this. Look for accessible tall buildings, or a hill overlooking the city for this.
  • Urbex – This entails photographing abandoned buildings, or accessing underground tunnel systems. Urbex stands for urban exploration. Look to take gritty photos, in interesting locations. Urbex can be dangerous though, so make sure you stay safe.
  • Architecture – Stunning architecture is a staple of urban photography. Look for new buildings, statues or bridges for this.
Unique photo of a cherry tree photographed through a lensball
The natural world is full of landscape possibilities. This photo utilizes a lensball to capture 
an image of a cherry blossom tree.

2 – Nature

At the other end of the scale to urban photography is nature photography. In this case the more remote you can go, the more stunning the landscape is likely to be.

You can always find amazing natural locations you can reach by driving your car. But chances are you’ll be taking a photo like those taken by many other people.

The true wilderness will reward you. Think deserts, mountain ranges or even volcanos.

Photo of a waterscape with a fisherman at sunset in purple, orange, and yellow colours
Sunsets and sunrises make for great photos. This coastal location is minimalist in nature, 
and there is a silhouette of a fishermen in the frame.

3 – Sunsets or Sunrises

In the case of both nature and urban photography, sunset or sunrise are an ideal time for photos.

Many landscape photographers will only photograph during this time. Why is that? This time of the day gives you all those warm colours in the sky, something only seen for a short time during the day.

It’s also a time when the light is easier to control, it’s less bright and comes from a lower angle.

Not every sunset is the same though, and planning needs to go into getting the best results.

  • Time of year – The position of the sun changes all year round. The farther away from the equator you are, the more dramatic this shift will be. You can plan for the sun to set in a specific location for more interesting photos by using a website like suncalc.
  • Sunset or sunrise – Is your location a sunset or sunrise? If it’s a sunrise you’ll need to be prepared to wake up early in the morning. Check the sunrise time and be there an hour before that time.
  • Check the weather – If it’s raining, you’re not going to see a sunset or sunrise. So check the weather forecast before heading out.
Astrophotography shot of a desert and the night sky above with stars and the milkyway
Astrophotography has become very popular. You will need to find dark sky locations to 
capture the milkyway.

4 – Astrophotography

Camera equipment has improved a lot in recent years. Camera’s can now perform well even at higher ISO’s. This has meant photographing the stars is easier than before. Subjects like the Milky Way are becoming more and more popular.

The following are some typical subjects you can photograph in the night sky.

  • Star trails – Use a program like StarStax, and create beautiful star trails across your photo.
  • The Milky Way – You’ll need a wide-angle lens with a large aperture, and a camera capable of performing at high ISO. Milky Way photos can be magical, it’s an amazing genre.
  • The Moon – This requires a lens with a long focal length. You can still get good results with a regular zoom of 300mm. You will have to crop the image in post processing to zoom further in on the moon. Look for events like eclipses for even more dramatic results.
  • The Aurora – Visiting somewhere like Iceland is like going to Mecca for a photographer. One of the main reasons for this is the chance to photograph the Aurora. You can photograph this anywhere as long as you’re close enough to the north or south pole.

5 – The Seasons

The changing seasons can make for a dramatic photos. Capturing the seasons can mean visiting the same location many times. You can photograph the same composition during winter, spring, summer and autumn. This photo series is classic and timeless.

There will be some locations which work very well for a particular season. But they might be less dramatic at other times of the year. Use these location scouting techniques to figure out the best spot.

Types of Landscape Photography Techniques

The type of landscape photography technique you use can also lead to you have a particular style.

The following are some of the most popular landscape photography techniques out there. Read on and see if one of these fits your style.

Photo of a cityscape from a worm's eye view with light painting
Light painting is a great photography technique, here you can see kinetic light painting 
taken from a worm’s eye view.

6 – Light Painting

Light painting is one of the most creative techniques out there. There is an immense amount of potential that comes with it. In fact you’re making your own image here, so you can make compelling images from any location.

The genre has many tools you can use. Keep in mind you’ll need to find a location that’s dark, and you’ll need a tripod.

  • Wire wool – Place some fine grade wire wool into a metal whisk, set it on fire and spin. You’ll get dramatic results, but be careful of the fire risk.
  • LED light stick – Two light sticks have transformed light painting in recent years. The Magi light, and the pixel stick are very creative tools.
  • Light orbs – Place a light source on the end of a string and spin it to create light orbs.
Photo of a landscape and an Asian-style temple in infra-red
Infra-red photography can have a transformative effect on a scene.

7 – Infrared

This technique is a great way of transforming your scene into a dreamscape. You’ll need the conditions to make a success of this technique. Look for a sunny day with a few clouds. At the very least you need sunshine. IR photography works best when leaves are photosynthesising.

When vegetation photosynthesises the light it emits is infra-red light. This is what you’ll use for this type of landscape photography.

You can manipulate the white balance in camera, or post-process later. IR photography will make any green vegetation appear white.

There are two main approaches to this form of photography.

  • Filter – Attach this to the front of your camera to filter all light out, except infra-red light. You’ll likely need to use long exposure when using a filter.
  • Adapted camera – You can get your camera body adapted so that it photographs in infrared light. It now performs like a regular camera, only the images will all be infra-red.

8 – Lensball photography

A popular form of photography in recent years involves the use of a lensball. This is a glass ball that works as an external lens optic, this can be handheld or put on the ground.

You can capture a fisheye-like image within the ball and blur out the background behind the ball.

You’ll have to overcome the challenge of the image within the ball being upside down. This is all part of the fun when using one of these spheres.

Long exposure photo of a waterscape in black and white
Long exposure was used in this photo to flatten the water an give a minimalist feel.

9 – Long Exposure

Another favourite of landscape photographers is long exposure. Use this to transform the moving elements within your frame.

You’ll need a tripod to carry out photographs of this type, and a strong neutral density filter.

Use an ND1000 filter if your wish to take long exposure photos during the middle of the day.

The following are popular subjects for long exposure photography.

  • Water – Long exposure can flatten the sea, or make white water at a waterfall appear like silk.
  • Clouds – On days that clouds move across the sky a long exposure can capture this motion.
  • Light trails – Car light trails are the most popular here, but you can use boats too.

10 – Silhouettes

Silhouettes can form interesting landscape photos. These photos can be very minimalist in nature. The silhouette is your main subject.

A great landscape composition is layering silhouetted mountains against one another. Another great option is to silhouette a person or object against a sunset sky.

Different Landscape Compositions

Composition is a key element of a photo. There are several different options available here to photographers.

You can even choose one and make it your signature style.

11 – Worm’s Eye

This describes a composition where you are looking straight up, from ground level.

This works best when you’re surrounded by tall objects. Make sure those objects are close into the camera. Think of tall buildings in a city, or trees in a forest.

Night-time photo of an urban cityscape with skyscrapers from a birds-eye view
Roof topping is one way you can acheive a birds-eye view.

12 – Bird’s Eye

The bird’s eye view describes looking straight down. You’ll want to be taking this type of photo from an elevated position.

The world from above looks very different.

The perspective lends a minimalist vibe to your work. Roads cutting through the countryside are a good subject for this.

There are several ways to achieve a perspective like this.

  • A high position – This can be an overpass looking over a road, or the viewing deck of a tall building. Getting into a higher position than your subject is all that’s required.
  • A drone – Nowadays there is the option to fly a drone. This gives you a lot of freedom for your composition.
  • In flight – The old approach to flying could also work. A ride on a helicopter, out of the window of a plane, or even taking a hot air balloon ride.

13 – Minimalism

Minimalist landscapes look striking. The question is how to go about achieving this look? You’ll often need to visit somewhere like a desert or a coastline for this.

Get your wide angle lens, and look for one single subject. The rest of the frame should be simple and uncluttered.

14 – Panorama

One of the most popular landscape compositions is the panoramic shot. It’s not be something everyone photographs for. The six by four composition most camera’s have means extra work to produce them.

It’s a great composition though. And it works well for many landscape photography situations be it nature or urban.

The following are the options available to produce this composition.

Photo of the silhouette of a temple with mountains in the background
Layered silhouettes work well in this photo. The outline of the temple acts as the main 
subject in this image.

15 – The Single Subject

It’s almost a given that your photo will have the one main subject. A successful photo will cut out other areas of the photo to allow the view to focus on the message of the photo.

Choosing one subject means your photo is likely to be minimalist in nature, but what will that subject be?

You might be an urban photographer and all your photos focus on bridges as the main subject. If you’re a nature photographer, it might be a single tree.

You might even include one person in each photo. They could be looking off into the distance giving your photo a narrative.

16 – Wide Angle

Not all landscape photos are taken with a wide angle lens. Some photos involve the use of a long telephoto lens.

The long lens will be for distant cityscapes, or to focus in on some distant mountains.

The wide angle composition makes you work more for the photo though. You will need to think about what to include in the foreground elements of your photo.

Get low to the ground and let the foreground jump out of the frame with your wide angle lens. Include roads in the foreground, as they lead up to your main subject in the background.

Photo of an Asian-style gate with blue sky, clouds, and the sun shining through
Using a small aperture in this photo makes the sun appear as a starburst.

Post Processing Landscape Photography

The final part of any photographers workflow is post processing. This is an area rich with possibilities. You can explore it more for your type of landscape photography.

Here are a few types of post-processing for landscape images.

17 – Black and White

This is one of the most popular forms of photography. It’s difficult to reproduce the results you’d get with a film camera. But with the correct post processing you can still get good results.

Avoid using the camera’s built-in black and white function. Focus on post processing a RAW file.

Black and white photography is all about contrast. You only have grey-scale to work with after-all. Look to introduce this using adobe camera raw.

You can carry out the majority of the work with Nik Silver efex. This program has a range of presets. You can use them on your photo to give it the punch a good black and white photo should have.

18 – Digital Blending

Another very popular way to edit photos is digital blending. You’ll notice HDR is not in this list of 21. That’s because digital blending is far superior. It allows you to manually blend together photos of differing dynamic range.

This will be a real game changer for most photographers. You’ll produce natural looking photos that have a real impact.

Photo of a panoramic landscape with digital blending
In this photo, digital blending was used to balance the foreground with the sky.

19 – Desaturating

A lot of photographers want to add to the saturation of an image to make it more colourful. Photography is all about your style though, and it can be very pleasing to de-saturate as well.

This works especially well if you have a sequence of photos that all have a uniform editing style.

You can achieve this look by reducing the saturation of your image. You might also choose to reduce the contrast as well.

Nik color efex has several filters that will allow you to create this de-saturated look if this is your aim.

20 – Time-lapse

Another type of landscape photography is time-lapse. This is a video of course, but you may want to experiment with this style.

The key is to get a sense of movement. You’re looking for places where traffic moves, people move, or clouds move.

One of the best uses of this style of recording shows day turning into night or vice versa. What’s happening here is single frame photos are stacked together to form a continuous video-like scene. The clouds and other objects are moving fast across the frame.

One of the latest styles to explore is hyper-lapse. It’s time-consuming but very creative.

21 – Presentation

You can also look to present your photos with style. In galleries photos will often have white or black borders.

You can add this to your image for online presentation. By using this with all your photos you can develop a style. You could also experiment with the vignetting effect within the image itself.

Darkening or lightening the edges of your image will draw the eye to the central area of your photo. This is likely your main subject.

Conclusion

With so many landscape photographers out there, it can be hard to stand out from the crowd. It’s especially tough given that the majority of the world’s iconic landscapes have been photographed many times before.

This article presents the many ways you can add your own style to the landscape photo you wish to take. The aim is to develop your style. When people see your work they know it’s you without even needing to look at the name tag.

Do you use any of the landscape styles listed above, or indeed a combination of the above? Is there a style you use, which isn’t on this list?

We’d love to hear from you, and see your landscape photos. Please share any thoughts or images in the comments below.


---------------------------------------------------------------------------------------------------------------------

PHOTOGRAPHY FREEBIE:

How to make money with your Photography even if you're not a Pro.

Copy & paste this link into your browser, click ENTER, and enjoy: 

https://mrdarrylt.blogspot.com/2020/01/how-to-make-500-month-from-your.html

                                                         or

https://www.photography-jobs.net/?hop=darryl54

 ----------------------------------------------------------------------------------------------------------------------

Visit me on Facebook and post your pictures.

https://www.facebook.com/Darryl-T-363867387724297/  
----------------------------------------------------------------------------------------------------------------------
Need a camera?  Try this link (Tri State Camera) for discounted prices:  https://ebay.to/2Smb1ho


Thursday, March 4, 2021

How to Shoot Surreal Portrait Photography

Tags: Photography for Beginners, Portrait Photography, Surreal, 
 

Surreal portraits are often thought-provoking, haunting, otherworldly, or a mix of all three.

Want to make your portraits look surreal and feel exciting at the same time? Here are a few important (and easy!) tricks you need to keep in mind.

What Is Surreal Photography?

Surreal portrait photo of a man with painted face
Surreal portraits almost always make you wonder about the story behind the picture. You might end up with more questions than answers. But isn’t it the whole point of surrealism in general?

Surrealism is a form of art that focuses on dream-like elements. These elements can be bizarre, like Dali’s The Elephants, or unbelievably realistic, like Justin Peters’ Cloud Whale.

These two examples are very different. But they share the same characteristics. They aren’t something you’d see in everyday life.

Yet, they’re still capable of making you think from a different perspective. You might even find them relatable on an emotional level. Surreal pictures are often something you could potentially see in a dream.

Recreating dreams is a common technique in various photography genres. But it’s especially popular in surreal portrait photography.

You can shoot stunning surreal portraits if you play around with facial expressions, poses, or props.

Surrealism allows you to express yourself, experiment, and create fine art.

Keep Facial Expressions Serious to Intensify the Surreal Effect

In surreal portrait photography, you’ll notice that models have similar expressions. They might look lost in thought, confused, unaware of the camera, and so on.

The seriousness of their expressions plays an important role. It has the ability to intensify the surreal effect of the portrait.

If they looked cheerful in the middle of an unusual landscape, the image would look out of place. There’s nothing wrong with this mix, but it doesn’t define the surreal portraits genre.

The more serious your model looks, the easier it is to make even simple compositions look surreal.

Here are a few general portrait examples to use as references. Share them with your model before the photoshoot to ensure that you’re both on the same page.

Not every expression will go well with your theme. Be open to your model’s feedback. Don’t hesitate to experiment!

Portrait photo of a woman in brownish hues

Simply looking up will make your model look like they’re lost in thought or looking at something mysterious in the distance.

Black and white portrait photo of a woman

When you shoot profiles, take a few photos where your model looks straight ahead or a little to the side. Like the previous expression, this will create mystery and continuity.

This way, your model’s expression will suggest that there’s more to your photo than meets the eye.

Photo of a woman looking out of a window on a rainy day

One of the best ways to create pure surrealism is to hide your model’s face completely. You can do this by asking them to stand with their back to the camera.

You can also have them cover their faces with masks, hair, or their hands.

Surreal portrait photo of a woman with a blurry effect

This expression is great for emotional or tranquil photographs. All your model has to do is close their eyes and slightly part their lips.

Close-up portrait photo of a woman looking directly into the camera

Last but not least, ask your model to make an intense expression when looking at the camera. This is perfect for close-up portraits, as the viewer can make eye contact with the model.

This way, they will not be distracted by other subjects.

Use Moody Lighting to Enhance Your Story

Photo of a woman running on a field with a bird flying beside her

Moody lighting can also intensify the surreal effect. This setting makes it easier for you to set the mood at the beginning of your photoshoot.

Moody lighting exists in many forms. If you want to use natural light, shoot when it’s cloudy or gloomy outside. You can also shoot indoors when it’s cloudy for an even moodier effect.

You can also use artificial light for a sharper result. This will give you more control over the atmosphere in your images. Artificial light also allows you to shoot as much as you can, without having to worry about unpredictable weather changes.

Keep your artificial light bright but limited. You can use neon lights or cover any light source with colored gel filters.

Portrait photo of a woman in the dark with neon lights

Use Layers to Create Depth and Mystery

Surreal photo of a woman with a textured layer

Surrealism goes hand in hand with unusual ideas. Because of this, you can use cheap but unusual props to enhance your portraits. These can be curtains, transparent sheets of paper, or anything else with texture.

You can use these props to hide parts of your model’s face, make them less visible, or add depth to your photos. The more textured the material you use, the more mysterious your images will look.

Layers are also an easy way to make a dull composition stand out. All you have to do is shoot through them with your model posing somewhere in the distance.

For a softer effect, use a large aperture like f/2.5. This will blur any layers that are out of focus and create even more depth.

A blurry effect will also make it harder for viewers to understand what’s going on in your image. This is perfect for abstract and surreal portraits.

Use Smoke Bombs to Create Dreamlike Atmospheres

Surreal photo of a person standing with an umbrella with the use of a green smoke bomb
It’s likely that the model in this shot posed for a few seconds before putting the smoke bomb 
away. Concepts like this are inspiring but quite dangerous as well. Don’t try to recreate this 
unless you know how to handle smoke bombs professionally.

Another easy way to take outstanding surreal portraits is to use colored smoke bombs.

Smoke bombs are affordable and can be used in a variety of settings. You can use them as backgrounds, foregrounds, or props to hide your model’s face.

They can be quite dangerous though, especially when used indoors. Familiarise yourself with smoke bomb hazards to keep yourself and your model safe.

If the risks outweigh the creative benefits, you can use incense or flour instead.

Use a Slow Shutter Speed to Create Eerie Motion Blur

To make motion blur look even more eery, convert your surreal portraits to black & white. You can do this in-camera or in post-editing. Converting your images afterward will give you more control over the tones in your work.

Black and white portrait photo of a man with a motion blur effect on his face

Fast shutter speed is great for capturing movements in detail. Slow shutter speed is ideal for soft and eerie images.

Slow shutter speed is often used in landscape photography to track the natural movements of water or wind. In surreal portrait photography, you can use motion blur to capture ghostly figures or create a more abstract effect.

If you want to capture a specific movement without blurring your entire photo, use a tripod.

Surreal portrait photography can help you leave your comfort zone. Feel free to experiment with fun photography techniques and compositions!


---------------------------------------------------------------------------------------------------------------------

PHOTOGRAPHY FREEBIE:

How to make money with your Photography even if you're not a Pro.

Copy & paste this link into your browser, click ENTER, and enjoy: 

https://mrdarrylt.blogspot.com/2020/01/how-to-make-500-month-from-your.html

                                                         or

https://www.photography-jobs.net/?hop=darryl54

 ----------------------------------------------------------------------------------------------------------------------

Visit me on Facebook and post your pictures.

https://www.facebook.com/Darryl-T-363867387724297/  
----------------------------------------------------------------------------------------------------------------------
Need a camera?  Try this link (Tri State Camera) for discounted prices:  https://ebay.to/2Smb1ho


Tuesday, March 2, 2021

What Is a Telephoto Lens? 5 Things To Know About Long Lenses

Tags: Photography for Beginners, Telephoto Lens, Long Lenses
 

A telephoto lens is a long lens that makes objects appear as if they were closer to the camera.

Don’t think you should pull out a telephoto lens only when you need to capture that thing in the distance. You’d be missing out on some of the biggest reasons to shoot with a long lens.

Here’s what budding photographers need to know about telephoto lenses.

a telephoto lens on a tripod on the edge of a city rooftop
Photo by Ilya Mirnyy, Unsplash
 

What Is a Telephoto Lens?

A telephoto lens is any lens that has a long focal length. Depending on who you ask, some 

say a telephoto lens is anything that’s 60mm or greater. Other photographers wouldn’t consider 

a lens telephoto until 80mm or 85mm. And others don’t use the term until the mid-telephoto 

range above 135mm.

Either way, a telephoto lens helps to bring distant subjects closer to the camera than a 

wide-angle or standard focal length lens.

A telephoto lens can be a zoom lens, with multiple focal lengths in one lens such as a 

70-300mm lens. But, a telephoto lens can also be a prime lens with a single focal length, 

such as a 200mm lens or a 600mm lens.

To bring subjects up close to the camera, telephoto lenses require multiple pieces of glass 

inside the lens itself. Because of that, telephoto lenses are often long and heavy.

The biggest telephoto lenses have a tripod collar to help support the lens’ weight using 

a tripod.

two telephoto lenses on the grass
Photo by Chuttersnap, Unsplash

Telephoto Lenses and Sensor Size

A 300mm lens on a full-frame camera is a 300mm lens. But change the size of the sensor 

in the camera body, and the angle of view that the lens captures also changes.

A crop sensor, such as an APS-C sensor or Micro Four Thirds, makes a telephoto lens appear 

to bring the subject even closer. That’s because it takes a crop of what the lens sees.

The optics in a lens projects the image onto the sensor (or a piece of film). If that sensor is 

smaller, the image is cropped. Cropping the image makes that distant subject feel even closer.

That crop is why photographers who need to capture close-up images of their subjects 

sometimes prefer crop sensor cameras. This is despite the fact that full-frame cameras 

offer more in terms of image quality.

With Micro Four Thirds, the crop factor is 2x — which means a 300mm lens shoots like 

a 600mm lens. That allows photographers to get up much closer with a smaller, often cheaper, 

lens.

Types of Telephoto Lenses

Telephoto lenses are often further divided into sub-categories based on focal length.

Lenses between 85mm and 135mm are considered short telephotos. These lenses have some 

ability to bring an object in close and create background separation, but to less of an extreme.

These focal lengths are often popular for portrait photography. The lens offers more background 

separation without requiring the photographer to stand too far from the subject.

A 135mm to 300mm lens is often called a medium telephoto lens. These focal lengths are among 

the most popular. They offer a significant reach without a significant price tag.

Lenses above 300mm are typically also referred to as a super telephoto lens. These lenses offer 

the most reach. But they are often expensive and typically used by professionals more often

 than hobbyists.

Telephoto Lenses and Shutter Speed

The camera settings that work with a wide-angle lens may create blur with a telephoto lens. 

That’s because telephoto lenses are more prone to camera shake.

The magnification of the lens can exaggerate even the most minor camera movements. And 

this creates blur. Telephoto lenses are also heavier, which means your hands are also more 

prone to shake too.

As a general ‘rule,’ the denominator on the shutter speed should be at or greater than the 

focal length when shooting handheld. A 100mm lens should be shot at a minimum 

of 1/100 second, a 200mm lens at a minimum of 1/200.

Heavier lenses may need an even faster speed, as well as photographers that are more prone 

to shaky hands. To shoot with a telephoto lens and a slower shutter speed, you’ll need a tripod.

The rule isn’t true 100% of the time though. Some stabilized lenses (or lenses attached to a 

stabilized body) can shoot a bit lower without shake. Some heavier lenses will need an even 

faster shutter to eliminate shake.

a wading heron shot with 16mm telephoto lens
Shot at 165mm. Photo by Hillary K Grigonis
a wading heron shot with 300mm telephoto lens
Shot at 300mm. Photo by Hillary K Grigonis

How Telephoto Lenses Affect the Background

Sometimes, photographers choose a telephoto lens because of what it can do to the background 

of the shot. Lens compression is a photography term that’s used to describe how close the 

background appears to the subject.

With a telephoto lens, the background appears closer to the subject than with a wide-angle lens. 

 In fact, the longer the focal length is, the less exaggerated distances seem to be.

Lens compression is actually a result of standing further from the subject rather than the actual 

lens optics. But the effects on the photograph are important to understand nonetheless.

Because of lens compression, a telephoto lens can help fill in the background with less empty 

space. A building, for example, will fill the background of a portrait with a telephoto lens but 

not with a wide-angle lens.

Lens compression will also help the background to appear more blurred. A common 

misconception is that using a telephoto lens actually creates a shallower depth of field or 

creates more background blur.

A telephoto lens doesn’t actually affect the math for calculating the depth of field. But, the

background compression brings that blurry background in close. This gives it the appearance 

of having more blur.

In short, a telephoto lens will make the background appear closer and more blurred. That is 

a result of how close you are to the subject, not because of any optical trickery in the lens itself.

That background blur is one reason why even photographers who could walk closer to the 

subject still choose a telephoto.

How Telephoto Lenses Affect the Subject

The difference between the background of a photo shot with a wide-angle and a photo shot 

with a telephoto is significant. But the subject itself will also have some subtle differences too.

Just like the distance between the subject and the background is compressed, other distances 

in the photo appear to be shorter too.

In a portrait, a wide-angle lens will make the eyes, nose and mouth appear farther apart. 

With a telephoto lens, those facial features appear closer together. This typically creates 

a more flattering portrait.

The effect is the same for subjects other than portraits too. Remember that a telephoto lens 

makes distances seem shorter in the image.

If you want to create the sense that the objects in the photograph are closer together, use a 

telephoto. To exaggerate distance, use a wide-angle.

a group of birds shot with 300mm telephoto lens
Shot with a 300mm lens. Photo by Hillary K Grigonis

Other Common Telephoto Lens Questions

What is the difference between a telephoto lens and a zoom lens?

Telephoto and zoom are two different ways to describe a lens — and a lens can be both a 

telephoto and a zoom lens.

A zoom lens is a lens that allows the photographer to adjust the focal length. This is usually 

done by twisting the lens barrel. A telephoto lens is a lens with a long focal length — typically 

more than 80mm. It’s used to get closer images of far off subjects.

A telephoto zoom lens would be a lens that has more than one focal length but also a long 

focal length, such as a 70-300mm lens. A telephoto prime lens would be a long lens that 

doesn’t zoom in or out, like a 200mm lens.

A zoom lens such as a 18-55mm isn’t a telephoto lens at all but a wide-angle zoom lens.

Do you really need a telephoto lens?

That depends on what you are photographing. If you can walk closer to the subject, then a 

telephoto isn’t necessary. Subjects that are impossible to get close to, such as wild animals 

or the action on a sports field, require a telephoto lens.

Other times, a telephoto is nice because of the background compression. Or the way the optics 

make the background appear closer to the subject.

A 100mm lens, for example, is a popular choice for portraits. It offers more background blur, 

even though in a portrait, it’s usually easy to walk closer to the subject.

Are telephoto lenses good for landscape?

Wide-angle lenses are the most popular optics for landscape photography. But a telephoto 

lens can sometimes create great shots that would not have been possible with a shorter lens.

A telephoto lens will make objects in the landscape appear closer together. This can sometimes 

work well in landscape photography.

Photo by Chuttersnap, Unsplash

Bringing a subject in close is the obvious reason to use a telephoto. But there’s so much more 

to long lenses than that.

The background will also appear closer and more blurred. And the proportions on a portrait 

subject’s face appear more pleasing.


---------------------------------------------------------------------------------------------------------------------

PHOTOGRAPHY FREEBIE:

How to make money with your Photography even if you're not a Pro.

Copy & paste this link into your browser, click ENTER, and enjoy: 

https://mrdarrylt.blogspot.com/2020/01/how-to-make-500-month-from-your.html

                                                         or

https://www.photography-jobs.net/?hop=darryl54

 ----------------------------------------------------------------------------------------------------------------------

Visit me on Facebook and post your pictures.

https://www.facebook.com/Darryl-T-363867387724297/  
----------------------------------------------------------------------------------------------------------------------
Need a camera?  Try this link (Tri State Camera) for discounted prices:  https://ebay.to/2Smb1ho