----------------------------------------------------------------------------------------------------------------------------------------
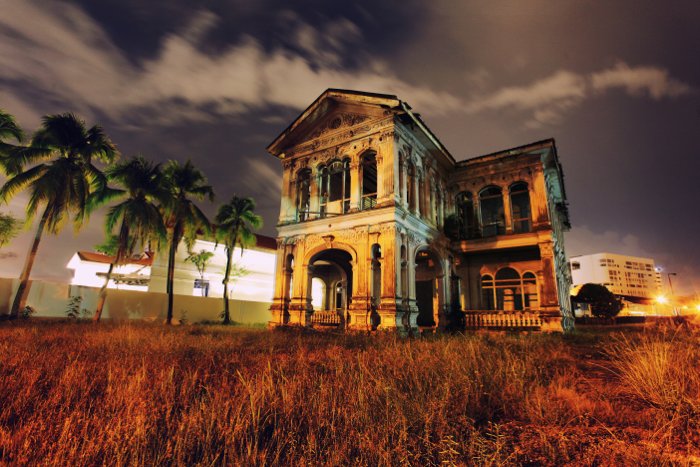
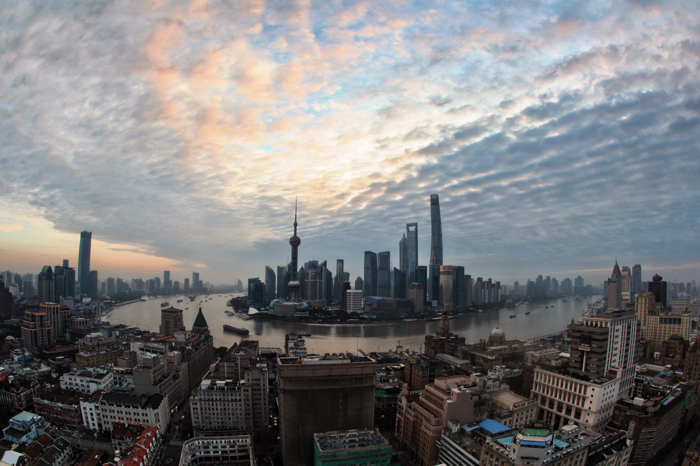
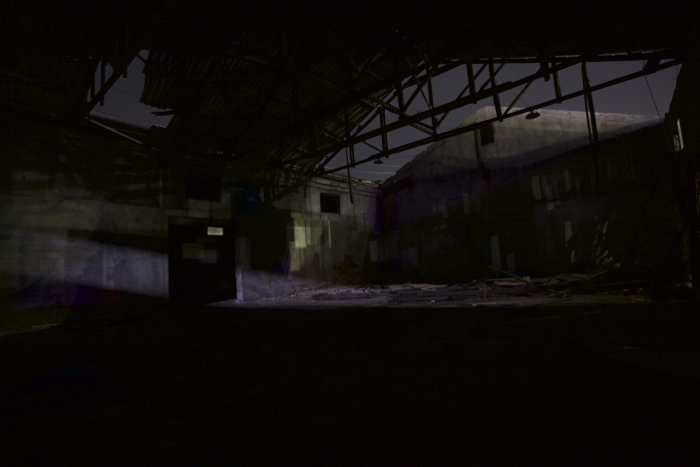
One of the most exciting types of photography you can try is urbex. Urbex stands for urban exploration. It describes finding locations in an urban setting that are interesting to photograph.
So now you might be wondering how to find abandoned places near you. In today’s article, you’ll learn exactly how to do this.
Urban exploration is a lot more involved than looking around a city. In fact, some urbex photography occurs in places that aren’t strictly speaking urban.
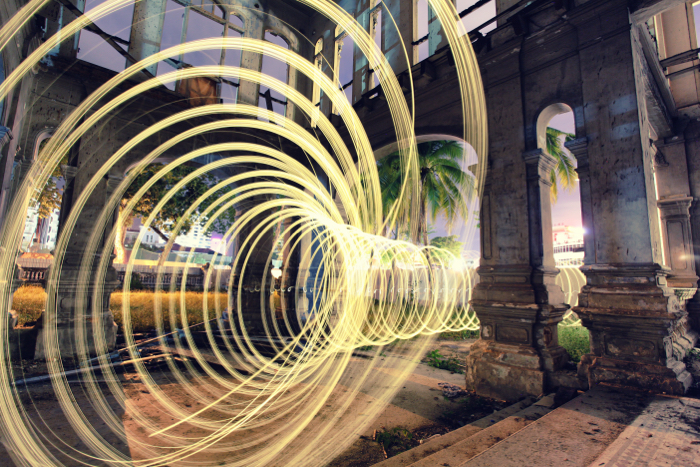
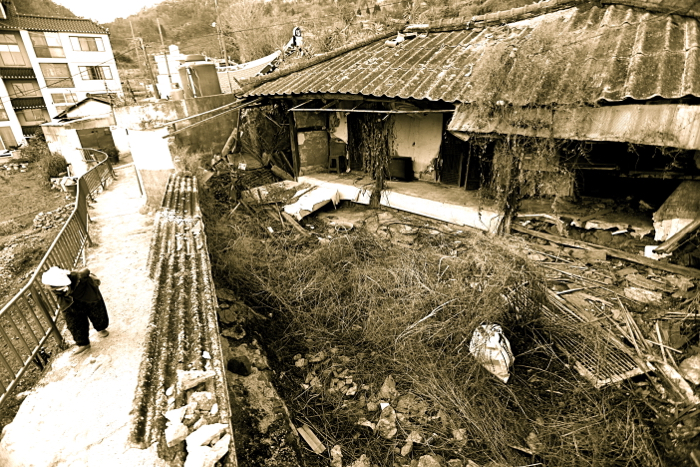
The majority of urbex photography happens within cities though. The locations are places that have been abandoned. The following are popular types of photos to take in these locations.
An abandoned factory will work better than an abandoned family home in suburbia. That factory might be harder to gain permission to enter though.
The following list only reflects what would be interesting from a photography perspective. Gaining access to such places will be covered later.
An important aspect of urban exploration is your own safety. You’ll need to look at this from the point of view of wearing the right clothes, and personal safety.
The following is a suggested list for exploring abandoned buildings. These places have plenty of hazards that could cause injury, so look to bring the following.
Abandoned buildings have plenty of risks. With the right gear, you can minimize the risk of personal injury. The worst can still happen.
You could hurt yourself badly enough that it might be difficult to get out of the building. This could occur through falling through floor boarding or getting bitten by a snake.
Abandoned places where you’re on your own are also good places to get mugged, so it might be worth packing some mace.
The best protection against all of the above is to bring a friend. Probably another photographer who also knows the risks. They can help should you get into trouble.
It costs money to build a building, and if you do so you want to get use out of that building.
It goes without saying that most buildings will be occupied. Finding abandoned buildings isn’t easy. You’ll need to try some of the methods below to identify a building.
There are plenty of urbex photographers out there. One of the best ways of finding out about urbex locations is to visit places other urbex photographers have visited before.
Online forums can help with this. You can also use the following sites that work as databases for urbex photographers.
Nothing beats local knowledge, that’s true of any form of photography. This is especially true when it comes to urbex.
You can gain local knowledge by visiting urbex forums and websites. If you can join a local photographer that’s even better. Having someone with you will also give you that added safety.
The last option is to explore yourself. This is the most time consuming and risky. It can also be the most rewarding if you can find a location and be the first to photograph there.
Of course, this isn’t easy to do, and in some parts of the world, this might be almost impossible. There are some things you can do to improve your chances.
Get permission before accessing a building. This means you’re legitimate. If you choose not to do so, any risks you undertake are yours.
This website does not endorse breaking the law.
There are several options open to you here. Finding the owner of the building and asking is not always easy.
The following are some strategies to use when engaging in urban exploration.
So now you’re all set with all the information you need to kick start your urbex adventure. Have you explored abandoned places before? What were your experiences? Was it easy or difficult to gain access to the abandoned building?
We would love to hear your experiences on finding abandoned places near you. Feel free to share your thoughts and photographs in the comments section of this article.
---------------------------------------------------------------------------------------------------------------------
PHOTOGRAPHY FREEBIE:
How to make money with your Photography even if you're not a Pro.
Copy & paste this link into your browser, click ENTER, and enjoy:
https://mrdarrylt.blogspot.com/2020/01/how-to-make-500-month-from-your.html
or
https://www.photography-jobs.net/?hop=darryl54
----------------------------------------------------------------------------------------------------------------------
Visit me on Facebook and post your pictures.
https://www.facebook.com/Darryl-T-363867387724297/
When I first started indoor photography, I was afraid of the limitations. As a natural light enthusiast, I wanted to have as few restrictions as possible.
When I discovered the positive sides of this genre, I was able to pinpoint my creative weaknesses. It helped me strengthen the skills I already had.
Indoor photography is a flexible genre for several reasons:
How do you take good indoor pictures? Here are 10 photography tips on how to get better at shooting inside.
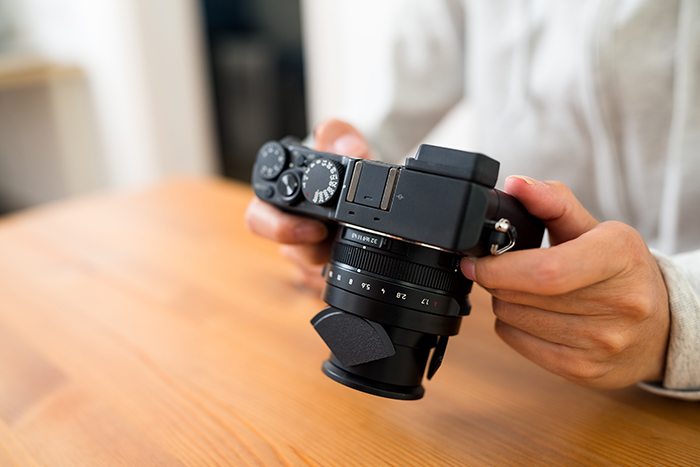
Indoor photography lighting can be very complicated. Especially when it’s almost dark outside. To take sharp photographs, you’ll have to increase your ISO number. As scary as it might sound, it won’t ruin your photographs.
So what is the best ISO setting for indoor photography? In general, ISO 100 or 200 can work well if you are using a tripod and you have enough brightness.
If you are shooting from your hand, you have to raise your ISO to 800 or 1000. Sometimes even higher, as you will notice from my camera settings below.
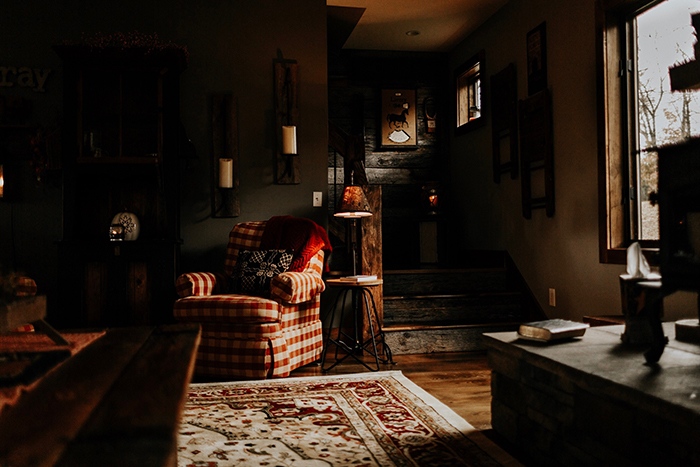
I took the photos above on a gloomy day. I used both natural window light and artificial one.
These are the camera settings I used:
Though every camera is different, most modern ones have a high noise tolerance. Using my Canon 5D Mark III, I can take all kinds of indoor photographs without making them look too grainy.
The camera I used before this, a Canon 60D, produced a little more grain when I played with ISO. But this effect created a cinematic feeling that complemented my photographs.
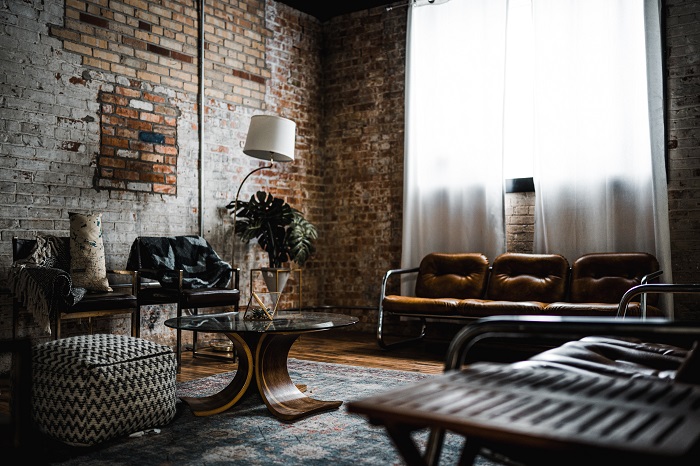
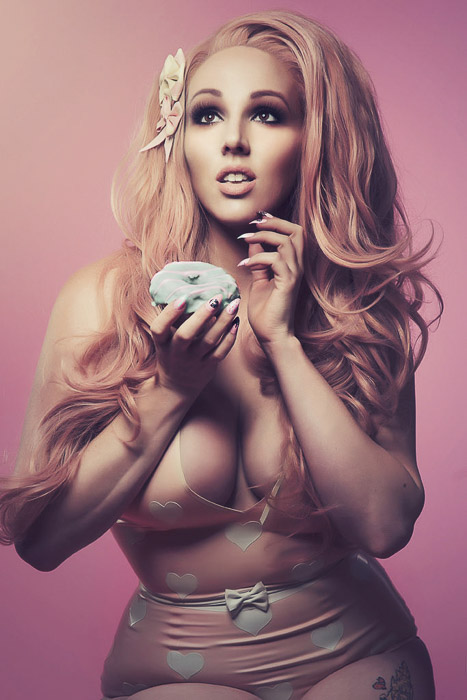
Indoor photographs can look very simple, especially if you’re shooting in an empty or abandoned space. To make up for this, you can add eye-catching elements to your compositions.
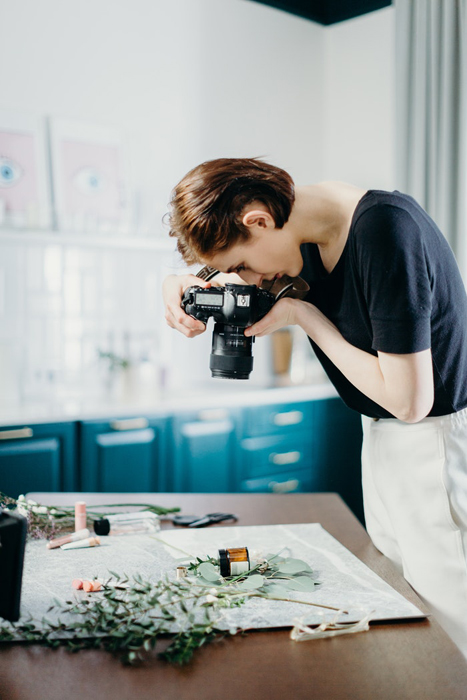
Many of us don’t have studios. But you can create your own using things you see every day. Search vibrant objects that you could turn into subjects, foregrounds, or backgrounds.
Have a look at your surroundings. What do you usually take for granted? Could you use that item in a photograph?
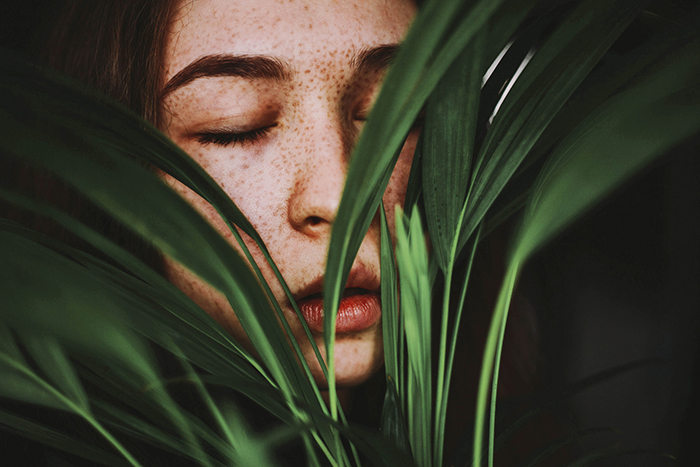
Here’s an example from my own life: I have a few plants on my table. I appreciate them for what they are or use them as subjects in my portraits.
Plants make amazing foregrounds, especially when it comes to simple indoor photographs.
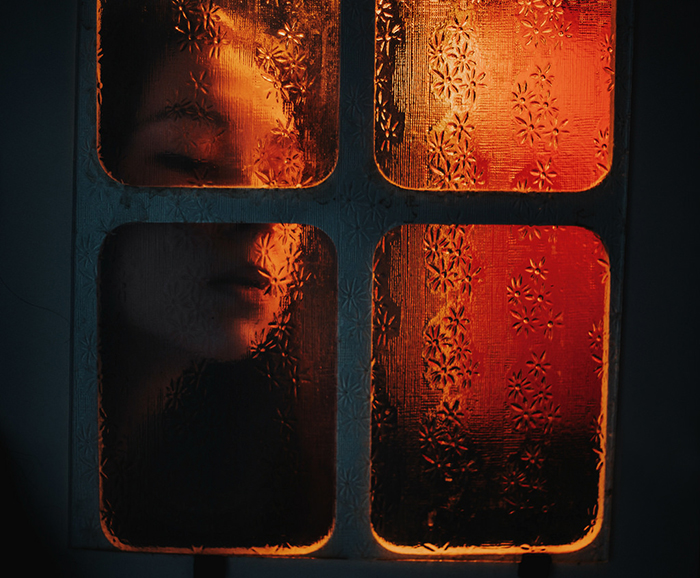
What is the best lighting for indoor photography? Many photographers would say that natural lighting.
But I say that any indoor lighting you have can give you fantastic results!
My experiments with simple artificial light led to my favourite portraits. I’ve never used professional studio lighting in my life. But I believe in the power of simple light sources.
A few examples are lamps, torches, and phone screens. Regardless of their simplicity, these objects are great to add a spark to your photos.
You can use artificial light not only for brightening your subject. It can also help you to focus better. When I take self-portraits in dark locations, I have to make sure that the autofocus feature captures the right details.
To do this, I flash a torch on my face until the camera finds me. Once this is done, I can take photos like the one above.
Use artificial light sources to get the right focus. It can add more depth to your photographs. It also helps to familiarise yourself with different lighting techniques.
And when you do get your hands on professional studio equipment, you’ll already know what to do!
Natural light is very limited at indoor locations. If you want to get as much light as possible indoors, shoot at these times of day:

Every room has its beauty. The white walls of an empty room can be used as backdrops for classical portraits or still life. A cluttered room can reflect your subject’s personality. It can add a touch of colour to your background, or be the subject itself.
Every indoor location can be a great place for a photoshoot.
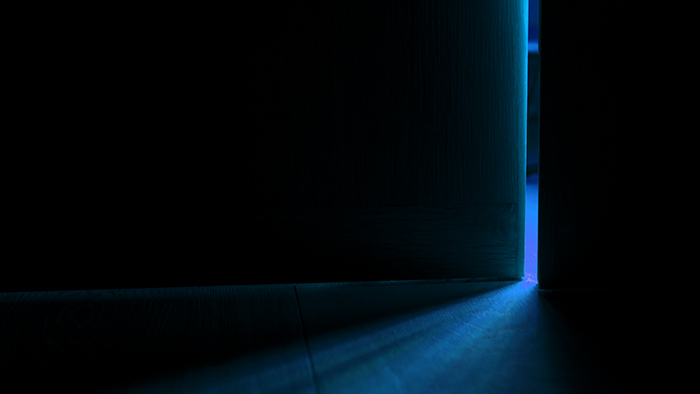
When you take photos indoors, observe every room. Find details to include in your compositions. Think about how to get good lighting in that specific room.
Sometimes, this might only mean taking photos next to a well-lit doorway. You don’t have to overthink it.
Train your eye to see potential in every indoor space. You’ll notice a great improvement in your work.
DIY projects should be your best friends. Besides being fun, these projects are very helpful and budget-friendly. If you want to take your indoor photography to the next level, you must experiment with them.
If you don’t have the time for complicated DIY projects, stick to simple hacks. They change your photography in no time.
You can use foil to light up your subject’s features if you don’t have access to a reflector. If you want to add a dreamy look to your photos, you can cover your lens with cling film.
And if you want to create a studio of your own, you can put up a tablecloth behind your subject.
Another example is placing an object in front of a sheet of paper taped to a window. This will create a soft lightbox effect.
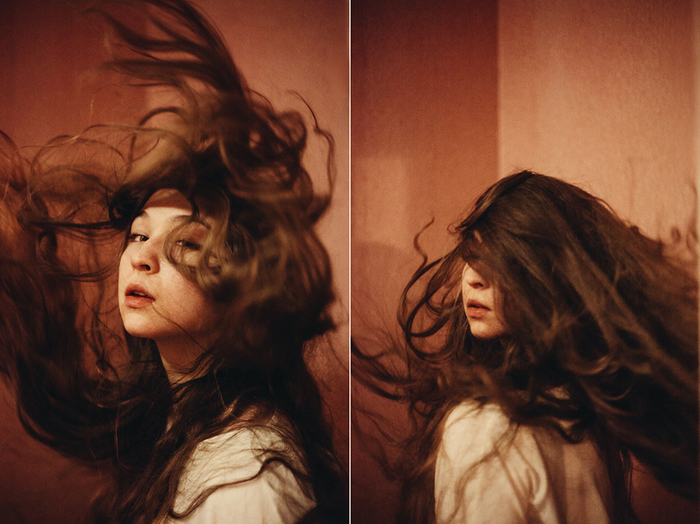
Indoor photography is often associated with warmth and cosiness. If you are not shooting product photos, you might try to intensify the atmosphere in your work.
This is even more important in portrait photography. This genre relies on emotions to tell compelling stories.
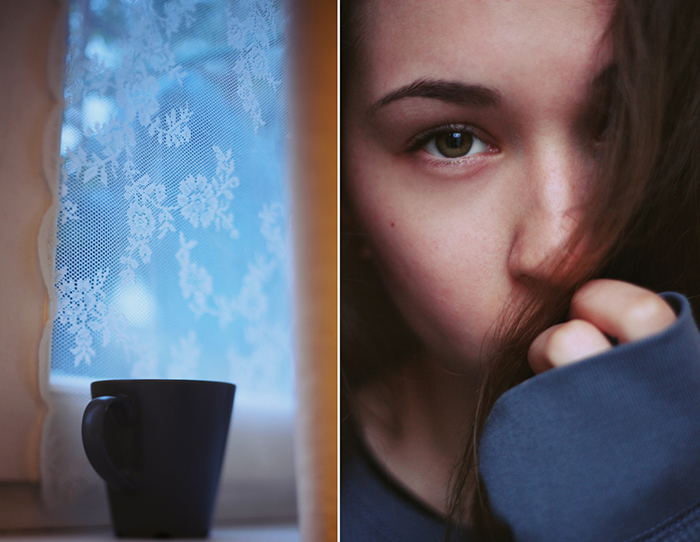
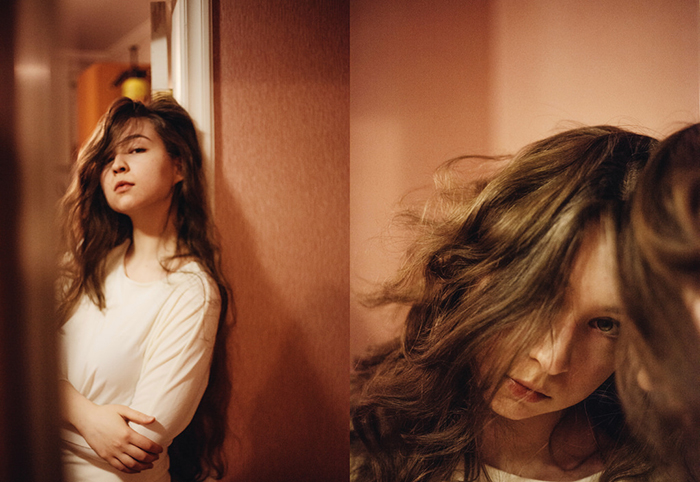
One of the best ways to capture an atmosphere is to photograph various sides of it. When you have a few photos that you like, turn them into diptychs (a collage of two photos). They tell a more wholesome story.
This will give your photographs more personality and make them more relatable. It also gives your viewers a clearer idea of your subject.
Watching out for diptych-worthy moments will make you more appreciative of indoor photography. By wanting to tell deeper stories, you’ll be more aware of details, spaces, and subjects that most people would ignore.
Combined, these things will have a positive impact on your work.
There’s only so much you can fit into your camera lens when it comes to indoor spaces. With a prime or zoom lens, you’re going to have to step back a bit. Then you can capture both your subject and their surroundings.
You might not be able to do so because of the room’s size. In cases like this, use a wide-angle lens.
If you can’t afford a wide-angle lens, make panoramas instead. Panoramas are a bunch of different photos stitched together in Photoshop. They’re great for people who want to create detailed compositions that resemble medium format photos.
They’re also great for those who enjoy taking landscape-like photos of indoor environments.
Besides complementing your subject, backgrounds should reflect their personality in some way.
This is much easier to do indoors because we associate buildings with homes. They have objects that play a big role in our personal lives.
If you’re planning to take indoor portraits, make sure you get to know your model’s space. Ask them what items they care about most. What part of their room do they love the most? What do they enjoy doing in the comfort of their own space?
Using this information, position your subject in a way that will reveal both their expression and their favourite items. Including these things in the background will make your photos stand out.
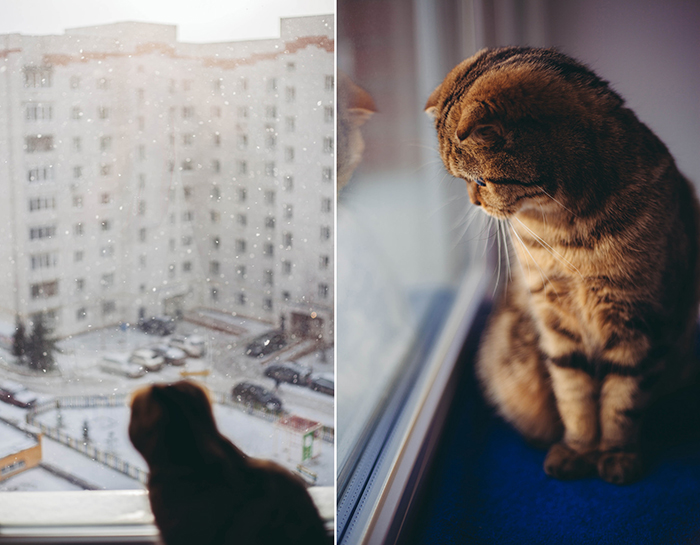
If you’re planning to take photos of objects, animals, etc., you can do something similar. For instance, my cat likes watching snowflakes while sitting on windowsills. To capture her curiosity, I took a closeup next to the window.
I also photographed the snow itself so that the viewer would have a better idea of what she’s so curious about. I made the two photos into a diptych to tell a short story.
Indoor photography is often challenging. Especially when you don’t have a lot of experience with artificial light, backgrounds, and projects. If you start to feel frustrated, just take photos next to a window.
Windows are the best source of natural light. They also make fantastic foregrounds and backgrounds. You can never go wrong with them.
Here are ways you can use them to enhance your compositions:

Indoor photography overflows with frustrating obstacles that outdoor photography doesn’t have. When I began this genre, I was afraid of getting bored, taking silly photos, or not making the most of my creative time.
Then I realised how freeing those obstacles were. I found ways to make indoor photography both enjoyable and challenging. The DIY projects, various lighting setups, and artificial light helped me in the process.
You, too, can enjoy the perks of being an indoor photographer. All you have to do is get up, grab your camera, and photograph something that catches your eye. Before you know it, you’ll be having fun and taking fantastic photographs.
---------------------------------------------------------------------------------------------------------------------
PHOTOGRAPHY FREEBIE:
How to make money with your Photography even if you're not a Pro.
Copy & paste this link into your browser, click ENTER, and enjoy:
https://mrdarrylt.blogspot.com/2020/01/how-to-make-500-month-from-your.html
or
https://www.photography-jobs.net/?hop=darryl54
----------------------------------------------------------------------------------------------------------------------
Visit me on Facebook and post your pictures.
https://www.facebook.com/Darryl-T-363867387724297/
------------------------------------------------------------------------------------------------------------------
PHOTOGRAPHY FREEBIE:
How to make money with your Photography even if you're not a Pro.
Copy & paste this link into your browser, click ENTER, and enjoy:
https://mrdarrylt.blogspot.com/2020/01/how-to-make-500-month-from-your.html
----------------------------------------------------------------------------------------------------------------------
Cash App Earn Money. Just copy & paste this link into your browser, click "ENTER" and
follow the easy steps: bit.ly/3g2Ghhi
One of the best things about mirror photography is that it offers
unlimited possibilities. As long as you have access to a mirror, you can
take photos wherever and whenever you want.
If you want to stay in, experiment with different outfits,
and take great photos with a limited amount of light, you can easily do
so. You just need to work with artificial light and DSLR camera settings that are usually not needed during the warmer months.
Artificial light can enhance your subject’s features. As you take
photos, make sure you manually change your photos’ colour temperature
and ISO.
Colour temperature will let you fix unflattering tones and ISO will help you take sharp photos in locations with limited light.
Depending on the concept of your shoot, you might have to deal with a lot of busy foregrounds and backgrounds in your compositions.
Because of this, autofocus might capture the wrong subject or not be
able to focus at all. Especially if you’re working with a small f-number like f/1.2. You can avoid this by switching to manual focus.
Manual focus will let you capture exactly what you want. If you don’t
use it regularly, it will feel very awkward at first. Don’t let this
bother you!
It’s also likely that the mirror you use will create distortions on your
model’s face. These will be noticeable only when you zoom into your
photo, so they shouldn’t be a problem.
Small spaces like elevators have mirrors to give the illusion of more
space. You can use this trick to your advantage when you shoot in small
rooms.
If you live in a small apartment, you can use a large mirror to take
mirror images of your subject from a distance. This is especially handy
if you use a zoom lens, which typically isn’t practical to use indoors.
You can also use large mirrors to create more space between yourself and
your model. This will make them feel more comfortable and give them
room to pose without worrying about bumping into your camera.

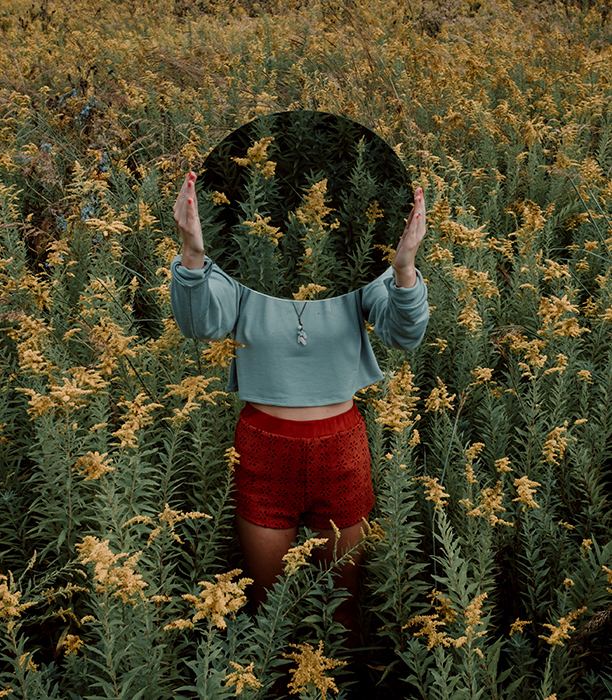
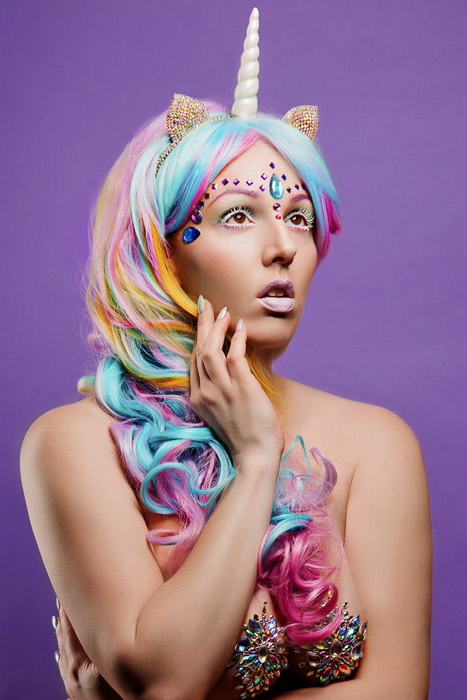
Surreal photography is all about otherworldly concepts and stories inspired by fairytales. Some surrealist photographers, like Rosie Hardy, use their photo editing skills to create unusual photos.
Others, like John Dykstra, use props and their imagination to create unedited masterpieces.
You don’t always need incredible editing skills or props
to create surreal photos, though. With use of mirrors (at least two),
you can focus on different angles of your model’s face and reflect
objects that wouldn’t be visible in a photo with one mirror.
Here, you can also different reflective surfaces for better images.

Portrait photography tends to focus on those standing in front of the
camera. Anyone behind it should be invisible. Mirror photography is an
exception to this rule, as you can take photos of both yourself and your
model in the mirror.
You can use this technique to add depth to your creative self-portraits. It can also be used to create more space in a photo or to fill in empty areas in your composition.
Make sure you use this technique sparingly, though. The more you use it, the more unoriginal your concepts will be.
Try creative these self-reflection portraits with broken mirrors for some added creativity.
There are lots of exciting outdoor locations that you can enhance with
the help of a mirror. You can use it to cover parts of your model’s
body, reflect a beautiful location, or even use it to improve your landscape photography skills.
I recommend using a small mirror outdoors.
Carrying a large mirror is impractical. And it will make your photo
shoot significantly more inconvenient than a normal one with smaller
props.
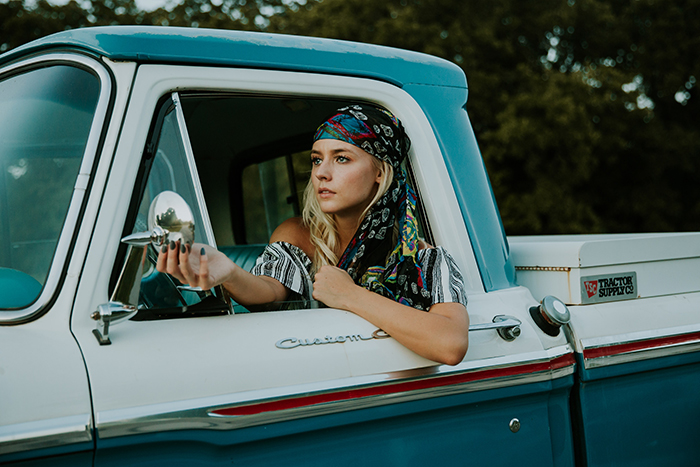
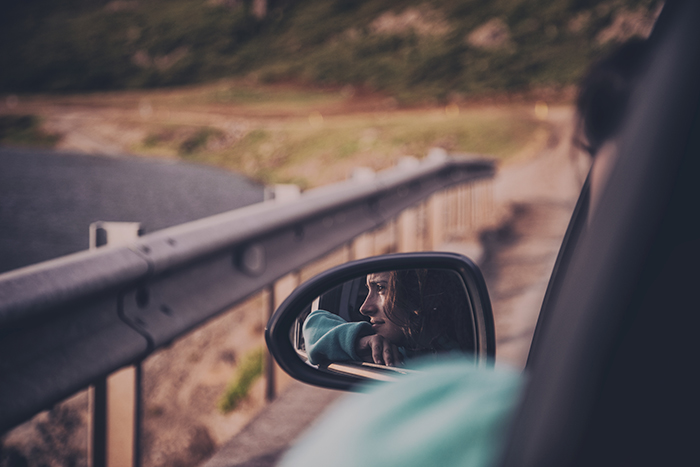
You don’t need to go on an epic road trip to take exciting travel photos. If you have a car, you can recreate travel photos by simply having your model sit in it. No driving necessary!
Use a side mirror or rear view mirror to focus on your model. Make sure
the background (preferably an eye-catching location) is visible, too.
This will give dimension to your photo and create a sense of adventure.
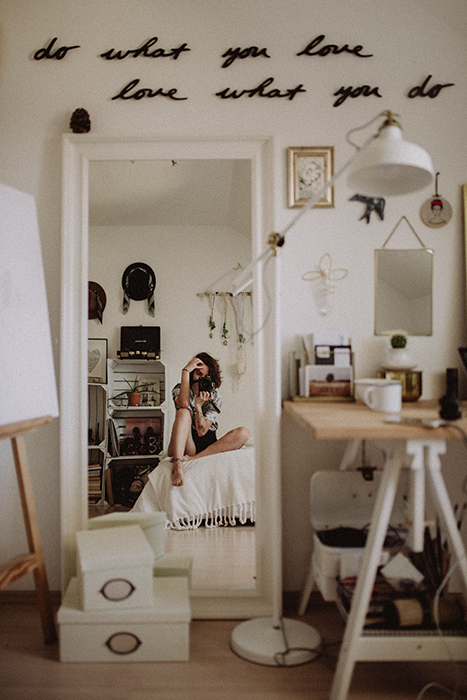
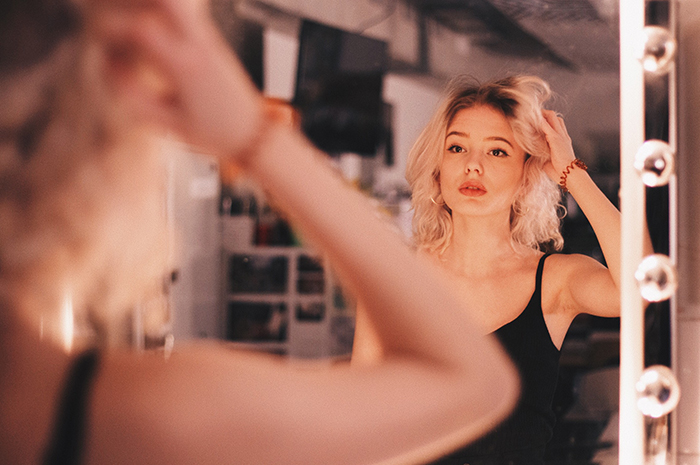
Mirror selfies have become so popular that they’re no longer interesting, but this doesn’t mean you can’t use them to create original self-portraits.
Instead of focusing solely on yourself, try to create an atmosphere
using objects next to your mirror. The photographer in the image above
used her bedroom to create a cozy and pleasant feel.
While most of the objects in her photo aren’t sharp, they still complement her pose and reflect her personality (no pun intended).
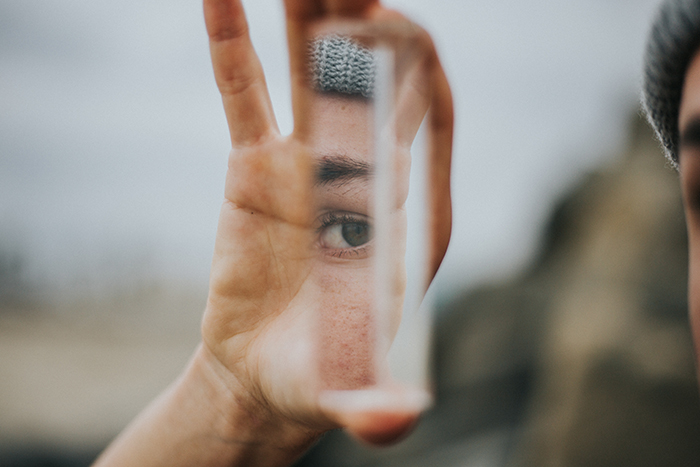
Abstract portraits are unconventional and striking. They can be used to
create photos that resemble paintings or simply highlight one part of
your model’s face, like the eye in the photo above.
You can use a handheld mirror or a prism
to experiment with this effect. A prism might make reflections appear
more distorted. You’ll also have to focus very carefully to get sharp
results.
A handheld mirror will reflect more of your subject’s face and make it easier for you to focus on them.
Since both of these mirrors are affordable and accessible, I recommend experimenting with both.
Mirror photography will help you appreciate unusual perspectives, try out new photography styles, and add more depth to your photos.
Even the simplest mirror can help you take your portraits to the next level.
So what are you waiting for? Grab a mirror and start shooting!
---------------------------------------------------------------------------------------------------------------------
PHOTOGRAPHY FREEBIE:
How to make money with your Photography even if you're not a Pro.
Copy & paste this link into your browser, click ENTER, and enjoy:
https://mrdarrylt.blogspot.com/2020/01/how-to-make-500-month-from-your.html
or
https://www.photography-jobs.net/?hop=darryl54
----------------------------------------------------------------------------------------------------------------------
Visit me on Facebook and post your pictures.
https://www.facebook.com/Darryl-T-363867387724297/
Due to the difficult nature of self-portraits, many photographers shy away from the idea. This type of photography can be very beneficial to you and your company.
Self-portraits are not about vanity or attention-seeking. They are a way to put yourself in your clients’ shoes. And they also give you the freedom to try out new ideas.
Photographing yourself can be helpful to learn different lighting and posing without having to hire a model. It can be also therapeutic for creativity.
I contacted Beth Claire of Lost Highway Imaging, one of the best self-portrait photographers in the industry, for her top tips.

The first time you attempt a self-portrait, whether boudoir or not, it is important to clear your day. It is more time consuming than you might expect and you want to be able to give yourself space to not feel rushed.
Checking on the clock will only add to the stress. If you are not experienced with hair and makeup you may want to hire an artist. This will give you the full effect that your boudoir clients would receive. Why not pamper yourself for the day!
It is important to do a dry run without a stylist so the pressure is not on you the day of your styled shoot.
Claire suggests using a tripod versus propping your camera on a bench or dresser table. It is easier to keep the frame stable and you will have more flexibility on where you are shooting.
In the past, I have attempted to put my camera on a table or chair and it never had the stability for framing the area as my tripod. A big portion of self-portraits is having patience.
It will take practice to get your focus right, so take your time to avoid frustration.
Changing up posing will give you the options to show movement and fluidity in your posts.
Before you begin you will need to see what equipment you have to work with for the shoot. I have tried using the timer on my camera. But I recommend a remote or something similar.
The back and forth will indeed lead to a cardio workout. The exhaustion will show in your images.
Claire uses a CamRanger unit. She has used a remote and intervalometer in the past. Remember if you use a push button remote you will have to hide it in one of your hands.
Some cameras do have built-in intervalometers. Before you start, you will want to check your manual.
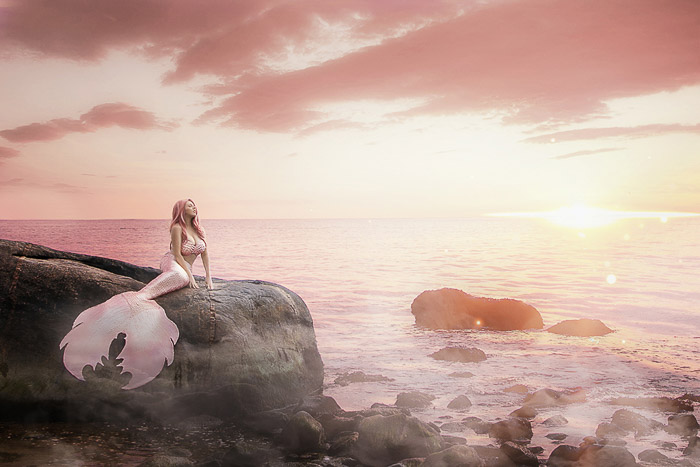
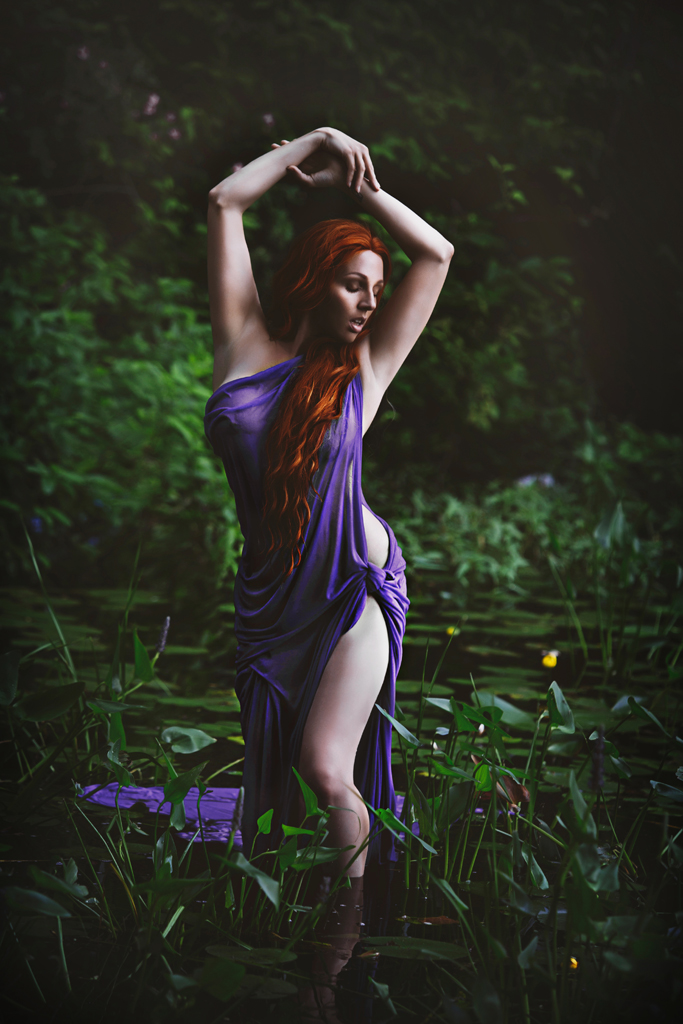
If you’re setting up images on location such as at the beach, take an assistant with you. In the image above, Claire creates her own silicone mermaid tail.
Silicone tails are difficult to get into. Jumping down off the rocks to readjust in case of a tripod fall would be difficult. Having an assistant to sit with your camera when you are in a themed set up will help.
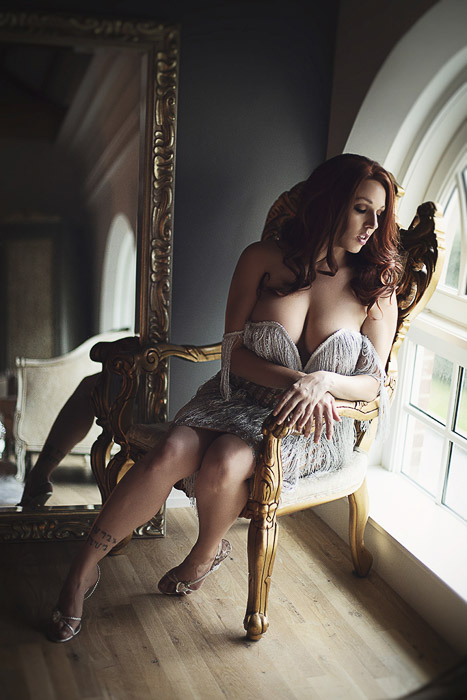
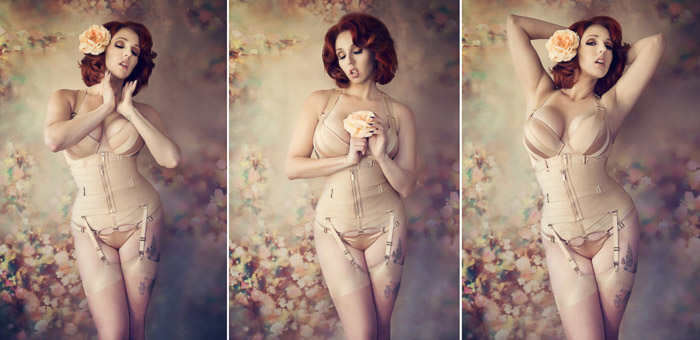
Use props such as mirrors and textured wardrobes such as this robe to help give your portrait an advantage. In this image, Claire can add drama all while hiding any remote or trigger in her shot.
Setups do not have to be difficult or time-consuming. A robe, a mirror, and a strobe gave Claire all she needed to capture this dramatic portrait.

Focusing is probably the most difficult aspect of self-portraits. If you are looking for a specific depth of field it can be helpful to place a mannequin or other object in the spot. This will give you something to focus on before you step into the frame.
She even suggests using kids toys for a stand-in model.
When shooting on a bed, you can use brightly colored tape in the shape of an X for a focal point. If a stand-in is not an option, it will be important to give yourself a little more depth of field than you would normally shoot.
Until Claire gained more experience with self-portraits she started out with an f/5.6. She now shoots reliably at f/1.8 without any issues.
In the beginning, it was helpful to have this wiggle room in case the focus was not right on to start.
She prefers the Cam Ranger since she can often select the focus point directly on the screen of your device.
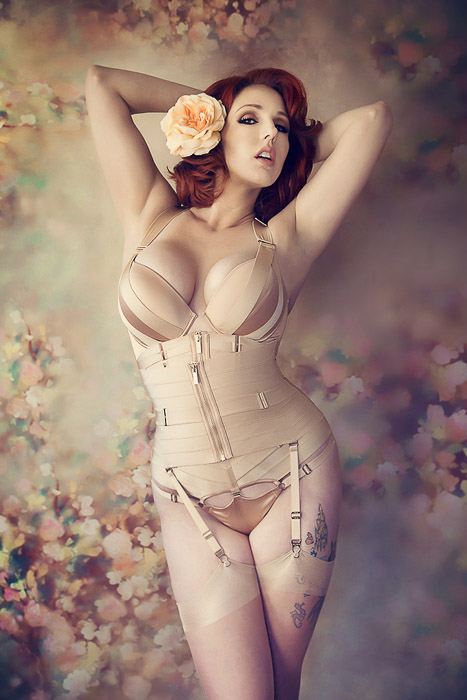
It is important to choose a wardrobe that makes the storyline come alive. And that also makes you feel good. You will most likely be alone during your self-portraits so chose pieces that you will not need assistance with.
Unless you have a friend near, lacing up a corset may be too difficult and become frustrating for your first time. Chose items that make sense to you instead of what you feel would be more acceptable.
If you are more into Calvin Klein underwear, use this. Don’t struggle with a bodysuit that is itchy and uncomfortable.
Unlike a client session, self-portraits may not produce as many usable shots. Expect to take twenty to thirty shots for every one that will work. This is mainly true in the start of your self-portrait career.
Plan to walk away with one or two great shots the first time around rather than filling an album. The intent for this is more to practice until you get the hang of your own style in this new genre.
If you are nervous about lighting or posing it may help to pose just as you would with your own clients. Create your posing and lighting flow just as you would with one of your clients during a normal rotation.
This removes the guesswork of lighting and posing. And it creates content for your client group. It is a great way to blog and interact with your VIP groups. Let them know you put yourself in their shoes.
Your clients will appreciate that you understand how nerve-wracking a session can be. And that you can relate.
The great thing about self-portraits is the freedom of creativity. You are not bound to a specific look so this is the time to get all those ideas into your camera.
When working with clients you may be nervous to attempt a new look and waste your clients time. Hiring models is a great way. But it also costs money for their time.
Self-portraits give you the flexibility to add a new dramatic look, try out new poses, or even a brand new style.
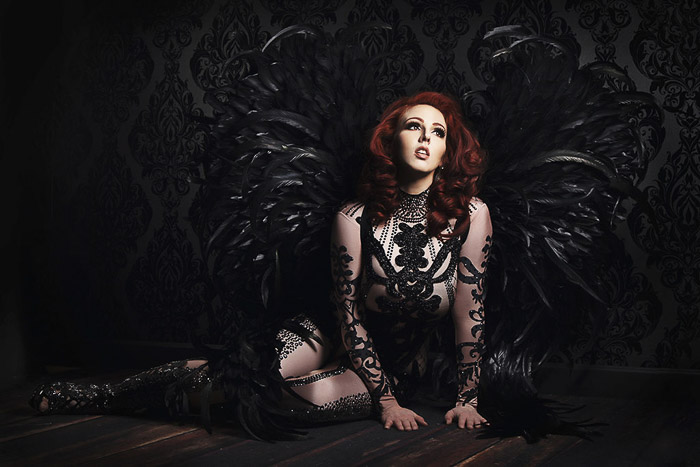
Once you get your focus down, you can start playing with other options such as themed styles. Claire creates a shoot with holiday-themed ideas to put to her VIP groups.
This gives her clients the visual of what her setups will be for a Halloween session for example. Adding in strobe lighting will give a dramatic look to your session as well.
You may want to wait on artificial lighting until after a few tries. That way you are not overdoing it your first time around.

After you gain experience, chose a variety of looks to test out new ideas. If you normally love to shoot in lingerie, next time chose a themed look. You’ll get more diversity in your self-portrait portfolio.
A common mistake of first-timers is sticking to the same poses and angles for the entirety of the shoot. Change it up in each shot to see which you prefer.
You would never take 30 shots of your clients in the same pose. Why do this with your own session?
Getting frustrated throughout the shoot if you feel it is not going the way you had intended is another mistake. Take a few deep breaths and walk away for a moment.
This is not a client shoot where the money is on the table. This is for your own personal creativity. Unless you are creating a calendar project you will have plenty of time to get it right.
Another mistake is to be judgmental of yourself. Self-portraits take time and patience to learn. Your first attempt may in your mind be a failure but it is just a stepping stone to the next session.
It is important to be kind to yourself during a self-portrait photography session. This kindness applies to every step of the process from getting dressed to reviewing the back of your camera.
During the session, take a step back and look at yourself the way you would your clients. If you would not judge them for stretch marks, cellulite or weight, why judge yourself?
No matter when you start or how many images you may get from your first shoot, you will gain a new respect for photography and your clients.
It opens your eyes to your shooting space, lighting, posing choices and much more. Self-portrait boudoir photography can lead you to a whole new world of options for your business.
---------------------------------------------------------------------------------------------------------------------
PHOTOGRAPHY FREEBIE:
How to make money with your Photography even if you're not a Pro.
Copy & paste this link into your browser, click ENTER, and enjoy:
https://mrdarrylt.blogspot.com/2020/01/how-to-make-500-month-from-your.html
or
https://www.photography-jobs.net/?hop=darryl54
----------------------------------------------------------------------------------------------------------------------
Visit me on Facebook and post your pictures.
https://www.facebook.com/Darryl-T-363867387724297/
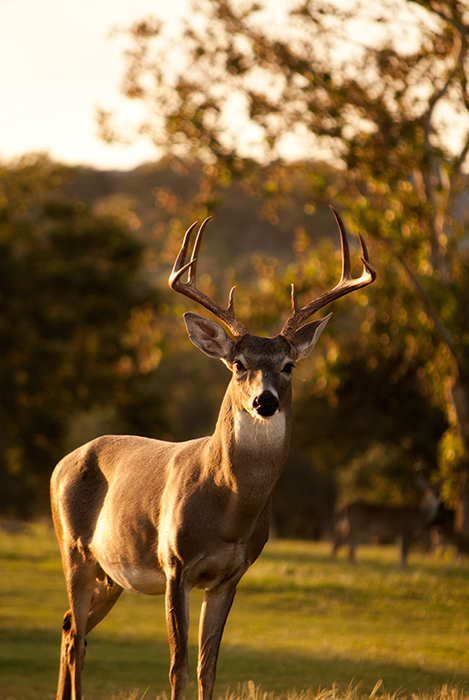 There’s a lot you can do with animal photography during golden hour.
Golden hour occurs after sunrise and before sunset. You can use it to take photos from all kinds of angles. All without worrying about overexposing or underexposing your photos.
 You don’t need a lot of professional equipment to take professional photos of animals. If you have a pet, you can practise by using window light.
Instead of using direct window light, use different angles.
Side lighting, the one that lights half of your subject’s face, can create a beautiful gradient.
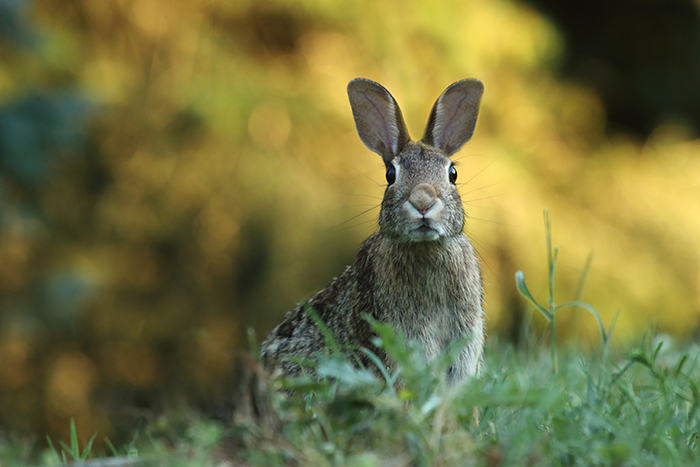
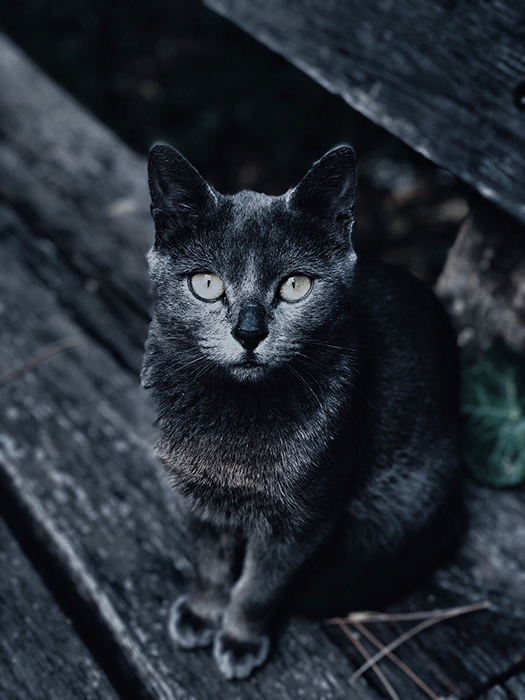
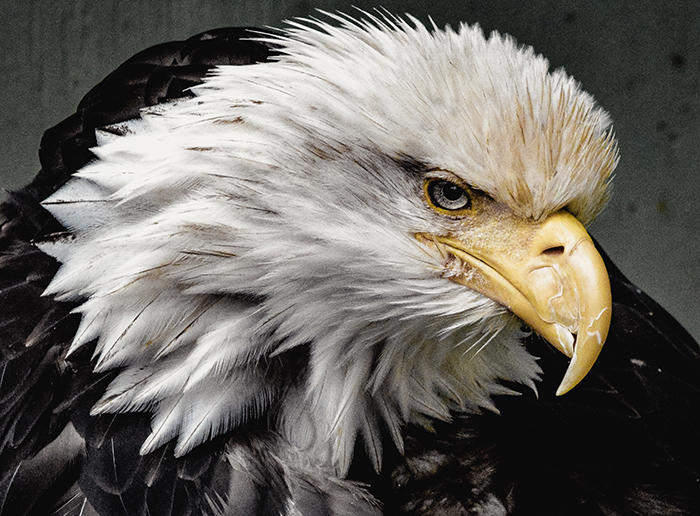
 Just like portrait photography, animal photography relies on the eyes.
To take expressive photos, get on the animal’s level and focus on its eyes. For the best results, make sure the animal looks directly into the lens.
You can do this by capturing its attention with rewards or harmless sounds.
 If you want to become a professional animal photographer, you need to invest in a zoom lens.
You can use zoom lenses to take sharp photos of animals from a distance.
This will come in handy if your subject is too far away to catch up with or if they’re dangerous.
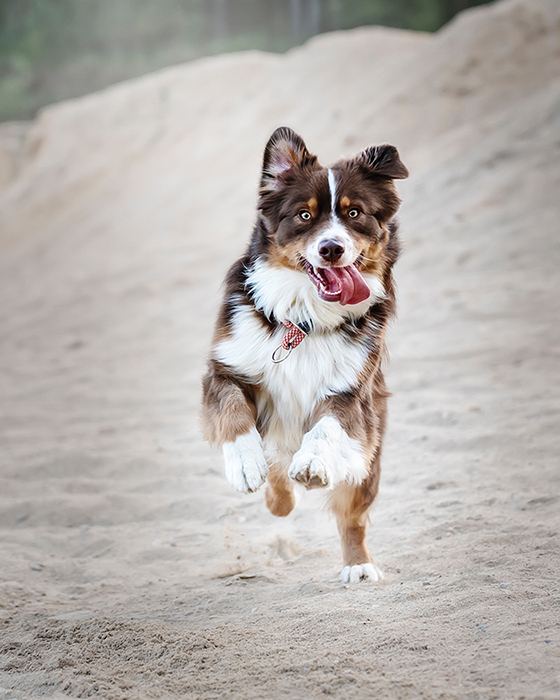
To take detailed photos of your pet in action, you need to familiarise yourself with shutter speed. Shutter speed will determine how quickly your camera takes a photo.
The right shutter speed will allow you to take all kinds of action shots.
This is ideal for owners of energetic pets who can’t sit still for a photo!
 A blurred background like the one above is easy to achieve.
Look for a number on your lens. It might say something like f/1.8, f/5-6.3, etc. This is the largest possible aperture you can work with.
The larger the aperture (or the smaller the number), the blurrier you can make your backgrounds.
An aperture of f/1.2, for example, will result in a soft backdrop like the one above.
This will help you blur out distractions and focus on your subject.
 No photo is complete without a story. To make your animal photos more emotional, tell stories through your subjects.
The best way to do this is to photograph them interacting with one another.
For example, it seems like the Atlantic Puffins in this photo are talking to each other.
Finding moments like this isn’t easy, but it will help you find potential in simple interactions.
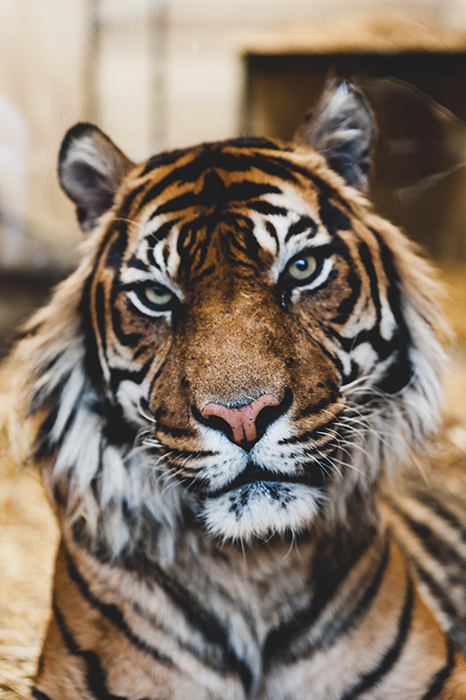
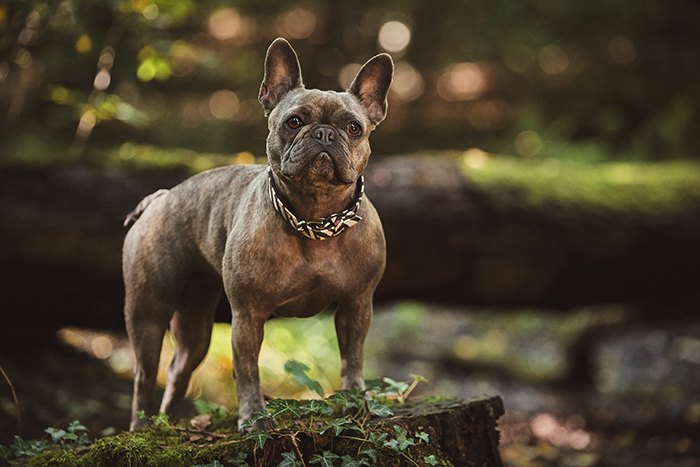
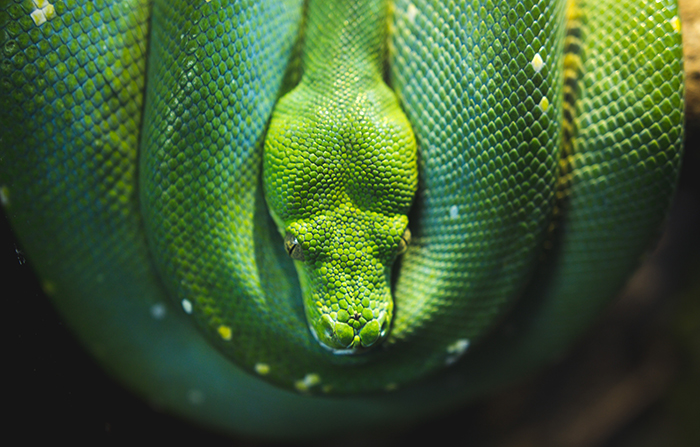 Some of the best animal photos are simple and pleasing to the eye.
Most animals have some kind of beautiful pattern that deserves to be photographed in the best light.
Find these patterns, colors, and lines to take breathtaking images.
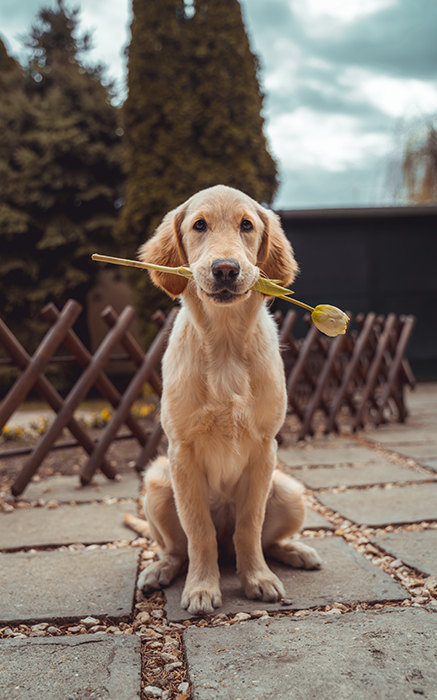
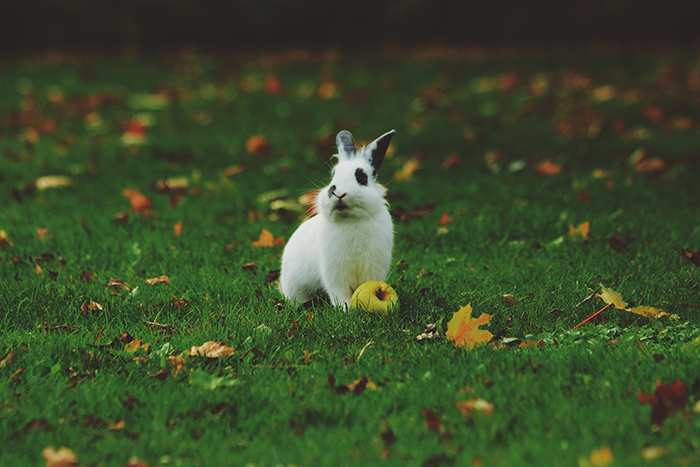 Every
animal has something it loves, be it a specific food or a toy.
Documenting this is an easy way to make your animal portraits more
personal and interesting to look at.
Every
animal has something it loves, be it a specific food or a toy.
Documenting this is an easy way to make your animal portraits more
personal and interesting to look at.
If the animal is a pet, its favorite item will also make it feel comfortable in front of your camera.
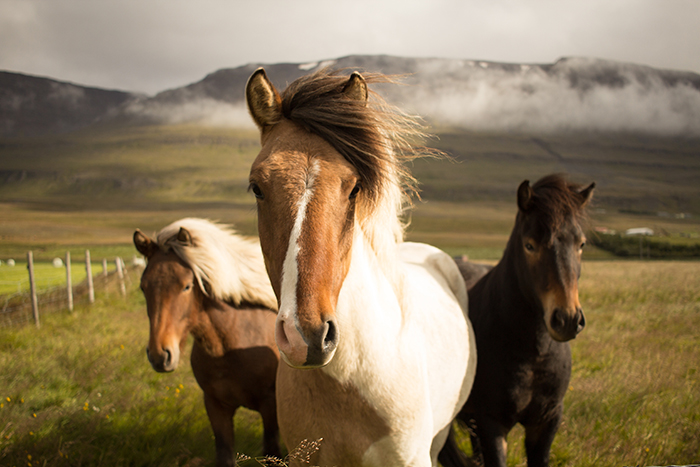 Horses are majestic creatures, especially when they’re together.
Take photos of them using a wide-angle lens. This will let you capture as many details and surroundings as possible.
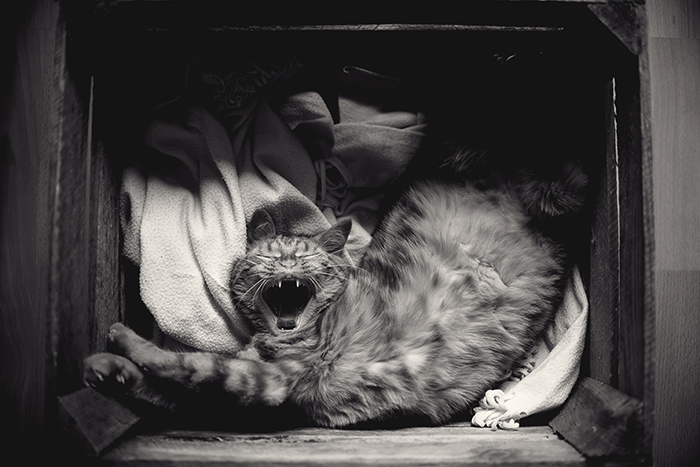
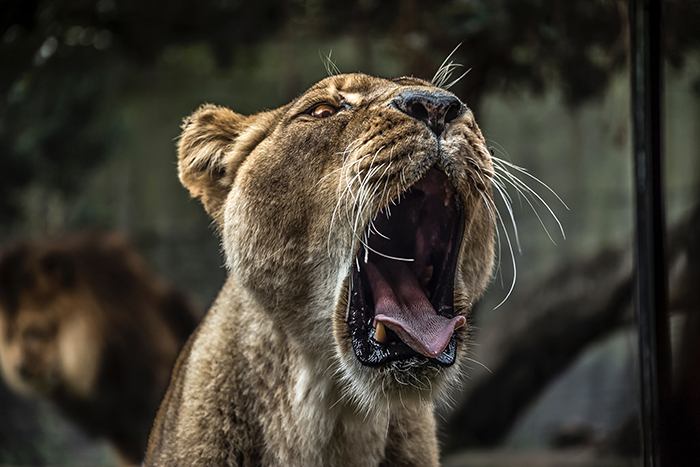 Yawns can help you take hilarious or impressive photos of animals.
To sharply capture something as quick as a yawn, you need to be familiar with shutter speed. Check out idea #25 to find out more.
 Editing
is an essential part of any photography style. Even if you don’t like
Photoshop, you can still use it to enhance your photos even a little.
Editing
is an essential part of any photography style. Even if you don’t like
Photoshop, you can still use it to enhance your photos even a little.
Editing is great for restoring shadows in dark photos. You can mute highlights in overexposed shots and correct distracting colors.
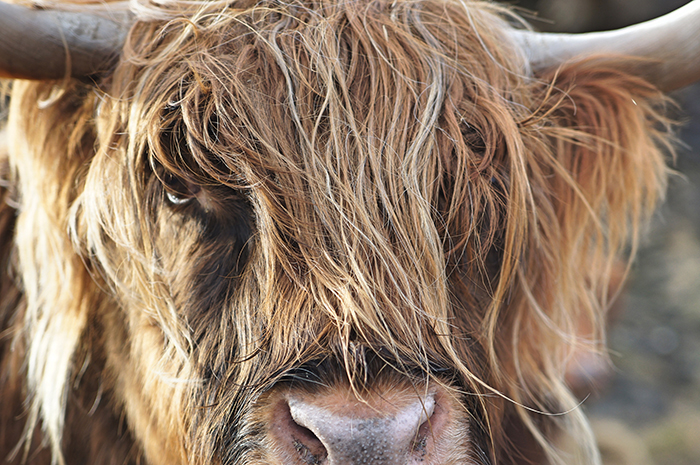 Using a zoom or macro lens, you can take amazing photos of Highland Cattle.
These creatures are known for their majestic horns and furry bodies. These features are great for taking otherworldly photos.
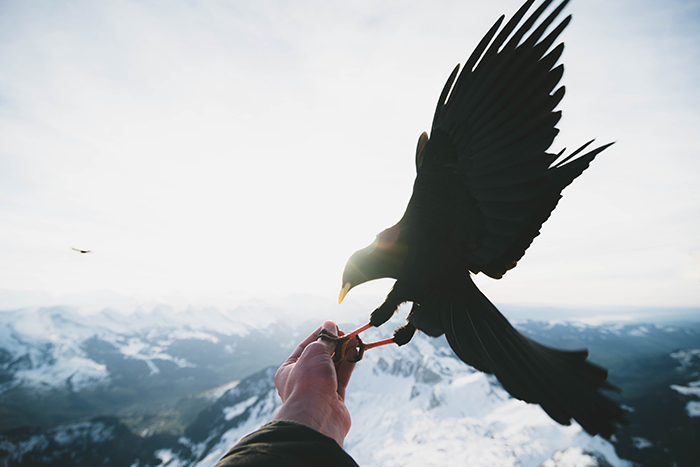 Why
not include yourself in some animal photos? Photos of animals
interacting with people or their owners are unique and heartwarming.
Why
not include yourself in some animal photos? Photos of animals
interacting with people or their owners are unique and heartwarming.
Make sure the animals you’re interacting with won’t bite your hand off!
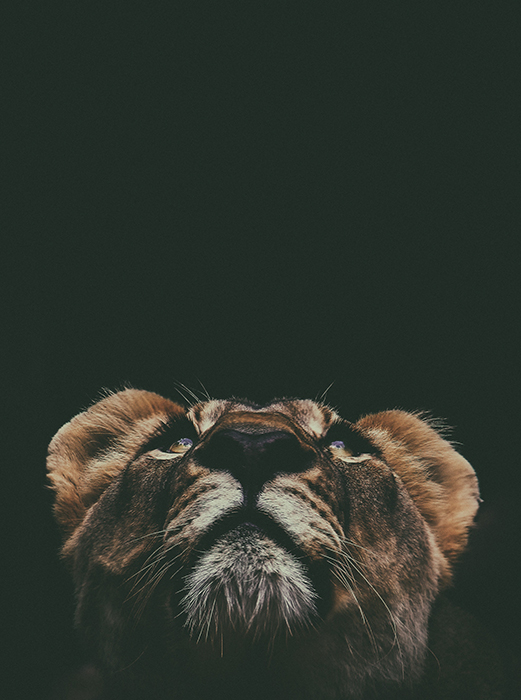
 Sometimes,
details aren’t that important. To capture an atmosphere, take photos
using backlight. This is light that shines behind your subject.
Sometimes,
details aren’t that important. To capture an atmosphere, take photos
using backlight. This is light that shines behind your subject.
This will create a silhouette that you can use to emphasise specific shapes.
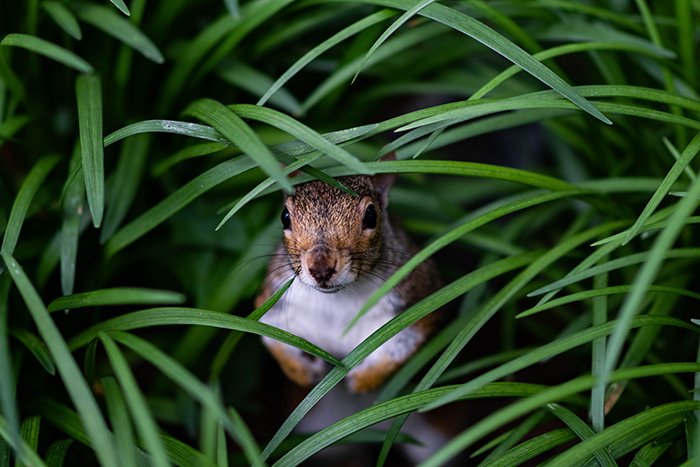 Foregrounds are located close to the camera lens. With a large aperture, they usually get blurred out.
This makes them the perfect tools for simple yet eye-catching animal photos.
Use simple foregrounds, like grass and branches. These will add depth to your photos and put the spotlight on your subject.
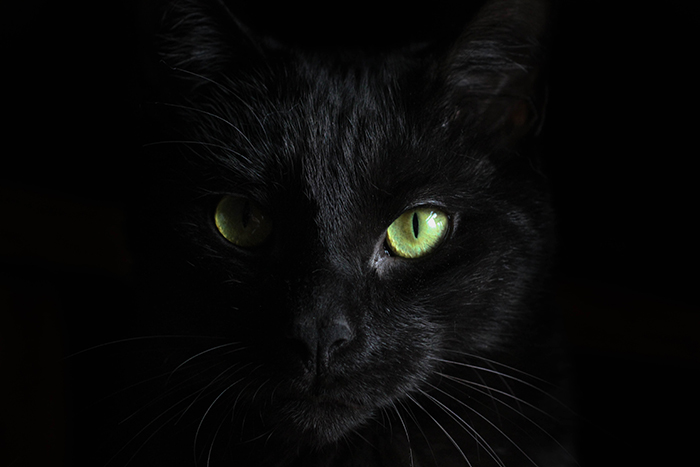
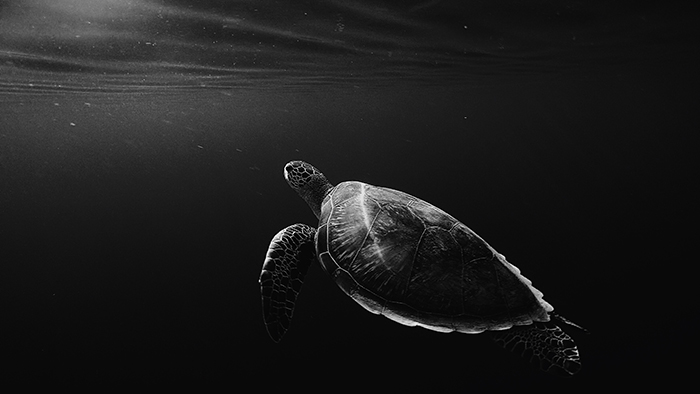
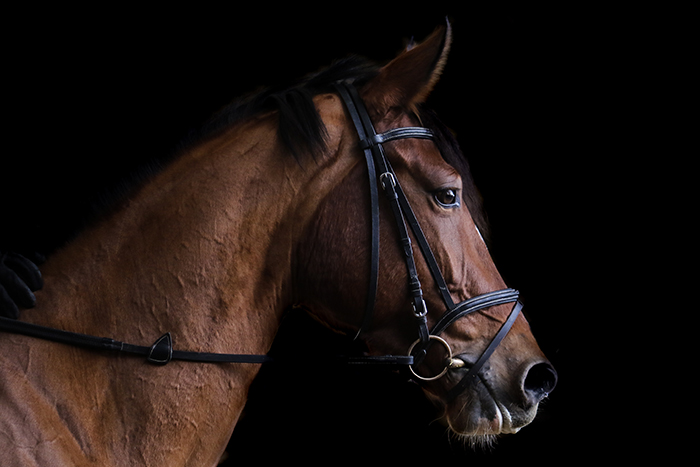 A
black background can make any photo look professional or moody. One of
the best things about black backgrounds is that they’re affordable and
very easy to set up!
A
black background can make any photo look professional or moody. One of
the best things about black backgrounds is that they’re affordable and
very easy to set up!
This is perfect for horse photography, which often revolves around elegance and strength.
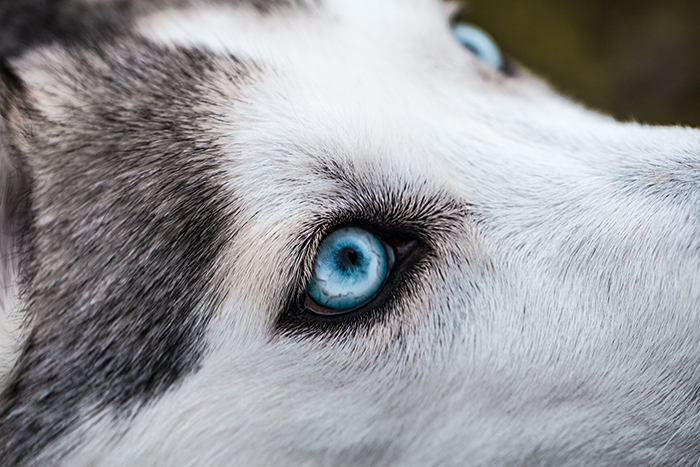
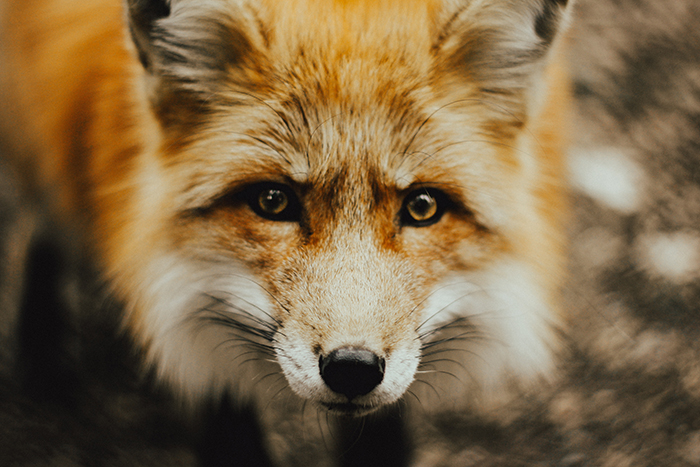
Animal eyes are so detailed. It’s impossible not to take unflattering photos of them. You can use a macro lens for your camera or phone to take amazing photos of eyes.
You can even turn this into a project where you photograph animal eyes exclusively.
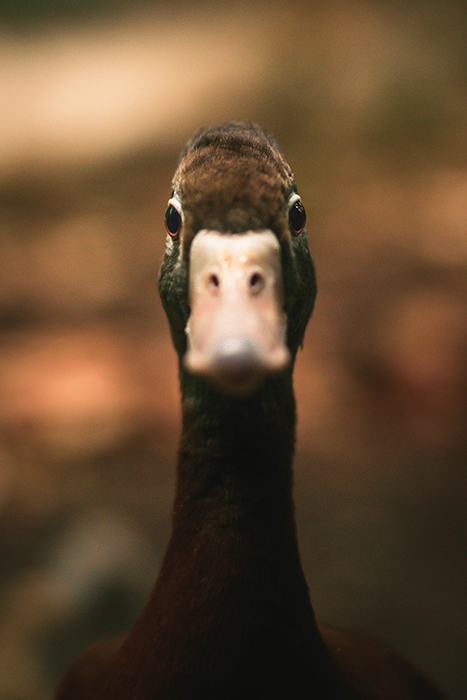 If you used autofocus to photograph the duck in the picture above, your camera would probably focus on the beak.
I recommend using manual focus when you want the sharpest results possible. Especially when you’re working with calm animals like ducks and turtles.
 You don’t need to go far to improve your animal photography.
If you have a pet, practice by having photoshoots with it as often as possible.
Shoot outdoors to get better at working with a variety of natural light.
 Animals look good from every angle. Feel free to experiment with different points of view.
The more unusual the angles, the more unique your photos will be.
 Some
locations are overly colorful. This can make it difficult to make an
animal stand out. This doesn’t mean you can’t shoot in those locations.
Some
locations are overly colorful. This can make it difficult to make an
animal stand out. This doesn’t mean you can’t shoot in those locations.
You can use your editing program to desaturate your entire image. Or you can make specific colors stand out less.
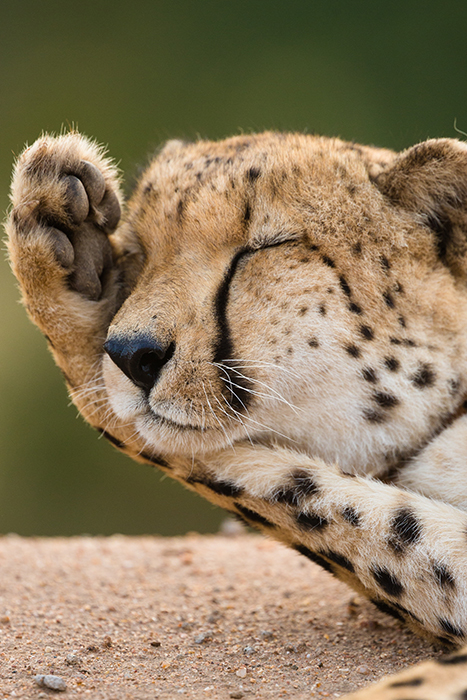
 Funny
animal photos are a necessity. One of the most efficient ways to take
funny photos is to use your animal’s sleeping patterns as inspiration.
Funny
animal photos are a necessity. One of the most efficient ways to take
funny photos is to use your animal’s sleeping patterns as inspiration.
Some animals, especially cats, have unusual sleeping preferences that are the perfect excuse to take great photos.
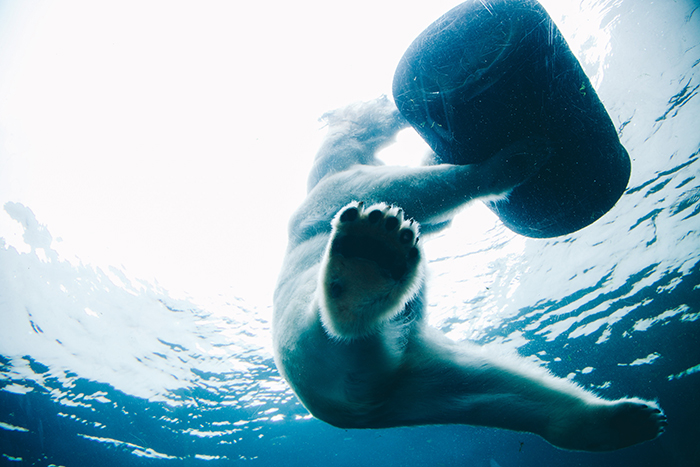 It’s unlikely that you live in a place with constant access to polar bears. But you can still take impressive underwater photos of different animals.
Disposable underwater cameras cost as little as $15. These can quickly improve your analog photography.
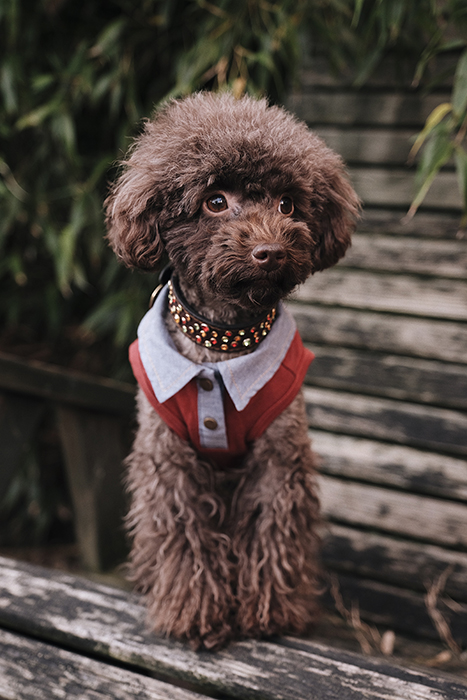 Sometimes, all you need is a collection of adorable dog photos. Thanks to the uniqueness of different dog outfits, it’s easy to take stunning photos of the same dog.
This will probably not give you photos worthy of being published in National Geographic. But you’ll get better at using light and take some cool Instagram images.
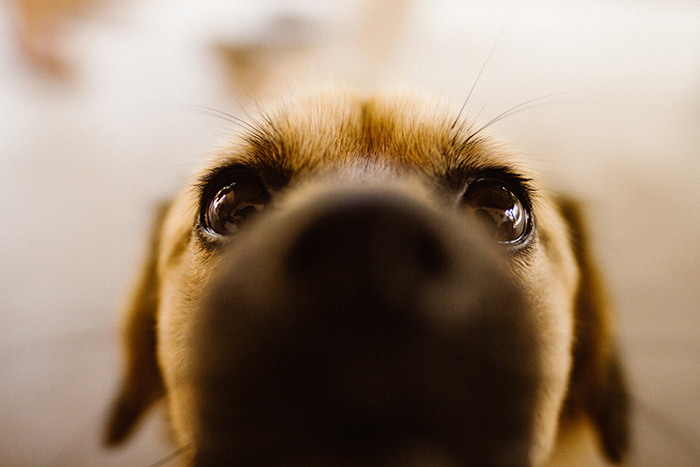 Another way to make the most of animal photography is to take funny closeups.
To do this, all you need is a wide-angle or macro lens. Use one that will capture both an animal’s eyes and nose.
Get as close to the animal as possible, making sure its eyes are in focus.
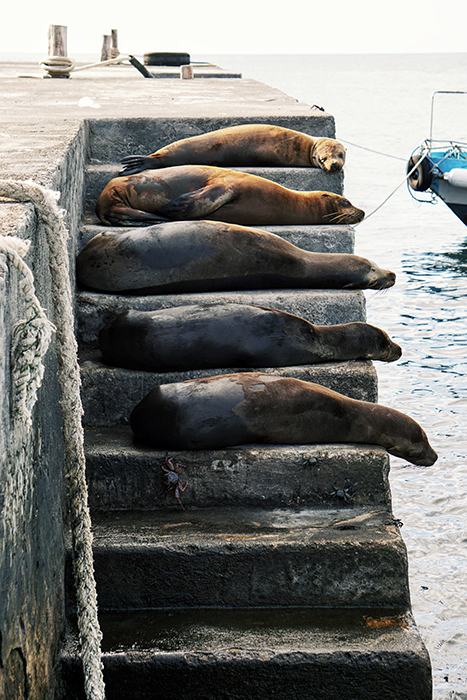 Finding unique situations isn’t easy, but it’s definitely a great excuse to spend more time outdoors.
Observe different animals and their quirks. You might come across something as interesting as the sleeping seals in the photo above!
 You can make a simple photo look more interesting by cropping or enlarging it. Some photos look better as panoramas. Others look more appealing when they’re cropped.
Experiment with different formats to find a few that enhance your compositions.
 If slight desaturation isn’t enough, you can shoot in, or convert to, black & white.
High contrast photos look even more amazing in b&w. If your photos are flat, make sure you add contrast to them before you convert them to b&w to avoid unflattering results.
 In addition to having weird sleeping patterns, animals have a bunch of unique quirks.
Photograph your pet carrying unusual things, playing with “toys” that aren’t mean to be played with, and running around in their favorite place.
You can take this further by taking a self-portrait with them!
Animal photography is open to animal lovers of all kinds.
Whether you’re a cat person, a dog lover, or a wildlife photography enthusiast, you can enjoy this genre whichever way you like without missing out.
---------------------------------------------------------------------------------------------------------------------
PHOTOGRAPHY FREEBIE:
How to make money with your Photography even if you're not a Pro.
Copy & paste this link into your browser, click ENTER, and enjoy:
https://mrdarrylt.blogspot.com/2020/01/how-to-make-500-month-from-your.html
or
https://www.photography-jobs.net/?hop=darryl54
----------------------------------------------------------------------------------------------------------------------
Visit me on Facebook and post your pictures.
https://www.facebook.com/Darryl-T-363867387724297/Need a camera? Try this link (Tri State Camera) for discounted prices:
https://ebay.to/2Smb1ho