Tuesday, February 9, 2021


How to Care for Your Photography Equipment in Cold Weather

Tags: Photography for Beginners, Winter Photography

Protecting your equipment for winter photography is essential. After all, you don’t want to ruin all that expensive camera gear.
I live in Fairbanks, Alaska. That’s about 65 degrees north latitude, or just a little over a degree south of the Arctic Circle. We are deep in the interior of this most northern of US states, far from the temperature-mellowing presence of the maritime areas.
My point is this: it gets cold here. Not just chilly, “I need to put on a sweater” kind of weather, but honest-to-god, bone-chilling, spit freezes before it hits the ground, kind of cold.
Yearly, our little northern city will reach temperatures colder than -40F (-40C). We will go for weeks at a time where, even during the day, our temperatures do not climb above -20F (-29C).
Beautiful shot of snow covered trees at sunset. Winter photography.
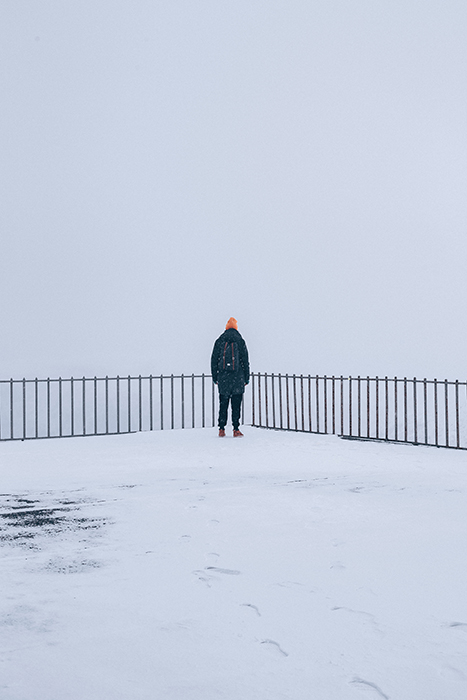
You might think that I wouldn’t even want to step outside in conditions like that, let alone take all my equipment out to take winter photography. But, you’d be wrong.
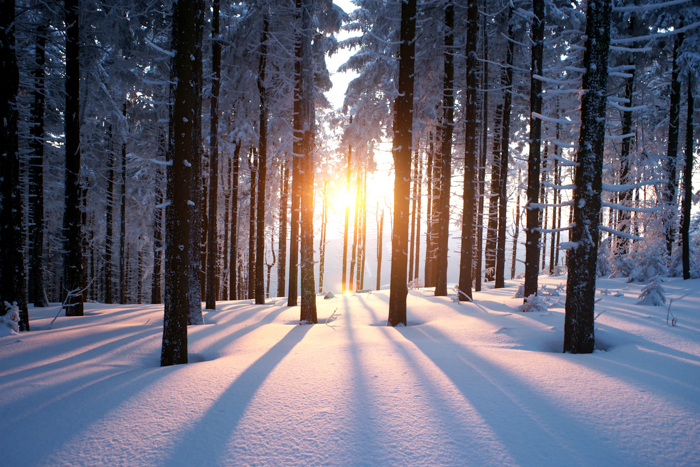
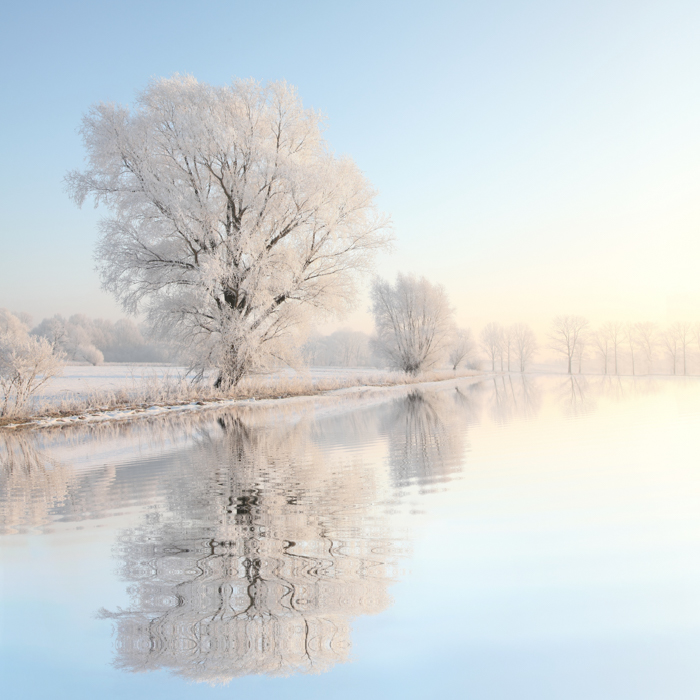
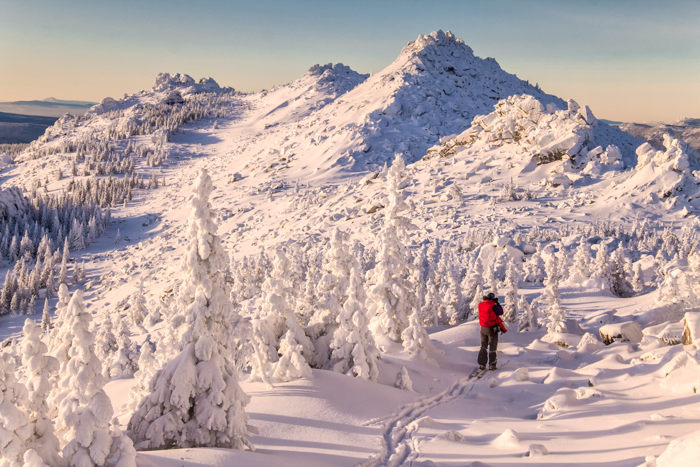
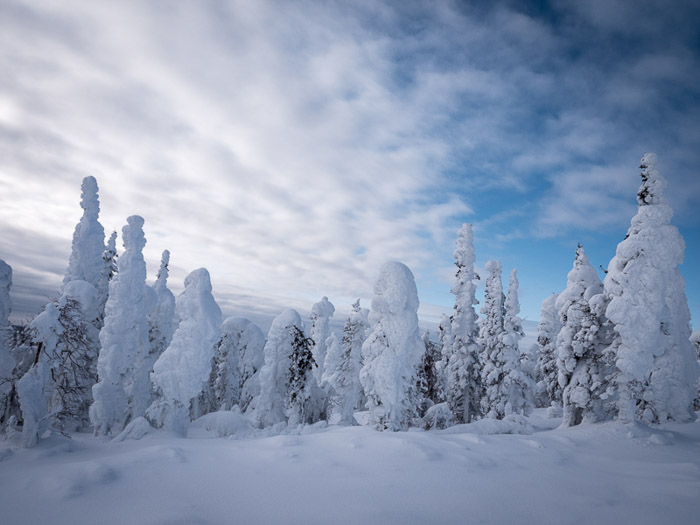
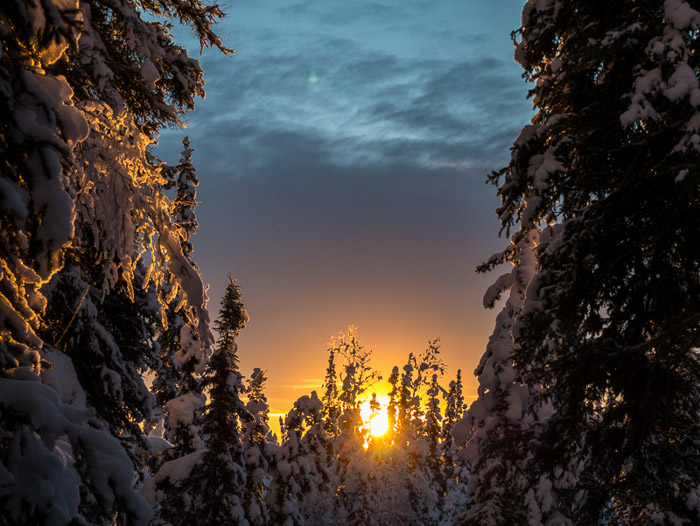
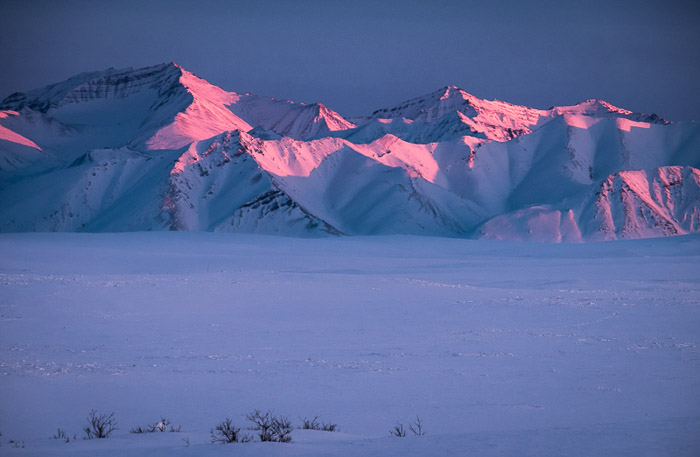
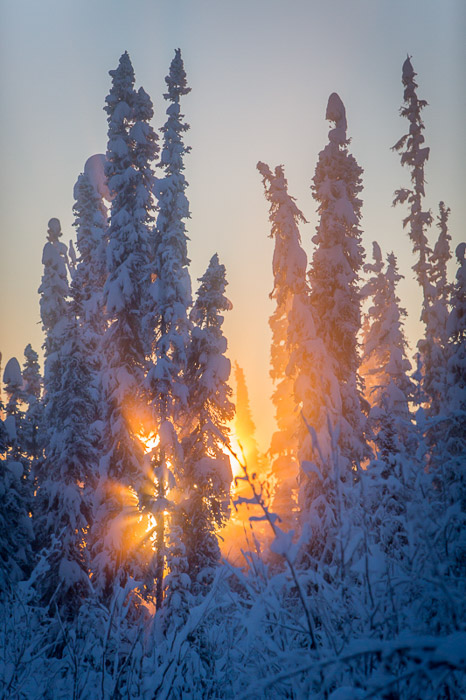
The light during the short days of winter is absolutely sublime. The sun never rises far above the horizon and the low-angle, warm-toned light is often too much for me to resist.
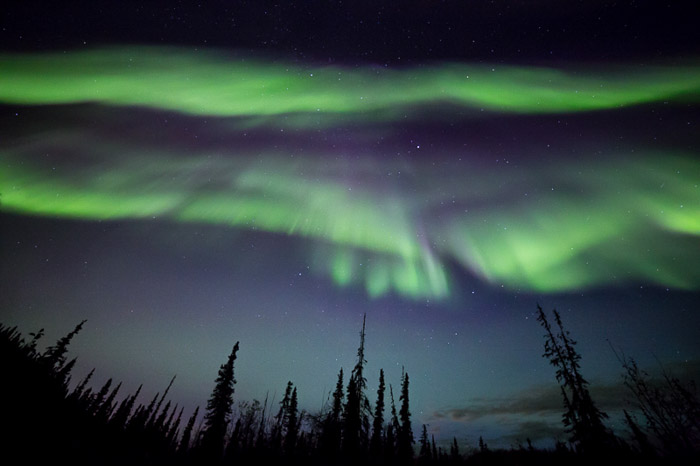
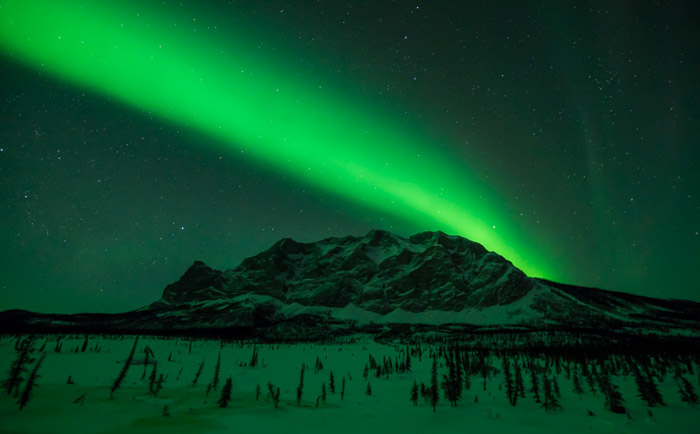
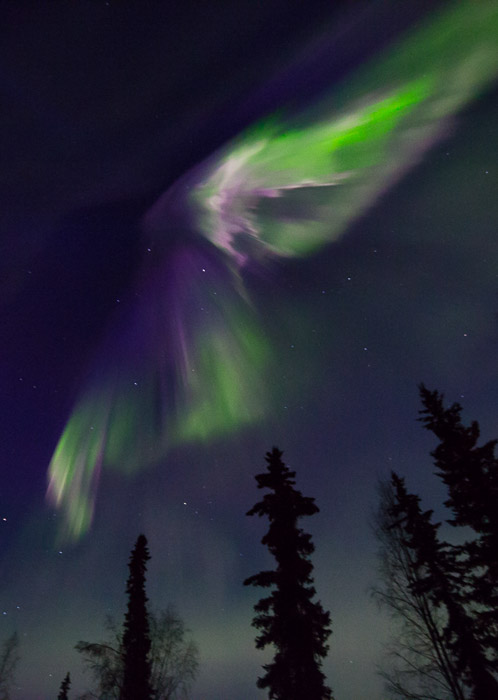
Winter is also the time that the aurora borealis dances overhead, during our long nights. Frequently, I will spend hours out, alone, in the dark and cold, photographing a display of northern lights.
Photo of the northern lights over the silhouettes of trees. Winter photography.
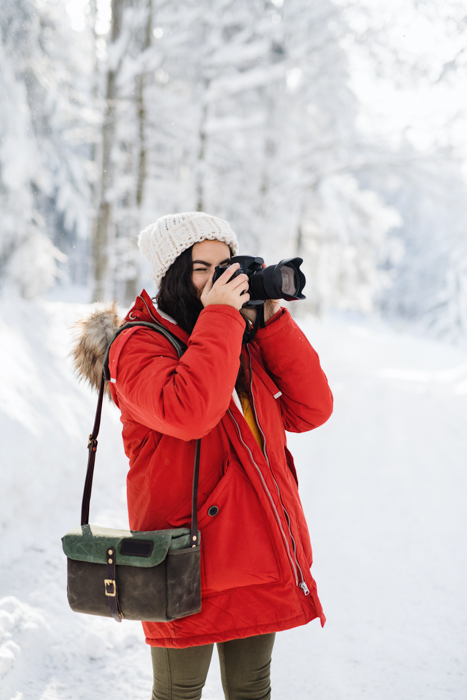
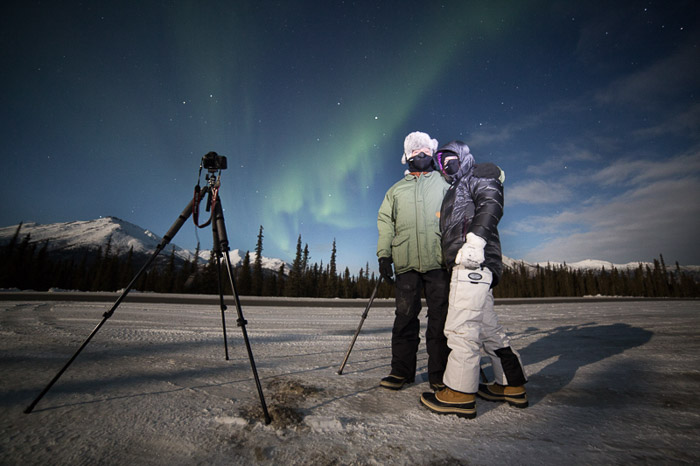
To venture out in those conditions for any length of time, you and your winter photography gear need to be prepared.
You need the right clothes to keep yourself warm, and you need to make sure your camera equipment is ready too.

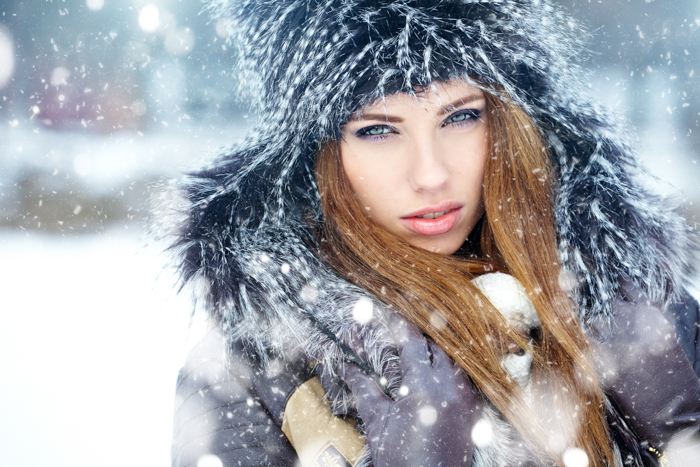
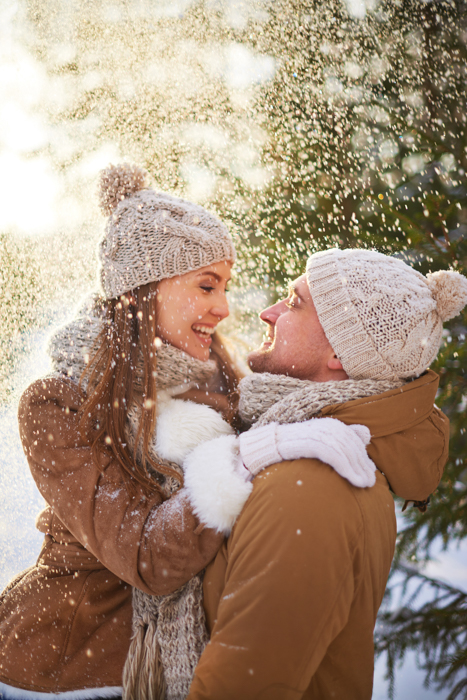
Winter Photography Clothing

Photo of two photographers with camera and tripod shooting the northern lights. Winter photography.
Two students on one of my aurora photography workshops model the right kind of clothing 
for a cold night out photographing the northern lights.

You’ve got to dress right. It doesn’t matter what the light is doing if you get frostbite on your fingers, and can’t operate the camera. When dressed for extreme winter photography, I feel a bit like an onion, wrapped in layer upon layer.
From inside to outside my system goes like this:

  • long underwear;
  • fleece or wool sweater and pants;
  • down or synthetic vest;
  • 800 fill down jacket with hood;
  • windproof Thinsulate pants;
  • two pairs of thick wool socks topped by expedition quality winter boots;
  • a musher’s style hat complete with ear flaps;
  • a balaclava or face mask;
  • thin nimble gloves with a pair of expedition over-mitts dangling from wrist straps.

Lastly, I’ll often throw a couple of chemical hand-warmers into my jacket pockets. When temperatures drop to -40F, it’s best not to mess around.
Stunning landscape winter photography shot of snow covered forest.

Camera Batteries

Keeping a camera operating in the cold can be one of the biggest challenges to winter photography when the mercury drops. Cold temperatures increase the internal resistance in a battery, limiting how much electricity it can discharge.
On a warm day, a battery can dump all of its available power, but when it drops down to 0F (-18C), you may only get 50% of the available power. At -40, it’s a relatively small fraction.
In other words, much less time to shoot before your battery gives up the ghost.
The solution is pretty easy: carry multiple batteries. I keep at least a couple of spares in an inside pocket, where they will stay warm. When one dies, I swap it out for a warm battery.
By alternating back and forth, you can really extend the life of the battery, and keep shooting hours longer than you would otherwise be able to.
Photo of the northern lights over a mountainous landscape. Winter photography.
The more power hungry your camera, the more batteries you will need. I’ve recently switched from Canon to Sony and Lumix, and one of the things I miss is the long battery life of my Canon DSLRs.
With the comparatively small batteries of the Sony and power-hungry mirrorless system, I have to carry twice the batteries, maybe more, as I did with Canon. My Lumix however, despite also being mirrorless, has a larger battery and a much longer life than the Sony.
My point is, even really good cameras have their limitations. You need to know your gear, and plan for it. I can work with a shorter battery life as long as I have spares available.
Stunning winter photography shot of snow covered forest at sunset.

Camera Mechanics in the Cold

Within your camera’s manual, you’ll usually find a temperature range within which it is designed to work. Never does that range include some of the conditions in which I frequently work. Yet, despite shooting for many hours at a time in temps as low as -45F, I’ve never had a camera seize up.
However, I have had students, on aurora photo workshops, experience that. Frequently this is a battery issue, just not enough juice to drive the shutter and other mechanic parts of the camera. But occasionally it’s a deeper problem.
Spectacular winter photography of the northern lights dancing above the silhouettes of trees
On a workshop a year or two ago, a client’s Nikon DSLR completely seized. Nothing worked. No shutter, no focus, nothing. The screen on the back flickered with a warning code, and then died.
When a fresh, warm battery refused to bring it back to life, we packed it in for the evening. After a night stored safely in a dry bag (see below) he turned it on. The camera popped to life, no worse for wear.
When shooting in the most brutal occasions, sometimes you may just need to stop and warm up your gear. Your gear will likely suffer no ill effects.

Bad Breath

Canon camera on tripod with lens and camera body completely covered in frost, winter photography.
This is what happens if you bring a cold camera indoors unprotected by a plastic bag. The lens and camera body are completely covered in frost.

Cold temperatures require you to be careful not just with your batteries, but also with how you handle it. The cold comes with other risks. One in particular, can ruin your day of photography, and that is – watch your breath. I mean it.
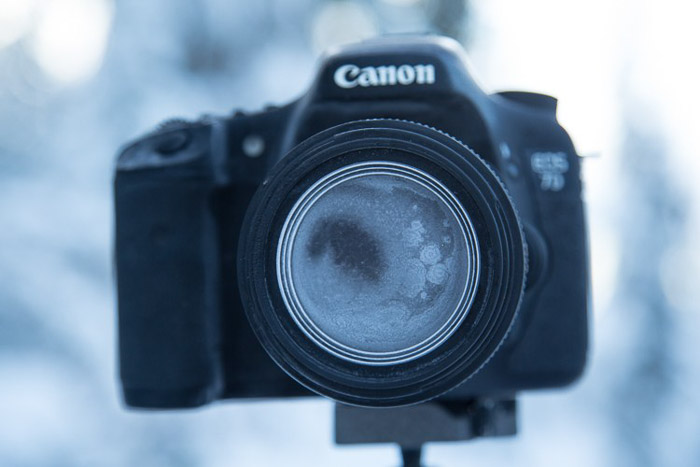
A mistimed, warm, humid, breath will condense on your lens, resulting in a layer of milky frost on the glass. It doesn’t matter how much money you spend on your lenses, no amount of sharpness will make up for that kind of damage. Wiping at it usually just smudges it more, and defrosting it inside (see below), can take hours.
Watch where you breathe, if you turn your camera around to check lens settings, don’t exhale. I also usually wear a neck gaiter or balaclava that I pull up over my mouth and nose. When wearing a mask, with your mouth covered, your breath is directed up, where it frosts on your eyelashes instead of your camera.
hills covered in snow at sunset with pinkish glow on them

Use That Lens Cap

Breath is the usual culprit of fogged lenses, but when shooting at night, there is always the chance that natural frost will form. To avoid this, use your lens cap when you aren’t shooting. If you are walking from one location to another, taking a break, or searching for a new composition, put the cap back on your lens.
When I’m out shooting the aurora at night, my cap is on my lens, even if I’m just walking a short distance to a new shooting location.

Back Indoors

Last, and perhaps most importantly, is the return indoors. You know how on a hot day, your cold beer glass gathers condensation? Ever watched how those drips can form and run down the bottle, pooling in a messy ring on the hard-wood table?
Imagine that happening to your camera gear. It can, and it will.
Evening winter photography of a sunset through icy trees.
If you bring a camera indoors that you’ve been using in cold temperatures, the equipment will be cold. After a frigid night photographing the aurora borealis, an unprotected cameras will grow frost crystals in seconds after coming inside.
This condensation can wreak havoc with the camera’s electronics, and cause moisture to build up and fog in the internal workings of lenses and bodies alike. I know from experience, it’s ugly, and it can wreck a camera.
Fortunately, it’s easy to deal with. When you step back indoors to take a break, warm up, or finish up for the day, place your camera and lenses into an airtight bag. Simple.

a canon camera put in a sandwich bag to prevent it from getting wet and dirty
Though a zip lock style plastic bag like this will work, even better is a roll-top style dry bag, 
like those used by boaters.

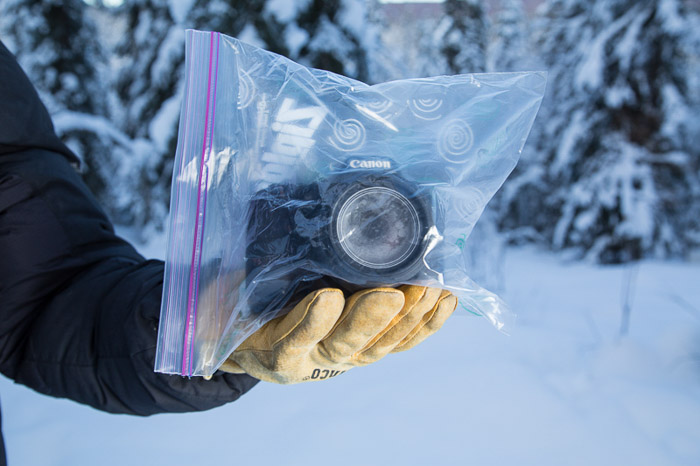
Ziplocks are good, but I favour lightweight roll-top dry bags like those used by boaters to keep their gear dry. These are tough, reusable, and work like a charm.
Once sealed up tight in a ziplock or dry bag, condensation can’t form on your gear. Just let your camera warm up to room temperature before you pull it out.
Awinter photography shot of a snow covered mountain.

The cold scares a lot of photographers, and make no mistake, a frigid, mid-winter Alaskan night is nothing to mess around with.
But with a few precautions – warm clothes, spare batteries, avoiding frost, and protecting against condensation – you can take advantage of the stellar beauty of crisp, clear, days and nights.

Friday, February 5, 2021

18 Exciting Winter Photography Tips and Ideas

Tags: Photography for Beginners, Winter Photography, Tips and Ideas


Winter may not seem like the best time of year to have exciting photo shoots and take gorgeous photos.

In reality, it’s the best season for creating surreal, and dreamy images.

To make the most out of winter photography, take a look at our 18 tips and creative ideas.

 Light shining through the trees in winter 

1. How to Prepare Yourself and Your Camera for the Cold Weather

You’re probably already aware that winter can be cold! You have to prepare for that if you are interested in winter photography.

Your camera can work slower in cold weather conditions. Spare batteries for being able to shoot everything you planned, as they rapidly run out.

Also, take a hot beverage with yourself in a thermos. And of course, dress properly, wear the warmest clothes you can. Especially if you are planning to stay put in one place, rather than hiking!

Fingerless gloves can make your task easier because you will be able to adjust your camera settings more easily.

After shooting outdoors, make sure to let your camera to try out. Moist can find it’s way into your lens and the camera body.

Although it doesn’t feel the same as rain, snow can soak your gear as well. Even if it’s not snowing, when you go into a warm place, you can immediately see the moist on your glass.

Don’t pack it immediately, let it dry in a warm (but not too hot) place. This way you can avoid getting camera lens fungus.

These are the base of every other winter photography tips for outdoor ideas.

A photographer shooting winter photos outdoors

2. Use Your Camera Settings for Enhancing Soft Lights

Shooting in snow is a great challenge as a great part of your images is going to be bright and white.

You can overexpose your photos in wintertime. It means that you can let more light into your camera. Open the aperture wider, or use a slow shutter speed.

This way you can reach a soft effect. The soft ambient light works well with overexposing. Also, it looks good in a landscape, when everything is covered in snow.

A fast shutter speed or a small aperture can make your images dark and lose their sparkly atmosphere.

You can also experiment with the white balance settings of your camera. Snowy scenes can turn out magical by modifying the color temperature a little bit.

Dreamy winter photography of snowy trees by a lake

3. Have a Winter-Themed Portrait Photo shoot

Winter photography goes hand in hand with warm outfits. Faux fur animal hats are perfect for outdoor photo shoots.

Asking your model to stand in the snow might seem like a bad idea. But if you use the right outfits and props, there is nothing wrong with it. Snow makes your images more fabulous, like you were illustrating a storybook.

Portrait photography doesn’t always have to feature fancy dresses and accessories. A cozy outfit can actually make your photos look more heartwarming than a summer portrait.

There are typical accessories you can use. Scarves, hats, hooded coats, gloves or boots all can be stylish elements of your images.

You can decide what kind of effect you want to reach and ask your subject to dress accordingly.

You can create a contrast between the snow and the clothes by asking to dress in vivid colors. But you can make him or her a part of the background and the scene by using cold colors, such as blue and grey.

To add warmer tones to the snow, you can even try using different lamps or candles.

Winter portrait of a female model in the snow

4. Take Photos of Couples to Bring Warmth into Your Winter Photo shoots

Winter photography is becoming more demanded when it comes to engagement photos or other couple photos.

This is because a little snow adds a lot to the atmosphere of the images. Also, in most countries, snowy days are rarer than warm and sunny ones. So winter photos in snow-covered environments make the images to look less mass-produced.

The contrast between the cold temperature and the smiling faces will help you take heartwarming photos. Use the cold weather to bring the couple closer to each other. Hugs, shared coats, holding hands in gloves all look nice in these images.

If you have a significant other, you can take a cute self-portrait with him or her.

Make sure to take this photo shoots as short as you can, to prevent frozen smiles. Always prepare in advance, and keep a few possible poses in mind.

A couple posing in the snow

5. Use Winter Fog to Take Gloomy Photos of People

Winter photography tips are not just about sparkly snow and warm, cozy evenings. When it seems like the sun won’t appear anytime soon, you can take moody photos.

For example, you can use winter fog as an eerie background. It enhances the lonely and cold side of winter. Cold days can be gloomy and a bit depressing wit their long nights.

For capturing this, your model can stare off into the distance with their back to your camera. His or her figure should be small compared to the background.

The brightness of the snow will give you enough light to create images similar to the one below.

 A snowy winter portrait of a figure standing by a fence

6. Take Your Wildlife Photography Skills to the Next Level by Photographing in Winter

Winter might not the most ideal time for sitting outside for hours, waiting for a wild animal to pass by.

But snow-covered environments can give a great frame to the animals you do spot. Of course, there are some white animals out there. But a lot of them can’t hide as well as in other seasons.

If you don’t want to wander in the cold winter weather, you can even attract animals to your garden or window.

Place food for birds in a feeder, and they are going to come to you.

You can start feeding them when the first frost comes. Then continue it until spring. If they get used to a place where they can find food, they are going to go back regularly. So don’ just attract and then abandon them.

Winter is ideal for bird photo shoots because of its perfectly white tones. This makes it the perfect background for simple yet eye-catching photos.

Because winter photography usually consists of dull colors, things can blend together in an unflattering way. This might take attention away from your subject.

To blur out background distractions, use a large aperture like f/1.4.

Winter photography of a robin in a snowy tree

7. Make the Most Out of Christmas Photography Using Items You Love

For many people, one of the highlights of winter is Christmas. All the reds and greens are a breath of fresh air during this gloomy season.

Even if you’re not a fan of shooting among cold winter conditions, you’ll love taking Christmas-themed photos.

Christmas-themed flat lays are a great way to highlight the best parts of winter photography. You can photograph your favorite objects, like cups or tree decorations, by using a bird’s eye view.

Of course, not only flat lays work here. Shoot sidewards to reach a shallow depth of field. Blurred lights in the background bring warmth even in cold weather.

To make this idea as fun as possible, take photos of the things you love about Christmas.

You can capture a handmade decoration or a childhood memory. The Christmas table setting is also something you can shoot to get stunning images.

Once the photos are ready, you can turn them into album photos. You and your family will treasure them for years to come. You can even make postcards of these.

White themed Christmas table setting

8. Use Food Photography to Capture the Winter Mood

Winter is the perfect time to stay in and cook something delicious. You can slow down a bit and take some time for food photography.

This is one of those photography ideas for winter that you don’t have to leave your house for.

There are typical Christmas foods and typical winter beverages. You can almost smell them just by looking at their images.

You can make mulled wine, hot chocolate, tea, or even coffee, served in a winter-mug. Or you can bake some gingerbread, a cake or anything that reminds you of winter.

It would be a lot to cook proper Christmas dishes before or after Christmas just for fun. So you should experiment with smaller tasks just like cookies.

And you can capture the dishes at Christmas if you have the time before your family eats everything.

These arranged food photography sessions are going to mean a nice preparation for the holidays.

Flat lay of making Christmas themed cookies

9. Take Macro Photos to Capture the Beauty of Winter

Winter isn’t always fun. This can make it difficult to be excited about photography during this time of year.

But winter isn’t all about gloominess and cold temperatures.

To inspire yourself, start a project that focuses on the beauty of winter. One of the best ways to do that is to photograph snowflakes and frost.

Frost can be found anywhere and always looks stunning. Combined with sunshine, it can result in breathtaking photographs.

This challenge will help you find beauty in simple places and will hopefully cheer you up on a gloomy day.

A tiny snowflake resting on blue wool

10. Freeze Soap Bubbles for Incredible Results

When it’s very cold outside, you can blow some bubbles and create magic!

All you need are soap bubbles, a macro lens, and good lighting.

Soap bubbles can be difficult to work with, especially if it’s windy outside. Make sure you take photos when the weather is calm.

Blow the bubbles in a location where they can gently land. Branches, flowers, and bushes are perfect for this.

For the best lighting results, shoot when the sun is out.

Photos like this make winter photography more than just a challenging genre.

If you’re lucky, your bubbles will end up getting covered in frost. This will make it seem like you managed to capture snowflakes in a drop of water.

A iridescent bubble on the snow

11. Create a Contrast With Autumn and Spring to Enhance The Power of Winter

You can find frozen leaves in winter, the remains of autumn. They are not only beautiful but they make a nice contrast with the previous season.

The first signs of spring, such as little flowers growing from the snow-covered land can also enhance the contrast between two seasons.

These unique contrasts can remind the viewer of the essence of winter. It can freeze the world in a beautiful way, but it doesn’t only mean death. Beautiful things can grow after.

Look for these small signs and tell stories of nature and the circle of life by capturing them.

frozen leaves in winter

12. Focus on the Connection Between Buildings and Snow

The coldness of winter puts a spotlight on things we might overlook at other times of the year.

For example, it’s impossible not to notice a vibrant light in a colorless, snowy scene.

If you’re a fan of architecture, you can make your subjects stand out even more with the help of snow.

You can use all the negative space to lead a viewer’s eyes to a building.

You can even emphasize shapes that aren’t that visible when they’re surrounded by trees, a blue sky and a busy street.

Architectural photography is usually not strongly connected to winter photography ideas. But if you try it, you’ll realise how different buildings can look at this time of the year.

A building covered in snow on a winter evening

13. Take Landscape Images to Show The Magic of Winter

In winter, nature changes. Snow makes everything look totally different. Go out for a walk into a forest with your camera and capture the beauty of this season.

Prepare for the cold weather, but if you keep moving, a small hike can be a great activity.

You can decide what you would like to enhance with your images. Of course, it depends on the weather.

You can shoot to enhance the golden lights. But this is not the only way to go.

When it comes to winter photos, you might be tempted to make them as warm as possible to make up for the lack of colors. What if you went against that idea?

Make your cold winter photos even colder. Adjust your camera’s white balance. Experiment with different cool tones.

This exercise will help you think outside the box and encourage you to break the rules sometimes.

Snowy winter landscape

14. Get Up Early for Magical Lights

As everything in winter, sunrises are magical.

If you are lucky and you look ahead a sunny day, the first lights are going to look mesmerizing. Morning lights are usually colder than the lights of a sunset.

Probably the best combination is morning fog with the first signs of a sunny day. The first rays can brighten the whole scene, and make mist look like it’s glowing.

You don’t necessarily need a snowy landscape to create stunning sunrise photos. Any kind of winter weather worth a shot.

Snowy winter landscape

15. Capture Sunsets to Create Dramatic Contrast

One of the best ways to take stunning winter photos is to create contrast.

If possible, use a vibrant sunset or sunrise to create outstanding photos of nature.

The dramatic difference between warm and cool tones will make your photos look striking and atmospheric.

This is ideal for landscape photographers who want to capture the gritty and vulnerable sides of winter.

Also, during the blue hour in winter you can find perfect contrast with the white of the snow. Usually, the sky is lighter than the landscape itself. The dark blue sky of the blue hour is going to make a bit surreal contrast with the snow.

Evening clouds over a snowy winter landscape

16. Take Creative Snow Falling Photos to Make Playful Images

Falling snow is often used in winter photography. This idea is perfect for having fun and improving your action photography skills at the same time.

You can capture the snowfall itself, but it’s even better to combine it with a portrait photography session.

Your aim is to take sharp photos of falling snow and make your model or models stand out.

To make this process easier, take photos using burst mode. Burst mode is a feature that allows photographers to take multiple photos while holding the shutter.

You can also play with shutter speed to blur the falling snow a little bit.

You can use this technique to take adorable and funny photos of people enjoying winter.

A couple embracing in the snow

17. Take Adorable Photos of Your Pet in Winter Attire

Our winter photography tips are not just for humans and Christmas decorations.

For this idea, you need to own a pet. If your pet loves spending time outdoors in the winter, you’re lucky!

Adorable pet photos are always in demand. You can turn your pet portraits into stunning works of art every time you go out.

You can use colorful outfits and accessories to make your photos stand out.

If you like the results, you can even use these images as Christmas postcards to your family or friends!

Make sure to reward your pet with treats during and after your photo shoot.

A cute dog in the snow

18. Don’t Forget to Take a Wintery Self-Portrait!

It’s as important to photograph others as it is to take self-portraits throughout the process.

During this cold season, don’t forget to take a few photos of yourself surrounded by a stunning winter landscape.

Even if your face isn’t visible in your self-portraits, your results will document your journey.

You can even set a home studio and practice with self-portraits. You can create your own cozy memories by shooting at home surrounded by your favorite Christmas decorations.

But you don’t necessarily have to have a Christmas-themed portrait of yourself. Your favorite pullover can be more than enough.

They might even remind you of how much you’ve progressed as an artist.

Snowy winter landscape

Winter is coming, folks.

Before it arrives, satisfy your creative needs with plans, mood boards, and ideas. These will make your winter photography a success.

Consider our winter photography tips, and experiment with them to get outstanding images. Snowy days are usually rare in most parts of the world. Your images are going to be more unique just by showing some snow.

When winter is here, you’ll be ready to take your best photos yet.  Share this article.


----------------------------------------------------------------------------------------------------------------------

PHOTOGRAPHY FREEBIE:

How to make money with your Photography even if you're not a Pro.

Copy & paste this link into your browser, click ENTER, and enjoy: 

https://mrdarrylt.blogspot.com/2020/01/how-to-make-500-month-from-your.html

                                                         or

https://www.photography-jobs.net/?hop=darryl54

 ----------------------------------------------------------------------------------------------------------------------

Visit me on Facebook and post your pictures.

https://www.facebook.com/Darryl-T-363867387724297/  

 ------------------------------------------------------------------------------------------------------------------------

Need a camera?  Try this link for discounted prices:  https://ebay.to/2Smb1ho  


Thursday, February 4, 2021


5 Reasons To Buy a Nikon D850 — or Any DSLR — in 2021

Wasim Ahmad's picture

When it was released in 2017, the Nikon D850 could be considered the alpha and the omega of the SLR photography world. It represented almost every advancement ever made for cameras with swinging mirrors. But are there still reasons to buy one of these, or any DSLR, in 2021?

If you’re YouTuber and photographer Adrian Alford, that’s a definite yes. If you’re the rest of us, that’s a solid maybe, I’d say. Alford makes some good points in the DSLR column, but to play devil’s advocate, some of it is not always the case. Let’s start with price.

While in Australia, where Alford is filming from, there’s a price difference between the Nikon mirrorless and DSLR models, the D850 goes for the same price as the Z 7II, which is $2996. But that number isn’t quite what it seems. What sets the D850 and the Z 7 II mirrorless apart is the lenses. You’ll get very similar performance out of a premium Nikon 24-70mm lens, but in the Z-mount, it will cost you $200 more than the recent DSLR F-mount version, the AF-S NIKKOR 24-70mm f/2.8E ED VR lens. But then again, the almost $2,300 is the only option you have for a Z-mount, whereas if you step one version back in the F-mount, you can get the non-stabilized AF-S NIKKOR 24-70mm f/2.8G ED Lens for just under $1,600. Or a refurbished one for $1,200. That kind of saving is nothing to sneeze at, especially since even at two generations behind, the G version of the lens is extremely sharp and extremely versatile even in 2021. So while the cost of the bodies may be the same, Alford’s point about money stands when you add up the cost of lenses or adapters to use old lenses on mirrorless bodies.

That does all tie into Alford’s point about a large back catalog of lenses being available for the F-mount. The F-mount has been around for decades, and so while some of the older lenses don’t hold up on the newest sensors, there are still plenty of used and older models that do. That sensor is another plus for the D850, as Alford mentions that the sensor is still the same as the one as the new Z models and holds up even today.

That said, two of the things that I always find odd in the mirrorless versus DSLR debate are the points about battery life and autofocus. For one, the addition of eye-autofocus in almost every mirrorless camera out there these days instantly push them to the top of the pile for me, but even in Alford’s use case of wildlife photography, the accuracy of focusing directly off the sensor in a mirrorless camera and not having to worry about micro-adjusting lenses is fantastic. I can’t tell you how much of my life was wasted doing that.

And as for battery life, while it’s slightly worse on a mirrorless camera, I’ve still been able to get through all-day shoots on my Canon EOS R and still have some juice to spare, even in cold temperatures. Maybe not as much as a DSLR would have left, but it still gets me through the day. This wasn’t the case a few years back with the extremely tiny batteries on Micro Four Thirds cameras I had, but times have changed.

Much of what Alford says about the D850 can really apply to any DSLR out there. So it’s 2021, what’s your choice, mirrorless or DSLR? Leave your thoughts in the comments below.

3 Things to Consider Before Buying Your First Film Camera

Andy Day's picture

If digital images feel a bit too clean and clinical, consider giving your photography some soul by shooting on film. Before buying your first analog camera, here are three things that you should keep in mind.

Experienced film photographer Kyle McDougall has put together a couple of thoughts for those getting into film photography with the intention of helping them avoid any disappointment or frustration that can be part of a process that has more variables and potential pitfalls compared to digital.

Regarding his first point, you could balance McDougall’s suggestion by embracing the attitude that film photography can be about making the most of imperfections. Obviously, it’s not ideal if your camera’s light leaks are ruining every photograph that you take, but sometimes, those unexpected elements can bring some character to your images.

If the idea of imperfect, low-quality images sounds appealing, consider having a look at the 110 format cameras made by Lomography. Strangely, the naming system is all over the place and 110 is nowhere near as big as 120. Instead, it's quite the opposite — around half the width of 35mm (a.k.a. 135). You can grab a camera and a couple of cartridges of film for as little as $45. (And if you’ve any idea why Kodak decided in 1972 to call this format 110, I’d be grateful if you could leave a comment below!)


Tuesday, February 2, 2021

 More Photography Freebies

Tags:  Photography for Beginners, Portrait, Landscape


Just click on the Titles (in blue) to get your freebies.


The Portrait Photography  Collective


If you’ve always wanted to do portraiture, this ebook is definitely something worth reading. You’ll learn the art history of some of the most accomplished portrait photographers in the photography scene and how to shoot amazing portrait photos effortlessly. You’ll also learn 10 different portraiture approaches and from there you’ll find the inspiration you need to make your portrait photos masterpieces.


2. The Landscape Photography  Collective

Here’s the blatant truth: Landscape photography is a challenge to many photographers. Heck, even the best photographers have a rough time illuminating what’s out there. In this ebook, you’ll learn the secrets and insights that’ll help you create gorgeous photos in pretty much any scenery. From secrets of mountain photography to photographing in some of the loneliest places on earth among others. In addition, there are also interviews with famous photographers like Iain Sarjeant, Eirik Johnson, and Carla Fernandez among others talking about how it’s done.


----------------------------------------------------------------------------------------------------------------------

PHOTOGRAPHY FREEBIE:

How to make money with your Photography even if you're not a Pro.

Copy & paste this link into your browser, click ENTER, and enjoy: 

https://mrdarrylt.blogspot.com/2020/01/how-to-make-500-month-from-your.html

                                                         or

https://www.photography-jobs.net/?hop=darryl54

 ----------------------------------------------------------------------------------------------------------------------

Visit me on Facebook and post your pictures.

https://www.facebook.com/Darryl-T-363867387724297/  

 ------------------------------------------------------------------------------------------------------------------------

Need a camera?  Try this link for discounted prices:  https://ebay.to/2Smb1ho  

Monday, February 1, 2021

The Minuta Stereo is a 3D stereoscopic pinhole camera that shoots 35mm or 120 format film

Stereoscopic photography is a wonderful thing. Whether you’re able to use it in serious client work or not, it’s incredibly fun. It’s something I’ve been doing occasionally for years, and even recently with digital – thanks to the Weeview SID. But there’s no experience like shooting it on film. Until you’ve developed it, there’s no real way to know if you’ve got the shot or how it’s going to look. It’s an almost magical experience.

Well, Architect Dominik Oczkowski at Oczko Stereo wants to bring that experience to everybody with the new Minuta Stereo – a stereoscopic pinhole camera that shoots both 35mm and 120 medium format roll film. It also lets you adjust the “rise” of the film plane to compensate for off-axis horizons and keystoning. And it’s coming to Kickstarter next month.


The camera houses a pair of pinholes, which they say are a 50mm equivalent when shooting square format images on 35mm film and a 20mm equivalent when shooting panoramic images (presumably 6×6 medium format, too) with an aperture of f/140. On a 35mm roll, you get 20-24 square photos or 8 panoramics. With 120 medium format roll film, you get 6 square photos.

The Minuta Stereo is billed as an “affordable starter set” to make shooting 3D on film more accessible to more people and introduce them to the world of stereoscopic photography. No price has been mentioned yet, though, and it’s unlikely we’ll hear of one before the Kickstarter campaign goes live. When it does go live, it’ll be available in two ways. Either a pre-built and ready-to-go camera that you just need to load film into, or as a DIY kit of laser-cut components that you assemble yourself.

But whichever way you go, you’ll be sure to get some pretty cool images – although, yes, that will largely depend on the scene towards which you’re pointing it and it will most certainly take some getting used to. So, use some cheap film stock while you’re learning.

Go on, cross your eyes and give it a try!

As well as the Minuta Stereo camera, there’s also the Emulsia Stereo 3D viewer, allowing you to easily look at your pairs of images in all of their 3D glory when viewed in front of a light panel or another strong light source. And if you’ve scanned images into your phone, it’ll even work with that.

The Kickstarter campaign is due to go live in a little over 28 days. Until then, as mentioned above, there’s no word on price or how soon the cameras will ship on the conclusion of the Kickstarter campaign. That is, assuming it gets fully funded – which I hope it does. It looks like it’ll be a lot of fun to shoot with!

For now, though, if you want to find out more about the camera and viewer, head on over to the Minuta Stereo website. And if you want a crazy (not quite stereoscopic but maybe kinda could be) DIY pinhole camera to try and build in the meantime, be sure to check out La Guillotine camera.


----------------------------------------------------------------------------------------------------------------------

PHOTOGRAPHY FREEBIE:

How to make money with your Photography even if you're not a Pro.

Copy & paste this link into your browser, click ENTER, and enjoy: 

https://mrdarrylt.blogspot.com/2020/01/how-to-make-500-month-from-your.html

                                                         or

https://www.photography-jobs.net/?hop=darryl54

 ----------------------------------------------------------------------------------------------------------------------

Visit me on Facebook and post your pictures.

https://www.facebook.com/Darryl-T-363867387724297/  

 ------------------------------------------------------------------------------------------------------------------------

Need a camera?  Try this link for discounted prices:  https://ebay.to/2Smb1ho  


Censorship Concerns Arise After Journalist Arrested for Photographing Protest


Freelance photographer Andy Aitchison was recently arrested in the United Kingdom for performing the duties of his job: documenting an event. Aitchison was tasked with photographing a protest, and after he concluded his business and uploaded his images, he was arrested at his home.

According to a report on The Independent, Aitchison attended the demonstration outside the Napier Barracks in Folkestone, England and took photos of protestors throwing buckets of fake blood at the gates to the site. The protest came in response to concerns that asylum seekers housed in the barracks were facing poor living conditions. For example, over 100 of those housed there have contracted the coronavirus in the last two weeks.

Aitchison concluded his on-site reporting and his images were later used in local press reports. But more than six hours after the demonstration concluded, Aitchison was arrested at his home by five police officers under “suspicion of criminal damage of a dwelling.” 

Police seized his mobile phone and the memory card from his camera and was taken to the local police station where he was held for more than five hours before being released on bail. According to the report, Aitchison’s bail has been granted until his February 22 hearing and he was specifically instructed not to return to the Napier barracks until the case had been concluded.

In an interview with The Independent, Aitchison said it was the first time he had ever been arrested, and the experience of being detained as the result of the work he does felt “bizarre.”

“It feels like a light has been shone on them and they’ve got the sledgehammer out,” he said. “It’s censorship: if you don’t toe the line, we shut you down.”

According to Aitchison, the demonstration at the barracks lasted for no more than 10 minutes and was nonviolent. He says that the buckets of fake blood were simply food coloring, water, and shampoo/conditioner.

Additionally, Aitchison did not take part in the protest but was simply there to document it as a member of the free press. The National Union of Journalists said that it was “extremely concerned by the arrest.

“Andrew was present solely as a journalist and took no part in the protest,” the organization added.

“It does seem like a political thing. People have highlighted how bad things are there, and I’ve shared that with the world, and because of that I’ve been hit. It’s going to have an impact on me for the rest of my life, and for work,” Aitchison said.


Thursday, January 28, 2021

This Startup Develops Your Film and Sends Photos Directly to Your Phone


New startup Indisposable is offering a unique proposition to photographers by acting as a film developing service that understands the importance of digital. The company says it is blending film photography seamlessly into digital.

Indisposable’s service is relatively straightforward. A photographer would send their film to Indisposable and after they are developed and scanned, the images are automatically sent to their phone. Indisposable also offers disposable cameras for sale, which the company says it does to encourage more people to try film photography. At present, the company offers a Fuji disposable (with 27 exposures) and a Kodak disposable (with 39 exposures).

“By erasing the barrier between the physical and digital experience, Indisposable offers everyone a simple way to bridge the gap between shooting on film and sharing online,” the company claims.

As it stands, there are two ways to send the company your film. First, you can receive a label from the company via email that you can print at hoe or they can mail you a custom pre-paid postage mailer for you to put your film into and mail back to them. The company of course also gives you the option to receive your negatives back, for an added $3.00 charge.

While Indisposable does have an app where your images will automatically appear after they are processed, you don’t have to use the app to access your photos. You will also get an email that will have your images attached so you can store them on your computer as well.

Indisposable also says that any images uploaded to its app will always remain there and will never expire.

Currently, the company can develop three types of film: 35mm, disposable, and 120 film. 35mm film development starts at $20 per roll, with black and white film costing $2.00 more; developing disposable also costs $20. 120 film is slightly more expensive at $23 per roll.

Indisposable claims that it stands out from the other expensive boutique film companies by being more affordable and more accessible to the average, casual film photographer. Additionally, its core business isn’t about making prints, and the company at present doesn’t offer them. Indisposable seems to believe that even if you shoot on film, the majority use case for the images is going to be digital and is going all-in on that assumption at launch. That said, the company does has indicated that it plans to offer prints in the near future.

Last year my friends and I took a trip to Colorado, and before our flight I ran out and grabbed a disposable camera for each of us. We all took photos throughout the trip that we weren’t able to review until we were home and had them developed… it was such a fun surprise to get the photos back and share! We were instantly hooked and this hobby continued for us until the pandemic began. But we noticed that a lot of labs only did prints or gave you images on CD’s. We wanted to take the simplicity a step further and have the images be sent right to your phone. No extra steps of downloading reels and putting them on your device. We had a feeling a lot of users were like us, and placed the most value on the digital version of the film photo.

-Founder and CMO Kyle Rothwell

The company’s app is currently only available on iOS and while the cost to develop film through Indisposable is a bit expensive, the business model seems solid.

To give the program a shot, download the app or visit Indisposable’s website.  Share this article.


----------------------------------------------------------------------------------------------------------------------

PHOTOGRAPHY FREEBIE:

How to make money with your Photography even if you're not a Pro.

Copy & paste this link into your browser, click ENTER, and enjoy: 

https://mrdarrylt.blogspot.com/2020/01/how-to-make-500-month-from-your.html

                                                         or

https://www.photography-jobs.net/?hop=darryl54

 ----------------------------------------------------------------------------------------------------------------------

Visit me on Facebook and post your pictures.

https://www.facebook.com/Darryl-T-363867387724297/  

 ------------------------------------------------------------------------------------------------------------------------

Need a camera?  Try this link for discounted prices:  https://ebay.to/2Smb1ho  


Monday, January 25, 2021

 Repost 


Another win on Ebay

I won this Nikon N65 35mm film camera on Ebay a few weeks ago.  It came with the 28mm to 90mm lens.  It is an auto-focus model.  I have not yet taken any pictures with it.  But I'm looking forward to it.  If you've been reading my posts for any length of time, you already know I love buying equipment on Ebay.  It doesn't matter what time of year you might be shopping for cameras.  Ebay is a good place to buy great used or new equipment.
If you know of a good source of inexpensive lenses (I don't want to pay more than $50 per lens) for Nikon brand cameras please let me know.  I'm probably not going to be buying many more cameras.  I currently own 12 of them.  But I do want 100mm lenses or longer for each of them.  I'm looking forward to your feed back.  'till next time, Happy Shutter Bugging!


Sunday, January 24, 2021


How to Photograph Fantastic Portraits with One Flash

Tags: Photography for Beginners,  Studio lighting, Flash, Portraits


Using a flash for portraits can be a great way to enter the world of studio lighting without having to spend too much on an expensive lighting kit. While there are affordable systems, using a flash is both easy to set up and use when you know how to do it right. After some practice, you’ll achieve looks that have that studio quality and creative lighting all-in-one.
Image: Use one flash for portraits and bounce light off the ceiling for an even light on your client...
Use one flash for portraits and bounce light off the ceiling for an even light on your client’s face.

Why use flash for portraits?

Flash can give you the portability that you’re looking for in a lighting system without having to carry extra gear just to use it. You can use a flash on or off-camera. It offers versatility in use so that you can achieve the look you want in your portraits.
Image: Use one flash on-camera to light your clients against a sunset sky.
Use one flash on-camera to light your clients against a sunset sky.
Also, when you need to fill in light, say during sunset or compete with afternoon lighting, using a flash can help you get better exposure from frame-to-frame during your sessions. This gives both you and your clients more final images to choose from that are correctly exposed. You’ll also spend less time working on the images in an editing program.

What kind of flash is best to use for portraits?

While most flash systems are pretty good in their own right, you’ll want to invest a bit in a flash that is able to be used in both manual and TTL modes. Having a flash that has the ability to use both modes will give you more range during your portrait sessions.
Image: Difference between flash and no flash. Notice the background in both pictures. This was using...
Difference between flash and no flash. Notice the background in both pictures. This was using one 
flash on-camera.
Choose a flash system that is compatible with your camera. It doesn’t have to be of the same brand family. However, choose one that is made to work with your camera brand. It will give you better results and have fewer faults when the time comes to set it up and use it. You will spend less time learning how to use it on your camera and more time experimenting with it instead!

Modes on flash

There are two main modes on a flash and both have their purpose when it comes to portraits: TTL and manual.
How to Photograph Fantastic Portraits with One Flash
One mode is TTL, which means “through the lens.” It’s when the flash meters the light and then chooses how much light it will fire when you take the photo. This result can sometimes be inconsistent lighting frame-to-frame, but it’s helpful when you need to work quickly without having much time to change the settings.
TTL does come with flash compensation, however, so you can choose it to output more light or less light depending on what you want to achieve for your portraits. This will still allow the flash to meter and adjust accordingly on its own – thinking for you.
Image: Use TTL when you need to fire the flash quickly without wasting time with the settings. Use f...
Use TTL when you need to fire the flash quickly without wasting time with the settings. Use for 
moments that seem like they’ll pass quickly like fireworks. The flash meters the light and sets what 
it thinks is the correct power output.
The other main mode is Manual.
Manual allows you to set the power output from full (1/1), down to 1/128, on some flashes. This gives you control over how much light you want the flash to fire onto your subject and you can adjust as you go along. Manual gives you more consistent output and light since you only need to set it once. You can then leave it until your lighting situation changes or until you want to try something different.
Image: Taken with one flash on-camera at half-power to compensate for the fading light.
Taken with one flash on-camera at half-power to compensate for the fading light.
Both modes are great to explore when using flash on or off-camera to achieve your desired look in the portraits you take.

What happens when you use flash during sessions?

When you use flash during portrait sessions, you’re essentially taking a photo of the ambient light and the flash in one photo together.
Flash happens quickly. This is why many cameras often won’t allow you to use a shutter speed faster than 1/200th of a second so that your camera has time to capture the light in a scene. Some flashes come with an “h” button for high-speed sync, where it gives you the option to use a high shutter speed with the flash.
Image: Hitt the “H” button to be able to use the high-speed sync mode and photograph por...
Hitt the “H” button to be able to use the high-speed sync mode and photograph portraits with a 
shutter speed faster than 1/200th of a second.
Changing your shutter speed only changes the amount of ambient light. Whereas, when you change or adjust the ISO and aperture, both change the flash and ambient exposure. Changing the flash power only changes the flash exposure.
All are important to take into consideration when you use flash, whether on-camera or off so that you can correctly expose.
Image: In the photo on the left, I used one flash off-camera to camera right near the couple. On the...
In the photo on the left, I used one flash off-camera to camera right near the couple. On the right, 
no flash, same location and time.
For example, you can leave the flash power at a consistent output and change the ISO and aperture to achieve the desired look you want.
Image: Single flash tilted about 60 degrees toward the top with the bounce card up to bounce light b...
Single flash tilted about 60 degrees toward the top with the bounce card up to bounce light back 
onto the girl’s face.
When you’re getting started in using flash for portraits, keep in mind that you’re taking two photos in one exposure. A photo of what the flash lights and what it doesn’t. It takes some practice to achieve good results, so don’t worry if you don’t get it right the first time.

On-camera vs. off-camera

On-camera

Flash, on-camera, works really well during portraits when you need to add a pop of light, or to bounce light to fill in shadows. It’s also great when you can angle it in a creative way to add some interesting light to your portraits.
Most often, you can use the flash on the camera and get the right look for your portraits. Especially if they are families, weddings, and other similar types of portraits.
Image: One flash on-camera pointed toward the client at night.
One flash on-camera pointed toward the client at night.
The great thing about external flashes is that they come with the ability to angle at different degrees. They also give you the option to rotate the head and get the flash to fire in the direction and angle that best fits your situation. For example, a bride getting ready in a room with low light is the perfect time to use the flash, either bouncing from the ceiling or wall perpendicular to the bride.
Image: The photo on the left is with the flash angled to the side. For the photo on the right, I poi...
The photo on the left is with the flash angled to the side. For the photo on the right, I pointed the 
single flash toward the ceiling to bounce light back into the bride’s face.
Using the flash on-camera, angled at the ceiling will give you nice even lighting, especially if the ceiling is white. Additionally, if you use the flash pointed sideways, it will bounce light at an angle that will give your bride some shadows and thus more drama and depth.
At a beach, for example, place the flash on the camera and angle it toward your clients. Here, you can make sure your clients are lit while the sun rises or sets. Depending on where you’re located, you can light them evenly while getting the colors in the sky exposed correctly as well.
Image: Both portraits are lit with a single flash on-camera.
Both portraits are lit with a single flash on-camera.
If you’re competing with midday sunlight, with the flash on your camera, you can fill in shadows as you photograph your client. This is a good alternative to using a reflector or having an extra pair of hands to help reflect light.
Another great advantage of having your flash on-camera is that it moves with you. You take your light where you need it. For example, if you’re following a child running along the seashore, your on-camera flash goes with you and fires each time you hit the shutter fully. That way, you don’t have to worry about moving the flash while trying to capture this fleeting moment for your clients.
Image: Single flash on-camera pointed directly at the clients to be able to expose for both the back...
Single flash on-camera pointed directly at the clients to be able to expose for both the background 
and clients.
Another pro is that when the flash is on your camera, it’s faster to set or change your settings for the particular situation you’re photographing. Let’s say you need to work quickly while photographing the portraits for a bride and groom right after the ceremony.
Having your camera on your flash will make it easier to adjust the settings and power output for smaller or larger groups as they can change from frame-to-frame. Or when you’re photographing in sunlight that keeps hiding and coming out from behind moving clouds. You can adjust your settings at each change of sunlight so that you can expose your clients perfectly.
Image: Both photos use a single flash on-camera to light the client. Flash can be used indoors and o...
Both photos use a single flash on-camera to light the client. Flash can be used indoors and outdoors.

Off-camera

You’re more likely to achieve more studio-like lighting to your portraits using off-camera flash. It’s also an excellent choice when you’re photographing individuals, couples, or in a closed space. The ability to trigger your flash while not attached to your camera can offer lots of different creative lighting angles too. It can give you results that more closely resemble what you had visualized.
Image: Only one flash was used to camera left pointed at clients directly while I stood about 45 deg...
Only one flash was used to camera left pointed at clients directly while I stood about 45 degrees 
from the flash.
For example, in the photo above, the couple was walking along the shore. The cloudy sky didn’t offer us much light before setting behind the horizon. Having the flash off-camera angled at them, but also angled so that it lit the sand below, helped create more drama.
Image: The photo on the left has no flash. However, the portrait on the right is using the flash off...
The photo on the left has no flash. However, the portrait on the right is using the flash off-camera 
left. Notice the difference in the ambient light temperature (the lamp post lights are warmer in the 
photo with flash).
With the flash off-camera and on a light stand, you have the ability to photograph portraits with a longer focal length without having to worry about changing settings.
Let’s say you want to light a portrait with the light at 45-degrees of your client, and pointed down so it adds a little bit of drama to the scene.
Set the flash and adjust the settings on a stand. Now you use a longer lens like an 85mm, 100mm, or the 70-200mm lens at about 10-feet of distance. You get the same results with other focal lengths because you don’t have to move your flash around.
Image: A single flash was positioned closer to the client in front of me while I stepped about 10-fe...
A single flash was positioned closer to the client in front of me while I stepped about 10-feet back 
to use my 50mm lens and get some interesting light on the portraits.
The advantage of off-camera flash is that you get consistent lighting without having to worry about moving it around the scene even when you use a different lens and are farther from your subject.
In addition, while the flash is on a stand, you’re able to use attachments like an umbrella or softbox with your flash and not have to worry about it falling over or moving it at all.
Image: Single flash used off-camera on a stand. I placed it high to mimic the sun in a small bedroom...
Single flash used off-camera on a stand. I placed it high to mimic the sun in a small bedroom.
With off-camera flash, you’ll need to use a radio transmitter/trigger of some sort. That way, your flash, and camera can communicate wirelessly and achieve different lighting techniques.
Some transmitters come with receivers, and you’ll need to physically touch the flash to change the settings. Other transmitters come with a built-in LCD screen where you can change the settings of the flash from your camera. This is a huge advantage if you are at a distance from the flash.
Image: Single flash used off-camera on a light stand. I made the photos warmer in post-production.
Single flash used off-camera on a light stand. I made the photos warmer in post-production.

How to Photograph Fantastic Portraits with One Flash
Taking portraits with one flash can be a much easier setup and offer many different lighting opportunities for your portraits. Whether you use the flash on or off-camera, you will be able to create and manipulate the light in your portrait both inside and out on location.
Have you used flash during portraits before? Share with us your setup and experiences.

Share this article. 


----------------------------------------------------------------------------------------------------------------------

PHOTOGRAPHY FREEBIE:

How to make money with your Photography even if you're not a Pro.

Copy & paste this link into your browser, click ENTER, and enjoy: 

https://mrdarrylt.blogspot.com/2020/01/how-to-make-500-month-from-your.html

                                                         or

https://www.photography-jobs.net/?hop=darryl54

 ----------------------------------------------------------------------------------------------------------------------

Visit me on Facebook and post your pictures.

https://www.facebook.com/Darryl-T-363867387724297/  

 ------------------------------------------------------------------------------------------------------------------------

Need a camera?  Try this link for discounted prices:  https://ebay.to/2Smb1ho